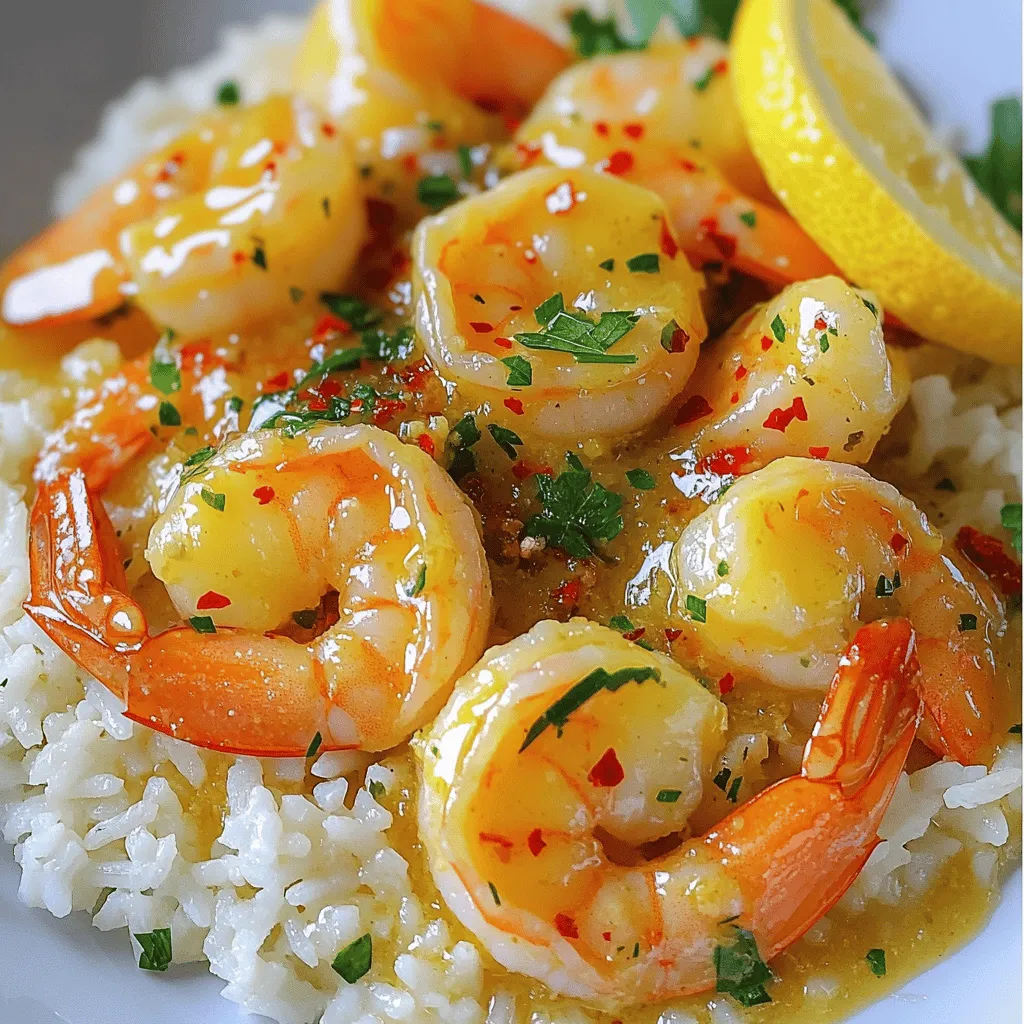
Looking for a quick and tasty meal? This 30-Minute Garlic Butter Shrimp dish is perfect for you! With just a few simple ingredients, you can whip up a flavorful dinner in no time. Imagine tender shrimp coated in rich garlic butter, seasoned to perfection, and served with crusty bread or rice. Follow my easy steps, and you’ll impress your loved ones at the dinner table tonight! Let’s get cooking!
Ingredients
Essential Ingredients
– 1 pound large shrimp, peeled and deveined
– 4 tablespoons unsalted butter
– 5 cloves garlic, finely minced
Seasoning Additions
– 1 teaspoon red pepper flakes (adjust for desired heat)
– Juice and zest of 1 lemon
– Salt and freshly ground black pepper, to taste
Garnish and Serving Suggestions
– 2 tablespoons fresh parsley, finely chopped
– Cooked rice or crusty bread, for serving
In this dish, the shrimp take center stage. Start with 1 pound of large shrimp. They should be peeled and deveined for easy eating. The shrimp cook quickly, so they make a great choice for a fast meal.
Next, we need 4 tablespoons of unsalted butter. This butter brings rich flavor. It also serves as the base for our garlic butter sauce.
Then, use 5 cloves of garlic, finely minced. Garlic adds a strong, fragrant taste. It pairs well with shrimp and bright lemon.
For added heat, add 1 teaspoon of red pepper flakes. You can adjust this amount based on your preference for spice.
You’ll also need the juice and zest of 1 lemon. This citrus adds brightness and balances the richness of the butter.
Finally, season your dish with salt and freshly ground black pepper to taste. These simple seasonings elevate the flavors.
To finish, chop 2 tablespoons of fresh parsley for garnish. It not only adds color but also freshness. Serve your shrimp over cooked rice or with crusty bread. This helps soak up the delicious garlic butter sauce.
Step-by-Step Instructions
Preparing the Garlic Butter Base
Start by melting the butter in a large skillet over medium heat. You want it to bubble gently. This is where the magic begins. Next, add the finely minced garlic and red pepper flakes. Stir this mix for about one minute. Be careful not to burn the garlic. You want it fragrant and lightly golden.
Cooking the Shrimp
Now it’s time for the shrimp. Add them in a single layer to the skillet. This helps them cook evenly. Let them sit for 2-3 minutes. You will see them turn a bright pink. Once they look good on one side, carefully flip each shrimp. This ensures they cook properly on both sides.
Finishing Touches
After flipping, squeeze fresh lemon juice over the shrimp. This adds a bright flavor. Don’t forget to sprinkle lemon zest on top! Season with salt and freshly ground black pepper to taste. Mix these flavors well. Finally, remove the skillet from heat and fold in chopped parsley. This gives your dish a fresh look and taste. Serve your garlic butter shrimp hot over rice or with crusty bread. Enjoy your meal!
Tips & Tricks
Ensuring Perfectly Cooked Shrimp
How can you tell when shrimp are done? Look for a bright pink color. The shrimp should also curl into a C shape. If they turn opaque and firm, they are ready. Avoid overcooking them. Overcooked shrimp can become rubbery and tough.
Common mistakes to avoid include cooking shrimp on high heat. This can burn the garlic quickly and ruin the dish. Also, do not overcrowd the pan. Cook shrimp in batches if needed for even cooking.
Enhancing Flavor Profiles
What additional spices can you consider? Try adding paprika for a smoky flavor. You can also use herbs like thyme or basil for freshness. Experiment with lemon zest for a bright touch. A splash of soy sauce adds umami.
What should you pair with this dish? Serve garlic butter shrimp with steamed vegetables. Lightly sautéed asparagus or green beans work well. A fresh garden salad balances the meal.
Making It a Complete Meal
What side dishes can you suggest? Cooked rice is a classic choice. Crusty bread is perfect for soaking up the sauce. You could also serve it with pasta for a filling meal.
What are the best drinks to serve? A chilled white wine pairs nicely. Lemonade is a refreshing choice for a non-alcoholic option. Sparkling water with a slice of lemon can enhance the meal. Enjoy your 30-Minute Garlic Butter Shrimp with these tips to make it shine!

Variations
Adjusting Spice Levels
To make a mild version, skip the red pepper flakes. This way, even picky eaters will enjoy it. For a spicy twist, add more red pepper flakes. Just remember, a little goes a long way!
Different Proteins
You can swap shrimp for scallops or chicken. If you use scallops, cook them for about 3-4 minutes on each side. For chicken, cut it into small pieces and cook for 5-7 minutes or until fully cooked. Adjust the cooking time to avoid drying out the proteins.
Adding Vegetables
To boost nutrition, add veggies like spinach, bell peppers, or zucchini. Chop them into small pieces for even cooking. Add them to the skillet right after the garlic. Sauté for about 2-3 minutes before adding shrimp. This method helps both the shrimp and veggies cook perfectly together.
Storage Info
How to Store Leftovers
To store your garlic butter shrimp, first let it cool. This step prevents condensation in the container. Next, pack the shrimp in a clean, airtight container. Make sure to seal it tightly. Use a container that is suitable for refrigeration. Glass or BPA-free plastic containers work great.
Freezing Instructions
If you want to freeze garlic butter shrimp, it’s best to act fast. Place the cooled shrimp in a freezer-safe bag or container. Remove as much air as possible before sealing. This helps prevent freezer burn. For the best texture, use the shrimp within three months. To thaw, place the shrimp in the fridge overnight. This keeps them from getting mushy.
Reheating Tips
When you’re ready to enjoy leftovers, you have a few options. The best method is to reheat in a skillet. Heat the skillet over low to medium heat. Add a little butter or oil to prevent sticking. Cook the shrimp until warmed through, about 5 minutes. You can also use a microwave. If you choose this method, heat in short bursts. This keeps the shrimp from getting tough. Enjoy your flavorful dish just like when it was fresh!
FAQs
Can I use frozen shrimp?
Yes, you can use frozen shrimp for this dish. Here are some best practices:
– Thawing: Always thaw shrimp properly. Place them in the fridge overnight or use cold water to soak them for about 15-20 minutes.
– Cooking time: Frozen shrimp may take a minute longer to cook. Check for that bright pink color and opaque texture.
– Quality: Use shrimp that are raw, peeled, and deveined for the best flavor. Avoid pre-cooked shrimp, as they can become tough when heated.
How long does garlic butter shrimp last in the fridge?
Garlic butter shrimp will last in the fridge for about 3 days. Here are some storage tips:
– Cool quickly: Allow the shrimp to cool at room temperature for no more than two hours.
– Container: Use an airtight container to keep the shrimp fresh.
– Reheat carefully: When you reheat, do it gently to avoid overcooking.
What can I serve with garlic butter shrimp?
Garlic butter shrimp pairs well with several dishes. Here are some recommended pairings:
– Cooked rice: Fluffy jasmine or basmati rice absorbs the sauce well.
– Crusty bread: Perfect for soaking up that rich garlic butter sauce.
– Salad: A fresh green salad adds a nice crunch and balance.
– Pasta: Toss the shrimp with your favorite pasta for a satisfying meal.
This blog post guides you through making delicious garlic butter shrimp. You learned about essential ingredients, precise steps, and handy tips for perfect cooking. We explored variations to suit your taste. Proper storage and reheating ensure you enjoy leftovers without losing flavor. Overall, garlic butter shrimp is simple and satisfying. Keep experimenting with flavors and serving ideas to make it your own. Enjoy your culinary adventure!