Cherry Oatmeal Squares Delightful and Easy Recipe

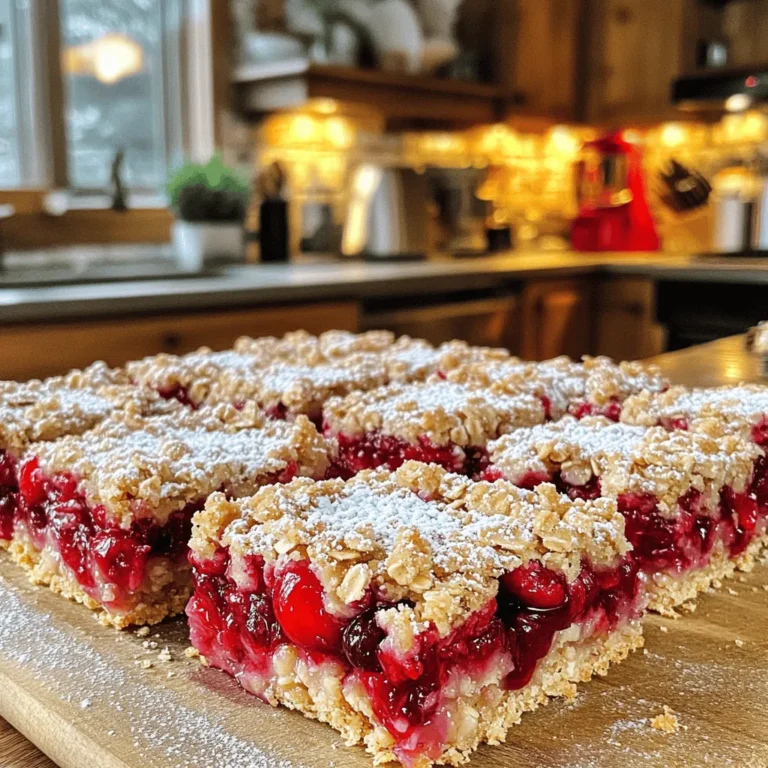
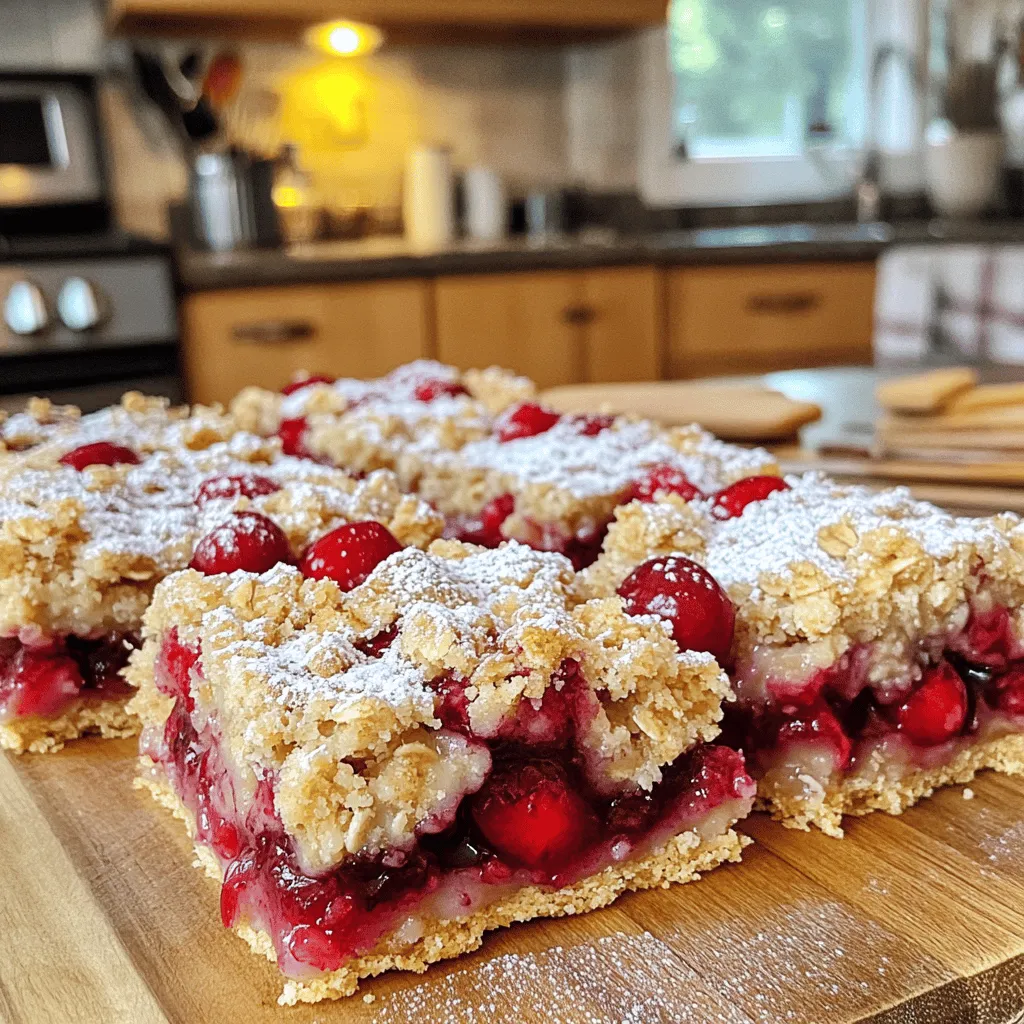
Looking for a delicious snack that’s easy to make? Try my Cherry Oatmeal Squares! These tasty bars feature chewy oats and juicy cherries, creating a perfect treat for any time of day. I’ll guide you step-by-step through the recipe, share tips to improve flavor, and even suggest fun variations. Get ready to impress your friends and family with this delightful dessert that they will want more of!

Ingredients

List of Ingredients

– 1 cup rolled oats

– 1 cup all-purpose flour

– 1/2 cup packed brown sugar

– 1/2 teaspoon baking powder

– 1/2 teaspoon baking soda

– 1/4 teaspoon fine salt

– 1/2 cup unsalted butter, melted and slightly cooled

– 1/2 teaspoon pure vanilla extract

– 1 1/2 cups fresh or frozen cherries, pitted and halved

– 1 tablespoon cornstarch

– 1 tablespoon freshly squeezed lemon juice

Gathering fresh ingredients makes a big difference in your Cherry Oatmeal Squares. I love using fresh cherries when they are in season. They add a juicy burst of flavor. If you can’t find fresh cherries, frozen ones work great too. Just ensure they are pitted and halved before using.

Substitute Options

– Alternatives for butter: coconut oil, margarine

– Gluten-free option: use gluten-free flour blend

– Sweetener alternatives: maple syrup, honey, coconut sugar

If you want to switch things up, try using coconut oil instead of butter. This adds a nice, tropical taste. For those who need gluten-free options, a gluten-free flour blend works well. You can also replace brown sugar with maple syrup or honey for a different sweetness. These small changes can make your squares unique while keeping them delicious.

For the Full Recipe, you can follow the detailed steps to create these tasty squares. Enjoy making them!

Step-by-Step Instructions

Preparation Steps

– Preheat your oven to 350°F (175°C).

– Grease an 8×8 inch baking pan. This makes it easy to take out your squares later.

Mixing Ingredients

– In a large bowl, combine the rolled oats, all-purpose flour, packed brown sugar, baking powder, baking soda, and fine salt. Mix well.

– Gradually add the melted butter and vanilla extract to the dry mix. Stir until it looks like a crumbly dough.

Assembling Layers

– Take the oat mixture and press it firmly into the bottom of your greased pan. This forms a solid base.

– In another bowl, mix the cherries with cornstarch and lemon juice. This enhances their flavor. Spread this cherry mix evenly over the oat layer.

– Sprinkle the reserved oat mixture over the cherry layer. This creates a tasty topping.

Baking Instructions

– Place the pan in the oven and bake for 25-30 minutes.

– Watch for a golden brown top. The cherries will bubble and smell amazing when done.

Follow these steps closely for a tasty treat! You can find the Full Recipe for more details. Enjoy your baking adventure!

Tips & Tricks

Perfecting the Recipe

To make the best Cherry Oatmeal Squares, avoid overmixing the dough. Overmixing can make the texture tough. You want a crumbly feel. Gently mix until the dry and wet ingredients come together.

Using fresh cherries will enhance the flavor. Fresh cherries taste sweeter and juicier than frozen ones. If you can find them, use them for the best results.

Serving Suggestions

Serve your squares warm with a scoop of vanilla ice cream. The cold ice cream pairs perfectly with the warm squares. It adds a creamy touch that makes each bite special.

Before serving, dust the squares with powdered sugar. This adds a nice, sweet finish. It makes the dish look lovely, too!

Storage Tips

To store any leftovers, place them in an airtight container. This keeps the squares fresh and moist.

If you want to freeze the squares, cut them first. Wrap each square in plastic wrap. Then, place them in a freezer bag. They will stay fresh for up to three months. Enjoy them later by thawing in the fridge!

Variations

Flavor Options

You can easily change the flavor of Cherry Oatmeal Squares. Try adding nuts like walnuts or pecans for extra crunch. Chopped nuts will add a lovely texture. You can also spice it up! Use cinnamon or nutmeg to give warmth to your squares. These spices will enhance the sweet cherry taste.

Fruit Alternatives

If you want a fruity twist, swap cherries for other berries. Blueberries, raspberries, or strawberries work great. Each berry brings its own unique flavor. You can even mix berries for a fun twist. Create a mixed berry version for a colorful treat. This will make your squares even more exciting!

Texture Variations

Do you want your squares to be chewier? Adjust the oat and filling ratios. This change will give you a different texture. You might also want to add chocolate chips. This will make your treat sweeter and more indulgent. These small changes can make a big impact on your Cherry Oatmeal Squares!

For the full recipe, check the earlier section.

Storage Info

Storage Tips

Store your Cherry Oatmeal Squares at room temperature for up to three days. Keep them in an airtight container to stay fresh. If you want them to last longer, you can store them in the fridge for up to a week.

To freeze individual squares, wrap each one tightly in plastic wrap. Place them in a freezer-safe bag or container. They can last in the freezer for about three months. Just remember to label the bag with the date.

Shelf Life

Cherry Oatmeal Squares stay fresh for about three days at room temperature. If you refrigerate them, their freshness can last up to a week.

Look for signs that the squares have gone bad. If you see mold or if they smell off, it’s best to toss them. Also, if they feel very dry or hard, they may not taste good.

Reheating Instructions

For the best taste, reheat your squares in the oven. Preheat it to 350°F (175°C). Place the squares on a baking sheet for about 10 minutes. You can also use a microwave. Heat for about 15-20 seconds per square, but check to avoid overheating.

After reheating, serve them warm with a scoop of vanilla ice cream or a sprinkle of powdered sugar. This adds extra joy to each bite!

FAQs

How can I make Cherry Oatmeal Squares vegan?

To make Cherry Oatmeal Squares vegan, you can swap some key ingredients. Use coconut oil instead of butter. For the egg, try using a flaxseed meal mix. Combine one tablespoon of flaxseed meal with three tablespoons of water. Let it sit for five minutes to thicken. This mix works well as a binder in your squares.

Can I use instant oats instead of rolled oats?

You can use instant oats, but the texture will change. Instant oats absorb water faster and may make your squares softer. Rolled oats give a chewier bite and help keep the squares firm. If you prefer softer squares, instant oats can work, but I recommend sticking with rolled oats for the best result.

What to do if my squares are too crumbly?

If your Cherry Oatmeal Squares are crumbly, the mixture might need more moisture. Try adding a splash of water or plant milk to the mix. Press the mixture down more firmly into the pan before baking. This helps the squares stick together better. If they are still crumbly after baking, consider storing them in an airtight container. This can help them soften.

Is it possible to add other fruits to the recipe?

Yes, you can add other fruits! Blueberries, raspberries, or sliced strawberries work great. You can even mix different fruits for a fun twist. Just remember to adjust the cornstarch if the fruit is juicier. This keeps the filling from getting too soggy and helps maintain the right texture.

How do I know when Cherry Oatmeal Squares are done baking?

To check if the squares are done, look for a golden brown top. The edges should pull away slightly from the pan. You can also insert a toothpick into the center. If it comes out clean, your squares are ready. Keep an eye on them during the last few minutes of baking to avoid overcooking.

Can I double the recipe for a larger pan size?

Yes, you can double the recipe! Use a 9×13 inch pan for more squares. When doubling, bake for a few extra minutes. Start checking for doneness at the same time as the original recipe. If the edges brown too fast, cover them with foil. This helps ensure the center cooks evenly while the edges don’t burn.

In this post, we explored how to make Cherry Oatmeal Squares. We listed key ingredients, provided substitute options, and shared easy step-by-step instructions. You learned tips for perfecting the recipe, serving suggestions, storage advice, and variations to try.

Remember, baking is simple when you follow the steps closely. Enjoy creating these delicious squares with your favorite fruits and flavors. Your kitchen can be a space for fun and tasty treats!

- 1 cup rolled oats - 1 cup all-purpose flour - 1/2 cup packed brown sugar - 1/2 teaspoon baking powder - 1/2 teaspoon baking soda - 1/4 teaspoon fine salt - 1/2 cup unsalted butter, melted and slightly cooled - 1/2 teaspoon pure vanilla extract - 1 1/2 cups fresh or frozen cherries, pitted and halved - 1 tablespoon cornstarch - 1 tablespoon freshly squeezed lemon juice Gathering fresh ingredients makes a big difference in your Cherry Oatmeal Squares. I love using fresh cherries when they are in season. They add a juicy burst of flavor. If you can’t find fresh cherries, frozen ones work great too. Just ensure they are pitted and halved before using. - Alternatives for butter: coconut oil, margarine - Gluten-free option: use gluten-free flour blend - Sweetener alternatives: maple syrup, honey, coconut sugar If you want to switch things up, try using coconut oil instead of butter. This adds a nice, tropical taste. For those who need gluten-free options, a gluten-free flour blend works well. You can also replace brown sugar with maple syrup or honey for a different sweetness. These small changes can make your squares unique while keeping them delicious. For the Full Recipe, you can follow the detailed steps to create these tasty squares. Enjoy making them! - Preheat your oven to 350°F (175°C). - Grease an 8x8 inch baking pan. This makes it easy to take out your squares later. - In a large bowl, combine the rolled oats, all-purpose flour, packed brown sugar, baking powder, baking soda, and fine salt. Mix well. - Gradually add the melted butter and vanilla extract to the dry mix. Stir until it looks like a crumbly dough. - Take the oat mixture and press it firmly into the bottom of your greased pan. This forms a solid base. - In another bowl, mix the cherries with cornstarch and lemon juice. This enhances their flavor. Spread this cherry mix evenly over the oat layer. - Sprinkle the reserved oat mixture over the cherry layer. This creates a tasty topping. - Place the pan in the oven and bake for 25-30 minutes. - Watch for a golden brown top. The cherries will bubble and smell amazing when done. Follow these steps closely for a tasty treat! You can find the Full Recipe for more details. Enjoy your baking adventure! To make the best Cherry Oatmeal Squares, avoid overmixing the dough. Overmixing can make the texture tough. You want a crumbly feel. Gently mix until the dry and wet ingredients come together. Using fresh cherries will enhance the flavor. Fresh cherries taste sweeter and juicier than frozen ones. If you can find them, use them for the best results. Serve your squares warm with a scoop of vanilla ice cream. The cold ice cream pairs perfectly with the warm squares. It adds a creamy touch that makes each bite special. Before serving, dust the squares with powdered sugar. This adds a nice, sweet finish. It makes the dish look lovely, too! To store any leftovers, place them in an airtight container. This keeps the squares fresh and moist. If you want to freeze the squares, cut them first. Wrap each square in plastic wrap. Then, place them in a freezer bag. They will stay fresh for up to three months. Enjoy them later by thawing in the fridge! {{image_4}} You can easily change the flavor of Cherry Oatmeal Squares. Try adding nuts like walnuts or pecans for extra crunch. Chopped nuts will add a lovely texture. You can also spice it up! Use cinnamon or nutmeg to give warmth to your squares. These spices will enhance the sweet cherry taste. If you want a fruity twist, swap cherries for other berries. Blueberries, raspberries, or strawberries work great. Each berry brings its own unique flavor. You can even mix berries for a fun twist. Create a mixed berry version for a colorful treat. This will make your squares even more exciting! Do you want your squares to be chewier? Adjust the oat and filling ratios. This change will give you a different texture. You might also want to add chocolate chips. This will make your treat sweeter and more indulgent. These small changes can make a big impact on your Cherry Oatmeal Squares! For the full recipe, check the earlier section. Store your Cherry Oatmeal Squares at room temperature for up to three days. Keep them in an airtight container to stay fresh. If you want them to last longer, you can store them in the fridge for up to a week. To freeze individual squares, wrap each one tightly in plastic wrap. Place them in a freezer-safe bag or container. They can last in the freezer for about three months. Just remember to label the bag with the date. Cherry Oatmeal Squares stay fresh for about three days at room temperature. If you refrigerate them, their freshness can last up to a week. Look for signs that the squares have gone bad. If you see mold or if they smell off, it’s best to toss them. Also, if they feel very dry or hard, they may not taste good. For the best taste, reheat your squares in the oven. Preheat it to 350°F (175°C). Place the squares on a baking sheet for about 10 minutes. You can also use a microwave. Heat for about 15-20 seconds per square, but check to avoid overheating. After reheating, serve them warm with a scoop of vanilla ice cream or a sprinkle of powdered sugar. This adds extra joy to each bite! To make Cherry Oatmeal Squares vegan, you can swap some key ingredients. Use coconut oil instead of butter. For the egg, try using a flaxseed meal mix. Combine one tablespoon of flaxseed meal with three tablespoons of water. Let it sit for five minutes to thicken. This mix works well as a binder in your squares. You can use instant oats, but the texture will change. Instant oats absorb water faster and may make your squares softer. Rolled oats give a chewier bite and help keep the squares firm. If you prefer softer squares, instant oats can work, but I recommend sticking with rolled oats for the best result. If your Cherry Oatmeal Squares are crumbly, the mixture might need more moisture. Try adding a splash of water or plant milk to the mix. Press the mixture down more firmly into the pan before baking. This helps the squares stick together better. If they are still crumbly after baking, consider storing them in an airtight container. This can help them soften. Yes, you can add other fruits! Blueberries, raspberries, or sliced strawberries work great. You can even mix different fruits for a fun twist. Just remember to adjust the cornstarch if the fruit is juicier. This keeps the filling from getting too soggy and helps maintain the right texture. To check if the squares are done, look for a golden brown top. The edges should pull away slightly from the pan. You can also insert a toothpick into the center. If it comes out clean, your squares are ready. Keep an eye on them during the last few minutes of baking to avoid overcooking. Yes, you can double the recipe! Use a 9x13 inch pan for more squares. When doubling, bake for a few extra minutes. Start checking for doneness at the same time as the original recipe. If the edges brown too fast, cover them with foil. This helps ensure the center cooks evenly while the edges don’t burn. In this post, we explored how to make Cherry Oatmeal Squares. We listed key ingredients, provided substitute options, and shared easy step-by-step instructions. You learned tips for perfecting the recipe, serving suggestions, storage advice, and variations to try. Remember, baking is simple when you follow the steps closely. Enjoy creating these delicious squares with your favorite fruits and flavors. Your kitchen can be a space for fun and tasty treats!

Cherry Oatmeal Squares

Indulge in a slice of happiness with these Cherry Oatmeal Squares with a Touch of Zing! This delightful recipe combines wholesome oats and fresh cherries for a treat that's both satisfying and delicious. Perfect for breakfast or dessert, these squares are easy to make with simple ingredients you probably have at home. Click through to explore the full recipe and elevate your snack game today!

Ingredients
  

1 cup rolled oats

1 cup all-purpose flour

1/2 cup packed brown sugar

1/2 teaspoon baking powder

1/2 teaspoon baking soda

1/4 teaspoon fine salt

1/2 cup unsalted butter, melted and slightly cooled

1/2 teaspoon pure vanilla extract

1 1/2 cups fresh or frozen cherries, pitted and halved

1 tablespoon cornstarch

1 tablespoon freshly squeezed lemon juice

Instructions
 

Begin by preheating your oven to 350°F (175°C). Lightly grease an 8x8 inch baking pan to ensure easy removal of the squares later.

    In a sizable mixing bowl, combine the rolled oats, all-purpose flour, packed brown sugar, baking powder, baking soda, and fine salt. Stir until evenly mixed.

      Gradually pour in the melted and slightly cooled butter along with the vanilla extract. Stir gently until the dry ingredients are just incorporated and the mixture resembles a slightly crumbly dough.

        Set aside 1 cup of the oat mixture, which will be used as the topping. Firmly press the remaining mixture evenly into the bottom of your prepared baking pan, creating a solid base.

          In a separate bowl, unveil the deliciousness of the cherries by tossing them with cornstarch and a splash of lemon juice. This will help enhance their flavor and brighten the filling. Spread the cherry mixture evenly over the pressed oat layer in the baking pan.

            Take the reserved oat mixture and sprinkle it generously over the cherry layer, ensuring an even coating that helps to create a delightful crust.

              Place the baking pan in the preheated oven and bake for 25-30 minutes. Watch for the top to turn golden brown and the cherries to become bubbly and fragrant.

                Upon completion, remove the pan from the oven and allow the squares to cool in the pan on a wire rack for approximately 15 minutes. This cooling time helps the squares set, making them easier to cut.

                  Once cooled, cut into equal squares and serve warm or at room temperature.

                    Prep Time: 15 minutes | Total Time: 45 minutes | Servings: 9 squares

                      - Presentation Tips: For a delightful finishing touch, dust the squares with powdered sugar before serving. For those craving a little indulgence, serve alongside a scoop of creamy vanilla ice cream for a perfect pairing!

                        Leave a Comment

                        Recipe Rating