Skip to content
DisclaimerTerms Of UseGDPR PolicyCookie Policy

eataroundit

  • Home
  • Drinks
  • Appetizers
  • Dinner
  • Dessert
  • About
  • Contact
  • Privacy Policy
DisclaimerTerms Of UseGDPR PolicyCookie Policy

Hannah

When making mango coconut popsicles, using fresh, quality ingredients is key. Here’s what you need: - Fresh mangoes - Coconut milk - Sweetener options (honey or maple syrup) - Lime juice - Pure vanilla extract - Salt - Optional garnishes (coconut flakes) 1. Fresh mangoes: You need 2 ripe mangoes. They should be sweet and juicy. Peel and dice them for easy blending. 2. Coconut milk: Use 1 cup of coconut milk. Canned coconut milk gives a richer taste. 3. Sweetener options: You can use 1 tablespoon of honey or maple syrup. This step is optional, depending on how sweet you like your popsicles. 4. Lime juice: Add 1 tablespoon of fresh lime juice. This adds a nice zing and balances the sweetness. 5. Pure vanilla extract: Use 1/4 teaspoon for extra flavor. It makes the popsicles taste even better. 6. Salt: A pinch of salt enhances all the flavors. It’s a small but important step. 7. Optional garnishes: If you want, roll the tops in coconut flakes. This adds texture and a fun look. Gather these ingredients for a delightful treat. This recipe is easy and fun to make. You can find the full recipe for Tropical Bliss Mango Coconut Popsicles to guide you through each step. Preparing these popsicles is a fantastic way to enjoy the sunny flavors of summer! To start, gather your ingredients. You need ripe mangoes, coconut milk, honey or maple syrup, lime juice, vanilla extract, and a pinch of salt. 1. Blending the ingredients: Place the diced mangoes, coconut milk, honey or maple syrup, lime juice, vanilla extract, and salt into a blender. Blend on high speed until smooth and creamy. This step is key for the perfect texture. 2. Tasting and adjusting sweetness: After blending, taste the mixture. If it’s not sweet enough, add more honey or maple syrup. Blend again for a few seconds to mix it well. It’s all about making it just right for your taste. Now, let’s get that mixture into molds! 1. Pouring into molds: Carefully pour the mango-coconut mixture into popsicle molds. Leave a little space at the top to let the popsicles expand as they freeze. 2. Inserting popsicle sticks: Insert popsicle sticks into each mold. Make sure they are centered. You can gently tap the molds on the counter to release any air bubbles. This step helps avoid ice crystals. 3. Freezing time recommendations: Place the molds in the freezer. Let them freeze for at least 4 to 6 hours. You want them to be completely solid and firm before you take them out. Finally, it’s time to enjoy your treats! 1. Running warm water over molds: When you’re ready to eat, run warm water over the outside of the molds for a few seconds. This will help loosen the popsicles. 2. Removing popsicles: Gently pull on the sticks to free the popsicles from the molds. If they stick, give them a little more warm water to help them out. Now, your Mango Coconut Popsicles are ready to delight your taste buds! For the full recipe, check out the Tropical Bliss Mango Coconut Popsicles. To boost the taste of your mango coconut popsicles, consider using fresh coconut milk instead of canned. Fresh coconut milk offers a lighter texture. Canned coconut milk is thicker and creamier. Choose based on your preference. You can also add spices for more flavor. A pinch of cinnamon or a dash of cardamom can add warmth. Lime zest gives a bright, fresh taste. A little goes a long way, so start small! Garnishing your popsicles makes them look fun and appetizing. Try rolling the tops in coconut flakes for texture. You can also add fresh mango slices on the side. Serve the popsicles on a colorful plate or a wooden board. Adding lime wedges beside them makes for a vibrant display. Simple touches make a big difference! If you want vegan popsicles, skip the honey or maple syrup. Use agave syrup or leave it out entirely. The natural sweetness of mangoes is often enough. For those watching sugar, use a low-carb sweetener. Stevia or erythritol can work well. Adjust the amount to taste, just like with honey. This way, everyone can enjoy these tasty treats! For the full recipe, see the sections above. {{image_4}} You can make mango coconut popsicles even more fun by adding other fruits. Pineapple and banana are great choices. They add sweetness and tropical flair. For a berry twist, try mixing in strawberries or blueberries. These fruits bring a burst of color and flavor. You can blend them into the mango mixture or layer them. This lets you enjoy different tastes in each bite. If you want a creamier popsicle, consider using Greek yogurt. It adds a rich texture and protein. You can also try nut milk like almond or cashew. These options can make the popsicles dairy-free. Just swap out the coconut milk for your nut milk of choice. Each variation gives a new twist to the classic flavor. Make your popsicles even more exciting by using different molds. You can find fun shapes like stars or animals. Kids love these playful designs! Layering colors also adds visual appeal. Pour one color, let it freeze a bit, then add another color. This creates a stunning look that makes the popsicles even more tempting. To keep your mango coconut popsicles fresh, wrap them well. Use plastic wrap or aluminum foil. This prevents ice crystals from forming. You can also store them in a freezer-safe bag. Be sure to remove as much air as possible. Store your popsicles at a steady temperature. The ideal freezing temperature is 0°F (-18°C) or lower. Avoid opening the freezer too often. This helps keep the cold air inside. Mango coconut popsicles last up to two months in the freezer. After this time, they may lose flavor. Keep an eye out for signs of freezer burn. This looks like white or icy patches on the popsicles. If you see this, it’s best to throw them away. You can refreeze popsicles if they thaw. However, this might change the texture. They may become icy or grainy. The taste might also suffer a bit. To enjoy the best flavor and texture, eat them fresh when possible. Mango coconut popsicles usually take about 4 to 6 hours to freeze completely. This time ensures that they reach a firm and solid state. For the best results, I recommend leaving them in the freezer overnight. This way, you’ll always have a refreshing treat ready to enjoy. Yes, you can use frozen mango! It’s a great alternative when fresh mangoes aren't available. Just make sure to thaw the frozen mango slightly before blending. This helps create a smoother texture. Frozen mango often has a more intense flavor, which can make your popsicles even tastier. Mango coconut popsicles can be a healthy treat. They are low in fat and provide vitamins from the mangoes. Mangoes are rich in vitamin C and fiber. Coconut milk adds healthy fats that can be good for your heart. If you choose to use a natural sweetener like honey or maple syrup, you can control the sugar content. You can find pre-made mango coconut popsicles at many grocery stores. Look for brands that focus on natural ingredients. Stores like Whole Foods, Trader Joe’s, and local health food shops often carry them. You can also check online retailers for convenient delivery options. For the full recipe, check out the Tropical Bliss Mango Coconut Popsicles recipe! In this blog post, we explored how to make delicious mango coconut popsicles. We covered key ingredients, like fresh mangoes and coconut milk. You learned how to blend, mold, and freeze your popsicles perfectly. We shared tips for enhancing flavor and making variations to suit your taste. Lastly, we discussed storage tips to keep your treats fresh. Now, you can enjoy these fun, refreshing popsicles anytime. Get ready to savor the tropical taste of summer all year round!

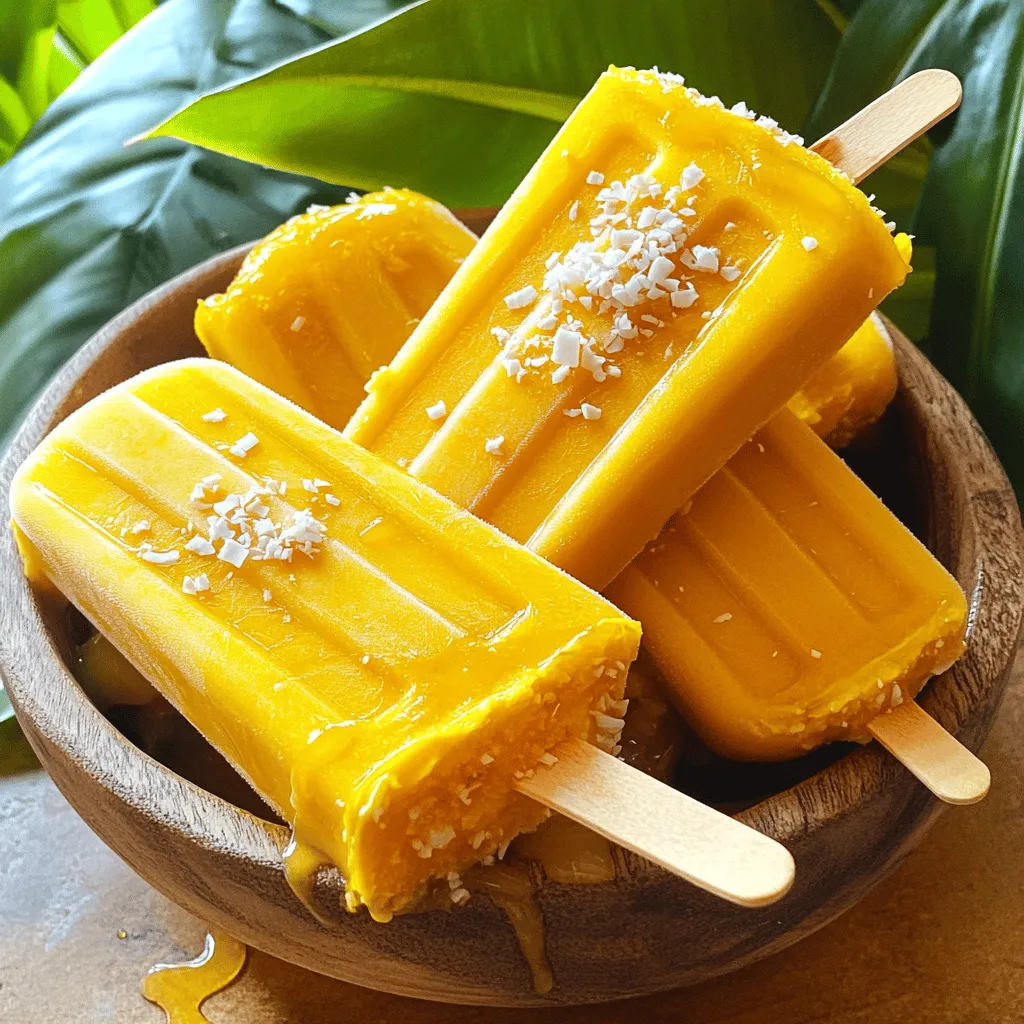
Mango Coconut Popsicles Simple and Refreshing Treat

Are you ready to beat the heat with a delicious treat? These Mango Coconut Popsicles are simple to make and

To make a delicious Creamy Sun-Dried Tomato Risotto, gather these key ingredients: - 1 cup Arborio rice - 4 cups vegetable broth (preferably low-sodium) - 1/2 cup sun-dried tomatoes, chopped (oil-packed for extra flavor) - 1 small onion, finely chopped - 2 cloves garlic, minced - 1/2 cup heavy cream - 1 cup freshly grated Parmesan cheese - 2 tablespoons olive oil - Salt and fresh ground black pepper to taste - Fresh basil leaves for garnish These ingredients come together to create a rich and creamy dish. Arborio rice is essential. Its high starch content gives risotto that famous creamy texture. The sun-dried tomatoes add a burst of flavor, while the heavy cream and Parmesan make it rich and indulgent. Using vegetable broth enhances the taste without overpowering the other ingredients. Fresh herbs like basil add a nice touch of color and freshness when serving. For a full recipe, check the detailed instructions on how to prepare this satisfying meal. First, heat the vegetable broth in a medium saucepan. Keep it on low heat. This warm broth helps the rice cook well. You want it warm for the whole cooking time. In a large skillet, add olive oil and warm it over medium heat. Once hot, add the finely chopped onion. Cook it until it turns soft and clear, about 3-4 minutes. Stir it often to avoid browning. Next, add minced garlic and chopped sun-dried tomatoes. Cook for an extra 1-2 minutes until the garlic smells nice, and the tomatoes soften. Now it’s time for the Arborio rice. Add it to the skillet and stir well. Toast the rice for about 2 minutes to bring out its nutty flavor. After that, start adding the warm broth. Do it one ladle at a time. Stir constantly and let each scoop soak in before adding more. This process should take about 18-20 minutes. The rice should be creamy and slightly firm. When the rice is done, take the skillet off the heat. Fold in the heavy cream and freshly grated Parmesan cheese. Stir until it all blends together. Season with salt and fresh ground black pepper to your taste. Let the risotto rest for a minute. This helps it thicken and become even creamier. Serve in warm bowls and garnish with fresh basil leaves. For extra taste, sprinkle more Parmesan on top. For the full recipe, check the earlier sections. To make your risotto creamy, keep the broth warm. Warm broth helps the rice absorb flavors and cook evenly. If the broth is cold, the rice can turn gummy. Stirring is also key for a creamy texture. Stir the rice often as you add broth. This helps release starch, creating that velvety feel. Use high-quality ingredients for the best flavor. Fresh sun-dried tomatoes packed in oil add rich taste. Choose good olive oil and fresh garlic, which boost flavor. You can also add spices like red pepper flakes or Italian herbs. They bring a nice kick and depth to the dish. One common mistake is overcooking or undercooking the rice. Keep an eye on the texture. It should be al dente, soft but with a slight bite. Another mistake is not stirring enough. Stirring helps the rice cook evenly and keeps it from sticking. So, keep stirring for that perfect creamy risotto! For the full recipe, check out the detailed instructions included above. {{image_4}} You can make this risotto even heartier by adding protein. For meat lovers, grilled chicken or sautéed shrimp pair great with the creamy sun-dried tomato flavor. Simply cook the chicken or shrimp separately and mix them in just before serving. If you prefer a vegetarian route, try adding chickpeas or white beans. They bring protein and fiber while keeping the dish plant-based. Just toss them in towards the end of cooking to warm them up. Seasonal vegetables can elevate this dish. Think about adding spinach, peas, or zucchini for a fresh touch. You can sauté these veggies in olive oil before adding them to the risotto. This technique brings out their flavors and keeps them tender. Adding vegetables not only boosts nutrition but also adds colorful appeal to your plate. Just remember to chop them into small pieces for easy mixing. To make your risotto even tastier, consider adding fresh herbs like thyme or parsley. They add brightness and depth to the dish. For a spicy kick, a pinch of red pepper flakes works well too. If you want to switch up the cheese, try feta or goat cheese instead of Parmesan. These alternatives give a unique flavor that complements the sun-dried tomatoes. For a full guide on how to make this delightful dish, check out the Full Recipe. To keep your creamy sun-dried tomato risotto fresh, follow these steps: - Refrigeration: Place leftovers in an airtight container. This keeps it moist and tasty. Store in the fridge for up to three days. - Freezing: To freeze, let the risotto cool completely. Then, put it in freezer-safe bags. Squeeze out air to prevent freezer burn. It can last up to three months in the freezer. When it's time to enjoy your risotto again, you have two main options: - Microwave: Place the risotto in a microwave-safe dish. Cover it with a damp paper towel to keep it moist. Heat in short bursts, stirring in between, until warmed through. - Stovetop: For stovetop reheating, add a splash of broth or water to the risotto in a skillet. Heat over low heat, stirring often. This helps bring back the creaminess. Adding moisture back into the risotto is key. It ensures that your dish remains creamy and delicious, just like when you first made it. If you need more tips, check the Full Recipe for extra guidance on storage and reheating. To make creamy risotto, you need to focus on a few key steps. First, you use Arborio rice, which has a high starch content. This starch is what gives risotto its creamy texture. 1. Warm broth: Always keep your vegetable broth warm. This helps the rice cook evenly. 2. Sauté aromatics: Start by cooking onion and garlic in olive oil. This adds depth to the flavor. 3. Toast rice: Stir in the Arborio rice and toast it for a couple of minutes. This enhances the nutty taste. 4. Add broth gradually: Pour in the warm broth one ladle at a time. Stir often and let the rice absorb the broth fully before adding more. 5. Finish with cream and cheese: When the rice is al dente, fold in heavy cream and Parmesan cheese. This creates a luscious, creamy dish. Yes, you can make risotto ahead of time. However, it’s best to serve it fresh. If you make it early, store it in the fridge for up to two days. When you reheat risotto, it often becomes too thick. To fix this, add a splash of broth or water while warming it. Heat it gently on the stovetop for best results. Creamy sun-dried tomato risotto pairs well with many dishes. Here are some great options: - Grilled chicken: The flavors complement each other well. - Roasted vegetables: Seasonal veggies add color and nutrition. - Fresh salad: A light salad balances the richness of the risotto. - Crusty bread: Perfect for soaking up that creamy goodness. Yes, you can substitute some ingredients in this risotto recipe. Here are a few ideas: - Rice: If you can't find Arborio rice, you can use Carnaroli or Vialone Nano. Both will yield a creamy result. - Broth: For a different taste, try chicken broth instead of vegetable broth. - Cream: You can use half-and-half or full-fat coconut milk for a lighter version. - Cheese: If you want a stronger flavor, swap Parmesan for Pecorino Romano. These substitutions can change the flavor and texture but will still give you a delicious risotto. For the full recipe, check out the main article. This blog post covered how to make a creamy sun-dried tomato risotto. We explored key ingredients, step-by-step instructions, tips for perfect texture, and ways to add protein or veggies. I shared storage tips to keep your risotto fresh and reheating advice to maintain creaminess. In conclusion, making risotto is fun and rewarding. With practice, you can create many delicious versions. Use this guide and enjoy every bite! You have the skills to impress anyone at the dinner table.

Creamy Sun-Dried Tomato Risotto Flavorful and Easy Dish

If you’re craving a comforting dish that’s both creamy and full of flavor, I have just the recipe for you!

Fresh corn and vegetables are the heart of this salad. You will need: - 4 ears of fresh corn, husked - 1 medium red bell pepper, diced - 1 jalapeño, finely chopped (seeds removed for milder flavor) - 1/2 cup red onion, finely chopped - 1/2 cup cherry tomatoes, halved - 1/4 cup fresh cilantro, chopped These components bring bright colors and fresh flavors. Each bite is a burst of summer. The sweet corn pairs well with the crisp bell pepper. The jalapeño adds just the right kick, while the tomatoes keep things juicy. Next, let's talk about the dressing components, which tie everything together. You will need: - Juice of 2 fresh limes - 3 tablespoons extra virgin olive oil - 1 teaspoon chili powder - Salt and freshly ground black pepper, to taste - Crumbled feta cheese (optional, for garnish) The lime juice gives a tart zing. Olive oil adds richness, while chili powder brings warmth. Salt and pepper enhance all the flavors. If you like, sprinkle some feta cheese on top for a creamy finish. For the full recipe, check out the details above. This salad is perfect for picnics or a light meal at home. - Preheat the grill to medium-high heat. - Place the husked corn directly on the grill. - Grill the corn for 10-12 minutes, turning occasionally. Grilling corn adds a smoky flavor that shines in this salad. When the corn is ready, you’ll see beautiful char marks. The corn kernels will be tender and juicy. - Allow the corn to cool for a few minutes. - Slice the kernels off the cobs using a sharp knife. - Add the grilled corn to a large mixing bowl with the vegetables. Mixing the grilled corn with fresh veggies enhances the salad. You’ll add diced red bell pepper, chopped jalapeño, red onion, halved cherry tomatoes, and chopped cilantro. Each bite will be a burst of flavor. - In a small bowl, whisk lime juice, olive oil, chili powder, salt, and pepper. - Drizzle the dressing over the salad and toss to combine. The lime dressing brings everything together. It adds brightness that complements the grilled corn. Taste the salad and adjust the seasoning if needed. You can add more lime or salt for extra zing. For a creamy touch, sprinkle crumbled feta cheese on top. For the full recipe, be sure to check out the [Full Recipe]. Enjoy your fresh and zesty Chili Lime Grilled Corn Salad! - Use fresh corn for the best flavor. Fresh corn gives a sweet and juicy taste. - Turn corn frequently for even charring. This helps cook it evenly and adds great grill marks. - Experiment with other spices or herbs. Consider using smoked paprika for a deeper flavor. - Try adding lime zest for extra citrus flavor. This will boost the freshness of the salad. - Serve chilled or at room temperature. This makes it a perfect dish for summer gatherings. - Garnish with whole cilantro leaves and lime wedges. This adds a lovely pop of color and extra zest. For the complete recipe, check out the [Full Recipe]. {{image_4}} You can boost your salad with protein. For a tasty twist, add grilled chicken or shrimp. These additions make the dish heartier and more filling. If you prefer a vegetarian option, black beans work great. They add protein and fiber without meat. You can mix and match based on your taste. Get creative with your veggies! You can add or substitute avocado for a creamy texture. Avocado pairs well with the lime and chili flavors. You can also use bell peppers in different colors. A mix of red, yellow, and green adds beauty and crunch to your salad. Each color brings its own flavor and nutrients. The dressing can change the whole taste. You might try a cilantro-lime vinaigrette for a fresh take. It adds a zesty kick that brightens the salad. If you want a creamier option, Greek yogurt is a great choice. It gives a rich texture and tangy flavor. Don't hesitate to experiment to find your favorite! For the full recipe, check out the earlier sections. To keep your salad fresh, store it in an airtight container in the fridge. This will lock in the flavors and keep it tasty. You should eat it within 2-3 days for the best taste. You can serve this salad cold or at room temperature. It's best not to reheat it, as it may change the texture. Before serving leftovers, mix it well to combine all flavors again. If you're not serving the salad right away, store each part separately. This way, nothing gets soggy. Make sure to keep the dressing in a different container until you're ready to eat. This keeps everything fresh and crunchy! Yes, it's best if made a few hours before to let flavors meld. The longer it sits, the better the taste. You will enjoy a richer flavor profile. Store it in the fridge until you're ready to serve. Yes, thaw and grill or sauté for best results. Frozen corn can be a great time-saver. Just make sure to remove excess moisture before cooking. This ensures it grills up nicely, adding that delicious charred flavor. Absolutely, it keeps well and is refreshing when served cold. This salad lasts a few days in the fridge. Pack it in individual containers for quick lunches or snacks. Just remember to keep the dressing separate until serving. This blog post covered how to make a fresh corn salad. You learned about the key ingredients, like juicy corn and vibrant veggies. We also discussed how to prepare the corn, mix in vegetables, and whip up a simple dressing. I shared tips to enhance flavors and suggested fun variations, like adding proteins or trying different dressings. By following these steps, you’ll create a refreshing dish perfect for any meal. Enjoy making this salad and feel free to get creative!

Chili Lime Grilled Corn Salad Fresh and Zesty Delight

Looking for a fresh and zesty dish that brightens any meal? My Chili Lime Grilled Corn Salad is bursting with

- 2 cups pretzel rods, broken into bite-sized pieces - 1 cup granulated sugar - 6 tablespoons unsalted butter - 1/4 cup heavy cream - 1 teaspoon vanilla extract - 1 cup semi-sweet chocolate chips - 1/2 teaspoon sea salt - Optional: flaked sea salt for garnish Using quality chocolate is key. It makes the bark taste rich and smooth. I recommend semi-sweet chocolate chips, as they melt nicely and balance well with the sweet caramel. When picking pretzels, choose rods that are sturdy. They hold up better under the warm caramel. Look for pretzels that are not too salty, as you will add sea salt later. This way, your bark won't be too salty and will keep that perfect sweet and salty mix. For the full recipe, check out the details above. First, preheat your oven to 350°F (175°C). This step is key to getting the perfect bark. Next, take a baking sheet and line it with parchment paper. Make sure to leave some edges hanging over the sides. This makes it easier to lift the bark out later on. In a medium saucepan, combine 1 cup of granulated sugar and 6 tablespoons of unsalted butter. Heat this mixture over medium heat. Stir it constantly. You want the sugar to melt and turn a golden color, which takes about 5-7 minutes. Keep a close eye to avoid burning. Once the sugar has melted, slowly add in 1/4 cup of heavy cream. Expect some bubbling, and keep stirring. After that, mix in 1 teaspoon of vanilla extract. This adds a lovely aroma and flavor to the caramel. Now, evenly spread the broken pretzel pieces on the parchment-lined baking sheet. Make sure they are in a single layer. This allows for proper coverage with caramel. Next, pour the warm caramel over the pretzels. Use a spatula to spread it evenly. Every pretzel should get a good coat of caramel. Place the baking sheet in the oven and bake for 10-12 minutes. You’ll know it’s ready when the caramel is bubbly and darkened slightly. Once done, take it out and let it cool for about 10 minutes. While the pretzel-caramel mixture cools, melt 1 cup of semi-sweet chocolate chips. Put them in a microwave-safe bowl. Heat in 20-second intervals, stirring between each. This method keeps the chocolate smooth. After the caramel pretzel base has cooled slightly, drizzle the melted chocolate over it. Use a spatula or knife to spread it out. This ensures that every bite is chocolatey. Finally, sprinkle 1/2 teaspoon of sea salt over the chocolate layer. This adds the perfect salty touch to your sweet bark. Let your creation cool completely for about 30 minutes. You can also speed things up by refrigerating it for 15 minutes. Once set, lift the bark out using the parchment paper overhang. Break it into pieces for serving. For the full recipe, check out the complete details! To make great caramel, watch your sugar closely. Here are some key tips: - Avoiding burnt sugar: Use medium heat and stir often. If the sugar gets too hot, it will burn. This can ruin your caramel. If you see dark brown spots, it’s too late. - Checking for the right color: The best caramel has a golden amber color. Aim for this shade before adding cream. This color means your sugar is ready for the next step. You can make your bark even more fun! Here are some ideas: - Adding nuts or dried fruit: Try adding chopped nuts like almonds or peanuts. Dried fruit like cranberries or cherries works well, too. These add flavor and texture. - Infusing flavors in the chocolate: Want to change the chocolate taste? Mix in a little cinnamon or espresso powder. This gives your bark a special twist. Presentation matters. Here are some serving ideas: - Presentation ideas for gatherings: Serve your Sweet & Salty Caramel Pretzel Bark on a pretty platter. You can also use a clear jar for an eye-catching display. - Pairing recommendations with snacks or drinks: This sweet treat pairs well with coffee or milk. You can also serve it with salty snacks for a fun mix. {{image_4}} To make your pretzel bark even better, add nuts! Almonds or peanuts work great. They add a nice crunch. Simply chop them up and mix them in with the pretzels. You can also sprinkle them on top before the chocolate sets. This adds flavor and texture. Plus, nuts are healthy! They give your bark a new twist that everyone will love. Want to spice things up? Add cayenne or chili powder to your caramel! Just a pinch can make a big difference. The heat balances the sweet and salty flavors. It gives your bark a fun kick. Start with a small amount and taste as you go. You can always add more if you like it hot! You can change the bark for the holidays, too! For Christmas, try adding peppermint extract. This gives a fresh, minty flavor. You can also crush peppermint candies and sprinkle them on top. For fall, add cinnamon to the caramel. It gives a cozy, warm taste. Get creative with your flavors, and make it your own! To keep your salted caramel pretzel bark fresh, use an airtight container. This helps keep moisture away. It also prevents the bark from becoming stale. Choose a container that fits the size of your bark. If you don’t have one, wrap the bark tightly in plastic wrap. Then place it in a zip-top bag. This method works well too. You can store your bark at room temperature for about one week. If you keep it in the fridge, it can last up to two weeks. Just remember, the colder it gets, the firmer the chocolate will be. This might change the texture a bit. For best taste, enjoy it within a week! To freeze your salted caramel pretzel bark, follow these steps. First, cut the bark into pieces. Then, place the pieces in a single layer on a baking sheet. Freeze them for about an hour until solid. After that, move the pieces to an airtight container or a freezer bag. Label the bag with the date. When you want to enjoy it, take it out and let it thaw at room temperature. This keeps the flavors fresh and delightful! Yes, you can use dark chocolate! It adds a rich flavor to the bark. Dark chocolate pairs well with the sweet caramel and salty pretzels. Just choose a dark chocolate you enjoy. Melt it the same way as semi-sweet. The process stays the same, so don't worry. No pretzel rods? No problem! You can use pretzel twists or even pretzel sticks. Just break them into smaller pieces. Any crunchy pretzel will work well in this recipe. You can also try using potato chips for a fun twist. To prevent seizing, melt chocolate slowly. Use a microwave in short bursts. Stir often to keep it smooth. If you’re using a double boiler, ensure no water gets into the chocolate. If it does seize, add a small amount of vegetable oil to help smooth it out. Yes, you can make this bark gluten-free! Use gluten-free pretzels. Many brands offer tasty gluten-free options. Check the labels to ensure they are safe for your diet. You can also substitute with rice crackers for a different crunch. Absolutely! You can add flavors to the caramel for extra fun. Try adding a pinch of sea salt or a splash of bourbon. Vanilla extract is great, but you can also use almond extract for a twist. Just be careful with strong flavors; a little goes a long way. For the complete recipe, check out the Full Recipe! This blog explores making delicious pretzel bark, showcasing key ingredients like quality chocolate and pretzels. The step-by-step guide helps you create the perfect treat, while tips improve your technique. Variations let you customize your bark to suit any taste or season. Store it well for lasting enjoyment, and remember, you can adapt flavors and ingredients. Making pretzel bark is fun and easy, and it offers a tasty snack for any occasion. Enjoy your cooking adventure!

Salted Caramel Pretzel Bark Irresistible Sweet Treat

Indulge your sweet tooth with my Salted Caramel Pretzel Bark! This treat combines crunchy pretzels, rich caramel, and smooth chocolate,

- 1 tablespoon extra virgin olive oil - 1 medium onion, finely chopped - 3 cloves garlic, minced - 2 tablespoons fresh ginger, freshly grated - 1 tablespoon fresh turmeric, finely grated (or alternatively, 1 teaspoon turmeric powder) - 3 cups high-quality vegetable broth - 1 cup full-fat coconut milk - 2 medium carrots, diced into bite-sized pieces - 1 bell pepper (any color), diced - 1 cup kale or spinach, roughly chopped The stars of this soup are fresh ginger and turmeric. They add warmth and health benefits to your dish. The ginger gives a spicy kick, while turmeric helps boost your immune system. I always use fresh ingredients for the best flavor. The broth and coconut milk create a rich base. They blend perfectly with veggies like carrots and bell peppers. These veggies not only add color but also nutrition. Kale or spinach rounds out the mix, adding a healthy green touch. - 1 teaspoon ground cumin - 1 teaspoon ground coriander - Salt and freshly cracked pepper to taste - Juice of 1 fresh lemon - Fresh cilantro leaves, for garnish Now, let's talk about flavor. Ground cumin and coriander really elevate the soup. They bring a warm, earthy taste that pairs well with the fresh ingredients. A pinch of salt and pepper is also key. They let all the flavors shine. The squeeze of fresh lemon juice at the end makes the soup bright. It adds a zing that balances the richness. Finally, don’t forget the cilantro! It’s not just for looks; it adds a fresh flavor that makes each bowl special. For the complete experience, you can find the Full Recipe. Enjoy cooking this nourishing soup! 1. Start by heating the olive oil in a large pot over medium heat. 2. Once the oil is hot, add the chopped onion. Sauté it for about 5 minutes. You want the onion to be soft and clear. 3. Next, add minced garlic, grated ginger, and grated turmeric. Stir this mixture for 2 to 3 minutes. The scent will be amazing! 4. Carefully pour in the vegetable broth and coconut milk. Stir well to mix everything together. 5. Now, add diced carrots and bell pepper. Bring the soup to a gentle boil. Then, reduce the heat to low. Let it simmer for 15 minutes. This makes the veggies soft and lets the flavors combine. 1. After 15 minutes, add chopped kale or spinach. Sprinkle in ground cumin and ground coriander. Season the soup with salt and pepper to taste. 2. Let the soup simmer for another 5 minutes. This will make the greens tender. 3. Remove the pot from heat. Squeeze in fresh lemon juice and stir well. 4. Taste the soup one last time. Adjust the seasoning if needed. 5. Serve the soup hot in bowls. Garnish with fresh cilantro leaves for a nice look and extra flavor. For more details, check the Full Recipe. - Using homemade broth versus store-bought: Homemade broth gives your soup a richer taste. It allows you to control the flavors and add your favorite herbs. Store-bought broth can be quicker, but it may taste salty. Always read the labels for quality. - Fresh herbs vs. dried herbs: Fresh herbs add a bright flavor. Use them at the end of cooking for the best taste. Dried herbs work well too, but they need more time to release their flavor. If using dried, add them early in the cooking process. - Adjusting the spice level: You can make the soup milder or spicier. To add heat, include more ginger or a pinch of cayenne pepper. For a milder taste, reduce the ginger and spices. Taste as you go to find your perfect balance. - Best pot to use for soups: A heavy-bottomed pot works best. It heats evenly and prevents burning. A Dutch oven is a great choice. It retains heat and keeps your soup warm longer. - How to avoid overcooking vegetables: Add firmer vegetables, like carrots, early in cooking. Softer greens, like kale or spinach, should go in later. This way, all veggies stay tender but not mushy. - Batch cooking for meal prep: Make a large batch of soup and store it in portions. This saves time for busy days. Use airtight containers to keep it fresh. You can easily reheat it whenever you need a quick meal. For the full recipe, check out the complete guide to making this nourishing soup! {{image_4}} You can make this soup even better by swapping some ingredients. Here are some ideas: - Alternative vegetables for added nutrients: Try adding sweet potatoes for a sweet taste. You can also use zucchini or broccoli for more vitamins. Each vegetable will give a unique flavor and boost health benefits. - Substitutes for coconut milk: If you want a lighter version, use almond milk or cashew cream instead. These options will change the taste but still keep it creamy. - Using different types of broth: For more flavor, use chicken broth instead of vegetable broth. You can also try mushroom broth for a rich, earthy taste. You can easily adjust this soup to fit your diet. Here’s how: - Making the soup vegan or vegetarian: This soup is already vegetarian! To make it vegan, just ensure the broth is plant-based. All other ingredients are already vegan-friendly. - Gluten-free adaptations: The soup is already gluten-free! Just make sure the broth and any added ingredients do not contain gluten. - Low-carb modifications: If you want fewer carbs, skip the carrots. Instead, add more leafy greens like spinach or use cauliflower for a hearty texture without the carbs. Feel free to explore these variations to make the soup your own. Check out the Full Recipe for more details. To keep your Turmeric Ginger Immune Soup fresh, use airtight containers. Glass containers work well, but BPA-free plastic ones are fine too. Make sure to cool the soup to room temperature before sealing. This step helps avoid condensation inside the container. You can store the soup in the refrigerator for up to four days. If you plan to keep it longer, freezing is a great option. Just remember to leave some space in the container, as the soup will expand when frozen. Reheat the soup on the stove for the best results. Place it in a pot over medium heat. Stir it often to ensure even heating. If you want to use the microwave, pour the soup into a microwave-safe bowl. Heat it in short bursts, stirring in between. To keep the texture and flavor, avoid boiling the soup again. Instead, warm it gently until it’s hot. If the soup seems thick, add a splash of vegetable broth or water. This helps bring back its smooth consistency. To spice up your soup, add more fresh ginger or turmeric. You can also toss in red pepper flakes or a pinch of cayenne pepper. Start with a little, then taste until it's just right for you! Yes, you can freeze the soup! Let it cool completely, then pour it into airtight containers. It will stay fresh for up to three months. When you're ready to eat, thaw it in the fridge overnight and reheat on the stove. Yes, turmeric is healthy in moderation. It contains curcumin, which has great anti-inflammatory properties. Just remember to pair it with black pepper for better absorption. Enjoying turmeric in soup adds flavor and boosts your health! For the full recipe, check out the Turmeric Ginger Immune Boosting Soup. Turmeric Ginger Immune Soup is a tasty and healthy choice. We explored its key ingredients, like fresh ginger, turmeric, and vibrant vegetables. The step-by-step guide made cooking simple and fun. You learned tips to enhance flavor and how to adjust for dietary needs. This soup is not just a meal; it boosts immunity and warms you up. Experiment with variants or store leftovers for easy meals later. Enjoy making this soup, knowing it’s good for you!

Turmeric Ginger Immune Soup Nourishing and Delicious

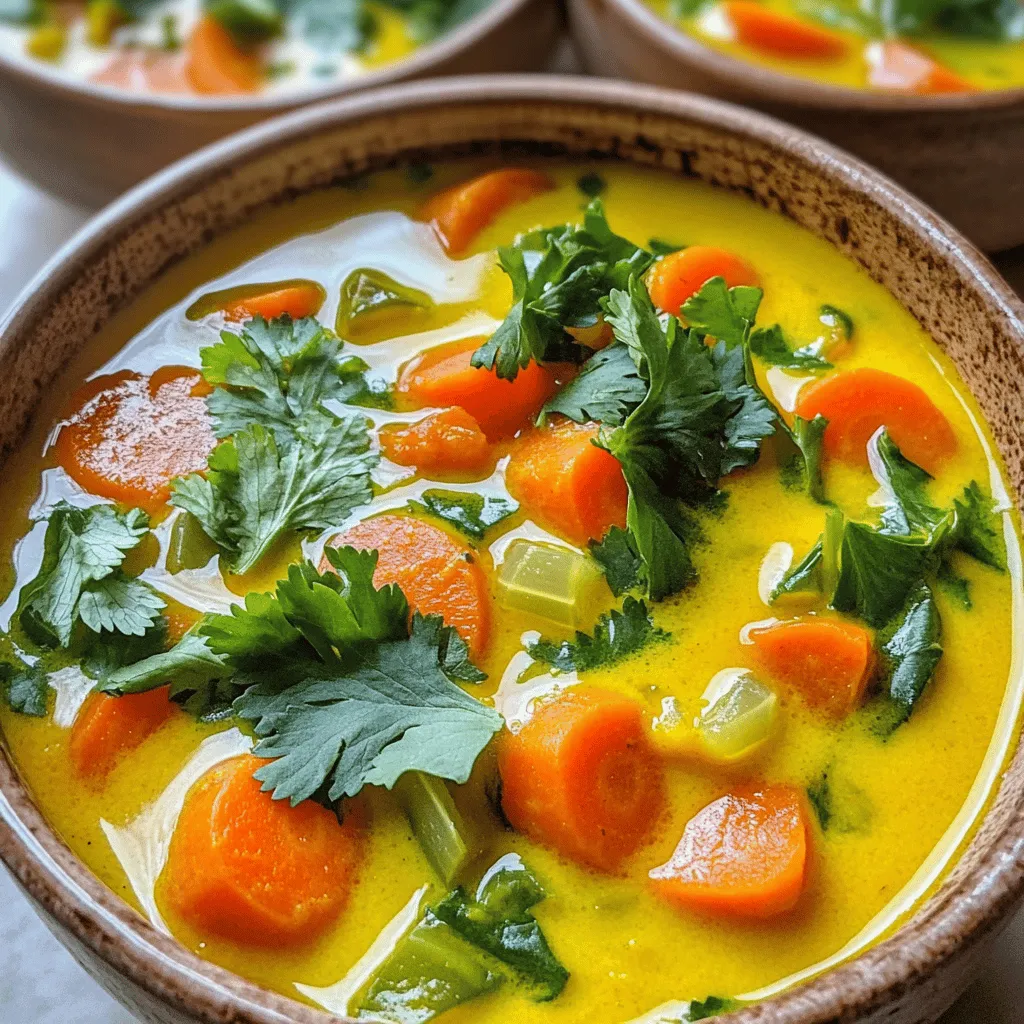
Are you looking for a tasty way to boost your immune system? Look no further! My Turmeric Ginger Immune Soup

To make delicious blueberry crumble muffins, gather these simple items: - 1 ½ cups all-purpose flour - ½ cup brown sugar, packed - ½ cup granulated sugar - 2 teaspoons baking powder - ½ teaspoon baking soda - ½ teaspoon salt - 1 teaspoon ground cinnamon - ¾ cup whole milk - 1/3 cup vegetable oil - 1 large egg - 1 teaspoon pure vanilla extract - 1 cup fresh blueberries Each ingredient works together to create a light, fluffy muffin. The balance of sugars gives sweetness without being too much. The flour provides structure, while the baking powder and baking soda help the muffins rise. For the crumble topping, you will need: - ½ cup rolled oats - ¼ cup all-purpose flour - ¼ cup brown sugar, packed - 2 tablespoons unsalted butter, melted - ½ teaspoon ground cinnamon The crumble adds a nice crunch. The oats and flour create texture, while the butter binds it all together. The cinnamon gives a warm flavor that pairs well with the blueberries. These ingredients make the muffins flavorful and fun to bake. You can find the Full Recipe at the end of this section if you want to try it yourself. First, set your oven to 375°F (190°C). This temperature helps the muffins rise nicely. Next, grab a 12-cup muffin tin. You can line it with paper liners or spray it with non-stick cooking spray. This step keeps the muffins from sticking. In a large bowl, mix the dry ingredients. Combine 1 ½ cups all-purpose flour, ½ cup brown sugar, ½ cup granulated sugar, 2 teaspoons baking powder, ½ teaspoon baking soda, ½ teaspoon salt, and 1 teaspoon ground cinnamon. Whisk them together well. In another bowl, whisk the wet ingredients. Grab ¾ cup whole milk, ⅓ cup vegetable oil, 1 large egg, and 1 teaspoon pure vanilla extract. Mix until smooth. Now, pour the wet mixture into the dry ingredients. Use a spatula to fold them gently. You want to mix just until combined. It's okay if the batter is a bit lumpy. Then, gently fold in 1 cup of fresh blueberries. This adds a burst of flavor. For the crumble topping, mix ½ cup rolled oats, ¼ cup all-purpose flour, ¼ cup brown sugar, 2 tablespoons melted unsalted butter, and ½ teaspoon ground cinnamon in a small bowl. Stir until it looks like coarse crumbs. Spoon the muffin batter into the prepared muffin cups. Fill each cup about ⅔ full. This gives room for the muffins to rise. Sprinkle the crumble topping over each muffin. Make sure it covers well for added crunch. Place the muffin tin in the preheated oven. Bake for 18-22 minutes. Your muffins are done when the tops are golden brown. A toothpick inserted into the center should come out clean. After baking, let the muffins cool in the pan for about 5 minutes. Then, transfer them to a wire rack. This step helps them cool completely and keeps them fluffy. For the full recipe, check the previous section. - Avoiding overmixing: Mix the batter just until you see no dry flour. Lumps are fine. Overmixing makes muffins tough. - Ensuring even blueberry distribution: Toss fresh blueberries in a little flour before adding them. This helps them stay suspended in the batter. - Adding additional spices or ingredients: Consider adding a pinch of nutmeg or ginger for warmth. You can also mix in some lemon zest for brightness. - Substituting fresh or frozen blueberries: Fresh blueberries offer a juicy pop. Frozen blueberries are great too; just add them without thawing. They can make the batter a little blue, but they taste just as good! - Serving suggestions: Serve your muffins warm with some butter or cream cheese. They also pair well with coffee or tea. - Garnishing ideas: Sprinkle a bit of powdered sugar on top for a sweet touch. You can also add a few whole blueberries on top for a pretty look. For the full recipe, check out the Berry Burst Blueberry Crumble Muffins 🫐 recipe above! {{image_4}} You can switch up the blueberries with other fruits. Try raspberries, blackberries, or diced peaches. Each fruit adds a unique taste. You can even mix different types of fruits. This keeps your muffins fresh and exciting. If you need gluten-free muffins, use gluten-free flour. You can find it in most stores. Just replace the all-purpose flour with the gluten-free type. This keeps the texture light and fluffy. It tastes great without the gluten. You can make these muffins vegan too. Replace the egg with a flax egg or applesauce. Use almond milk instead of whole milk. For the butter, try coconut oil or vegan butter. These swaps keep the muffins moist and tasty without any animal products. To keep your blueberry crumble muffins fresh, store them properly. You can keep them at room temperature or in the fridge. - Room Temperature: If you plan to eat the muffins in a few days, store them in an airtight container at room temperature. This keeps them soft and moist. - Refrigerator: If you want to keep them longer, put them in the fridge. Just note that they may dry out a bit. For best results, use a container that seals well. A glass or plastic container with a tight lid works great. Freezing is a smart way to save muffins for later. Follow these tips to freeze and reheat them well. - Tips for Freezing: First, let the muffins cool completely. Then, wrap each muffin in plastic wrap. After that, place them in a freezer bag. This helps prevent freezer burn. - Duration for Best Quality: For the best taste, eat the muffins within three months. They will stay safe to eat beyond that time, but the texture may change. When you're ready to enjoy them, just take a muffin out, unwrap it, and reheat it in the microwave for 15-20 seconds. This will bring back the warmth and softness. Enjoy your muffins fresh and delicious! You can use several options if you need a milk substitute. Here are some good choices: - Almond milk - Soy milk - Oat milk - Coconut milk - Yogurt (thinned with water) Each option brings its own flavor. Almond and soy milk have mild tastes. Oat milk is creamy and rich. Coconut milk adds a hint of sweetness. To check if your muffins are ready, look for these signs: - The tops should be golden brown. - The muffins should rise well and look puffy. - Insert a toothpick into the center. It should come out clean. If you see wet batter on the toothpick, bake them a few more minutes. Yes, you can use frozen blueberries! Here are some best practices: - Do not thaw the blueberries before using them. This helps keep the batter from turning blue. - Toss the frozen blueberries in a little flour before adding them to the batter. This helps them stay suspended during baking. Frozen blueberries work great and still taste fresh. These muffins stay fresh for about three days at room temperature. Keep them in an airtight container to avoid drying out. If you want them to last longer, you can freeze them. They will keep well for up to three months in the freezer. Yes, you can prepare the batter ahead of time. - Mix the dry ingredients and the wet ingredients separately. - Store them in the fridge for up to 24 hours. When you are ready to bake, just combine them and fold in the blueberries. This makes for a quick and easy breakfast! For the full recipe, check out the Berry Burst Blueberry Crumble Muffins. Now you know how to make delicious blueberry muffins from scratch. We covered the essential ingredients, step-by-step instructions, and helpful tips. You can also explore variations like gluten-free and vegan options. With proper storage techniques, your muffins can last longer and stay fresh. Baking can be fun and rewarding. Enjoy experimenting with flavors and sharing your creations. Happy baking!

Blueberry Crumble Muffins Flavorful and Easy Recipe

Are you ready to whip up a batch of delicious Blueberry Crumble Muffins? This easy recipe will fill your kitchen

To make a Zesty Italian Pasta Salad, you need fresh ingredients that bring flavor and texture. Here’s what you will need: - 2 cups uncooked rotini or fusilli pasta - 1 cup cherry tomatoes, halved - 1 cup cucumber, diced - 1/2 cup red bell pepper, diced - 1/2 cup black olives, pitted and sliced - 1/2 cup mozzarella balls or diced mozzarella cheese - 1/4 cup red onion, thinly sliced - 1/4 cup grated Parmesan cheese - 1/4 cup fresh basil, chopped - 1/4 cup high-quality olive oil - 3 tablespoons red wine vinegar (or substitute with apple cider vinegar) - 1 teaspoon Italian seasoning - Salt and pepper to taste Each ingredient adds a burst of flavor. The pasta gives a hearty base, while the veggies add crunch and freshness. The olives and cheese provide a savory touch. The dressing ties it all together, making this dish vibrant and zesty. You can always find the full recipe above to guide you through the cooking process. Enjoy making this delicious salad! Start by boiling a large pot of salted water. Once it reaches a rolling boil, add 2 cups of rotini or fusilli pasta. Cook it for about 8-10 minutes until it's al dente. This means the pasta should be firm but not hard. After cooking, drain the pasta in a colander. Rinse it under cold water to stop the cooking process and cool it down quickly. Rinsing helps keep the pasta from getting sticky. In a large mixing bowl, combine the cooled pasta with your veggies. Use 1 cup of halved cherry tomatoes, 1 cup of diced cucumber, 1/2 cup of diced red bell pepper, 1/2 cup of sliced black olives, and 1/4 cup of thinly sliced red onion. Mix gently to ensure the ingredients are evenly distributed. A gentle stir helps keep the veggies intact. In a medium bowl, whisk together the dressing ingredients. Use 1/4 cup of high-quality olive oil, 3 tablespoons of red wine vinegar (or apple cider vinegar), and 1 teaspoon of Italian seasoning. Add a pinch of salt and pepper to taste. Whisk well until the mixture is smooth and slightly emulsified. This means it should look creamy and well blended. Now, pour the dressing over the pasta and vegetable mixture. Toss everything gently with a spatula or tongs. Make sure every ingredient gets a nice coat of the dressing. This step is key for flavor. Next, fold in 1/4 cup of grated Parmesan cheese and 1/4 cup of chopped fresh basil. Be careful not to break the pasta or the veggies while mixing. Use a gentle hand to keep everything whole. The cheese and herbs add a rich flavor to the salad. Cover the bowl with plastic wrap or a lid. Place it in the refrigerator to chill for at least 30 minutes. Chilling helps the flavors meld together beautifully. When you’re ready to serve, give the salad a quick toss. Check the seasoning and adjust if needed. For a great presentation, serve in a large bowl or individual portions. Garnish with a sprig of fresh basil and extra Parmesan cheese for a nice touch. To make a great pasta salad, pick fresh, high-quality ingredients. Choose ripe cherry tomatoes that burst with flavor. Look for firm cucumbers and bright bell peppers. Good mozzarella should be creamy and soft. Fresh basil adds the best taste, so opt for it over dried. For a quicker prep, cook your pasta in advance. You can boil it the day before and store it in the fridge. Chilling the pasta helps it mix better with the dressing. Also, chop your veggies ahead of time. This way, you save time when it’s time to assemble the salad. Zesty Italian pasta salad pairs well with grilled meats and fish. You can serve it alongside burgers or hot dogs at cookouts. For a lighter meal, it works great with a green salad. When hosting a gathering, consider individual servings. Use small cups or jars for a fun twist. This makes it easy for guests to grab and enjoy. You can also place extra toppings, like croutons or cheese, on the side for a personalized touch. If you want to switch things up, try different dressings. A lemon vinaigrette adds a bright pop. You can use pesto for a herby twist. For a creamier option, mix in some ranch or Caesar dressing. Always taste your dressing before adding it to the salad. Adjust the seasoning by adding a bit more salt or pepper. You can also add a splash of hot sauce for some heat. The key is to balance the flavors to suit your taste. {{image_4}} You can easily make this pasta salad vegetarian. To add protein, try chickpeas or lentils. They give a nice texture and boost. You can also use tofu for a healthy twist. For cheese, if you want to skip mozzarella, try feta or a vegan cheese. Both options keep the salad creamy and tasty. For gluten-free pasta, look for brown rice or quinoa pasta. They work well and taste great. Make sure all other ingredients are gluten-free too. Check labels on olives, dressing, and cheese. This way, everyone can enjoy the dish without worry. If you want to serve this pasta salad as a main dish, adjust the portions. Double the recipe for a bigger crowd. You can also add proteins like grilled chicken or tuna. This makes it heartier and more filling. You can find the full recipe to guide you through these changes. To keep your Zesty Italian Pasta Salad fresh, place it in the fridge right away. Use an airtight container. This helps the salad stay crisp and tasty. If you have a lot, divide it into smaller containers. This way, you can grab one without opening the whole batch. You can freeze pasta salad, but it may change texture. The veggies might become mushy. If you want to freeze it, do so without the dressing. Store it in a freezer-safe container. When you're ready to eat, thaw it overnight in the fridge. Serve it cold with fresh dressing to bring back the zesty flavor. Zesty Italian Pasta Salad lasts about three to five days in the fridge. If you see any mold or bad smell, it’s time to throw it out. If the pasta looks slimy or the veggies have lost their crunch, skip eating it. Always check for freshness before enjoying your leftovers. Zesty Italian Pasta Salad is a colorful and flavorful dish. It typically has pasta, fresh veggies, and cheese. The dressing brings it all together with a tangy taste. Common ingredients include: - 2 cups uncooked rotini or fusilli pasta - 1 cup cherry tomatoes, halved - 1 cup cucumber, diced - 1/2 cup red bell pepper, diced - 1/2 cup black olives, pitted and sliced - 1/2 cup mozzarella balls or diced mozzarella cheese - 1/4 cup red onion, thinly sliced - 1/4 cup grated Parmesan cheese - 1/4 cup fresh basil, chopped - 1/4 cup high-quality olive oil - 3 tablespoons red wine vinegar - 1 teaspoon Italian seasoning - Salt and pepper to taste Yes, you can make this pasta salad ahead of time. I recommend preparing it at least a few hours before serving. This gives flavors time to blend. Store it in the fridge in an airtight container. It will stay fresh for about three days. To spice up your pasta salad, add some heat. You can use crushed red pepper flakes or diced jalapeños. Another option is to include spicy Italian sausage. Just cook it first, then mix it in. Absolutely! This salad is great for meal prep. You can make a big batch and portion it out for lunches. Use containers to separate servings. This way, you have a quick meal ready to go. You can find pre-made Zesty Italian Pasta Salad in many grocery stores. Look for brands like Deli or Fresh Express. They usually have a tasty version in the deli section. Check the labels for quality ingredients. This blog post covered how to make a tasty Zesty Italian Pasta Salad. We discussed the ingredients, step-by-step cooking methods, and helpful tips. With the right ingredients and a few easy steps, you can create a dish everyone will enjoy. Remember to chill it for the best flavor and try new variations to keep it exciting. Perfect for any meal or gathering, this salad is easy, fun, and delicious. Enjoy your cooking adventures!

Zesty Italian Pasta Salad Fresh and Flavorful Dish

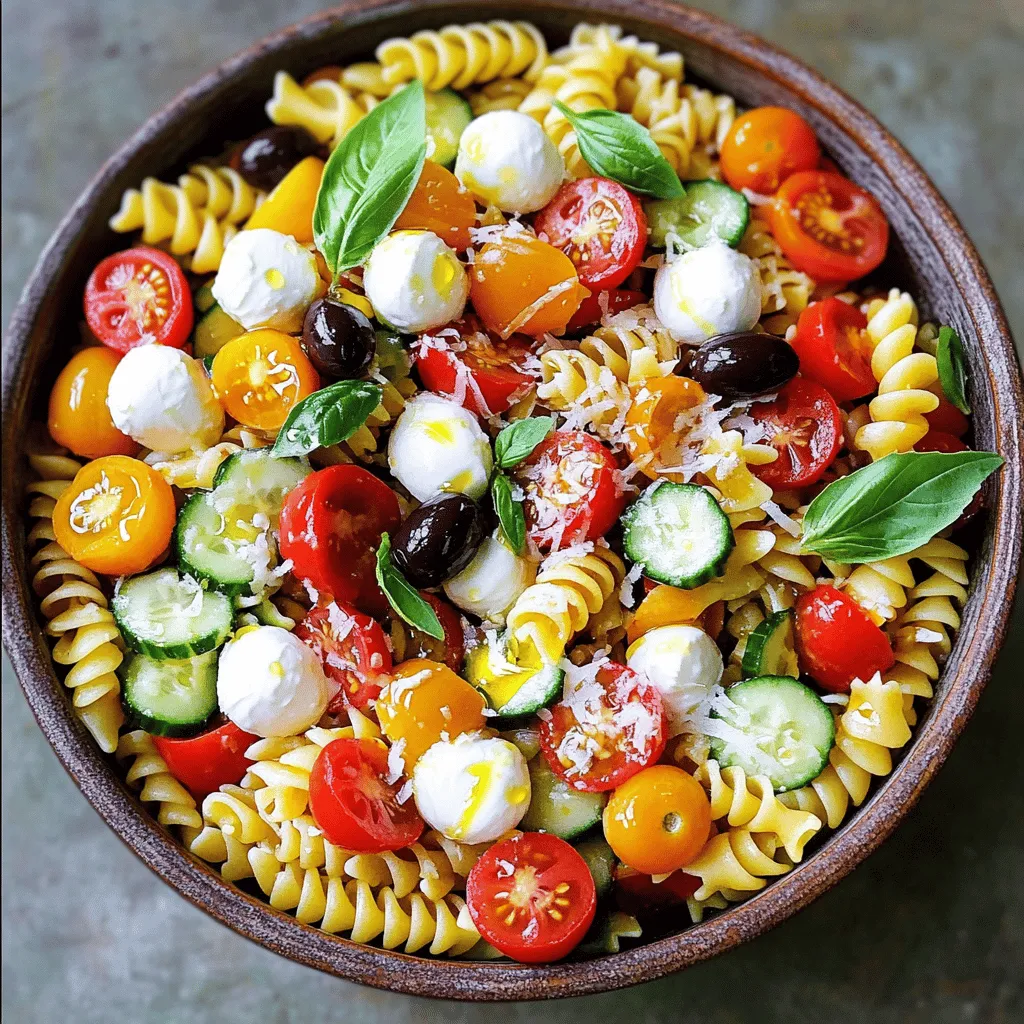
Looking for a fresh and flavorful dish? Zesty Italian Pasta Salad checks all the boxes! Packed with vibrant veggies and

- Firm tofu (14 oz block) - Honey or agave syrup (3 tablespoons) - Soy sauce (3 tablespoons) - Rice vinegar (2 tablespoons) - Garlic and ginger (4 cloves and 1 tablespoon respectively) I love using firm tofu for this dish. It holds its shape well and absorbs flavors nicely. Press the tofu to remove extra moisture. This step is key! You can use a tofu press or wrap it in a towel. Place something heavy on top for about 30 minutes. For the sauce, I mix honey or agave syrup with soy sauce and rice vinegar. The garlic and fresh ginger give it a nice kick. You will enjoy this sweet and savory blend. - Cornstarch (1 tablespoon) - Sesame oil (2 tablespoons) - Green onions and sesame seeds for garnish Cornstarch is my secret for a crispy texture. Toss the marinated tofu in it before cooking. It helps create that golden crust we all crave. Sesame oil adds a nutty flavor to the dish. Finally, sprinkle green onions and sesame seeds on top for a pop of color and taste. These simple touches elevate the dish. You can find the full recipe to make these delicious Sticky Honey Garlic Tofu Bites. Happy cooking! To start, we need to press the tofu. This step removes extra moisture. Place the tofu on a clean towel. Then, add a weight on top. Let it sit for at least 30 minutes. This helps the tofu soak up flavors later. Once pressed, cut the tofu into bite-sized cubes. Aim for even pieces to ensure they cook well. Next, let’s make the marinade. In a medium bowl, mix together honey or agave syrup, soy sauce, rice vinegar, minced garlic, and grated ginger. Whisk these ingredients until they blend nicely. Set aside a few tablespoons to use later for glazing the tofu. Now, add the tofu cubes to the marinade. Make sure they are fully covered. Let them soak for at least 15 minutes. Flip them halfway through to get all sides covered in flavor. After marinating, sprinkle cornstarch over the tofu. Toss the cubes gently until they are evenly coated. This gives the tofu a nice crispy texture when cooked. Heat sesame oil in a large non-stick skillet over medium-high heat. Once the oil is hot, add the tofu cubes in a single layer. Be careful not to crowd the pan; this helps them sear well. Cook them for about 3-4 minutes on each side until golden brown and crispy. Use a spatula to flip them gently. Once the tofu is crispy, pour the reserved marinade over it in the skillet. Let it bubble for about 2-3 minutes. This allows the sauce to thicken and creates a sticky glaze. Lastly, remove the skillet from heat. Serve the tofu bites on a platter. Garnish with chopped green onions and sesame seeds to make it look great. You can find the full recipe for these sticky honey garlic tofu bites in the earlier sections. To make crispy tofu, pressing is key. This step removes extra moisture. When tofu holds water, it won’t crisp up well. I recommend pressing your tofu for at least 30 minutes. You can use a tofu press or just a clean towel with a weight on top. Next, use the right amount of cornstarch. Cornstarch helps create that crunchy layer. After marinating, sprinkle cornstarch all over the tofu. Toss it lightly to coat every side. This will help achieve that perfect crispy texture when you cook it. To enhance the flavor, try adding spices. A pinch of chili flakes can bring some heat. You might also add a dash of smoked paprika for a different twist. Feel free to adjust the honey or agave to your taste. Some folks enjoy it sweeter, while others prefer a more savory bite. Experimenting with different sweeteners can change the dish. Maple syrup can be a fun choice too! Serve your sticky honey garlic tofu with rice or vegetables. Steamed jasmine rice pairs well with the dish's sweetness. You can also stir-fry some colorful veggies for added crunch. For creative plating, stack the tofu bites in a pyramid. Drizzle some extra sauce around the plate for flair. Add a sprinkle of sesame seeds and chopped green onions on top. This not only looks great but also adds texture. You can find the full recipe [here](#) for more details on making this tasty dish! {{image_4}} You can easily adapt this dish to fit your diet. For a vegan option, use agave syrup instead of honey. Agave syrup has a similar sweetness but is plant-based. If you need a gluten-free choice, tamari is your best friend. It has the same rich flavor as soy sauce without gluten. Spice things up by adding chili flakes to the marinade. This gives the tofu a nice kick. If you crave something different, try adding pineapple chunks. This adds a sweet and sour twist that makes each bite exciting. You can mix and match flavors to find what you love most. If you want to switch it up, consider using tempeh or seitan. Tempeh has a nutty flavor and is packed with protein. Seitan has a chewy texture and absorbs flavors well. Cooking tips? Cut them into similar sizes as tofu for even cooking. Adjust the cooking time based on the texture you choose. Each option offers a unique twist on this tasty dish. For the full recipe, check out the Sticky Honey Garlic Tofu Bites recipe. To store your Sticky Honey Garlic Tofu Bites, let them cool completely. Place the tofu in an airtight container. This helps keep the flavors fresh. You can store them in the fridge for up to 3 days. If you want to keep them longer, consider freezing them. When reheating tofu, aim for a hot, crispy texture. The best way is to use a skillet. Heat a bit of oil over medium heat. Add the tofu and cook until warm and crispy. You can also use an oven. Preheat it to 350°F (175°C) and bake for about 10 minutes. This helps keep the outside crunchy. If you want to freeze your tofu bites, place them in a single layer on a baking sheet. Freeze them for 1-2 hours until solid. Then transfer them to a freezer-safe bag or container. This way, they won’t stick together. To thaw, leave them in the fridge overnight. Reheat them in a skillet or oven as noted earlier. Enjoy your delicious dish! For the full recipe, check out the Sticky Honey Garlic Tofu Bites. To make sticky honey garlic tofu bites, start by pressing the tofu. Remove moisture for about 30 minutes. Then, cut the tofu into small cubes. Next, mix honey, soy sauce, rice vinegar, minced garlic, and grated ginger. Let the tofu soak in this mix for at least 15 minutes. After marinating, sprinkle cornstarch over the tofu for a crispy texture. Heat sesame oil in a pan and cook the tofu until golden brown. Finally, add the reserved marinade, let it thicken, and enjoy! Yes, you can make this recipe vegan. Just swap honey with agave syrup. This change keeps the flavor and sweetness intact. You can also check other ingredients for animal products. For example, ensure your soy sauce is gluten-free if needed. These small tweaks make it vegan-friendly without losing taste. Sticky tofu bites pair well with many sides. You can serve them with steamed rice or quinoa. Stir-fried vegetables add color and nutrition. A simple salad with fresh greens offers a nice crunch. You can also try them with noodles for a heartier meal. Choose what you love! You can store leftover tofu bites in the fridge for about 3 to 5 days. Keep them in an airtight container to maintain freshness. Make sure they cool down before sealing. This helps prevent sogginess. For longer storage, consider freezing them. Yes, you can use different types of tofu. Firm tofu works best for this recipe. It holds its shape well during cooking. Soft or silken tofu may not be ideal, as they can break apart. If you prefer, try extra-firm tofu for an even sturdier bite! To press tofu, start by wrapping it in a clean towel. Place a weight on top, like a skillet or a can. Let it sit for about 30 minutes. This method removes extra moisture. Alternatively, use a tofu press if you have one. This tool makes pressing easier and more effective. This post shared how to make sticky honey garlic tofu bites. We covered main ingredients, step-by-step instructions, and helpful tips. You learned how to press tofu, marinate it, and achieve a crispy texture. You can easily customize the recipe with spices or different sweeteners. Remember, storing leftovers properly ensures you enjoy them later. With these tips, cooking tofu becomes simple and fun. Enjoy your creation, and don’t hesitate to explore more variations!

Sticky Honey Garlic Tofu Bites Flavorful and Easy Dish

If you love bold flavors and simple cooking, my Sticky Honey Garlic Tofu Bites are a must-try. This dish brings

- 1 cup cream cheese, softened to room temperature - 1 cup pumpkin puree (not pumpkin pie filling) - 1/2 cup powdered sugar The cream cheese gives this dip its rich and creamy base. Use full-fat cream cheese for the best texture. Pumpkin puree adds that lovely fall flavor. Make sure to choose pure pumpkin, not the sweetened pie filling. The powdered sugar sweetens the dip and helps it achieve that perfect dessert taste. - 1 teaspoon pure vanilla extract - 1 teaspoon pumpkin pie spice - 1/4 teaspoon fine sea salt Vanilla extract boosts the sweet flavor. It blends well with pumpkin. Pumpkin pie spice adds warmth and that classic fall taste. This spice mix often includes cinnamon, nutmeg, and ginger. Sea salt balances the sweetness and enhances flavors. - Graham crackers - Apple slices - Pretzels Graham crackers offer a sweet crunch. They pair perfectly with the creamy dip. Apple slices add a fresh and juicy contrast. The tartness of apples brightens the flavor. Pretzels give a salty crunch, which is fun and tasty. You can mix and match these dippers for a fun platter. This pumpkin cheesecake dip is a must-try. It’s easy to make and perfect for your next gathering. Check the Full Recipe for detailed steps! To make this dip, start with the cream cheese. Use a large bowl and mix the cream cheese and pumpkin together. You can use a hand mixer or a spatula. Blend until the mix is smooth and creamy. It should have no lumps. Next, add the powdered sugar. Mix it in gradually. Keep stirring until the mixture is lump-free and dreamy. Now, it’s time to make it taste great. Carefully stir in the vanilla extract, pumpkin pie spice, and fine sea salt. Mix until you see the spices evenly spread. Next, gently fold in the whipped topping. Use a spatula to keep it light and airy. This gives the dip a fluffy texture. Once mixed, transfer the dip to a nice serving bowl. Smooth the top with your spatula for a pretty look. Cover the bowl with plastic wrap or a lid. Chill the dip in the fridge for at least 30 minutes. This time helps the flavors mix well. Before serving, stir the dip gently. You can add a sprinkle of pumpkin pie spice or a dollop of whipped topping on top for a fun finish. Enjoy this tasty pumpkin cheesecake dip with your favorite dippers! For the full recipe, check out the details above. To achieve a smooth dip, start with softened cream cheese. This helps blend well with pumpkin puree. Mix until there are no lumps. If you want it extra creamy, beat it longer. Chilling is key. Refrigerate for at least 30 minutes. This time allows the flavors to meld and the texture to set. Create a colorful platter to wow your guests. Use a decorative bowl for the dip. Surround it with an array of dippers. Try graham crackers for sweetness, crisp apple slices for freshness, and pretzels for crunch. Each dipper adds a fun twist. For vegan options, swap cream cheese with a plant-based alternative. Use coconut cream or almond milk to keep it creamy. You can also find gluten-free dippers like rice crackers or veggie sticks. These swaps make the dip inclusive and tasty for everyone. {{image_4}} You can make your pumpkin cheesecake dip even more fun. Try adding chocolate or caramel for a sweet twist. Just drizzle some melted chocolate on top or swirl in caramel. This adds extra flavor and looks nice too. Seasonal spices can also change the taste. A bit of nutmeg or ginger can give your dip a warm kick. Don’t be afraid to play with flavors! When it comes to dippers, you have many choices. For a healthy option, use carrots or celery sticks. They add crunch and a fresh taste. If you want something sweet, cookie sticks are a great pick. They pair well with the creamy dip. You can even try pretzels or graham crackers for more variety. This makes your serving platter exciting! Want to turn your dip into a dessert? You can easily transform it into a cheesecake. Just pour the mixture into a crust and let it set. Layering with graham cracker crumbs adds a nice crunch. This gives a fun twist to your treat. Your guests will love this new version just as much! For the full recipe, check out the detailed instructions to create this delightful dish. To store leftover pumpkin cheesecake dip, place it in an airtight container. This method keeps the dip fresh and tasty. Use a container that seals well to avoid air exposure. You can also cover the bowl with plastic wrap. Make sure to press it down to remove any air pockets. It is best to refrigerate the dip right after serving. Yes, you can freeze pumpkin cheesecake dip. First, transfer it to a freezer-safe container. Leave some space at the top for expansion. Seal the container tightly to avoid freezer burn. When you want to enjoy it again, thaw it in the fridge overnight. This slow thawing keeps the texture smooth and creamy. In the fridge, pumpkin cheesecake dip lasts about 3 to 5 days. Check for signs of spoilage before eating. If the dip looks discolored or smells off, it’s best to discard it. Also, if you notice any separation or curdling, that’s a sign it’s time to toss it out. Always trust your senses when it comes to food safety! Pumpkin cheesecake dip is a creamy, delightful treat. It blends pumpkin puree with cream cheese, powdered sugar, and spices. The result is a smooth, sweet dip that tastes like dessert. You can serve it with graham crackers, apple slices, or pretzels. This dip is perfect for parties or cozy gatherings. Yes, you can make this dip ahead of time. Prepare the dip and store it in the fridge. Cover it tightly with plastic wrap or a lid. This keeps the dip fresh. It’s best to chill for at least 30 minutes before serving. This allows the flavors to meld together. You can use fresh pumpkin, but canned pumpkin is easier. Canned pumpkin puree is smooth and ready to use. Fresh pumpkin needs cooking and pureeing, which takes more time. Both options are tasty, but canned is quicker for this recipe. To make this dip dairy-free, substitute the cream cheese. Use a dairy-free cream cheese made from nuts or soy. You can also use coconut whipped cream instead of regular whipped topping. Check the labels to ensure they are dairy-free. Your dip will still be creamy and delicious! Pumpkin puree is versatile and can be used in many recipes. You can add it to pancakes or muffins for extra flavor. Try it in soups for a creamy texture. You can also mix it into smoothies or oatmeal. Pumpkin puree adds nutrition and taste to your meals. We explored how to make a delicious pumpkin cheesecake dip using cream cheese and pumpkin puree. By enhancing flavors with vanilla and spices, and providing various dippers, you can create an exciting treat. Remember to chill the dip for the best texture. Try the variations for a unique twist, and follow the storage tips to keep it fresh. Making this dip can be simple, tasty, and fun for everyone to enjoy. Give it a try; you won’t regret it!

Pumpkin Cheesecake Dip Irresistible Party Treat

Welcome to the ultimate party treat that will wow your guests: Pumpkin Cheesecake Dip! This creamy, sweet dip is loaded

- 2 chicken breasts, seasoned, grilled, and sliced thin - 1 can (15 oz) black beans, rinsed and drained - 1 cup corn, fresh, canned, or frozen - 1 red bell pepper, diced - 1 ripe avocado, diced - 1 cup cherry tomatoes, halved - 1/2 red onion, finely chopped - 1/2 cup fresh cilantro, chopped - Tortilla strips (optional) - Juice of 1 lime - 1/4 cup extra virgin olive oil - 1 teaspoon ground cumin - 1 teaspoon chili powder - Salt and black pepper The first step is to gather all your ingredients. Fresh ingredients make the best salad. The chicken provides protein, while black beans add fiber. Corn gives sweetness and crunch. Next, we add colorful veggies. Red bell pepper adds a crisp bite. Avocado brings creaminess. Cherry tomatoes pop with flavor. Red onion adds a nice sharpness. Don't forget fresh cilantro. It brightens the dish. You can add tortilla strips on top for crunch. For the dressing, we use lime juice for a zesty kick. Olive oil adds richness. Ground cumin and chili powder bring warmth and depth. Season with salt and black pepper. Each ingredient plays a role, creating a balanced and tasty meal. For the full recipe, check below. To start, you need to whisk together some tasty ingredients. Take a medium mixing bowl and add the lime juice, olive oil, cumin, chili powder, and a pinch of salt and black pepper. Use a whisk to mix everything well. The goal is to create a smooth and balanced dressing. This emulsification helps the flavors blend perfectly. Now, let’s assemble the salad. Grab a large serving bowl. Start by layering the grilled chicken slices at the bottom. Next, add the black beans. Then, layer in the corn, followed by the diced red bell pepper. Keep going with the avocado and halved cherry tomatoes. Finish with the finely chopped red onion and cilantro on top. This colorful layering makes the salad look inviting and fun. Once your salad is layered, it’s time to toss it with the dressing. Drizzle the dressing all over the salad. Then, gently toss everything together. Make sure every bite is coated in that delicious dressing. After tossing, let the salad rest for about 10 minutes. This resting time allows the flavors to mix and deepen, making every bite even more delightful. If you want a nice crunch, add some crispy tortilla strips right before serving. These small touches can really elevate your dish. For the complete recipe, check the Full Recipe section above. To get great grilled chicken, start with good seasoning. I like to use salt, pepper, and a touch of cumin. You can also add garlic powder for more flavor. Marinate the chicken for 30 minutes for best results. For grilling, set your grill to medium heat, about 350°F to 400°F. This temp helps cook the chicken evenly. Grill the chicken for about 6-7 minutes on each side. When the chicken reaches 165°F, it is ready. Let it rest for a few minutes before slicing. For a stunning look, serve the salad on a large platter. Arrange the layers in different sections. This makes each color pop and looks very inviting. You can also use a clear bowl to show off the layers. To enhance the meal, serve tortilla chips or warm corn tortillas on the side. These add a great crunch. You can also offer a small bowl of extra dressing for those who like more flavor. To boost the flavor, consider adding spices like smoked paprika or garlic powder. These can make the salad taste even better. A little cayenne pepper can add heat if you like it spicy. Balance flavors by mixing sweet and savory. Try adding diced mango or pineapple for sweetness. This helps round out the taste and makes the salad more exciting. {{image_4}} You can change up your dressing for the Southwest Chicken Salad easily. One great option is avocado dressing. It gives a creamy texture that pairs well with the salad. To make this, blend ripe avocado with lime juice, garlic, and a bit of olive oil. For convenience, you can also pick up store-bought dressings. Look for options like ranch or a zesty lime vinaigrette. These can save time while still adding flavor. If you want to try different proteins, tofu or shrimp work well. Tofu is a great choice for a vegetarian option. Just marinate it in lime juice and spices before grilling. Shrimp adds a nice twist with a quick cook time. You can also brighten the salad with fruits. Try adding mango or strawberries for a sweet contrast. They bring a fun pop of color and flavor. Changing ingredients with the seasons keeps your salad fresh. In spring, add fresh peas or asparagus for a crisp bite. Summer is perfect for juicy tomatoes or cucumbers. In the fall, consider roasted squash or apples for warmth. Fresh herbs like basil or dill also elevate the taste. These small changes can make a big difference in flavor and enjoyment. To keep your Southwest Chicken Salad fresh, store leftovers right away. Use airtight containers to prevent air and moisture from spoiling your food. Glass or plastic containers work well. Make sure to separate the dressing if you want to keep the salad crisp. This way, it stays tasty for 3 to 4 days in the fridge. If you want to save the salad longer, freezing is an option. However, be mindful of texture. The veggies and chicken may become mushy after thawing. To freeze, put the salad in a freezer-safe bag. Remove as much air as possible. Use it within a month for the best taste. When it's time to eat again, reheating is key. The best method is to use a microwave. Heat in short bursts for about 30 seconds. Stir in between to ensure even warming. If you stored the dressing separately, add it after heating. This keeps the flavors fresh and bright. Enjoy your meal! For the full recipe, check the [Full Recipe]. To make this salad, start by grilling seasoned chicken. Slice it thin. Then, rinse and drain black beans. Heat corn if frozen. Dice red bell pepper, avocado, and chop cherry tomatoes and red onion. In a bowl, mix lime juice, olive oil, cumin, chili powder, salt, and pepper to make the dressing. Layer the chicken, beans, corn, and veggies in a large bowl. Pour the dressing over the salad and toss gently. Let it sit for about 10 minutes for the flavors to blend. Finally, top with tortilla strips for crunch. You can find the full recipe here. For side dishes, consider flavors that complement the salad. Here are some ideas: - Cornbread: Sweet and crumbly, it pairs well with the spice. - Guacamole and Chips: Creamy avocado with crispy chips adds texture. - Rice: Cilantro lime rice can enhance your meal's flavors. - Fruit Salad: A refreshing mix of fruits balances the savory salad. Each option brings its unique taste and texture to the table. You can prep this salad ahead of time. Here are some tips: - Store ingredients separately: Keep the dressing separate to avoid sogginess. - Cut veggies fresh: Chop ingredients like avocado and tomatoes just before serving. - Use airtight containers: Store the salad in sealed containers to keep it fresh. - Marinate before serving: Let it sit for a short time to blend flavors. These steps help maintain the salad's quality and taste. This blog post guides you through making a delicious Southwest Chicken Salad. You learned about key ingredients like chicken, beans, and corn. We covered dressing components and how to assemble the salad for the best taste. Tips on grilling chicken and serving options enhance your meal. Variations allow you to customize based on what you have. Remember to store leftovers correctly to keep flavors fresh. Enjoy this healthy, tasty dish at home, and feel free to experiment with it!

Southwest Chicken Salad Flavorful and Nutritious Delight

Are you craving a meal that’s both hearty and healthy? Look no further than my Southwest Chicken Salad! Packed with

Older posts
Newer posts
← Previous Page1 Page2 Page3 … Page76 Next →

dsad

© 2025 eataroundit • Built with GeneratePress

Our Policies

  • Copyright Policy
  • Cookie Policy
  • GDPR Policy
  • Privacy Policy
  • Disclaimer
  • Terms Of Use

More Information

  • Home
  • About
  • Contact
  • Appetizers
  • Dessert
  • Dinner
  • Drinks
©2025, eataroundit About Back To Top