Skip to content
DisclaimerTerms Of UseGDPR PolicyCookie Policy

eataroundit

  • Home
  • Drinks
  • Appetizers
  • Dinner
  • Dessert
  • About
  • Contact
  • Privacy Policy
DisclaimerTerms Of UseGDPR PolicyCookie Policy

Hannah

- 1 pound ground chicken - 1/2 cup breadcrumbs (preferably panko for extra crunch) - 1/4 cup grated Parmesan cheese The ground chicken gives our meatballs a lean and tasty base. I love using panko breadcrumbs. They add a wonderful crunch. Parmesan cheese brings a savory, rich flavor that everyone loves. - 1/4 cup green onions, finely chopped (plus extra for garnish) - 2 cloves garlic, minced - 1 tablespoon fresh ginger, grated Green onions add a fresh, mild kick to the meatballs. Garlic adds depth and aroma. Ginger gives a warm, zesty flavor that pairs well with chicken. - 1 large egg, beaten - 1 tablespoon soy sauce - 1 tablespoon sriracha (adjust to your desired spice level) The egg helps bind everything together. Soy sauce adds a salty umami taste. Sriracha brings heat, and you can adjust it to fit your taste. For the full recipe, check out the Firecracker Chicken Meatballs section. - Preheat the oven to 400°F (200°C). - Line a baking sheet with parchment paper. This helps with easy cleanup. - In a large bowl, combine: - 1 pound ground chicken - 1/2 cup breadcrumbs - 1/4 cup grated Parmesan cheese - 1/4 cup finely chopped green onions - 2 cloves minced garlic - 1 tablespoon fresh grated ginger - Stir these ingredients until they mix well. - In another bowl, blend: - 1 large beaten egg - 1 tablespoon soy sauce - 1 tablespoon sriracha - 1 tablespoon honey - 1 teaspoon sesame oil - Salt and pepper to taste - Whisk until smooth, then pour into the chicken mixture. - Gently stir until just combined. Don’t over-mix! - Lightly grease your hands with oil. - Shape the mixture into small meatballs, about 1 inch wide. - Place them on the prepared baking sheet. Leave space between each meatball. - Bake in the oven for 18-22 minutes. Check that they reach an internal temperature of 165°F (74°C). - They should look golden brown. Now your firecracker chicken meatballs are ready to impress! For a full recipe with all details, check the [Full Recipe]. - Avoid over-mixing: When you mix your meatball ingredients, do it gently. Over-mixing makes the meatballs tough. You want them soft and juicy. - Proper sizing of meatballs: Make your meatballs about 1 inch wide. This size helps them cook evenly and stay tender. - Modifying sriracha: If you want less heat, use less sriracha. Start with a teaspoon, then add more if you like. - Customizing flavors: You can switch up the flavors by adding other spices or herbs. Try garlic powder or chopped cilantro for a different twist. - Garnishing with sesame seeds: Sprinkle sesame seeds on top before serving. This adds texture and a nice look. - Using a dipping sauce: Serve with sweet chili sauce on the side. It complements the meatballs and adds extra flavor. {{image_4}} You can switch the ground chicken for turkey or beef. Turkey gives a lighter taste. Beef adds a rich flavor. Both options work well with the spices. For a vegetarian choice, use lentils or chickpeas. Mash them up and mix with other ingredients. You still get a tasty meatball that everyone will love. Want to spice things up? Try a fiery hot sauce. Add more sriracha or chili paste. You can also mix in some garlic for an extra kick. If you prefer sweet, use a honey-soy glaze. This sauce pairs well with the meatballs. It adds a nice balance to the flavors. Firecracker chicken meatballs taste great with rice or noodles. Serve them on a bed of jasmine rice for a filling meal. You can also toss them with soba noodles and veggies for a light dish. Want to impress your guests? Serve them as appetizers. Skewering the meatballs makes them easy to grab. Add a side of dipping sauce for extra flavor. Try the sweet chili sauce for a perfect match. Don't forget to check the full recipe for more ideas. To store cooked meatballs, place them in an airtight container. This helps keep them fresh. You can refrigerate them for up to three days. Make sure they cool down first. Keeping them in a single layer prevents them from sticking together. If you want to enjoy them later, always check for any signs of spoilage before eating. Freezing meatballs is simple and effective. First, let the cooked meatballs cool to room temperature. Then, arrange them in a single layer on a baking sheet. Freeze them for about an hour. Once they are firm, transfer them to a freezer bag. They can stay frozen for up to three months. To reheat, place them in a skillet over medium heat. Add a splash of water to steam them for about 10 minutes. You can also use the microwave for quick heating. Firecracker chicken meatballs are perfect for meal prep. You can add them to salads or wraps for quick lunches. Pair them with rice or noodles for easy dinners. They also make great snacks for game days. With their bold flavors, they are sure to please everyone. For more ideas, check out the Full Recipe to inspire your meal plans. To add spice, increase the sriracha in your mix. You might also add red pepper flakes. For a kick, consider a dash of hot sauce on top before serving. Adjust the heat to fit your taste. Yes, you can make the meatballs in advance. Shape them and store them in the fridge for a day. You can also freeze them for up to three months. Just remember to thaw them before baking. These meatballs pair well with rice or noodles. You can also serve them with a fresh salad. Try adding some steamed veggies for color and nutrition. Leftovers can last in the fridge for up to four days. Store them in an airtight container. Make sure they are completely cooled before sealing to keep them fresh. Yes, whole wheat breadcrumbs work fine. They will give a different texture but still taste great. You may want to adjust seasonings to enhance the flavor. For the best crunch, stick with panko if you can. Check out the Full Recipe for more details! In this blog post, we covered how to make Firecracker Chicken Meatballs. We discussed key ingredients, flavor enhancers, and binding agents. I shared step-by-step instructions for mixing, shaping, and baking. Tips helped ensure tender meatballs with custom spice levels. You can also explore tasty variations and storage methods. These meatballs are fun and easy to prepare. They’re perfect for weeknight meals or parties. Enjoy experimenting with flavors and serving options!

Firecracker Chicken Meatballs Tasty Dinner Recipe

Are you ready to spice up your dinner? These Firecracker Chicken Meatballs pack a punch of flavor that will excite

To make your zucchini carrot muffins, you'll need these main ingredients: - 1 cup grated zucchini (about 1 medium zucchini) - 1 cup grated carrot (about 2 medium carrots) - 1 ½ cups all-purpose flour - 1 teaspoon baking powder - ½ teaspoon baking soda - ½ teaspoon salt - 1 teaspoon ground cinnamon - ½ teaspoon ground nutmeg (optional) - ¾ cup packed brown sugar - ½ cup granulated sugar - 2 large eggs - ⅓ cup vegetable oil - 1 teaspoon pure vanilla extract - ½ cup chopped walnuts or pecans (optional) These ingredients blend well together. The zucchini keeps the muffins moist. The carrots add natural sweetness and color. You can enhance your muffins with fun add-ins. Here are some ideas: - Chocolate chips for a sweet treat - Dried fruit like raisins or cranberries for extra flavor - Seeds like chia or flax for a healthy boost Feel free to mix and match! Each choice adds something unique. Having the right tools makes baking easier. Here’s what I recommend: - Mixing bowls for combining ingredients - Grater for the zucchini and carrots - Whisk for mixing dry and wet ingredients - Muffin tin for baking - Toothpick for checking doneness With these tools, you’ll be ready to bake delicious muffins. For the complete list of steps, check out the Full Recipe. Enjoy your baking adventure! Start by preheating your oven to 350°F (175°C). This step warms the oven, ensuring your muffins bake evenly. Next, grab a muffin tin. You can line it with paper liners or lightly grease each cup with oil or cooking spray. This helps the muffins pop out easily after baking. Now it's time for the star ingredients: zucchini and carrots. In a mixing bowl, combine 1 cup of grated zucchini and 1 cup of grated carrot. To keep your muffins from getting soggy, squeeze out any extra moisture. You can use a clean kitchen towel or cheesecloth for this. It’s a simple step that makes a big difference in texture. In a separate bowl, whisk together 1 ½ cups of all-purpose flour, 1 teaspoon of baking powder, ½ teaspoon of baking soda, ½ teaspoon of salt, and 1 teaspoon of ground cinnamon. If you like, add ½ teaspoon of ground nutmeg for extra flavor. Set this dry mix aside. In another larger bowl, blend together ¾ cup of packed brown sugar, ½ cup of granulated sugar, and 2 large eggs. Whisk until everything is smooth. Next, pour in ⅓ cup of vegetable oil and 1 teaspoon of pure vanilla extract to the sugar-egg mix. Stir until it’s combined well. Gradually add your dry ingredient mix to the wet mixture, stirring gently. Be careful not to overmix. Overmixing can lead to tough muffins. Finally, fold in your prepared zucchini and carrots. If you want, you can also add ½ cup of chopped walnuts or pecans at this stage. Distribute the batter evenly into your prepared muffin cups, filling each about ¾ full. This gives them room to rise without overflowing. Now, place the muffin tin in your preheated oven. Bake for 18-22 minutes. To test if they are done, insert a toothpick into the center of one muffin. If it comes out clean, they are ready. After baking, let the muffins cool in the tin for about 5 minutes. Then transfer them to a wire rack to cool completely. For a fun twist, serve these muffins warm with a light dusting of powdered sugar or a dollop of cream cheese frosting. Enjoy these tasty treats! For the full recipe, check the section above. To keep your muffins from getting soggy, moisture control is key. Squeeze out extra water from the grated zucchini and carrots using a clean towel. This step helps keep your muffins fluffy. Also, avoid overmixing the batter. Overmixing can trap too much air and create a dense texture. For tender muffins, use room-temperature eggs and oil. Cold eggs can shock the batter. This shock can lead to uneven baking. Ensure you mix the dry and wet ingredients gently. Stir just until combined. This technique keeps your muffins light and airy. You can easily adjust the sweetness. If you like a sweeter muffin, add more brown sugar. For a healthier option, reduce sugar and use mashed bananas. Feel free to add spices, such as ginger or allspice, for more flavor. Nuts or chocolate chips can also enhance both taste and texture. Check out the Full Recipe for all the details needed! {{image_4}} You can easily make zucchini carrot muffins gluten-free. Use a gluten-free flour blend instead of regular flour. Look for options made from rice or almond flour. This swap keeps the muffins light and fluffy. For a vegan version, replace the eggs with flaxseed meal. Mix 1 tablespoon of flaxseed meal with 3 tablespoons of water. Let it sit for a few minutes until it thickens. You can also use applesauce or mashed banana as an egg substitute. Feel free to get creative with flavors! You can add chocolate chips for a sweet twist. Dark chocolate pairs well with the muffins' base. Nuts add crunch; walnuts or pecans work great. You can also sprinkle in some dried fruits like raisins or cranberries for extra sweetness. Each variation makes your muffins unique and delightful. For the full recipe, please refer to the earlier section. To keep your zucchini carrot muffins fresh, store them in an airtight container. This helps maintain moisture and flavor. You can leave them at room temperature for up to three days. If you want to keep them longer, consider refrigerating them. However, this may change their texture slightly. Freezing these muffins is simple. Once they cool completely, wrap each muffin in plastic wrap. Place them in a freezer-safe bag. They will stay fresh for up to three months. When you are ready to enjoy one, simply take it out and let it thaw at room temperature. To reheat, preheat your oven to 350°F (175°C). Place the muffins on a baking sheet for about 5 to 10 minutes. This helps them regain their soft texture. You can also use a microwave. Heat each muffin for about 15-20 seconds. Just be careful not to overheat them, or they could become tough. For a tasty twist, spread a little butter on top before heating! Yes, you can use fresh zucchini and carrots from your garden. Homegrown produce adds great flavor. Just make sure to wash them well. Grate them finely to mix well into the batter. To make these muffins healthier, consider these tips: - Use whole wheat flour instead of all-purpose flour. - Reduce the sugar amount by half. - Substitute applesauce for some or all of the oil. - Add in seeds like chia or flax for extra fiber. These changes keep the muffins tasty while boosting nutrition. If you need an egg substitute, try: - 1/4 cup unsweetened applesauce for each egg. - 1/4 cup mashed banana. - 1 tablespoon ground flaxseed mixed with 2.5 tablespoons water. These options help bind the muffins without using eggs. These muffins stay fresh for about 3 to 4 days at room temperature. Store them in an airtight container. If you want them to last longer, freeze them for up to 3 months. Just remember to thaw them before eating. For the complete recipe, check the full recipe. Zucchini carrot muffins are simple and fun to make. We covered key ingredients, steps for baking, and helpful tips. You can customize these muffins to match your taste, too. Storing muffins lets you enjoy them later. Remember, great cooking comes from trying new things. Don't hesitate to experiment with flavors and textures. Happy baking!

Zucchini Carrot Muffins Flavorful and Healthy Treat

Do you crave a tasty snack that’s also healthy? Look no further than these Zucchini Carrot Muffins! Packed with veggies

- 4 boneless, skinless chicken thighs - 2 tablespoons extra virgin olive oil - 1 tablespoon dried oregano - 3 cloves garlic, finely minced - 1 lemon, zested and juiced - Salt and freshly ground black pepper to taste - 1 red bell pepper, diced into bite-sized pieces - 1 medium zucchini, sliced into rounds - 1 cup cherry tomatoes, halved - 1 small red onion, cut into wedges - Crumbled fresh feta cheese (optional for serving) - Fresh parsley, chopped, for garnish To make this one-pan Greek chicken and veggies, I focus on fresh, vibrant ingredients. The chicken thighs provide a rich flavor and juicy texture. The veggies, like bell pepper, zucchini, cherry tomatoes, and red onion, add color and nutrition. A mix of olive oil, oregano, and garlic creates a simple yet tasty marinade. When you zest and juice the lemon, it adds a bright, tangy note. This flavor enhances the whole dish. Don't forget salt and pepper. They balance everything and make it pop. For garnish, I love adding crumbled feta cheese. It gives a nice salty finish. Fresh parsley brightens the dish visually and taste-wise. Feel free to check the Full Recipe for more details. These key ingredients work together to create a delicious and colorful meal that everyone will enjoy. Marinating the chicken for best flavors Start by making a marinade. In a bowl, mix olive oil, oregano, garlic, lemon juice, lemon zest, salt, and pepper. This blend gives the chicken great flavor. Add the chicken thighs to the marinade. Make sure they are well-coated. Let them sit for at least 15 minutes. If you have more time, marinate for up to 2 hours in the fridge. This wait helps the chicken soak up the flavors. Prepping the vegetables for optimal cooking While the chicken marinates, it’s time to chop the veggies. Cut the red bell pepper into bite-sized pieces. Slice the zucchini into rounds. Halve the cherry tomatoes. Cut the red onion into wedges. Keep the pieces similar in size. This way, they cook evenly. Place the chopped vegetables aside until you are ready to bake. Oven temperature and baking specifics Preheat your oven to 400°F (200°C). This step is key for even cooking. In a large, oven-safe skillet, arrange the marinated chicken in a single layer. Add the prepared vegetables around the chicken. Drizzle with some olive oil and sprinkle more salt and pepper on the veggies. Transfer the skillet to the oven. Bake for 25-30 minutes. The chicken should reach 165°F (75°C) internally. The veggies will become tender and bright. Broiling for the finishing touch After baking, switch the oven to broil for the last 2-3 minutes. This step adds a nice char to both the chicken and the veggies. Watch closely to avoid burning. Once done, take it out of the oven. You can add crumbled feta cheese and chopped parsley for extra flavor and color. This dish is not just tasty; it also looks beautiful. Serve it straight from the skillet for a rustic feel. Enjoy your one-pan Greek chicken and veggies! For more details, check the Full Recipe. To ensure chicken is cooked properly, always check the internal temperature. Use a meat thermometer to verify it reads 165°F (75°C). This keeps the chicken juicy and safe to eat. I recommend letting it rest for a few minutes after baking. This helps the juices stay inside the meat. Avoiding overcooked vegetables is key. Cut your veggies into uniform pieces. This ensures they cook evenly. Check them about halfway through the baking time. If they look tender but not mushy, they are just right. To elevate the dish, consider adding spices like paprika or thyme. These herbs boost the flavor and introduce new dimensions. You can also include fresh herbs like basil or dill for a bright taste. Marinating time matters. Aim for at least 15 minutes for good flavor. However, if you have the time, refrigerate the chicken for up to 2 hours. This allows the flavors to penetrate deeper, making each bite more delicious. For the full recipe, check out One-Pan Greek Chicken and Veggies. {{image_4}} You can easily swap out the chicken for other proteins. Turkey works well, and tofu is a great choice for vegans. Both of these options soak up flavors just like chicken. Using seasonal vegetables also adds variety. In spring, try asparagus or peas. In fall, you can add butternut squash or Brussels sprouts. Each season brings new tastes. Want to mix up the flavors? You can try adding ingredients from different cuisines. For a Mediterranean twist, use olives or artichokes. If you prefer Italian, add basil or sundried tomatoes. Adding heat can spice things up. You can toss in sliced jalapeños or crushed red pepper flakes. This will give your dish a nice kick without overpowering the other flavors. For the full recipe, check out the One-Pan Greek Chicken and Veggies. To store leftover chicken and veggies, follow these steps: - Let the dish cool down to room temperature. - Place leftovers in an airtight container. This keeps moisture in and prevents odors. - Store in the fridge for up to three days for best quality. I recommend using glass containers. They are easy to clean and do not stain. Plus, you can see what's inside! For reheating, use these methods: - Oven: Preheat to 350°F (175°C). Place the chicken and veggies in a baking dish. Heat for 15-20 minutes. This helps keep the flavors intact. - Microwave: Place in a microwave-safe dish. Cover with a damp paper towel. Heat for 2-3 minutes, stirring halfway through. Consume leftovers within three days. This keeps the meal fresh and safe to eat. You can find the full recipe for One-Pan Greek Chicken and Veggies earlier in the article! Can I use chicken breasts instead of thighs? Yes, you can use chicken breasts. They cook well, but they may dry out quicker than thighs. To keep them juicy, watch the cooking time closely. I recommend a cooking time of about 20-25 minutes. How can I make this dish ahead of time? To make this dish ahead, marinate the chicken and chop the veggies the night before. Then, keep them in the fridge. When you are ready to cook, just follow the baking steps from the Full Recipe. This saves time and enhances the flavors. Is this dish healthy? Yes, this dish is healthy. It features lean chicken and fresh veggies. The olive oil adds healthy fats. The dish is rich in vitamins and minerals. It is a balanced meal for any diet. What are the calorie counts per serving? Each serving has about 350 calories. This count can vary based on added ingredients like feta cheese. Adjust as needed to fit your dietary goals. This blog covered the key ingredients for a delicious chicken and vegetable dish. You learned about preparation, cooking steps, and tips to enhance flavor. I provided ways to change ingredients and adjust flavors. Proper storage and reheating methods will keep your meals tasty. Remember, by following these steps, you can create healthy and enjoyable meals at home. Trust me, with practice, you’ll master this dish and impress everyone with your skills. Let's get cooking and have fun in the kitchen!

One-Pan Greek Chicken and Veggies Flavorful Meal

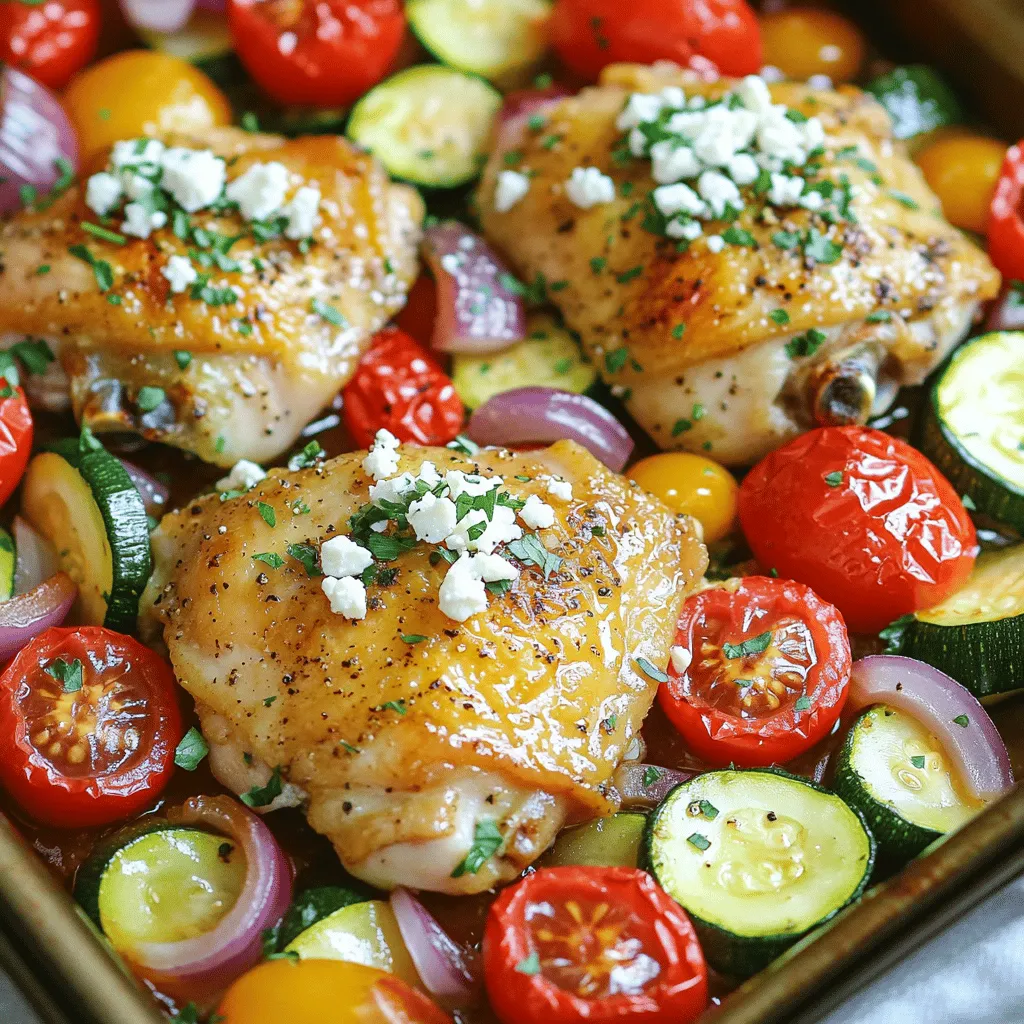
Are you ready for a meal that’s both simple and bursting with flavor? One-Pan Greek Chicken and Veggies is the

- 1 cup whole wheat flour - 1/2 cup unsweetened cocoa powder - 1/2 cup honey or maple syrup - 1/4 cup unsweetened applesauce These ingredients form the base of our healthy chocolate muffins. Whole wheat flour adds fiber and nutrients. Unsweetened cocoa powder gives a rich chocolate flavor without extra sugar. Honey or maple syrup serves as a natural sweetener, while applesauce keeps the muffins moist and tender. - 2 large eggs - 1/2 cup Greek yogurt - 1 teaspoon vanilla extract - 1 teaspoon baking powder - 1/2 teaspoon baking soda - 1/4 teaspoon salt The eggs provide structure and richness to the muffins. Greek yogurt adds creaminess and a boost of protein. Vanilla extract enhances the flavor. Baking powder and baking soda help the muffins rise, while salt balances the sweetness. - 1/2 cup dark chocolate chips - Dairy-free chips for a vegan option - Nutmeg or cinnamon for added flavor Dark chocolate chips bring extra sweetness and indulgence. If you prefer a vegan muffin, use dairy-free chips. Adding nutmeg or cinnamon can elevate the taste and add warmth. When you feel adventurous, try these options to customize your muffins. For the full recipe, check out the complete guide. 1. Preheat your oven to 350°F (175°C). This step is key for even baking. 2. Prepare a muffin tin. Use paper liners or spray the tin with non-stick spray. This helps the muffins come out easily. 1. In a large bowl, combine the following dry ingredients: - 1 cup whole wheat flour - 1/2 cup unsweetened cocoa powder - 1 teaspoon baking powder - 1/2 teaspoon baking soda - 1/4 teaspoon salt 2. Whisk these ingredients together. Make sure there are no lumps. A smooth mix gives better muffins. 1. In another bowl, whisk together: - 1/2 cup honey or maple syrup - 1/4 cup unsweetened applesauce - 1/2 cup Greek yogurt - 2 large eggs - 1 teaspoon vanilla extract 2. Mix until smooth and well blended. This helps the flavors mix well. 3. Carefully add the wet mixture to the dry ingredients. Stir gently with a spatula or spoon. Do not overmix; it can make muffins dense. 1. Fold in 1/2 cup dark chocolate chips. Ensure they are evenly spread through the batter. 2. Spoon the batter into the prepared muffin tin. Fill each cup about 3/4 full to allow for rising. 3. Bake in your preheated oven for 18-20 minutes. Check doneness with a toothpick. It should come out clean or with few crumbs. 4. Let the muffins cool in the tin for about 5 minutes. Then, transfer them to a wire rack to cool completely. Enjoy your baking! For the full recipe, check out the details provided. - Avoid overmixing the batter: Mixing too much can make muffins tough. Just mix until combined. - Check for doneness with a toothpick: Insert a toothpick in the center. It should come out clean or with a few crumbs. - Substitute sugar with natural sweeteners: Use honey or maple syrup for a healthier sweet taste. - Increase fiber with oats or nuts: Adding oats or nuts can boost fiber. This makes your muffins more filling. - Use silicone muffin cups: These help muffins pop out easily and reduce waste. - Adjust baking time for mini muffins: Mini muffins bake faster. Check them at about 10-12 minutes. These tips will help you make the best healthy chocolate muffins. Follow the full recipe for a delicious treat! {{image_4}} You can easily make these muffins vegan. First, replace regular eggs with flax eggs. To make a flax egg, mix one tablespoon of ground flaxseed with three tablespoons of water. Let it sit for five minutes. This mix binds the ingredients well. Next, swap Greek yogurt for a plant-based alternative. Options like almond or coconut yogurt work great. These swaps keep the muffins moist and delicious while staying vegan-friendly. For a gluten-free version, choose gluten-free flour blends. Many brands offer mixes that work well in baking. These blends often include rice flour or almond flour. They give the muffins a nice texture without gluten. Also, check that your chocolate chips are gluten-free. Some brands add gluten during processing. Look for labels that say “gluten-free” to be safe. Get creative with flavors! You can add fruits like mashed bananas or fresh berries. Bananas make the muffins sweet and moist. Berries add a burst of flavor in every bite. Consider adding spices for extra warmth. Cinnamon is a popular choice and pairs well with chocolate. You could also try ginger for a spicy kick. These different flavors make the muffins even more enjoyable. For the full recipe, refer to the earlier section. To keep your healthy chocolate muffins fresh, cool them completely before storing. This step stops moisture from building up, which can make them soggy. After cooling, place them in airtight containers. This keeps out air and keeps your muffins soft. If you want to save some muffins for later, freezing is a great option. To freeze muffins, wrap each one tightly in plastic wrap. Then, place them in a freezer bag. This method keeps them fresh for about three months. When you’re ready to enjoy them, take out a muffin and let it thaw at room temperature or microwave it for about 15 seconds for best results. Healthy chocolate muffins can last a few days at room temperature. If you store them in the fridge, they can last up to a week. Just remember, cold muffins can dry out faster. Always check for signs of spoilage, like an off smell or mold. For the freshest taste, enjoy them within a few days. For the full recipe, see the earlier sections. Yes, you can substitute whole wheat flour. Here are some alternatives: - All-purpose flour: This is easy to find and works well. - Oat flour: You can make this by grinding oats. It adds a nice flavor. - Almond flour: This is gluten-free and rich in nutrients. - Coconut flour: Use less of this, as it absorbs a lot of moisture. Each option changes the taste and texture a bit. It’s fun to experiment! Here are some tips to lower the calorie content: - Reduce sweeteners: Use less honey or maple syrup without losing flavor. - Use less oil or butter: Replace with unsweetened applesauce. - Skip chocolate chips: Or use fewer chips for a lighter muffin. - Choose low-fat yogurt: This cuts calories but keeps moisture. These small changes keep the muffins tasty and healthy! Eggs help bind the muffins. Here are great substitutes: - Flax eggs: Mix 1 tablespoon of ground flaxseed with 2.5 tablespoons of water. Let it sit until thick. - Chia seeds: Similar to flax eggs, mix 1 tablespoon of chia seeds with 2.5 tablespoons of water. - Unsweetened applesauce: Use 1/4 cup for each egg. It adds moisture too. - Yogurt: 1/4 cup of yogurt can replace one egg. These options work well in baking and keep the muffins moist. Healthy Chocolate Muffins stay fresh for about: - Room temperature: 3-4 days in an airtight container. - Refrigerated: Up to a week, but they might dry out. - Freezing: They can last up to 3 months. Wrap them well! Always let them cool completely before storing. This keeps them soft and delicious. Healthy chocolate muffins are simple to make with the right ingredients. Whole wheat flour and unsweetened cocoa are your base. Sweeten with honey or maple syrup and add applesauce for moisture. You can customize your muffins with optional ingredients like dark chocolate chips or spices. Remember to follow key steps and tips for perfect results. Store them well, or freeze for future treats. Enjoy experimenting with variations and enjoy healthy baking that fits your taste!

Healthy Chocolate Muffins Easy and Nutritious Recipe

If you crave a sweet treat that won’t weigh you down, you’re in the right place! This Healthy Chocolate Muffins

To make this dish, you need a few key items: - 1 medium spaghetti squash - 1 cup cashews, soaked for 4 hours and drained - 1 cup vegetable broth - 2 tablespoons nutritional yeast - 1 garlic clove, minced - 1 tablespoon freshly squeezed lemon juice - 1 tablespoon extra virgin olive oil - Salt and freshly cracked black pepper to taste These ingredients come together to create a creamy and rich sauce that pairs well with the squash. You can add extra flavor and texture to your dish. Here are some fun options: - 1 cup cherry tomatoes, halved - Spinach or kale for added greens - Grilled chicken or shrimp for protein Feel free to mix and match based on what you like or have on hand. Seasoning is key to great flavor. Use: - Salt to enhance the taste - Freshly cracked black pepper for a bit of heat - Finely chopped fresh parsley for garnish These small touches make a big difference in presentation and taste. You can find the full recipe [here](#). First, preheat your oven to 400°F (200°C). Next, take the spaghetti squash and cut it in half lengthwise. Use a spoon to scoop out the seeds. Drizzle the inside with olive oil. Sprinkle salt and pepper inside for great taste. Place the squash halves, cut-side down, on a baking sheet lined with parchment paper. Roast the squash for about 40 minutes. It should feel soft when you pierce it with a fork. While the squash cooks, make the creamy Alfredo sauce. In a high-speed blender, put the soaked cashews, vegetable broth, nutritional yeast, minced garlic, lemon juice, and a bit of salt and pepper. Blend until smooth and creamy. If needed, scrape down the sides to mix well. This sauce gives a rich, nutty flavor that makes the dish shine. After roasting, let the squash cool for a few minutes. Use a fork to scrape the flesh into long strands. In a large skillet over medium heat, add the spaghetti squash strands. Pour the Alfredo sauce over the squash and stir gently to mix. Cook for 2-3 minutes until everything is warm. If you want, add halved cherry tomatoes for extra color and taste. Serve your Spaghetti Squash Alfredo Delight warm, garnished with fresh parsley. This dish brings joy and comfort to your table. For the full recipe, check out the details above. When picking spaghetti squash, look for a firm one. It should feel heavy for its size. The skin should have a nice golden color. Avoid any with soft spots or blemishes. These signs mean the squash may be overripe or bad. To make the sauce creamy, soak the cashews for four hours. This softens them and helps blend smoothly. Use a high-speed blender for the best texture. Add vegetable broth, garlic, and nutritional yeast. Blend until it is silky and smooth. If it feels too thick, add a bit more broth. Let your spaghetti squash alfredo cool before storing. Place it in an airtight container. It can stay fresh in the fridge for up to four days. To reheat, use a skillet over medium heat. Add a splash of water to keep it moist. Enjoy this dish again without losing its creamy goodness! {{image_4}} You can make Spaghetti Squash Alfredo heartier by adding protein. Cooked chicken or shrimp works great. For chicken, grill or sauté it until golden. Slice it into bite-sized pieces. For shrimp, cook until pink and tender. Mix your choice into the warm Alfredo sauce. This adds flavor and keeps you full. Veggies can enhance your dish too. Broccoli or spinach adds color and nutrition. For broccoli, steam it until tender. Then toss it in with the squash and sauce. If you prefer spinach, add it fresh at the end. Stir it in until it wilts. Both options make your meal healthier and more fun. Spaghetti Squash Alfredo is already gluten-free and vegan, but you can switch things up. Use lentils or chickpeas for added protein if desired. Swap cashews with sunflower seeds for a nut-free option. For a creamier sauce, try coconut milk. These changes keep the dish tasty and suitable for many diets. For the full recipe, check out Spaghetti Squash Alfredo Delight for more details. To keep your Spaghetti Squash Alfredo fresh, store it in an airtight container. Place it in the fridge within two hours of cooking. It can last up to four days. Before eating, check for any signs of spoilage. If it smells off or looks strange, throw it away. You can freeze Spaghetti Squash Alfredo for longer storage. First, let it cool completely. Then, place it in a freezer-safe container. Label it with the date. It will stay good for about three months. When you're ready to eat it, thaw it in the fridge overnight. To reheat, you have a few options. You can use the microwave or stovetop. For the microwave, place it in a bowl and cover it. Heat in short bursts until warm. For the stovetop, add a splash of vegetable broth in a pan. Heat on low, stirring gently until hot. Enjoy your dish warm and creamy again! For the full recipe, check out the link. Spaghetti squash is a unique vegetable. When cooked, its flesh turns into thin strands. These strands look like spaghetti, hence the name. It has a mild flavor and is low in calories. You can cook it by baking, boiling, or microwaving. This squash is a great alternative to traditional pasta. It adds a fun twist to meals while keeping them light and healthy. This recipe is already gluten-free! Spaghetti squash is a perfect substitute for wheat pasta. The creamy Alfredo sauce uses cashews, which are also gluten-free. Just ensure that any broth you use is labeled gluten-free. You can enjoy this dish without worrying about gluten. Yes, you can make the sauce in advance. Blend the cashews, broth, and spices, then store it in the fridge. Keep it in an airtight container for up to three days. When you're ready to use it, just heat it on the stove. This helps save time on busy days. To store leftovers, place them in an airtight container. You can keep the dish in the fridge for up to three days. If you want to keep it longer, freeze it for about a month. Just remember to separate the sauce from the squash if possible. This helps maintain texture. Yes, you can use other nuts. Almonds or macadamia nuts work well, too. Just soak and blend them like cashews. Each nut adds its unique flavor. Adjust the seasoning to keep the taste balanced. This dish pairs well with a fresh salad. You can also serve it with grilled chicken or shrimp for protein. Another option is adding a side of garlic bread. Each choice complements the creamy flavors nicely. This guide covered how to make Spaghetti Squash Alfredo. We explored main ingredients and optional add-ins. The step-by-step instructions helped you prep squash and make the sauce. Tips and tricks ensured your dish is creamy and tasty. I also shared variations for adding protein or veggies and how to store leftovers. In conclusion, this dish is easy and adaptable. Try different add-ins to suit your taste. Enjoy your cooking!

Spaghetti Squash Alfredo Creamy and Simple Delight

Craving a creamy pasta dish that’s both healthy and delightful? Let’s create a magical meal with Spaghetti Squash Alfredo! I’ll

To make vegan sloppy joes, gather these simple ingredients: - 1 tablespoon olive oil - 1 medium onion, finely chopped - 2 cloves garlic, minced - 1 red bell pepper, finely chopped - 1 medium carrot, grated - 1 medium zucchini, grated - 1 cup cooked lentils (you can also use canned lentils, rinsed and drained) - 1 cup canned crushed tomatoes - 2 tablespoons tomato paste - 1 tablespoon maple syrup - 1 tablespoon apple cider vinegar - 1 teaspoon smoked paprika - 1 teaspoon chili powder - Salt and freshly ground black pepper to taste - 4 whole wheat burger buns - Fresh cilantro or parsley, chopped, for garnish If you need to swap out any ingredients, here are some great options: - Use avocado oil instead of olive oil. - Substitute yellow onion for red onion. - Try using mushrooms instead of lentils for a different texture. - Maple syrup can be replaced with agave syrup or date syrup. - For a gluten-free option, use gluten-free buns or lettuce wraps. These vegan sloppy joes are not only tasty but also healthy. Each serving offers: - Calories: Approximately 250 - Protein: 12 grams - Fiber: 8 grams - Sugars: 6 grams - Fats: 5 grams This meal is packed with nutrients and great for anyone looking for a hearty plant-based dish. For the full recipe, check out the details above. 1. Heat 1 tablespoon of olive oil in a large skillet over medium heat. 2. Add 1 medium chopped onion. Sauté for 3-4 minutes until it’s soft. 3. Stir in 2 cloves of minced garlic for 1 minute. Let it smell great! 4. Toss in 1 finely chopped red bell pepper, 1 grated carrot, and 1 grated zucchini. Cook for 5-6 minutes. Stir often. 5. Add 1 cup of cooked lentils, 1 cup of crushed tomatoes, 2 tablespoons of tomato paste, 1 tablespoon of maple syrup, and 1 tablespoon of apple cider vinegar. 6. Sprinkle in 1 teaspoon of smoked paprika and 1 teaspoon of chili powder. Mix well. 7. Add salt and pepper to taste. Lower the heat and simmer for 10-15 minutes. Stir occasionally. 8. While it simmers, toast 4 whole wheat burger buns until golden. 9. Spoon the lentil mix onto the bottom half of each bun. 10. Top with fresh cilantro or parsley before adding the other bun half. - Use fresh veggies for the best flavor. - Taste your mix before serving. Adjust salt and spice as needed. - Let the mixture sit for a few minutes off the heat. This helps the flavors meld. - For a bit of heat, add more chili powder or some hot sauce. - Use canned lentils. They save time and are easy to use. - Chop vegetables ahead of time. This speeds up your cooking process. - Cook a big batch. You can freeze leftovers for quick meals later. - Make extra and use it as a filling for wraps or tacos. For the full recipe, check out the Vegan Sloppy Joes with a Twist . It has everything you need for this tasty meal! To make your vegan sloppy joes shine, focus on the seasoning. Use fresh herbs like cilantro or parsley for brightness. I suggest toasting the buns for extra crunch. This adds texture and keeps the filling from making them soggy. Let the mixture simmer longer if you want a thicker sauce. This helps the flavors deepen and blend well. One mistake is overcooking the veggies. You want them soft but not mushy. Another issue is not tasting the mixture. Always adjust the salt and spices to your liking. If you skip toasting the buns, they might get soggy. Lastly, don’t rush the simmering process. Give it time to develop rich flavors. Serve your vegan sloppy joes with crispy sweet potato fries. A fresh salad on the side adds a nice crunch. You can also create a fun plate by adding pickles or coleslaw. For a twist, try serving them in lettuce wraps. This keeps it light and refreshing. For the full recipe, check the section above. {{image_4}} You can switch up the protein in your vegan sloppy joes. Lentils are great, but try these: - Chickpeas: They add a nutty flavor and a nice texture. - Black beans: These bring a rich, earthy taste to the dish. - Quinoa: It's light and fluffy, adding a nice bite. Each option creates a unique taste and texture profile. Just cook them the same way as lentils. You’ll have a fun twist on the classic dish. You can adjust the flavors to fit your taste. Here are some ideas: - Spicy: Add more chili powder or some diced jalapeños. - Sweet: Increase the maple syrup or add a splash of BBQ sauce. - Savory: Use smoked paprika or a dash of soy sauce for depth. Mix and match these flavors. You can create a new experience every time you make them. Serving your sloppy joes can be just as fun as making them. Here are some ideas: - Lettuce wraps: Use large lettuce leaves instead of buns for a fresh twist. - Stuffed peppers: Fill halved bell peppers with the mixture and bake until tender. - Taco style: Serve the filling in taco shells with toppings like avocado and salsa. These ideas keep your meals exciting. You can impress your friends and family with these fun twists on vegan sloppy joes. For the full recipe, check out the section above! To keep your vegan sloppy joes fresh, store them in an airtight container. Let the mixture cool first. Place it in the fridge. Use it within 4 to 5 days for the best taste. Make sure to separate the buns from the filling. This keeps the buns from getting soggy. When you're ready to eat, reheat the lentil mixture on the stove. Use a medium pan over low heat. Stir often to warm it evenly. You can also microwave it in a safe bowl. Heat in short bursts of 30 seconds. Check and stir in between until hot. If you want to save some for later, freeze the lentil mix. Use a freezer-safe container or bag. It can last up to 3 months. When ready to eat, thaw it in the fridge overnight. Reheat it as mentioned above. The flavors will still be great! For the buns, freeze them separately if needed. To make Vegan Sloppy Joes from scratch, start by heating olive oil in a skillet. Add chopped onion and sauté until it turns soft. Next, stir in minced garlic. After that, add chopped bell pepper, grated carrot, and zucchini. Cook these for a few minutes until they soften. Then, mix in cooked lentils, crushed tomatoes, tomato paste, maple syrup, and apple cider vinegar. Season with smoked paprika, chili powder, salt, and pepper. Let it simmer until thick. Finally, serve on toasted whole wheat buns. For the complete process, check the Full Recipe. If you need a substitute for lentils, try black beans or chickpeas. These beans add great texture and protein. You can also use crumbled tempeh or tofu. Just make sure to cook them well so they blend into the sauce. Each option brings its unique flavor, making your dish special. Yes, many stores offer vegan Sloppy Joe options. You can find pre-made sauces and mixes in the condiment aisle. Some brands even sell ready-to-eat meals. Check labels to ensure they are fully vegan. These can save time and deliver good taste, especially for busy days. To make Vegan Sloppy Joes less spicy, simply reduce or leave out the chili powder. You can also add more crushed tomatoes to balance the heat. A bit of sugar or maple syrup can help tone down spiciness too. Adjusting the spices lets you customize the flavor to your liking. Vegan Sloppy Joes are easy to make and packed with flavor. We covered the best ingredients, cooking steps, and common mistakes to avoid. I shared tips to save time and make your dish pop. Plus, you learned how to store and reheat leftovers safely. Experiment with different proteins and flavors to find your favorite. Enjoy this tasty meal that is both healthy and satisfying. Dive in and savor every bite!

Vegan Sloppy Joes Flavorful and Simple Meal Guide

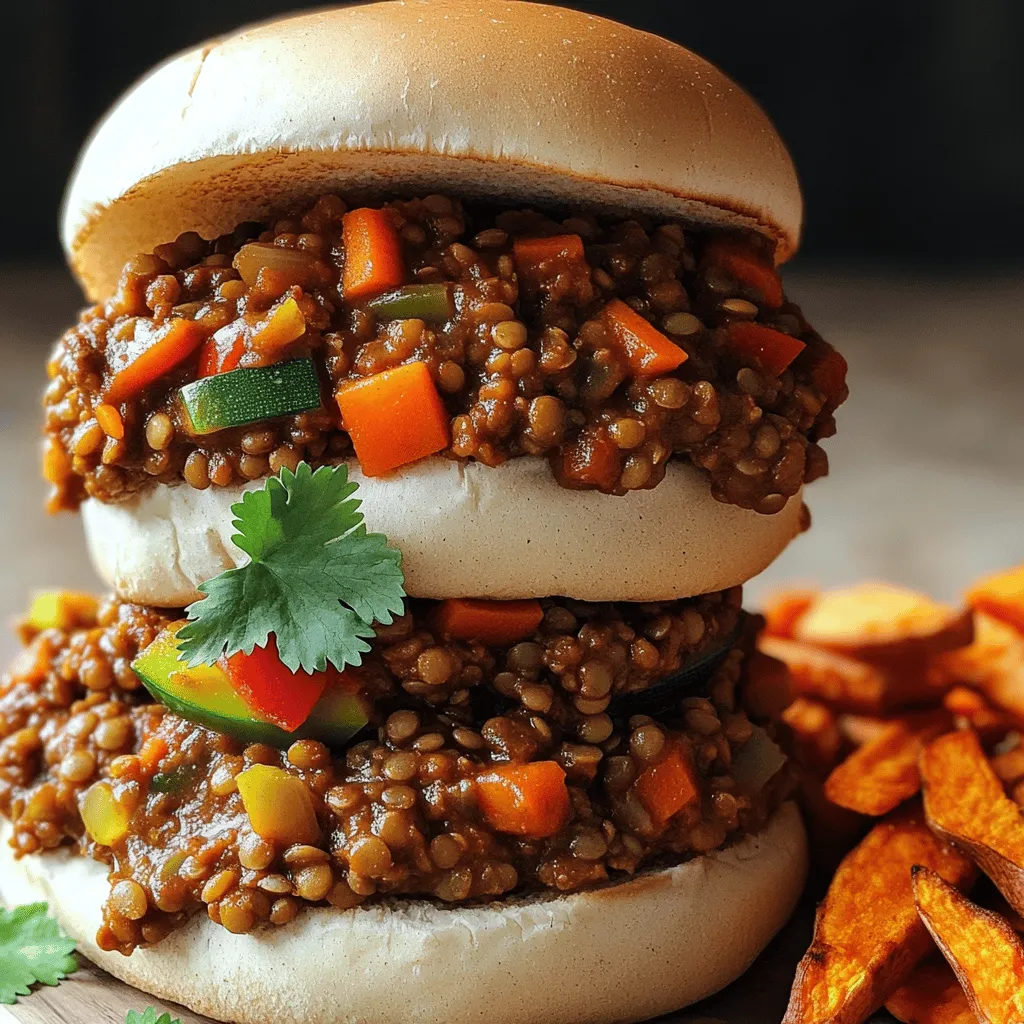
Are you ready for a tasty twist on a classic? My Vegan Sloppy Joes recipe is simple, delicious, and perfect

- 1 can (5 oz) tuna in water, drained - 1 ripe avocado, thoroughly mashed - 1/4 cup plain Greek yogurt - 1 tablespoon Dijon mustard - 1 tablespoon freshly squeezed lemon juice - 1/2 cup celery, finely chopped - 1/4 cup red onion, finely chopped - 1/4 cup bell pepper (any color), finely chopped - Salt and freshly cracked black pepper, to taste - Fresh parsley or cilantro, finely chopped, for garnish This healthy tuna salad is a great meal. It’s easy to make and packed with nutrients. Each ingredient plays a role in flavor and texture. The tuna gives protein and healthy fats. The avocado adds creaminess and more healthy fats. Greek yogurt replaces heavy mayo, making it lighter. I love adding fresh veggies like celery, onion, and bell pepper. They give crunch and flavor. You can adjust the veggies based on what you like. The lemon juice gives it a nice tang. Salt and pepper enhance all these tastes. When you prepare this salad, use the freshest ingredients. They make a big difference. For a delicious touch, garnish with parsley or cilantro. It adds color and freshness. You can find the full recipe [here](#). Enjoy making this tasty and nutritious meal! - Step 1: Combine tuna and avocado Start by opening your can of tuna. Drain it well and place it in a mixing bowl. Next, take your ripe avocado and mash it until smooth. Add the mashed avocado to the tuna. Use a fork to mix them together until they form a creamy blend. - Step 2: Add yogurt, mustard, and lemon juice Now it's time to add some flavor. Pour in 1/4 cup of plain Greek yogurt. Then add 1 tablespoon of Dijon mustard and 1 tablespoon of freshly squeezed lemon juice. Stir everything until the mixture is smooth and all ingredients are well mixed. - Step 3: Fold in vegetables Take your finely chopped celery, red onion, and bell pepper. Gently fold these into the tuna mixture. Be careful not to over-mix, as you want to keep the crunch from the veggies. This adds a great texture to your salad. - Step 4: Season to taste Next, it’s time to add a little bit of flavor. Sprinkle in some salt and freshly cracked black pepper. Taste the salad and adjust the seasoning if needed. If you like more tang, add a bit more lemon juice. - Step 5: Garnish and serve For the final touch, garnish your salad. Use freshly chopped parsley or cilantro to add color and flavor. Serve your tuna salad in multiple ways: on a bed of mixed greens, in crisp lettuce wraps, or as a filling for whole-grain sandwiches. For the full recipe, check out Zesty Avocado Tuna Salad 🥑. Enjoy your healthy and tasty creation! Achieving the perfect creaminess To get creamy tuna salad, you need to mix well. Start with the avocado since it has a smooth texture. When you blend it with the tuna, it creates a rich base. Greek yogurt adds extra creaminess without too many calories. Make sure to mash the avocado well for a smooth finish. Balancing flavors with herbs and spices Herbs and spices bring life to your tuna salad. Fresh parsley or cilantro adds a bright taste. Lemon juice gives it a tangy kick. Don't forget salt and pepper; they help enhance all the flavors. Experiment with other herbs like dill or chives for more depth. Keeping the salad crunchy Crunch is key to a great tuna salad! Chop the celery, bell pepper, and onion finely but not too small. This keeps them crisp. Add them last when mixing, so they stay crunchy. If you want more crunch, try adding chopped pickles or radishes. Check out the Full Recipe for step-by-step guidance! {{image_4}} You can make your healthy tuna salad even better with fun twists. Here are some ideas: - Adding extra vegetables: Try adding diced cucumbers, shredded carrots, or even sweet corn. These veggies add crunch and flavor. They also boost the nutrients in your salad. - Alternative proteins: Want to switch things up? Consider adding chickpeas or black beans. They are great for protein and add a different taste. Mixing in these legumes can make your salad heartier and more filling. - Dressing alternatives: Instead of Greek yogurt, you can use hummus or tahini. These options keep the salad creamy while adding extra flavor. You can also try a splash of vinegar or a squeeze of lime for a zesty kick. These simple changes can keep your healthy tuna salad exciting and new. For more ideas, check out the full recipe for Zesty Avocado Tuna Salad. To keep your tuna salad fresh, use an airtight container. Glass or plastic containers work well. These containers prevent air from getting in, which keeps your salad tasty. When refrigerating, place the salad in the fridge right after making it. This helps stop bacteria from growing. Never leave it out for more than two hours. Your tuna salad will stay fresh for about 3 days in the fridge. After that, it may spoil. Always check for any bad smells or changes in color before eating. If you want to save it longer, you can freeze it. However, freezing can change the texture. Thaw it in the fridge before serving. For the best taste, I recommend making it fresh or eating leftovers within a few days. For the full recipe, check out the Zesty Avocado Tuna Salad. It’s a great way to enjoy a healthy meal! Is tuna salad healthy? Yes, tuna salad is healthy! It offers lean protein from tuna. Avocado adds healthy fats, while Greek yogurt provides probiotics and creaminess. The veggies boost fiber and vitamins. Can I substitute avocado for mayonnaise? Absolutely! Avocado is a great swap for mayonnaise. It gives a creamy texture and adds nutrients. Plus, it has fewer calories and is heart-healthy. How many calories are in this tuna salad? This tuna salad has about 250 calories per serving. It varies based on portion size and ingredients. You can check the Full Recipe for exact details. What are the best side dishes to serve with tuna salad? Serve tuna salad with whole-grain crackers, mixed greens, or veggie sticks. You can also add fruits like apple slices or grapes for a sweet touch. Can I make this salad ahead of time? Yes, you can make this salad ahead of time! Store it in an airtight container in the fridge. It stays fresh for up to two days. Just give it a good stir before serving. This blog post shared a simple recipe for healthy tuna salad. You learned the key ingredients, step-by-step preparation, and useful tips. I offered creative ideas for variations and storage methods, too. Remember, this salad is not just tasty; it's also good for you. Trust these tips to make a great dish every time. Enjoy your cooking and feel proud of this healthy meal!

Healthy Tuna Salad Tasty and Nutritious Meal

Are you craving a meal that’s both tasty and healthy? Look no further! This Healthy Tuna Salad is not only

- 4 boneless, skinless chicken thighs - 1 cup fresh pineapple chunks - ½ cup teriyaki sauce For Pineapple Teriyaki Chicken, the main ingredients are essential. The chicken thighs give a juicy bite. Fresh pineapple adds a sweet twist. Teriyaki sauce brings all the flavors together. - 2 tablespoons soy sauce - 1 tablespoon honey - 1 teaspoon freshly grated ginger - 2 cloves garlic, finely minced The marinade is key to great taste. Soy sauce adds salt and umami. Honey gives a sweet touch. Fresh ginger and garlic boost flavor and aroma. Together, they create a rich blend that soaks into the chicken. - 1 green onion, thinly sliced (for garnish) - Sesame seeds (for garnish) - Cooked jasmine rice (for serving) Garnishes make the dish look fun and fresh. Sliced green onions add color and crunch. Sesame seeds give a nice nutty flavor. Serving over jasmine rice offers a fluffy base that balances the dish. Enjoy the full recipe for detailed cooking steps! To start, you need to whisk together the teriyaki sauce, soy sauce, honey, ginger, and garlic. This mix creates a sweet and savory blend. Make sure to stir well until everything combines smoothly. This marinade packs a punch and gives the chicken great flavor. Next, add the chicken thighs into the marinade. Coat each piece well. This step is key for flavor. Cover the bowl and place it in the fridge. Let it marinate for at least 30 minutes. If you have more time, let it sit overnight for deeper flavor. Heat a large skillet over medium-high heat. Add vegetable oil once the skillet is hot. You want the oil to shimmer but not smoke. Take the chicken out of the marinade and place it in the skillet. Sear the chicken for about 5-7 minutes on each side. Look for a golden brown color. Use a meat thermometer to check if it reaches 165°F (75°C). Once cooked, move the chicken to a plate and let it rest for a few minutes. In the same skillet, pour in the reserved marinade. Add your fresh pineapple chunks. Bring the mixture to a gentle simmer. Cook for about 5 minutes to let it thicken. This creates a rich sauce with juicy pineapple. Slice the rested chicken thighs into strips. Add them back into the skillet with the pineapple and sauce. Gently toss everything together for around 2 minutes. Ensure the chicken is fully coated and heated through. Serve your Pineapple Teriyaki Chicken over jasmine rice. For a nice look, use shallow bowls. Start with a layer of rice, then top it with chicken and pineapple. Add a sprinkle of sesame seeds and sliced green onions for extra flavor and a pop of color. Enjoy this dish for a fun meal! For the full recipe, check out the provided details. For the best flavor, marinate your chicken for at least 30 minutes. If you have more time, letting it sit overnight works wonders. The longer it marinates, the deeper the flavors sink in. Balance is key in your marinade. The acidity from the pineapple and soy sauce helps tenderize the chicken. Too much acidity can make it mushy, so stick to the recipe. Cook your chicken until it reaches an internal temperature of 165°F (75°C). This ensures the chicken is safe to eat and juicy. Searing the chicken in a pan gives it a nice crust. You can bake it too, but it may not get that same tasty sear. If you choose to bake, keep an eye on the time to avoid drying it out. Get creative by adding spices like red pepper flakes or a dash of smoked paprika for extra kick. You can also toss in veggies like bell peppers for color and crunch. Fresh pineapples enhance the dish more than canned ones. They offer a brighter taste and better texture. If you use canned, rinse them to remove excess syrup. This helps keep your dish light and fresh. For the full recipe, check out the [Full Recipe]. {{image_4}} You can switch up the protein in this dish. Using chicken breasts gives a leaner option. They cook quickly and stay juicy if you don’t overcook them. Chicken thighs are richer and have more flavor. They are less likely to dry out. If you want a plant-based choice, consider tofu or shrimp. Tofu absorbs flavors well. Press it first to remove excess water, then marinate. Shrimp cooks fast and brings a sweet touch. Just be careful not to overcook shrimp, or they will turn rubbery. Want to add some heat? Try jalapeños. You can chop them finely and mix them into the marinade. This will give your dish a nice kick. If you want to switch sauces, consider hoisin or soy sauce. These can change the flavor while keeping it tasty. You can also use a sweet chili sauce for a fun twist. This adds sweetness and spice all in one. Pineapple Teriyaki Chicken can be served in many ways. One fun option is to make bowls. Start with jasmine rice, then add chicken and pineapple. You can layer it all up for a colorful meal. Wraps are another great idea. Use lettuce or tortillas and fill them with chicken and fresh veggies. Skewers are perfect for grilling. Just thread the chicken and pineapple onto sticks, then grill until caramelized. Each method offers a unique dining experience. Check out the Full Recipe for more inspiration! After you enjoy your Pineapple Teriyaki Chicken, store any leftovers in an airtight container. This keeps the chicken fresh and tasty. Make sure it cools down first before sealing it. The leftovers can last for up to 3 days in the fridge. You can also label the container with the date for easy tracking. If you want to save it for later, freezing is a great option. First, cool the chicken completely. Then, place it in a freezer-safe bag or container. Try to remove as much air as possible. This helps prevent freezer burn. You can freeze it for up to 2 months. When you are ready to eat it, thaw it in the fridge overnight. This slow thawing helps keep the chicken juicy and flavorful. Reheating your Pineapple Teriyaki Chicken can be done in two main ways: the oven or the microwave. - Oven: Preheat your oven to 350°F (175°C). Place the chicken in a baking dish and cover it with foil. Heat for about 15-20 minutes, or until warm. This method keeps the chicken's texture nice. - Microwave: For a quicker option, use the microwave. Place the chicken in a microwave-safe bowl. Cover it with a lid or microwave-safe wrap. Heat on medium power for about 2-3 minutes. Check it often to avoid overcooking. No matter how you reheat it, make sure the chicken is steaming hot all the way through. This keeps the delicious flavor intact. To make homemade teriyaki sauce, mix these simple ingredients: - ½ cup soy sauce - ¼ cup water - ¼ cup brown sugar - 1 tablespoon rice vinegar - 1 teaspoon minced garlic - 1 teaspoon minced ginger Whisk them together in a bowl. Cook over medium heat until it thickens. This sauce gives a sweet and savory taste. Yes, you can use canned pineapple. Here are the pros and cons: Pros: - Canned pineapple is convenient and saves time. - It’s sweet and tender, which works well in dishes. Cons: - Canned pineapple may have added sugar or syrup. - The texture is softer than fresh pineapple. If you want the best flavor, I recommend using fresh pineapple. Here are some great side dishes: - Steamed broccoli - Fried rice - Cucumber salad - Grilled vegetables These sides balance the sweet and savory chicken well. They add color and texture to your meal. For the best flavor, marinate the chicken for at least 30 minutes. You can marinate it up to 24 hours. The longer it sits, the more flavor it absorbs. Just be careful. Too long can make the chicken mushy. Yes, Pineapple Teriyaki Chicken can be gluten-free. Use gluten-free soy sauce or tamari. Always check labels on sauces. This way, you avoid hidden gluten. Enjoy this dish without worry if you choose the right ingredients. Pineapple Teriyaki Chicken is a tasty dish you can easily make. We covered main ingredients, marinade tips, cooking methods, and serving ideas. Remember to marinate your chicken well for great flavor. You can also try different proteins or adjust the sauce to fit your taste. Store leftovers properly so they stay fresh. With these steps and tips, you can create a dish that impresses any crowd. Enjoy cooking and experimenting with flavors!

Pineapple Teriyaki Chicken Flavorful and Fun Recipe

Looking for a meal that’s both tasty and easy? Pineapple Teriyaki Chicken is your answer! This dish combines juicy chicken

To make my roasted garlic hummus, you need a few key items. Here is what you will need: - 1 can (15 oz) chickpeas, drained and rinsed - 1 head of garlic - 3 tablespoons tahini - 2 tablespoons freshly squeezed lemon juice - 3 tablespoons extra virgin olive oil, plus extra for drizzling - 1 teaspoon ground cumin - 1/2 teaspoon smoked paprika, plus extra for garnish - Salt, to taste - Water, as needed for desired consistency These ingredients work together to create a smooth and rich flavor. Garnishes can take your hummus from good to great! Here are a couple of things you might add: - Fresh parsley, finely chopped - Extra drizzle of olive oil - A sprinkle of smoked paprika These toppings add color and flavor, making your dish even more appealing. You will need some tools to make this hummus. Gather these items: - A food processor - Aluminum foil - A measuring spoon - A serving bowl Having the right tools makes the process easier and more fun. With these ingredients and tools, you're ready to create a fantastic roasted garlic hummus. For the full recipe, check the section above! To start, you need to roast the garlic. Preheat your oven to 400°F (200°C). Take a whole head of garlic and slice the top off. This exposes the cloves inside. Drizzle some olive oil on the cut side. Wrap the garlic in aluminum foil. Place it in the oven for 30 to 35 minutes. When the garlic is soft and golden, take it out and let it cool. Once cool, squeeze the roasted cloves into a bowl. This gives your hummus a rich, sweet flavor. Now it’s time to blend! Grab your food processor. Add the drained chickpeas to the bowl. Next, add the roasted garlic cloves you just squeezed out. Add three tablespoons of tahini and two tablespoons of lemon juice. Pour in three tablespoons of extra virgin olive oil, one teaspoon of ground cumin, and half a teaspoon of smoked paprika. Don't forget to add a pinch of salt! Blend these ingredients together until they mix well. After blending, check the texture of your hummus. If it seems thick, add cold water, one tablespoon at a time. Blend after each addition until you reach the creamy texture you want. Once smooth, taste it. You may want to add more salt or lemon juice to boost the flavor. Adjust as needed. Your roasted garlic hummus is now ready to serve! Check out the Full Recipe for more details. To roast garlic, first, preheat your oven to 400°F (200°C). Take a head of garlic and slice the top off. This exposes the cloves inside. Next, drizzle a bit of olive oil over the exposed cloves. Wrap the garlic in foil and place it in the oven. Roast for 30-35 minutes. The cloves will become soft and sweet. Let it cool, then squeeze the cloves out. This roasted garlic adds a rich, deep flavor to your hummus. When making your hummus, taste is key. After blending, taste your hummus. If it needs more flavor, add a pinch of salt or more lemon juice. For a smoother texture, add a tablespoon of cold water. Blend again until it reaches your desired creaminess. Remember, small tweaks can change the whole dish. Presentation matters! Serve your roasted garlic hummus in a nice bowl. Drizzle extra virgin olive oil on top for shine. Sprinkle smoked paprika for color. Add fresh parsley for a pop of green. Surround the bowl with warm pita bread and colorful raw veggies. This makes a beautiful platter that invites everyone to dig in. For the full recipe, check the link. {{image_4}} You can change the flavor of hummus by adding spices. For a kick, try cayenne pepper. If you want warmth, add some ground cinnamon. For a fresh touch, consider adding dill or coriander. Just start with a small amount and taste as you go. This way, you can find the perfect mix that you love. You can make roasted garlic hummus even better by adding other ingredients. For instance, roasted red peppers add a sweet and smoky flavor. Simply blend in some chopped roasted red peppers with the other ingredients. You can also add sun-dried tomatoes for a tangy twist. Mixing in a handful of spinach or kale boosts nutrients, too! The great news is that this hummus is already vegan and gluten-free! If you want to keep it that way, just ensure all added ingredients fit these diets. Look for gluten-free pita bread or serve it with fresh veggies. This makes for a perfect snack or meal option for everyone. Enjoy these variations with the Full Recipe to explore the endless possibilities of flavor! To keep your roasted garlic hummus fresh, store it in an airtight container. Make sure the container seals well to keep out air. You can also drizzle a little olive oil on top before sealing. This helps keep the hummus moist. You can freeze hummus if you want to save some for later. Pour it into a freezer-safe container, leaving some space at the top. Hummus expands when it freezes. To thaw, move it to the fridge for a few hours or overnight. Stir well before serving, and add a splash of water if it seems too thick. Homemade roasted garlic hummus lasts about five to seven days in the fridge. Check for any off smells or changes in texture before eating. If you freeze it, it can last up to three months. Always remember to label your containers with the date you made it for easy tracking. Homemade hummus lasts about five to seven days in the fridge. Store it in an airtight container. This keeps it fresh and tasty. If you notice any change in smell or color, it's best to toss it. You can use fresh garlic, but the flavor will be very strong. Roasted garlic gives a sweet, mellow taste. If you want to use fresh garlic, start with a small amount. You can always add more if needed. If you don't have tahini, try using peanut butter or sunflower seed butter. These options will change the taste, but they work well. You can also use yogurt for a different texture and flavor. Yes, many stores sell pre-made roasted garlic hummus. Check the refrigerated section of your grocery store. Look for brands that use natural ingredients for the best taste. However, making it at home is easy and fun! For a detailed guide, check out the Full Recipe. Roasted garlic hummus is easy to make at home. We covered key ingredients, cooking steps, and helpful tips. You can customize flavors and store your hummus safely. Don’t forget to experiment with spices and extra ingredients to make it your own. With these simple steps and tricks, you can enjoy tasty hummus anytime. So go ahead, gather your ingredients, and make your own delicious batch!

Roasted Garlic Hummus Flavorful and Easy Recipe

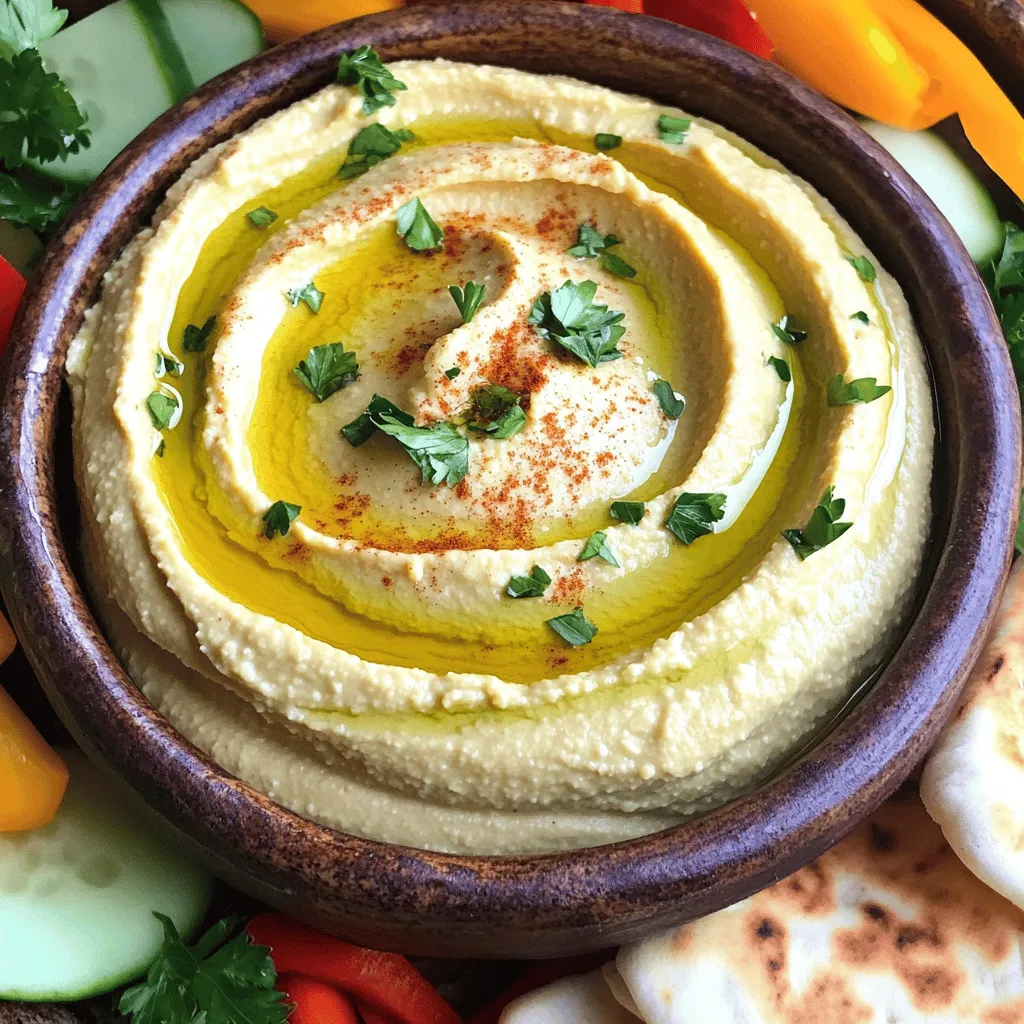
If you’re looking to elevate your snack game, try my roasted garlic hummus recipe. It’s simple to make and packed

For garlic butter steak bites, you need just a few key ingredients: - 1 lb sirloin steak, cut into bite-sized cubes - 4 tablespoons unsalted butter - 4 cloves garlic, minced - 1 teaspoon fresh rosemary, finely chopped - 1 teaspoon fresh thyme, finely chopped - Salt and freshly ground black pepper, to taste - 1 tablespoon olive oil These ingredients work together to create a rich and savory dish. The sirloin steak is tender and juicy, making it perfect for quick cooking. The garlic adds a wonderful aroma, while the butter gives a rich finish. Seasoning is crucial for flavor. You should generously use salt and freshly ground black pepper. These simple seasonings enhance the natural taste of the steak. - Salt helps to bring out the flavors. - Black pepper adds a slight kick. Feel free to adjust the amount based on your taste preference. The fresh rosemary and thyme also add depth, making each bite special. Garnishes can elevate your dish. I like to use freshly chopped parsley. It adds a touch of color and freshness. You can also serve the steak bites with toothpicks for easy eating. If you want to be creative, consider adding crumbled blue cheese or a sprinkle of red pepper flakes for a spicy twist. These options can change the flavors and make your dish unique. For the full recipe, check out the details above. To start, gather your ingredients. You need: - 1 lb sirloin steak, cut into bite-sized cubes - 4 tablespoons unsalted butter - 4 cloves garlic, minced - 1 teaspoon fresh rosemary, finely chopped - 1 teaspoon fresh thyme, finely chopped - Salt and freshly ground black pepper, to taste - 1 tablespoon olive oil - Fresh parsley, chopped (for garnish) First, season the steak. In a big bowl, sprinkle salt and pepper over the steak cubes. Mix it well. Make sure each piece gets a good coat. This step adds flavor. Now, let’s cook. Heat a large skillet on medium-high. Add olive oil and let it shimmer. This means it's hot enough. Add the seasoned steak cubes in one layer. Don't crowd them. Each side needs about 2-3 minutes to brown. Aim for medium-rare to medium doneness for the best taste. Once the steak bites are cooked, reduce the heat to medium. Move the steak to one side of the pan. Add the butter, garlic, rosemary, and thyme to the empty space. Let the butter melt and the garlic sizzle for 1-2 minutes. This creates a rich sauce. Gently toss the steak in the melted garlic butter. This helps each piece soak up the flavor. Cook for one more minute. Then, remove the skillet from the heat. Transfer the steak bites to a serving platter. Drizzle any leftover garlic butter from the pan over the top. Finally, sprinkle freshly chopped parsley for color and taste. Serve on a wooden board or rustic plate. Adding toothpicks makes it easy to eat. Enjoy this simple yet satisfying dish! You can find the full recipe for more details. For garlic butter steak bites, I recommend sirloin steak. Sirloin has great flavor and tenderness. It cooks quickly, making it perfect for bite-sized pieces. You can also try ribeye for more marbling. This adds even more flavor. Choose cuts that are fresh and bright red. Avoid any that look brown or dry. Cook your steak bites for about 2-3 minutes on each side. This gives a nice brown crust while keeping the inside juicy. Aim for medium-rare to medium doneness. Use a meat thermometer if you have one. The ideal temperature for medium-rare is 130-135°F. Remember, the steak will continue to cook a bit after you take it off the heat. You can add more flavor to your steak bites with easy extras. Try adding a splash of Worcestershire sauce or soy sauce for a deeper taste. If you like spice, sprinkle some red pepper flakes into the garlic butter. Fresh herbs like oregano or basil can also brighten the dish. Don’t be shy to mix and match to find what you love. For the full recipe, refer back to the main instructions. {{image_4}} You can swap sirloin for other meats. Chicken breast works well for a lighter dish. Pork tenderloin is another great choice. Each protein brings its own taste and texture. Adjust cooking time based on the meat you choose. For chicken, cook until it reaches 165°F. For pork, aim for 145°F. Want to change the taste? Try different herbs. Oregano or basil can add a fresh twist. You can also use lemon zest for brightness. If you like heat, add red pepper flakes. A splash of soy sauce can deepen the flavor. Each change creates a new experience. Serve these steak bites with sides. Roasted veggies pair well, adding color and health. You can also serve with a creamy dip or sauce. Try chimichurri for a zesty touch. If you’re hosting, use toothpicks for easy grabbing. This makes it fun for everyone at your table. For more ideas, check out the Full Recipe. To store your garlic butter steak bites, let them cool first. Place the bites in an airtight container. This helps keep them fresh. You can store them in the fridge for up to three days. If you want them to last longer, freeze them. Use a freezer-safe bag or container. They can stay good for up to three months in the freezer. When it's time to eat again, reheating is simple. You can use the microwave for a quick fix. Heat them in short bursts, about 30 seconds at a time. Stir in between to avoid hot spots. If you prefer a stovetop method, warm them in a skillet over low heat. Add a little butter or oil to keep them moist. This will help the flavors pop again. Meal prepping garlic butter steak bites is easy and rewarding. Cook a large batch and let them cool. Divide them into meal-sized portions. Pair them with veggies or rice for a complete meal. Store these portions in the fridge or freezer. This way, you'll have a tasty meal ready to go anytime. For the full recipe, check the section above! The best way to cook steak bites is to sear them in a hot skillet. First, season the steak cubes with salt and pepper. Preheat the skillet with olive oil until it shimmers. Add the steak in a single layer to avoid steaming. Cook for about 2-3 minutes on each side. This creates a nice brown crust while keeping the inside tender. The key is high heat and quick cooking. Yes, you can use frozen steak, but it’s best to thaw it first. Thaw the steak in the fridge overnight for even cooking. If you cook it from frozen, the outside will cook faster than the inside. This can lead to uneven doneness. For the best results, always use fresh or properly thawed steak. To check if steak bites are done, use a meat thermometer. For medium-rare, the internal temperature should be around 130°F. For medium, aim for 140°F. If you don’t have a thermometer, cut one piece in half. The inside should be warm and slightly pink for medium-rare. Cooking time varies, so keep an eye on them while they cook. Garlic butter steak bites are a tasty treat made with key ingredients and perfect seasoning. We discussed preparation and cooking steps for that perfect bite. I also shared tips on choosing the right steak and cooking it just right. You can try different proteins and flavor tweaks for fun variations. Remember to store them well and enjoy leftovers. With these insights, you can confidently make this dish shine at your table. Happy cooking!

Garlic Butter Steak Bites Simple and Satisfying Recipe

Garlic Butter Steak Bites are a tasty treat that’s easy to make. They are perfect for any meal or snack.

Older posts
Newer posts
← Previous Page1 … Page12 Page13 Page14 … Page60 Next →

dsad

© 2025 eataroundit • Built with GeneratePress

Our Policies

  • Copyright Policy
  • Cookie Policy
  • GDPR Policy
  • Privacy Policy
  • Disclaimer
  • Terms Of Use

More Information

  • Home
  • About
  • Contact
  • Appetizers
  • Dessert
  • Dinner
  • Drinks
©2025, eataroundit About Back To Top