
Raspberry Lemon Muffins Freshly Baked Delight
Are you craving a sweet and tangy treat? My Raspberry Lemon Muffins are the answer! These freshly baked delights are
Are you craving a sweet and tangy treat? My Raspberry Lemon Muffins are the answer! These freshly baked delights are
![To make the best Maple Pecan Granola, you need the right ingredients. Each one plays a key role in flavor and texture. Here’s what you’ll need: - 2 cups old-fashioned rolled oats - 1 cup pecans, roughly chopped - ½ cup almond slices - ½ cup unsweetened shredded coconut - ½ teaspoon ground cinnamon - ½ teaspoon sea salt - ½ cup pure maple syrup - ¼ cup coconut oil, melted - ½ cup dried cranberries or raisins (optional) Each ingredient adds its charm to the mix. Old-fashioned rolled oats give that crunchy base. Pecan nuts bring a rich, buttery taste. Almond slices add a nice crunch, while shredded coconut offers a sweet hint. Ground cinnamon and sea salt balance the flavors perfectly. The pure maple syrup and melted coconut oil work together to coat everything nicely. You can also toss in dried cranberries or raisins for a sweet touch. This granola is not just a snack; it’s a delightful treat. You can find the full recipe above. Enjoy making this tasty Maple Pecan Granola! 1. Preheat oven and prepare baking sheet Start by preheating your oven to 300°F (150°C). Line a large baking sheet with parchment paper. This helps prevent sticking and makes cleanup easy. 2. Mix dry ingredients in a large bowl In a large bowl, combine 2 cups of rolled oats, 1 cup of chopped pecans, ½ cup of almond slices, and ½ cup of shredded coconut. Add ½ teaspoon of ground cinnamon and ½ teaspoon of sea salt. Stir them well to mix. 3. Combine maple syrup and coconut oil In a small bowl, whisk together ½ cup of pure maple syrup and ¼ cup of melted coconut oil. This mix adds a rich sweetness to your granola. 4. Coat dry ingredients with wet mixture Pour the maple syrup and coconut oil mix over the dry ingredients. Use a spatula to stir until all the dry ingredients are coated. This step is key for flavor. 5. Spread and press granola on the baking sheet Spread the granola mixture evenly on the prepared baking sheet. Press it down gently to form clumps. This helps create the crunchy clusters we all love. 6. Bake and stir granola halfway through Bake the granola for 25-30 minutes. Make sure to stir it halfway through. This ensures even browning and crispiness. 7. Cool and fold in dried fruits After baking, remove the granola from the oven. Let it cool completely on the baking sheet. As it cools, it will get crisp. If you want, fold in ½ cup of dried cranberries or raisins for added sweetness. 8. Store granola in an airtight container Once cooled, transfer the granola to an airtight container. Store it at room temperature. It stays fresh for up to two weeks. Enjoy it at breakfast or as a snack. For the complete recipe, check the [Full Recipe]. To get crunchy clusters in your granola, press the mix down on the baking sheet. This helps it bake into clusters, which are fun to eat. Stir the granola halfway through baking to ensure even cooking. If you want to switch up sweeteners, you can use honey or agave syrup. Both add a nice taste without changing the texture. You can also mix maple syrup with brown sugar for a richer flavor. For flavor variations, try adding spices. A touch of nutmeg or ginger can spice things up. You can also play with the amount of cinnamon for a sweeter or spicier taste. Each adjustment can change the whole profile of your granola. Using these tips, you can master your Maple Pecan Granola. Check out the Full Recipe for more details! {{image_4}} You can easily change this recipe to fit your taste. Start by adding more nuts and seeds. Try walnuts, sunflower seeds, or pumpkin seeds. Each nut gives a unique flavor and texture. Mix and match to find your favorite combo. Next, think about different dried fruits. You can use raisins, apricots, or even mango. Each fruit adds a nice sweetness. You can also add chocolate chips for a treat! Flavoring your granola is also fun. Adding a splash of vanilla or almond extract boosts the taste. Just a little goes a long way. You can experiment with spices, too. Nutmeg or ginger can give your granola a warm touch. Feel free to check the Full Recipe to find the base you can build on. To keep your maple pecan granola fresh, store it in an airtight container. This helps prevent moisture and keeps it crunchy. I like to use glass jars or plastic containers with tight lids. Homemade granola lasts about two weeks at room temperature. If you want it to stay fresh longer, try freezing it. Just place the granola in a freezer-safe bag or container. It can last up to three months in the freezer. When you're ready to eat it, just take out what you need and let it thaw. This way, you always have a tasty snack on hand. For the full recipe, check out the earlier section. Enjoy your granola! Yes, you can make granola without nuts. Just swap nuts for seeds like pumpkin or sunflower seeds. You can also add more oats or coconut for texture. I love serving Maple Pecan Granola with yogurt or milk. You can also enjoy it as a snack on its own. Add some fresh fruit for a tasty breakfast. To modify for dietary needs, use gluten-free oats if you're gluten-free. For a vegan option, replace honey with maple syrup. You can also skip the coconut oil for a nut-free version. You can use quick oats, but the texture will change. Quick oats will make a softer granola, while rolled oats create a crunchier texture. I recommend sticking with rolled oats for the best results. Yes, Maple Pecan Granola can be healthy. It has whole grains from oats and healthy fats from nuts. It’s also low in added sugars if you control the maple syrup amount. Enjoy it in moderation as part of a balanced diet. You can find the full recipe for Maple Pecan Granola above. Making your own Maple Pecan Granola is simple and fun. We covered ingredients to get you started, like oats, nuts, and maple syrup. The step-by-step instructions show how to mix and bake it. Use tips to get crunchy clusters and try different flavor options. Store it properly for freshness, and don’t forget the ways to customize it. You can enjoy this tasty snack anytime. With these easy steps, you’ll create a delicious treat that adds great flavor to your day.](https://eataroundit.com/wp-content/uploads/2025/06/a62c14a7-b259-49e1-adb0-47f05fc57091.webp)
Looking for a crunchy and flavorful snack? Let me introduce you to my Maple Pecan Granola! Packed with simple, wholesome
![To make classic chicken enchiladas, you need a few simple ingredients. Here’s what you’ll need: - 2 cups cooked chicken, shredded - 1 cup onion, finely chopped - 2 cups enchilada sauce - 1 cup shredded cheese - 8 medium flour tortillas - 1 teaspoon garlic powder - 1 teaspoon ground cumin - Salt and pepper to taste - 1/4 cup fresh cilantro - Sour cream for serving (optional) These ingredients create a savory and delightful meal. The shredded chicken gives the enchiladas their main flavor. The onion adds sweetness, while garlic and cumin bring warmth. The enchilada sauce ties everything together with a rich taste. For the cheese, I recommend using either cheddar or Monterey Jack. Both melt nicely and add creaminess. Flour tortillas are perfect because they are soft and easy to roll. If you want to elevate the dish, fresh cilantro adds a burst of fresh flavor. You can also serve sour cream on the side for extra creaminess. With these ingredients ready, you can start your cooking adventure. For the full recipe, check out the details in the [Full Recipe]. 1. First, preheat your oven to 375°F (190°C). This step gets the oven ready for the enchiladas. 2. Next, heat a tablespoon of oil in a large skillet over medium heat. This oil helps cook the onions evenly. 3. Add 1 cup of finely chopped onion to the skillet. Sauté the onions until they become soft and translucent, about 5 minutes. This step builds a tasty base for your dish. 4. After the onions are ready, add 2 cups of shredded chicken to the skillet. Sprinkle in 1 teaspoon of garlic powder, 1 teaspoon of ground cumin, and a pinch of salt and pepper. Stir everything together and heat for 3-4 minutes. This mix should be warm and fragrant. 1. Take one tortilla and lay it flat on a clean surface. Spoon about 1/3 cup of the chicken mixture into the center of the tortilla. 2. Roll the tortilla tightly, making sure the filling stays inside. Place it seam-side down in a greased baking dish. 3. Repeat this process with the remaining tortillas, filling each with the chicken mixture. This step is fun and lets you build your dish. 1. Once all the tortillas are in the dish, pour 2 cups of enchilada sauce evenly over the top. This sauce keeps the enchiladas moist and adds flavor. 2. Next, sprinkle 1 cup of shredded cheese over the sauce. I love using cheddar or Monterey Jack for a creamy finish. 3. Cover the baking dish with aluminum foil. This prevents the cheese from burning while baking. Bake in the preheated oven for 20 minutes. 4. After 20 minutes, remove the foil and bake for an additional 10 minutes. You want the cheese to be bubbly and golden brown. 5. Once done, let the enchiladas rest for a few minutes. Then, garnish with 1/4 cup of finely chopped cilantro for a fresh touch. Enjoy your delicious classic chicken enchiladas! For more details, check out the Full Recipe. To get the best flavor in your enchiladas, focus on the chicken mixture. Use tender, juicy chicken for a great taste. Add the garlic powder and ground cumin for warmth. Mix well to blend all the flavors. Don't skip the salt and pepper; they enhance everything. When rolling tortillas, it’s key to warm them first. Heat them in a pan for a few seconds. This helps make them soft and less likely to tear. Place the filling in the center and fold the sides in. Then roll it tightly, keeping the filling secure. If a tortilla does tear, don’t worry. You can patch it with enchilada sauce when baking. For a stunning look, garnish your enchiladas with fresh cilantro. This adds color and a fresh taste. You can also drizzle more enchilada sauce on top for a rich look. Add a dollop of sour cream for creaminess. Lime wedges on the side boost the flavor and make it pop. Choose colorful plates to serve your enchiladas. Bright colors make the dish more inviting. A round plate works well for a nice presentation. Arrange the enchiladas neatly and enjoy the compliments! {{image_4}} You can easily spice up your chicken enchiladas. Adding jalapeños gives a nice kick. For a smoky flavor, try chipotle seasoning. Both options enhance the taste and bring heat. You can also explore different spicy enchilada sauces. Look for ones made with tomatillos or extra chili peppers. These sauces add depth and excitement to the dish. If you prefer a meatless meal, there are great alternatives. You can substitute chicken with black beans or mixed veggies. This keeps the dish hearty and satisfying. When it comes to cheese, consider using a blend of mozzarella and Monterey Jack. This combination melts well and creates a creamy texture. You can find many tasty vegetarian options that still bring flavor. For a full recipe, check out the main article. To keep your chicken enchiladas fresh, store them properly. First, let the enchiladas cool down to room temperature. Then, place them in an airtight container. You can also wrap them tightly in plastic wrap. If you want to save them for longer, freeze them. For freezing, use a freezer-safe container. Make sure to label the container with the date. They can stay good in the fridge for 3-4 days and in the freezer for up to 3 months. Reheating enchiladas needs care to keep their taste and texture. For the best results, use the oven. Preheat it to 350°F (175°C). Place the enchiladas in a baking dish. Cover them with foil to prevent drying out. Bake for about 20 minutes or until they are hot. You can also use a microwave. Place one enchilada on a plate, cover it with a damp paper towel, and heat for 1-2 minutes. This method helps keep them moist. Enjoy your enchiladas just like they were fresh! You can find the full recipe above to make a fresh batch anytime. What can I substitute for the chicken? You can use cooked turkey instead of chicken. Shredded beef works well too. If you want a vegetarian option, try black beans or sautéed veggies. Both choices keep the taste rich and satisfying. Can I make enchiladas ahead of time? Yes, you can prepare them a day early. Assemble the enchiladas, cover them, and store them in the fridge. When you’re ready to bake, just add extra time to heat them through. What are the best side dishes to serve with enchiladas? Serve your enchiladas with rice or beans for a filling meal. A fresh salad adds a nice crunch. You could also try corn on the side. These pair well and balance the flavors nicely. For the full recipe, check out the "Savory Chicken Enchiladas" section. You now have a complete guide to making delicious chicken enchiladas. We covered the key ingredients, step-by-step instructions, and helpful tips to enhance your dish. You learned about variations for spicy and vegetarian options too. Remember, storing and reheating properly keeps flavors intact. Enjoy creating this meal that will impress family and friends. Your culinary skills will grow with practice and creativity. Dive in and make these enchiladas your own!](https://eataroundit.com/wp-content/uploads/2025/06/35ab15f9-357f-4eb4-b250-e78da4bb3079.webp)
Are you ready to impress your family and friends with a hearty meal? Classic Chicken Enchiladas are a simple, yet
![To make a tasty veggie fried rice, you need a few key items. Here’s what you will need: - 2 cups cooked jasmine rice - 1 cup mixed vegetables (carrots, peas, bell peppers, sweet corn) - 1 small onion, finely diced - 2 cloves garlic, minced - 2 tablespoons soy sauce - 1 tablespoon sesame oil - 1 teaspoon fresh ginger, grated - 2 eggs, lightly beaten (optional) - Salt and black pepper to taste - 2 green onions, finely chopped - A sprinkle of sesame seeds These ingredients come together to create a colorful dish that is both satisfying and quick to make. While the core ingredients make a great fried rice, you can add extras for more flavor. You might try: - Mushrooms for umami richness - Broccoli for crunch and nutrition - Spinach for a vibrant color boost - Cashews or peanuts for added texture - Chili flakes or sriracha for a spicy kick Feel free to mix and match based on what you like or have on hand. Picking fresh vegetables is key to a great fried rice. Here are some tips: - Choose vegetables with bright colors. They are usually fresher. - Look for firm textures. Avoid any soft or wilted ones. - Buy seasonal produce. It often tastes better and costs less. - Visit local markets for fresh picks. You can find unique veggies there too. Fresh veggies not only add flavor but also make your dish look appealing! Start by gathering your ingredients. You need cooked jasmine rice, mixed veggies, and some aromatics. Make sure to wash and chop the vegetables. Use carrots, peas, bell peppers, and sweet corn for color. If you use fresh rice, let it cool to avoid mush. Heat a large skillet or wok over medium-high heat. Add sesame oil to the pan. When the oil shimmers, add diced onion and minced garlic. Sauté for about 2-3 minutes until the onion turns soft and clear. Next, add the grated ginger and your mixed vegetables. Cook this mix for 3-4 minutes, stirring often. The veggies should be soft but still bright in color. If you want to add protein, push the veggies to one side of the pan. Pour the beaten eggs into the empty space. Scramble them until fully cooked, then mix them into the veggie blend. Now, add your cooled rice. Use a spatula to break apart any clumps. Toss the rice with the veggies and eggs until everything is mixed well. Drizzle the soy sauce over your rice mixture. Stir well to coat every grain. Season with salt and black pepper to taste. Let this fry for another 2-3 minutes. This step gives the rice a nice crispiness. Once done, take the pan off the heat. Sprinkle chopped green onions and sesame seeds on top before serving. For a vibrant touch, serve in bowls and garnish with more green onions and sesame seeds. A lime wedge on the side adds a fresh twist! You can find the Full Recipe for a detailed cooking guide. To make great fried rice, start with good rice. Use jasmine rice for a nice texture. If you can, cook the rice a day before. This lets it cool and dry out. Fresh rice can turn mushy when frying. If you have to use fresh rice, cool it completely before frying. Spread it out on a tray to let steam escape. The key to great fried rice is in the heat and timing. Use high heat when cooking. This helps to fry the rice quickly. Stir often but not too much. You want some crispy bits for texture. Also, break up clumps gently when adding rice. This keeps it from becoming a sticky mess. For beginners, a few simple tips can make cooking easier. First, prepare all your ingredients before cooking. This keeps your workspace clean and organized. Second, use a large skillet or a wok. This allows for even cooking and better stirring. Finally, don’t rush it. Cooking is about enjoying the process, so take your time! For the full recipe, check out the [Full Recipe]. {{image_4}} You can easily make this fried rice vegan. Simply skip the eggs. In their place, add a bit more tofu or tempeh for protein. You can also toss in chickpeas for extra texture. This keeps the dish hearty and satisfying without losing flavor. If you want more protein, add cooked chicken, shrimp, or tofu. These choices work well with the rice. Simply stir in your protein of choice after cooking the veggies. This makes the dish more filling and adds a new layer of taste. Feel free to mix and match vegetables based on what you love. Here are some great options: - Broccoli florets - Snap peas - Zucchini - Mushrooms - Bell peppers Adding seasonal vegetables can also change the dish. Each choice adds its own flavor and color. You can create a new version every time you cook! For more details, check the Full Recipe. After you finish your meal, let the fried rice cool down. Store it in an airtight container. This keeps moisture in and flavors fresh. Place the container in the fridge if you plan to eat it in the next few days. It will last about 3 to 4 days. To reheat your fried rice, use a skillet for best results. Heat a little oil over medium heat. Add the rice and stir often until it’s hot. This helps restore the texture. You can also use a microwave. Just cover the bowl and add a splash of water. Heat in short bursts, stirring in between. If you want to keep it longer, freezing is a great option. First, cool the rice completely. Then, scoop it into freezer bags. Make sure to squeeze out the air before sealing. Label the bags with the date. The rice can stay frozen for up to three months. To use, thaw it in the fridge overnight before reheating. For the full recipe, check out the vibrant veggie fried rice delight! Yes, you can use different types of rice. Long-grain rice, brown rice, or basmati rice all work well. The key is to use rice that is cooked and cooled. Day-old rice gives the best texture. Fresh rice may turn mushy when frying. If you have leftover rice, it is perfect for this dish. To add spice, you can use chili paste or hot sauce. Sriracha is a great choice. You can also add diced fresh chili peppers. For a milder heat, try adding red pepper flakes. Mix these in while cooking to release their flavors. Start with a small amount, then adjust to your taste. Avoid using too much oil, as it can make the dish greasy. Do not overcrowd the pan; this can steam the rice instead of frying it. Always cook on high heat to get that nice crisp. Lastly, remember to break apart any clumps of rice. This helps the flavors mix well. For more tips, check out the Full Recipe. This blog post covered how to make simple veggie fried rice. You learned about essential and optional ingredients. We explored tips for fresh veggies and cooking steps. The discussion included best practices for rice texture and techniques. I offered variations like vegan options and protein add-ins. Lastly, we went over storage tips and common questions. Now, you have the tools to create your own delicious fried rice. Enjoy experimenting with flavors and textures in your dish!](https://eataroundit.com/wp-content/uploads/2025/06/b8f7da7f-6184-41d7-a7b6-211736ae246c.webp)
Are you ready to whip up a tasty meal in no time? This Simple Veggie Fried Rice is not only

Who can resist a warm, gooey cinnamon roll? In this guide, I’ll show you how to make homemade cinnamon rolls
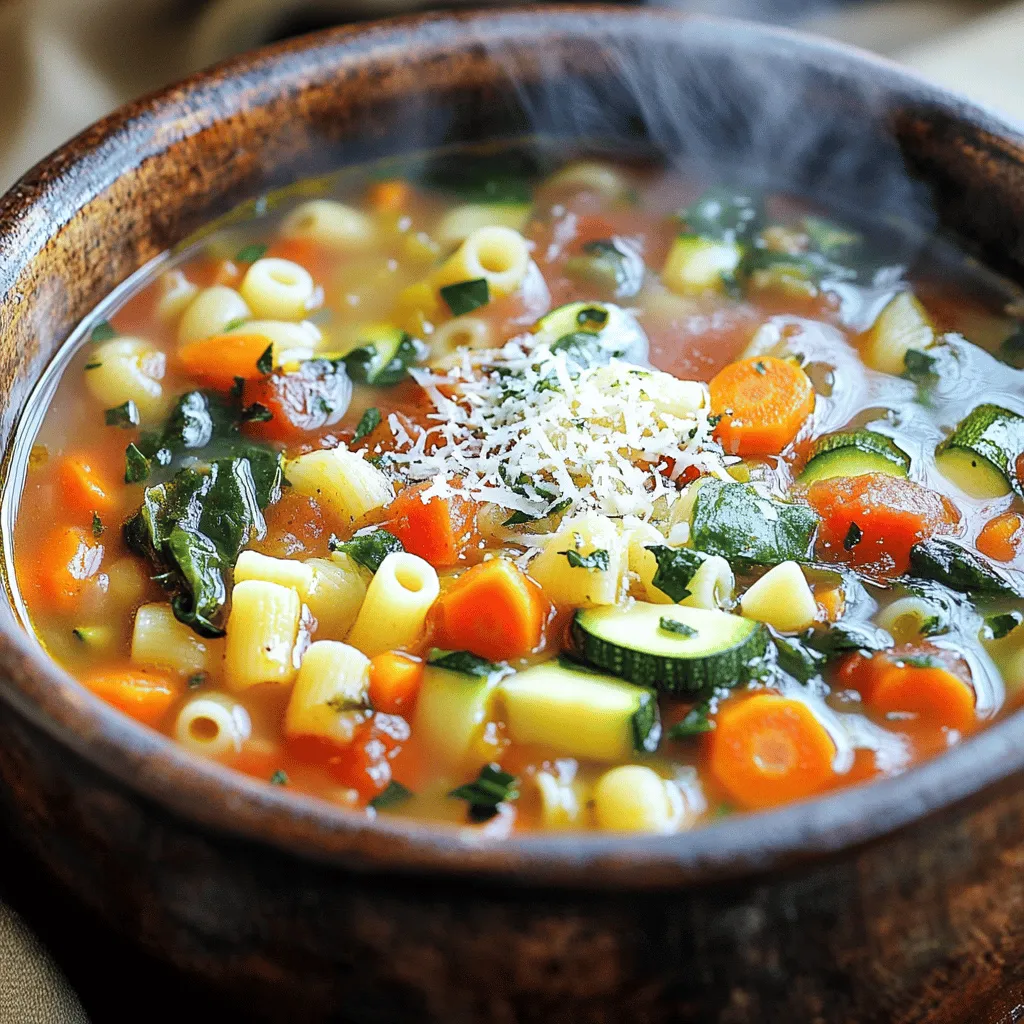
Looking for a meal that’s easy, hearty, and bursting with flavor? This easy minestrone soup recipe is your answer! Packed
![- 2 large onions, sliced into 1/4-inch thick rings - 1 cup all-purpose flour - 1 teaspoon garlic powder - 1 teaspoon onion powder - 1 teaspoon smoked paprika - 1/2 teaspoon cayenne pepper (optional) - 1 teaspoon salt - 1/2 teaspoon black pepper - 2 large eggs, beaten - 1 cup breadcrumbs (panko recommended) - Olive oil spray - Baking sheet - Parchment paper - Shallow bowls for coating - Cup and teaspoon measuring tools - A whisk for beaten eggs Gathering your ingredients is the first step to making crispy baked onion rings. You will need two large onions. Slice them into 1/4-inch thick rings. This thickness helps them cook evenly. The flour mixture is key to the flavor. Combine flour with garlic powder, onion powder, smoked paprika, cayenne pepper, salt, and black pepper. This blend adds depth and spice. You’ll also need two large eggs, which you'll beat in a bowl. The eggs help the breadcrumbs stick. For the best crunch, use panko breadcrumbs. Finally, grab some olive oil spray. It gives the onion rings that golden finish when baked. For this recipe, you will also need a baking sheet lined with parchment paper. This makes clean up easy and prevents sticking. Use shallow bowls to coat the onion rings. Measuring tools like cups and teaspoons will help you get the right amounts. A whisk is perfect for beating the eggs. Once you have everything ready, you can follow the [Full Recipe] for the steps to cook these delicious onion rings! - Preheat oven to 425°F (220°C). - Line a baking sheet with parchment paper. - Slice onions into rings and separate them. First, I love to get my oven hot. Preheating it to 425°F ensures a crispy finish. While the oven warms, I line a baking sheet with parchment paper. This keeps the onion rings from sticking and makes cleanup easy. Then, I slice my onions into 1/4-inch thick rings. It’s key to separate the rings gently. This way, each ring cooks evenly. - Mix flour and seasonings in a shallow bowl. - Beat eggs in a separate bowl. - Prepare breadcrumbs for coating. Next, I mix flour with some tasty seasonings. In a shallow bowl, I stir together all-purpose flour, garlic powder, onion powder, smoked paprika, cayenne pepper, salt, and black pepper. This blend adds great flavor. In another bowl, I beat the eggs until they’re smooth. Then, I prepare my breadcrumbs in a third bowl. Using panko gives the onion rings a nice crunch. - Dip onion rings in flour, then egg, then breadcrumbs. - Place coated rings on the baking sheet. - Lightly spray with olive oil and bake for 15-20 minutes. Now comes the fun part! I take each onion ring and dip it into the flour mix. I make sure it’s fully coated but shake off the extra flour. Next, I dip it in the beaten eggs, letting the extra egg drip off. Finally, I coat the ring in breadcrumbs, pressing gently so they stick well. I place the coated rings in a single layer on the baking sheet. A light spray of olive oil on top helps them crisp up in the oven. I bake them for 15-20 minutes, flipping halfway. I watch for that golden brown color. That's when I know they are ready! You can find the full recipe to enjoy this savory treat. - Use panko breadcrumbs for enhanced crunch. They create a great texture. - Ensure even coating by shaking off excess flour and egg. This helps avoid clumps. - Flip onion rings halfway through baking for even crisping. This makes both sides golden. - Arrange rings in a single layer on the baking sheet. This allows hot air to circulate. - Use olive oil spray for a golden finish. It adds flavor and helps with crispness. - Pair with various dipping sauces like ranch or spicy ketchup. This adds fun flavors. - Serve as a side or snack for parties. They are always a crowd favorite. - Try them with homemade garlic aioli for a tasty twist. It’s a great addition! For the full recipe, refer to the Crispy Baked Onion Rings section above. Enjoy your cooking! {{image_4}} You can spice up your onion rings easily. Add herbs like oregano or thyme to the flour mix. This will give your rings a fresh scent and taste. You can also try different spices. For heat, sprinkle in some chili powder. This small change can turn your dish into a spicy treat. Want a new texture? Try cornmeal instead of breadcrumbs. This will give your onion rings a different crunch. You can also use crushed potato chips. They add a fun flavor and extra crispness. Serving style matters too. Pair your onion rings with a homemade garlic aioli. This creamy dip will enhance the flavor. Another idea is to top your rings with cheese. Bake them again until the cheese melts for cheesy onion rings. This twist can make your dish even more exciting. Check out the Full Recipe for more tips! To keep your crispy baked onion rings fresh, let them cool completely. This step is key to avoiding sogginess. Once cooled, place them in an airtight container. Store them in the fridge. They will stay good for about 3-4 days. If you want to save some for later, freezing works great. First, lay the cooked onion rings on a baking sheet. Make sure they do not touch each other. Freeze them for a few hours until solid. Once frozen, move them to a zip-top bag. They can stay in the freezer for up to three months. To enjoy your onion rings again, reheat them in the oven. Set the oven to 375°F (190°C) for the best results. Place the onion rings on a baking sheet and warm them for about 10 minutes. This method keeps them crispy. Avoid using the microwave, as it can make them soft and chewy. Use panko breadcrumbs and don’t skip the olive oil spray. Panko gives a great crunch. The olive oil helps to brown the outside. This combination makes a huge difference. Try using a mixture of flour and water or a flaxseed egg as a substitute. Both options work well. They help the breadcrumbs stick to the onion rings just like eggs do. They can last in the fridge for up to 3-4 days when stored properly. Keep them in an airtight container. This helps maintain their flavor and texture. Yes, bake ahead and reheat them in the oven to regain crispiness. This is perfect for parties or busy days. Just make sure to reheat them at a low temperature. Popular choices include ketchup, ranch, barbecue sauce, and chipotle mayo. Each sauce offers a unique flavor. Try different ones to find your favorite. Yes, substitute flour and breadcrumbs with gluten-free alternatives like almond flour and gluten-free breadcrumbs. This way, everyone can enjoy these crispy baked onion rings. These baked onion rings are easy and tasty. I shared the key ingredients, tools, and steps to make them crispy and delightful. Remember to use panko breadcrumbs and olive oil spray for the best crunch. You can also get creative with flavors and dips. Whether for a snack or a side dish, these onion rings will impress. Enjoy cooking and experimenting with your own twist on this classic recipe!](https://eataroundit.com/wp-content/uploads/2025/06/ff5c3cca-409d-471e-8750-27af5df10787.webp)
Looking for a snack that’s both crunchy and delicious? This crispy baked onion rings recipe is your answer! Simple to
![- 4 salmon fillets (6 oz each) - 2 tablespoons extra virgin olive oil - 4 cloves garlic, minced - 2 fresh lemons (one sliced into rounds, juice of the other) - 1 teaspoon dried oregano - 1 teaspoon smoked paprika - Sea salt and freshly cracked black pepper to taste - 1 pound asparagus, trimmed - 1 cup cherry tomatoes, halved - Fresh parsley, finely chopped for garnish In this tasty dish, salmon shines as the star. The four fillets are tender and flavorful. You can choose wild-caught or farmed salmon, based on your budget. Each fillet weighs about six ounces, perfect for a meal. Extra virgin olive oil helps the salmon stay moist. It also adds a rich flavor. Garlic brings a bold taste to the dish. I love using four cloves for a nice punch. Fresh lemons add brightness. One lemon gives juice, while the other is sliced for garnish. Asparagus adds a nice crunch. I use one pound, trimmed to fit the pan. Cherry tomatoes bring a burst of sweetness. Halving them makes them easy to eat. For seasoning, dried oregano and smoked paprika add depth. Sea salt and black pepper bring out all the flavors. Fresh parsley is a must for garnish. It adds color and freshness. You can find the full recipe for this bright dish online, and it will guide you through each step. 1. Preheat your oven to 400°F (200°C). This helps cook the salmon just right. 2. Line a large sheet pan with parchment paper. This makes cleanup easy and prevents sticking. 3. In a small bowl, mix 2 tablespoons of olive oil, 4 minced garlic cloves, and the juice of one lemon. 4. Add 1 teaspoon of dried oregano, 1 teaspoon of smoked paprika, sea salt, and black pepper. Mix well to form the lemon garlic marinade. 1. Place 4 salmon fillets on one side of the sheet pan. Make sure they are skin-side down. 2. Brush each fillet generously with the lemon garlic marinade. This adds great flavor. 3. On the other side of the pan, place 1 pound of trimmed asparagus and 1 cup of halved cherry tomatoes. Drizzle any leftover marinade over them. Toss gently to coat. 4. Lay lemon slices on top of the salmon and scatter a few around the veggies. This boosts flavor and looks great. 5. Put the sheet pan in the oven and roast for 15-20 minutes. The salmon should flake easily with a fork. The asparagus should be tender yet crisp. 1. Remove the sheet pan from the oven. Let it rest for a couple of minutes. 2. Before serving, sprinkle fresh parsley on top for color. 3. For a rustic feel, serve directly from the sheet pan. For a fancier look, plate individual portions topped with more parsley and lemon slices. For the full recipe, check out the complete guide. Enjoy your delicious meal! How to know when salmon is cooked perfectly You can tell salmon is cooked when it flakes easily with a fork. The center should be opaque, not raw. For best results, use a meat thermometer. Aim for an internal temperature of 145°F (63°C). This ensures it is safe and tender. Secrets for perfectly crisp asparagus To keep asparagus crisp, do not overcook it. Roast it alongside the salmon for 15-20 minutes. If you want extra crunch, add the asparagus halfway through cooking. This gives it a slight bite while still absorbing flavor. Pairing with sides and drinks This dish pairs well with a light salad or rice. For drinks, try a chilled white wine or sparkling water. They complement the lemon and garlic flavors nicely. Ideas for garnishing Fresh herbs add color and flavor. Chopped parsley is great on top. You can also use lemon wedges for extra zest. Lastly, a sprinkle of red pepper flakes adds a nice kick to the dish. For the full recipe, check out the [Full Recipe]. {{image_4}} If you want to change things up, consider swapping the salmon. Here are some great options: - Trout fillets: They have a similar taste and texture. - Chicken breasts: They work well with the same marinade. - Tofu: A good choice for a plant-based meal. You can also play with the vegetables. Try these: - Broccoli: It adds a nice crunch. - Bell peppers: They give a sweet flavor. - Zucchini: It cooks fast and is very mild. To make this dish even tastier, add herbs and spices. Consider these options: - Fresh dill: It pairs well with lemon and salmon. - Thyme: Offers a warm, earthy taste. - Cilantro: A bright option if you like fresh flavors. Want to spice it up? Here’s how: - Red pepper flakes: Add a pinch for heat. - Sriracha: Mix it with the marinade for a spicy kick. - Soy sauce or teriyaki: These can give a unique twist. For more ideas, check the Full Recipe, and enjoy creating your own version! To keep your salmon and veggies fresh, store leftovers in airtight containers. Make sure to cool them to room temperature first. Place the salmon in one container and the vegetables in another. This way, each component stays tasty. Leftovers can last in the fridge for up to three days. If you want to keep them longer, consider freezing. Wrap the salmon tightly in plastic wrap, then place it in a freezer bag. The veggies can go in another bag. They can stay in the freezer for up to three months. To enjoy your leftovers, the best method is reheating in the oven. Preheat your oven to 350°F (175°C). Place the salmon and veggies on a baking sheet. Heat for about 10-15 minutes. This keeps the flavors intact and avoids a rubbery texture. If you need a faster option, the microwave works too. Use a microwave-safe plate and cover it with a damp paper towel. Heat in short bursts of 30 seconds. Check often to avoid overcooking. For meal prep, portion out the salmon and veggies into meal containers. This makes it easy to grab a healthy meal anytime. You can even add a fresh lemon wedge for a zesty kick when you reheat. For the full recipe, check out the earlier section. What can I substitute for salmon in this recipe? You can use other fish like trout or cod. Chicken breasts also work well. Just adjust cooking times based on the meat’s thickness. Can I use frozen salmon fillets? Yes, you can use frozen salmon. Just thaw the fillets first. It’s best to thaw in the fridge overnight for safety. How do I prevent my salmon from sticking to the pan? To prevent sticking, line your pan with parchment paper. You can also use oil to grease the pan lightly. How healthy is this recipe? This recipe is very healthy. Salmon is rich in omega-3 fatty acids. Asparagus and tomatoes add vitamins and fiber. Can I make this dish low-carb? Yes, you can make it low-carb. Just skip the cherry tomatoes or replace them with low-carb veggies like zucchini. Can I prepare the marinade in advance? Absolutely! You can make the marinade a day ahead. Just store it in the fridge until you're ready to use it. What other dishes can I make using a sheet pan? You can make roasted veggies, chicken fajitas, or even stir-fry. Sheet pan meals are versatile and fun! For more ideas, check out the full recipe. This blog post covered a simple and tasty sheet pan lemon garlic salmon recipe. You learned key ingredients, step-by-step instructions, and helpful tips. I shared variations and storage ideas to keep your meals fresh. Cooking should be fun and easy, so remember to improvise with flavors you love. This dish is perfect for busy nights or impressing guests. Enjoy cooking and savoring your delicious creation!](https://eataroundit.com/wp-content/uploads/2025/06/43f720df-4c43-428c-b418-ed82ba28dbab.webp)
Looking for a quick and tasty meal? This Sheet Pan Lemon Garlic Salmon will save you time while delivering big

If you love oatmeal raisin cookies, you’re in for a treat! This classic recipe is both tasty and easy, perfect
![To make a tasty chicken stir fry, you need a few key ingredients. Here’s what you will need: - 1 lb (450g) boneless, skinless chicken breasts, thinly sliced - 2 tablespoons soy sauce - 1 tablespoon oyster sauce - 1 tablespoon sesame oil - 2 cups mixed vegetables (bell peppers, broccoli, snap peas, and carrots) - 3 cloves garlic, minced - 1 inch piece of ginger, grated - 2 green onions, chopped - 1 tablespoon cornstarch mixed with 2 tablespoons water (for thickening) - Salt and pepper to taste - Cooked jasmine rice (for serving) These ingredients come together to create a meal that is both simple and full of flavor. You can boost the taste with some extra seasonings and sauces. Here are some ideas: - Chili flakes for heat - Hoisin sauce for sweetness - Rice vinegar for tang - Fresh herbs like cilantro or basil Feel free to mix and match to match your taste. If you have dietary needs, there are great alternatives you can use. Here are some options: - Swap chicken for tofu or shrimp for a different protein. - Use gluten-free soy sauce if you need to avoid gluten. - Try using zucchini noodles instead of rice for a low-carb dish. These swaps let you enjoy the stir fry while sticking to your diet. For the full recipe, check out the details above. First, gather your chicken and a medium bowl. Slice 1 pound of boneless chicken breasts into thin pieces. Add this chicken to the bowl. Pour in 2 tablespoons of soy sauce and 1 tablespoon of oyster sauce. Drizzle in 1 tablespoon of sesame oil. Season with salt and pepper to taste. Mix well to coat every piece of chicken. Let the chicken marinate for about 15 minutes. This helps to flavor the meat deeply. While the chicken marinates, get your skillet or wok ready. Heat 1 tablespoon of sesame oil over medium-high heat until it shimmers. Add 3 cloves of minced garlic and 1 inch of grated ginger to the hot oil. Stir them quickly for about 30 seconds. You want to smell that great aroma, but don’t let them burn! After the garlic and ginger cook, it’s time for the chicken. Turn the heat to high and add the marinated chicken to the skillet. Stir-fry it for 5 to 7 minutes. You want the chicken to brown nicely and cook all the way through. Once the chicken is done, toss in 2 cups of mixed vegetables, like bell peppers, broccoli, snap peas, and carrots. Stir-fry these for another 3 to 4 minutes. This step keeps the veggies crisp and colorful. Next, mix 1 tablespoon of cornstarch with 2 tablespoons of water. Slowly pour this into the skillet while stirring. This will thicken the sauce. Cook for another 1 to 2 minutes until the sauce coats everything beautifully. Finally, add 2 chopped green onions and give everything a good stir. Remove the skillet from heat. Serve the chicken stir-fry over cooked jasmine rice. For an extra touch, sprinkle more green onions on top. Enjoy this delicious meal! For a complete guide, check the Full Recipe. To cook chicken just right, start with thin slices. Thin cuts cook faster and stay juicy. Marinate the chicken for at least 15 minutes with soy sauce, oyster sauce, and a pinch of salt and pepper. This helps add flavor and tenderness. When cooking, make sure your skillet is hot. A hot pan seals the chicken quickly, locking in juices. Stir-frying is quick and fun! Use high heat to keep the food sizzling. Always keep the ingredients moving in the pan. This prevents burning and ensures even cooking. Use a large skillet or wok. This gives you more room and helps avoid crowding. If you have a lot of veggies, cook them in batches. This keeps everything crisp and colorful. To boost flavor, add garlic and ginger at the start. They bring warmth and depth. For a fresh twist, sprinkle lime juice before serving. It brightens the dish! When plating, use a large shallow bowl. This makes the meal look inviting. Top your stir-fry with extra green onions or sesame seeds for a pop of color. Check out the Full Recipe for more helpful tips! {{image_4}} You can easily swap chicken for other proteins. Try thinly sliced beef for a richer taste. Use flank steak or sirloin for best results. If you prefer plant-based options, tofu works well. Firm tofu soaks up flavors nicely. Just press it first to remove excess water. Mix up your veggies based on what is fresh. In spring, use asparagus or snap peas. Summer favorites include zucchini and bell peppers. In fall, try adding butternut squash or mushrooms. Winter can bring in hearty greens like kale or bok choy. The goal is to keep colors bright and flavors bold. The sauce is key to flavor in stir fry. Besides soy and oyster sauce, consider teriyaki for sweetness. A bit of chili paste adds heat if you like spice. Coconut aminos offer a great soy-free option. Try sesame or peanut sauce for a nutty twist. Experiment and find your favorite mix! For the full recipe, check out the [Full Recipe]. To keep your chicken stir fry fresh, store leftovers in an airtight container. Place the stir fry in the fridge within two hours of cooking. It will stay good for up to three days. Make sure to let it cool down before sealing the container. This helps prevent moisture buildup. When you’re ready to enjoy the leftovers, reheat them gently. I recommend using a skillet for this. Heat a little oil over medium heat, then add the stir fry. Stir it often to ensure even heating. This way, the flavors will stay vibrant. If you prefer, you can also use a microwave. Heat it in short bursts, stirring in between. If you want to save your stir fry for later, freezing is a great option. Pour the cooled stir fry into a freezer-safe bag or container. Remove as much air as possible before sealing to prevent freezer burn. Your stir fry can last up to three months in the freezer. When you’re ready to eat it, thaw it overnight in the fridge and reheat as mentioned before. Enjoy this easy chicken stir fry again in just a few steps! For the full recipe, check out the earlier sections. The best way to cut chicken is to slice it thinly. Start with boneless, skinless breasts. Place the chicken in the freezer for 30 minutes. This makes it easier to cut. Use a sharp knife for neat slices. Aim for strips about 1/4 inch thick. This size cooks quickly and evenly. Yes, you can use frozen vegetables. They save time and are still healthy. Make sure to thaw them first. Drain any excess water from them. This prevents the stir-fry from getting watery. Add them straight to the hot pan. Stir-fry until they are heated through. To make this recipe gluten-free, substitute soy sauce. Use a gluten-free soy sauce or tamari. Check the oyster sauce for gluten as well. You can also make your own oyster sauce with mushrooms. Replace cornstarch with a gluten-free thickener if needed. This way, you can enjoy a tasty stir-fry without worry. For more tips and the complete cooking process, check the Full Recipe. In summary, this article covers everything you need for an easy chicken stir fry. We explored key ingredients, step-by-step cooking instructions, and helpful tips for great results. You can try various proteins, vegetables, and flavors to fit your taste. Plus, we shared storage tips to keep leftovers fresh and tasty. With this guide, you can create a delicious meal any night. Enjoy your cooking adventure with confidence!](https://eataroundit.com/wp-content/uploads/2025/06/358d0778-df10-47fc-94c8-ac95a284c86c.webp)
Looking for a quick and tasty meal? My Easy Chicken Stir Fry is perfect for you! This dish is simple
