Skip to content
DisclaimerTerms Of UseGDPR PolicyCookie Policy

eataroundit

  • Home
  • Drinks
  • Appetizers
  • Dinner
  • Dessert
  • About
  • Contact
  • Privacy Policy
DisclaimerTerms Of UseGDPR PolicyCookie Policy

Hannah

To create a bright and tasty Lemon Dill Orzo Salad, gather these key items: - 1 cup orzo pasta - 2 tablespoons olive oil - 1 tablespoon fresh lemon juice - Zest of 1 lemon - 1 cup cherry tomatoes, halved - 1 medium cucumber, diced - 1/4 red onion, finely chopped - 1/4 cup fresh dill, roughly chopped - Salt and freshly ground black pepper to taste These ingredients come together to make a fresh and vibrant dish that bursts with flavor. You can customize your salad with these optional ingredients: - Crumbled feta cheese (for a creamy touch) - Olives (for a briny kick) - Bell peppers (for added crunch) - Avocado (for creaminess and healthy fats) Feel free to mix and match based on your taste. Fresh herbs and garnishes elevate this salad. Consider these options: - Extra dill (for a pop of green) - Chives (for a mild onion flavor) - Parsley (for freshness) - Lemon wedges (for serving) These additions not only enhance taste but also make your dish look stunning. For the complete cooking process, check out the Full Recipe. Start with a large pot. Fill it with about 4 cups of salted water. Heat the water until it boils. Now, add 1 cup of orzo pasta. Cook the orzo for 8 to 10 minutes. You want it to be al dente, which means firm to the bite. Once cooked, drain the orzo in a colander. Rinse it under cold water to stop the cooking. Set it aside to cool down. Grab a small mixing bowl. In it, whisk together 2 tablespoons of olive oil. Add 1 tablespoon of fresh lemon juice and the zest of 1 lemon. Don't forget to sprinkle in a pinch of salt and pepper. Mix well until the dressing comes together and looks smooth. Taste it to see if you need more salt or lemon juice. In a big mixing bowl, add your cooled orzo. Toss in 1 cup of halved cherry tomatoes and 1 diced cucumber. Next, add 1/4 of a finely chopped red onion and 1/4 cup of roughly chopped fresh dill. Gently mix everything until it is evenly combined. Now, pour the dressing over the orzo and veggies. Using a large spoon, toss everything to coat well. Taste the salad and adjust seasoning if needed. If you like, you can sprinkle crumbled feta cheese on top. Serve it chilled or at room temperature. This recipe is a fresh and colorful treat. For the full details, check the Full Recipe. To cook orzo just right, use a large pot. Add about 4 cups of salted water. Bring it to a rolling boil. Carefully drop in the orzo pasta. Cook it for 8 to 10 minutes. Stir it occasionally to keep it from sticking. You want it to be al dente, or firm to the bite. Once done, drain it in a colander. Rinse it under cold water to stop the cooking. This keeps it from getting mushy. Making Lemon Dill Orzo Salad ahead of time is simple. Prepare the orzo and let it cool. Chop the veggies and fresh dill. Store each part in separate containers. When you are ready to eat, mix them together. Add the dressing right before serving. This keeps the salad fresh and crunchy. It’s a great option for lunch or dinner during a busy week. Taste your salad before serving. If it needs more flavor, add more salt. You can also add more lemon juice for brightness. Freshly ground black pepper can give a nice kick. If you like it creamy, sprinkle on some crumbled feta cheese. Remember, cooking is all about your preference. Feel free to experiment until you find your perfect balance. For the full recipe, check out the details above! {{image_4}} You can make Lemon Dill Orzo Salad heartier by adding protein. Grilled chicken or shrimp works great. Simply cook the chicken or shrimp until done, then slice or toss it in. This twist gives the salad a satisfying boost. The flavors of lemon and dill pair well with grilled meats. They add depth and make the salad a full meal. For a vegetarian touch, try adding chickpeas or creamy avocado. Chickpeas bring protein and a nice bite. Just drain and rinse them before mixing in. Avocado adds a rich, smooth texture. Cut it into cubes and fold it in gently. Both options keep the salad light and fresh while making it filling. Seasonal veggies can change the salad's flavor and texture. In spring, add asparagus or peas for a crisp crunch. In summer, try bell peppers or zucchini for a sweet touch. Fall's harvest brings roasted squash or beets, giving warmth and color. Feel free to swap in any fresh produce you love. This keeps the dish exciting and flexible. Check out the Full Recipe for more inspiration! To keep Lemon Dill Orzo Salad fresh, store it in an airtight container. Make sure the salad is cool before sealing it. This helps preserve its flavors and texture. If you have added feta cheese, it’s best to store it separately. This prevents the cheese from becoming soggy. Reheating orzo salad is simple. You can warm it in the microwave for 30 seconds to 1 minute. Stir it halfway to heat evenly. If you prefer it cold, enjoy it straight from the fridge. The flavors actually get better as it sits! Lemon Dill Orzo Salad lasts about 3 to 5 days in the fridge. Always check for any signs of spoilage before eating. If it smells off or has a strange texture, throw it away. To keep your salad at its best, eat it within this time frame. For a full recipe, refer back to the beginning! Yes, you can make this salad gluten-free. Use gluten-free orzo pasta or any gluten-free pasta you like. Cooking times may differ, so check the package for best results. The rest of the ingredients are gluten-free. This way, everyone can enjoy the bright flavors of the salad. If you want to skip feta cheese, try goat cheese or ricotta. Both add a creamy texture and great taste. For a dairy-free option, use avocado or omit cheese entirely. The salad still tastes fresh and delicious without it. You can also try adding nuts for crunch. To spice up the salad, add chopped jalapeños or red pepper flakes. You can also include a dash of hot sauce in the dressing. These options will give the salad a nice kick. Just remember to taste as you go. You want it to be tasty, not overwhelming. For the complete recipe, check the [Full Recipe]. This blog post covered everything you need for a tasty Lemon Dill Orzo Salad. We explored key ingredients, step-by-step cooking instructions, and even tips to perfect your dish. You can customize it with proteins or fresh veggies. Storage and reheating tips ensure your leftovers stay fresh. Remember, this salad is flexible and fun to make! Enjoy experimenting with flavors and ingredients that suit your taste. Happy cooking!

Lemon Dill Orzo Salad Fresh and Flavorful Delight

Are you ready to brighten up your meals with a fresh and tasty dish? My Lemon Dill Orzo Salad is

To make Smoky Chipotle Black Bean Burgers, you need: - 2 cans black beans, thoroughly rinsed and drained - 1 cup cooked quinoa (preferably chilled) - 1/2 cup breadcrumbs (plus extra if needed) - 1/4 cup fresh cilantro, finely chopped - 1/2 red onion, finely diced - 2 cloves garlic, minced - 1-2 chipotle peppers in adobo sauce, minced - 1 teaspoon smoked paprika - 1 teaspoon ground cumin - 1 teaspoon salt - 1/2 teaspoon freshly cracked black pepper - 1 tablespoon olive oil (for grilling) - Burger buns (your choice) - Toppings: sliced avocado, crisp lettuce, juicy tomato slices, and your favorite sauce If you want to adjust the recipe, here are some swaps: - Use kidney beans instead of black beans for a different flavor. - Quinoa can be replaced with cooked rice or barley. - Gluten-free breadcrumbs work well for those avoiding gluten. - Fresh parsley can replace cilantro if you prefer a milder taste. - For a spicier kick, add more chipotle peppers or a dash of hot sauce. - Use any burger bun type, including lettuce wraps for a low-carb option. Choose high-quality ingredients to boost flavor: - Use fresh herbs like cilantro for vibrant taste. - Opt for canned black beans with no added salt for better control over seasoning. - Select a good brand of chipotle peppers for rich, smoky depth. - Choose extra-virgin olive oil for grilling to enhance flavor. - Make sure your spices are fresh for the best flavor impact. For the complete recipe, check out the Full Recipe section. Enjoy crafting these flavorful burgers! First, we need to mash the black beans. In a large mixing bowl, use a fork or potato masher. Aim for a rough feel, leaving some beans whole. This adds texture to the burgers. Next, add the cooked quinoa, breadcrumbs, cilantro, red onion, garlic, and minced chipotle peppers. Then, sprinkle in smoked paprika, cumin, salt, and black pepper. Mix everything well until combined. If the mix feels too wet, add more breadcrumbs until it holds together. Now comes the fun part! Divide the mixture into equal portions. I like to make patties about one inch thick. You should end up with about six to eight patties. Make sure they are not too thick; this helps them cook evenly. Set the patties aside while you get ready to cook. You can cook these burgers on a grill or in a skillet. Heat your grill or a non-stick skillet over medium heat. Add a tablespoon of olive oil to the surface, so they don’t stick. When it’s hot, carefully place the patties on the grill or skillet. Cook for four to five minutes on each side. You want a nice crispy outside and a warm inside. While they cook, prepare your burger buns and toppings. Toast your buns if you like. Assemble your burgers with a patty, toppings, and sauce. Enjoy your Smoky Chipotle Black Bean Burgers! To get the right texture, mash the black beans well but keep some whole. This gives the burger a nice bite. Mixing in quinoa adds fluffiness. If the mixture feels too wet, add more breadcrumbs. They help hold everything together. The ideal patty should be firm yet moist. To boost the smoky taste, use smoked paprika and chipotle peppers. These ingredients add depth. Adjust the chipotle peppers based on your heat preference. For extra flavor, try adding a splash of liquid smoke. This gives a rich, BBQ taste without grilling. When grilling, preheat the grill or skillet. This helps the patties form a crispy crust. Use olive oil to coat the grill or skillet to avoid sticking. Cook each side for about 4 to 5 minutes. Flip them gently to keep them intact. If you want, toast the burger buns for added flavor. For the complete recipe, check out the Full Recipe section. Enjoy your smoky chipotle black bean burgers! {{image_4}} You can easily make these Smoky Chipotle Black Bean Burgers vegetarian or vegan. The base is already plant-based, which makes it simple. Just skip any cheese or non-vegan sauces. Use a vegan mayo or a homemade avocado spread for creaminess. This keeps the flavor while staying friendly to all diets. To kick up the flavor, consider adding cheese or extra spices. A slice of pepper jack cheese adds creaminess and spice. You can also try adding some fresh herbs, like basil or dill, for a twist. If you want more heat, add more chipotle peppers or a dash of cayenne. Don’t be afraid to experiment with spices like chili powder or onion powder. Each twist makes the burger unique. Serve these burgers with fresh sides and dips for a complete meal. Crispy sweet potato fries pair perfectly with the smoky flavors. You can also offer a cool salad, like a cucumber tomato salad, to balance the heat. For dips, try a zesty salsa or creamy avocado dip. They add great flavor and texture to your meal. For a fun touch, serve the burgers on a wooden board with all the toppings on the side. This lets everyone build their perfect burger. For the full recipe, check out the details above. After you enjoy your Smoky Chipotle Black Bean Burgers, store any leftovers in an airtight container. This keeps them fresh for up to three days in the fridge. Make sure the burgers cool down to room temperature before sealing them. This helps prevent moisture buildup that can make the patties soggy. If you want to save some patties for later, freezing is a great option. Place the cooked patties in a single layer on a baking sheet. Freeze them for about one hour until solid. Then, transfer the frozen patties to a freezer-safe bag. Label the bag with the date and use them within three months for the best taste. Reheating is simple. For the best texture, heat the patties on a skillet over medium heat for about 4-5 minutes per side. You can also use an oven. Preheat it to 350°F (175°C). Place the patties on a baking sheet and heat for about 10-15 minutes. This will keep them crispy on the outside. Enjoy your delicious Smoky Chipotle Black Bean Burgers anytime! For the full recipe, check above. To adjust the spice level, you can change the amount of chipotle peppers. Start with one pepper if you prefer mild heat. If you enjoy more spice, add two peppers. You can also add more smoked paprika for extra flavor without much heat. Alternatively, include a dollop of sour cream on top to tone down the heat for those who may find it too spicy. Yes, you can make these burgers ahead of time. Prepare the patties and store them in the fridge for up to two days. You can also freeze them for up to three months. Just make sure to layer parchment paper between the patties to prevent sticking. Thaw them overnight in the fridge before cooking. The best toppings for these burgers include sliced avocado, crisp lettuce, and juicy tomato slices. You can also try red onion for crunch or jalapeños for more heat. For sauces, chipotle mayo or salsa work great. Feel free to get creative with your favorite toppings to make each burger unique. For the full recipe, check out the details above. To recap, we explored the key ingredients that make your black bean burgers shine. I shared tips for choosing the best ingredients and offered substitutions for dietary needs. We covered cooking methods and how to form perfect patties. I also shared ways to enhance flavor, achieve great texture, and suggested fun variations. Lastly, we discussed how to store leftovers and answered common questions. Now, it’s time for you to make these tasty burgers. Enjoy the process and the delicious results!

Smoky Chipotle Black Bean Burgers Tasty and Simple Meal

Are you ready to spice up your meal with a Smoky Chipotle Black Bean Burger? This tasty and simple dish

- 2 cups cooked chicken, shredded - 1 cup fresh mushrooms, sliced - 1 cup creamy Alfredo sauce - 1 cup shredded mozzarella cheese - 4 large flour tortillas - 2 tablespoons olive oil - 1 teaspoon garlic powder - 1 teaspoon onion powder - Salt and pepper to taste Gathering these ingredients is key. You start with the chicken. Shredded cooked chicken gives great texture. Next, fresh mushrooms add earthiness. I prefer button or cremini mushrooms for their mild flavor. The creamy Alfredo sauce ties it all together, making each bite rich. For extra flavor, you'll need mozzarella cheese. It melts well and gives a lovely stretch. Flour tortillas are the perfect base, holding all the goodness inside. Olive oil helps crisp the quesadilla as it cooks. Now, let’s not forget the seasonings. Garlic powder and onion powder boost flavor without overpowering. A pinch of salt and pepper is essential. They enhance all the other tastes in this dish. This dish is simple, yet it delights your taste buds. Check out the Full Recipe for complete cooking steps and tips. First, grab a large skillet. Heat 1 tablespoon of olive oil over medium heat. Once the oil is hot, add the sliced mushrooms. Sauté them for about 5 to 7 minutes. You want them golden brown and tender. Season with garlic powder, onion powder, salt, and pepper. These spices bring out great flavor. After cooking, remove the mushrooms from the skillet and set them aside. In a mixing bowl, combine the shredded chicken and the sautéed mushrooms. Pour in the creamy Alfredo sauce. Stir the mixture well. Ensure every piece of chicken and mushroom is coated in the sauce. This step makes the filling rich and tasty. Now, let's prepare the quesadilla. In the same skillet, heat the remaining tablespoon of olive oil over medium heat. Place one tortilla in the skillet. Evenly sprinkle half of the shredded mozzarella cheese over the tortilla. Next, spread half of the chicken and mushroom Alfredo mixture on top of the cheese. Add another sprinkle of mozzarella cheese. Carefully lay another tortilla over these layers. Cook the quesadilla for about 3 to 4 minutes. You want the bottom tortilla to turn golden brown and crispy. Use a large spatula to flip the quesadilla. Cook the other side for another 3 to 4 minutes until it is also golden and crispy. Once both sides are cooked well, remove the quesadilla from the skillet. Let it cool for a minute before cutting. Cut the quesadilla into wedges for easy sharing. Repeat these steps with the rest of the tortillas and filling to make more quesadillas. Before serving, sprinkle freshly chopped parsley on top for extra color and taste. You can find the full recipe for this delightful dish in the section above. To cook the perfect quesadilla, aim for medium heat. This helps the tortilla brown evenly. If the heat is too high, the outside may burn while the inside stays cold. Flipping can be tricky. Use a large spatula to support the quesadilla fully. This way, it won’t break apart mid-flip. Boost flavor by adding spices. Consider a pinch of chili powder for heat. You can also add fresh herbs like basil or oregano for a fresh twist. For an extra kick, try jalapeños or a dash of hot sauce. These ingredients can elevate the taste and add depth to your quesadilla. When serving, pair your quesadilla with dips like salsa or guacamole. These add freshness and balance to the rich filling. For plating, arrange the quesadilla wedges on a bright platter. Garnish with lime wedges and fresh parsley for a pop of color. This adds visual appeal and shows off your culinary skill. You can find the full recipe for this delightful dish in the main article. {{image_4}} You can easily switch the chicken for other proteins. Turkey works well if you want a lighter taste. Shrimp can add a nice seafood twist that many enjoy. For a vegetarian option, use mushrooms and spinach. The mushrooms give a rich flavor, while spinach adds nutrition and color. You can choose between homemade Alfredo or store-bought versions. Homemade sauce lets you control the flavors and ingredients. Store-bought sauce saves time and is often creamy. Additionally, you can try different sauce flavors. Adding herbs or spices to your sauce can make your quesadilla unique. Cheese plays a big role in flavor. Use mozzarella for a classic taste. Cheddar or pepper jack can add a sharp kick. Mixing different cheeses enhances the overall flavor. A blend of mozzarella and cheddar makes a delicious combination. Experiment with your favorite cheeses to find what you love best. After enjoying your Chicken and Mushroom Alfredo Quesadilla, store leftovers safely. First, let them cool down for about 20 minutes. This step is key to keep the quesadillas fresh. Next, place them in airtight containers. A good seal helps prevent drying out. You can keep them in the fridge for up to three days. When it’s time to enjoy your leftovers, reheating correctly makes a big difference. For best results, use a stovetop pan. Heat the pan over medium heat and add a tiny bit of oil. Place the quesadilla in the pan and cook for about three minutes on each side. This method keeps the outside crispy. If you’re in a hurry, a microwave will work too. Just remember, it might make the quesadilla a bit soft. Freezing is a great way to save extra quesadillas for later. Start by letting them cool completely, as heat can cause ice crystals. Wrap each quesadilla tightly in plastic wrap or foil. Then, place them in a freezer bag. This helps avoid freezer burn. For best taste and texture, eat them within two months. To thaw, simply take them out of the freezer and let them sit in the fridge overnight. This way, they will be ready to reheat and enjoy! To heat tortillas, I recommend using a dry skillet over medium heat. Place the tortilla in the skillet for about 30 seconds. Flip it and heat for another 30 seconds. This method keeps the tortilla soft but not soggy. You can also use the microwave. Wrap the tortillas in a damp paper towel and heat for 15 seconds. This method is quick but may make them a bit softer. Yes, you can prep the filling ahead of time. Store the chicken and mushroom mixture in the fridge for up to two days. When ready, assemble and cook the quesadilla. If you cook them in advance, let them cool, then store in airtight containers. They last in the fridge for about three days. Reheat them in a skillet for the best texture. You can use gluten-free tortillas instead of regular flour tortillas. Many brands offer great options made from rice or almond flour. Check the ingredient list to ensure they are gluten-free. Also, make sure your Alfredo sauce is gluten-free. Some store-bought sauces contain gluten. I love serving quesadillas with salsa or guacamole. A fresh salad with lime dressing makes a great side too. You can also add some rice or beans for a heartier meal. These sides balance the creamy quesadilla well. Look for a golden brown color on both sides. The cheese should be melted and gooey inside. When you cut into it, the filling should ooze out just a bit. If the outside is crispy and the inside is warm, you've nailed it! To sum up, this blog post walks you through making Chicken and Mushroom Alfredo Quesadillas. We covered key ingredients like cooked chicken, mushrooms, and rich Alfredo sauce. I shared step-by-step instructions to achieve a golden, crispy finish. You learned helpful tips for better flavor and presentation. Plus, I offered tasty variations and storage tips for leftovers. Remember, cooking is all about creativity and fun. So, don’t hesitate to experiment and make this dish your own. Enjoy your cooking!

Chicken and Mushroom Alfredo Quesadilla Delightful Dish

Are you ready to elevate your quesadilla game? The Chicken and Mushroom Alfredo Quesadilla is a creamy, cheesy delight that

- 2 large flour tortillas - 1 cup cooked chicken breast, shredded - 1 cup shredded mozzarella cheese - 1/2 cup grated Parmesan cheese - 1/2 cup Alfredo sauce - 1/4 cup spinach, chopped (optional) - 1/4 teaspoon garlic powder - 1/4 teaspoon black pepper - Olive oil or cooking spray for frying The ingredients for Chicken and Cheese Quesadilla Alfredo are simple yet flavorful. You need two large flour tortillas to hold everything together. I love using cooked chicken breast since it adds protein and taste. Shredding it makes it mix well with the cheese and sauce. For cheese, I use both mozzarella and Parmesan. The mozzarella melts beautifully, while the Parmesan gives a nice, rich flavor. The Alfredo sauce binds all the ingredients, adding creaminess. If you want a touch of green, add some chopped spinach for extra nutrients. For seasoning, garlic powder and black pepper bring out the flavors without being overpowering. Finally, use olive oil or cooking spray to fry the quesadilla. This ensures it turns golden brown and crispy. You can find the full recipe with detailed instructions and tips to make this dish shine. Enjoy crafting this delightful meal! First, gather your ingredients. In a bowl, combine: - 1 cup cooked chicken breast, shredded - 1 cup shredded mozzarella cheese - 1/2 cup grated Parmesan cheese - 1/2 cup Alfredo sauce - 1/4 cup spinach, chopped (optional) - 1/4 teaspoon garlic powder - 1/4 teaspoon black pepper Mix these well. Ensure that the chicken and cheeses are fully coated with the sauce. This mix will be rich and creamy. Next, preheat a skillet over medium heat. Lightly drizzle with olive oil or use cooking spray. This step helps prevent sticking. Take one large tortilla and place it in the skillet. Spoon half of the chicken and cheese mixture onto the tortilla. Spread it evenly across the surface. Carefully place the second tortilla on top. Press down gently to secure the filling. Cook for about 3-4 minutes until the bottom is golden brown and crispy. Using a spatula, flip the quesadilla to the other side. Cook for another 3-4 minutes. You want both sides to be golden brown and the cheese to melt nicely. Once done, remove it from the skillet and let it cool for a minute. Slice it into wedges for easy serving. Serve the quesadilla warm. You can add extra Alfredo sauce on the side for dipping. This adds more flavor and creaminess. For a fun touch, present the quesadilla wedges on a colorful plate. Consider adding a sprinkle of chopped parsley or some fresh salsa for extra color and taste. Enjoy your meal! To get a great crisp, you need the right heat. I recommend cooking on medium heat. This way, the quesadilla cooks evenly. Cook each side for about 3-4 minutes. You want a golden brown color. If it’s too dark, lower the heat a bit. To avoid sticking, use a non-stick skillet. A light drizzle of olive oil or cooking spray helps too. Make sure to coat the pan before adding your tortilla. This small step makes a big difference. You can make your quesadilla even tastier with extra seasonings. Consider adding a dash of chili powder for some heat. A pinch of cumin adds a nice depth too. Try a sprinkle of smoked paprika for a smoky twist. Customizing the filling is fun! You can add bell peppers or mushrooms. If you love spice, throw in some jalapeños. For a fresh taste, add more chopped spinach or even some diced tomatoes. Make it your own! For the full recipe, check out the details above. {{image_4}} You can switch the chicken for shrimp or beef in this quesadilla. Shrimp adds a nice seafood twist. Simply cook the shrimp until pink and tender. For beef, ground beef or shredded beef works well. Season the meat with spices to enhance the flavor. These alternatives bring a new taste to the dish and keep it exciting. If you want a meatless quesadilla, use beans or mushrooms. Black beans or refried beans are great for protein. Mushrooms add a savory, earthy flavor. You can also include veggies like bell peppers and zucchini. Just sauté them first to soften. This makes a tasty and colorful quesadilla. Cheese is key to a great quesadilla. While mozzarella and Parmesan are classic, feel free to try other cheeses. Cheddar gives a sharp taste, while pepper jack adds spice. You can mix different cheeses for a flavor boost. Experimenting with cheese can change the whole experience of this dish. Check out the Full Recipe to explore these variations and more! To keep your quesadilla wedges fresh, place them in an airtight container. You can store them in the fridge for up to three days. Make sure they cool down before sealing. For reheating, use a skillet over medium heat. This method helps keep the quesadilla crispy. You can also use a microwave, but it may make the quesadilla soft. If you want to save quesadillas for later, freezing works well. Wrap each wedge tightly in plastic wrap. Then, place them in a freezer bag. This keeps them safe from freezer burn. They can stay good in the freezer for up to two months. When ready to eat, thaw in the fridge overnight. Then, heat them in a skillet until warm and crispy. This way, you can enjoy your Chicken and Cheese Quesadilla Alfredo anytime! For the full recipe, check above. Yes, you can use homemade Alfredo sauce. Making your own sauce is easy and fun. Here are some tips: - Use butter, heavy cream, and garlic for a rich flavor. - Add grated Parmesan cheese for creaminess. - Stir until the sauce is smooth and warm. - Adjust seasoning with salt and pepper to taste. These quesadillas pair well with many sides. Some recommended options include: - Fresh salsa for a zesty kick. - Guacamole for a creamy touch. - A simple green salad for crunch. - Sour cream to balance flavors. You can easily make this dish gluten-free. Here’s how: - Use gluten-free tortillas, available at most stores. - Check labels for any hidden gluten in sauces. - Make sure all other ingredients are gluten-free. This way, you can enjoy the quesadilla without worry! You learned how to make a tasty Chicken and Cheese Quesadilla with Alfredo sauce. We discussed the main ingredients, seasonings, and the steps to cook it perfectly. Tips for crispiness and flavor helped make it even better. You saw fun variations like using different proteins and cheeses. Lastly, we covered how to store and reheat leftovers. Now, you can enjoy this dish any time!

Chicken and Cheese Quesadilla Alfredo Delightful Meal

Are you craving a tasty twist on a classic dish? Look no further! My Chicken and Cheese Quesadilla Alfredo combines

- 2 cups cooked chicken, shredded - 1 cup fresh broccoli florets, steamed and finely chopped - 1 cup Alfredo sauce (store-bought or homemade) - 2 cups shredded mozzarella cheese - 4 large flour tortillas - 1 tablespoon olive oil - 1 teaspoon garlic powder - 1 teaspoon onion powder - Salt and pepper to taste - Fresh parsley, chopped (for garnish) For this Chicken and Broccoli Alfredo Quesadilla, you will need simple yet tasty ingredients. First, gather your main ingredients. Cooked chicken provides protein and flavor. Broccoli adds a nice crunch and nutrition. Alfredo sauce brings creaminess to the mix. Next, you need some extra components. Mozzarella cheese melts beautifully and makes everything cheesy. Flour tortillas hold it all together and create that quesadilla shape. A little olive oil helps achieve a golden crust. Finally, don’t forget the seasonings. Garlic powder and onion powder add depth to your filling. Salt and pepper can bring out all the flavors. Use fresh parsley on top for a pop of color and taste. You can find the complete cooking process in the Full Recipe. This setup ensures each bite is delicious and satisfying. - Combine the chicken, broccoli, Alfredo sauce, and seasonings in a bowl. - Mix well until everything is coated evenly. - Heat a skillet and add olive oil. - Place one tortilla in the skillet. Layer half of the chicken and broccoli mixture on it. - Sprinkle one cup of shredded mozzarella cheese on top. - Place another tortilla on top and press down gently. - Cook for about 3-4 minutes until golden brown. Then, flip it over carefully. - Cook for another 3-4 minutes until both sides are crispy. - Slice the quesadilla into wedges. Serve warm and enjoy! For the full recipe, check the details above. To make the best chicken and broccoli Alfredo quesadilla, a non-stick skillet is key. This helps your quesadilla cook evenly without sticking. When you fill your quesadilla, don’t overload it. Too much filling makes flipping hard. Keep it simple for a perfect golden crust. To boost the taste, you can add spices. Red pepper flakes give heat and zing. You can also mix in other veggies like bell peppers or spinach. If you want more protein, try adding shrimp or turkey. Each change can make a new dish that’s just as tasty. Serving your quesadilla can be fun! Pair it with dips like salsa or sour cream for extra flavor. A fresh salad on the side adds crunch and freshness. This makes a complete meal that everyone will enjoy. You can find more ideas in the Full Recipe. {{image_4}} You can switch the chicken for turkey or shrimp. Both options give a nice twist. If you prefer a vegetarian option, try using tofu. Tofu absorbs flavors well and adds protein. Get creative with your sauces! You can use garlic Alfredo or parmesan Alfredo for a new taste. If you want a change, try a white sauce or a simple cheese sauce. Each sauce can add something special to your quesadilla. Think about the tortillas you use. Whole wheat or spinach tortillas add more nutrition. If you need a gluten-free option, choose gluten-free tortillas. They work great and taste delicious too. To keep your Chicken and Broccoli Alfredo Quesadilla fresh, store it in an airtight container. Place it in the refrigerator right after it cools down. It tastes best when you eat it within 3-4 days. This way, you enjoy the flavor and quality without any loss. If you want to save some for later, freezing works great. You can freeze the quesadillas after you cook them. They last up to 2 months in the freezer. To reheat, just take them out and place them directly on a skillet or in the microwave. This makes for a quick meal that tastes just as good as fresh! Yes, try cheddar or a Mexican blend for different flavors. Each cheese brings its own taste. For a milder flavor, use Monterey Jack. If you like stronger flavors, consider blue cheese or feta. Mixing cheeses can also create a nice blend. Use less cheese or incorporate more vegetables for added nutrition. You can add spinach, bell peppers, or zucchini. These veggies boost vitamins and minerals. You can also use a low-fat Alfredo sauce. Swapping the tortillas for whole grain options adds more fiber. Pair with a light salad, guacamole, or a refreshing beverage. A simple green salad adds crunch and freshness. Guacamole adds creaminess, while drinks like iced tea or lemonade complement the flavors. You could also serve it with salsa for a tangy twist. Look for a golden brown color and melted cheese as signs it's ready to serve. The edges should crisp up nicely. When you cut it, the cheese should stretch. If it looks golden and feels firm, it’s time to enjoy! This blog post shared a simple recipe for Chicken and Broccoli Alfredo Quesadillas. We explored key ingredients and step-by-step cooking instructions. I offered tips to enhance flavor and suggested variations to suit your taste. Don’t forget to store leftovers properly and try different cheeses or sauces. You can easily customize this dish for your family's needs. Enjoy crafting these delicious quesadillas, and make them your own with fun twists!

Chicken and Broccoli Alfredo Quesadilla Tasty Recipe

Are you ready to elevate your dinner game with a quick and tasty recipe? The Chicken and Broccoli Alfredo Quesadilla

- 2 cups cooked chicken, shredded - 1 cup cream cheese, softened - 1 cup mozzarella cheese, shredded - 1 cup sharp cheddar cheese, shredded - 8 large flour tortillas - 1 cup Alfredo sauce - 1 teaspoon taco seasoning - Salt and pepper to taste - 1/2 cup green onions, finely chopped - 1/4 cup fresh cilantro, roughly chopped The ingredients for Chicken and Cheese Enchiladas Alfredo Quesadilla create a creamy and cheesy delight. The base is shredded chicken, which gives great flavor and protein. Cream cheese adds richness, while mozzarella and sharp cheddar give wonderful texture and taste. I love using large flour tortillas, as they hold all the filling well. For the sauce, Alfredo adds a creamy touch that ties everything together. The taco seasoning boosts the flavor and makes it pop. For toppings, green onions and cilantro add freshness and color. You can even customize your toppings to fit your taste. Check out the Full Recipe to see how to put this all together! Mixing the Filling To start, grab a large bowl. Combine 2 cups of shredded chicken, 1 cup of softened cream cheese, and 1 cup of Alfredo sauce. Add 1 teaspoon of taco seasoning for a kick. Season with salt and pepper to taste. Mix it all with a fork until smooth. Then, fold in half of the mozzarella and cheddar cheese. This mix will burst with flavor! Assembling the Quesadillas Now, lay one tortilla flat on your counter. Spread about 1/3 cup of the chicken filling over one half. Top it with 1 tablespoon of the remaining mozzarella and cheddar cheese. Carefully fold the tortilla over to make a half-moon. Press the edges to seal. Repeat this with the rest of the tortillas and filling. Cooking the Quesadillas in Skillet Heat 1 tablespoon of olive oil in a skillet over medium heat. Once hot, add your first quesadilla. Cook it for about 3-4 minutes on each side. You want it golden brown and crispy. The cheese inside should melt nicely. Achieving Crispy Texture After cooking, take out the quesadilla and let it rest for a minute on a cutting board. This helps it hold its shape. Then, slice it into wedges. Each wedge should be crispy and filled with cheesy goodness. Garnishing the Quesadillas Before you serve, sprinkle freshly chopped green onions and cilantro on top. This adds color and freshness. It also makes the dish look appealing. Pairing with Sides Serve the quesadilla wedges on a bright platter. Drizzle with extra Alfredo sauce for richness. Pair with salsa or guacamole for dipping. This enhances your meal and makes it fun! For the full recipe, check out the recipe section above. Ensuring Cheese Melts To get that perfect melt, use both mozzarella and sharp cheddar. These cheeses blend well together. When cooking, keep the heat medium. This allows the cheese to melt without burning the tortilla. Best Practices for Tortilla Usage Choose large flour tortillas for this recipe. They hold the filling well and cook evenly. Warm the tortillas slightly before filling. This makes them easier to fold and less likely to crack. Additional Seasoning Ideas Add a pinch of cayenne pepper for some heat. You can also sprinkle in garlic powder or onion powder. These small changes boost the flavor of the chicken and cheese mix. Using Different Cheese Combinations Feel free to experiment with cheese. Pepper jack adds a spicy kick. Gouda brings a smoky flavor. Mixing different cheeses keeps things interesting and fun. Pre-Cooking Chicken Use leftover chicken or rotisserie chicken. This cuts down prep time. Shred the chicken and mix it with the cheese and sauce. It’s quick and easy. Using Store-Bought Alfredo Sauce For a faster meal, grab a jar of Alfredo sauce from the store. It saves time without sacrificing flavor. Just remember to taste it before mixing in other seasonings. For the full recipe, check out the complete instructions above! {{image_4}} Alternative Proteins If you want to switch things up, try using different proteins. Ground turkey or beef work well. You can also use shredded pork for a tasty twist. For a vegetarian option, black beans or mushrooms can add great flavor. Dairy-Free Options For those avoiding dairy, swap cream cheese with a dairy-free version. Look for vegan mozzarella and cheddar cheeses, which melt nicely. You can also use a creamy cashew sauce instead of Alfredo sauce for a rich taste. Enchilada-Style Considerations If you love enchiladas, roll the filling inside the tortillas instead of folding. Place them in a baking dish, cover with Alfredo sauce, and sprinkle more cheese on top. Bake until bubbly and golden for a fun enchilada-style dish. Quesadilla Fusion Ideas Feel free to get creative! Add ingredients like spinach, sun-dried tomatoes, or jalapeños for extra flavor. You can also try different tortillas, like corn or whole wheat, for a unique taste and texture. Scaling for Larger Groups When cooking for a crowd, simply double or triple the recipe. Make sure to have enough tortillas and filling. You can prepare multiple quesadillas at once in a large skillet or a griddle. Mini Quesadilla Versions For a fun appetizer or snack, try making mini quesadillas. Use small tortillas or cut regular ones in half. Fill them with the same mixture, and they’ll be perfect for dipping and sharing. Try the Full Recipe for a delicious meal that your family will love. - Refrigeration Guidelines: After enjoying your Chicken and Cheese Enchiladas Alfredo Quesadilla, let them cool to room temperature. Place leftovers in an airtight container. They will stay fresh in the fridge for up to three days. - Freezing Instructions: For longer storage, wrap each quesadilla tightly in plastic wrap and then in foil. Place them in a freezer-safe bag. They can last up to three months in the freezer. - Best Methods for Reheating: To reheat, use a skillet over medium heat. This method keeps the quesadilla crispy. Cook each side for about 2-3 minutes until heated through. You can also use an oven at 350°F for about 10-15 minutes. - Avoiding Soggy Quesadillas: To prevent sogginess, avoid microwaving directly. If using a microwave, place a paper towel under the quesadilla. This absorbs extra moisture. - How Long They Last in Fridge: When stored properly, these quesadillas last about three days in the fridge. - Signs of Spoilage: Check for any off smells or a change in texture. If the quesadilla feels slimy or has mold, it is best to discard it. Yes, you can prepare the quesadillas in advance. To do this, follow these steps: - Make the filling and assemble the quesadillas as described in the recipe. - Place them in an airtight container, separating layers with parchment paper. - Store them in the fridge for up to 24 hours. - When ready to cook, heat them in a skillet as normal. Preparing them ahead helps save time. This way, you can enjoy a quick meal after a busy day. If you need an alternative to Alfredo sauce, there are many options: - Use a homemade white sauce. Just mix butter, flour, and milk. - Try a creamy ranch dressing for a tangy flavor. - A salsa verde can give a fresh kick. - For a healthier option, use Greek yogurt mixed with herbs. These substitutes can change the taste, so pick one that matches your mood. Absolutely! These quesadillas are great for kids. Here’s how to make them even more appealing: - Use plain cheese if your child loves it. - Cut the quesadillas into fun shapes with cookie cutters. - Serve with a side of salsa or guacamole for dipping. - Let kids help assemble their own quesadilla. Involving kids in making their food can make them excited to eat! This article covered making delicious quesadillas. We explored the main ingredients, like chicken and cheese, and shared tips for perfecting texture. You learned about variations, storage, and reheating methods. Quesadillas are versatile and fun. You can mix and match ingredients for endless flavors. Enjoy your cooking adventure and make it your own!

Chicken and Cheese Enchiladas Alfredo Quesadilla Delight

Are you ready to supercharge your dinner game? Today, we’ll make Chicken and Cheese Enchiladas Alfredo Quesadilla Delight! This dish

To make classic spinach artichoke dip, you need fresh spinach, artichokes, and creamy cheeses. This dip is rich, warm, and perfect for sharing. You can serve it with chips or bread. The full recipe is easy and quick, taking about 40 minutes from start to finish. - 1 cup fresh spinach, chopped - 1 cup artichoke hearts, canned or frozen, drained and chopped - 1 cup cream cheese, softened at room temperature - ½ cup sour cream - ½ cup mayonnaise - 1 cup shredded mozzarella cheese - ½ cup grated Parmesan cheese - 2 cloves garlic, minced - 1 teaspoon onion powder - Salt and black pepper to taste - Optional: Red pepper flakes for a spicy kick You can change some ingredients if you want. For cream cheese, use Greek yogurt for a lighter dip. Instead of mayonnaise, use plain yogurt for less fat. You can add herbs like parsley or basil for fresh flavor. If you like it spicy, add more red pepper flakes. These changes will keep your dip fun and fresh! Start by preheating your oven to 375°F (190°C). This helps the dip bake evenly. In a large bowl, mix together the softened cream cheese, sour cream, and mayonnaise. Use a hand mixer or spatula to blend until smooth. It’s important to get rid of any lumps for a creamy texture. Next, add the minced garlic, onion powder, and a pinch of salt and black pepper. Stir well to combine the flavors. This makes the base tasty. Now, gently fold in the chopped spinach, artichoke hearts, shredded mozzarella, and grated Parmesan cheese. If you want some heat, add red pepper flakes to your taste. Transfer the mixture into a medium-sized baking dish. Spread it out evenly using a spatula. This helps it cook uniformly. Place the dish into your preheated oven. Bake for about 25-30 minutes. Look for a golden brown top and bubbly edges. This shows the dip is ready. Allow the dip to cool for 5-10 minutes after baking. This makes it easier to serve. You can serve it warm with tortilla chips, pita bread, or fresh vegetables. To make it look fancy, sprinkle some extra Parmesan cheese or chopped parsley on top. Enjoy this creamy delight! For the full recipe, check out the detailed steps above. To make your dip even creamier, start with softened cream cheese. This helps it mix well. You can also add a bit more sour cream or mayonnaise. If you want a richer taste, consider using full-fat versions. For a twist, mix in a splash of cream or Greek yogurt. This will add a nice texture and flavor. Seasonings can take your dip to the next level. Add garlic powder or a dash of Worcestershire sauce for depth. You may also try using smoked paprika for a unique smoky taste. Fresh herbs like basil or parsley can brighten up the dish too. Don't forget to taste and adjust the salt and pepper as needed. One common mistake is overcooking the dip. Keep an eye on it while baking. You want a golden top, not burnt edges. Another mistake is not mixing well. Make sure all ingredients blend together for even flavor. Lastly, don’t skip the cooling time. Letting it rest for a bit makes it easier to scoop and enjoy. For the full recipe, refer to the above section. {{image_4}} If you like heat, you can spice things up. Add red pepper flakes to the mix. Start with a teaspoon and adjust to your taste. You can also use spicy cheese, like pepper jack, for more kick. The heat pairs well with the creamy dip and makes it exciting. For a rich and creamy twist, try using fontina cheese. This cheese melts beautifully and adds a nutty flavor. Simply replace half of the mozzarella with fontina. The dip will become even more indulgent and delicious. Your guests will love the extra cheesy goodness. You can make a vegan version too! Use cashew cream or tofu instead of cream cheese. Swap sour cream with dairy-free yogurt. For cheese, try nutritional yeast for a cheesy taste. This way, everyone can enjoy a tasty dip without any animal products. Plus, it still tastes amazing! For the full recipe, check the details above. Enjoy making these variations for your next gathering! To keep your spinach artichoke dip fresh, store it in an airtight container. Make sure to seal it well. Place the container in the fridge. It will stay good for 3 to 5 days. When you’re ready to eat, give it a quick stir. You might need to add a little cream or sour cream to refresh the texture. You can freeze this dip for later use. Just put it in a freezer-safe container. Be sure to leave some space at the top for expansion. The dip can last for about 2 months in the freezer. To thaw, move it to the fridge a day before you plan to use it. This helps keep the flavor and texture nice. When it's time to reheat, there are a few easy methods. You can use the oven, microwave, or stovetop. If using the oven, preheat it to 350°F (175°C). Bake for about 15-20 minutes until it's warm. If using a microwave, heat it in short bursts, stirring in between. This helps it heat evenly. On the stovetop, use low heat and stir often. Enjoy your creamy dip warm! Yes, you can. Make the dip a day before. Store it in the fridge. When ready to serve, just bake it. This saves time when you have guests. It also allows the flavors to blend well. You have many great options to serve. Here’s a list: - Tortilla chips - Pita bread - Sliced veggies like carrots and celery - Crackers - Breadsticks These choices add fun textures. They also let everyone enjoy dipping. You can use fresh artichokes. However, they need more prep time. Cook them first, then chop them up. Canned artichokes are easier and faster. But fresh ones can add a nice taste. Choose what works best for you. For the full recipe, check out the Full Recipe section! This blog post covered the essentials for making Spinach Artichoke Dip. We reviewed the ingredients, step-by-step instructions, and tips to enhance your dip. Don’t forget the variations to suit your taste or diet. Proper storage helps keep leftovers fresh. You can easily prepare this dish for any occasion. Enjoy your cooking, and have fun testing your own twists on this classic recipe!

Classic Spinach Artichoke Dip Tasty and Simple Recipe

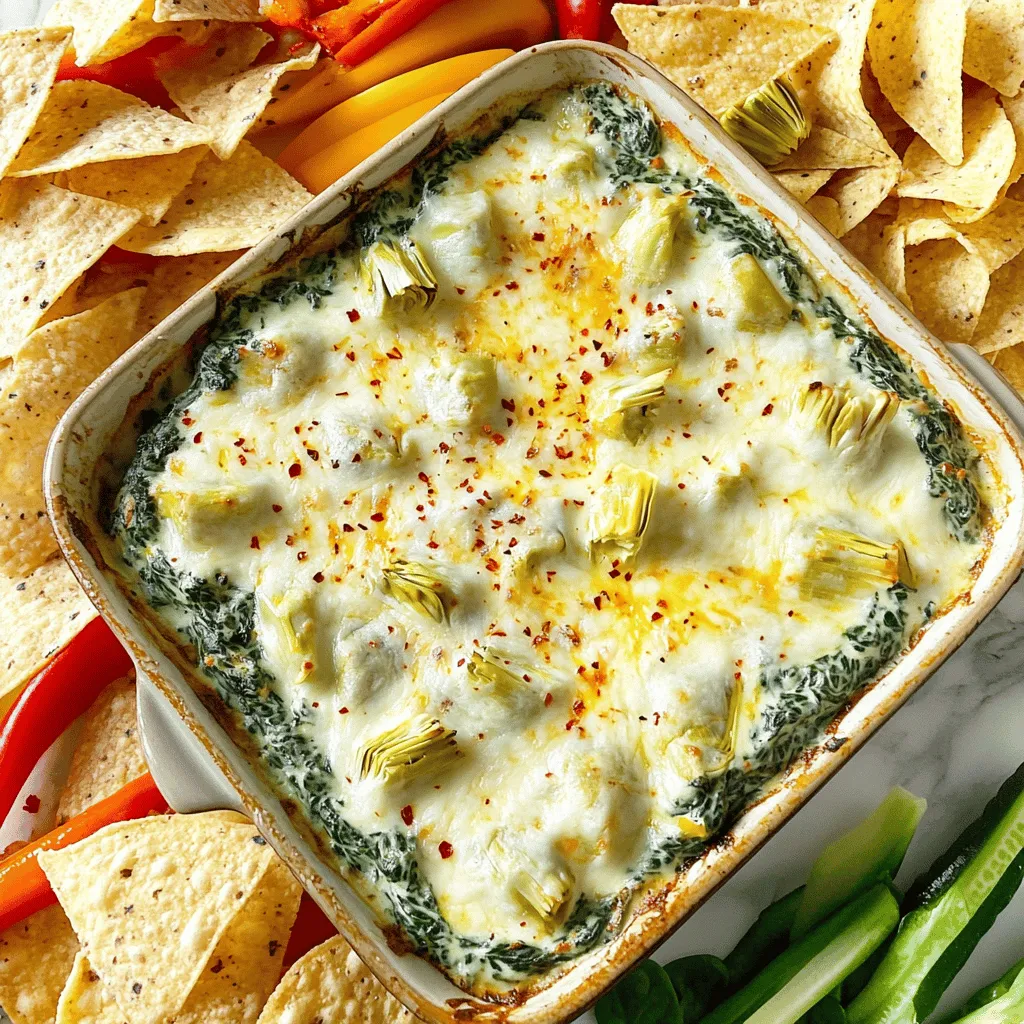
If you’re looking for a crowd-pleasing appetizer that’s easy to make, you’ve found it! This classic spinach artichoke dip is

To make a tasty No Bake Lemon Icebox Pie, gather these key ingredients: - 1 ½ cups graham cracker crumbs - ½ cup unsalted butter, melted - 1 cup sweetened condensed milk - ½ cup freshly squeezed lemon juice - 2 tablespoons lemon zest (preferably from organic lemons) - 1 teaspoon pure vanilla extract - 1 cup heavy whipping cream - 2 tablespoons powdered sugar - Fresh mint leaves and lemon slices for garnish (optional) You can swap some ingredients for a different taste or dietary needs: - For graham cracker crumbs, use crushed cookies or digestive biscuits. - Instead of sweetened condensed milk, try coconut cream or a vegan option. - If you want less sweetness, use Greek yogurt mixed with honey. - Use dairy-free whipping cream for a vegan version of this pie. Selecting the best ingredients makes your pie shine. Here are some tips: - Choose fresh lemons for the best juice and zest. Organic lemons offer better flavor. - Look for high-quality sweetened condensed milk; it should be thick and creamy. - Use unsalted butter for better control of the pie’s overall taste. - For the whipping cream, select heavy cream with a high fat content for fluffiness. Using fresh, quality ingredients enhances the flavor and texture. Dive into the full recipe and enjoy this refreshing dessert! Start with the crust. In a medium bowl, mix 1 ½ cups of graham cracker crumbs with ½ cup of melted unsalted butter. Stir until the crumbs look like wet sand. This step is key for a good crust. Next, press the crumb mixture firmly into a 9-inch pie pan. Make sure it covers the bottom and sides evenly. This helps the filling stay in place. Once done, chill the crust in the fridge while you make the filling. Now, let’s make the lemon filling. In a large bowl, whisk together 1 cup of sweetened condensed milk, ½ cup of freshly squeezed lemon juice, 2 tablespoons of lemon zest, and 1 teaspoon of pure vanilla extract. Whisk until the mixture is smooth and all the ingredients blend well. This filling has a bright and tangy flavor that shines through. Next, we need to make the whipped cream. In a separate bowl, use an electric mixer to whip 1 cup of heavy cream with 2 tablespoons of powdered sugar. Beat until stiff peaks form. This means the cream is fluffy and light. Now, carefully fold the whipped cream into the lemon mixture in batches. Use gentle motions so you don’t lose the airiness. Once combined, pour the filling into your chilled crust. Smooth the top with a spatula. Cover with plastic wrap and refrigerate for at least 4 hours. The pie needs to set firm. For the full recipe, check out the details above. To get a fluffy filling, whip the heavy cream until you see stiff peaks. This means the cream holds its shape well. After that, gently fold it into the lemon mix. Use a spatula and make slow motions to keep the air in. This step is key for a light, airy texture. If you mix too hard, the filling could become dense. One common mistake is not chilling the crust enough. If the crust is warm, it will not hold up. Another mistake is overmixing the filling after adding the whipped cream. This will make it flat and heavy. Lastly, always use fresh lemon juice. Bottled juice lacks the zing that fresh juice brings to the pie. Serve your No Bake Lemon Icebox Pie cold for the best taste. Top each slice with fresh mint leaves and a lemon slice for a pop of color. You can also pair it with a dollop of extra whipped cream on the side. This adds a creamy touch that balances the tartness of the lemon. For more ideas, check out the Full Recipe for fun variations! {{image_4}} You can change the flavor of your icebox pie easily. Try using lime juice instead of lemon juice. This gives a nice twist. You can also use orange juice for a sweeter taste. Blend in some berries, like strawberries or blueberries, for a fruity kick. Just swap out some lemon juice for berry puree. Each option offers a fresh take on the classic pie. If you want a lighter version, use low-fat cream cheese instead of heavy cream. You can also replace sweetened condensed milk with coconut milk for a dairy-free option. For the crust, use almond flour instead of graham crackers. This adds a nutty taste and makes it gluten-free. Choose organic ingredients whenever possible for better flavor and nutrition. Mini icebox pies are fun and easy to make. Use a muffin tin or small ramekins for individual servings. Press the crust mixture into each cup, and fill with the lemon mixture. Adjust the chilling time to about 2 hours for these smaller pies. They are perfect for parties or picnics. Garnish each mini pie with a small slice of lemon or a sprig of mint. You can find the full recipe [here](#). To keep your No Bake Lemon Icebox Pie fresh, cover it tightly. Use plastic wrap or a lid to seal it well. Store it in the fridge. This keeps the pie cool and tasty. Make sure to place it on a flat shelf. This helps avoid any spills or mess. You can freeze this pie for later enjoyment. First, wrap it in plastic wrap. After that, place it in a freezer-safe container. This helps prevent freezer burn. When you want to eat it, thaw it in the fridge overnight. Never refreeze once it has thawed. The texture might change, and that’s not what we want! The pie can last up to five days in the fridge. Check for any signs of spoilage, like an off smell or color change. If it looks or smells strange, it’s best to toss it. For frozen pie, use it within three months for the best taste. Mark your container with the date. This way, you will know when to enjoy your refreshing treat! For the complete recipe, check out the Full Recipe section. Yes, you can use bottled lemon juice. However, fresh juice has a brighter taste. The flavor of fresh lemons makes the pie more lively. If you choose bottled juice, pick a good quality one. Refrigerate the pie for at least 4 hours. This time helps the filling set well. If you can, leave it in the fridge overnight. This extra time improves the flavor and texture. Yes, you can make this pie in advance. It holds well in the fridge for up to 2 days. Just cover it tightly with plastic wrap. This keeps it fresh and tasty for your guests. If you don’t have graham crackers, use digestive biscuits. They work great as a crust too. You can also try shortbread cookies for a richer flavor. Crush them the same way as graham crackers. The filling is set when it feels firm to the touch. Give it a gentle poke with your finger. If it springs back, it’s ready! The chilled pie should slice neatly without falling apart. For the full recipe, check out the entire guide. This blog post gives you all you need for a great icebox pie. You learned about key ingredients, simple steps, and tips for the best results. We covered fun variations and how to store your pie properly. Remember, quality matters when choosing ingredients. Follow these steps, and avoid common mistakes for a tasty treat. Enjoy your fun baking journey, and share your pie with friends. Whether you keep it classic or try something new, you can’t go wrong!

No Bake Lemon Icebox Pie Refreshing Summer Dessert

Looking for the perfect summer treat? Let me introduce you to my No Bake Lemon Icebox Pie! This cool and

- 8 oz spaghetti or fettuccine - 2 cups cooked chicken, shredded - 1 cup sliced mushrooms - 1 cup frozen peas - 1 small onion, finely chopped - 3 cloves garlic, minced - 2 cups chicken broth - 1 cup heavy cream - 1 cup grated Parmesan cheese, divided - 2 tablespoons olive oil - 1 teaspoon dried thyme - Salt and black pepper to taste - Fresh parsley for garnish (optional) Gathering these ingredients is simple. I like to keep my kitchen stocked. This makes cooking easier. For the pasta, you can choose spaghetti or fettuccine. Both work well. The cooked chicken needs to be shredded. You can use leftovers or rotisserie chicken. Mushrooms add a nice texture. I prefer fresh mushrooms, but canned works in a pinch. Frozen peas save time, and they add a pop of color. A small onion enhances the flavor. Garlic gives it that amazing aroma. You need chicken broth for the sauce. It adds depth and richness. Heavy cream creates a smooth texture. Don't forget the Parmesan cheese! It melts beautifully. Olive oil is essential for sautéing. Thyme offers a lovely herbal note. Lastly, season with salt and pepper to taste. Fresh parsley adds a nice touch, but it’s optional. This list covers everything you need for our easy and tasty chicken tetrazzini. You can find the [Full Recipe] for detailed steps on how to bring it all together! - Preheat oven to 350°F (175°C). - Cook spaghetti or fettuccine according to package directions. To start, you need to set your oven. Preheating it helps cook the dish evenly. While the oven warms up, focus on the pasta. Cook it just until it’s firm, or al dente. This keeps the pasta from getting mushy later. - Sauté onion and garlic in olive oil. - Add mushrooms and cook until tender. Next, grab a large skillet. Heat olive oil over medium heat. Toss in the chopped onion and minced garlic. Sauté them for about five minutes. You want the onion to look clear and smell great. Now, add the sliced mushrooms. Stir them in and cook for another three to four minutes until they are soft. - Combine chicken broth and heavy cream. - Incorporate shredded chicken and frozen peas. For the sauce, pour in chicken broth and heavy cream. Stir everything together. Add shredded chicken and frozen peas to the mix. Cook it for two to three more minutes. This helps warm everything through and blends the flavors nicely. - Mix pasta with the creamy chicken mixture. - Spread mixture in a greased baking dish and sprinkle with Parmesan. In a big bowl, combine the pasta with the creamy chicken mixture. Stir well to coat all the pasta. Next, transfer this tasty mix into a greased baking dish. Make sure it spreads out evenly. Finish by sprinkling the top with Parmesan cheese for that delicious crust. - Bake for 25-30 minutes until golden brown and bubbly. - Allow to cool before serving. Place your dish in the preheated oven. Bake it for 25 to 30 minutes. You want to see a golden brown crust and bubbling edges. Once it’s done, let it cool for a few minutes. This makes serving easier and keeps little hands safe. Enjoy your Easy Chicken Tetrazzini! For the full recipe, check the earlier sections. - Ensure pasta is cooked al dente for the best texture. This keeps it firm and prevents mushiness. - Use freshly shredded chicken for added flavor. It enhances the overall dish and tastes better than pre-packaged chicken. - Pair with a crisp salad or garlic bread. This adds crunch and balances the creaminess of the tetrazzini. - Consider adding a side of steamed vegetables. Bright greens like broccoli or green beans add color and nutrition. - Garnish with fresh parsley before serving. This adds a pop of color and freshness to the dish. - Serve in individual bowls for a family-style presentation. It makes each serving feel special and welcoming. For a full recipe, check out the Creamy Chicken Tetrazzini Delight. {{image_4}} You can easily change the main protein in your dish. Instead of chicken, try turkey or ham. Both give a nice twist to the classic taste. For the creaminess, consider using half-and-half. This lighter option still keeps your dish rich and smooth. Want to boost nutrition? Toss in some spinach or bell peppers. They add color and vitamins. You can also try different mushrooms. Shiitake or cremini mushrooms bring unique flavors. Experiment to find what you enjoy most. For a touch of brightness, add a little lemon juice. It lifts the flavors and adds a fresh taste. You can also use herbs like rosemary or basil. These herbs give a nice depth to your dish. Each variation can make your Easy Chicken Tetrazzini feel new and exciting. For the [Full Recipe], check the main section! To keep your Easy Chicken Tetrazzini fresh, store it in an airtight container in the refrigerator. This keeps moisture in and prevents it from drying out. It tastes best when you eat it within 3-4 days. If you wait too long, the flavors might fade. If you want to save some for later, freeze it! Use freezer-safe containers to store the dish for up to 3 months. This way, you can enjoy it during busy days. When you’re ready to eat, thaw it overnight in the refrigerator. This helps it warm up evenly when reheating. For the best taste, reheat your Chicken Tetrazzini in the oven. This gives it a crispy top that adds texture. If you’re in a hurry, the microwave works too. Just remember to add a splash of milk if it seems dry. This keeps it creamy and delicious. Enjoy your tasty comfort food! To make Easy Chicken Tetrazzini healthier, you can use low-fat ingredients. For example, swap heavy cream for low-fat milk or a plant-based cream. You can also add more vegetables. Try mixing in spinach, bell peppers, or zucchini for extra color and nutrients. Yes, you can use uncooked chicken in this dish. However, it will take longer to cook. If you choose this option, make sure to cut the chicken into smaller pieces. This helps it cook evenly. Alternatively, you can pre-cook the chicken by boiling or baking it first. Chicken Tetrazzini pairs well with garlic bread, a fresh salad, or steamed vegetables. These sides add flavor and balance to your meal. A crisp green salad with a light vinaigrette works wonders to cut the creaminess of the Tetrazzini. Absolutely! You can assemble the dish and refrigerate it before baking. Just cover the baking dish tightly with foil. When you are ready to serve, bake it straight from the fridge. It may need a few extra minutes, so keep an eye on it. Yes, you can make Chicken Tetrazzini gluten-free. Simply swap regular pasta for gluten-free pasta. Many brands offer great options that taste just as good. This way, you can enjoy a tasty meal without worrying about gluten. For the Full Recipe, check the detailed steps above. In this blog post, we covered how to make a tasty chicken tetrazzini. You learned about the main and liquid ingredients, such as chicken, pasta, and cream. I shared tips for cooking, serving, and storing this dish. You can even tweak the recipe with different veggies or flavors. Overall, chicken tetrazzini is an easy and delicious meal. It's perfect for any night. Enjoy making it your own!

Easy Chicken Tetrazzini Tasty Comfort Food Recipe

Craving a warm, cozy meal that’s easy to whip up? You’ve found it! This Easy Chicken Tetrazzini recipe is the

- 4 chicken thighs, bone-in and skin-on Using bone-in and skin-on chicken thighs gives you flavor and moisture. The bone adds depth, while the skin crisps up nicely during roasting. This combination makes the meat juicy and tender. - 4 cloves garlic, finely minced - 2 lemons (zest and juice) - 3 tablespoons extra virgin olive oil - 2 teaspoons fresh thyme leaves, picked - 1 teaspoon smoked paprika - Salt and pepper, to taste The marinade is simple yet packed with flavor. Garlic gives a punch, while lemons add brightness. Olive oil keeps everything moist and helps the skin crisp. Fresh thyme brings a lovely aroma, and smoked paprika adds warmth. Don’t forget salt and pepper; they enhance all the flavors. - Fresh parsley, chopped A sprinkle of fresh parsley adds a burst of color and a fresh taste. It’s a great way to finish your dish and make it look beautiful. For the full recipe, you can refer to the entire cooking process for more detailed steps. Start by preheating your oven to 425°F (220°C). This temperature is perfect for roasting chicken thighs. A hot oven helps the skin get crispy while keeping the meat juicy. Next, let’s make the marinade. In a small bowl, mix together: - 4 cloves garlic, finely minced - Zest from 2 lemons - Juice from 2 lemons - 3 tablespoons extra virgin olive oil - 2 teaspoons fresh thyme leaves - 1 teaspoon smoked paprika - Salt and pepper, to taste Stir this mixture well. The smell will be amazing! For the best flavor, let the chicken marinate. You can leave it at room temperature for 30 minutes or in the fridge for up to 2 hours. Now, let's roast the chicken. Place the marinated thighs in a baking dish, skin-side up. This way, the skin will get crispy as it cooks. Put the dish in your preheated oven. Roast the chicken for 35-40 minutes. Use a meat thermometer to check for doneness. The internal temperature should reach 165°F (74°C) in the thickest part of the thigh. For extra crispiness, broil the chicken for the last 2-3 minutes. Just keep a close watch to avoid burning. Once cooked, take the chicken out of the oven and let it rest for 5-10 minutes. This step helps make the chicken tender and juicy. Garnish your dish with fresh parsley and drizzle the pan juices over the top. Enjoy the full recipe for Lemon Garlic Roasted Chicken Thighs! For the best flavor, marinate your chicken thighs for at least 30 minutes. If you have time, refrigerate them for up to 2 hours. This longer marination will help the chicken soak up the bright lemon and bold garlic flavors. To achieve crispy skin, start with high heat. Preheat your oven to 425°F (220°C). Place the chicken thighs skin-side up in the baking dish. This position allows the skin to crisp up nicely while cooking. You can even broil the chicken for the last few minutes to add extra crunch. Using a meat thermometer is key. Check the thickest part of the thigh. The internal temperature should reach 165°F (74°C). This ensures your chicken is safe to eat and juicy. Always trust your thermometer for perfect results. For the complete recipe, check the [Full Recipe]. {{image_4}} You can change the flavor by using different herbs. Thyme works well, but rosemary adds a nice twist. Simply swap thyme for fresh rosemary in the recipe for a more earthy taste. You may also try oregano or basil for a Mediterranean flair. Mixing herbs can make your dish unique. You don’t have to roast in the oven. An air fryer gives you crispy skin and juicy meat in less time. Set the air fryer to 380°F (193°C) and cook for about 20-25 minutes. You can also grill the chicken for a smoky flavor. Just cook over medium heat, turning until they reach 165°F (74°C). Pair this dish with roasted vegetables or a light salad. The bright lemon flavor works well with greens like arugula or spinach. You might also serve it with a creamy garlic sauce or a zesty chimichurri. Each bite will be a burst of flavor. For a full experience, check the Full Recipe for more ideas. To keep your Lemon Garlic Roasted Chicken Thighs fresh, store them in an airtight container. Place the chicken in the fridge within two hours of cooking. Always cover it well to prevent drying out. The chicken lasts up to four days in the fridge. For best results, keep the skin on until serving to retain moisture and crispiness. If you want to save leftovers, freezing is a great option. Wrap each chicken thigh tightly in plastic wrap, then place them in a freezer bag. Remove as much air as possible. Label the bag with the date. Frozen chicken thighs can last up to three months. When you’re ready to eat, thaw them in the fridge overnight for best texture. To reheat, the oven is your best friend. Preheat your oven to 350°F (175°C). Place the chicken thighs on a baking sheet. Cover them with foil to keep moisture in. Heat for about 20-25 minutes or until warm. You can also microwave them, but this may make the skin less crispy. For the best flavor and texture, stick to the oven method. Enjoy your Lemon Garlic Roasted Chicken Thighs even after the first meal! For the full recipe, check out the [Full Recipe]. You can pair this dish with many sides. Some great options are: - Roasted vegetables like carrots and potatoes. - A fresh green salad with light dressing. - Steamed broccoli or green beans for crunch. - Garlic bread to soak up the tasty juices. These sides balance the flavors of the chicken. They also add color to your plate. Yes, you can use boneless chicken thighs. They cook faster than bone-in thighs. - Expect to reduce your cooking time by about 10-15 minutes. - Boneless thighs may not get as crispy as those with skin. - They can be just as juicy and flavorful if cooked right. Check a few signs to know your chicken is ready: - The skin should be golden brown and crisp. - Juices should run clear when you cut into the meat. - Use a meat thermometer to check the internal temperature. It should be at least 165°F (74°C). These signs ensure your chicken is safe and tasty to eat. In this post, we explored how to make tasty lemon garlic roasted chicken thighs. You learned about key ingredients like bone-in chicken, fresh herbs, and spices. I shared a step-by-step guide, from marinating to roasting. Tips helped you get that crispy skin. You also discovered variations, storage tips, and answers to common questions. Perfecting this dish can really elevate your meal. Enjoy your cooking and savor every bite!

Lemon Garlic Roasted Chicken Thighs Flavorful Dish

Looking to impress at dinner with a burst of flavor? You’re in the right place. Lemon Garlic Roasted Chicken Thighs

Older posts
Newer posts
← Previous Page1 … Page18 Page19 Page20 … Page60 Next →

dsad

© 2025 eataroundit • Built with GeneratePress

Our Policies

  • Copyright Policy
  • Cookie Policy
  • GDPR Policy
  • Privacy Policy
  • Disclaimer
  • Terms Of Use

More Information

  • Home
  • About
  • Contact
  • Appetizers
  • Dessert
  • Dinner
  • Drinks
©2025, eataroundit About Back To Top