Skip to content
DisclaimerTerms Of UseGDPR PolicyCookie Policy

eataroundit

  • Home
  • Drinks
  • Appetizers
  • Dinner
  • Dessert
  • About
  • Contact
  • Privacy Policy
DisclaimerTerms Of UseGDPR PolicyCookie Policy

Hannah

- Sweet potatoes, black beans, kidney beans - Diced tomatoes, vegetable broth - Onion, garlic, bell pepper - Spices: chili powder, cumin, smoked paprika, cayenne pepper - Olive oil, sea salt, black pepper - Garnish: fresh cilantro To make Vegan Sweet Potato Chili, you need simple and fresh ingredients. Sweet potatoes are the star, giving a sweet and hearty base. Black beans and kidney beans add protein and fiber. Diced tomatoes bring acidity and juiciness, while vegetable broth enhances flavor. You’ll want to finely chop an onion and mince garlic for depth. A bell pepper adds color and crunch. The spices are key: chili powder for warmth, cumin for earthiness, smoked paprika for richness, and cayenne pepper for heat. Use extra virgin olive oil to sauté the veggies. Sea salt and black pepper round out the dish. Finally, fresh cilantro gives a bright finish. This recipe is perfect for a cozy meal. - Calories per serving: Approximately 350 - Protein: 15 grams - Fat: 7 grams - Carbohydrates: 60 grams - Fiber content: 15 grams - Vitamins: High in vitamin A and C This chili is not just tasty; it's also good for you. Each serving has about 350 calories, making it a filling option. You get protein from the beans, which helps build muscle. Sweet potatoes provide vitamins and fiber, supporting digestion. - Gluten-free options: All ingredients are naturally gluten-free. - Possible ingredient substitutes: Use any beans you prefer. Swap sweet potatoes for butternut squash, if desired. - Adjustments for low-sodium diets: Use low-sodium vegetable broth and skip added salt. You can customize this chili to fit your diet. If you need gluten-free meals, you’re in luck! This recipe uses only gluten-free items. If you want to change the flavor, try different beans or squash. For low-sodium diets, just swap in low-sodium broth. For the full recipe, visit the [Full Recipe]. Enjoy making this hearty meal! Start by prepping your veggies. Peel the sweet potatoes and chop them into 1-inch cubes. Next, finely chop the onion and bell pepper. When using a knife, keep your fingers safe. Curl your fingertips in while holding the veggie. This helps to avoid cuts and makes chopping easier. Now, let’s cook! Heat olive oil in a large pot over medium heat. Add the chopped onion and bell pepper. Sauté them until they soften. This usually takes about five minutes. Next, add minced garlic and stir for one minute. You want it to smell great! Then, add the diced sweet potatoes to the pot. Stir well and cook for 5-7 minutes. This helps them start to soften. Now, it’s time to add the spices. Sprinkle in chili powder, ground cumin, smoked paprika, and cayenne pepper. Stir everything to coat the sweet potatoes well. Pour in the diced tomatoes and vegetable broth. Bring the mixture to a quick boil. Once it boils, lower the heat to a gentle simmer. Cover the pot and let it simmer for 20-25 minutes. This will make the sweet potatoes fork-tender. After simmering, stir in the black beans and kidney beans. Let the chili simmer uncovered for another 10 minutes. This heats everything through. Taste your chili and adjust the seasonings if needed. Finally, serve it hot and garnish with fresh cilantro. Enjoy your hearty and flavorful meal! For the full recipe, check out the details above. To make your vegan sweet potato chili shine, start with spice levels. You can add more cayenne for heat or less if you prefer mild. Taste as you cook. This helps you find the right balance. Herbs can enhance the taste too. Fresh cilantro adds brightness. You can also try adding dried oregano for a warm flavor. Just remember, add herbs near the end of cooking to keep their taste fresh. Simmering is key for great chili. Bring your chili to a boil first, then reduce the heat. Cover the pot and let it simmer. This allows the flavors to blend well. Simmer for about 20-25 minutes to get the sweet potatoes just right. To avoid mushy sweet potatoes, cut them into 1-inch cubes. This size cooks evenly. Stir gently in the pot to prevent them from breaking apart. Serving your chili in bright bowls makes it pop. Lime wedges add a zesty touch. A sprinkle of fresh cilantro on top brings color and flavor. Toppings can elevate your meal. Try avocado slices for creaminess or crushed tortilla chips for crunch. You can also serve the chili with warm cornbread or over fluffy rice for a filling meal. For the full recipe, check out the complete guide. {{image_4}} You can easily change this vegan sweet potato chili to suit your taste. Adding other vegetables makes it fun and colorful. Try adding chopped carrots or corn for sweetness and crunch. You can also toss in zucchini or spinach for more greens. For protein, consider adding lentils or quinoa. Lentils cook fast and add a hearty texture. Quinoa is a great source of protein and gives a nice bite. Both options make the chili even more filling. Change the flavor of your chili by adding different ingredients. For a Mexican twist, squeeze some lime juice and top with avocado. This adds a fresh taste and creamy texture. If you want an Italian flair, mix in fresh basil and oregano. These herbs give the chili a warm and earthy feel. You can also add a splash of balsamic vinegar for a tangy kick. There are many ways to serve this chili. One tasty option is to use it as a topping for baked potatoes. The fluffy potato pairs well with the chili's richness. Another idea is to serve it over rice or quinoa. This adds another layer of flavor and makes your meal heartier. You can even serve it in a bowl with crunchy tortilla chips on the side for a fun twist. For a full experience, check out the [Full Recipe]. To store leftover chili, let it cool first. Use an airtight container. Place it in the fridge. It will stay fresh for about five days. If you want to store it longer, freeze it. For freezing, use freezer-safe containers. Leave some space for expansion. Seal tightly to avoid freezer burn. When you are ready to eat, reheat the chili gently. Use a pot on the stove or a microwave. If using the stove, heat on low. Stir it often to avoid sticking. For the microwave, place it in a bowl. Heat in short intervals, stirring in between. Aim for a temperature of 165°F (74°C) for safe eating. Chili lasts about five days in the fridge. If you freeze it, it can last up to three months. Check for signs of spoilage. If it smells sour or looks strange, throw it out. Always trust your senses when it comes to food safety. Enjoy your Vegan Sweet Potato Chili fresh and delicious! It takes about one hour to make this chili. You will spend 15 minutes prepping and 45 minutes cooking. This time includes sautéing veggies and simmering the chili. Yes, making this chili ahead of time is a great idea. You can store it in the fridge for up to five days. The flavors will deepen and become even better when you let it sit. You can also freeze it for up to three months. Just thaw it overnight in the fridge before reheating. You can serve this chili with many sides. Here are a few ideas: - Cornbread or tortilla chips - A fresh green salad - Avocado slices or guacamole - Rice or quinoa for a hearty meal - Lime wedges to add a zesty kick For more delicious ideas, check out the Full Recipe. This guide covered how to create a delicious Vegan Sweet Potato Chili. We explored essential ingredients, nutritional benefits, and meal prep tips. Remember, you can make this dish your own by adjusting spices or adding different vegetables. Storage and reheating methods ensure your leftovers stay tasty. Enjoy the process of cooking, and don’t hesitate to experiment with flavors. Healthy meals can be simple and fun. You'll impress everyone with your chili creation while fueling your body right.

Vegan Sweet Potato Chili Hearty and Flavorful Meal

Looking for a meal that’s hearty and packed with flavor? Vegan Sweet Potato Chili is a perfect choice! This dish

To make the best Garlic Parmesan Roasted Corn, gather these key items: - 4 ears of fresh corn, husked - 3 tablespoons unsalted butter, melted - 4 cloves garlic, finely minced - 1/2 teaspoon smoked paprika - 1/4 teaspoon cayenne pepper (optional for an extra kick) - 1/2 cup freshly grated Parmesan cheese - 2 tablespoons fresh parsley, finely chopped - Salt and freshly ground black pepper to taste - Lemon wedges, for serving These ingredients create a tasty flavor blend. The corn shines with its sweet and crunchy texture. Garlic adds depth, while Parmesan gives a rich, cheesy taste. You can add a few fun extras to boost the taste: - A squeeze of fresh lime juice for zest - Crushed red pepper flakes for more heat - A sprinkle of chili powder for a smoky twist Feel free to mix and match these options. They can elevate the dish and make it your own! Using the right tools makes cooking easier. Here are some must-haves for this recipe: - Baking sheet lined with parchment paper or foil - Basting brush for even coating - Sharp knife to husk the corn - Small mixing bowl for the garlic butter mixture Having these tools ready will help you create the perfect Garlic Parmesan Roasted Corn. For the complete recipe, check out the Full Recipe section. Start by preheating your oven to 425°F (220°C). This heat is key for roasting corn evenly. Next, husk the corn. Remove all silk and husks to expose the kernels. Rinse each ear under cold water to clean off any dirt. After cleaning, pat the corn dry with a paper towel. This helps the butter stick better. In a small bowl, melt three tablespoons of unsalted butter. Add four cloves of finely minced garlic to the melted butter. Mix in half a teaspoon of smoked paprika. If you like a bit of heat, add a quarter teaspoon of cayenne pepper. Season this mixture with salt and freshly ground black pepper. Whisk it all together until well combined. This will give your corn a rich flavor. Place the husked corn on a large baking sheet lined with parchment paper. Use a basting brush to coat each ear of corn with the garlic butter mixture. Make sure to cover all sides. Then, sprinkle half a cup of freshly grated Parmesan cheese over the corn. Gently press the cheese onto the corn to help it stick. Roast the corn in your preheated oven for 20 to 25 minutes. Turn the ears halfway through to ensure even cooking. The corn is ready when it is tender and golden brown. Once done, take the corn out and sprinkle chopped parsley on top. Serve it hot with lemon wedges on the side. Squeezing lemon juice over the corn adds a lovely zesty touch. For the full recipe, refer to the section above. Choose sweet, fresh corn for the best flavor. Look for bright green husks. The silk should be soft and brown. The kernels should feel firm and plump when pressed. Fresh corn has a sweet scent. You want sweet corn for this dish. Roasting corn at high heat gives it a nice golden color. Preheat your oven to 425°F (220°C). This step is key for roasting. Use a basting brush to coat the corn well with garlic butter. Make sure to turn the corn halfway through cooking. This helps it cook evenly. Roast for 20-25 minutes until tender and golden. Serve Garlic Parmesan Roasted Corn hot for the best taste. It pairs well with grilled meats, salads, or rice dishes. Adding lemon wedges on the side brightens the flavor. You can also sprinkle extra herbs on top for color. Try serving with a cool dip to balance the warm corn. For more on how to make this dish, check the Full Recipe. {{image_4}} Want some heat? Try adding more cayenne pepper. This adds a nice kick. You can also use a hot sauce. Just mix it into the garlic butter. This spicy twist makes your taste buds dance. For a fresh flavor, add herbs. You can use thyme, basil, or oregano. Chop them finely and add to the garlic butter mix. This gives the corn a fragrant taste. It pairs well with the cheese and garlic. Each bite will be full of flavor. Grilling corn brings out its natural sweetness. To make this, soak the corn in water for 30 minutes. Then, coat it with the garlic butter. Grill on medium heat for about 15-20 minutes. Turn often until you see nice grill marks. Finish with cheese and parsley when it's done. This method adds a smoky taste that is simply delicious. For the full recipe, check out the detailed steps earlier. To store leftover roasted corn, let it cool first. Wrap each ear in plastic wrap or foil. Place the wrapped corn in an airtight container. This keeps it fresh and tasty. Store it in the fridge for up to three days. The best way to reheat roasted corn is in the oven. Preheat your oven to 350°F (175°C). Remove the corn from its wrapping and place it on a baking sheet. Cover it with foil to keep it moist. Heat for about 10-15 minutes. You can also reheat it in the microwave. Place the corn on a microwave-safe plate. Cover it with a damp paper towel. Heat for 2-3 minutes or until warm. You can freeze garlic Parmesan roasted corn for later use. First, let the corn cool completely. Cut the kernels off the cob for easy storage. Place the kernels in a freezer-safe bag. Remove as much air as possible before sealing. This will help prevent freezer burn. You can freeze the corn for up to six months. When ready to enjoy, thaw it in the fridge overnight before reheating. For the full recipe, check the recipe section above. Enjoy your delicious garlic Parmesan roasted corn! Yes, you can use frozen corn instead of fresh corn. Just make sure to thaw it first. Drain any excess water before using it. This will help the flavors stick better. The cooking time might be a bit shorter, so watch it closely. If you don't have Parmesan cheese, try using Pecorino Romano. It has a similar taste but is a bit saltier. You can also use nutritional yeast for a dairy-free option. It adds a cheesy flavor without the milk. To make Garlic Parmesan Roasted Corn vegan, replace the butter with olive oil or vegan butter. For cheese, use nutritional yeast or a vegan cheese alternative. These swaps keep the dish tasty while fitting a plant-based diet. You can still enjoy all the rich flavors! For the full recipe, check out the details above! Garlic Parmesan Roasted Corn is easy and tasty! We covered the key ingredients, steps, and tools needed. You can add your favorite flavors or try different methods like grilling. I shared tips for choosing fresh corn and serving it well. If you have leftovers, I explained how to store and reheat them. Remember, cooking should be fun. Experiment with this recipe to find your perfect twist!

Garlic Parmesan Roasted Corn Flavorful Side Dish

Are you ready to elevate your side dishes? Garlic Parmesan Roasted Corn is a game-changer! With its rich, buttery flavor

To make classic blueberry muffins, you will need: - 1 ½ cups all-purpose flour - ½ cup granulated sugar - ½ teaspoon baking powder - ½ teaspoon baking soda - ¼ teaspoon sea salt - 1 large egg - ½ cup unsalted butter, melted and cooled - 1 teaspoon pure vanilla extract - ½ cup buttermilk (or milk with 1 teaspoon vinegar) - 1 ½ cups fresh blueberries (or frozen, do not thaw) You can swap ingredients if needed. For the flour, use whole wheat flour for a healthier option. If you want less sugar, try using honey or maple syrup. For a dairy-free version, use almond milk instead of buttermilk. You can replace butter with coconut oil for a different taste. Just melt it like you would the butter. When picking blueberries, look for plump, firm berries. The color should be deep blue with a light white bloom on it. Avoid berries that are soft or have green spots. Fresh blueberries should smell sweet and fragrant. If you buy them from a store, check the bottom of the container for any signs of mold. Enjoy the fresh taste of blueberries for your muffins! First, preheat your oven to 375°F (190°C). This step is key for fluffy muffins. While the oven heats, prepare your muffin pan. You can line it with paper liners or spray it with a non-stick cooking spray. This helps the muffins come out easily after baking. In a medium bowl, mix your dry ingredients. Combine 1 ½ cups of all-purpose flour, ½ cup of granulated sugar, ½ teaspoon of baking powder, ½ teaspoon of baking soda, and ¼ teaspoon of sea salt. Use a whisk to blend them well. In another bowl, crack 1 large egg and stir it gently. Then, add ½ cup of melted and cooled unsalted butter, 1 teaspoon of pure vanilla extract, and ½ cup of buttermilk. Whisk until it is smooth and combined. Now, it’s time to combine the two mixtures. Slowly pour the wet mixture into the dry one. Use a spatula to fold them together gently. Mix until just combined. It’s okay if there are some lumps. Then, carefully fold in 1 ½ cups of fresh blueberries. Make sure to spread them evenly throughout the batter. Avoid breaking the berries to keep them whole. Next, divide the batter into your muffin cups. Fill each cup about ¾ full, giving the muffins room to rise. Place the muffin pan in the preheated oven and bake for 18-20 minutes. To check if they are done, insert a toothpick into the center of a muffin. It should come out clean or with a few moist crumbs. Once baked, let the muffins cool in the pan for about 5 minutes. After that, transfer them to a wire rack to cool completely. Enjoy your classic blueberry muffins! For the full recipe, refer to the earlier details. When making blueberry muffins, some errors can ruin your batch. Here are the top mistakes: - Overmixing the batter: This makes muffins dense. Mix just until combined. - Using cold ingredients: Cold butter or milk can lead to uneven baking. Use room-temperature items. - Not measuring flour correctly: Scoop and level flour for accuracy. Too much flour leads to dry muffins. - Skipping the cooling step: Let muffins cool in the pan for 5 minutes. This helps set their shape. Fluffy muffins are a delight. Here’s how to get that perfect texture: - Use fresh baking powder and soda: Old leavening agents won’t make muffins rise. - Fold in blueberries gently: This keeps the air in the batter. Breaks can lead to dense muffins. - Don’t pack flour: Lightly spoon flour into your measuring cup. This keeps the muffins light. Texture is key to a great muffin. Here are my tips for perfecting it: - Add buttermilk: It gives moisture and a tender crumb. If you don't have it, mix regular milk with vinegar. - Use melted butter: This adds rich flavor and keeps muffins moist. - Incorporate flavor: A touch of lemon zest brightens the taste and adds a nice zing. For the full recipe, you can refer back to the main section! {{image_4}} You can easily make these blueberry muffins healthier. Replace some all-purpose flour with whole wheat flour. This swap adds fiber and nutrients. You can also cut the sugar by using honey or maple syrup. These natural sweeteners add flavor without all the processed sugar. To boost the taste, consider adding lemon zest. A teaspoon of zest brightens the muffins and pairs well with blueberries. You can also mix in nuts, like walnuts or pecans. Nuts add crunch and protein, making your muffins even more satisfying. You can switch blueberries for other berries. Raspberries offer a tart flavor, while strawberries add sweetness. Just remember to adjust the amount to match the size of the berries. This lets you enjoy a new muffin each time you bake. For a mixed berry treat, try combining all three types. It’s colorful and delicious! For the full recipe, check out the Deliciously Classic Blueberry Muffins section. To keep your blueberry muffins fresh, store them in an airtight container. This helps them stay soft and moist. Place a paper towel at the bottom of the container to absorb any extra moisture. You can also add a layer of paper towel on top of the muffins before sealing the lid. This keeps them from getting soggy. Store them at room temperature for up to 2 days. For longer storage, refrigeration can dry them out, so it’s best to avoid that. Freezing muffins is easy and keeps them fresh for a longer time. Start by cooling the muffins completely. Next, wrap each muffin tightly in plastic wrap. Then, place them in a freezer bag or an airtight container. Make sure to remove as much air as possible to prevent freezer burn. You can freeze them for up to 3 months. When you’re ready to eat them, just take out the muffins and let them thaw at room temperature. To enjoy your muffins warm, you can reheat them in the oven or microwave. For the oven, preheat it to 350°F (175°C). Place the muffins on a baking sheet and heat for about 5-10 minutes. This will keep them soft and fluffy. If you use a microwave, heat each muffin for about 15-20 seconds. Be careful not to overheat, as this can make them tough. Enjoy them warm for the best taste! For the full recipe, check out the details above. You can make these muffins gluten-free by using a gluten-free flour blend. Look for blends that include xanthan gum. Replace the all-purpose flour with this blend in the same amount. The muffins will still taste great! Yes, you can use frozen blueberries! Just add them directly to the batter without thawing. This keeps the muffins moist and prevents them from turning purple. Frozen blueberries work well and are convenient. Baking powder contains both an acid and a base. It needs moisture to activate. Baking soda is a base that requires an acid to work. If a recipe calls for one, you cannot swap them directly without adjustments. These muffins stay fresh for about 2-3 days at room temperature. Store them in an airtight container. If you want them to last longer, freeze them. They can last up to 3 months in the freezer. For best taste, reheat them before serving. We covered all the key steps for making the best blueberry muffins. From selecting fresh blueberries to storing muffins for later, you now have the tools to succeed. Avoid common mistakes for fluffy muffins, and experiment with tasty variations. Remember, baking is about fun and trying new things. With practice, you'll create perfect muffins every time. Enjoy your baking adventure!

Classic Blueberry Muffins Savory and Simple Recipe

If you crave a warm, buttery bite filled with juicy blueberries, you’re in the right place. My “Classic Blueberry Muffins:

- Dried Chickpeas: Use 1 cup of dried chickpeas. Soak them overnight in water. This step helps soften the chickpeas and makes them easy to blend. - Fresh Herbs and Aromatics: You need 1 small onion, finely chopped, and 2 cloves of minced garlic. Add 1/4 cup of finely minced parsley and 1/4 cup of finely minced cilantro. These add bright flavors to the falafel. - Spices and Seasonings: Use 1 teaspoon of ground cumin and 1 teaspoon of ground coriander. For a little heat, add 1/4 teaspoon of cayenne pepper (optional). Add salt and pepper to taste. These spices give the falafel its signature taste. - Cooking and Binding Agents: You’ll need 3 tablespoons of olive oil and 1 tablespoon of freshly squeezed lemon juice. Use 1/4 cup of whole wheat flour to help bind the mixture. If it feels too wet, add more flour until you can shape it easily. For the full recipe, you can check the section above. Start by preheating your oven to 400°F (200°C). This temperature helps make the falafel crispy. Line a baking sheet with parchment paper. This step prevents sticking and makes cleanup easy. Next, grab your food processor. Add soaked and drained chickpeas, chopped onion, minced garlic, parsley, and cilantro. Also, add ground cumin, ground coriander, baking soda, and a pinch of salt and pepper. Pulse until the mix is coarse, but don’t overdo it. You want small pieces, not a paste. Now, transfer the falafel mix to a large bowl. Add olive oil, lemon juice, and whole wheat flour. Stir until everything is combined well. If the mix feels too wet to shape, add more flour slowly until it holds together nicely. To shape the falafel, coat your hands lightly with oil. Form small balls, about 1.5 inches wide, or flatten them into patties. Place each piece on the baking sheet, leaving space between them for even cooking. For crisp falafel, brush or spray the tops lightly with olive oil. This helps achieve that golden color and crunch. Bake the falafel in the preheated oven for 25-30 minutes. Flip them halfway through to ensure they brown evenly. They should be golden brown and crispy on all sides when done. After baking, let the falafel cool for a few minutes before serving. Enjoy your tasty and healthy snack! For the full recipe, check the previous section. To get crispy baked falafel, olive oil is key. It helps create a golden-brown crust. Use about three tablespoons for the mix, plus a bit more to brush on top. This adds flavor and helps the falafel crisp up nicely. Control moisture for the best results. If your mixture feels wet, add more whole wheat flour. This will help bind the ingredients and keep them from falling apart. A good balance of dry and wet ingredients is vital for that perfect crunch. One common mistake is over-processing the chickpeas. If you blend them too much, your falafel will turn into a paste. Aim for a coarse texture to keep them light and fluffy. Another pitfall is not baking at the right temperatures. Make sure your oven is preheated to 400°F (200°C). Baking for 25-30 minutes allows the falafel to cook evenly. Flip them halfway for the best browning. Falafel pairs well with many sauces. Tahini sauce is a classic choice. You can also use yogurt sauce for a refreshing taste. Get creative with your serving ideas! Stuff falafel into warm pita bread with fresh veggies. You could also serve them over a salad for a healthy option. For a fun twist, make falafel wraps with your favorite toppings. For the full recipe, check out the details above. {{image_4}} You can easily change the taste of your falafel. Adding herbs like mint or dill gives a fresh twist. These herbs add bright flavors that pair well with chickpeas. You can also try mixing in vegetables. Zucchini or spinach can add moisture and nutrition. Just chop them finely and mix them in. This helps create a unique taste each time you make falafel. Crispy baked falafel can fit many diets. If you need gluten-free, use chickpea flour instead of whole wheat. This keeps the texture while being safe for gluten-free eaters. For those who avoid nuts, this recipe is already nut-free. You can easily adapt it by checking the ingredients. Each change can still lead to a tasty, healthy snack. With these simple swaps, everyone can enjoy falafel. For more detailed instructions, check the full recipe. To keep your leftover falafel fresh, store them in the fridge. Use an airtight container to avoid drying them out. Make sure they cool down to room temperature before sealing. This way, they will stay tasty for up to four days. If you want to keep falafel for longer, freezing is a great option. Start by placing cooked falafel on a baking sheet. Freeze them for about an hour until firm. Once frozen, transfer them to a freezer bag. This method helps prevent them from sticking together. You can store them in the freezer for up to three months. Reheating falafel is easy and helps keep them crispy. The best method is to use the oven. Preheat your oven to 375°F (190°C). Place the falafel on a baking sheet. Heat for about 10-15 minutes until warm. This method helps them regain their crunch. Avoid using the microwave, as it can make them soggy. If you're in a hurry, a skillet works too. Heat a little oil in the pan and warm the falafel for a few minutes on each side. This brings back some crispness while warming them. To get crispy baked falafel, you need a few key methods. First, use soaked dried chickpeas instead of canned ones. This helps with texture. Second, add olive oil to the mixture and brush it on top before baking. This helps them brown. Finally, bake them at a high temperature, about 400°F (200°C). This creates a nice crust that adds crunch. Yes, you can use canned chickpeas, but there are pros and cons. Canned chickpeas save time and are easy to find. However, they may make the falafel too wet. If you use canned ones, drain and rinse them well. You might need to adjust the flour to keep the mix from being too soggy. Look for visual and texture cues to know if falafel is done. They should be golden brown all over. The outside should feel firm and slightly crispy. If you cut one open, the inside should be soft but not mushy. Trust your eyes and touch for the best results. Many dipping sauces pair great with falafel. Here are a few ideas: - Tahini sauce: Creamy and nutty, it’s a classic choice. - Yogurt sauce: Cool and refreshing, this adds a nice contrast. - Spicy harissa: If you like heat, this adds a kick. - Hummus: Smooth and flavorful, it’s always a hit. Feel free to mix and match your favorites! For the full recipe, check out the Crispy Baked Falafel recipe above. This guide covers how to make delicious baked falafel from scratch. We discussed key ingredients, step-by-step instructions, and helpful tips for success. Remember to soak your chickpeas and carefully mix your herbs and spices. Avoid common mistakes for the best results. You can customize your falafel with different flavors or dietary needs. Store leftovers properly to enjoy later. With practice, you’ll perfect this tasty dish and impress your friends and family. Enjoy your cooking journey and the tasty rewards that follow!

Crispy Baked Falafel Tasty and Healthy Snack Option

Looking for a tasty and healthy snack? Crispy baked falafel is your answer! This dish combines dried chickpeas, fresh herbs,

- 3 large apples (Fuji or Honeycrisp recommended) - 1 teaspoon ground cinnamon - 2 tablespoons granulated sugar - 1 tablespoon fresh lemon juice - A pinch of salt To make cinnamon apple chips, you need a few simple ingredients. I recommend using Fuji or Honeycrisp apples for their sweet and crisp texture. These apples work well because they hold their shape during baking and offer a great taste. Here’s a breakdown of the ingredients: - Apples: Choose large, fresh apples. They give the best flavor and texture. - Ground cinnamon: This spice adds warmth and sweetness. It’s the star of the show! - Granulated sugar: This sweetens the chips and helps them crisp up nicely. - Fresh lemon juice: This prevents browning and adds a zesty kick to the flavor. - Salt: Just a pinch enhances the overall taste. It balances the sweetness. Once you gather these ingredients, you’re ready to create a delicious snack. If you want to see how to do this, check out the Full Recipe for detailed steps. First, preheat your oven to 225°F (110°C). This low temperature helps the apples dry out slowly. While the oven is heating, prepare your baking sheet by lining it with parchment paper. This step makes cleanup a breeze and prevents sticking. Next, wash the apples under cool water. After rinsing, core the apples to remove the seeds. You want to slice the apples very thinly. Use a mandolin slicer or a sharp knife. Aim for about 1/8 inch thick slices. Remember, thinner slices yield crispier apple chips! In a large bowl, mix together fresh lemon juice, granulated sugar, ground cinnamon, and a pinch of salt. Whisk these ingredients until well combined. This mixture gives the apples a sweet, warm flavor. Add the apple slices to the bowl. Toss them gently in the cinnamon-sugar mixture. Make sure each slice is evenly coated. Now, arrange the apple slices in a single layer on the prepared baking sheet. Avoid overlapping any slices. This spacing allows them to bake evenly. Place the baking sheet in the preheated oven. Bake for 1.5 to 2 hours. Flip the apple chips halfway through to ensure they cook evenly. You want them to be dry and crisp, not burnt. When the baking time is up, remove the apple chips from the oven. Let them cool completely on the baking sheet. As they cool, they will become even crispier. Enjoy your delightful and healthy snack! For the full recipe, check out the earlier section. To get crispy apple chips, slice your apples very thin. Aim for about 1/8 inch thick. Use a mandolin slicer or a sharp knife for best results. If the slices are too thick, they won’t crisp up well. When you place the apple slices on the baking sheet, make sure they are in a single layer. If they overlap, they won’t cook evenly. This step is key for that perfect crunch you want. You can boost the flavor of your apple chips in fun ways. Try adding nutmeg or allspice with the cinnamon. These spices can give your chips a unique twist. You can also add sweeteners like honey or maple sugar. These can enhance the sweetness and flavor of your apple chips. Just sprinkle a little on top before baking! For a beautiful presentation, serve your apple chips in a decorative bowl. Sprinkle a bit of extra cinnamon sugar on top for a nice touch. Pair your chips with dips like caramel sauce or yogurt. This adds a fun element to your snack. You could also enjoy them with a cup of tea or cider for a cozy treat. Check out the full recipe for more details! {{image_4}} Baked apple chips have a crispy texture and a sweet taste. When you bake them, the heat brings out their natural sugars. Dehydrated apple chips, on the other hand, have a chewy quality. They hold more flavor and retain nutrients better. To dehydrate apples, slice them thinly and place them in a dehydrator. Set it to a low temperature, around 135°F (57°C), and let them dry for 6 to 8 hours. This method gives a different bite, and you can enjoy them anytime. Not all apples are the same. The best apples for chips are Fuji and Honeycrisp. They are sweet and crisp, which makes for delicious chips. You can also try Granny Smith for a tart flavor. Don't be afraid to experiment! Mix different apple types for a unique taste. Try adding a bit of pear or even a sprinkle of nutmeg to the mix. Each variety brings something special to your apple chips. Love a kick? Add a pinch of cayenne pepper to your cinnamon mix. This will give your apple chips a spicy twist that surprises the taste buds. You can also add herbs like rosemary or thyme for a savory snack. These flavors balance the sweetness of the apples. It’s a fun way to make your chips stand out. Try both sweet and savory options to find your favorite. For more details on making these tasty snacks, check out the Full Recipe. To keep your cinnamon apple chips fresh, store them in airtight containers. This prevents air from making them soft. You can use glass jars or plastic containers. If you want them to last longer, consider keeping them in the fridge. But, they stay just fine at room temperature too. Cinnamon apple chips can last for about one to two weeks. After that, they may start to lose their crunch. Look for signs of spoilage, like a change in color or a soft texture. If they feel chewy or sticky, it’s time to toss them out. If your apple chips become soft, don’t worry! You can re-crisp them. Place them on a baking sheet and put them in a low oven (about 200°F). Bake for 10 to 15 minutes. This will help remove moisture. Avoid exposing them to humidity. Keep them sealed tight to stay crisp longer. To make cinnamon apple chips, follow these simple steps: 1. Preheat your oven to 225°F (110°C). 2. Line a baking sheet with parchment paper. 3. Wash and core 3 large apples (Fuji or Honeycrisp work best). 4. Slice the apples into thin rounds, about 1/8 inch thick. 5. In a bowl, mix 1 tablespoon of fresh lemon juice, 2 tablespoons of sugar, 1 teaspoon of ground cinnamon, and a pinch of salt. 6. Toss the apple slices in the mixture until they are well coated. 7. Arrange the slices on the baking sheet without overlapping. 8. Bake for 1.5 to 2 hours, flipping halfway through. 9. Let the chips cool completely before enjoying! These steps will help you create the perfect crispy snack. For a detailed guide, check the Full Recipe. Cinnamon apple chips offer several health benefits: - Apples are rich in fiber, which aids digestion and keeps you feeling full. - They also contain vitamin C, which boosts your immune system. - Cinnamon has antioxidant properties and can help regulate blood sugar levels. - It may also have anti-inflammatory effects, promoting overall health. Combining these two ingredients creates a tasty and nutritious snack. Enjoy these chips guilt-free! You can find pre-made cinnamon apple chips at many stores. Here are some suggested brands and stores: - Brands: Look for brands like Bare Snacks, Trader Joe's, or Eden Foods. - Stores: Check local grocery stores, health food stores, or online retailers like Amazon. These options make it easy to enjoy cinnamon apple chips without the hassle of making them yourself. You learned how to make tasty cinnamon apple chips from scratch. Key steps include slicing apples, coating them, and baking. I shared tips to sharpen your skills, like choosing the right apple and enhancing flavors. You can enjoy baked or dehydrated chips, and even explore sweet and savory options. Storing them properly keeps them fresh longer. Now you have the tools to create a delicious snack at home. Try it out and enjoy the crunch!

Cinnamon Apple Chips Crispy and Irresistible Snack

Looking for a crunchy snack that’s both tasty and healthy? I’ve got just the thing: cinnamon apple chips! With just

To create a delightful peach crisp, you need a few key ingredients: - 4 large fresh peaches, pitted and sliced - 1 tablespoon freshly squeezed lemon juice - ½ cup brown sugar, divided - 1 teaspoon ground cinnamon - 1 tablespoon cornstarch - 1 cup rolled oats - ½ cup all-purpose flour - ½ cup packed brown sugar (for topping) - ½ teaspoon salt - ½ teaspoon pure vanilla extract - ½ cup unsalted butter, melted These main ingredients blend to create a sweet and tangy filling, topped with a crunchy oat topping. The fresh peaches give a juicy base, while the brown sugar and cinnamon add warmth. You can add a couple of optional ingredients to enhance your crisp: - ¼ cup chopped pecans (optional, for added texture) - ½ teaspoon pure vanilla extract (for enhanced flavor) Adding nuts gives a nice crunch. Vanilla extract boosts the flavor, making your dessert even more delightful. To make the peach crisp, you'll need some basic kitchen tools: - 9x13-inch baking dish - Mixing bowls These tools help you mix your ingredients and bake your delicious crisp. The baking dish holds all the goodness, while the mixing bowls allow you to combine flavors easily. For the full recipe, follow the steps outlined earlier to create this summer delight! - Preheat the oven to 350°F (175°C). This helps cook the crisp evenly. - In a large bowl, combine the sliced peaches with 1 tablespoon of lemon juice, ½ cup of brown sugar, 1 teaspoon of cinnamon, and 1 tablespoon of cornstarch. Toss gently until the peaches are well coated. - Pour the peach mixture into a greased 9x13-inch baking dish. Spread it out evenly for the best bake. - In another bowl, mix 1 cup of rolled oats, ½ cup of all-purpose flour, ½ cup of brown sugar, ½ teaspoon of salt, and ½ teaspoon of pure vanilla extract. - Add ½ cup of melted unsalted butter to the dry mix. Stir until it forms a crumbly texture that looks like wet sand. - Spread the oat mixture evenly over the peach layer in the baking dish. Cover the fruit completely for a tasty topping. - Place the baking dish in the preheated oven. Bake for 30-35 minutes until the topping turns golden brown and the peaches bubble up. - For more details, check the Full Recipe for extra tips. To make the best peach crisp, choose ripe but firm peaches. This ensures a great texture. Overripe peaches can turn mushy in the oven. You can also adjust sugar levels based on your sweetness preference. If you like it sweeter, add more brown sugar. If you prefer it less sweet, cut back a bit. Serving your peach crisp warm is key. Pair it with vanilla ice cream for a creamy contrast. The ice cream melts into the warm crisp, creating a lovely mix. You can also top it with whipped cream for extra richness. A sprinkle of cinnamon adds a nice touch, enhancing the warm flavors. For added depth, try spices like nutmeg or ginger. These spices bring a warm kick to the dish. You can also mix in other fruits for a fun twist. Berries, apples, or even plums can create a delightful mixed fruit crisp. This way, you can enjoy different flavors in one dish. For more ideas, check the Full Recipe. {{image_4}} You can swap peaches with many fruits. Berries, apples, or plums work well. Each fruit gives a new flavor. You can also mix fruits for a fun twist. A mixed fruit crisp brings joy to any table. Just remember to adjust sugar based on the fruit's sweetness. This keeps your dessert balanced. If you need a gluten-free option, it's easy! Use gluten-free oats and flour. They work just as well in this recipe. Almond flour is another great choice. It gives a nice nutty taste. Your crisp will still be tasty and satisfying. To make this dessert vegan, replace butter with coconut oil or vegan butter. Both give richness to the topping. You can also use a plant-based sweetener. Maple syrup or agave nectar are great options. These swaps keep the flavor while fitting your diet. Enjoy your peach crisp without worry! Store any leftover peach crisp in an airtight container in the refrigerator. This keeps it fresh. It will last for about three to four days. Make sure it’s completely cool before sealing it to avoid moisture buildup. To enjoy your peach crisp again, warm it in the oven or microwave. If using the oven, preheat it to 350°F (175°C). Place the crisp in an oven-safe dish and cover it with foil. Heat for about 10-15 minutes. In the microwave, warm a single serving for about 30 seconds to 1 minute. This helps keep the topping crisp and the peaches warm. If you want to save some for later, freeze the crisp in individual portions. Use freezer-safe containers or bags. Make sure to label them with the date. It can last up to three months in the freezer. When you're ready to eat, thaw it in the fridge overnight and reheat as mentioned above. This method makes for quick and easy servings! Yes, you can use frozen peaches! Frozen peaches work well when fresh ones are not in season. They keep their flavor and texture. Just remember to thaw them first and drain excess juice. This helps prevent a soggy crisp. Fresh peaches add a great taste, but frozen ones can still shine. To boost the crunch, try these tips: - Use more rolled oats for the topping. - Add chopped nuts like almonds or walnuts for extra texture. - Bake the crisp a bit longer until the topping is golden brown. - Make sure to mix the butter well into the topping for a crispier bite. These steps help create a delightful crunch that everyone will love. If you need a substitute for brown sugar, here are some options: - Use white sugar mixed with a bit of molasses. - Try coconut sugar for a similar taste. - Honey or maple syrup can also work, but adjust the liquid in your recipe. These choices keep the sweet flavor without changing your dish too much. Peach crisp can last in the fridge for about 3-5 days. To keep it fresh, store it in an airtight container. When you're ready to enjoy it, just reheat it in the oven or microwave. This way, you can savor the taste of summer peach crisp even days later. For the best flavor, eat it sooner rather than later. Check the look and smell to ensure freshness. For the full recipe, check out the Peachy Paradise Crisp section! Peach crisp is simple and fun to make. Fresh peaches and a sweet topping create a great treat. Remember to prepare your ingredients and follow each step closely. Add nuts or spices for extra flavor. Try using other fruits, too, for variety. Store leftovers in the fridge or freeze for later. Your peach crisp can be enjoyed warm or cold. I hope you have fun making this delicious dessert!

Fresh Peach Crisp Delightful Summer Dessert Recipe

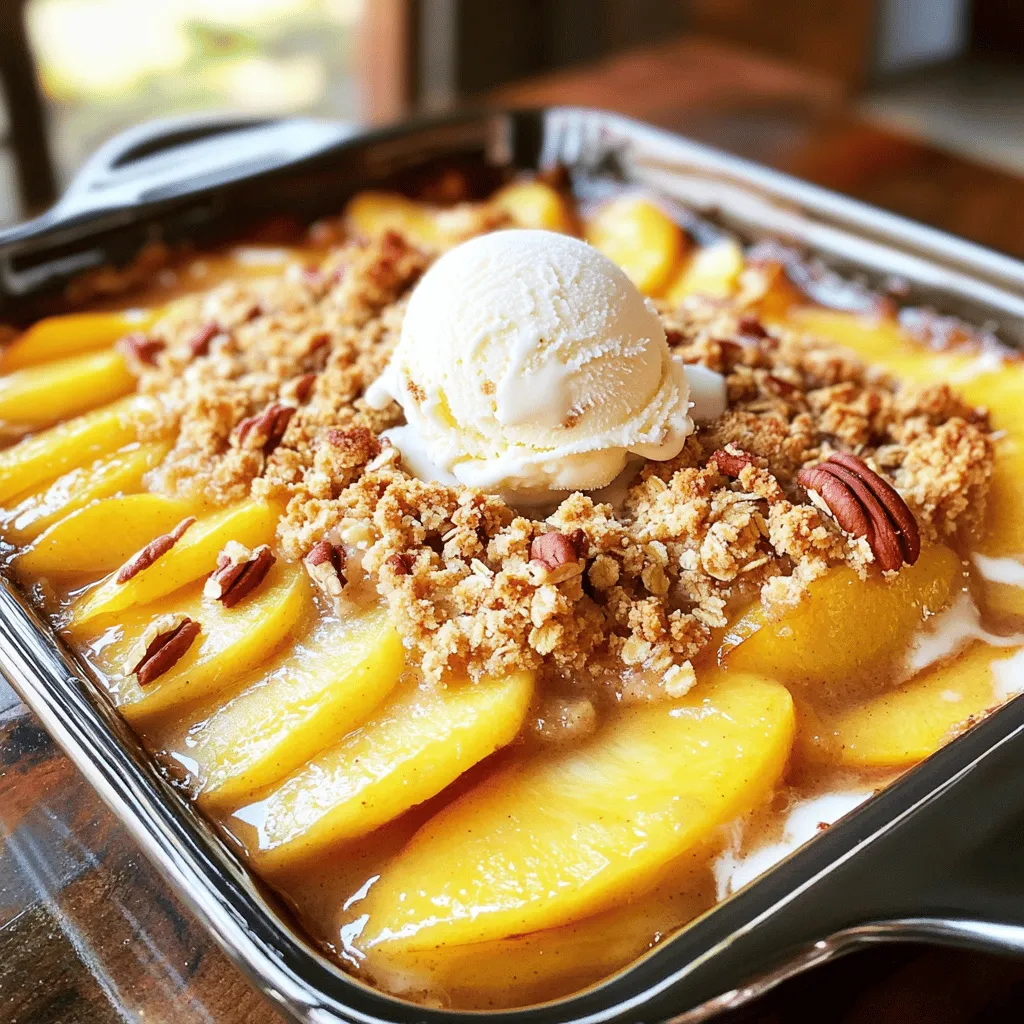
Summer is here, and there’s nothing like a Fresh Peach Crisp to sweeten those warm days! This easy and delightful

To make chocolate covered strawberry bites, you need a few simple items. Here’s what to gather: - 1 pound fresh strawberries, hulled and thoroughly washed - 8 ounces dark chocolate chips (high-quality for the best flavor) - 2 tablespoons coconut oil (for a glossy finish) - 1/4 cup crushed nuts (such as almonds or hazelnuts for added crunch) - 1/4 cup unsweetened shredded coconut (for a tropical flair) - 1/4 teaspoon sea salt (to enhance the chocolate flavor) These ingredients ensure your bites are tasty and look beautiful. Fresh strawberries are key. They should be firm and bright red. Choose dark chocolate chips for rich flavor. The coconut oil helps the chocolate shine. Optional toppings add crunch and fun! You can mix and match toppings based on what you like. Now that we have our ingredients, you’re ready to dive into the full recipe and create these delightful treats. First, wash your strawberries thoroughly. This step is key. You must dry them well after washing. Any water left can make the chocolate seize. Use a clean towel to pat each berry dry. For the best bites, choose strawberries that are medium-sized. They should be firm and ripe for the best flavor. Next, it’s time to melt the chocolate. I recommend using dark chocolate chips. They give a rich taste. Combine them with coconut oil in a microwave-safe bowl. Heat the mixture in the microwave in 30-second bursts. Stir well after each interval until it is smooth and shiny. The coconut oil helps achieve a nice glossy finish. Now the fun part begins! Grab each strawberry by the stem. Dip it into the melted chocolate, covering about two-thirds of the berry. Allow the excess chocolate to drip back into the bowl. After dipping, sprinkle your chosen toppings right away. You can use crushed nuts or shredded coconut to add flavor and crunch. If you like, add a pinch of sea salt for an extra kick. Once you finish dipping, place the strawberries on a parchment-lined tray. Repeat this process until all your strawberries are covered. Let them chill in the fridge for about 30 minutes. This will harden the chocolate and make them ready to enjoy! How do I avoid chocolate seizing? To avoid chocolate seizing, keep water away from it. Even a small drop can cause the chocolate to clump. Always use dry bowls and utensils. Why is temperature control important? Chocolate melts best at a low and steady heat. Use short bursts in the microwave. Stir well between each burst to ensure even melting. What are the best serving dishes for chocolate-covered strawberries? Use a nice plate or a tiered stand. A white plate makes the colors pop. A clear glass bowl can also showcase the treats well. What are some garnishing ideas for an elegant look? Sprinkle extra shredded coconut on top. Whole strawberries can add charm. You can also use mint leaves for a fresh touch. These small details make a big difference. They turn simple bites into stunning treats. For more on making these delightful bites, check out the full recipe. {{image_4}} You can use both white and dark chocolate for your treats. Dark chocolate has a rich taste and a deep color. It adds a bold flavor to the strawberries. White chocolate is sweeter and creamier. It contrasts nicely with the tartness of the strawberries. For pairing, try fruit like raspberries or a hint of lemon zest with white chocolate. These flavors work well together. Adding toppings can make your strawberry bites even better. You can use nuts for a nice crunch. Almonds or hazelnuts are great choices. They add texture and taste. For a fun twist, try toppings like crushed cookies or sprinkles. You can even use different flavors like matcha or chili powder. Experiment with what you like. Your strawberry bites can be unique and delicious. To keep your chocolate-covered strawberry bites fresh, store them in an airtight container. Place a layer of parchment paper between layers to avoid sticking. The best place to store them is in the fridge. This keeps the chocolate firm and the strawberries fresh. - Ideal storage conditions: Use a cool, dark spot in your fridge. - Tips for maintaining freshness: Avoid leaving them out at room temperature for long. Enjoy them within a few days for the best taste and texture. Can you freeze chocolate-covered strawberries? Yes, you can! Freezing is a great way to enjoy these treats later. - Best practices for freezing: First, let them cool completely in the fridge. Then, place them on a baking sheet in a single layer. Freeze them for about two hours. Once frozen, transfer to a freezer-safe container. They can last up to three months in the freezer. When you want to enjoy them, simply take them out and let them thaw in the fridge. This method helps keep their flavor and texture intact. To make chocolate-covered strawberries, start by washing and drying the strawberries. You want them dry to help the chocolate stick. Next, melt dark chocolate chips with coconut oil in a bowl. Heat it in short bursts in the microwave, stirring until smooth. Then, dip each strawberry into the melted chocolate, covering about two-thirds. Let the excess chocolate drip off. Before the chocolate sets, sprinkle on crushed nuts or shredded coconut for extra flair. Finally, chill the strawberries for about 30 minutes to harden the chocolate. Yes, you can use different types of chocolate. Milk chocolate is a great choice if you like it sweeter. White chocolate adds a creamy touch and looks nice, too. You can even use flavored chocolates, like mint or orange, for a twist. Each type brings its own flavor and style to your treats. When choosing strawberries, look for ones that are fresh and firm. Bright red strawberries with no soft spots are best. Size matters too; medium-sized strawberries are great for dipping. They hold the chocolate well and are easy to eat. Always pick strawberries that smell sweet, as this shows they are ripe and tasty. You’ve learned how to make delicious chocolate-covered strawberries. Start with fresh strawberries and melt your chocolate to the right texture. Dip, decorate, and impress with your treats. Use tips for a perfect finish and fancy presentation. Explore variations and unique toppings to shake things up. Remember how to store leftovers or freeze your sweets for later. Making these treats is fun and easy. Enjoy every bite and share them with friends for smiles all around.

Chocolate Covered Strawberry Bites Delightful Treats

If you’re craving a sweet and simple treat, chocolate-covered strawberry bites are the answer! These delightful morsels combine fresh strawberries

- Chickpeas - Quinoa - Vegetables (Cucumber, Cherry Tomatoes, Avocado) - Mixed Greens - Tahini & Lemon Dressing The main star of this dish is chickpeas. They bring a great source of protein and fiber. I use one can, which is about 15 ounces. Rinse and drain them well to get rid of excess sodium. Next, we have quinoa. I like to use one cup of cooked quinoa, which adds a nice texture. Quinoa is gluten-free and packed with nutrients. For the vegetables, I choose cucumber, cherry tomatoes, and avocado. The cucumber adds crunch. The cherry tomatoes offer sweetness, while the creamy avocado balances the spice. Mixed greens are essential. I use about two cups, choosing a blend of spinach, kale, and arugula. They give a fresh taste and bright color to the bowl. Finally, we have the tahini and lemon dressing. It ties everything together beautifully. The tahini adds creaminess, while lemon juice gives a zesty kick. - Fresh Parsley - Extra Spices Garnishing is where you can get creative. I like to sprinkle fresh parsley on top. It adds a pop of color and fresh flavor. You can also add extra spices if you want more heat or flavor. Try adding a pinch of paprika or some black pepper to enhance the taste. For the full recipe, be sure to check out the detailed instructions! - Preheat Oven and Season Chickpeas Start by heating your oven to 400°F (200°C). While it warms up, grab a mixing bowl. Add the rinsed chickpeas. Pour in olive oil, smoked paprika, cayenne pepper, garlic powder, sea salt, and pepper. Mix well with a spoon or your hands. Ensure every chickpea is coated in spices. - Roasting the Chickpeas Spread the chickpeas on a baking sheet lined with parchment paper. Lay them in a single layer. Roast for 25-30 minutes. Stir them halfway through to cook evenly. They should turn golden and crispy. - Layering the Quinoa and Greens In a large serving bowl, start with the cooked quinoa. Spread it evenly as the base. Next, add mixed greens on top of the quinoa. This adds color and nutrients. - Arranging Vegetables and Chickpeas Now, it’s time to make it pretty! Place the diced cucumber, halved cherry tomatoes, and sliced avocado on top. Arrange them in sections for a vibrant look. Finally, sprinkle the roasted chickpeas over everything for that spicy kick. - Preparing the Tahini Sauce In a small bowl, mix tahini, lemon juice, and a pinch of sea salt. Whisk until smooth. If it’s too thick, add a splash of water. This will help you get the perfect drizzle. - Drizzling and Final Touches Generously drizzle the tahini sauce over your Buddha bowl. This adds flavor and creaminess. Finish by garnishing with fresh parsley for a pop of color. Enjoy your Spicy Chickpea Buddha Bowl! For more detailed steps, refer to the Full Recipe. - Achieving Crispiness For crispy chickpeas, start by drying them well. After rinsing, pat them dry with a towel. This helps remove extra moisture. Use plenty of olive oil and spices for flavor. Spread them out evenly on the baking sheet. Space is key to crispiness. - Avoiding Soggy Chickpeas To prevent sogginess, avoid overcooking them. Keep an eye on them while roasting. Stir halfway through to cook evenly. If they sit too long after roasting, they may lose their crunch. Serve them right away for the best texture. - Creating a Colorful Layout A bright bowl is more appetizing. Start with a base of quinoa. Layer mixed greens on top. Then, add colorful veggies like cucumber and tomatoes. Place roasted chickpeas on top for crunch. Finally, add avocado slices for creaminess. - Serving Suggestions Use a shallow bowl for a beautiful presentation. Arrange the ingredients in sections. This makes each part visible and appealing. Drizzle extra tahini sauce around the edges for flair. This small touch adds to the visual charm of your dish. - Nutritional Value of Ingredients This bowl is packed with nutrients. Chickpeas provide protein and fiber. Quinoa adds complete protein and amino acids. Mixed greens offer vitamins and minerals. Healthy fats come from avocado and tahini. Each ingredient plays a role in a balanced diet. - Advantages of a Balanced Meal Eating a balanced meal like this supports overall health. It helps maintain energy levels. The mix of proteins, fats, and carbs keeps you full. Plus, it provides a wide range of nutrients. This meal is not just yummy; it’s good for you, too! {{image_4}} You can swap chickpeas for other legumes. Try black beans or lentils for a new twist. If you want a different grain, use brown rice or farro. For greens, you can replace spinach with arugula or kale. Each option brings its unique flavor and texture. To boost flavors, add spices like cumin or coriander. Fresh herbs like cilantro or dill can also brighten the dish. If you want more tang, drizzle balsamic vinegar or a yogurt sauce on top. These small changes can make your bowl pop. If you have a crowd, double or triple the recipe. Make sure to adjust cooking times for the chickpeas. For easy meal prep, divide the bowl into containers. This way, you have a healthy meal ready for the week. Every bite will keep you satisfied and energized. How to Store Leftovers After making your spicy chickpea Buddha bowl, let it cool. Place leftovers in an airtight container. This keeps the flavors fresh. Store the chickpea bowl in the fridge. It can last for about three days. Shelf Life of Ingredients Chickpeas and quinoa can stay good for a long time. Cooked chickpeas can last in the fridge for up to five days. Quinoa can last about a week when stored well. Fresh veggies like cucumber and tomatoes should be used within three days for the best taste. Proper Methods for Heating Up Chickpeas To reheat chickpeas, you can use the oven or a skillet. For the oven, place them on a baking sheet at 350°F (175°C) for about 10 minutes. If using a skillet, heat them over medium heat for about five minutes. This keeps them crispy and tasty. Keeping the Bowl Fresh When reheating, keep the dressing separate until you serve. This keeps your bowl fresh and flavorful. Warm the quinoa and chickpeas, then add them to fresh greens and veggies. This way, your Buddha bowl tastes just as good as when you first made it. You can find the complete recipe for the spicy chickpea Buddha bowl to guide you through the process. A Buddha bowl is a colorful dish filled with healthy foods. It often includes grains, veggies, and proteins. The name comes from the way the bowl looks, like a round belly. Buddha bowls are popular because they are healthy and fun to eat. They offer many nutritional benefits, such as: - High in fiber - Packed with vitamins - Full of protein - Supportive of healthy digestion Yes, you can easily make this recipe vegan. Here are some substitutions: - Use maple syrup instead of honey in dressings. - Choose plant-based yogurt instead of dairy yogurt. - Skip cheese or use a nut-based cheese alternative. These swaps keep the meal tasty and plant-based! You can make your Buddha bowl unique by mixing flavors and textures. Here are some ideas: - Try different grains like brown rice or farro. - Add roasted sweet potatoes or beets for sweetness. - Use a variety of greens like arugula or spinach. - Mix in nuts or seeds for crunch. Feel free to experiment with your favorite ingredients! To keep your chickpeas crispy, follow these tips: - Rinse and drain the chickpeas well before seasoning. - Pat them dry with a towel to remove extra moisture. - Roast them at a high temperature, around 400°F (200°C). - Stir them halfway through cooking for even crispiness. These steps will give you perfectly roasted chickpeas every time! For the full recipe, check out the Full Recipe section. This blog post covers all you need to create a tasty Buddha Bowl. You learned about the key ingredients like chickpeas and quinoa, along with step-by-step instructions. We explored tips for perfect chickpeas and colorful presentation. You can even customize your bowl with different grains or spices. Remember, a Buddha Bowl can be healthy and fun. Experiment with flavors and make it your own! Enjoy each bite as you nourish your body and delight your taste buds.

Spicy Chickpea Buddha Bowl Flavor-Packed Meal

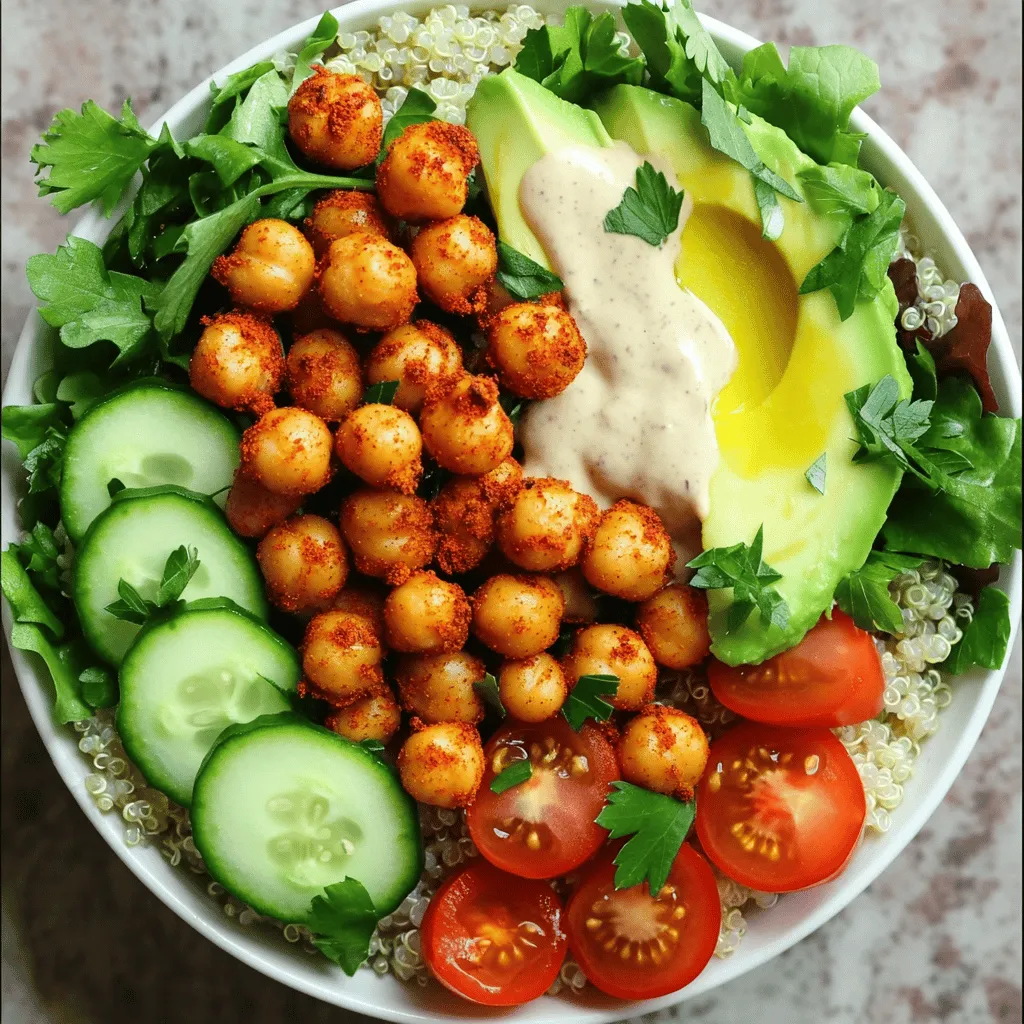
Are you ready to spice up your dinner routine? This Spicy Chickpea Buddha Bowl is bursting with flavor and packed

- 1 lb white fish fillets (cod or tilapia recommended) - 1 cup all-purpose flour - 1/2 cup cornmeal - 1 teaspoon cayenne pepper - 1 teaspoon garlic powder - 1 teaspoon paprika - 1/2 teaspoon salt - 1/4 teaspoon black pepper - 2 large eggs, beaten - 1 cup panko breadcrumbs - Vegetable oil for frying - 8 small corn tortillas - 1 cup cabbage, finely shredded - 1 ripe avocado, diced - 1/4 cup fresh cilantro, chopped - Lime wedges, for serving - Salsa or hot sauce, optional for extra flavor Gathering the right ingredients is key to making great crispy fish tacos. I recommend using fresh white fish like cod or tilapia. They fry nicely and stay flaky. You will also need a mix of dry ingredients. This includes flour, cornmeal, and spices like cayenne, garlic powder, and paprika. This mix gives the fish a tasty crunch. Next, you will need eggs for the breading process and panko breadcrumbs for that extra crisp. Don’t forget the vegetable oil for frying! It’s essential for achieving that golden color. For the tacos, use small corn tortillas. They are soft and perfect for wrapping around your filling. You can top your tacos with shredded cabbage, diced avocado, and fresh cilantro for added flavor. Don’t skip the lime wedges! They add a refreshing touch. If you like heat, add salsa or hot sauce. For the full recipe, check out the detailed instructions. Enjoy every bite of your crispy fish tacos! First, rinse the fish fillets under cold water. This step helps remove any unwanted bits. Next, dry the fillets well with paper towels. Removing moisture is key for crispiness. Now, slice each fillet into strips that are about 1 inch wide. This size is perfect for tacos. In a medium bowl, mix together the flour, cornmeal, cayenne pepper, garlic powder, paprika, salt, and black pepper. Stir well to blend the spices evenly. This coating gives the fish its crunch and flavor. It’s time to set up your breading station. In one bowl, pour the beaten eggs. In another bowl, have the panko breadcrumbs ready. This setup makes the breading process easy and organized. Heat about 1 inch of vegetable oil in a large skillet over medium-high heat. Wait until the oil shimmers before adding the fish. Fry the fish strips in small batches. This prevents overcrowding. Cook each side for about 3-4 minutes, or until they turn golden brown. Let the fish drain on paper towels after frying to remove extra oil. While the fish cools, warm the corn tortillas. Use a dry skillet over medium heat. Heat each tortilla for about 30 seconds on each side. This step makes them soft and easy to fold. Now, it’s time to assemble your tacos! On each warm tortilla, add 2-3 pieces of the crispy fish. Top with finely shredded cabbage, diced avocado, and chopped cilantro. This layering creates a burst of flavor and color. Enjoy your crispy fish tacos right away! Serve with lime wedges and salsa for extra kick. For the full recipe, check the detailed instructions above. To get that perfect crispy texture, start by drying the fish well. Moisture can ruin your crunch. Use paper towels to pat the fish until it's dry. Next, heat the oil to the right temperature. The oil should shimmer but not smoke. A temperature of about 350°F works great. If the oil is too cool, the fish will soak up too much oil. If it’s too hot, the outside will burn before the inside cooks. Choosing the right fish matters. I recommend using white fish like cod or tilapia. These types have a mild flavor and cook well. They also hold their shape during frying. Avoid fish with a strong taste or flaky texture, as they may not work as well in tacos. To boost flavor, adjust your spices. A mix of cayenne pepper, garlic powder, and paprika gives a nice kick. You can add more cayenne if you like heat. For a fresh twist, try adding lime zest to the coating mix. Fresh herbs like cilantro or parsley can also brighten the dish. Remember, taste as you go! This way, you can find the perfect balance for your tacos. For the full recipe, check out the [Full Recipe]. {{image_4}} If you want to switch things up, try using shrimp, chicken, or tofu. Shrimp works well as it cooks fast and has a sweet taste. Just season it like you would the fish and fry until pink. Chicken can be cut into strips or cubes and seasoned with spices. It should be cooked well for safety. Tofu is a great option too. Use firm tofu, press it to remove moisture, and cube it. Coat it with the same breading and fry until golden. Each choice brings a new flavor to your tacos. While avocado and cabbage are classic toppings, you can get creative! Consider using fresh mango salsa for a sweet twist. Pineapple slaw adds a nice crunch and fruity flavor. You can also try pickled red onions for a tangy punch. Radishes add a crisp bite, while jalapeños can give some heat. Don't forget about cheese! Crumbled queso fresco or shredded cheddar can make your tacos even tastier. Mix and match to find your perfect topping combo! The right sauce can enhance your tacos. You can make your own or use store-bought options. A simple lime crema is easy to whip up. Just mix sour cream, lime juice, and a pinch of salt. For a spicy kick, try chipotle mayo. Combine mayonnaise with chipotle peppers in adobo sauce. If you prefer store-bought, look for spicy salsas or zesty cilantro dressings. These sauces add a burst of flavor and can take your tacos to the next level. Check out the Full Recipe for more sauce ideas! To keep your tacos fresh, place them in an airtight container. Store them in the fridge. They are best eaten within two days. Make sure to keep the fish separate from the tortillas and toppings. This helps to keep everything crisp. To reheat and keep them crispy, use the oven. Preheat it to 350°F (175°C). Place the tacos on a baking sheet. Heat them for about 10 minutes. This method keeps the fish nice and crunchy. Avoid using the microwave as it makes the tacos soggy. You can freeze the fish but not the assembled tacos. To freeze the fish, let it cool completely. Wrap it tightly in plastic wrap, then place it in a freezer bag. It will last for up to three months. When ready to eat, thaw in the fridge overnight before reheating. For the tortillas and toppings, it's best to prepare them fresh. I recommend using white fish fillets like cod or tilapia. These fish are mild and flaky. They fry up nicely and stay tender inside. Cod has a firm texture, while tilapia is soft. Both options soak up flavors well, making them ideal for tacos. Yes, you can prep some parts ahead. Slice the fish and mix the coating early. You can even bread the fish and store it in the fridge for a few hours. Just fry them right before serving. This keeps them crispy and fresh. Great sides include rice, beans, or a fresh salad. You can also try chips and salsa for a crunchy touch. A light coleslaw pairs well too, adding a cool, crisp contrast. You can make a simple spicy sauce with just a few ingredients. Mix 1/2 cup of sour cream with 1-2 tablespoons of hot sauce. For more flavor, add lime juice and a pinch of salt. Adjust the heat to your taste. This sauce adds a fantastic kick to the tacos. For more details, check the Full Recipe. This article covers the ingredients, steps, and tips to make crispy fish tacos. You learned about the best fish options, how to achieve a perfect crunch, and ideas for tasty variations. Remember, using fresh ingredients and following the frying tips ensures a delicious meal. Enjoy experimenting with toppings and sauces to make your tacos unique. With these guidelines, you can create a fun and flavorful dish that everyone will love. Happy cooking!

Crispy Fish Tacos Flavorful and Easy to Make

Craving a tasty dish that’s easy to whip up? Look no further than crispy fish tacos! You’ll learn how to

- 1 pre-made pizza crust - 1 cup pizza sauce - 1 ½ cups shredded mozzarella cheese - ½ cup sliced bell peppers (red, green, yellow) - ½ cup sliced red onion - 1 cup fresh spinach leaves - ½ cup sliced mushrooms (button or cremini) - ½ cup black olives, sliced - ½ cup cherry tomatoes, halved - 1 teaspoon dried oregano - 1 teaspoon garlic powder - Fresh basil leaves for garnish Loaded veggie pizza shines with its blend of flavors and colors. You can start with a pre-made pizza crust. This crust saves time and helps you focus on the toppings. Choose your favorite store-bought crust or use your homemade version. Next, spread a cup of pizza sauce evenly over the crust. Marinara sauce works great too. Now, let’s talk cheese. Use 1 ½ cups of shredded mozzarella cheese. The cheese melts beautifully and adds creaminess to every bite. For the veggie toppings, I love using a mix of bell peppers. They add sweetness and color to the dish. Slice up red, green, and yellow bell peppers for a vibrant look. Add some sliced red onion for a bit of zing. Fresh spinach leaves bring a pop of green and are packed with nutrients. You can also add sliced mushrooms, black olives, and halved cherry tomatoes for extra flavor. To make it even tastier, sprinkle on some dried oregano and garlic powder. These spices boost the taste and make your pizza more aromatic. Finally, add fresh basil leaves as a garnish. They add a lovely touch and a burst of freshness. This loaded veggie pizza is not only colorful and tasty, but it is also healthy. You can enjoy it guilt-free, knowing you are eating plenty of veggies. For the full recipe, check out the details above. - Preheat oven to 475°F (246°C). - Position pre-made pizza crust on a baking sheet or pizza stone. Start by heating your oven. A hot oven makes the crust crispy. While it heats, get your pizza crust ready. Place it on a baking sheet or pizza stone. This choice helps with even cooking. - Spread pizza sauce over the crust. - Layer mozzarella cheese and distribute toppings evenly. Now, take your pizza sauce. Spread it over the crust, leaving a small edge. This edge will rise and give you a nice crust. Next, sprinkle half of the mozzarella cheese on the sauce. This helps hold the toppings. Add your veggie toppings next. Use bell peppers, red onion, spinach, mushrooms, black olives, and cherry tomatoes. Make sure to spread them evenly. This step is key for a good bite every time. - Add seasonings and final cheese layer. - Bake for 12-15 minutes until golden brown. Sprinkle your seasonings now. Use garlic powder and dried oregano for great flavor. If you like heat, add red pepper flakes. Finally, top with the rest of the mozzarella cheese. Slide your loaded veggie pizza into the oven. Bake for 12-15 minutes. Watch for that golden brown color. When it’s done, let it cool for a few minutes. This helps with slicing. Serve hot and enjoy the taste of fresh veggies! For the full recipe, check out the section above. To get a great crust, you need heat. Preheat your oven to 475°F (246°C). This high heat helps the crust get crispy. You can use either a pizza stone or a baking sheet. A pizza stone gives a really nice crust. It holds heat well and cooks evenly. If you use a baking sheet, make sure it’s hot before placing the pizza on it. Both methods work, but a stone is best if you have one. Layering your toppings is key for a great look and taste. Start with sauce, then cheese, and finally, your veggies. Spread your toppings evenly. This helps each slice have a bit of everything. For a fun look, mix the colors of your veggies. Use red, green, and yellow bell peppers. Balance flavors with crunchy veggies like onions and soft ones like mushrooms. This makes each bite exciting. If you like spice, add some heat to your pizza! You can use red pepper flakes for a kick. Just sprinkle them on top before baking. If you want more flavor, try jalapeños or pepperoncini. They add spice and taste. For a milder option, consider using a spicy sauce or infused oils. These choices let you control the heat level in a fun way. You can check the Full Recipe for more tips! {{image_4}} For a vegan loaded veggie pizza, you can swap cheese for plant-based options. Options like cashew cheese or almond cheese work well. They melt nicely and add creaminess. You can also use nutritional yeast for a cheesy flavor. For protein, think about using toppings like chickpeas or lentils. These add a hearty bite. You might also add vegan sausage or tempeh. Both give great flavor and texture. If you need a gluten-free option, choose gluten-free pizza crusts. You can find these in stores or make one at home. Many brands now offer tasty, ready-made crusts. For the sauce, marinara is safe and delicious. You can also try pesto or a white sauce. Both add unique flavors. Top your pizza with your favorite veggies, but check the labels for gluten. Using seasonal vegetables can make your pizza special. In summer, add zucchini, fresh corn, or ripe tomatoes. These veggies bring bright flavors to the dish. In fall, try butternut squash or Brussels sprouts. Roasted sweet potatoes also add a nice touch. These seasonal ingredients enhance taste and give a beautiful look. Storing uneaten pizza the right way keeps it fresh. First, slice the pizza into wedges. Then, place the slices in an airtight container. You can also wrap them in plastic wrap. Make sure to store it in the fridge. It lasts up to three days. After that, the flavors fade, and the crust can get soggy. Freezing loaded veggie pizza is easy. First, let the pizza cool completely. Then, slice it into portions. Wrap each piece in plastic wrap. After that, place the wrapped slices in a freezer bag. Make sure to remove as much air as possible. You can freeze it for up to three months. When you want to eat it, take it out and let it thaw in the fridge overnight. Reheat the pizza in the oven at 375°F (190°C) for about 10-15 minutes. This helps keep the crust crispy. Meal prep makes weeknight dinners quick. You can make the pizza ahead of time. Bake it and let it cool. Then, store it in the fridge for quick meals. You can also prep the toppings and sauce a day before. Keep them in separate containers. This way, you can assemble and bake your pizza in no time. Always remember to use fresh veggies for the best taste. For more tips, check out the Full Recipe to explore different ways to enjoy your loaded veggie pizza! To make loaded veggie pizza from scratch, start with the right ingredients. You can use a pre-made pizza crust or make your own dough. For a simple dough, mix flour, water, yeast, and salt. Let it rise, then roll it out. Here are the main ingredients you need: - 1 pre-made pizza crust - 1 cup pizza sauce - 1 ½ cups shredded mozzarella cheese - ½ cup sliced bell peppers - ½ cup sliced red onion - 1 cup fresh spinach leaves - ½ cup sliced mushrooms - ½ cup black olives - ½ cup cherry tomatoes - 1 teaspoon dried oregano - 1 teaspoon garlic powder - Red pepper flakes (optional) - Fresh basil leaves (for garnish) Gather these items, and you are ready to create your delicious pizza. For veggie pizza, you have many tasty options. Here are some popular choices that create great flavor: - Bell peppers: They add crunch and color. - Red onion: This gives a sweet and sharp taste. - Fresh spinach: Adds a nice green touch and is healthy. - Mushrooms: They provide a rich, earthy flavor. - Black olives: These add a salty kick. - Cherry tomatoes: They burst with sweetness when cooked. You can mix and match these veggies to find your favorite combo. Absolutely! While mozzarella is classic, you can try other cheeses too. Here are some good options: - Cheddar: It adds a sharp taste. - Feta: This gives a tangy flavor. - Gouda: Its creamy texture is delicious. - Vegan cheese: Perfect for plant-based diets. Feel free to experiment and find the cheese you love best! If you want the full recipe, check it out above. In this post, I covered how to make a Loaded Veggie Pizza. We started with the essential ingredients and learned the steps to prepare the crust and toppings. I shared tips for a perfect bake and tasty variations, including vegan and gluten-free options. Finally, we talked about storing leftovers and meal prep. Try out these methods and enjoy making this pizza yourself. You'll love the taste and ease!

Loaded Veggie Pizza Flavorful and Healthy Delight

Looking for a healthy twist on pizza? You’re in the right place! My Loaded Veggie Pizza packs bold flavors and

Older posts
Newer posts
← Previous Page1 Page2 Page3 … Page55 Next →

dsad

© 2025 eataroundit • Built with GeneratePress

Our Policies

  • Copyright Policy
  • Cookie Policy
  • GDPR Policy
  • Privacy Policy
  • Disclaimer
  • Terms Of Use

More Information

  • Home
  • About
  • Contact
  • Appetizers
  • Dessert
  • Dinner
  • Drinks
©2025, eataroundit About Back To Top