Skip to content
DisclaimerTerms Of UseGDPR PolicyCookie Policy

eataroundit

  • Home
  • Drinks
  • Appetizers
  • Dinner
  • Dessert
  • About
  • Contact
  • Privacy Policy
DisclaimerTerms Of UseGDPR PolicyCookie Policy

Hannah

To make the best blueberry scones, gather these ingredients: - 2 cups all-purpose flour - 1/2 cup granulated sugar - 1 tablespoon baking powder - 1/2 teaspoon salt - 1/2 cup unsalted butter, cold and cut into small cubes - 1 cup fresh blueberries (frozen can be used if fresh aren't available) - 3/4 cup heavy cream - 1 large egg - 1 teaspoon vanilla extract - Zest of 1 lemon (optional for added freshness) - Extra heavy cream and sugar for a sweet topping You can swap some ingredients if needed. Here are some ideas: - Use whole wheat flour for a nutty flavor. - Substitute coconut sugar for granulated sugar for a healthier option. - Replace heavy cream with milk or almond milk for a lighter scone. - If you lack fresh blueberries, frozen ones work just fine. When selecting blueberries, look for these signs: - Choose berries that are plump and firm. - Check for a deep blue color; avoid any that are red or green. - Inspect for mold or any signs of squishiness. - Smell them! Fresh blueberries should have a sweet scent. These tips will help you pick the best blueberries for your scones. Enjoy the process of baking! For the full recipe, refer to the previous section. To make perfect blueberry scones, follow these steps closely. First, preheat your oven to 400°F (200°C). Line a baking sheet with parchment paper. This helps prevent sticking. Next, grab a large bowl. Mix 2 cups of flour, 1/2 cup of sugar, 1 tablespoon of baking powder, and 1/2 teaspoon of salt. Whisk these dry ingredients until they blend well. Now, add 1/2 cup of cold, cubed butter. Use your hands or a pastry cutter to mix. You want it to look like coarse crumbs, with some bigger pieces. This gives the scones a nice texture. Gently fold in 1 cup of fresh blueberries. Be careful not to burst them. In another bowl, mix 3/4 cup of heavy cream, 1 large egg, 1 teaspoon of vanilla, and optional lemon zest. Pour this over the dry mix. Stir with a spatula until just combined. The dough will be sticky. Don’t overmix; this keeps them fluffy. Transfer the dough to a floured surface. Shape it into a circle about 1 inch thick. Cut it into wedges or use a round cutter. Put the scones on the baking sheet. Brush the tops with extra cream and sprinkle sugar on them for a sweet crust. Bake for 15-20 minutes. They should be golden brown. A toothpick will come out clean when they are ready. Let the scones cool on a wire rack for a few minutes before serving. This helps them set up nicely. You will need a few key items to make these scones: - Mixing bowls - Whisk - Pastry cutter or your hands - Spatula - Baking sheet - Parchment paper - Wire rack Avoid these common mistakes for the best results: - Overmixing the dough can make scones tough. - Using warm butter can lead to dense scones. - Not measuring ingredients accurately can change the texture. - Forgetting to chill the dough can affect baking. By following these steps, you will create delicious blueberry scones. For the complete recipe, check the [Full Recipe]. To make sure your scones are light and fluffy, always use cold butter. This helps create steam as the scones bake. The steam makes the scones rise. Also, mix the dough gently. Overmixing can lead to tough scones. When you fold in the blueberries, be careful not to crush them. This keeps the scones from turning purple. I love to serve these blueberry scones warm. They taste great with clotted cream or butter. You can also add a drizzle of honey for extra sweetness. For a fun touch, serve them with a side of lemon curd. Pair them with tea or coffee for a nice afternoon treat. If you have leftover scones, store them in an airtight container. They stay fresh for up to two days at room temperature. If you want to keep them longer, freeze them. Wrap each scone in plastic wrap, then place them in a zip-top bag. They can last up to three months in the freezer. When you're ready to eat, just reheat them in the oven for a few minutes. This will help them regain their fluffy texture. For the full recipe, check out the details above! {{image_4}} You can change the flavor of your scones easily. Try adding lemon or almond for a twist. - For lemon scones, add zest from one lemon to the dough. - For almond flavor, mix in almond extract instead of vanilla. Both options add a fresh taste and aroma to the scones. Blueberries are great, but other berries can work too. You can use raspberries, blackberries, or strawberries. - Just make sure to chop larger berries into smaller pieces. - Mixing berries is also fun. Combine blueberries with raspberries for a berry medley. This gives your scones a colorful and tasty twist. If you need gluten-free scones, it’s easy to adapt. - Use a gluten-free all-purpose flour blend instead of regular flour. - Add a bit of xanthan gum to help with texture. These changes keep the scones soft and delicious. You’ll enjoy the same great flavor without the gluten! For the full recipe, check the original instructions above. Each scone has about 200 calories. This count includes all ingredients. The main sources are flour, sugar, and butter. Enjoying one scone is a tasty treat without too many calories. Blueberries are full of vitamins and antioxidants. They help fight free radicals and boost your immune system. Heavy cream adds calcium and healthy fats, which can support bone health. - All-purpose flour: Good for energy but low in fiber. - Sugar: Provides quick energy but should be consumed in moderation. - Unsalted butter: Adds flavor and richness but is high in saturated fat. - Blueberries: Low in calories and high in vitamins C and K. - Heavy cream: Rich in fat, which aids in satiety. - Egg: A great source of protein and essential nutrients. These insights help you make informed choices while baking. For detailed recipes, you can check out the Full Recipe. You can freeze homemade blueberry scones easily. First, let them cool completely after baking. Then, place them in a single layer on a baking sheet. Freeze them for about one hour. After that, transfer the scones to an airtight container or a freezer bag. They will keep well for up to three months. To enjoy them later, just thaw at room temperature or warm in the oven for a few minutes. Yes, you can use frozen blueberries! They work well in this recipe. Frozen blueberries may burst more easily than fresh ones, so mix them in gently. This keeps your scones from turning too blue in color. They will still taste great, and using frozen berries can be a time-saver! Blueberry scones taste wonderful with a variety of toppings. Try serving them with clotted cream or butter for a rich taste. You can also add a sweet jam, like strawberry or raspberry, for an extra flavor kick. Pairing them with fresh fruit or yogurt can add a nice touch, too! To check if your scones are done, look for a light golden color on top. Insert a toothpick into the center of a scone. If it comes out clean or with a few crumbs, your scones are ready. If the toothpick has wet dough on it, bake them a few more minutes. You can use different types of flour, but it may change the texture. For a lighter scone, you can try cake flour. For a healthier option, whole wheat flour works too. Keep in mind that whole wheat flour may make the scones denser. You might need to adjust the liquid in the recipe if you switch flours. For the full recipe, check above. Making blueberry scones is fun and easy. We explored the key ingredients, tips for freshness, and detailed instructions. We also talked about how to avoid common mistakes and ensure fluffy results. Variations add new flavors and ideas for gluten-free options. In the end, blueberry scones are a treat you can enjoy in many ways. Follow these tips to make your scones delicious every time. Happy baking!

Homemade Blueberry Scones Perfect for Any Gathering

Are you ready to impress your friends and family with a delicious treat? Homemade blueberry scones are the perfect blend

- 1 pound large shrimp, peeled and deveined - 1 cup unsweetened shredded coconut - 1 cup panko breadcrumbs - 1/2 cup all-purpose flour - 2 large eggs - 1 teaspoon garlic powder - 1 teaspoon paprika - 1/2 teaspoon salt - 1/4 teaspoon freshly ground black pepper - Cooking spray For people with allergies, you can make this dish gluten-free. Use gluten-free flour and breadcrumbs. When selecting shrimp, I suggest looking for shrimp that is firm and has a mild smell. Fresh shrimp should have a light color and a slight sheen. You will need an air fryer for this recipe. Make sure it has a good capacity for cooking shrimp evenly. Use mixing bowls to combine the ingredients. A shallow dish works well for the coconut and breadcrumbs. A whisk will help mix the eggs. 1. Preheat the air fryer to 400°F (200°C). This step is key for even cooking. Let it heat for about 5 minutes. 2. In a large bowl, combine the all-purpose flour, garlic powder, paprika, salt, and black pepper. Whisk them until mixed well. This will be your seasoned flour mixture. - Dredging techniques for crispy coating: Take each shrimp and first coat it in the seasoned flour. Make sure to shake off any extra flour. This helps the next layer stick better. - Tips for even coating: After the flour, dip the shrimp into the whisked eggs. Let the excess egg drip off. Then coat it in the coconut-panko mix. Press gently to ensure even coverage. - Arranging shrimp in the air fryer: Place the coated shrimp in a single layer in the air fryer basket. Do not overlap them to ensure they cook evenly. Lightly spray them with cooking spray for added crispiness. - Cooking time and temperature details: Air fry the shrimp for 8 to 10 minutes. Flip them halfway through for a golden brown finish. They are done when they look crispy and reach an internal temperature of 120°F (49°C). To get that golden crunch, use cooking spray. This step is key to crispiness. Lightly coat the shrimp before they cook. This adds flavor and helps them brown nicely. Cooking in batches helps too. If you overcrowd the air fryer, the shrimp may steam. This can make them soggy. So, cook in smaller groups for the best results. Pair your coconut shrimp with tasty sauces. I love sweet chili sauce for its perfect balance of heat and sweet. You can also try a tangy mango sauce or a zesty lime dip. For sides, serve with a fresh salad or some jasmine rice. Garnish with lime wedges and cilantro for a pop of color. This adds freshness and makes the dish more inviting. A common mistake is letting the shrimp get soggy. To avoid this, ensure they are well-coated but not too wet. Also, be mindful of cooking time. Overcooked shrimp can turn rubbery. They should be pink and firm but not tough. Follow the cooking times in the Full Recipe for the best results. Enjoy your crispy coconut shrimp! {{image_4}} You can make your coconut shrimp more exciting. Try adding spices to the flour mix. A bit of curry powder gives a nice kick. You can also use flavored breadcrumbs. Garlic or herb panko adds depth. Experiment and find your favorite blend. If you want alternatives, consider swapping the coconut. Try crushed cornflakes for a different texture. You can also change the protein. Chicken or tofu works well. Just make sure to adjust cooking times based on the new protein choice. Air frying gives the best crisp. But you can bake them too. If using an oven, set it to 425°F (220°C). Bake for about 15-20 minutes, flipping halfway. This method works if you don’t have an air fryer. To keep your coconut shrimp fresh, use airtight containers. Glass containers work great. They keep the shrimp crispy and tasty. If you have a lot, you can use freezer bags. Store the leftovers in the fridge for up to three days. In the freezer, they last up to three months. Just remember to label your bags with the date. To reheat coconut shrimp, use your air fryer. Set it to 350°F (175°C) for about 5 minutes. This method keeps them crispy. You can also use a conventional oven. Place them on a baking sheet and heat for 10 minutes at 375°F (190°C). Avoid using a microwave. It makes the shrimp soggy. Keep an eye on them to prevent overcooking. You want them warm, not dry. You can tell shrimp are done when they turn pink and opaque. They should also curl into a "C" shape. If they look gray or feel soft, they need more time. Fully cooked shrimp have an internal temperature of 120°F (49°C). Yes, you can make this coconut shrimp gluten-free! Use gluten-free flour and gluten-free panko breadcrumbs. Many brands offer great options that taste amazing. Always check the labels to ensure they are safe. Coconut shrimp taste great with many sauces. Here are some popular choices: - Sweet chili sauce - Mango salsa - Pineapple dipping sauce - Spicy aioli You can even make your own by mixing mayonnaise with sriracha for heat. Yes, you can use frozen shrimp! Just make sure to thaw them first. Place the shrimp in the fridge overnight or run them under cold water for a quick thaw. Pat them dry before coating to help the breading stick. To add heat, mix cayenne pepper into your flour mixture. You can also sprinkle some chili flakes in the coconut and panko coating. Another option is to serve with a spicy dipping sauce for a kick. You can find the Full Recipe for Air Fryer Coconut Shrimp, which includes all the details you need to make this tasty dish. Enjoy the crispy and flavorful delight! This blog post explored how to make crispy coconut shrimp. We covered ingredients, essential tools, and step-by-step instructions. You learned tips for a perfect crisp and common mistakes to avoid. Variations like spice additions and cooking methods were also discussed. By following this guide, you can create delicious coconut shrimp at home. Enjoy your cooking journey and share with friends! The right techniques and tools make all the difference. Happy frying!

Air Fryer Coconut Shrimp Crispy and Flavorful Delight

If you’re craving a crispy and flavorful treat, look no further than Air Fryer Coconut Shrimp! This dish combines succulent

To make a tasty Cheesy Beef Enchilada Skillet, you need: - 1 pound ground beef - 1 medium onion, finely diced - 2 cloves garlic, minced - 1 can (15 oz) enchilada sauce - 1 cup canned black beans, drained and rinsed - 1 cup corn (fresh, frozen, or canned) - 1 teaspoon chili powder - 1 teaspoon cumin - Salt and freshly ground black pepper, to taste - 2 cups cooked rice (either white or brown) - 1 cup shredded cheddar cheese - 1 cup shredded Monterey Jack cheese These ingredients create the base of the skillet. The ground beef gives a hearty flavor, while the beans and corn add texture and nutrition. You can boost the flavor and look of your dish with these toppings: - Fresh cilantro, chopped - 1 ripe avocado, diced - Sour cream These optional garnishes make the meal look vibrant and fresh. The avocado adds creaminess, while cilantro brings a burst of flavor. To prepare this dish, you need a few simple tools: - Large skillet - Spatula - Knife and cutting board - Measuring cups and spoons Having these tools ready makes cooking smoother and more fun. You can gather everything before you start and enjoy the process. For the full recipe, check out the details provided. To start, heat a large skillet over medium-high heat. Add 1 pound of ground beef. Use a spatula to break it apart as it cooks. Keep cooking until it turns brown, which takes about 5-7 minutes. Drain any extra fat to keep the dish light. Next, add 1 medium onion, finely diced, and 2 cloves of minced garlic to the skillet. Stir these together with the beef. Cook until the onion is soft and clear, about 3-4 minutes. Make sure to stir often to prevent burning. Now it's time to add flavor. Pour in 1 can of enchilada sauce. Then, add 1 cup of canned black beans, 1 cup of corn, 1 teaspoon of chili powder, and 1 teaspoon of cumin. Season with salt and freshly ground black pepper. Mix well and bring everything to a gentle simmer for a few minutes. Next, gently fold in 2 cups of cooked rice. Stir until the rice is well mixed with the beef and sauce. Let it simmer together for 5 minutes. This allows the flavors to blend nicely. Sprinkle 1 cup of shredded cheddar cheese and 1 cup of shredded Monterey Jack cheese over the top. Cover the skillet with a lid. Cook for another 3-5 minutes until the cheese melts and bubbles. Finally, remove the skillet from the heat. Garnish with fresh cilantro for added flavor. Serve hot with diced avocado and a scoop of sour cream for creaminess. Enjoy this easy and flavorful meal! For the full recipe, check out the earlier sections. To keep your Cheesy Beef Enchilada Skillet from being greasy, drain the beef well. After browning it, tilt the skillet and let the fat drain off. You can also choose lean ground beef. This helps cut down on extra fat. Using a paper towel can soak up any remaining grease. This simple step makes a big difference. To boost flavor, try adding fresh lime juice before serving. It adds a nice kick. You can also toss in chopped jalapeños for heat. Adding fresh herbs like cilantro or parsley will brighten the dish. If you want more depth, consider using smoked paprika. These small tweaks can elevate your dish from good to great. You can make this dish your own! Swap the ground beef for ground turkey or chicken. If you want it vegetarian, use black beans or lentils. Feel free to mix different cheeses for a unique taste. Want more veggies? Add bell peppers, zucchini, or spinach. Experimenting with flavors keeps it fun and fresh. For the full recipe, check out the details above. {{image_4}} You can easily make a vegetarian version of the Cheesy Beef Enchilada Skillet. Just swap the ground beef for a mix of vegetables. Try using: - 1 cup diced bell peppers - 1 cup zucchini, chopped - 1 can (15 oz) black beans Sauté the veggies with the onion and garlic until they soften. Follow the same steps as the original recipe. This keeps the dish hearty and full of flavor. For those who love heat, add jalapeños to your skillet. You can use: - 1-2 fresh jalapeños, diced - 1 teaspoon crushed red pepper flakes Mix the jalapeños in with the onion and garlic for a good kick. Adjust the spice to your taste. This version will pack a punch! To make this dish gluten-free, ensure your enchilada sauce is gluten-free. Use: - 1 can (15 oz) gluten-free enchilada sauce Also, check that your rice is gluten-free. Follow the original recipe, and you’ll have a tasty meal that everyone can enjoy. Allow your Cheesy Beef Enchilada Skillet to cool down first. Once it's cool, place it in an airtight container. Store it in the fridge for up to three days. Make sure to keep it sealed tightly. This helps keep the flavors fresh and delicious. To reheat, you can use the microwave or stovetop. If using a microwave, place a serving in a microwave-safe bowl. Heat it for 1-2 minutes or until hot. Stir halfway through for even heating. If using the stovetop, place the skillet over low heat. Stir gently until it's warmed through. Add a splash of water if it seems dry. You can freeze leftovers for later! Use a freezer-safe container or bag. Make sure to remove as much air as possible before sealing. It can last in the freezer for up to three months. When ready to eat, thaw it overnight in the fridge. Reheat it using the stovetop or microwave as mentioned. Enjoy your easy meal anytime! You can use ground turkey or chicken as a leaner option. If you want a meat-free dish, try black beans or lentils. Both options will keep the dish hearty and tasty. Absolutely! You can use any cheese you like. Pepper Jack adds spice. Gouda gives a smoky flavor. Just pick your favorite cheese or mix a few for fun. To add heat, mix in diced jalapeños or hot sauce. You can also increase the chili powder. Start with a little and taste as you go. It’s easy to add more heat! Yes, you can make it ahead. Cook the beef and mix in the veggies and sauce. Store it in the fridge. When you’re ready, heat it up and melt the cheese before serving. This makes a busy night easier! For the full recipe, check out the Cheesy Beef Enchilada Skillet Delight . This blog post covered how to make a cheesy beef enchilada skillet. You learned about key ingredients, step-by-step cooking, and helpful tips. Variations for dietary needs also make this dish versatile. Proper storage tips ensure you can enjoy leftovers later. In closing, this dish is easy to make and fun to customize. You can create a meal that suits your taste and needs. Enjoy the cooking process and share it with others!

Cheesy Beef Enchilada Skillet Easy and Flavorful Meal

Craving a quick, tasty meal? You’ve come to the right place! My Cheesy Beef Enchilada Skillet recipe combines bold flavors

- 8 oz. fresh or dried noodles - 4 cloves garlic, finely minced - 2 tablespoons sesame oil The main ingredients are simple but full of flavor. Noodles are the star, and you can pick fresh or dried. I love using lo mein or spaghetti for this dish. Garlic adds a punch of taste, and sesame oil brings a nutty aroma. - 2 tablespoons soy sauce - 1 tablespoon chili paste - 1 tablespoon rice vinegar - 1 tablespoon honey or maple syrup The sauce is where the magic happens. Soy sauce gives a salty kick, while chili paste adds heat. Rice vinegar brings some tang, and honey or maple syrup adds a nice sweetness. This mix creates a balanced flavor profile. - 2 green onions, thinly sliced - ½ cup bell peppers, thinly sliced - ¼ cup shredded carrots - Sesame seeds and fresh cilantro Garnishes take your dish to the next level. Green onions add a fresh crunch. Bell peppers give color and sweetness, while carrots add a hint of earthiness. Don’t forget sesame seeds and cilantro for that final touch. You can find the full recipe for these spicy garlic noodles in the main article. - Bring water to a rolling boil. - Cook noodles according to package directions. Cooking noodles is simple. Start by boiling a large pot of water. Make sure to add a good amount of salt for flavor. Once the water bubbles, toss in your noodles. Keep an eye on the clock. You want them al dente, not mushy. Once cooked, drain the noodles and set them aside. - Whisk together soy sauce, chili paste, rice vinegar, and honey. Next, we need to create the garlic sauce. Grab a small bowl and add the soy sauce, chili paste, rice vinegar, and honey. Use a whisk or fork to mix it all together. You want a smooth blend. Let it sit for a bit. This helps the flavors combine nicely. - Heat sesame oil and sauté garlic. - Add vegetables and stir-fry. Now, heat some sesame oil in a large skillet or wok over medium heat. Once hot, add the minced garlic. Stir it for about one minute. The smell will be amazing! Next, toss in the sliced bell peppers and shredded carrots. Stir-fry the veggies for 2-3 minutes. They should be soft but still crunchy. - Toss in cooked noodles with sauce. - Mix in green onions and remove from heat. It’s time to bring it all together. Add the cooked noodles to the skillet. Pour over the garlic sauce and gently toss everything. Make sure the noodles are well-coated. Stir in the sliced green onions, then remove the skillet from heat. Your spicy garlic noodles are almost ready to serve! For the full recipe, check the earlier section. To get al dente noodles, cook them in boiling salted water. This method helps keep them firm. Follow package directions, but check a minute early. Drain them right away and rinse with cold water. This cools them down and stops the cooking. Avoid soggy noodles by not overcooking. If you want to mix them later, toss with a little oil to prevent sticking. You can change the heat of your spicy garlic noodles easily. Use more or less chili paste to suit your taste. Start with one tablespoon and add more if you like. You could also try fresh chilies or crushed red pepper. These can add different flavors and heat levels. Just remember to taste as you go to find your perfect spice. Garnishes can make your dish pop! Try green onions, sesame seeds, or chopped cilantro. Each adds flavor and a nice look. You could also use crushed peanuts for a crunchy texture. Pairing flavors can help too. For example, try a squeeze of lime for a fresh twist. Don't be afraid to get creative and make your dish unique! {{image_4}} You can boost your spicy garlic noodles with protein. Tofu, chicken, or shrimp all work well. If you choose chicken, use boneless pieces, cut into small bites. For shrimp, use large, peeled shrimp. To cook chicken, sauté it first in sesame oil until golden. For shrimp, add them to the skillet when you sauté the garlic. They cook quickly, just 2-3 minutes. If using tofu, press it to remove extra water. Cut it into cubes and fry until golden before adding to the dish. To make this dish vegan, swap honey with maple syrup. You can also use soy sauce alternatives, like tamari or coconut aminos. If you need a gluten-free option, choose gluten-free noodles. Rice noodles or quinoa noodles are great choices. Just follow the cooking instructions on the package for best results. Serve your spicy garlic noodles with a side of crispy spring rolls or a fresh salad. You can also pair them with sautéed greens, like bok choy or spinach. For a fun twist, try serving in bowls with chopsticks. Top your noodles with extra sesame seeds and cilantro for a pop of color. Add lime wedges on the side for a zesty kick. Check out the Full Recipe for more ideas! To store leftover spicy garlic noodles, let them cool first. Once cooled, place them in an airtight container. I recommend using glass containers to keep the flavors fresh. Make sure to seal the lid tightly. This will help prevent any odors from affecting your dish. You can freeze spicy garlic noodles for longer storage. Divide the noodles into portions before freezing. Use freezer-safe bags or containers to prevent freezer burn. When you're ready to enjoy them again, thaw them in the fridge overnight. To reheat, warm them in a skillet over low heat with a splash of water. This keeps them moist and tasty. These noodles will last about 3 to 4 days in the fridge. Always check for signs of spoilage before eating. If you see mold or smell something off, it’s best to throw them out. Trust your senses; they are your best guide! If you need a soy sauce alternative, try these options: - Tamari: A gluten-free option, similar in taste. - Coconut aminos: A sweeter, soy-free choice. - Worcestershire sauce: Adds a unique flavor, but use it sparingly. - Miso paste: Mix with water for a quick substitute. These alternatives work well in the spicy garlic noodles, keeping the dish tasty. Yes, you can use many types of noodles. Some good options are: - Spaghetti: Easy to find and works great. - Udon: Thick and chewy, adds a nice texture. - Rice noodles: Perfect for a gluten-free version. - Soba: Adds a nutty flavor to the dish. Feel free to use what you have on hand for the spicy garlic noodles. The spice level in these noodles can vary. The chili paste is the main heat source. If you like it mild, use less chili paste. To make it spicier, add more. You can also try: - Red pepper flakes: For a different kind of heat. - Fresh chili peppers: Slice them up and add for extra kick. Adjust the spice to match your taste and enjoy your fiery garlic noodles! Spicy garlic noodles are easy and fun to make. You learned about the key ingredients and step-by-step cooking tips. I shared ways to customize these noodles for your taste, including adding proteins or veggies. You also got storage tips to keep leftovers fresh. Now, you can create a delicious meal at home. Enjoy making this dish, and share it with friends or family!

Spicy Garlic Noodles Flavorful and Easy Dish

Craving something tasty and quick? Spicy Garlic Noodles are the answer! In this recipe, you’ll learn how to whip up

- 2 medium zucchinis, cut into fry-shaped strips - 1 cup panko breadcrumbs - 1/2 cup freshly grated Parmesan cheese - 1 teaspoon garlic powder - 1 teaspoon onion powder - 1 teaspoon dried oregano - Salt and pepper to taste - 2 large eggs - Olive oil spray First, preheat your air fryer to 400°F (200°C) for 5 minutes. This step warms up the air fryer and helps the fries cook evenly. While it warms, prepare your zucchini. Cut the zucchinis into fry-shaped strips. This shape gives you the perfect bite-sized pieces for dipping. In a medium bowl, mix panko breadcrumbs, grated Parmesan, garlic powder, onion powder, dried oregano, salt, and pepper. This blend adds a nice crunch and great flavor. In another bowl, crack the two eggs and whisk them together. Now, take each zucchini fry. First, dip it into the egg wash to coat it. Let any extra egg drip off. Next, roll the fry in the breadcrumb mixture. Press gently so the coating sticks well. Arrange the coated fries in a single layer in the air fryer. Avoid overcrowding; this helps them get crispy. Lightly spray the tops with olive oil. This adds to the crunchiness. Set the timer for 10 to 12 minutes. Flip the fries halfway through cooking. This ensures they brown evenly. When they turn golden brown and crispy, remove them carefully. Let them cool for a minute before serving. Enjoy these tasty zucchini fries with your favorite dip! For the full recipe, check out the detailed instructions. To get that perfect crispiness, do not overcrowd the basket. When you pile zucchini fries together, they steam instead of fry. This can make them soggy. Instead, arrange them in a single layer, giving each fry room to breathe. To test for doneness, look for a golden color and a crispy texture. A simple poke with a fork can help. If they feel firm and crispy, they are ready to eat. For a tasty twist, try different spices. I recommend adding smoked paprika or cayenne for a kick. You can also use Italian seasoning for a herbaceous touch. Using panko breadcrumbs adds extra crunch. They are lighter than regular breadcrumbs and create a better texture. The larger flakes fry up crispier, making your fries irresistible. If you want to switch things up, try using almond flour instead of panko. You can also use nutritional yeast for a cheesy flavor without dairy. Adding fresh herbs like basil or thyme can elevate the taste. Just chop them finely and mix them in with your breadcrumbs for a fresh touch. For dipping sauces, marinara is a classic choice. It pairs well with the crispy texture. Ranch dressing is another great option for a creamy contrast. For a complete meal, serve these fries alongside grilled chicken or fish. They add a tasty veggie side to any dish. Enjoy your crispy air fryer zucchini fries! After making zucchini fries, store them in an airtight container. Place a paper towel in the container to absorb moisture. This helps keep them crispy. Refrigerate the fries within two hours of cooking. They will stay fresh for up to three days. To reheat the fries, use your air fryer. Set it to 375°F (190°C) for about 5 to 7 minutes. This method keeps the fries crispy. You can also use a conventional oven. Preheat it to 375°F (190°C) and heat the fries for about 10 minutes. Can I use frozen zucchini? Using frozen zucchini is not ideal. Frozen zucchini has more water, which can make fries soggy. Fresh zucchini gives the best results. How do I prevent the zucchini from getting soggy? To avoid sogginess, slice the zucchini evenly and dry them well. You can also sprinkle salt on them and let them sit for 10 minutes. This draws out moisture. What air fryer temperature is best for zucchini fries? The best air fryer temperature is 400°F (200°C). This temperature helps achieve a golden, crispy texture. Each serving of zucchini fries contains about 150 calories. They are low in carbs and rich in vitamins. Zucchini provides fiber, vitamin C, and potassium. The Parmesan adds protein and calcium, making them a healthy snack. You can make this recipe gluten-free by using gluten-free breadcrumbs. Look for options made from rice or almond flour. Just adjust the recipe to fit your needs. {{image_4}} To make crispy air fryer zucchini fries, you need a few simple steps. First, gather these ingredients: - 2 medium zucchinis, cut into fry-shaped strips - 1 cup panko breadcrumbs - 1/2 cup freshly grated Parmesan cheese - 1 teaspoon garlic powder - 1 teaspoon onion powder - 1 teaspoon dried oregano - Salt and pepper to taste - 2 large eggs - Olive oil spray Instructions: 1. Preheat your air fryer to 400°F (200°C) for about 5 minutes. 2. In a bowl, mix panko, Parmesan, garlic powder, onion powder, oregano, salt, and pepper. 3. In another bowl, beat the two eggs until smooth. 4. Dip each zucchini fry in the egg, letting the excess drip off. Then roll it in the breadcrumb mix, pressing gently. 5. Place the coated fries in a single layer in the air fryer basket. 6. Lightly spray the tops with olive oil for extra crunch. 7. Air fry for 10 to 12 minutes, flipping halfway through to ensure even cooking. 8. Once golden and crispy, let them cool for a minute before serving. Serving Tips: Serve warm with marinara sauce or your favorite dip. A sprinkle of parsley adds color. Enjoy these crispy treats with family and friends! Zucchini fries are a simple and tasty dish. We covered everything from ingredients to cooking tips. Remember to coat your zucchini well for a crisp bite. Customizing flavors can make them even better. Store any leftovers right, and they’ll stay good. Enjoy these fries in many ways, or dip them in your favorite sauce. With the right advice, you can make delicious, healthy snacks at home. Try this recipe and delight in your cooking skills!

Crispy Air Fryer Zucchini Fries Quick and Tasty Snack

Are you craving a tasty snack that’s easy to make? My Crispy Air Fryer Zucchini Fries are the perfect solution!

- 4 salmon fillets (approximately 6 oz each) - 2 tablespoons Cajun seasoning - 2 tablespoons olive oil - 1 tablespoon fresh lemon juice - 1 teaspoon garlic powder - 1 vibrant red bell pepper, sliced into thin strips - 1 medium zucchini, sliced into rounds - 1 small red onion, sliced into half-moons - Fresh parsley, chopped, for garnish - Lemon wedges, for serving When preparing Baked Cajun Salmon, you need to gather fresh ingredients. Start with salmon fillets, which provide a rich and tasty base. The Cajun seasoning gives the dish its signature kick. I often choose a blend that includes paprika, cayenne, and garlic for the best flavor. Next, I like to add olive oil. It helps the seasoning stick and keeps the salmon moist. Fresh lemon juice brightens the dish and adds a tangy touch. Garlic powder enhances the savory notes. For vegetables, I prefer a mix of red bell pepper, zucchini, and red onion. They roast beautifully alongside the salmon. Their colors make the dish pop. For finishing touches, I sprinkle fresh parsley on top. It adds a vibrant green color. Lemon wedges are a must for serving. A squeeze of lemon elevates the flavors. You can find the full recipe with detailed steps and notes for perfecting this dish. First, preheat your oven to 400°F (200°C). This high heat will help the salmon cook evenly and quickly. Next, prepare the marinade. In a small bowl, mix together the Cajun seasoning, olive oil, lemon juice, garlic powder, salt, and pepper. This blend will add a great kick to your salmon. Now, let's marinate the salmon. Place the salmon fillets in a shallow dish. Make sure they fit snugly without overlapping. Pour the marinade over the salmon. Use a spoon or brush to coat each fillet evenly. Let the salmon soak in the flavors for about 15 minutes. This soaking time is key; it helps the fish absorb all those tasty spices. While the salmon marinates, prepare your vegetables. In a separate bowl, combine the sliced red bell pepper, zucchini, and red onion. Drizzle with olive oil and add salt and pepper. Toss the veggies until they are well coated. Next, line a baking sheet with parchment paper or grease it lightly. Arrange the marinated salmon in the center of the baking sheet. Surround it with the seasoned vegetables. Spread the veggies out to ensure even cooking. It’s time to bake! Place the baking sheet in the preheated oven. Bake for 15-20 minutes. You’ll know the salmon is done when it looks opaque and flakes easily with a fork. For safety, the salmon should reach an internal temperature of 145°F (63°C). Once done, remove the baking sheet from the oven. Your Baked Cajun Salmon is ready to impress. Don't forget to check the full recipe for more details! Marinating the salmon is key. Let it soak for at least 15 minutes. This short time allows the flavors to blend well. Use two tablespoons of Cajun seasoning. This amount gives a nice kick without being too spicy. Adjust salt and pepper to your taste. Too much salt can overpower the dish, so be careful. For easy cleanup, use foil or parchment paper on your baking sheet. This keeps the salmon from sticking and makes washing up a breeze. To avoid overcooking the salmon, check it at 15 minutes. It should be opaque and flake easily with a fork. If you leave it too long, the fish can dry out. Plating your dish can make it more appealing. Serve the salmon on a bed of the roasted veggies. This adds color and makes the dish look fancy. You can also sprinkle fresh parsley on top for a pop of green. Add lemon wedges around the plate for a bright touch. This adds flavor and looks great! For the full recipe, check here. {{image_4}} You can change the flavor of your Baked Cajun Salmon with different spice blends. Try a smoky paprika mix for a different kick. You can also use Creole seasoning if you want a milder taste. If you are adventurous, blend spices like cayenne, thyme, and oregano to make your own Cajun seasoning. Just mix equal parts of each to create a unique blend. If you don’t have bell peppers, zucchini, or onions, don’t worry! You can swap them for other veggies. Broccoli, asparagus, or even cherry tomatoes work well. Adding more veggies boosts the nutrition and flavor of your dish. Always aim for a colorful mix on your plate. This makes your meal not only tasty but also visually appealing. You can grill or bake your salmon, each method has its perks. Grilling gives a smoky taste and crispy edges. Baking, on the other hand, keeps the salmon juicy and tender. If you want a hands-off option, try a slow cooker. Just place your marinated salmon in the slow cooker and set it on low for about 2-3 hours. You still get that rich Cajun flavor without much fuss. For the full recipe, check out the recipe section. To store baked salmon, let it cool first. Wrap each fillet tightly in plastic wrap or foil. Place it in an airtight container. This keeps the salmon moist and fresh. Baked salmon lasts in the fridge for 3 to 4 days. If you want to keep it longer, consider freezing. When reheating salmon, do it gently. Use the oven or a skillet for best results. Preheat the oven to 275°F (135°C). Place the salmon on a baking sheet. Heat for about 15 minutes or until warm. In a skillet, add a splash of water and cover. This helps to keep the fish moist. The safe temperature for reheating cooked salmon is 145°F (63°C). Use a food thermometer to check. To freeze baked salmon, wrap each piece in plastic wrap. Then, place it in a freezer bag. Remove as much air as you can. This prevents freezer burn. Salmon can stay in the freezer for up to 3 months. When you’re ready to eat it, thaw it in the fridge overnight. Reheat it using the same tips mentioned above. Enjoy your delicious meal! For the full recipe, check out the link. Cajun seasoning blends several spices. It usually includes paprika, cayenne, garlic powder, and onion powder. Some mixes add thyme and oregano. Each spice adds depth and heat to your dish. You can buy it pre-made or mix your own at home. Yes, you can. If you prefer white fish, try tilapia or cod. You can also use trout for a richer flavor. These fish cook well and absorb the Cajun spices nicely. Just adjust cooking times for thinner fillets. Try pairing your salmon with rice or quinoa. Both add a nice base for the dish. Roasted vegetables like asparagus or broccoli also work great. A fresh salad with lemon dressing can brighten up the meal too. The best way is to check the temperature. Salmon should reach 145°F (63°C). It should also look opaque and flake easily with a fork. If it’s still pink in the middle, give it a bit more time. Baked Cajun salmon is a simple and tasty meal. Using just a few key ingredients, you can create a flavorful dish. Remember to marinate your salmon and choose fresh veggies to boost health. With tips for tasty seasoning and easy cleanup, you’ll impress anyone with your cooking. Try different spices and veggies for fun variations. Enjoy leftovers in many ways, and always check for proper cooking. Follow these steps, and you'll serve up a winning dish every time!

Baked Cajun Salmon Juicy and Flavorful Delight

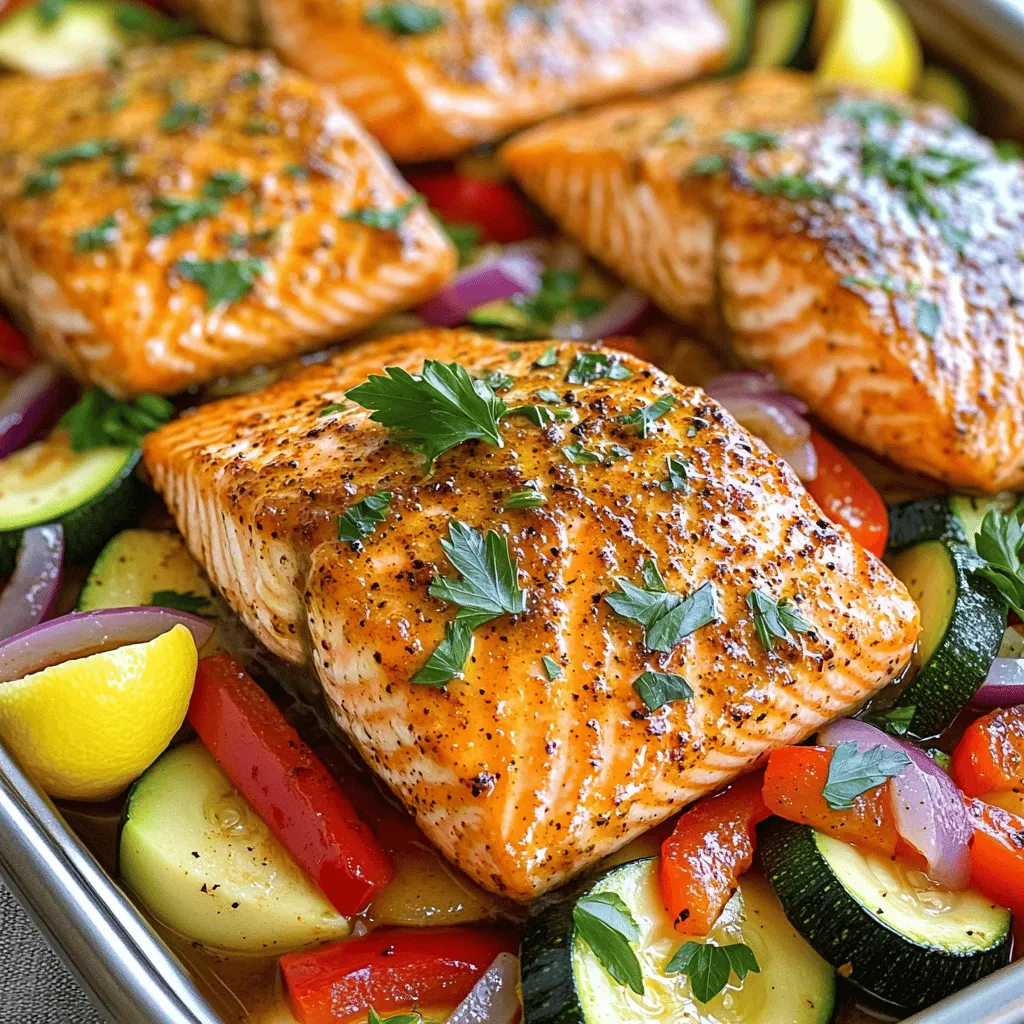
Are you ready to spice up your dinner? Baked Cajun Salmon is the dish you need! It’s juicy, flavorful, and

- 4 cups fresh broccoli florets - 1 medium onion, finely diced - 2 cloves garlic, minced - 4 cups vegetable broth - 1 cup heavy cream - 2 cups sharp cheddar cheese, freshly shredded - 1 tablespoon extra virgin olive oil - 1 teaspoon sea salt - ½ teaspoon freshly ground black pepper - ½ teaspoon smoked paprika - Crusty bread for serving - Fresh garlic - Smoked paprika - Use coconut cream for a dairy-free option. - Try different cheeses like gouda or pepper jack. - Opt for low-sodium broth if you prefer less salt. - Sautéing Aromatics: Start by heating the extra virgin olive oil in a large pot over medium heat. When the oil is hot, add the diced onion. Sauté for about 5 minutes. You want the onion to become soft and see-through. - Adding Garlic: Next, stir in the minced garlic. Cook it for one more minute. This step adds a lovely, fragrant smell. Be careful not to let the garlic burn, as it can turn bitter. - Incorporating Broccoli Florets: Now, add your fresh broccoli florets to the pot. Gently toss them in the oil and onions. Sauté for about 2 minutes. This helps the broccoli soak up all the tasty flavors. - Pouring in Vegetable Broth: After sautéing, pour in the vegetable broth. Make sure the broccoli is fully submerged. Bring this mix to a gentle boil. - Immersion Blender Techniques: Once boiling, turn down the heat and let it simmer for about 15 minutes. Your broccoli should be fork-tender now. Use an immersion blender to blend the soup until it is smooth and creamy. - Achieving Desired Texture: If you want an even silkier soup, you can use a regular blender. Just blend in small batches and return it to the pot when done. - Adding Cream and Cheese: Return the blended soup to medium heat. Stir in the heavy cream and the freshly shredded cheddar cheese. Mix well until the cheese melts into the soup. - Seasoning and Simmering: Season your soup with sea salt, black pepper, and smoked paprika. Taste and adjust the seasonings as needed. Let it simmer gently for another 5 minutes, stirring occasionally. Now, enjoy this creamy broccoli cheddar soup. For the full recipe, check out the link provided. Using Fresh Ingredients Fresh ingredients make a big difference. Use bright green broccoli florets for your soup. They bring a crisp taste and vibrant color. Choose a sharp cheddar cheese for that rich flavor. Fresh garlic adds a nice kick too. If you have herbs, like thyme or parsley, add them in for extra depth. Experimenting with Spices Spices can change the game. Start with smoked paprika for a hint of smokiness. Add a pinch of cayenne for heat, if you like spice. Nutmeg can lend a warm note to the mix. Try different spices to find what you love best. Blending Techniques To make your soup creamy, blending is key. Use an immersion blender for ease. It lets you blend right in the pot. If you prefer a super smooth texture, transfer the soup to a countertop blender. Blend in batches, then return it to the pot. Cheese Melting Tips When adding cheese, do it slowly. Stir the cheese in over low heat. This helps it melt evenly without clumping. If the soup gets too thick, add a splash of broth or cream to loosen it up. Best Accompaniments Serve your soup with crusty bread. The texture of the bread pairs well with the creamy soup. Grilled cheese sandwiches are another great match. They add a fun twist to your meal. Garnishing Ideas Garnishes can elevate your soup. A sprinkle of extra cheddar on top looks nice. Add a dash of smoked paprika for color. Fresh herbs, like parsley or chives, can brighten the dish. These simple touches make your soup more inviting. For the full recipe, check out the complete details on how to make this creamy broccoli cheddar bliss. {{image_4}} Vegan Broccoli Cheddar Soup To make a vegan version, swap the heavy cream with coconut cream. Use vegan cheddar cheese or nutritional yeast for a cheesy flavor. This keeps the dish creamy and rich without dairy. Gluten-Free Options The original recipe is gluten-free if you use gluten-free broth. Always check labels to ensure your ingredients are safe. This makes it a great choice for those with gluten sensitivities. Adding Proteins You can make this soup heartier by adding proteins. Cooked chicken or crispy bacon can bring a nice twist. Just stir these in before serving for added flavor. Introducing Herbs Fresh herbs can change the whole taste of your soup. Try adding thyme for earthiness or basil for a hint of sweetness. These herbs will elevate the dish and make it smell amazing. Chunky vs. Smooth Soup Do you prefer a chunky soup? Simply blend half of the soup and leave the rest as is. This gives you a mix of textures. If you want it smooth, blend it all until creamy. Adding Other Vegetables Feel free to add veggies like carrots or cauliflower. This adds color and nutrition. Just cook them with the broccoli for a well-rounded flavor. To store your soup, let it cool down first. Pour it into an airtight container. Seal the container tightly. This helps keep out air and moisture. - Proper Cooling Techniques: Place the soup in the fridge after about 30 minutes. This helps it cool safely. - Storage Duration: You can keep it in the fridge for about 3 to 4 days. Freezing is a great way to save your soup for later. Just follow a few simple steps for best results. - Freezing Strategies: Use freezer-safe containers or bags. Leave some space at the top for expansion. You can also portion out servings for easy use. - How to Reheat Effectively: Thaw the soup overnight in the fridge. Reheat it on the stove over low heat. Stir often to keep it smooth and creamy. Don't let any leftovers go to waste! You can use them in various ways. - Incorporating into Other Dishes: Use the soup as a base for pasta or grain dishes. You can also drizzle it over baked potatoes for a tasty twist. - Repurposing Ideas for Meal Prep: Blend it into a sauce for mac and cheese. Pour it into a casserole for added creaminess. The possibilities are endless! For the complete recipe, check the Full Recipe section. Broccoli cheddar soup can last about 3 to 5 days in the fridge. To store it well, let it cool first. Then, place it in an airtight container. This helps keep the soup fresh and tasty. If you want to keep it longer, you can freeze it. Just remember to leave some space in the container for expansion. Yes, you can make broccoli cheddar soup ahead of time. It tastes great when you prepare it a day or two before. To do this, follow the recipe steps and let the soup cool. Then, store it in the fridge. When you're ready to eat, reheat it gently on the stove. Stir often to keep it from sticking. Add a splash of cream if it looks too thick. You can make broccoli cheddar soup without cheese. You might want to use a dairy-free cheese or nutritional yeast. These options add some flavor without using dairy. Keep in mind that the soup may not be as creamy. To enhance the texture, try adding more heavy cream or blended potatoes. This keeps the soup rich while being cheese-free. Broccoli cheddar soup offers a comforting mix of flavors and textures. We covered key ingredients, like fresh broccoli and sharp cheddar. You learned how to create a creamy base and blend the soup perfectly. I shared tips for enhancements and variations, including vegan options and protein additions. Remember to store leftovers properly for later enjoyment. Enjoy making and sharing this delicious dish. Your kitchen will be filled with warm smiles!

Broccoli Cheddar Soup Creamy Comfort Food Recipe

If you crave a warm hug in a bowl, this Broccoli Cheddar Soup is for you. With fresh broccoli, sharp

To make Buffalo Chicken Meatballs, you need a few key items. Here’s what you will need: - 1 lb ground chicken - 1/2 cup breadcrumbs - 1/4 cup grated Parmesan cheese - 1/4 cup buffalo sauce (plus extra for tossing) - 1 small onion, finely chopped - 2 cloves garlic, minced - 1/2 teaspoon salt - 1/4 teaspoon black pepper - 1/4 teaspoon smoked paprika - 1/2 teaspoon dried parsley - 1 egg, beaten These ingredients come together to create a flavorful and juicy meatball. Each item plays a role, from the ground chicken as the base to the buffalo sauce that brings the heat. You can easily customize your Buffalo Chicken Meatballs. Here are some optional ingredients to consider: - Chopped green onions for a fresh bite - Crumbled blue cheese for extra flavor - Diced jalapeños for added heat - Different spices like cayenne or onion powder Feel free to mix and match these extras to suit your taste. This helps you create a dish that feels personal and unique. If you have dietary restrictions, don’t worry! You can make simple swaps: - Use ground turkey instead of chicken for a leaner option. - Swap breadcrumbs for gluten-free varieties if needed. - Replace egg with a flaxseed mixture for a vegan alternative. These substitutions allow you to enjoy Buffalo Chicken Meatballs without compromising your dietary needs. You can still savor this simple and flavorful dish. For the full recipe, check out the details provided earlier. Start by preheating your oven to 400°F (200°C). This step is key for even cooking. Line a baking sheet with parchment paper. This helps the meatballs not stick. In a large mixing bowl, combine the following ingredients: - 1 lb ground chicken - 1/2 cup breadcrumbs - 1/4 cup grated Parmesan cheese - 1/4 cup buffalo sauce (plus extra for tossing) - 1 small onion, finely chopped - 2 cloves garlic, minced - 1/2 teaspoon salt - 1/4 teaspoon black pepper - 1/4 teaspoon smoked paprika - 1/2 teaspoon dried parsley - 1 egg, beaten Use your hands or a spatula to mix well. Make sure everything blends nicely. Avoid overmixing, as this can make your meatballs tough. With clean hands, take small portions of the mixture. Form them into balls, about 1 inch wide. Place them on the baking sheet, leaving space between each one. Bake the meatballs for 20-25 minutes. They should be 165°F (74°C) inside and no longer pink. When done, take them out of the oven. Toss the meatballs in a bowl with extra buffalo sauce. Serve the warm meatballs on a platter. Pair them with celery sticks and your favorite dipping sauce. Enjoy this simple and flavorful dish with friends and family. For the full recipe, check the details above! To make sure your meatballs stay tender, do not overmix the meat. When you mix the ingredients, use your hands or a spatula gently. Overworking the mix can lead to tough meatballs. Also, use fresh ingredients. Fresh chicken and spices will add moisture and flavor. Baking your meatballs is a great way to cook them evenly. Preheat your oven to 400°F (200°C) for the best results. Line your baking sheet with parchment paper. This helps prevent sticking and makes cleanup easy. Another method to cook them is pan-frying. This adds a nice crust. Start with a hot skillet and a little oil. Fry until golden brown, then finish in the oven to cook through. To boost the flavor, always use fresh herbs and spices. Fresh garlic and onion add a strong taste. Consider marinating your chicken in buffalo sauce before mixing. This adds extra zest. You can also toss the meatballs in more buffalo sauce right after baking for an added kick. For a fun twist, try adding cheese inside the meatballs. A small cube of mozzarella can melt as it cooks, adding a gooey surprise. For the full recipe, check the section above. {{image_4}} You can make these meatballs even spicier. Just add more buffalo sauce. You can mix in some chopped jalapeños or cayenne pepper for extra heat. This gives a nice kick and makes them great for those who love spice. If you're looking for a healthier option, try ground turkey instead of chicken. Turkey has less fat and still tastes great. You can also use ground chicken breast for fewer calories. Another option is to add finely chopped veggies like spinach or zucchini for extra nutrition. Buffalo chicken meatballs fit many occasions. For game day, serve them with celery sticks and blue cheese dip. If you're hosting a dinner, pair them with a fresh salad. They also work well as appetizers at parties. Just put them on skewers for easy eating. For a fun twist, serve them in sliders with a slice of cheese. Check the [Full Recipe] for more ideas on how to enjoy these tasty bites! After enjoying your Buffalo Chicken Meatballs, let them cool. Place them in an airtight container. Store the container in the fridge. They will stay fresh for about 3 to 4 days. Make sure to label the container with the date. This way, you won’t forget about them! If you want to save your meatballs for later, freezing works great. First, let the meatballs cool completely. Then, place them on a baking sheet in a single layer. Freeze them for about 1 hour. Once they are firm, transfer the meatballs to a freezer-safe bag. Remove as much air as possible to avoid freezer burn. They can last for up to 3 months in the freezer. To reheat, you can use the oven or microwave. For the oven, preheat it to 350°F (175°C). Place the meatballs on a baking sheet and heat for about 15 minutes. For the microwave, put a few meatballs on a plate. Cover them with a damp paper towel. Heat in 30-second intervals until warm. Always check the center to make sure they are hot. Enjoy your meal just like you made it fresh! You should cook Buffalo Chicken Meatballs for 20 to 25 minutes. Bake them at 400°F (200°C). Check that they reach an internal temperature of 165°F (74°C). This ensures they are safe to eat and fully cooked. If you want them crispier, leave them in a bit longer. Just keep an eye on them! Yes, you can make these meatballs ahead of time. Form the meatballs and store them in the fridge for a day. You can also freeze them for up to three months. Just freeze them on a baking sheet first, then transfer to a bag. When you’re ready, bake them straight from the freezer. They will still taste great! Buffalo Chicken Meatballs pair well with several tasty sauces. Creamy blue cheese dressing is a classic choice. It balances the heat of the buffalo sauce nicely. Zesty ranch dressing is another popular option. For a spicy kick, try sriracha or a spicy mayo. Serve with fresh celery sticks for a crunchy side. You can find more sauce ideas in the Full Recipe! This blog post covered all the key steps for making Buffalo Chicken Meatballs. We talked about essential and optional ingredients, along with substitutions for dietary needs. I shared easy instructions for mixing, forming, and baking the meatballs. You gained tips for tender texture and more flavor. We explored variations, storage info, and answered common questions. In the end, you have everything you need to create delicious meatballs. Enjoy them at any gathering or meal!

Buffalo Chicken Meatballs Simple and Flavorful Dish

Are you ready to spice up your mealtime? Buffalo Chicken Meatballs offer bold flavor and easy prep. This dish is

- 2 boneless, skinless chicken breasts, cut into bite-sized pieces - 8 oz (225g) penne pasta - 1 cup cherry tomatoes, halved - 2 cups fresh spinach leaves - 3 cloves garlic, finely minced - 1 cup chicken broth - 1/2 cup heavy cream - 1/2 cup grated Parmesan cheese - 2 tablespoons extra virgin olive oil - 1 teaspoon Italian seasoning blend - Salt and freshly ground black pepper, to taste - Fresh basil leaves for garnishing - Additional vegetables (bell peppers, zucchini) - Different pasta types (fettuccine, farfalle) - Extra seasonings (red pepper flakes, lemon zest) When I make this One Pan Tuscan Chicken Pasta, I love to focus on fresh ingredients. The chicken adds protein and flavor. The penne pasta holds onto the sauce well. Cherry tomatoes give a burst of sweetness. Fresh spinach adds color and nutrition. You can customize this dish easily. Try adding bell peppers or zucchini for more veggies. If you want a twist, swap the penne for fettuccine or farfalle. For extra heat, sprinkle in red pepper flakes or a bit of lemon zest. These choices let you make the dish your own. Each ingredient plays a big role in the final taste. This recipe is all about balance. You get creamy, savory, and fresh flavors all in one pan. It's a great way to enjoy dinner without a lot of fuss. Check out the Full Recipe for all the steps to create this delightful meal! - Heat olive oil in a skillet over medium heat. - Season the chicken pieces with salt, pepper, and Italian seasoning. - Sauté chicken until golden brown, about 5-7 minutes. Cooking chicken this way gives it a nice crust. The seasoning adds flavor that seeps into the dish. Once done, remove the chicken from the skillet and place it on a plate. - Add minced garlic to the skillet and sauté until fragrant, about 1 minute. - Toss in cherry tomatoes and cook for another 3-4 minutes until softened. Garlic releases its lovely aroma and pairs perfectly with the sweet tomatoes. This step builds a flavorful base for your pasta. - Pour in chicken broth and add penne pasta to the skillet. - Cover the skillet and cook according to package directions, around 10-12 minutes. The broth adds depth to the pasta. Stir occasionally to prevent sticking, ensuring even cooking. - Stir in heavy cream and grated Parmesan cheese until creamy. - Fold in the cooked chicken and spinach until well mixed. This last step creates a rich, comforting dish. The spinach wilts nicely and adds a pop of color. Enjoy your flavorful One Pan Tuscan Chicken Pasta! For the full recipe, check the earlier section. To make the best One Pan Tuscan Chicken Pasta, cook the chicken all the way through. This step is key for safety and flavor. Once the chicken is golden, set it aside. Next, when you add cream, do it slowly. This helps keep the cream smooth and prevents curdling. Remember, a little patience goes a long way! For a beautiful dish, serve your pasta in large bowls. Top it with fresh basil and a sprinkle of extra Parmesan. This not only looks good but also adds great taste. The vibrant colors from the basil and tomatoes will make your meal pop. Plus, it smells amazing! If you want to mix things up, try using shrimp or tofu instead of chicken. Both options bring unique flavors. You can also swap the heavy cream for Greek yogurt. This change keeps it light but still creamy. These small tweaks make the dish your own! {{image_4}} You can easily make this dish vegetarian. Simply swap the chicken for mushrooms or chickpeas. Both options add great texture and taste. Use vegetable broth instead of chicken broth to keep the flavors bright and fresh. Want to switch things up? Try whole wheat or gluten-free pasta. Both options give a different texture while keeping the dish healthy. You can also experiment with different pasta shapes like rotini or farfalle for a fun twist. To boost the taste, add fresh herbs like oregano or thyme. These herbs bring a lovely aroma and depth to the meal. You can also introduce citrus elements, like a splash of lemon juice, for a hint of brightness. This simple addition makes the dish pop with flavor. For more ideas, check out the Full Recipe for One Pan Tuscan Chicken Pasta. After enjoying your One Pan Tuscan Chicken Pasta, let it cool down. This helps keep the food safe. Once cooled, transfer the pasta to an airtight container. You can store it in the fridge for up to 3-4 days. This way, you can savor the deliciousness again! When it’s time to eat your pasta again, gently reheat it. You can use the stove or the microwave. To keep it moist, add a splash of broth or cream while reheating. This helps bring back the creamy texture and flavor. Want to save some for later? Freeze your pasta in individual portions. This makes it easy to grab a meal when you need one. When you’re ready to eat, thaw the pasta overnight in the fridge. This way, it warms up nicely when you reheat it. You can make this dish gluten-free by using gluten-free pasta. Many brands offer great options that taste just as good. Also, check the labels on your chicken broth. Some broths may contain gluten, so it’s best to choose one that is clearly labeled gluten-free. This way, you can enjoy the same rich flavors without any worries. Yes, you can prepare One Pan Tuscan Chicken Pasta ahead of time. Cook the dish and let it cool completely. Store it in an airtight container in the fridge. When you’re ready to eat, simply reheat just before serving. This keeps the flavors fresh and makes meal time easy. If you run out of heavy cream, don’t worry! You can substitute it with half-and-half. This gives a similar creamy texture. If you prefer a plant-based option, try a plant-based cream alternative. Both options work well and will still make your pasta rich and satisfying. For the best results, add them gradually to keep the sauce smooth. This blog covered key ingredients and simple steps for a tasty Tuscan chicken pasta. I shared tips to make it perfect and variations to fit your needs. Remember, you can adjust ingredients to suit your taste. This dish is quick, flexible, and enjoyable for everyone. Try it out and make it your own. Happy cooking!

One Pan Tuscan Chicken Pasta Flavorful Dinner Delight

Looking for a dinner that’s quick, tasty, and exciting? One Pan Tuscan Chicken Pasta checks all the boxes! This dish

- 2 lbs chicken wings - 1 tablespoon baking powder - 1 teaspoon salt - 1/2 teaspoon freshly ground black pepper - 1 teaspoon garlic powder - 1 teaspoon onion powder - 1 teaspoon smoked paprika - Zest of 1 lemon - 2 tablespoons fresh lemon juice - 1/2 cup unsalted butter, melted The main ingredients for crispy lemon pepper wings are simple. You need chicken wings as your base. Baking powder helps make them crispy. Salt and black pepper add essential flavors. Garlic and onion powder give depth. Smoked paprika adds warmth. Finally, lemon zest and juice provide that fresh zing. - Fresh parsley for garnish - Lemon wedges For serving, fresh parsley makes a nice touch. It adds color and flavor. Lemon wedges enhance the dish with more citrus. You can squeeze them over the wings for extra zest. - Baking sheet and wire rack - Mixing bowls and whisk Having the right tools is key. A baking sheet and wire rack help wings cook evenly. Mixing bowls are handy for preparing the spice blend. A whisk makes mixing easy and quick. Now that you know the ingredients, you can gather everything you need for the full recipe. This will help you make these tasty crispy lemon pepper wings with ease! - Preheat your oven to 400°F (200°C). - Line a baking sheet with aluminum foil for easy cleanup. - Place a wire rack on top. This helps the air flow around the wings. - Pat the chicken wings dry with paper towels. This step is key for crispiness. - In a bowl, mix together the baking powder, salt, black pepper, garlic powder, onion powder, and smoked paprika. - Make sure the dry ingredients are well combined. This blend gives great flavor. - Sprinkle this mixture over the chicken wings in a large bowl. - Toss the wings with your hands to coat them evenly in the seasoning. - Arrange the seasoned wings in a single layer on the wire rack. - Ensure the wings do not touch each other to avoid steaming. - Bake in the preheated oven for 40-45 minutes. - Flip the wings halfway through for extra crispiness. While the wings bake, prepare the zesty lemon pepper sauce. Combine melted butter, lemon zest, and fresh lemon juice in a bowl. Whisk until blended. Once the wings are golden brown, toss them in the sauce. Enjoy this crispy lemon pepper wings recipe for a delightful meal. For the complete details, refer to the Full Recipe. To make your wings crispy, start by drying them well. Use paper towels to soak up any moisture. Wet wings will steam instead of crisp. Next, add baking powder to your spice mix. This helps create a light and crispy skin. The baking powder raises the pH level of the skin, allowing it to brown better. You can adjust the spice levels to your taste. If you like heat, add some cayenne pepper to the mix. For a milder flavor, reduce the black pepper. Try adding garlic or onion powder for extra flavor. You can also mix in some herbs like oregano or thyme. If you want a twist, consider adding honey for a sweet and tangy glaze. Serve your wings on a large platter. Arrange them neatly, and add lemon wedges around the edges. This not only looks good but gives everyone a fresh squeeze of lemon. Garnish your wings with fresh parsley. This adds a pop of color and freshness. You can also sprinkle some extra lemon zest on top for a vibrant touch. Enjoy how this brightens up your dish! {{image_4}} You can make crispy lemon pepper wings in different ways. If you want a quick option, try air frying. This method cooks the wings faster while keeping them crispy. Set your air fryer to 400°F (200°C) and cook for about 25-30 minutes. Flip them halfway through for even crispiness. If you prefer a smoky flavor, grilling is a great choice. Preheat your grill to medium heat and cook the wings for about 20-25 minutes. Flip them often to avoid burning. This method adds a tasty, smoky touch that pairs well with the lemon pepper sauce. You can change up the flavor of your wings too. For a spicy kick, add cayenne pepper or hot sauce to the seasoning mix. This gives your wings a bold and fiery taste. You can also make a sweet and savory lemon glaze. Mix honey with lemon juice and pour it over the wings after cooking. This adds a nice balance of sweet and tangy flavors. If you need gluten-free options, check the spice labels. Most spices are gluten-free, but always confirm. You can also use gluten-free baking powder if needed. For those who want an oven-baking alternative, you can use parchment paper instead of aluminum foil. This still helps with cleanup while allowing the wings to crisp up. For the full recipe, check the section above. After you finish eating, let your wings cool down. This step is key. Once cool, transfer them into containers. I recommend using airtight containers. These help keep your wings fresh and tasty. To keep the wings crispy, the oven is your best friend. Preheat your oven to 375°F (190°C). Place the wings on a baking sheet. Bake them for about 10-15 minutes. This method brings back that crunch. The microwave is quick but can make them soggy. If you use the microwave, heat them for just a minute. You can store lemon pepper wings in the fridge for about 3-4 days. Check for any odd smells or slimy texture. These signs mean it's time to toss them. Always trust your senses when it comes to food safety. For the freshest taste, eat them sooner rather than later. To make crispy wings without frying, you need to focus on baking. Here are some best practices: - Preheat your oven to 400°F (200°C). - Use a wire rack on top of your baking sheet. This helps air circulate. - Pat the wings dry with paper towels to remove moisture. - Coat with baking powder and seasonings. Baking powder helps create a crunchy skin. - Arrange wings in a single layer on the rack to avoid steaming. - Flip halfway through baking for even crispiness. These steps ensure your wings turn out crispy and delicious without frying. Yes, you can use frozen wings. Here are some tips for thawing and preparation: - Thaw wings in the fridge overnight for best results. - If you're short on time, you can use cold water to thaw them. Place the wings in a sealed bag and submerge in cold water for about an hour. - Make sure to pat dry the wings after thawing. This step is key for crispiness. With proper thawing, frozen wings will work great in this recipe. The best dipping sauces for lemon pepper wings include: - Ranch dressing: Its creaminess balances the zesty flavor. - Blue cheese dressing: A classic choice that adds a bold taste. - Honey mustard: For a sweet and tangy contrast. These sauces complement the wings well and enhance your eating experience. For the full recipe, check out the cooking instructions above. This post covered how to make crispy lemon pepper wings. We talked about essential ingredients, like chicken wings and seasonings, and the tools you need. I shared easy steps for preparation, baking, and tips for crispiness. You have options for cooking methods and flavor variations. Remember to store any leftovers properly and reheat them without losing that crunch. With these methods, you'll enjoy tasty wings every time. Now, get cooking and delight your friends and family with your delicious lemon pepper wings!

Crispy Lemon Pepper Wings Easy and Flavorful Recipe

Are you ready to elevate your snacking game? My easy and flavorful Crispy Lemon Pepper Wings are just what you

Older posts
Newer posts
← Previous Page1 … Page19 Page20 Page21 … Page60 Next →

dsad

© 2025 eataroundit • Built with GeneratePress

Our Policies

  • Copyright Policy
  • Cookie Policy
  • GDPR Policy
  • Privacy Policy
  • Disclaimer
  • Terms Of Use

More Information

  • Home
  • About
  • Contact
  • Appetizers
  • Dessert
  • Dinner
  • Drinks
©2025, eataroundit About Back To Top