Skip to content
DisclaimerTerms Of UseGDPR PolicyCookie Policy

eataroundit

  • Home
  • Drinks
  • Appetizers
  • Dinner
  • Dessert
  • About
  • Contact
  • Privacy Policy
DisclaimerTerms Of UseGDPR PolicyCookie Policy

Hannah

For a tasty Creamy Chicken and Rice Soup, you need simple ingredients. Here’s what to gather: - 1 lb boneless, skinless chicken breasts, cut into small cubes - 1 cup long-grain white rice, thoroughly rinsed until the water runs clear - 1 medium onion, finely chopped - 2 cloves garlic, minced - 3 medium carrots, peeled and sliced into thin rounds - 2 celery stalks, diced into small pieces - 6 cups rich chicken broth (homemade or low sodium) - 1 cup heavy cream - 2 tablespoons extra virgin olive oil - 1 teaspoon dried thyme - 1 teaspoon dried oregano - Sea salt and freshly cracked black pepper, to taste These ingredients combine to create a warm, flavorful soup. The chicken adds protein, while the rice provides heartiness. The broth brings depth, and the cream makes it rich. To make your soup special, think about these garnishes: - Fresh parsley, finely chopped - Bread for dipping - Croutons for crunch These add a nice touch and enhance the overall meal. The parsley gives a pop of color, while bread or croutons add texture. Enjoy experimenting with your favorites! You can find the full recipe [here](Full Recipe). First, you need to chop the vegetables and cube the chicken. Take 1 medium onion and finely chop it. Next, peel and slice 3 medium carrots into thin rounds. Then, dice 2 celery stalks into small pieces. Finally, cut 1 pound of boneless, skinless chicken breasts into small cubes. These fresh ingredients will make your soup tasty and bright. Start by heating 2 tablespoons of extra virgin olive oil in a large pot over medium heat. Wait until the oil shimmers before moving on. Add the chopped onion and sauté for about 5 minutes, until soft and clear. Then, add 2 cloves of minced garlic, sliced carrots, and diced celery. Cook for another 3 to 4 minutes, stirring often, until the veggies soften and smell great. Next, toss in the diced chicken. Season the mix with sea salt, black pepper, 1 teaspoon of dried thyme, and 1 teaspoon of dried oregano. Cook for 6-8 minutes, stirring occasionally, until the chicken is no longer pink. After that, gradually pour in 6 cups of chicken broth while stirring. Bring your pot to a rapid boil. Once boiling, stir in 1 cup of rinsed long-grain white rice. Cover the pot with a lid, reduce the heat to low, and let it simmer for 20-25 minutes. Stir it now and then to keep the rice from sticking. When the rice is tender, remove the pot from the heat. Carefully stir in 1 cup of heavy cream to make the soup rich and creamy. Taste the soup and adjust the seasoning if needed. You can add more salt and black pepper to your liking. Finally, ladle the soup into bowls and garnish with fresh parsley for a lovely look. Enjoy your creamy chicken and rice soup, a true comfort meal! For a complete guide, refer to the Full Recipe. Simmering time is key for perfect rice. When you add the rice, reduce the heat and cover the pot. A gentle simmer helps the rice cook evenly. If the heat is too high, the rice may stick to the bottom. Aim for a simmer of about 20-25 minutes. This ensures the rice absorbs the broth well, making your soup creamy and rich. To boost the flavor, consider adding fresh herbs. Fresh thyme or rosemary can elevate the taste. You can also throw in bay leaves for an earthy hint. For a touch of heat, a pinch of red pepper flakes works wonders. Don't forget to taste as you go and adjust seasonings to your liking. One common mistake is overcooking the chicken. Cook it just until it’s no longer pink. This keeps the chicken juicy and tender. Another mistake is not rinsing the rice. Rinsing removes excess starch, preventing sticky rice. Always rinse until the water runs clear before adding to the pot. {{image_4}} You can easily switch up ingredients in this creamy chicken and rice soup. If you want a lighter option, try turkey instead of chicken. Tofu is a great choice for a vegetarian twist. For the rice, consider using brown rice or quinoa. Both options add unique flavors and textures. Just remember that different rice types may change the cooking time. Always check to ensure they are tender. To give your soup a new flair, add spices like cayenne or paprika. A pinch of cayenne adds warmth, while paprika can enhance the color and flavor. You can also toss in vegetables like peas or corn for extra taste and nutrition. These small tweaks can make a big difference and keep your soup exciting. If you need gluten-free or dairy-free options, it’s easy to adapt. Use gluten-free broth and rice to keep it gluten-free. For dairy-free, swap heavy cream with coconut milk or a plant-based cream. These changes help everyone enjoy this comforting soup without worry. Always check labels to ensure your choices fit your dietary needs. After making your creamy chicken and rice soup, you want to store leftovers properly. Cool the soup to room temperature. Then, transfer it to an airtight container. Make sure the lid fits tightly to keep out air. You can store it in the fridge for up to three days. This keeps the flavors intact while keeping the soup safe to eat later. If you want to save the soup for later, freezing is a great option. First, let the soup cool completely before freezing. Pour it into a freezer-safe container. Leave some space at the top, as the soup will expand when it freezes. You can also use freezer bags for easy storage. To reheat, thaw the soup in the fridge overnight. Heat it on the stove over low heat, stirring often. If it seems thick, add a splash of broth or water to bring it back to a nice, creamy texture. Creamy chicken and rice soup can last a while if stored right. In the fridge, it stays fresh for three days. If you freeze it, the soup keeps well for up to three months. Always check for signs of spoilage before eating. Look for any changes in color or smell. Enjoy your creamy chicken and rice soup whenever you crave comfort! For the complete recipe, check out the Full Recipe section. Yes, you can use cooked chicken. Just chop it into small pieces. Add it after you sauté the vegetables. You need to reduce the cooking time. Heat everything until warmed through. This keeps the chicken tender and tasty. You can enjoy this soup with many sides. Here are some ideas: - Crusty bread for dipping - A fresh garden salad for crunch - Cheesy garlic bread for extra flavor - Simple crackers for added texture These sides match well with the creamy soup and add variety to your meal. There are a few ways to thicken your soup: - Add more rice: This absorbs liquid and makes it heartier. - Use a slurry: Mix cornstarch with cold water, then stir it in. - Blend some soup: Take a cup of soup and blend it, then return it to the pot. - Add a roux: Cook equal parts flour and butter, then stir this into the soup. These methods help create a rich and creamy texture in your chicken and rice soup. For the full recipe, check out the details above. This guide covered the essential ingredients for a creamy chicken and rice soup. I shared step-by-step instructions, tips for timing, and common mistakes to avoid. You can adjust flavors and even substitute ingredients to suit your taste. Remember, storing your leftovers properly is key to enjoying them later. With these insights, you're set to make a delicious, comforting soup that warms you up. Enjoy your cooking adventure!

Creamy Chicken and Rice Soup Quick Comfort Meal

When the chill sets in, nothing soothes like a warm bowl of creamy chicken and rice soup. This quick comfort

- 2 cups cooked chicken (shredded) - 1 cup shredded cheese (cheddar or Monterey Jack) - 1/2 cup cream cheese (softened) - 1 teaspoon taco seasoning - 1/2 cup corn (canned or frozen) - 1/4 cup fresh cilantro (finely chopped) - 12 small flour tortillas - Olive oil (for brushing) Gather these ingredients for a quick and tasty meal. The cooked chicken gives the taquitos their hearty base. Shredded cheese adds a melty touch, while cream cheese makes the filling rich and creamy. Taco seasoning brings in that classic flavor we love. The corn adds sweetness, and fresh cilantro gives a bright taste. You can easily swap the cheese if you want something different. Pepper jack adds a spicy kick. For a quick option, rotisserie chicken works great too. Just shred it up and mix it in. Now, let’s get those tortillas ready! Be sure to have olive oil on hand. This will help your taquitos get crispy in the oven. You can find the full recipe linked above if you need more details. - Preheat oven to 400°F (200°C). - Prepare a baking sheet with parchment paper. This helps with easy cleanup. - Combine 2 cups of shredded chicken, 1 cup of shredded cheese, and 1/2 cup of cream cheese in a bowl. - Add 1 teaspoon of taco seasoning, 1/2 cup of corn, and 1/4 cup of chopped cilantro. - Mix well until all the ingredients blend together. - Lay a tortilla flat on a clean surface. - Place about 2 tablespoons of the chicken filling at one end. - Roll the tortilla tightly around the filling. Tuck in the sides to seal the roll. - Repeat this process with the rest of the tortillas. - Arrange the rolled taquitos seam-side down on the baking sheet. - Brush the tops with olive oil for a crispy texture. - Bake for 20 minutes until they are golden brown. These steps will help you make tasty Easy Chicken Taquitos. For the complete recipe, check the Full Recipe section. You can easily swap out cheese for a different flavor. Try using pepper jack for a spicy kick. If you want to save time, use rotisserie chicken instead of cooking your own. It makes prep fast and easy! Spacing your taquitos on the baking sheet is key. Leave some room between each one. This allows hot air to circulate and makes them crispy. Don't forget to brush the tops with olive oil. This simple step helps them get that nice golden crunch. When serving, arrange the taquitos on a colorful platter. Add bowls of salsa and guacamole for dipping. For a fun touch, sprinkle fresh cilantro on top. It looks great and adds fresh flavor. Enjoy your meal! {{image_4}} You can swap the chicken for black beans or your favorite veggies. Black beans add protein and flavor. Try corn, bell peppers, or zucchini for a tasty mix. For cheese, use cheddar, Monterey Jack, or even pepper jack for a kick. The cheese adds creaminess and binds the filling well. Want some heat? Add chopped jalapeños to the filling. They bring a nice spice and flavor boost. You can also mix in a pinch of cayenne pepper if you like it hotter. Serve these spicy taquitos with hot salsa on the side. The salsa enhances the flavors and adds freshness. These taquitos can also be a fun breakfast dish. Mix in scrambled eggs with your filling. You can use the same cheese and veggies you like. Top them with salsa, sour cream, or avocado slices. They make a great start to your day! For the full recipe, visit the [Full Recipe](#). To store your taquitos in the refrigerator, let them cool first. Place them in a container. Use an airtight container to keep them fresh. You can also wrap them in plastic wrap or foil. This keeps moisture in and prevents them from drying out. If you want to freeze taquitos, make sure they are fully cooled. Lay them in a single layer on a baking sheet. Freeze them for about an hour. Once they are firm, transfer them to a freezer-safe bag. Be sure to remove as much air as possible. This helps prevent freezer burn. When you are ready to eat them, take out the taquitos. You can reheat them straight from the freezer. Preheat your oven to 400°F (200°C). Place the frozen taquitos on a baking sheet. Bake for about 20-25 minutes until they are hot and crispy. Enjoy your taquitos just like fresh! For the full recipe, check out the link above. Making Easy Chicken Taquitos is quick and simple. You need about 15 minutes to prep. The cooking time is around 20 minutes in the oven. In total, you’re looking at about 35 minutes from start to finish. This time is perfect for a busy weeknight meal or a fun get-together. Yes, you can use corn tortillas. They have a different taste and texture. Corn tortillas are often gluten-free, which is a plus. However, they can break more easily than flour tortillas. If you choose corn, warm them before rolling for better flexibility. Flour tortillas are softer and more forgiving when rolling. Choose what fits your taste best! Taquitos go well with many sides. Here are some tasty options to serve: - Salsa: Fresh or chunky, it adds great flavor. - Guacamole: Creamy and rich, perfect for dipping. - Refried beans: A classic side that complements the meal. - Mexican rice: Adds a nice touch and rounds out the plate. - Jicama sticks: Crunchy and refreshing for a light side. You can prepare the taquitos in advance. Just roll them up and keep them in the fridge for a few hours. For longer storage, freeze them before baking. When ready to eat, bake them straight from the freezer. This saves time and makes meal prep easy! You now know how to make easy chicken taquitos. We covered the main and additional ingredients, along with step-by-step baking tips. Whether you want spicy, vegetarian, or breakfast variations, it’s all possible. Don’t forget to store leftovers properly or freeze them for later. Serve with salsa or guacamole for a tasty meal. Now, it's time to enjoy these crunchy bites. Happy cooking!

Easy Chicken Taquitos Flavorful Quick Recipe Guide

Looking to spice up snack time? My Easy Chicken Taquitos recipe packs a punch with flavor and is a breeze

To make this tasty roasted garlic cauliflower mash, you need: - 1 large head of cauliflower, cut into florets - 5-6 cloves of garlic, unpeeled - 3 tablespoons olive oil, divided - ½ cup heavy cream or unsweetened almond milk - ½ teaspoon salt, adjust to taste - ¼ teaspoon black pepper, adjust to taste - Fresh chives or parsley, finely chopped, for garnish You can change the flavor with these optional ingredients: - Fresh herbs like thyme or rosemary - A pinch of nutmeg for warmth - Grated Parmesan cheese for a cheesy twist This creamy cauliflower mash is not only tasty but also healthy. Here’s a quick look at its nutrition: - Calories: About 120 per serving - Fat: 8 grams, mostly from olive oil and cream - Carbohydrates: 8 grams, mainly from cauliflower - Fiber: 2 grams, good for digestion - Protein: 3 grams, with more if you add cheese This mash is low in carbs and rich in flavor, making it a great side dish. Feel free to check the Full Recipe for more details! Start by washing your large head of cauliflower. Cut it into bite-sized florets. This helps the cauliflower cook evenly. Next, grab 5-6 cloves of garlic. Keep them unpeeled; this will add a rich flavor when roasted. Place both the cauliflower and garlic on a large baking sheet. Drizzle 2 tablespoons of olive oil over them. Toss gently to coat everything well. Now, preheat your oven to 400°F (200°C). This temperature helps to roast the cauliflower perfectly. Spread the cauliflower and garlic in a single layer on the baking sheet. Roast them in the oven for 25-30 minutes. Look for a golden color at the edges and tender texture. After roasting, let them cool for a few minutes. This makes handling easier. Once the roasted garlic is cool, squeeze it out of its skins. It will be soft and sweet, adding depth to your mash. In a large mixing bowl or food processor, combine the roasted cauliflower, garlic, heavy cream, salt, and black pepper. Blend until you achieve a smooth, creamy texture. If the mash is too thick, add more heavy cream or almond milk to adjust the consistency. Taste your mash and adjust the seasoning as you like. Finally, serve the mash warm, garnished with fresh chives or parsley for a vibrant look. For the complete guide, check the Full Recipe. To find the best cauliflower, look for heads that are firm and heavy. The florets should be tightly packed and white. Avoid any brown spots or yellowing leaves. Fresh cauliflower has a crisp texture and a mild scent. You can also check the leaves; they should be bright green and healthy-looking. One common mistake is overcooking the cauliflower. If you cook it too long, it becomes mushy. Aim for tender but not falling apart. Another pitfall is not seasoning properly. Taste the mash before serving. Adjust salt and pepper as needed. Lastly, don't skip the roasted garlic. It adds a sweet flavor that elevates the dish. For a creamy texture, use heavy cream or unsweetened almond milk. Start with half a cup and add more if needed. Blending the mash in a food processor helps create a smoother finish. If you prefer a chunkier texture, use a potato masher instead. Always taste your mash and tweak the creaminess to fit your taste. For the full recipe, check out Roasted Garlic Cauliflower Mash. {{image_4}} To add a fresh twist, try herbs in your mash. Fresh herbs like thyme, rosemary, or basil work well. Just chop the herbs finely and mix them in after blending. This step boosts flavor and adds a lovely green color. For a stronger taste, use dried herbs. Just be sure to adjust the amount since dried herbs are more potent. Spices can make your cauliflower mash even more exciting. You might try adding smoked paprika for a warm, smoky note. A pinch of cayenne pepper will add heat if you like spice. You can also stir in a bit of curry powder for an exotic touch. Each spice will change the flavor profile, so play around to find your favorite. If you want a lighter version, you can swap heavy cream for unsweetened almond milk. This change keeps the mash creamy but cuts calories. Coconut milk is another great option for a hint of sweetness. If you do not have any milk on hand, try using vegetable broth. It adds flavor without adding fat. For a nut-free option, use a splash of water or additional olive oil. For the full recipe, check out the details above. After enjoying your roasted garlic cauliflower mash, you may have some left. To store it, place the mash in an airtight container. Make sure the lid is secure to keep out air. It can stay fresh in the fridge for up to three days. If you want to keep it longer, freezing is a great option. When it's time to enjoy your leftovers, reheating is key. The best way to reheat is on the stove. Place the mash in a pot over low heat. Stir gently and add a splash of cream or almond milk to help it stay creamy. You can also use the microwave. Heat it in short bursts, stirring in between, to avoid drying it out. If you want to freeze your cauliflower mash, follow these steps. First, let it cool completely. Then, transfer it to a freezer-safe container. Leave some space at the top since it may expand as it freezes. Label the container with the date. It can last in the freezer for about three months. When you're ready to eat it, thaw it overnight in the fridge before reheating. For more details on making this dish, check out the Full Recipe. Yes, you can easily make this recipe vegan. Just swap the heavy cream for unsweetened almond milk or coconut cream. This change keeps the mash creamy and rich while keeping it plant-based. If you want extra flavor, use a splash of vegetable broth too. This small tweak can really enhance the taste. To adjust the thickness of your mash, add more or less liquid. If the mash is too thick, pour in more heavy cream or almond milk, a little at a time. Blend until you reach your desired consistency. If it’s too thin, you can add more roasted cauliflower. Mash it up and blend again until it’s smooth. Roasted garlic cauliflower mash goes great with many dishes. It pairs well with grilled meat like chicken or steak. You can also serve it with fish for a lighter meal. For a vegetarian option, try it with roasted veggies or a hearty salad. It works as a side dish for almost any main course! Check out the Full Recipe for more ideas. This blog post covered how to make roasted garlic cauliflower mash. We talked about key ingredients, tips for a creamy finish, and variations to try. You learned how to store leftovers and reheat them. Roasted garlic cauliflower mash is a great way to enjoy vegetables. With simple steps, you can make it tasty and unique. Try it out and enjoy a healthy twist on comfort food.

Roasted Garlic Cauliflower Mash Creamy Flavor Boost

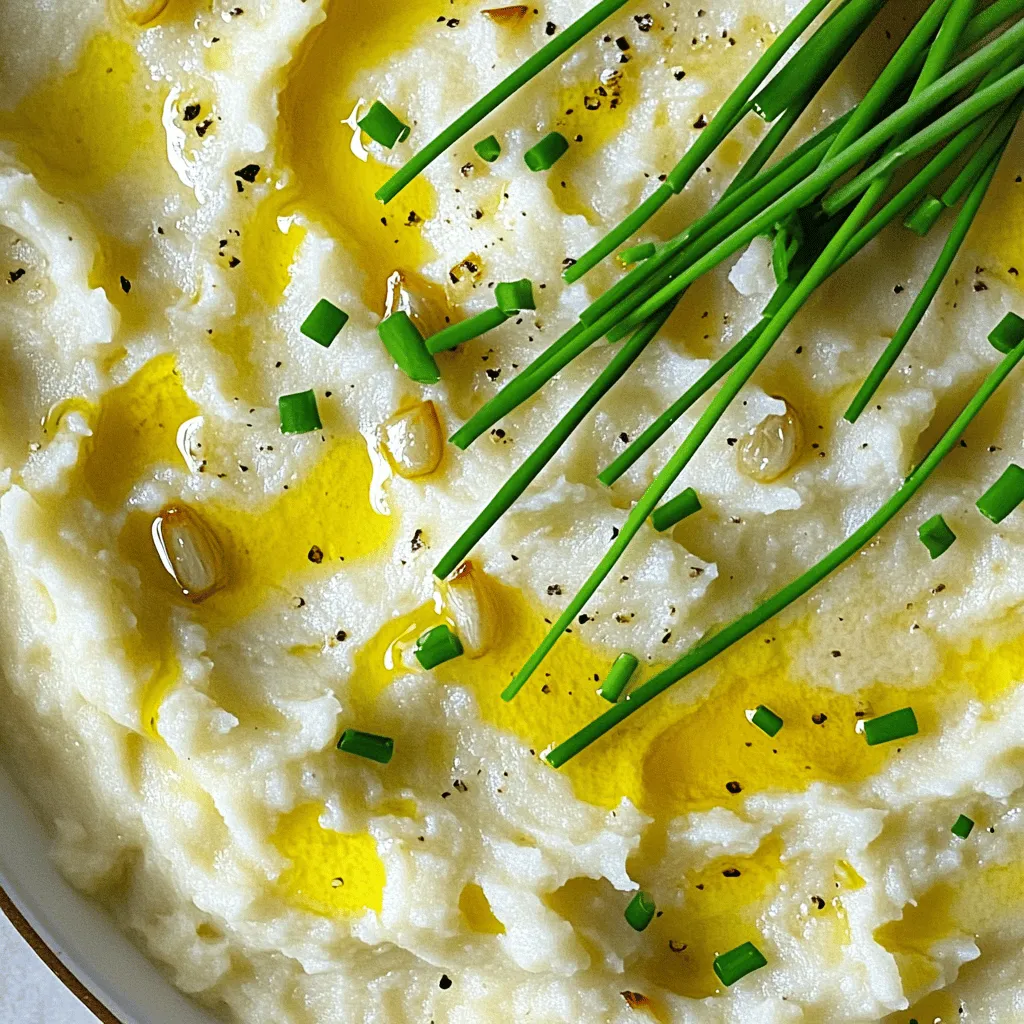
Looking for a creamy side dish that shines? My Roasted Garlic Cauliflower Mash is the answer! This dish packs the

Let’s dive into the tasty ingredients that make these vegan chocolate brownies so good. Each one plays an important role in creating that rich, chocolatey flavor. - All-purpose flour: This is the base of your brownies. It gives them structure and texture. - Coconut sugar and alternatives: Coconut sugar adds a nice caramel flavor. You can also use brown sugar or regular granulated sugar if you prefer. - Unsweetened cocoa powder: This is the star of the show! It gives the brownies their deep chocolate taste. - Baking soda and salt: Baking soda helps the brownies rise, while salt balances the sweetness. - Applesauce as an egg substitute: Applesauce makes these brownies moist and helps bind the ingredients together without eggs. - Plant-based milk options: Almond milk is a great choice, but any plant-based milk works well. This adds moisture to the batter. - Vegetable oil vs. coconut oil: Both oils work, but coconut oil adds a hint of coconut flavor. Choose whichever you like! - Optional ingredients: dark vegan chocolate chips: These chips take the brownies to the next level. They melt beautifully and add extra chocolatey goodness. Using these ingredients, you can create brownies that everyone will love. For the full recipe, check out the guidelines to whip up your own batch! First, preheat your oven to 350°F (175°C). This step is key for even baking. Grease an 8x8-inch baking pan or line it with parchment paper. This makes it easy to remove the brownies later. In a large mixing bowl, add the following dry ingredients: - 1 cup all-purpose flour - 1 cup coconut sugar - 1/2 cup unsweetened cocoa powder - 1/2 teaspoon baking soda - 1/4 teaspoon salt Whisk these ingredients together. This helps to mix them well and avoids clumps. In a separate bowl, blend the wet ingredients: - 1/3 cup unsweetened applesauce - 1/3 cup almond milk - 1/4 cup vegetable oil - 1 teaspoon pure vanilla extract Stir until the mixture is smooth. This ensures the flavors combine well. Carefully pour the wet mixture into the dry ingredients. Use a spatula to stir until just combined. The batter will be thick and a bit lumpy. Avoid overmixing to keep the brownies tender. If you want extra chocolate flavor, fold in 1/2 cup of dark vegan chocolate chips. This brings delightful bursts of chocolate in every bite. Pour the brownie batter into the prepared pan. Spread it evenly with your spatula. Then, place the pan in the preheated oven. Bake for 25-30 minutes. To check if they are done, insert a toothpick into the center. It should come out clean or with a few moist crumbs. After baking, let the brownies cool in the pan for about 10 minutes. Then, transfer them to a wire rack to cool completely. Once cool, slice them into squares for serving. Enjoy these tasty vegan treats! For the full recipe, refer to the earlier sections. To get the best texture, mix your ingredients just right. When combining wet and dry ingredients, stir until they are just combined. A few lumps are okay. Overmixing makes the brownies tough. You want them soft and fudgy. Always use room temperature ingredients for a smoother batter. One common mistake is measuring flour incorrectly. Use a spoon to scoop flour into your measuring cup, then level it off. Don't pack it down. Also, avoid opening the oven door too early. This can cause the brownies to sink. Patience is key! Bake your brownies for about 25 to 30 minutes. To check if they are done, use a toothpick. Insert it in the center. If it comes out clean or with slight crumbs, they are ready. If it’s wet, give them a few more minutes. Feel free to get creative with flavors! Add nuts for crunch or a pinch of sea salt on top. You can also mix in different extract flavors like almond or coffee. For a twist, try adding a tablespoon of peanut butter to the batter. It adds a rich, nutty taste that pairs well with chocolate. {{image_4}} If you want gluten-free brownies, use almond flour or oat flour instead of all-purpose flour. Both flours provide a great texture. Almond flour offers a nutty flavor, while oat flour gives a mild taste. Make sure to check that your baking powder is gluten-free, too. This way, everyone can enjoy these tasty treats! Coconut sugar works well, but you can switch it out. Try maple syrup or agave nectar for a different flavor. If you like it sweeter, add more sweetener to your mix. Just remember, liquid sweeteners will change the texture slightly. You might need to adjust the dry ingredients to keep the batter right. Get creative with flavor! You can add nuts like walnuts or pecans for a nice crunch. Chopped dark chocolate makes it even richer. Want a hint of spice? Consider adding cinnamon or a dash of espresso powder. Vanilla extract is great, but you can also try almond or mint extract for a unique twist. These little changes will make your brownies stand out! For the complete process, check the Full Recipe. To keep your brownies fresh, store them in an airtight container. They stay good at room temperature for up to three days. If you want to keep them longer, place them in the fridge. They will last about a week when chilled. Just remember to let them come to room temperature before serving. To freeze your brownies, start by cutting them into squares. Wrap each piece tightly in plastic wrap. Then, place the wrapped brownies in a freezer bag or container. They can last for up to three months in the freezer. When you’re ready to enjoy, let them thaw in the fridge overnight or at room temperature for a few hours. To reheat, simply place your brownie in the microwave for about 10-15 seconds. This warms them up nicely and keeps them soft. You can also heat them in the oven at 350°F (175°C) for about 5-10 minutes. Enjoy your delicious brownies warm, and maybe add a scoop of vegan ice cream for a special treat! Yes, you can use mashed bananas instead. They add sweetness and moisture. You can also try silken tofu. It gives a similar texture and keeps the brownies moist. To make your brownies more fudgy, reduce the flour by a few tablespoons. You can also add an extra tablespoon of oil or almond milk. This will create a denser and softer texture. You can use brown sugar or regular granulated sugar. Maple sugar is also a great choice. Each option adds a unique flavor, but all will work well. Not really! Vegan brownies can taste just as rich and delicious. The key is using quality cocoa and chocolate. Many people cannot tell the difference. Absolutely! A vegan chocolate ganache or a simple icing works well. Just mix powdered sugar with a little almond milk and cocoa for a quick frosting. It adds an extra layer of sweetness. For the full recipe, check out the detailed steps above! To make these vegan chocolate brownies, you'll need simple and accessible ingredients. Here’s what you should gather: - 1 cup all-purpose flour - 1 cup coconut sugar (or any granulated sugar of your choice) - 1/2 cup unsweetened cocoa powder - 1/2 teaspoon baking soda - 1/4 teaspoon salt - 1/3 cup unsweetened applesauce - 1/3 cup almond milk (or any preferred plant-based milk) - 1/4 cup vegetable oil (or melted coconut oil for a hint of coconut flavor) - 1 teaspoon pure vanilla extract - 1/2 cup dark vegan chocolate chips (optional for extra flavor) Each ingredient plays a key role in making the brownies rich and satisfying. All-purpose flour gives structure and helps the brownies hold together. You can also use gluten-free flour if you prefer. Coconut sugar adds a slight caramel taste and keeps the brownies sweet. You can swap it with brown sugar if needed. Cocoa powder is the heart of chocolate flavor. Use unsweetened to keep it rich without added sugar. Baking soda helps the brownies rise slightly. Just a little will do the trick. Salt enhances flavors, balancing the sweetness. Unsweetened applesauce acts as an egg substitute. It keeps the brownies moist and adds a hint of fruitiness. Almond milk (or any plant-based milk) provides moisture. You can try soy or oat milk too. Vegetable oil keeps the brownies fudgy. Coconut oil gives a delightful hint of coconut flavor. Pure vanilla extract boosts the chocolate taste, making it richer. Dark vegan chocolate chips add extra chocolate bursts. They’re optional, but highly recommended for that indulgent touch. Gather all these ingredients, and you’ll be ready to create a batch of delicious vegan chocolate brownies. For the complete recipe, check out the [Full Recipe]. In this post, we explored key ingredients for vegan brownies and learned how to bake them. I shared tips for texture, common mistakes, and variations. Remember, using plant-based milk and oil can make your brownies richer. I encourage you to experiment with flavors and sweeteners. Store leftovers properly for freshness. Enjoy baking and satisfying your sweet tooth with these tasty treats!

Vegan Chocolate Brownies Irresistible and Easy Recipe

If you’re craving something sweet that fits your vegan lifestyle, you’re in the right place. In this recipe, I’ll show

- 1 cup orzo pasta - 2 tablespoons extra virgin olive oil - 4 cloves of garlic, finely minced - 2 cups low-sodium vegetable broth - 1 cup heavy cream - 1 cup freshly grated Parmesan cheese - 1 teaspoon Italian seasoning blend - Salt and freshly cracked black pepper to taste - 1/4 cup fresh parsley for garnish Using fresh ingredients makes a big difference in this dish. Let's look at a few key points: - Quality of Parmesan cheese: Freshly grated Parmesan adds a rich flavor. It melts well and creates a creamy texture. Pre-grated cheese often lacks this quality. - Benefits of using low-sodium broth: Low-sodium broth controls the salt level. This allows you to season your dish perfectly. It also helps balance the creaminess. - Fresh parsley for flavor enhancement: Chopped fresh parsley brightens the dish. It adds a pop of color and freshness that makes each bite special. For the full recipe, check out the detailed instructions. Enjoy cooking this creamy delight! Start by heating the olive oil in a large saucepan over medium heat. Once the oil is hot, add the minced garlic. Sauté the garlic for about one minute. Keep stirring to prevent it from burning. Burnt garlic can ruin the taste of your dish. After the garlic is fragrant, pour in the vegetable broth. Bring the broth to a gentle simmer. This step infuses the broth with garlic flavor. Now it’s time to add the orzo. Pour the orzo into the simmering broth. Stir it well to avoid sticking. This is important, as orzo can clump together. Cook the orzo for 8 to 10 minutes. Stir occasionally and check the texture. You want it to be al dente, which means it should have a slight bite. Once the orzo is tender, lower the heat again. Stir in the heavy cream. Then, add the freshly grated Parmesan cheese. Mix everything together until the cheese melts fully. This creates a rich and creamy sauce. If you like, adjust the creaminess by adding more cream or cheese. It should be smooth and delicious, just like you want. To boost the taste of your creamy garlic Parmesan orzo, think about adding some optional spices. A pinch of red pepper flakes can add heat. You might enjoy a sprinkle of smoked paprika for a deeper flavor. Fresh herbs like thyme or basil can brighten the dish. Always taste as you go to find the right balance. Too much cream can dull the flavor, so adjust with salt and pepper. Cook your orzo until it’s al dente. This means it should be firm but not hard. Stir it often as it cooks to prevent sticking. After you mix in the cream and cheese, let the dish rest for a few minutes. This resting time helps thicken the orzo, making it creamier. Garnish your dish with fresh parsley. This adds color and freshness. Finely chop the parsley and sprinkle it on top just before serving. For serving, use a shallow bowl or a wide plate. This makes the dish look inviting and helps showcase the creamy sauce. You can even pair it with a side salad for a lovely meal. For the full recipe, check the Full Recipe above. {{image_4}} You can boost your creamy garlic Parmesan orzo by adding cooked vegetables. Spinach or mushrooms work well. They add color and nutrients. You can also mix in some cooked broccoli for a crunchy bite. If you want more protein, consider adding chicken or shrimp. Cooked chicken adds heartiness. Shrimp gives a nice seafood twist. Just make sure to cook them properly before mixing them in. If you need a gluten-free option, you can swap orzo for rice. It cooks similarly and absorbs flavors well. Brown rice adds a nutty taste, while white rice keeps it light. For a dairy-free version, use coconut milk instead of heavy cream. It gives creaminess and a hint of sweetness. You can also try cashew cream for a rich texture without dairy. Experimenting with different cheeses can change the dish's character. Try using feta or goat cheese for a tangy twist. You can also mix in some cheddar for a sharper flavor. Incorporate citrus or zesty flavors by adding lemon juice or zest. This brightens the meal and complements the garlic. A bit of zest can make your dish pop with freshness. For the Full Recipe, check the main section for detailed steps. To store your creamy garlic Parmesan orzo, use airtight containers. Glass or plastic containers work well. Make sure to let the orzo cool before sealing. This helps keep it fresh. You can keep it in the fridge for up to three days. If you want to store it longer, consider freezing it. When reheating, I recommend using the stove or microwave. If using the stove, add a splash of broth or water. This helps keep the creaminess. Stir often to avoid clumping. In the microwave, heat in short bursts. Stir in between to keep the texture smooth. To freeze the orzo, cool it completely first. Then, place it in freezer-safe bags or containers. Make sure to remove as much air as possible. This helps prevent freezer burn. You can freeze it for up to three months. When you’re ready to eat, thaw it in the fridge overnight. Reheat gently on the stove, adding a little broth to restore creaminess. Enjoy your meal again! For the full recipe, check the earlier section! How long does orzo take to cook? Orzo usually takes about 8 to 10 minutes to cook. Once you add it to the simmering broth, stir occasionally. This helps the orzo cook evenly and prevents it from sticking. Can I use other types of pasta? Yes, you can use other types of pasta. Just keep in mind that different shapes will change the cooking time. Smaller pasta shapes cook faster, while larger shapes take longer. Always check the package instructions for the best results. What can I use instead of heavy cream? If you want a lighter option, use half-and-half or whole milk. For a dairy-free choice, coconut milk or cashew cream works well too. These alternatives will change the flavor, but they still offer creaminess. Are there gluten-free alternatives to orzo? You can find gluten-free orzo made from rice or quinoa. These options work great and keep the dish similar. Just follow the cooking times on the package for the best results. What to serve with Creamy Garlic Parmesan Orzo? Creamy Garlic Parmesan Orzo pairs well with grilled chicken or steamed veggies. A fresh salad adds a nice crunch too. Consider a light vinaigrette dressing to balance the creaminess. How can I make this dish more filling? To make it more filling, add protein like cooked chicken, shrimp, or beans. Toss in some sautéed vegetables like spinach or peas for extra nutrition. You can even mix in some cooked bacon or sausage for a hearty twist. For the full recipe, check the details above. In this article, we explored the key ingredients for creamy garlic Parmesan orzo. We covered the step-by-step cooking process and shared tips for enhancing flavor and texture. You learned about different variations and how to store leftovers properly. Remember, using fresh ingredients makes a big difference in taste. Feel free to add your twist and enjoy this dish your way. With these easy steps, you can create a delicious meal that everyone will love. Cooking should be fun and satisfying, so dive in and enjoy every bite!

Creamy Garlic Parmesan Orzo Flavorful Dinner Recipe

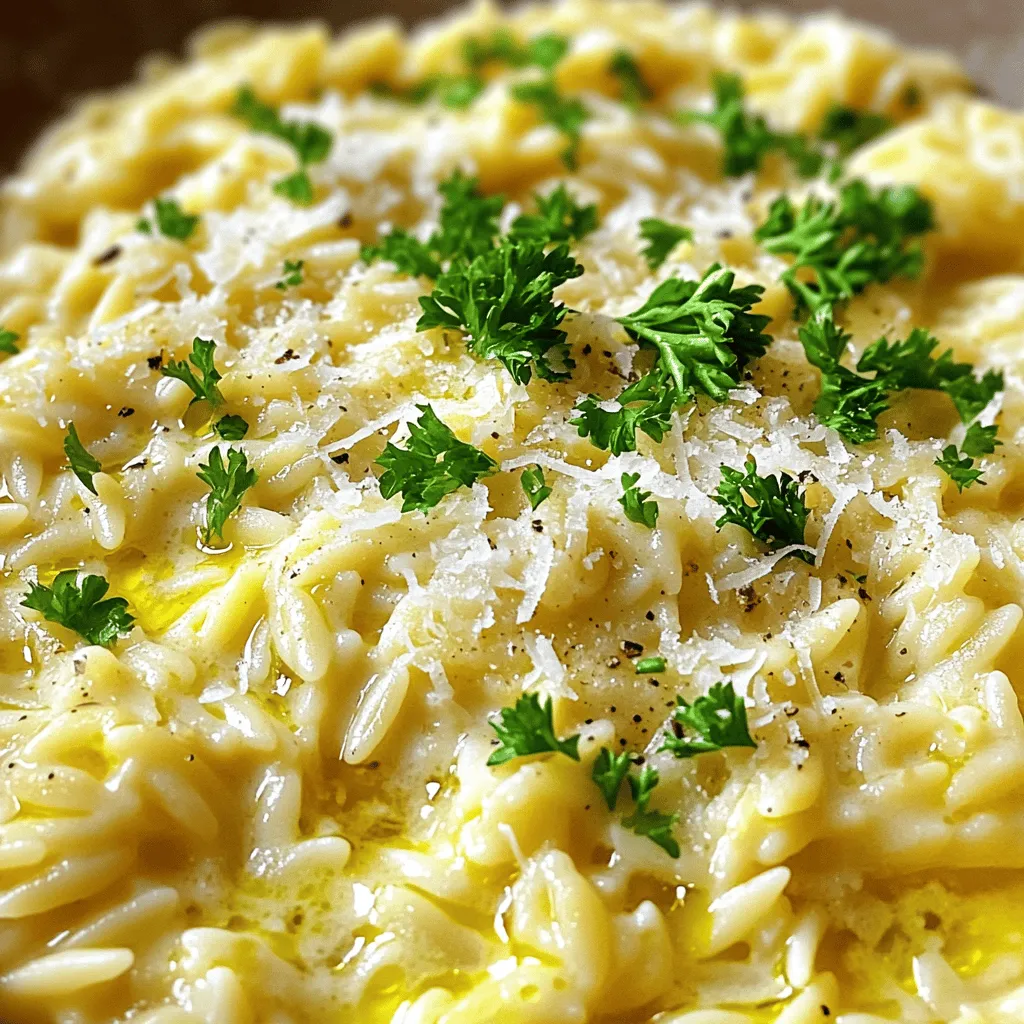
Looking for a warm, comforting dish? This Creamy Garlic Parmesan Orzo is the answer! With rich flavors and a creamy

Sweet potato breakfast hash is a tasty way to start the day. It’s colorful, filling, and packed with flavor. This dish combines sweet potatoes, peppers, and eggs for a balanced meal. Why use sweet potatoes? They are sweet, healthy, and full of vitamins. Their bright color makes the dish look inviting. You can find sweet potatoes in most grocery stores. The main ingredients are: - 2 medium sweet potatoes, peeled and diced - 1 red bell pepper, chopped - 1 green bell pepper, chopped - 1 small red onion, diced - 2 cloves garlic, minced - 1 teaspoon smoked paprika - 1/2 teaspoon ground cumin - 1/4 teaspoon cayenne pepper (optional) - Salt and pepper to taste - 3 tablespoons olive oil - 4 large eggs - Fresh parsley or cilantro for garnish To make the hash, heat olive oil in a skillet. Add the sweet potatoes and season them well. Cover the pan and let them cook until soft. This step is key because it helps the sweet potatoes caramelize and build flavor. While the sweet potatoes cook, use another skillet for the onion and garlic. Sauté them until they smell great. Then, add the bell peppers and cook until tender. Mixing these veggies adds layers of taste. Once the sweet potatoes are ready, mix them with the sautéed veggies. Create wells in the hash, and crack the eggs into them. Cover the skillet to cook the eggs. You want the whites firm but the yolks runny for a rich taste. Finish with a sprinkle of fresh herbs on top. This adds color and a fresh taste. You can serve the hash right from the skillet for a rustic feel. If you like spice, add some hot sauce for extra flavor. This sweet potato breakfast hash is easy to make and great for any morning! For the full recipe, check the details above. Enjoy your meal! We have explored common causes of error code 500 and how to fix them. This error often happens due to server overload, programming mistakes, or issues with plugins. Understanding these issues helps you troubleshoot them quickly. Remember, checking your server logs can provide clues. Staying calm and solving the problem step by step makes a big difference. Now you can tackle error code 500 with more confidence.

Sweet Potato Breakfast Hash Flavorful Morning Dish

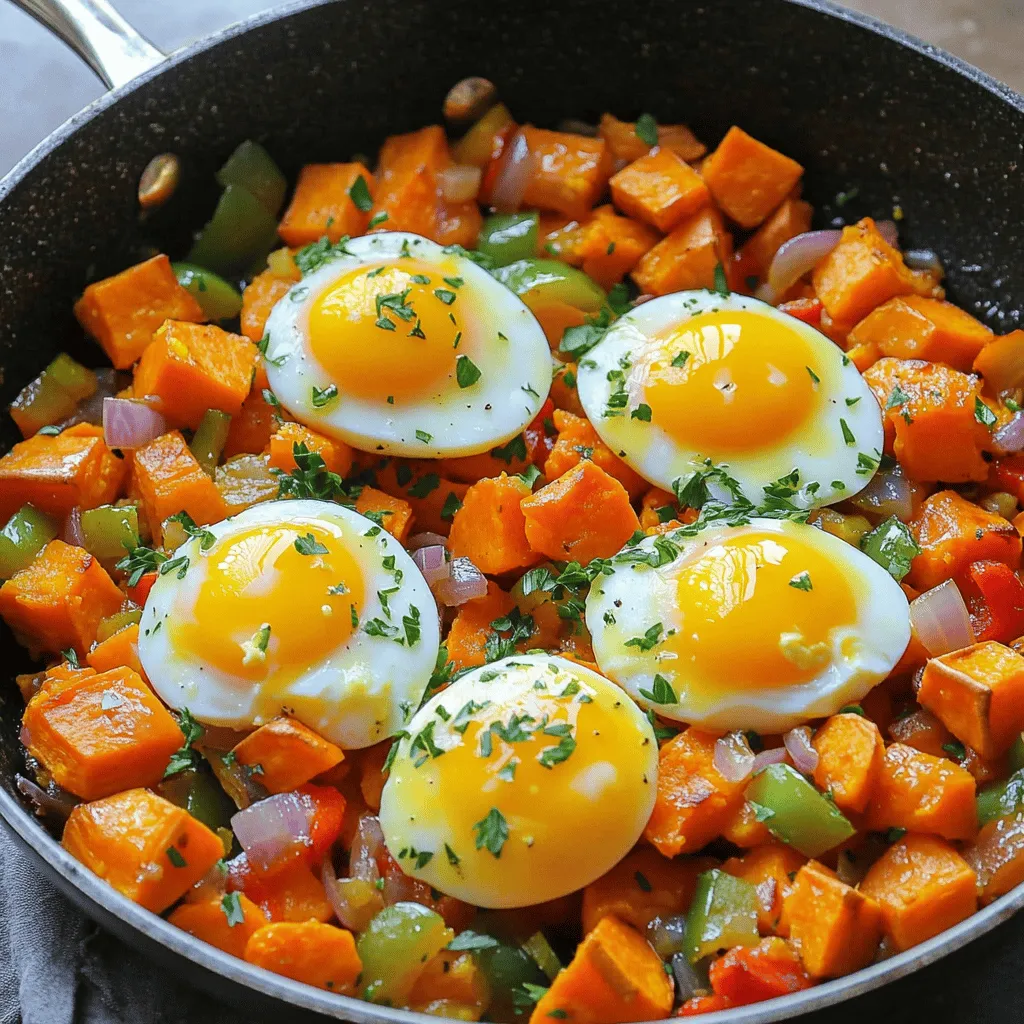
Are you ready to spice up your mornings? Sweet Potato Breakfast Hash is here to save your breakfast routine! Packed

- 2 cups tortilla chips - 1 cup cooked shredded chicken - 1 cup shredded sharp cheddar cheese - 1 cup canned black beans, rinsed and drained - 1/2 cup corn (canned or frozen) - 1 jalapeño, thinly sliced (optional for heat) - 1/2 cup fresh diced tomatoes - 1/4 cup sliced green onions - 1/4 cup sour cream - 1/4 cup guacamole - 1/4 cup salsa - 1 teaspoon taco seasoning - Olive oil for drizzling When I think about Loaded Chicken Nachos, I focus on using fresh and tasty ingredients. This blend makes every bite burst with flavor. Start with tortilla chips. They form the crunchy base. Choose chips that are thick enough to hold all the toppings. Next, use cooked shredded chicken. You can grill or use rotisserie chicken. Both options work well. The chicken adds protein and heartiness to the dish. Then, sprinkle shredded sharp cheddar cheese on top. This cheese melts perfectly and gives a rich taste. You can mix it with other cheeses, too. Just make sure to keep the taste strong. For toppings, black beans and corn add great texture. They also bring in fiber and nutrients. Fresh veggies like tomatoes and jalapeños provide a nice crunch and flavor. Green onions finish the look and taste. Don’t forget the dips! Sour cream, guacamole, and salsa are must-haves. They add creaminess and zest. Lastly, season the chicken with taco seasoning. A drizzle of olive oil helps the nachos crisp up while baking. This blend of ingredients makes my Loaded Chicken Nachos stand out. For the full recipe, check out the section above. 1. Preheat your oven to 350°F (175°C). This helps the nachos cook evenly. 2. On a large baking sheet, arrange the tortilla chips in a single layer. This gives them a nice crunch. 1. In a bowl, mix the cooked chicken with taco seasoning. This adds great flavor. 2. Spread the seasoned chicken evenly over the tortilla chips. Make sure it covers all the chips. 3. Next, sprinkle the rinsed black beans and corn over the chicken and chips. This adds texture and flavor. 1. Top everything with shredded sharp cheddar cheese. Make sure to cover the toppings well so that it melts nicely. 2. Add sliced jalapeños, diced tomatoes, and chopped green onions for freshness. 3. Drizzle olive oil lightly over the nachos to help them crisp. 4. Place the baking sheet in the oven and bake for 10-15 minutes. The cheese should be melted and bubbly. 5. After baking, take the nachos out and let them cool for a few minutes. 6. Top with sour cream, guacamole, and salsa as you like. 7. Garnish with more green onions for a nice finish. For the full recipe, check the details above. Enjoy this easy and tasty dish! To get the best crunch, spread the tortilla chips in a single layer on your baking sheet. Don’t pile them high. This lets heat reach every chip. Next, cover the chips fully with cheese. This helps hold the chips together and prevents them from getting soggy. You can swap ingredients to make your nachos unique. Try using pulled pork or tofu in place of chicken. Want more flavor? Add a pinch of cayenne pepper or a splash of hot sauce. You can also throw in some black olives or diced bell peppers for extra crunch and taste. Serving is key to enjoying your nachos. You can keep it casual by serving them right on the baking sheet. For a nicer look, use a colorful platter. Add small bowls of guacamole, salsa, and sour cream on the side. This lets everyone dip as they like. For a fun twist, sprinkle fresh cilantro or lime juice on top before serving. This adds color and a fresh taste to your dish. For the full recipe, check out Loaded Chicken Nachos Supreme. {{image_4}} If you want to change up the protein, ground beef or turkey works great. Just cook the meat with taco seasoning for flavor. You can also use shredded rotisserie chicken for a quick option. For a vegetarian twist, try black beans or lentils. They add protein and taste. Cheese is key to nachos. For a spicy kick, use pepper jack. It melts well and has a nice heat. A blend of cheeses can add richness. Try mixing cheddar, Monterey Jack, and mozzarella. Each cheese brings its own flavor and texture. Toppings make nachos special. Consider adding black olives or pickled jalapeños for extra zest. Fresh avocado adds creaminess and richness. You can also explore different salsas, like mango or pineapple, for a sweet and spicy mix. These toppings can elevate your nacho experience. For the full recipe, check out the Loaded Chicken Nachos Supreme . To keep your leftover nachos fresh, store them in an airtight container. This helps lock in moisture. Place a layer of parchment paper between layers to avoid sogginess. Refrigeration is key, so aim to eat them within two days for the best taste. To keep nachos crispy, avoid covering them tightly with plastic wrap. Instead, leave the container slightly open to allow air circulation. When it’s time to reheat, you have two main choices: the microwave or the oven. The microwave is quick, but it may make the chips soft. If you want to keep them crispy, the oven is your best bet. Preheat it to 350°F (175°C). Spread the nachos on a baking sheet and heat for about 10 minutes. This method helps preserve the texture and keeps everything warm and cheesy. Can you freeze nachos? Yes, but it’s better to freeze the components separately. Freeze the chicken, cheese, and toppings in separate bags. This way, you can make fresh nachos later. To freeze, use freezer-safe bags and squeeze out as much air as possible. When you’re ready to eat, thaw everything in the fridge overnight, then assemble and bake. To make Loaded Chicken Nachos healthier, swap out a few ingredients. Use baked tortilla chips instead of fried ones. You can also choose grilled chicken instead of rotisserie chicken. This cuts down on fat and calories. For cheese, use a lighter option like low-fat cheddar. You can even add more veggies, like bell peppers or avocado. These options keep your nachos tasty while making them healthier. For nachos, sharp cheddar cheese is a favorite. It melts well and has a bold taste. You can also try pepper jack cheese for a spicy kick. A blend of cheeses works well too. Combining cheddar, Monterey Jack, and mozzarella creates a rich flavor. The key is to choose cheeses that melt smoothly and taste great together. To scale Loaded Chicken Nachos for more people, simply increase the ingredient amounts. For each additional person, add more tortilla chips, chicken, and cheese. Use about one cup of chicken and cheese for every four servings. Adjust your baking time if you make a larger batch. You may need to bake for a few extra minutes to melt the cheese fully. Always check for a bubbly, golden finish! Loaded chicken nachos are a fun and easy dish to make. You start with tortilla chips and top them with chicken, cheese, and your favorite veggies. Bake them to melt the cheese, and you’ve got a tasty treat. Remember, you can mix things up with proteins, cheeses, and toppings to fit your taste. Follow the tips and storage advice to keep your nachos fresh. No matter how you customize them, these nachos will please everyone, making them a great addition to any gathering. Enjoy sharing this delightful dish!

Loaded Chicken Nachos Flavorful and Simple Recipe

Craving a tasty snack that’s easy to make? Loaded chicken nachos are the answer! With crunchy tortilla chips, savory shredded

- 4 boneless, skinless chicken thighs - 1 cup jasmine rice - 2 cups chicken broth - 1 medium onion, diced - 3 cloves garlic, minced - 1 teaspoon dried oregano - 1 teaspoon dried thyme - 1 teaspoon paprika - Salt and pepper to taste - 1 cup cherry tomatoes, halved - 1/2 cup Kalamata olives, pitted and sliced - 1/2 cup feta cheese, crumbled - 2 tablespoons olive oil One Pot Greek Chicken and Rice is a joy to make. Each ingredient shines in this dish. Chicken thighs give rich flavor and stay juicy. Jasmine rice adds a lovely texture. The chicken broth ties everything together, making it comforting. For aromatics, onion and garlic are key. They build a strong base. Use fresh onion and garlic for the best taste. The dried herbs add depth. Oregano brings warmth, while thyme adds a hint of earthiness. Paprika gives a subtle smokiness. Don't forget salt and pepper; they enhance all the flavors. The cherry tomatoes burst with freshness. They balance the dish with a sweet note. Kalamata olives offer a briny contrast. Feta cheese brings creaminess and tang. Olive oil adds richness. Each bite is a celebration of Greek flavors. You can find the full recipe above to guide you in creating this tasty meal. Enjoy the process and the delightful tastes! Start by browning the chicken thighs. Heat olive oil in a large pot over medium heat. Season both sides of the chicken with salt, pepper, and paprika. When the oil is hot, add the chicken thighs. Cook for about 5 minutes on each side until they turn golden brown. Once done, remove the chicken and cover it to keep warm. Next, cook the aromatics. In the same pot, add the diced onion. Sauté it for about 3 to 4 minutes. You want the onion to become soft and translucent. After that, add the minced garlic. Cook for an additional minute, stirring often. The garlic should become fragrant. Now it’s time to make the rice mixture. Stir in the jasmine rice. Toast the rice for 1 to 2 minutes. This step brings out a lovely flavor. Then, pour in the chicken broth. Return the browned chicken thighs to the pot. Sprinkle dried oregano and thyme evenly over everything. Finally, simmer the dish. Increase the heat to bring the pot to a gentle boil. Once boiling, reduce the heat to low. Cover the pot and let it simmer for 20 to 25 minutes. This timing helps the rice become tender and absorb all the liquid. For a full recipe, check the details above. To make your One Pot Greek Chicken and Rice shine, seasoning is key. Enhance the flavor by adding a squeeze of lemon juice. This brightens the dish and adds a nice zing. You can also try using fresh herbs instead of dried ones. Fresh oregano and thyme give a vivid taste. Resting time is important. After cooking, let the dish sit for about five minutes. This allows the flavors to blend together nicely. It makes a big difference in taste. Not everyone likes browning chicken. You can skip this step if you want. Just add the chicken directly to the rice mixture. It will still cook through and stay juicy. Controlling the cooking temperature is vital. Keep the heat on low once you cover the pot. This helps the rice cook evenly. If the heat is too high, you risk burning the bottom. Garnishing with fresh parsley makes the dish pop. Sprinkle some on top just before serving. This adds color and freshness to your meal. For serving, consider warm pita bread on the side. It’s great for scooping up the chicken and rice. You can also drizzle a bit of olive oil on top. This adds richness and flavor to every bite. For the full recipe, check out the included details. {{image_4}} You can switch up the protein in One Pot Greek Chicken and Rice to suit your taste. Chicken thighs offer great flavor, but chicken breasts work too. They are leaner and still tasty. If you want something different, try shrimp. They cook fast and add a nice touch. Tofu is a great choice for a vegan option. Just make sure to press it well to remove extra moisture. You can use different grains for this dish. Brown rice is a healthy choice. It takes longer to cook, about 40-45 minutes, so adjust your time. Couscous is another quick option. You only need to add it to the broth and let it sit for about 5 minutes. This gives you a fluffy texture that pairs well with the chicken and veggies. Adding vegetables makes this dish even better. Bell peppers add sweetness and color. You can toss them in with the onions. Spinach is another great option. Add it at the end so it wilts nicely. Feel free to get creative with seasonal veggies like zucchini or asparagus. They all enhance the flavor and nutrition of your meal. For the full recipe, check the link above. After you finish your meal, let the dish cool down. Place the chicken and rice in an airtight container. Store it in the fridge for up to four days. This keeps the dish fresh and tasty. To reheat, use a microwave or a stovetop. If using the microwave, heat for two to three minutes. Stir halfway to warm it evenly. On the stovetop, add a splash of broth and heat over low. This method helps keep the rice moist and the flavor intact. You can freeze One Pot Greek Chicken and Rice too. Place the cooled dish in a freezer-safe container. It will last for about three months in the freezer. When you want to eat it, take it out and thaw it overnight in the fridge. To reheat, follow the same stovetop method as before. Enjoy your meal later! One Pot Greek Chicken and Rice takes about 40 minutes in total. You spend around 10 minutes getting everything ready. Cooking the dish takes about 30 minutes. This includes browning the chicken and simmering the rice. Yes, you can make this dish ahead of time. Cook it fully and let it cool. Store it in an airtight container. It can last in the fridge for about 3 days. To reheat, just warm it in a pot or microwave. You can serve this dish with a few tasty sides. Try warm pita bread to soak up the flavors. A simple Greek salad pairs well too. Pair it with a glass of crisp white wine or iced tea for a refreshing drink. To make this dish healthier, you can swap out some ingredients. Use brown rice instead of jasmine rice for more fiber. You can also use skinless chicken breasts instead of thighs. Add more veggies like bell peppers or spinach for extra nutrients. This blog post covered how to make One Pot Greek Chicken and Rice. We explored the key ingredients like chicken thighs, jasmine rice, and flavorful herbs. You learned step-by-step instructions, including how to brown the chicken and cook the rice perfectly. To enhance your meal, I shared tips for flavor and presentation. You can also try protein and vegetable variations for a twist. Remember to store leftovers properly for later enjoyment. With these insights, you can create a delicious, hearty dish any time. Enjoy cooking!

One Pot Greek Chicken and Rice Flavorful Delight

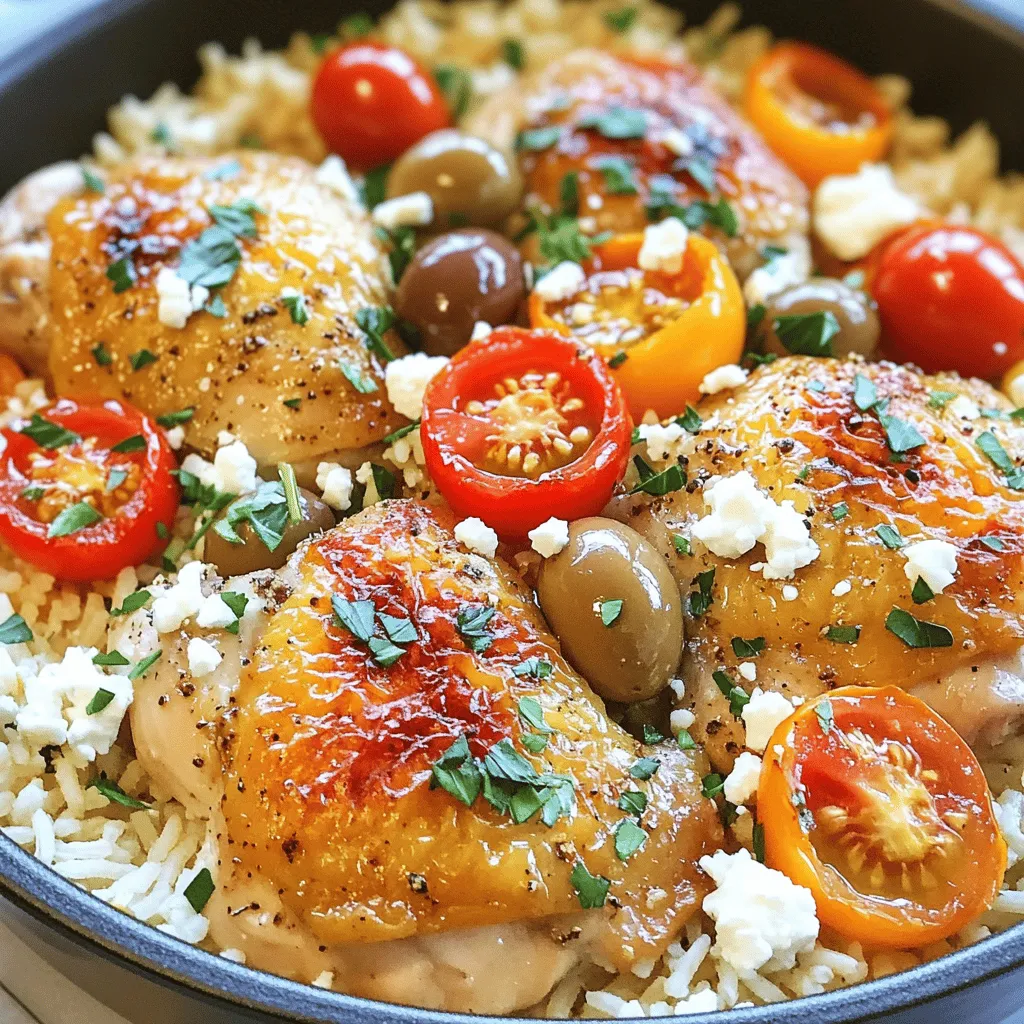
If you’re looking for a simple, tasty meal, One Pot Greek Chicken and Rice is for you! This dish packs

To make crispy lemon pepper wings, you need these key ingredients: - 2 lbs chicken wings - 1 tablespoon baking powder - 1 teaspoon salt - 1 teaspoon freshly ground black pepper - 1 tablespoon garlic powder - 1 tablespoon onion powder - 2 tablespoons fresh lemon zest - 1/4 cup unsalted butter, melted - 2 tablespoons fresh lemon juice These ingredients work together to create a tasty, crispy wing. The baking powder is vital for that crunch. It helps the skin crisp up while baking. The salt and spices add flavor, while lemon zest gives a bright, fresh taste. You can add a few optional items to boost the flavor: - 1 teaspoon crushed red pepper flakes (optional for heat) If you like spice, the crushed red pepper flakes add a great kick. Just sprinkle them in with the other spices for a spicy twist. To make your wings look great and add flavor, try these garnishes: - Fresh parsley, finely chopped Chop some fresh parsley and sprinkle it over the wings. This adds color and freshness. You can also serve lemon wedges on the side. They give an extra pop of lemony flavor. For the full recipe, check out the complete guide. First, preheat your oven to 425°F (220°C). This step is key for crispy wings. Line a baking sheet with parchment paper. This way, your wings do not stick. In a large bowl, combine the chicken wings with baking powder, salt, black pepper, garlic powder, and onion powder. Use your hands or a spoon to mix well. Make sure all wings are coated evenly. This will help create that crispy texture. Arrange the seasoned wings in a single layer on the baking sheet. Keep space between each wing to allow even cooking. Place the baking sheet in the preheated oven. Bake for 40 to 45 minutes. Flip the wings halfway through to ensure even browning. You want them golden and crispy all over. While the wings bake, prepare the lemon-butter sauce. In a small bowl, whisk together melted butter, fresh lemon zest, lemon juice, and crushed red pepper flakes if you like heat. Set this aside. The flavors will mix well while the wings cook. When the wings are done, toss them in the lemon-butter sauce. Make sure each wing is coated well. Serve hot, and enjoy the crispy goodness! You can find the full recipe for reference. To get crispy lemon pepper wings, start with dry wings. Pat them with paper towels. The less moisture, the better. Use baking powder in your mix. This ingredient helps create a crunchy outer layer. Bake them on a wire rack if you can. This allows air to flow all around the wings. Make sure they are not touching. This ensures even cooking and crispiness. Flip them halfway through baking. This helps both sides brown nicely. You can add more flavors to the wings. Try adding smoked paprika for a smoky taste. You can also mix in some lime zest for a twist. If you like heat, add more crushed red pepper flakes. You can use honey in your lemon-butter sauce. This gives a sweet touch to the wings. Experiment with different spices to find your perfect mix. You can cook your crispy lemon pepper wings in two ways. The oven method is great for a big batch. It cooks evenly and gives a nice crunch. Preheat your oven to 425°F (220°C) for the best results. The air fryer is faster and uses less oil. It also gives a great crispy texture. Set it to 400°F (200°C) and cook for about 25 minutes. Whichever method you choose, follow the same steps for flavor. Enjoy your wings with your favorite dipping sauces! For the full recipe, check the earlier section. {{image_4}} Want a kick? Add some heat to your lemon pepper wings. Mix in crushed red pepper flakes. Use about 1 teaspoon for a gentle heat. For more spice, increase the amount. You can also add hot sauce to the lemon-butter sauce. This gives the wings a fiery twist. It’s a great way to impress your friends! If you love garlic, this twist is for you. Combine garlic powder with grated Parmesan cheese. Toss the wings in this blend before baking. After baking, drizzle the lemon-butter sauce on top. Add a sprinkle of more Parmesan and fresh parsley. This variation gives a rich flavor and a cheesy finish. Craving something sweet? Try honey lemon pepper wings. Mix honey with the lemon-butter sauce. About 2 tablespoons of honey works well. This adds a sticky, sweet layer to the crispy wings. The honey balances the lemon's tanginess. Your taste buds will thank you for this delightful mix! For the full recipe, check out the details above. After enjoying your crispy lemon pepper wings, store any leftovers in an airtight container. Place a piece of parchment paper between layers if they stack. This keeps them from sticking together. Store them in the fridge for up to three days. Remember, the sooner you eat them, the better they taste! To reheat your wings, the oven is best. Preheat it to 350°F (175°C). Place the wings on a baking sheet and bake for about 10-15 minutes. This method keeps them crispy. You can also use an air fryer for about 5-7 minutes to restore their crunch. Avoid the microwave, as it makes them soggy. If you want to keep wings longer, freezing is a great option. First, let them cool completely. Then, place them in a freezer-safe bag. Squeeze out as much air as possible before sealing. You can freeze them for up to three months. When you’re ready to eat, thaw them in the fridge overnight before reheating. Cook your crispy lemon pepper wings for 40 to 45 minutes. This time gives them a nice golden color and a crunchy texture. Flip them halfway through to ensure they cook evenly. The high oven temperature helps get that perfect crispiness. Yes, you can use frozen chicken wings. Just make sure to thaw them first. This step helps the seasoning stick better and ensures they cook properly. You will also need to adjust the cooking time. Frozen wings may take a few extra minutes to cook fully. Some great side dishes to enjoy with lemon pepper wings include: - Celery sticks with blue cheese dressing - Crispy French fries - Fresh garden salad - Creamy coleslaw - Garlic bread These sides complement the tangy flavor of the wings and add variety to your meal. Many restaurants serve lemon pepper wings. Popular spots include: - Wing specialty shops - Sports bars - Pubs and taverns - Some casual dining restaurants Always check the menu online or call ahead to see if they offer this tasty dish. You can also look for places that have a reputation for great wings. You might find some exciting variations as well! Crispy lemon pepper wings are a tasty treat. We covered key ingredients, detailed steps, and helpful tips. You learned how to cook wings perfectly and make flavorful variations. Remember to store any leftovers properly for later enjoyment. These wings pair well with many side dishes, so be creative! I hope you feel ready to make your own crispy lemon pepper wings. Enjoy your cooking adventure and the delicious flavors ahead.

Crispy Lemon Pepper Wings That Satisfy Every Craving

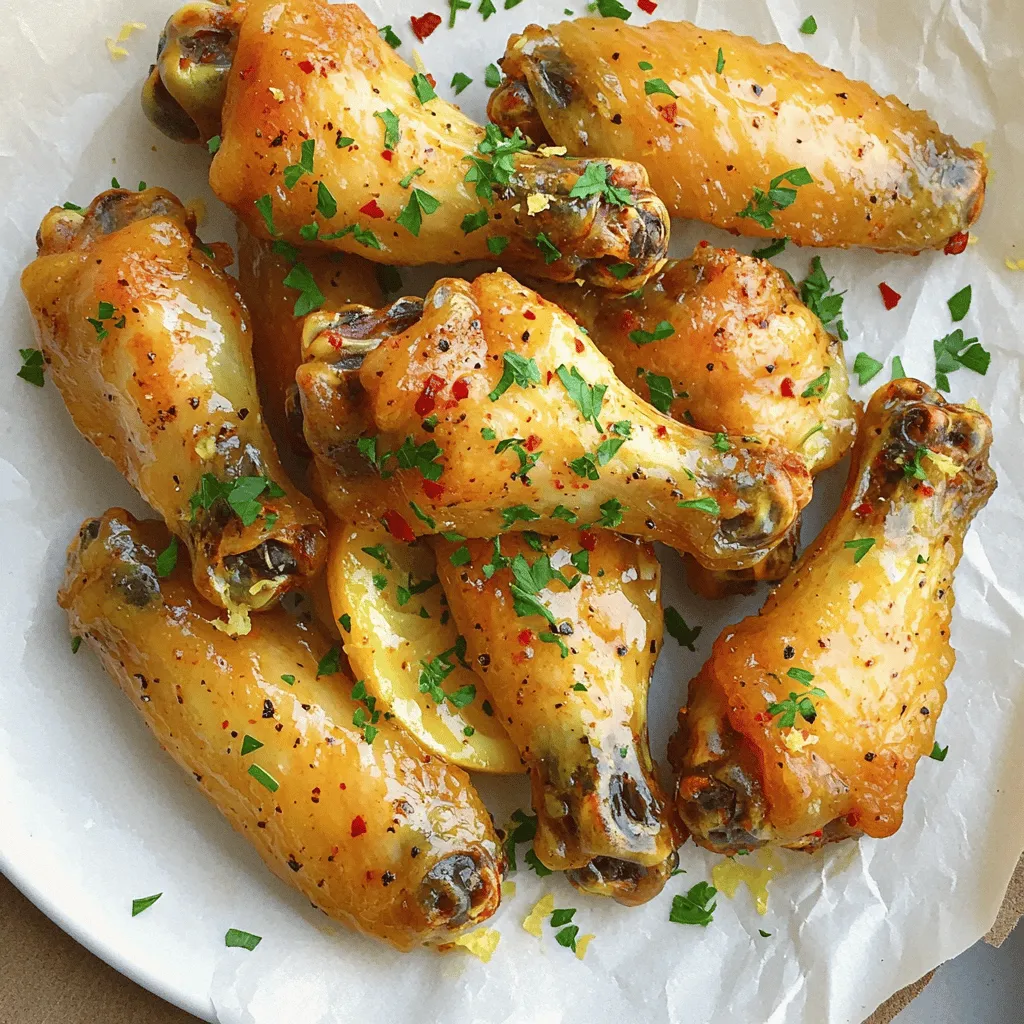
Are you ready to elevate your snack game? Crispy Lemon Pepper Wings are the perfect treat for any craving. These

- 2 cups shelled edamame (fresh or frozen) - 4 cloves garlic, finely minced - 1 tablespoon low-sodium soy sauce - 3 tablespoons high-quality olive oil - 1-2 teaspoons red pepper flakes - 1 teaspoon freshly grated ginger - Toasted sesame seeds - Chopped green onions - Salt, to taste When I make Spicy Garlic Edamame, I focus on fresh and simple ingredients. Edamame is the star, and I love using shelled ones for ease. You can use fresh or frozen; both work well. I always choose high-quality garlic for more flavor. Mince it finely to release its natural oils. For a kick, I add red pepper flakes. You can adjust this to your spice level. If you like it mild, use less. Fresh ginger adds warmth and depth, so don’t skip it! The soy sauce gives a savory touch, while olive oil helps everything sauté nicely. I prefer low-sodium soy sauce to keep the flavors balanced. For garnishing, I always sprinkle toasted sesame seeds and chopped green onions on top. They bring a nice crunch and color to the dish. Lastly, taste for salt. This dish is all about the layers of flavor. If you're ready to create this tasty snack, check out the Full Recipe for detailed steps! - Boiling Method for Frozen Edamame: Fill a pot with water and bring it to a boil. Add the frozen edamame and cook for about five minutes. Once tender, drain the edamame and set it aside. - Using Fresh Edamame: If you have fresh edamame, you can skip boiling. Just rinse and use it as is. Fresh edamame is ready to cook! - Heating the Olive Oil: In a large skillet, pour in the olive oil and heat it over medium heat. Wait until the oil shimmers slightly. - Sautéing Garlic and Ginger: Add minced garlic and grated ginger to the hot oil. Stir them for one to two minutes. You want them to smell great but not brown. Be careful, as burnt garlic tastes bitter. - Adding Red Pepper Flakes: Sprinkle in the red pepper flakes and keep stirring for about 30 seconds. This step releases their spicy flavor into the oil. - Mixing in Soy Sauce and Sesame Oil: Pour in the soy sauce and sesame oil. Mix everything well. This helps the edamame soak in all the delicious flavors. - Adjusting Seasoning: Taste your dish and add salt if needed. This step is key to bringing out all the flavors. - Garnishing the Edamame: Transfer the hot edamame to a bowl. Top it with toasted sesame seeds and chopped green onions. This adds a nice crunch and color to your dish! For the full experience, check out the Full Recipe for Spicy Garlic Edamame Delight 🧄. Enjoy every bite! Choosing the Best Edamame When picking edamame, freshness is key. Look for bright green pods with no brown spots. You can choose fresh or frozen edamame. Fresh edamame has a great snap and flavor. Frozen edamame is quick and easy. It is often picked at peak ripeness and frozen right away. Both options taste great in this recipe. Olive Oil vs. Other Oils High-quality olive oil brings rich flavor. Its fruity notes enhance the dish. You can use other oils like avocado or sesame oil if you prefer. Each oil brings its own taste. Just remember, use oils that can handle heat well. Adjusting Spice to Taste The red pepper flakes add heat, but you can adjust this. If you like it mild, use less. For more heat, add more flakes. Taste as you go to find your perfect level. Alternative Spicy Ingredients You can try different spicy elements too. Sriracha or chili oil works well. These add great flavor and a kick. Just remember to start with a small amount. You can always add more if needed. Serving Styles For a fun touch, serve your edamame in a rustic bowl. You can even add lime wedges on the side. They give a zesty kick and make the dish pop. Plating Techniques When plating, sprinkle toasted sesame seeds on top. They add crunch and look nice. Use a generous amount of chopped green onions as well. This adds color and freshness. A beautiful dish makes it more enjoyable to eat. For the complete experience, don't forget to check out the Full Recipe for detailed steps! {{image_4}} You can mix up the flavors of your spicy garlic edamame in fun ways. Here are two tasty options: - Lemon Garlic Edamame: For a zesty twist, add lemon juice and zest. This brightens the dish nicely. Simply mix the juice in after cooking. The fresh lemon flavor pairs well with garlic. - Miso-Glazed Edamame: Miso adds a rich, umami taste. Use white or yellow miso for a milder flavor. Stir in a tablespoon during cooking. This gives a creamy texture and deep flavor. Making your edamame fit different diets is easy! Here are some ideas: - Vegan and Gluten-Free Options: The base recipe is already vegan. Use gluten-free soy sauce to keep it safe for gluten-free eaters. - Low-Sodium Variations: To reduce salt, use low-sodium soy sauce. You can also skip added salt. The garlic and spices will still give it great flavor. Pairing your spicy garlic edamame can enhance your meal. Here are some perfect matches: - Best Accompaniments: Serve it with rice, sushi, or salads. It also goes well with grilled meats. - Wine and Beverage Pairings: Enjoy it with a light white wine like Sauvignon Blanc. It also pairs nicely with green tea or a citrusy soda. For the full recipe of spicy garlic edamame, check out the [Full Recipe]. - Refrigeration Tips: Let the edamame cool down before storing. Place it in an airtight container. You can keep it in the fridge for up to three days. This way, it stays fresh and tasty. - Freezing Instructions: If you have more leftovers, you can freeze them. Spread the edamame on a baking sheet. Freeze it for about an hour. Then, transfer the edamame to a freezer bag. It lasts up to three months in the freezer. - Best Methods for Retaining Flavor: To reheat, use a skillet over medium heat. Add a little olive oil and toss the edamame. This helps keep the flavors strong. - Avoiding Texture Loss: Avoid using the microwave. It can make the edamame mushy. Instead, heat slowly to keep that nice crunch. Enjoy your snack just like the first time! Boil frozen edamame for about 5 minutes. If you use fresh edamame, you can skip this step. Fresh edamame cooks quickly, so check for tenderness after a couple of minutes. Remember, you want it soft but not mushy. You should not eat the pods. They are tough and not tasty. Only eat the beans inside. The beans are packed with flavor and nutrients. You will enjoy them in your spicy garlic edamame dish. Spicy garlic edamame pairs well with many dishes. Try serving it with: - Sushi rolls - Rice bowls - Grilled meats - A fresh salad - Noodles These options complement the flavors and make a full meal. For more ideas, check out the Full Recipe for serving suggestions. In this post, we explored the delightful world of Spicy Garlic Edamame. We covered the key ingredients, cooking steps, helpful tips, and various ways to enjoy this dish. Remember to pick fresh and high-quality edamame for the best taste. Adjust the spice level to suit your liking. This dish is easy to make and versatile. You can enjoy it as a snack or as part of a meal. Try different flavors to keep it exciting. Enjoy cooking and savoring every tasty bite!

Spicy Garlic Edamame Flavorful and Quick Snack Recipe

Looking for a quick, tasty snack? Try my Spicy Garlic Edamame! This simple dish combines rich flavors with minimal effort.

Older posts
Newer posts
← Previous Page1 … Page21 Page22 Page23 … Page60 Next →

dsad

© 2025 eataroundit • Built with GeneratePress

Our Policies

  • Copyright Policy
  • Cookie Policy
  • GDPR Policy
  • Privacy Policy
  • Disclaimer
  • Terms Of Use

More Information

  • Home
  • About
  • Contact
  • Appetizers
  • Dessert
  • Dinner
  • Drinks
©2025, eataroundit About Back To Top