Skip to content
DisclaimerTerms Of UseGDPR PolicyCookie Policy

eataroundit

  • Home
  • Drinks
  • Appetizers
  • Dinner
  • Dessert
  • About
  • Contact
  • Privacy Policy
DisclaimerTerms Of UseGDPR PolicyCookie Policy

Hannah

- 4 plain rice cakes - 1 cup dark chocolate chips - 2 tablespoons coconut oil - 1/4 cup almond butter - 1/4 cup chopped nuts (almonds, walnuts, or pecans) - 1/4 cup dried fruit (cranberries, raisins, or apricots) - Sea salt, for a finishing sprinkle You can swap in different nut butters if you like. Sunflower seed butter works well too. If you want a dairy-free option, use dairy-free chocolate chips. Each serving contains about 200 calories. - Protein: 4g - Fat: 12g - Carbohydrates: 22g These numbers can change based on the nuts and fruits you use. Always check labels for precise values. Dark chocolate offers antioxidants. It may improve heart health and mood. Nuts add protein and healthy fats. Dried fruits provide vitamins and minerals. They also add natural sweetness. This snack combines flavor and nutrition, making it great for any time of day. To start, melt the dark chocolate chips and coconut oil. Use a microwave-safe bowl for this. Heat the mixture in 30-second intervals. Stir after each interval. Keep doing this until the chocolate is smooth and melted. Stirring helps mix the oil and chocolate well. This ensures a nice, silky drizzle. Now, let’s build our rice cakes. Lay the rice cakes flat on a parchment-lined baking sheet. Take about one tablespoon of almond butter. Spread it evenly on each rice cake. This creates a nice base for the chocolate. Next, use a spoon to drizzle the melted chocolate over the almond butter. Get creative! Use a zigzag pattern for a fun look. Once you've drizzled the chocolate, it's time for the toppings. Sprinkle chopped nuts and dried fruit over the chocolate while it’s still warm. This adds a great crunch and flavor. Finally, add a light pinch of sea salt on top. This little touch boosts the sweetness and makes each bite even better. Now, chill the rice cakes in the fridge for 15-20 minutes. This helps the chocolate set and makes them ready to eat. To melt chocolate well, you need to avoid overheating. Use a microwave-safe bowl. Heat the chocolate in short bursts of 30 seconds. Stir it after each burst. This keeps the heat even and helps prevent burning. If you see some lumps, continue stirring. The heat will melt them away. For a silky texture, mix in a little coconut oil. This oil makes the chocolate smooth and shiny. It also helps the chocolate drizzle look great on your rice cakes. Pair your rice cake snacks with a chilled glass of almond milk. The flavors of chocolate and almond butter mix well. You can also serve them with herbal tea. This adds a nice touch of warmth. For presentation, place the snacks on a colorful plate. You can arrange them in a fun pattern. Add a small bowl of almond butter for dipping. This makes it fun and interactive for guests. Store any leftover rice cake snacks in an airtight container. Keep them in the fridge to maintain freshness. This helps the chocolate stay firm and tasty. If you want to keep them longer, freeze the snacks. Wrap each one in plastic wrap. Place them in a freezer-safe container. When you’re ready to eat, let them thaw in the fridge. This keeps them delicious and fresh for later. {{image_4}} You can make your rice cake snacks even better by trying different flavors. Start with nut butters. Almond butter is great, but peanut butter or cashew butter works too. Each nut butter adds its own special taste. You can also mix in toppings. Try coconut flakes for a tropical twist or pumpkin seeds for added crunch. The sky's the limit, so have fun experimenting! If you want a change from dark chocolate, consider white or milk chocolate. Each one gives a new taste. You can also look for sugar-free or dairy-free chocolate. These options let you enjoy your treats while keeping your diet in mind. It’s easy to swap chocolate types. Just melt them like you would with dark chocolate, and you’re good to go! Celebrate the seasons with fun toppings! In winter, add crushed peppermint for a holiday vibe. For fall, try pumpkin spice or cinnamon. You can even add seasonal fruits like fresh berries in summer or apples in autumn. Using fresh fruits not only looks pretty but also gives a burst of flavor. Dress your rice cakes to match the season and enjoy a festive treat! You can find chocolate drizzle rice cake snacks at many stores. Look for brands like Quaker and Nature Valley. They offer tasty options that are easy to grab on the go. Check local grocery stores or big-box retailers for these snacks. You can also buy them online through sites like Amazon or Walmart. Both homemade and store-bought snacks have their benefits. Store-bought snacks are quick and easy. You can grab them on a busy day. However, homemade snacks let you control the quality and flavors. They can be fresher and more fun to make. In terms of cost, homemade snacks may save you money over time. You can make a batch for less than buying individual packs. If you want to make your own snacks, buying quality ingredients is key. Look for dark chocolate chips, almond butter, and rice cakes. You can find these at most grocery stores. For organic options, try local health food stores or specialty shops. Many farmers' markets also sell fresh nuts and dried fruits. This way, you can create a tasty snack with great ingredients. It takes about 10 minutes to prepare the ingredients. You need an extra 15-20 minutes to chill the snacks. So, the total time is around 30 minutes. This quick recipe fits well into a busy schedule. Yes, you can make these snacks ahead of time! Store them in an airtight container in the fridge. They stay fresh for up to three days. Just be sure to let them sit at room temperature for a few minutes before serving. You can mix and match toppings based on your taste. Here are some ideas: - Use peanut butter or sunflower seed butter instead of almond butter. - Try different nuts like pistachios or hazelnuts. - Add coconut flakes for a tropical twist. - Use seeds like chia or pumpkin for crunch. - Drizzle with caramel or honey for extra sweetness. These options let you customize your snacks to fit any diet or craving. This blog post covered how to make Chocolate Drizzle Rice Cake Snacks. We discussed the key ingredients, their health benefits, and how to prepare them step-by-step. You learned tips for melting chocolate, serving ideas, and storage advice. In conclusion, these snacks are simple to make and can fit many tastes. Whether you choose to buy them or make them from scratch, enjoy experimenting with flavors. With a few changes, you can create a treat that’s just right for you.

Chocolate Drizzle Rice Cake Snacks Delightful Treats

Are you ready for a sweet and satisfying snack? Chocolate Drizzle Rice Cake Snacks are here to delight your taste

- 1 pound ground turkey - 1/2 cup whole wheat breadcrumbs - 1/4 cup freshly grated Parmesan cheese - 1/4 cup fresh parsley, finely chopped - 1 clove garlic, minced - 1 teaspoon onion powder - 1 teaspoon Italian seasoning blend - 1 large egg, lightly beaten - 1 teaspoon kosher salt - 1/2 teaspoon freshly ground black pepper - 1/2 cup marinara sauce (for serving) - Fresh basil leaves for garnish Gather these ingredients before you start. Each one plays a key role in making these turkey meatballs tasty and juicy. Using ground turkey keeps them lean, while whole wheat breadcrumbs add a nice texture. Grated Parmesan cheese gives a rich flavor, and fresh parsley brings brightness. Don’t forget the garlic, onion powder, and Italian seasoning. These are the magic touch that makes every bite delicious. The egg helps hold everything together, while salt and pepper add just the right amount of seasoning. Finally, marinara sauce is perfect for dipping, and fresh basil adds a pop of color and flavor. For the full recipe, check the link above. Enjoy the cooking process! Preheat the oven to 400°F (200°C). This step is key for crisp meatballs. In a large bowl, combine the ground turkey with breadcrumbs, cheese, parsley, garlic, egg, onion powder, Italian seasoning, salt, and pepper. Mix until everything is well combined. Avoid overmixing to keep them tender. Take small portions of the mixture and roll them into golf ball-sized meatballs. Each ball should be about 1.5 inches wide. Place the meatballs on a baking sheet lined with parchment paper. Make sure to leave space between each meatball for even cooking. Put the baking sheet in the preheated oven. Bake for 20-25 minutes. The meatballs should turn golden brown. Use a meat thermometer to check that the internal temperature has reached 165°F (74°C). While the meatballs bake, heat your marinara sauce in a small pot over low heat. Stir it gently to keep it from sticking. After baking, let the meatballs rest for about 5 minutes. This helps to lock in all the tasty juices before serving. To make great meatballs, keep them moist. The key is not to overmix the ingredients. When you mix too much, the meatballs can become tough. Just combine everything until it’s mixed well. You want a nice, soft texture that holds together. Spacing your meatballs on the baking sheet is crucial. If they are too close, they won’t cook evenly. Aim for about an inch or so between each meatball. This allows heat to flow around them, giving you a perfect bake every time. These turkey meatballs are super versatile. You can pair them with pasta for a classic dish. They also work great in a sub sandwich, topped with marinara and cheese. Serve them as appetizers with toothpicks for a fun party snack. For more ideas, check the Full Recipe to explore different serving styles. {{image_4}} You can swap ground turkey for ground chicken or beef. Each option gives you a unique taste. Ground chicken is lighter, while beef offers a rich flavor. Try them out for fun twists on this recipe! Want to add heat? Crushed red pepper flakes do the trick. You can also switch up the herbs. Basil, oregano, or thyme can change the flavor. Experiment to find your favorite mix! If you're looking for a gluten-free option, use almond flour instead of breadcrumbs. This swap keeps the meatballs moist while making them healthier. It’s a simple change with a big impact! For the full recipe, check out the main section above! Store any leftovers in an airtight container. They will stay fresh for up to 3 days. This keeps them tasty and safe to eat later. You can freeze the meatballs before baking. Just place them in a freezer bag. They will last for up to 3 months. This makes meal prep easy and quick. To reheat, set your oven to 350°F (175°C). Place the meatballs on a baking sheet. Heat them until warmed through. This keeps them juicy and delicious. For more details, check out the Full Recipe. Yes, you can pre-make and freeze them for later use. This makes meal prep easy. When you're ready to eat, just bake them from frozen. It saves time and still tastes great! Ensure proper binding with breadcrumbs and eggs, and avoid overmixing. Mixing too much can make them tough. Just combine everything until it's blended, then shape them gently. Serve with marinara sauce, over pasta, or in a sandwich for a delicious meal. You can also add a sprinkle of fresh herbs on top for added flavor. For the full recipe, check out the main article! These turkey meatballs combine simple ingredients for a tasty dish. You learned how to prepare them with easy steps. I shared tips for perfect texture and even cooking. You can make variations with different meats or spices. Don't forget about storing leftovers for later meals. Enjoying this recipe will surely please your taste buds. Dive in and create your own delicious turkey meatballs today!

Easy Baked Turkey Meatballs Delicious and Quick Recipe

Looking for a quick and tasty dinner option? These Easy Baked Turkey Meatballs are just the solution! With simple ingredients

- 1 cup quinoa - 1 can black beans (15 oz), drained and rinsed - 1 cup corn kernels, fresh or frozen - 1 red bell pepper, diced into bite-sized pieces - 1 jalapeño pepper, finely diced (seeds removed for a milder flavor) The main ingredients in this dish create a hearty base. Quinoa is full of protein and fiber, making it a great start. Black beans add a rich flavor and more protein. Corn kernels give a nice sweetness and crunch. The bell and jalapeño peppers bring a pop of color and spice. - 1 teaspoon ground cumin - 1 teaspoon smoked paprika - 1 teaspoon chili powder - Salt and pepper to taste The spices and seasonings bring the dish to life. Ground cumin offers a warm, earthy flavor. Smoked paprika gives a hint of smokiness. Chili powder adds heat and depth. Don't forget salt and pepper to enhance all the flavors. - 2 tablespoons olive oil - Juice of 1 fresh lime - 1 ripe avocado, diced - Fresh cilantro leaves for garnish Finally, the additional ingredients complete the bowl. Olive oil helps sauté the veggies for a tender bite. Lime juice brightens the dish with a tangy twist. Avocado adds creaminess, and cilantro brings freshness. For the full recipe, check out the details above! Start by combining the rinsed quinoa and vegetable broth in a medium saucepan. Bring this mixture to a boil over medium-high heat. Once it boils, reduce the heat to low. Cover the pot and let it simmer for about 15 minutes. The quinoa should be light and fluffy when done. All the liquid should be absorbed. After cooking, remove it from the heat and let it rest, covered, for another 5 minutes. This ensures the perfect texture for your dish. While your quinoa cooks, heat olive oil in a large skillet over medium heat. Next, add the diced red bell pepper and jalapeño pepper to the skillet. Sauté these veggies for about 5 minutes. Stir occasionally until they become tender and fragrant. This step brings out their natural sweetness and adds a nice kick. Now it’s time to incorporate the corn and black beans into the skillet. After adding these, sprinkle in the ground cumin, smoked paprika, chili powder, salt, and pepper. Mix everything thoroughly. Cook for another 5 minutes. This allows the flavors to meld together and everything to heat through. Your spicy veggie mixture is almost ready! For the full recipe, check the earlier section. Rinsing quinoa is crucial. It removes the bitter coating called saponin. This step will give your quinoa a clean taste. Always rinse it under cold water before cooking. After cooking, let the quinoa rest. Cover it for 5 minutes once off the heat. This resting time makes it fluffy and light. You can adjust the spice levels to suit your taste. If you like heat, use more jalapeño. For less spice, remove all the seeds. Fresh lime juice adds a bright touch. Squeeze it over the bowl just before serving. This will boost all the flavors and make the dish pop. Layer your ingredients for a beautiful bowl. Start with the fluffy quinoa at the bottom. Then, add the sautéed veggies on top. This creates a nice contrast of colors. Finally, garnish with fresh cilantro leaves. They add a fresh flavor and make it look appealing. Serve with extra lime wedges on the side for added zing. For the full recipe, check the details above. {{image_4}} You can boost your Spicy Southwest Veggie Bowl with protein. Adding grilled chicken makes it heartier. Simply slice cooked chicken breast and place it on top. It adds great flavor and texture. If you prefer a plant-based option, incorporating tofu is a smart choice. Press the tofu to remove moisture, then cube it. Sauté it until golden brown, then add it to the bowl. Both options keep the dish filling and satisfying. For those who want variety, using different beans can change the dish. You might try pinto beans or kidney beans instead of black beans. Each type brings a unique taste and texture. If you want to keep it light, substituting light olive oil is also a good idea. This keeps the dish healthy while adding a nice flavor. You can adapt the spices for a milder taste. If you want less heat, leave out the jalapeño pepper or reduce the chili powder. You can also add sweetness by mixing in some diced mango. For a zesty kick, a sprinkle of lime zest can brighten up the flavors. I always recommend adding fresh herbs like cilantro or parsley for extra brightness. These small changes can make the bowl just right for your taste! Store your Spicy Southwest Veggie Bowl in the fridge for up to four days. Use airtight containers to keep it fresh. Glass or plastic containers with tight lids work best. Make sure to let the bowl cool before sealing it. This helps keep moisture from building up inside. You can freeze the veggie bowl for up to three months. To do this, place the cooled bowl into a freezer-safe container. Make sure to leave some space at the top for expansion. When you are ready to eat, thaw it overnight in the fridge. Reheat in the microwave or on the stove until hot. Watch for signs of spoilage. If the veggies look mushy or have a strange smell, throw them out. Leftovers should be eaten within four days if kept in the fridge. When frozen, they can last longer, but try to eat them within three months for the best taste. Yes, you can prepare this dish in advance. It's great for meal prep. To do this, cook the quinoa and veggies as usual. Let them cool completely before storing. Use airtight containers for the best results. You can keep leftovers in the fridge for up to four days. When you are ready to eat, simply reheat in the microwave. This bowl tastes even better the next day as flavors meld together. Serve with fresh lime juice and avocado for a bright touch. If you want to swap quinoa, there are many options. Brown rice is a great choice. It offers a nutty flavor and chewy texture. You can also use farro or barley for a hearty base. For a gluten-free option, try cauliflower rice. It’s low in carbs and adds a nice crunch. Each of these options will change the taste a bit, but they all work well in the bowl. Experiment to find what you like best. To boost the heat in your veggie bowl, add extra spicy ingredients. You can include more jalapeño peppers, or use a hotter variety like serrano. Another great option is to mix in diced chipotle peppers in adobo sauce. This will give a smoky flavor with heat. You can also sprinkle crushed red pepper flakes on top before serving. Adjust the spice level to fit your taste. Enjoy the kick! This blog post guided you through creating a Spicy Southwest Veggie Bowl. We covered key ingredients, step-by-step cooking instructions, and helpful tips for perfect texture and flavor. You also learned ways to customize the dish to suit your taste and dietary needs. With these techniques, you can make a vibrant meal at home. Experimenting with your bowl can lead to a new favorite. Enjoy the fresh flavors and feel confident trying different variations!

Spicy Southwest Veggie Bowl Flavorful and Healthy Dish

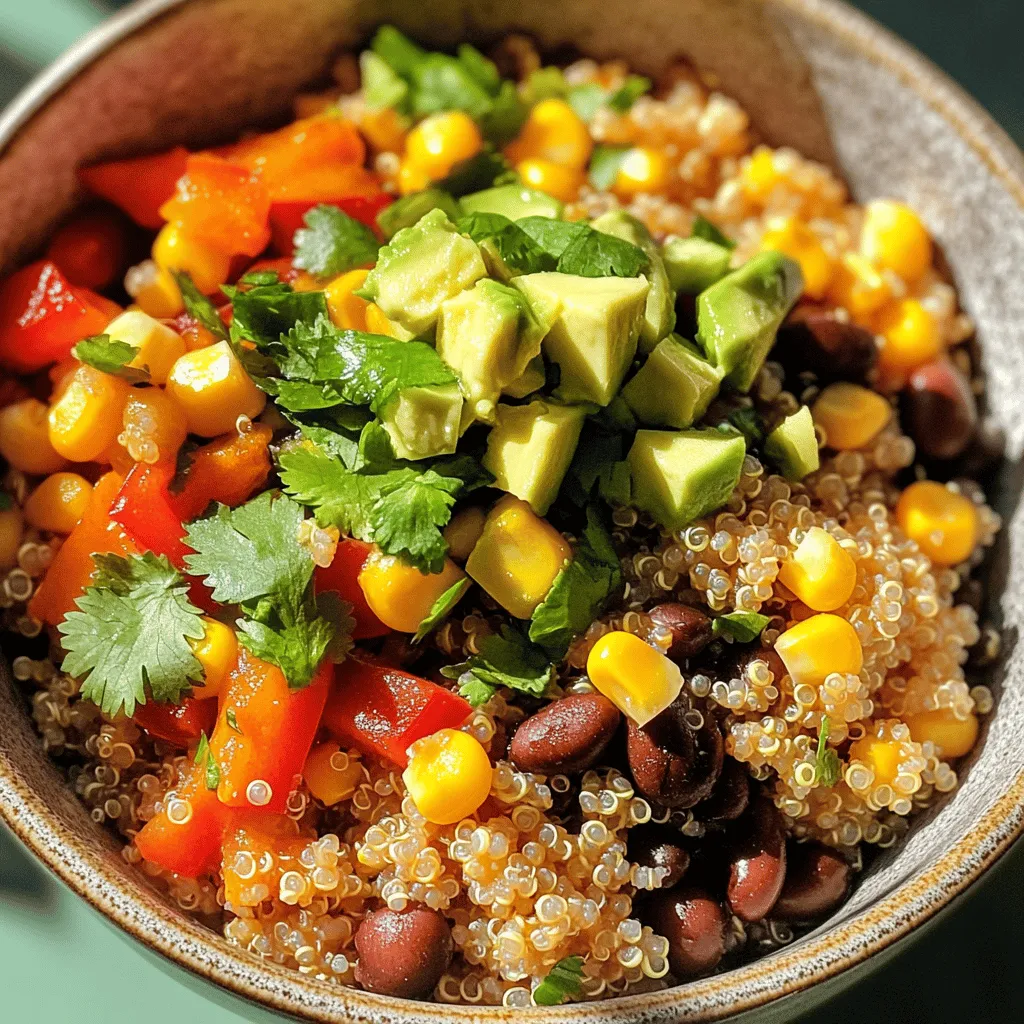
Are you craving a dish that’s both spicy and healthy? The Spicy Southwest Veggie Bowl is the perfect solution! With

- Sturdy French or Italian Bread - Unsalted Butter - Garlic - Dried Parsley Flakes - Italian Seasoning Blend - Shredded Mozzarella Cheese - Grated Parmesan Cheese - Salt and Black Pepper When making cheesy garlic bread, the right ingredients matter. A sturdy loaf holds the toppings well and gives a nice crunch. I suggest using French or Italian bread. Next, you need unsalted butter. Softened butter spreads easily and adds rich flavor. Garlic is key to that classic taste. Use fresh garlic for best results. Dried parsley flakes add a touch of color and flavor. Italian seasoning brings in herbs like oregano and basil for a delightful mix. Cheese is the star of this dish. Shredded mozzarella provides that gooey, melty texture. Grated Parmesan adds a nutty flavor and a nice crust. Don't forget salt and black pepper; they enhance all the flavors. - Alternatives for Butter - Different Cheese Options - Fresh vs. Dried Herbs You can swap out the butter for olive oil if you want a lighter option. It still adds flavor but with a different twist. For cheese, feel free to mix it up! Cheddar or Gouda can bring new tastes. When it comes to herbs, fresh ones can be used instead of dried. Fresh parsley or basil has a vibrant flavor. Just remember to use more fresh herbs than dried, as dried ones are stronger in flavor. For a full guide on making this delicious dish, check out the Full Recipe. - Preheating the Oven Start by preheating your oven to 375°F (190°C). This step is key for getting perfect garlic bread. A hot oven helps the cheese melt and the bread toast nicely. - Slicing the Bread Next, take your loaf of sturdy French or Italian bread. Carefully slice it in half lengthwise. This reveals the soft inside and makes it easier to spread the garlic butter. - Combining Ingredients In a medium bowl, mix 4 tablespoons of softened unsalted butter with 3 finely minced garlic cloves. Add 1 teaspoon of dried parsley flakes and 1 teaspoon of Italian seasoning blend. Don’t forget a pinch of salt and black pepper. Stir everything together with a fork until smooth and creamy. - Achieving the Right Consistency Your garlic butter should be well mixed but not too runny. If it feels too thick, let it sit for a minute. This helps it spread better on the bread. - Spreading the Garlic Butter Now, take your garlic butter mixture and spread it evenly over the cut sides of each bread half. Make sure to cover every bit. This ensures each bite is full of flavor. - Layering the Cheeses After spreading the butter, sprinkle 1 cup of shredded mozzarella cheese over the bread. Then, add 1/2 cup of grated Parmesan cheese on top. This helps create that cheesy, gooey texture we all love. - Baking and Broiling Instructions Place both bread halves cut side up on a baking sheet. Bake them in the preheated oven for about 12-15 minutes. You want the cheese to bubble and turn golden. For a crispy top, broil for an extra 2-3 minutes. Keep a close eye to avoid burning. Once perfect, let them cool for a minute and slice for serving. Enjoy this Easy Cheesy Garlic Bread with your favorite meal or as a snack! For the full recipe, refer back to the ingredients listed earlier. - Importance of Ingredient Quality Good ingredients make great garlic bread. Choose fresh garlic for the best taste. Use a sturdy loaf, like French or Italian bread. This helps hold all the toppings. Quality cheese, like mozzarella and Parmesan, adds rich flavor. - Best Practices for Spreading Spread the garlic butter evenly on the bread. Use a butter knife or spatula. Make sure to get into all the nooks and crannies. This ensures every bite is full of flavor. Don’t skimp on the garlic butter; it’s key to the taste. - Monitoring Baking Time Keep an eye on your garlic bread while it bakes. Ovens can vary, so check it a few minutes early. You want the cheese bubbly and golden, not burnt. If it looks good, it probably is! - Adding Extra Seasonings Get creative with flavors! Add red pepper flakes for heat. Try fresh herbs like basil or thyme for a fresh note. A sprinkle of lemon zest can brighten the taste. Don’t be afraid to experiment! - Tips for a Cheesy Crust For a crunchy cheesy crust, use a mix of cheeses. Blend mozzarella with fontina or cheddar. Add a layer of Parmesan on top for extra crispiness. Broil for a minute or two to get that golden finish. Enjoy the delightful crunch! {{image_4}} You can change the flavor of your cheesy garlic bread by using different cheeses. Mozzarella gives a great melt, but you can try: - Cheddar: This cheese adds a sharp taste. - Gouda: Use this for a creamy and smoky flavor. - Fontina: It melts well and has a rich taste. - Feta: Crumble it on top for a salty kick. Mixing cheeses can create a unique flavor profile. Experiment to find your favorite combo! To make your garlic bread even better, add some flavor boosters. Fresh herbs can brighten the taste. Try these options: - Basil: Adds a sweet, aromatic touch. - Chives: Give a mild onion flavor. - Oregano: It pairs well with Italian dishes. You can also add some veggies for extra flavor. Consider: - Diced tomatoes: They add sweetness and moisture. - Sliced bell peppers: They bring crunch and color. Cheesy garlic bread is perfect for many meals. You can serve it with: - Marinara sauce: A classic dip that pairs well. - Hummus: A healthy option that adds creaminess. - Spinach dip: It makes for a tasty, warm pairing. You can also use cheesy garlic bread in meal themes. Try it with pasta nights or serve it on a pizza night. You can even cut it into strips for a fun appetizer at parties! To keep your cheesy garlic bread fresh, wrap it in foil or plastic wrap. You can also use an airtight container. This method helps keep the bread moist while protecting it from air. Store it in the fridge for up to three days. If you want to keep it longer, freezing is a great option. Just slice the bread first for easy serving later. When it's time to enjoy your leftovers, you can use either the oven or the microwave. The oven gives the best results for reheating. Preheat your oven to 350°F (175°C). Place the bread on a baking sheet and heat for about 10 minutes. This keeps the bread crispy and warm. If you are in a hurry, the microwave works too. Just place the bread on a microwave-safe plate. Heat for about 30 seconds. However, this method may make the bread soft, so use it only if you need to. To maintain that crispy texture, always prefer the oven. It helps the cheese melt perfectly while keeping the outside crunchy. Enjoy your cheesy garlic bread just like it was fresh from the oven! For the complete recipe, check out the Full Recipe section. Homemade garlic bread lasts about 2 to 3 days. Keep it in an airtight container. You can also wrap it in foil or plastic wrap to keep it fresh. After a few days, the bread may get stale but still tastes good. Consider toasting it to bring back some crunch. Yes, you can freeze cheesy garlic bread! Wrap it tightly in foil or plastic wrap. It will stay fresh for up to 3 months in the freezer. When you want to eat it, let it thaw in the fridge overnight. Then, bake it at 375°F (190°C) for 15 to 20 minutes. Cheesy garlic bread pairs well with many dishes. Here are some great ideas: - Pasta with marinara sauce - Soup, like tomato or minestrone - Salad with a light dressing - Grilled meats or veggies - A charcuterie board Yes, you can use whole wheat bread! It adds a nice, nutty flavor. Just make sure the bread is sturdy enough to hold the toppings. Whole wheat bread may change the texture a bit but will still taste delicious. Enjoy your easy cheesy garlic bread with this twist! This blog post covered how to create the best garlic bread. You learned about key ingredients and their substitutions. I shared step-by-step instructions for prep, mixing, and baking. Tips for perfect garlic bread included quality ingredients and monitoring baking time. In the end, garlic bread is simple and fun to make. Customize it with your favorite flavors. With the right techniques, you can impress everyone at the table. Enjoy your garlic bread journey!

Easy Cheesy Garlic Bread Simple and Tasty Recipe

If you love garlic bread, you’re in for a treat! In this post, I’ll show you how to make Easy

Here’s what you need to make crispy air fryer Brussels sprouts. Gather these items: - 1 pound Brussels sprouts, trimmed and halved - 2 tablespoons olive oil - 1 teaspoon garlic powder - 1/2 teaspoon smoked paprika - 1/4 teaspoon freshly ground black pepper - 1/2 teaspoon sea salt - Optional toppings: balsamic glaze and shaved Parmesan cheese These ingredients create a delightful blend of flavors. The Brussels sprouts get crispy and tasty, while the seasonings add depth. You can adjust the spices to match your taste. If you want something extra, drizzle balsamic glaze on top or add some shaved Parmesan cheese. This will make the dish even more special. For the full recipe, check out the complete guide. First, set your air fryer to 375°F (190°C). This usually takes about 5 minutes. Preheating helps the Brussels sprouts cook quickly and get crispy. Next, grab a large bowl. Add 1 pound of halved Brussels sprouts. Pour in 2 tablespoons of olive oil. Then, add 1 teaspoon of garlic powder, 1/2 teaspoon of smoked paprika, 1/4 teaspoon of black pepper, and 1/2 teaspoon of sea salt. Mix well with your hands or a spatula. Each sprout should be coated with oil and spices for the best flavor. Carefully place the seasoned Brussels sprouts in the air fryer basket. Arrange them in a single layer. Do not overcrowd the basket; this helps them stay crispy. If you have too many, fry them in batches. Cook for 15-18 minutes at 375°F. Halfway through, shake the basket to ensure even cooking. When they look golden brown and crispy, they are ready to enjoy! Optionally, drizzle with balsamic glaze and top with shaved Parmesan cheese for extra flavor. For the complete recipe, check out the Full Recipe section. To get crispy Brussels sprouts, follow these tips: - Preheat your air fryer. Set it to 375°F (190°C) for about 5 minutes. - Don’t overcrowd the basket. Lay the sprouts in a single layer. This helps them cook evenly. - Shake the basket halfway. This ensures all sides get that perfect golden brown. Want to boost the taste? Here are some ideas: - Try different seasonings. Add chili powder for heat or lemon zest for freshness. - Top with fresh herbs. Basil or parsley adds a nice touch. - Consider unique toppings. Crumbled feta or toasted nuts can give extra flavor and crunch. Serving matters! Here’s how to make your dish shine: - Use a colorful plate. This makes the Brussels sprouts pop visually. - Garnish with herbs. A sprig of parsley adds a fresh look. - Serve with a drizzle. A small bowl of balsamic glaze next to the sprouts invites guests to add more flavor. For the full recipe, check the section above! Enjoy your crispy Brussels sprouts! {{image_4}} You can change up the flavors with different spices. If you like heat, add cayenne pepper or chili flakes to the mix. For a fresh twist, try using rosemary or thyme. These herbs pair well with Brussels sprouts and add a nice aroma. You can also use lemon zest for a bright flavor. Experiment and see what you enjoy most! If you're out of olive oil, you can use avocado oil or melted coconut oil. Both work well and keep the sprouts crispy. For a dairy-free option, skip the Parmesan cheese or try a vegan cheese. Nutritional yeast can also give a cheesy flavor without the dairy. These substitutes will help you keep the dish delicious and healthy. Don’t worry if you don’t have an air fryer. You can roast Brussels sprouts in the oven. Preheat your oven to 400°F (200°C). Toss the sprouts with oil and seasonings just like before. Spread them out on a baking sheet and roast for 20-25 minutes. Stir them halfway through for even cooking. If you prefer to sauté, heat a pan over medium heat with oil. Add the sprouts and cook for about 10-15 minutes, stirring often. Both methods will give you great results! For more details, check the Full Recipe. To store your leftover crispy Brussels sprouts, let them cool first. Place them in an airtight container. This keeps them fresh for up to three days in the fridge. If you want to avoid sogginess, do not cover them tightly. A loose lid allows some air to flow, keeping them crispy. When you are ready to eat the leftovers, reheat them in the air fryer. Set it to 350°F (175°C) for about five to seven minutes. This method helps restore their crispy texture. You can also use a regular oven. Place them on a baking sheet and heat at the same temperature. Avoid using the microwave, as it may make them soft. You can freeze Brussels sprouts, but it’s best to do it before cooking. Clean and trim them, then blanch in boiling water for three minutes. Cool them in ice water, then drain and dry. Place the sprouts in a freezer bag, removing as much air as possible. They can stay in the freezer for up to six months. When you are ready to cook them, just air fry from frozen. For the full recipe, check the details above. To reduce bitterness, try soaking them in cold water for 30 minutes. This helps draw out some of the bitter flavors. You can also add a pinch of sugar when seasoning. Cooking Brussels sprouts with oil, salt, and spices enhances their flavor. Roasting or air frying can caramelize the natural sugars, making them taste sweeter. Yes, you can use whole Brussels sprouts! However, cooking them whole will take longer. They may not get as crispy as halved ones. If you choose to air fry them whole, cook them for about 20-25 minutes. Check for doneness by piercing them with a fork. Halved Brussels sprouts cook faster and crisp up better. Cooked Brussels sprouts can last for about 3 to 5 days in the fridge. Store them in an airtight container to keep them fresh. Make sure they cool down before you seal them. Reheat them in the air fryer or oven for best results. This way, they stay crispy and tasty. You now have a clear guide for perfect Brussels sprouts in an air fryer. We covered the right ingredients, step-by-step instructions, and tips for the best results. Remember, crispy and tasty sprouts are within your reach. Feel free to mix in your favorite spices or toppings. Enjoy your cooking adventure!

Crispy Air Fryer Brussels Sprouts Easy and Flavorful Dish

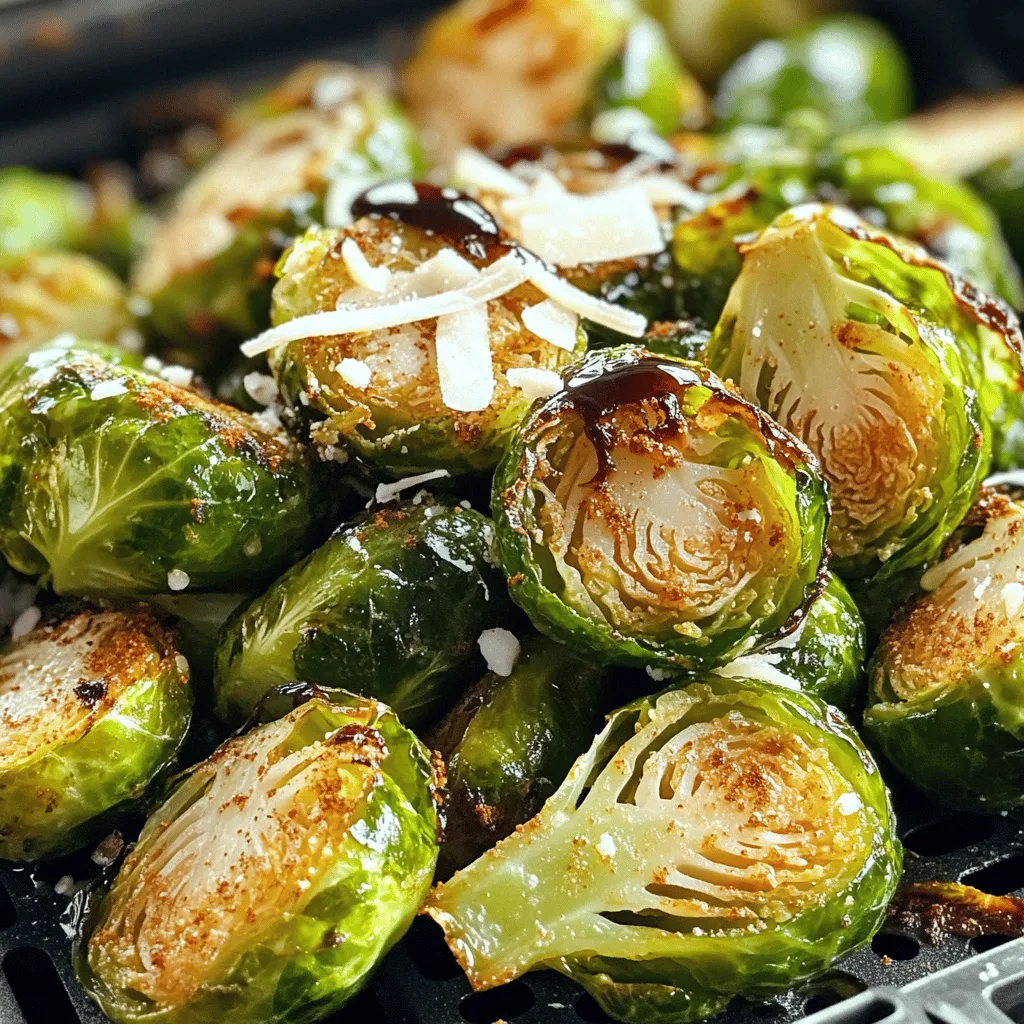
Looking for a quick, flavorful, and healthy side dish? Try my Crispy Air Fryer Brussels Sprouts! With just a few

- Sweet potatoes, black beans, kidney beans - Diced tomatoes, vegetable broth - Onion, garlic, bell pepper - Spices: chili powder, cumin, smoked paprika, cayenne pepper - Olive oil, sea salt, black pepper - Garnish: fresh cilantro To make Vegan Sweet Potato Chili, you need simple and fresh ingredients. Sweet potatoes are the star, giving a sweet and hearty base. Black beans and kidney beans add protein and fiber. Diced tomatoes bring acidity and juiciness, while vegetable broth enhances flavor. You’ll want to finely chop an onion and mince garlic for depth. A bell pepper adds color and crunch. The spices are key: chili powder for warmth, cumin for earthiness, smoked paprika for richness, and cayenne pepper for heat. Use extra virgin olive oil to sauté the veggies. Sea salt and black pepper round out the dish. Finally, fresh cilantro gives a bright finish. This recipe is perfect for a cozy meal. - Calories per serving: Approximately 350 - Protein: 15 grams - Fat: 7 grams - Carbohydrates: 60 grams - Fiber content: 15 grams - Vitamins: High in vitamin A and C This chili is not just tasty; it's also good for you. Each serving has about 350 calories, making it a filling option. You get protein from the beans, which helps build muscle. Sweet potatoes provide vitamins and fiber, supporting digestion. - Gluten-free options: All ingredients are naturally gluten-free. - Possible ingredient substitutes: Use any beans you prefer. Swap sweet potatoes for butternut squash, if desired. - Adjustments for low-sodium diets: Use low-sodium vegetable broth and skip added salt. You can customize this chili to fit your diet. If you need gluten-free meals, you’re in luck! This recipe uses only gluten-free items. If you want to change the flavor, try different beans or squash. For low-sodium diets, just swap in low-sodium broth. For the full recipe, visit the [Full Recipe]. Enjoy making this hearty meal! Start by prepping your veggies. Peel the sweet potatoes and chop them into 1-inch cubes. Next, finely chop the onion and bell pepper. When using a knife, keep your fingers safe. Curl your fingertips in while holding the veggie. This helps to avoid cuts and makes chopping easier. Now, let’s cook! Heat olive oil in a large pot over medium heat. Add the chopped onion and bell pepper. Sauté them until they soften. This usually takes about five minutes. Next, add minced garlic and stir for one minute. You want it to smell great! Then, add the diced sweet potatoes to the pot. Stir well and cook for 5-7 minutes. This helps them start to soften. Now, it’s time to add the spices. Sprinkle in chili powder, ground cumin, smoked paprika, and cayenne pepper. Stir everything to coat the sweet potatoes well. Pour in the diced tomatoes and vegetable broth. Bring the mixture to a quick boil. Once it boils, lower the heat to a gentle simmer. Cover the pot and let it simmer for 20-25 minutes. This will make the sweet potatoes fork-tender. After simmering, stir in the black beans and kidney beans. Let the chili simmer uncovered for another 10 minutes. This heats everything through. Taste your chili and adjust the seasonings if needed. Finally, serve it hot and garnish with fresh cilantro. Enjoy your hearty and flavorful meal! For the full recipe, check out the details above. To make your vegan sweet potato chili shine, start with spice levels. You can add more cayenne for heat or less if you prefer mild. Taste as you cook. This helps you find the right balance. Herbs can enhance the taste too. Fresh cilantro adds brightness. You can also try adding dried oregano for a warm flavor. Just remember, add herbs near the end of cooking to keep their taste fresh. Simmering is key for great chili. Bring your chili to a boil first, then reduce the heat. Cover the pot and let it simmer. This allows the flavors to blend well. Simmer for about 20-25 minutes to get the sweet potatoes just right. To avoid mushy sweet potatoes, cut them into 1-inch cubes. This size cooks evenly. Stir gently in the pot to prevent them from breaking apart. Serving your chili in bright bowls makes it pop. Lime wedges add a zesty touch. A sprinkle of fresh cilantro on top brings color and flavor. Toppings can elevate your meal. Try avocado slices for creaminess or crushed tortilla chips for crunch. You can also serve the chili with warm cornbread or over fluffy rice for a filling meal. For the full recipe, check out the complete guide. {{image_4}} You can easily change this vegan sweet potato chili to suit your taste. Adding other vegetables makes it fun and colorful. Try adding chopped carrots or corn for sweetness and crunch. You can also toss in zucchini or spinach for more greens. For protein, consider adding lentils or quinoa. Lentils cook fast and add a hearty texture. Quinoa is a great source of protein and gives a nice bite. Both options make the chili even more filling. Change the flavor of your chili by adding different ingredients. For a Mexican twist, squeeze some lime juice and top with avocado. This adds a fresh taste and creamy texture. If you want an Italian flair, mix in fresh basil and oregano. These herbs give the chili a warm and earthy feel. You can also add a splash of balsamic vinegar for a tangy kick. There are many ways to serve this chili. One tasty option is to use it as a topping for baked potatoes. The fluffy potato pairs well with the chili's richness. Another idea is to serve it over rice or quinoa. This adds another layer of flavor and makes your meal heartier. You can even serve it in a bowl with crunchy tortilla chips on the side for a fun twist. For a full experience, check out the [Full Recipe]. To store leftover chili, let it cool first. Use an airtight container. Place it in the fridge. It will stay fresh for about five days. If you want to store it longer, freeze it. For freezing, use freezer-safe containers. Leave some space for expansion. Seal tightly to avoid freezer burn. When you are ready to eat, reheat the chili gently. Use a pot on the stove or a microwave. If using the stove, heat on low. Stir it often to avoid sticking. For the microwave, place it in a bowl. Heat in short intervals, stirring in between. Aim for a temperature of 165°F (74°C) for safe eating. Chili lasts about five days in the fridge. If you freeze it, it can last up to three months. Check for signs of spoilage. If it smells sour or looks strange, throw it out. Always trust your senses when it comes to food safety. Enjoy your Vegan Sweet Potato Chili fresh and delicious! It takes about one hour to make this chili. You will spend 15 minutes prepping and 45 minutes cooking. This time includes sautéing veggies and simmering the chili. Yes, making this chili ahead of time is a great idea. You can store it in the fridge for up to five days. The flavors will deepen and become even better when you let it sit. You can also freeze it for up to three months. Just thaw it overnight in the fridge before reheating. You can serve this chili with many sides. Here are a few ideas: - Cornbread or tortilla chips - A fresh green salad - Avocado slices or guacamole - Rice or quinoa for a hearty meal - Lime wedges to add a zesty kick For more delicious ideas, check out the Full Recipe. This guide covered how to create a delicious Vegan Sweet Potato Chili. We explored essential ingredients, nutritional benefits, and meal prep tips. Remember, you can make this dish your own by adjusting spices or adding different vegetables. Storage and reheating methods ensure your leftovers stay tasty. Enjoy the process of cooking, and don’t hesitate to experiment with flavors. Healthy meals can be simple and fun. You'll impress everyone with your chili creation while fueling your body right.

Vegan Sweet Potato Chili Hearty and Flavorful Meal

Looking for a meal that’s hearty and packed with flavor? Vegan Sweet Potato Chili is a perfect choice! This dish

To make the best Garlic Parmesan Roasted Corn, gather these key items: - 4 ears of fresh corn, husked - 3 tablespoons unsalted butter, melted - 4 cloves garlic, finely minced - 1/2 teaspoon smoked paprika - 1/4 teaspoon cayenne pepper (optional for an extra kick) - 1/2 cup freshly grated Parmesan cheese - 2 tablespoons fresh parsley, finely chopped - Salt and freshly ground black pepper to taste - Lemon wedges, for serving These ingredients create a tasty flavor blend. The corn shines with its sweet and crunchy texture. Garlic adds depth, while Parmesan gives a rich, cheesy taste. You can add a few fun extras to boost the taste: - A squeeze of fresh lime juice for zest - Crushed red pepper flakes for more heat - A sprinkle of chili powder for a smoky twist Feel free to mix and match these options. They can elevate the dish and make it your own! Using the right tools makes cooking easier. Here are some must-haves for this recipe: - Baking sheet lined with parchment paper or foil - Basting brush for even coating - Sharp knife to husk the corn - Small mixing bowl for the garlic butter mixture Having these tools ready will help you create the perfect Garlic Parmesan Roasted Corn. For the complete recipe, check out the Full Recipe section. Start by preheating your oven to 425°F (220°C). This heat is key for roasting corn evenly. Next, husk the corn. Remove all silk and husks to expose the kernels. Rinse each ear under cold water to clean off any dirt. After cleaning, pat the corn dry with a paper towel. This helps the butter stick better. In a small bowl, melt three tablespoons of unsalted butter. Add four cloves of finely minced garlic to the melted butter. Mix in half a teaspoon of smoked paprika. If you like a bit of heat, add a quarter teaspoon of cayenne pepper. Season this mixture with salt and freshly ground black pepper. Whisk it all together until well combined. This will give your corn a rich flavor. Place the husked corn on a large baking sheet lined with parchment paper. Use a basting brush to coat each ear of corn with the garlic butter mixture. Make sure to cover all sides. Then, sprinkle half a cup of freshly grated Parmesan cheese over the corn. Gently press the cheese onto the corn to help it stick. Roast the corn in your preheated oven for 20 to 25 minutes. Turn the ears halfway through to ensure even cooking. The corn is ready when it is tender and golden brown. Once done, take the corn out and sprinkle chopped parsley on top. Serve it hot with lemon wedges on the side. Squeezing lemon juice over the corn adds a lovely zesty touch. For the full recipe, refer to the section above. Choose sweet, fresh corn for the best flavor. Look for bright green husks. The silk should be soft and brown. The kernels should feel firm and plump when pressed. Fresh corn has a sweet scent. You want sweet corn for this dish. Roasting corn at high heat gives it a nice golden color. Preheat your oven to 425°F (220°C). This step is key for roasting. Use a basting brush to coat the corn well with garlic butter. Make sure to turn the corn halfway through cooking. This helps it cook evenly. Roast for 20-25 minutes until tender and golden. Serve Garlic Parmesan Roasted Corn hot for the best taste. It pairs well with grilled meats, salads, or rice dishes. Adding lemon wedges on the side brightens the flavor. You can also sprinkle extra herbs on top for color. Try serving with a cool dip to balance the warm corn. For more on how to make this dish, check the Full Recipe. {{image_4}} Want some heat? Try adding more cayenne pepper. This adds a nice kick. You can also use a hot sauce. Just mix it into the garlic butter. This spicy twist makes your taste buds dance. For a fresh flavor, add herbs. You can use thyme, basil, or oregano. Chop them finely and add to the garlic butter mix. This gives the corn a fragrant taste. It pairs well with the cheese and garlic. Each bite will be full of flavor. Grilling corn brings out its natural sweetness. To make this, soak the corn in water for 30 minutes. Then, coat it with the garlic butter. Grill on medium heat for about 15-20 minutes. Turn often until you see nice grill marks. Finish with cheese and parsley when it's done. This method adds a smoky taste that is simply delicious. For the full recipe, check out the detailed steps earlier. To store leftover roasted corn, let it cool first. Wrap each ear in plastic wrap or foil. Place the wrapped corn in an airtight container. This keeps it fresh and tasty. Store it in the fridge for up to three days. The best way to reheat roasted corn is in the oven. Preheat your oven to 350°F (175°C). Remove the corn from its wrapping and place it on a baking sheet. Cover it with foil to keep it moist. Heat for about 10-15 minutes. You can also reheat it in the microwave. Place the corn on a microwave-safe plate. Cover it with a damp paper towel. Heat for 2-3 minutes or until warm. You can freeze garlic Parmesan roasted corn for later use. First, let the corn cool completely. Cut the kernels off the cob for easy storage. Place the kernels in a freezer-safe bag. Remove as much air as possible before sealing. This will help prevent freezer burn. You can freeze the corn for up to six months. When ready to enjoy, thaw it in the fridge overnight before reheating. For the full recipe, check the recipe section above. Enjoy your delicious garlic Parmesan roasted corn! Yes, you can use frozen corn instead of fresh corn. Just make sure to thaw it first. Drain any excess water before using it. This will help the flavors stick better. The cooking time might be a bit shorter, so watch it closely. If you don't have Parmesan cheese, try using Pecorino Romano. It has a similar taste but is a bit saltier. You can also use nutritional yeast for a dairy-free option. It adds a cheesy flavor without the milk. To make Garlic Parmesan Roasted Corn vegan, replace the butter with olive oil or vegan butter. For cheese, use nutritional yeast or a vegan cheese alternative. These swaps keep the dish tasty while fitting a plant-based diet. You can still enjoy all the rich flavors! For the full recipe, check out the details above! Garlic Parmesan Roasted Corn is easy and tasty! We covered the key ingredients, steps, and tools needed. You can add your favorite flavors or try different methods like grilling. I shared tips for choosing fresh corn and serving it well. If you have leftovers, I explained how to store and reheat them. Remember, cooking should be fun. Experiment with this recipe to find your perfect twist!

Garlic Parmesan Roasted Corn Flavorful Side Dish

Are you ready to elevate your side dishes? Garlic Parmesan Roasted Corn is a game-changer! With its rich, buttery flavor

To make classic blueberry muffins, you will need: - 1 ½ cups all-purpose flour - ½ cup granulated sugar - ½ teaspoon baking powder - ½ teaspoon baking soda - ¼ teaspoon sea salt - 1 large egg - ½ cup unsalted butter, melted and cooled - 1 teaspoon pure vanilla extract - ½ cup buttermilk (or milk with 1 teaspoon vinegar) - 1 ½ cups fresh blueberries (or frozen, do not thaw) You can swap ingredients if needed. For the flour, use whole wheat flour for a healthier option. If you want less sugar, try using honey or maple syrup. For a dairy-free version, use almond milk instead of buttermilk. You can replace butter with coconut oil for a different taste. Just melt it like you would the butter. When picking blueberries, look for plump, firm berries. The color should be deep blue with a light white bloom on it. Avoid berries that are soft or have green spots. Fresh blueberries should smell sweet and fragrant. If you buy them from a store, check the bottom of the container for any signs of mold. Enjoy the fresh taste of blueberries for your muffins! First, preheat your oven to 375°F (190°C). This step is key for fluffy muffins. While the oven heats, prepare your muffin pan. You can line it with paper liners or spray it with a non-stick cooking spray. This helps the muffins come out easily after baking. In a medium bowl, mix your dry ingredients. Combine 1 ½ cups of all-purpose flour, ½ cup of granulated sugar, ½ teaspoon of baking powder, ½ teaspoon of baking soda, and ¼ teaspoon of sea salt. Use a whisk to blend them well. In another bowl, crack 1 large egg and stir it gently. Then, add ½ cup of melted and cooled unsalted butter, 1 teaspoon of pure vanilla extract, and ½ cup of buttermilk. Whisk until it is smooth and combined. Now, it’s time to combine the two mixtures. Slowly pour the wet mixture into the dry one. Use a spatula to fold them together gently. Mix until just combined. It’s okay if there are some lumps. Then, carefully fold in 1 ½ cups of fresh blueberries. Make sure to spread them evenly throughout the batter. Avoid breaking the berries to keep them whole. Next, divide the batter into your muffin cups. Fill each cup about ¾ full, giving the muffins room to rise. Place the muffin pan in the preheated oven and bake for 18-20 minutes. To check if they are done, insert a toothpick into the center of a muffin. It should come out clean or with a few moist crumbs. Once baked, let the muffins cool in the pan for about 5 minutes. After that, transfer them to a wire rack to cool completely. Enjoy your classic blueberry muffins! For the full recipe, refer to the earlier details. When making blueberry muffins, some errors can ruin your batch. Here are the top mistakes: - Overmixing the batter: This makes muffins dense. Mix just until combined. - Using cold ingredients: Cold butter or milk can lead to uneven baking. Use room-temperature items. - Not measuring flour correctly: Scoop and level flour for accuracy. Too much flour leads to dry muffins. - Skipping the cooling step: Let muffins cool in the pan for 5 minutes. This helps set their shape. Fluffy muffins are a delight. Here’s how to get that perfect texture: - Use fresh baking powder and soda: Old leavening agents won’t make muffins rise. - Fold in blueberries gently: This keeps the air in the batter. Breaks can lead to dense muffins. - Don’t pack flour: Lightly spoon flour into your measuring cup. This keeps the muffins light. Texture is key to a great muffin. Here are my tips for perfecting it: - Add buttermilk: It gives moisture and a tender crumb. If you don't have it, mix regular milk with vinegar. - Use melted butter: This adds rich flavor and keeps muffins moist. - Incorporate flavor: A touch of lemon zest brightens the taste and adds a nice zing. For the full recipe, you can refer back to the main section! {{image_4}} You can easily make these blueberry muffins healthier. Replace some all-purpose flour with whole wheat flour. This swap adds fiber and nutrients. You can also cut the sugar by using honey or maple syrup. These natural sweeteners add flavor without all the processed sugar. To boost the taste, consider adding lemon zest. A teaspoon of zest brightens the muffins and pairs well with blueberries. You can also mix in nuts, like walnuts or pecans. Nuts add crunch and protein, making your muffins even more satisfying. You can switch blueberries for other berries. Raspberries offer a tart flavor, while strawberries add sweetness. Just remember to adjust the amount to match the size of the berries. This lets you enjoy a new muffin each time you bake. For a mixed berry treat, try combining all three types. It’s colorful and delicious! For the full recipe, check out the Deliciously Classic Blueberry Muffins section. To keep your blueberry muffins fresh, store them in an airtight container. This helps them stay soft and moist. Place a paper towel at the bottom of the container to absorb any extra moisture. You can also add a layer of paper towel on top of the muffins before sealing the lid. This keeps them from getting soggy. Store them at room temperature for up to 2 days. For longer storage, refrigeration can dry them out, so it’s best to avoid that. Freezing muffins is easy and keeps them fresh for a longer time. Start by cooling the muffins completely. Next, wrap each muffin tightly in plastic wrap. Then, place them in a freezer bag or an airtight container. Make sure to remove as much air as possible to prevent freezer burn. You can freeze them for up to 3 months. When you’re ready to eat them, just take out the muffins and let them thaw at room temperature. To enjoy your muffins warm, you can reheat them in the oven or microwave. For the oven, preheat it to 350°F (175°C). Place the muffins on a baking sheet and heat for about 5-10 minutes. This will keep them soft and fluffy. If you use a microwave, heat each muffin for about 15-20 seconds. Be careful not to overheat, as this can make them tough. Enjoy them warm for the best taste! For the full recipe, check out the details above. You can make these muffins gluten-free by using a gluten-free flour blend. Look for blends that include xanthan gum. Replace the all-purpose flour with this blend in the same amount. The muffins will still taste great! Yes, you can use frozen blueberries! Just add them directly to the batter without thawing. This keeps the muffins moist and prevents them from turning purple. Frozen blueberries work well and are convenient. Baking powder contains both an acid and a base. It needs moisture to activate. Baking soda is a base that requires an acid to work. If a recipe calls for one, you cannot swap them directly without adjustments. These muffins stay fresh for about 2-3 days at room temperature. Store them in an airtight container. If you want them to last longer, freeze them. They can last up to 3 months in the freezer. For best taste, reheat them before serving. We covered all the key steps for making the best blueberry muffins. From selecting fresh blueberries to storing muffins for later, you now have the tools to succeed. Avoid common mistakes for fluffy muffins, and experiment with tasty variations. Remember, baking is about fun and trying new things. With practice, you'll create perfect muffins every time. Enjoy your baking adventure!

Classic Blueberry Muffins Savory and Simple Recipe

If you crave a warm, buttery bite filled with juicy blueberries, you’re in the right place. My “Classic Blueberry Muffins:

- Dried Chickpeas: Use 1 cup of dried chickpeas. Soak them overnight in water. This step helps soften the chickpeas and makes them easy to blend. - Fresh Herbs and Aromatics: You need 1 small onion, finely chopped, and 2 cloves of minced garlic. Add 1/4 cup of finely minced parsley and 1/4 cup of finely minced cilantro. These add bright flavors to the falafel. - Spices and Seasonings: Use 1 teaspoon of ground cumin and 1 teaspoon of ground coriander. For a little heat, add 1/4 teaspoon of cayenne pepper (optional). Add salt and pepper to taste. These spices give the falafel its signature taste. - Cooking and Binding Agents: You’ll need 3 tablespoons of olive oil and 1 tablespoon of freshly squeezed lemon juice. Use 1/4 cup of whole wheat flour to help bind the mixture. If it feels too wet, add more flour until you can shape it easily. For the full recipe, you can check the section above. Start by preheating your oven to 400°F (200°C). This temperature helps make the falafel crispy. Line a baking sheet with parchment paper. This step prevents sticking and makes cleanup easy. Next, grab your food processor. Add soaked and drained chickpeas, chopped onion, minced garlic, parsley, and cilantro. Also, add ground cumin, ground coriander, baking soda, and a pinch of salt and pepper. Pulse until the mix is coarse, but don’t overdo it. You want small pieces, not a paste. Now, transfer the falafel mix to a large bowl. Add olive oil, lemon juice, and whole wheat flour. Stir until everything is combined well. If the mix feels too wet to shape, add more flour slowly until it holds together nicely. To shape the falafel, coat your hands lightly with oil. Form small balls, about 1.5 inches wide, or flatten them into patties. Place each piece on the baking sheet, leaving space between them for even cooking. For crisp falafel, brush or spray the tops lightly with olive oil. This helps achieve that golden color and crunch. Bake the falafel in the preheated oven for 25-30 minutes. Flip them halfway through to ensure they brown evenly. They should be golden brown and crispy on all sides when done. After baking, let the falafel cool for a few minutes before serving. Enjoy your tasty and healthy snack! For the full recipe, check the previous section. To get crispy baked falafel, olive oil is key. It helps create a golden-brown crust. Use about three tablespoons for the mix, plus a bit more to brush on top. This adds flavor and helps the falafel crisp up nicely. Control moisture for the best results. If your mixture feels wet, add more whole wheat flour. This will help bind the ingredients and keep them from falling apart. A good balance of dry and wet ingredients is vital for that perfect crunch. One common mistake is over-processing the chickpeas. If you blend them too much, your falafel will turn into a paste. Aim for a coarse texture to keep them light and fluffy. Another pitfall is not baking at the right temperatures. Make sure your oven is preheated to 400°F (200°C). Baking for 25-30 minutes allows the falafel to cook evenly. Flip them halfway for the best browning. Falafel pairs well with many sauces. Tahini sauce is a classic choice. You can also use yogurt sauce for a refreshing taste. Get creative with your serving ideas! Stuff falafel into warm pita bread with fresh veggies. You could also serve them over a salad for a healthy option. For a fun twist, make falafel wraps with your favorite toppings. For the full recipe, check out the details above. {{image_4}} You can easily change the taste of your falafel. Adding herbs like mint or dill gives a fresh twist. These herbs add bright flavors that pair well with chickpeas. You can also try mixing in vegetables. Zucchini or spinach can add moisture and nutrition. Just chop them finely and mix them in. This helps create a unique taste each time you make falafel. Crispy baked falafel can fit many diets. If you need gluten-free, use chickpea flour instead of whole wheat. This keeps the texture while being safe for gluten-free eaters. For those who avoid nuts, this recipe is already nut-free. You can easily adapt it by checking the ingredients. Each change can still lead to a tasty, healthy snack. With these simple swaps, everyone can enjoy falafel. For more detailed instructions, check the full recipe. To keep your leftover falafel fresh, store them in the fridge. Use an airtight container to avoid drying them out. Make sure they cool down to room temperature before sealing. This way, they will stay tasty for up to four days. If you want to keep falafel for longer, freezing is a great option. Start by placing cooked falafel on a baking sheet. Freeze them for about an hour until firm. Once frozen, transfer them to a freezer bag. This method helps prevent them from sticking together. You can store them in the freezer for up to three months. Reheating falafel is easy and helps keep them crispy. The best method is to use the oven. Preheat your oven to 375°F (190°C). Place the falafel on a baking sheet. Heat for about 10-15 minutes until warm. This method helps them regain their crunch. Avoid using the microwave, as it can make them soggy. If you're in a hurry, a skillet works too. Heat a little oil in the pan and warm the falafel for a few minutes on each side. This brings back some crispness while warming them. To get crispy baked falafel, you need a few key methods. First, use soaked dried chickpeas instead of canned ones. This helps with texture. Second, add olive oil to the mixture and brush it on top before baking. This helps them brown. Finally, bake them at a high temperature, about 400°F (200°C). This creates a nice crust that adds crunch. Yes, you can use canned chickpeas, but there are pros and cons. Canned chickpeas save time and are easy to find. However, they may make the falafel too wet. If you use canned ones, drain and rinse them well. You might need to adjust the flour to keep the mix from being too soggy. Look for visual and texture cues to know if falafel is done. They should be golden brown all over. The outside should feel firm and slightly crispy. If you cut one open, the inside should be soft but not mushy. Trust your eyes and touch for the best results. Many dipping sauces pair great with falafel. Here are a few ideas: - Tahini sauce: Creamy and nutty, it’s a classic choice. - Yogurt sauce: Cool and refreshing, this adds a nice contrast. - Spicy harissa: If you like heat, this adds a kick. - Hummus: Smooth and flavorful, it’s always a hit. Feel free to mix and match your favorites! For the full recipe, check out the Crispy Baked Falafel recipe above. This guide covers how to make delicious baked falafel from scratch. We discussed key ingredients, step-by-step instructions, and helpful tips for success. Remember to soak your chickpeas and carefully mix your herbs and spices. Avoid common mistakes for the best results. You can customize your falafel with different flavors or dietary needs. Store leftovers properly to enjoy later. With practice, you’ll perfect this tasty dish and impress your friends and family. Enjoy your cooking journey and the tasty rewards that follow!

Crispy Baked Falafel Tasty and Healthy Snack Option

Looking for a tasty and healthy snack? Crispy baked falafel is your answer! This dish combines dried chickpeas, fresh herbs,

- 3 large apples (Fuji or Honeycrisp recommended) - 1 teaspoon ground cinnamon - 2 tablespoons granulated sugar - 1 tablespoon fresh lemon juice - A pinch of salt To make cinnamon apple chips, you need a few simple ingredients. I recommend using Fuji or Honeycrisp apples for their sweet and crisp texture. These apples work well because they hold their shape during baking and offer a great taste. Here’s a breakdown of the ingredients: - Apples: Choose large, fresh apples. They give the best flavor and texture. - Ground cinnamon: This spice adds warmth and sweetness. It’s the star of the show! - Granulated sugar: This sweetens the chips and helps them crisp up nicely. - Fresh lemon juice: This prevents browning and adds a zesty kick to the flavor. - Salt: Just a pinch enhances the overall taste. It balances the sweetness. Once you gather these ingredients, you’re ready to create a delicious snack. If you want to see how to do this, check out the Full Recipe for detailed steps. First, preheat your oven to 225°F (110°C). This low temperature helps the apples dry out slowly. While the oven is heating, prepare your baking sheet by lining it with parchment paper. This step makes cleanup a breeze and prevents sticking. Next, wash the apples under cool water. After rinsing, core the apples to remove the seeds. You want to slice the apples very thinly. Use a mandolin slicer or a sharp knife. Aim for about 1/8 inch thick slices. Remember, thinner slices yield crispier apple chips! In a large bowl, mix together fresh lemon juice, granulated sugar, ground cinnamon, and a pinch of salt. Whisk these ingredients until well combined. This mixture gives the apples a sweet, warm flavor. Add the apple slices to the bowl. Toss them gently in the cinnamon-sugar mixture. Make sure each slice is evenly coated. Now, arrange the apple slices in a single layer on the prepared baking sheet. Avoid overlapping any slices. This spacing allows them to bake evenly. Place the baking sheet in the preheated oven. Bake for 1.5 to 2 hours. Flip the apple chips halfway through to ensure they cook evenly. You want them to be dry and crisp, not burnt. When the baking time is up, remove the apple chips from the oven. Let them cool completely on the baking sheet. As they cool, they will become even crispier. Enjoy your delightful and healthy snack! For the full recipe, check out the earlier section. To get crispy apple chips, slice your apples very thin. Aim for about 1/8 inch thick. Use a mandolin slicer or a sharp knife for best results. If the slices are too thick, they won’t crisp up well. When you place the apple slices on the baking sheet, make sure they are in a single layer. If they overlap, they won’t cook evenly. This step is key for that perfect crunch you want. You can boost the flavor of your apple chips in fun ways. Try adding nutmeg or allspice with the cinnamon. These spices can give your chips a unique twist. You can also add sweeteners like honey or maple sugar. These can enhance the sweetness and flavor of your apple chips. Just sprinkle a little on top before baking! For a beautiful presentation, serve your apple chips in a decorative bowl. Sprinkle a bit of extra cinnamon sugar on top for a nice touch. Pair your chips with dips like caramel sauce or yogurt. This adds a fun element to your snack. You could also enjoy them with a cup of tea or cider for a cozy treat. Check out the full recipe for more details! {{image_4}} Baked apple chips have a crispy texture and a sweet taste. When you bake them, the heat brings out their natural sugars. Dehydrated apple chips, on the other hand, have a chewy quality. They hold more flavor and retain nutrients better. To dehydrate apples, slice them thinly and place them in a dehydrator. Set it to a low temperature, around 135°F (57°C), and let them dry for 6 to 8 hours. This method gives a different bite, and you can enjoy them anytime. Not all apples are the same. The best apples for chips are Fuji and Honeycrisp. They are sweet and crisp, which makes for delicious chips. You can also try Granny Smith for a tart flavor. Don't be afraid to experiment! Mix different apple types for a unique taste. Try adding a bit of pear or even a sprinkle of nutmeg to the mix. Each variety brings something special to your apple chips. Love a kick? Add a pinch of cayenne pepper to your cinnamon mix. This will give your apple chips a spicy twist that surprises the taste buds. You can also add herbs like rosemary or thyme for a savory snack. These flavors balance the sweetness of the apples. It’s a fun way to make your chips stand out. Try both sweet and savory options to find your favorite. For more details on making these tasty snacks, check out the Full Recipe. To keep your cinnamon apple chips fresh, store them in airtight containers. This prevents air from making them soft. You can use glass jars or plastic containers. If you want them to last longer, consider keeping them in the fridge. But, they stay just fine at room temperature too. Cinnamon apple chips can last for about one to two weeks. After that, they may start to lose their crunch. Look for signs of spoilage, like a change in color or a soft texture. If they feel chewy or sticky, it’s time to toss them out. If your apple chips become soft, don’t worry! You can re-crisp them. Place them on a baking sheet and put them in a low oven (about 200°F). Bake for 10 to 15 minutes. This will help remove moisture. Avoid exposing them to humidity. Keep them sealed tight to stay crisp longer. To make cinnamon apple chips, follow these simple steps: 1. Preheat your oven to 225°F (110°C). 2. Line a baking sheet with parchment paper. 3. Wash and core 3 large apples (Fuji or Honeycrisp work best). 4. Slice the apples into thin rounds, about 1/8 inch thick. 5. In a bowl, mix 1 tablespoon of fresh lemon juice, 2 tablespoons of sugar, 1 teaspoon of ground cinnamon, and a pinch of salt. 6. Toss the apple slices in the mixture until they are well coated. 7. Arrange the slices on the baking sheet without overlapping. 8. Bake for 1.5 to 2 hours, flipping halfway through. 9. Let the chips cool completely before enjoying! These steps will help you create the perfect crispy snack. For a detailed guide, check the Full Recipe. Cinnamon apple chips offer several health benefits: - Apples are rich in fiber, which aids digestion and keeps you feeling full. - They also contain vitamin C, which boosts your immune system. - Cinnamon has antioxidant properties and can help regulate blood sugar levels. - It may also have anti-inflammatory effects, promoting overall health. Combining these two ingredients creates a tasty and nutritious snack. Enjoy these chips guilt-free! You can find pre-made cinnamon apple chips at many stores. Here are some suggested brands and stores: - Brands: Look for brands like Bare Snacks, Trader Joe's, or Eden Foods. - Stores: Check local grocery stores, health food stores, or online retailers like Amazon. These options make it easy to enjoy cinnamon apple chips without the hassle of making them yourself. You learned how to make tasty cinnamon apple chips from scratch. Key steps include slicing apples, coating them, and baking. I shared tips to sharpen your skills, like choosing the right apple and enhancing flavors. You can enjoy baked or dehydrated chips, and even explore sweet and savory options. Storing them properly keeps them fresh longer. Now you have the tools to create a delicious snack at home. Try it out and enjoy the crunch!

Cinnamon Apple Chips Crispy and Irresistible Snack

Looking for a crunchy snack that’s both tasty and healthy? I’ve got just the thing: cinnamon apple chips! With just

Older posts
Newer posts
← Previous Page1 … Page4 Page5 Page6 … Page58 Next →

dsad

© 2025 eataroundit • Built with GeneratePress

Our Policies

  • Copyright Policy
  • Cookie Policy
  • GDPR Policy
  • Privacy Policy
  • Disclaimer
  • Terms Of Use

More Information

  • Home
  • About
  • Contact
  • Appetizers
  • Dessert
  • Dinner
  • Drinks
©2025, eataroundit About Back To Top