Banana pudding is a classic dessert that brings a smile to everyone’s face. With ripe bananas and creamy goodness, it’s a treat you can’t resist. In this guide, I’ll share my delightful and easy recipe for the best banana pudding. You’ll learn about essential ingredients, step-by-step instructions, and useful tips to perfect your pudding. Get ready to impress your family and friends with a dessert that’s both simple and delicious!
Ingredients
Key Ingredients for Best Banana Pudding
– 4 ripe bananas
– 1 box (12 oz) vanilla wafers
The bananas must be ripe. They should have brown spots. This gives a sweet flavor. The vanilla wafers add a crunchy texture. They also soak up the pudding, making it soft.
Dairy and Sweeteners
– 2 cups whole milk
– 1 cup heavy cream
– 1/2 cup granulated sugar
– 1/2 cup packed brown sugar
Whole milk makes the pudding rich. Heavy cream adds a smooth texture. Granulated sugar provides sweetness. Brown sugar adds a hint of molasses flavor. You can mix these sugars for a deeper taste.
Other Essential Ingredients
– 1/4 cup cornstarch
– 1 tablespoon pure vanilla extract
– 1/2 teaspoon salt
– Whipped cream (for topping)
– Additional banana slices and crushed vanilla wafers (for garnish)
Cornstarch thickens the pudding. Vanilla extract boosts the flavor. A pinch of salt balances the sweetness. Whipped cream on top makes it pretty. Slices of banana and wafer crumbs give a nice finish.
Step-by-Step Instructions
Preparing the Pudding Base
1. Start by mixing the ingredients in a saucepan. In a large saucepan, combine 2 cups of whole milk, 1 cup of heavy cream, 1/2 cup of granulated sugar, 1/2 cup of packed brown sugar, 1/4 cup of cornstarch, and 1/2 teaspoon of salt.
2. Use a whisk to mix well. Make sure there are no lumps in the mixture.
3. Place the saucepan over medium heat. Stir the mixture continuously as it heats up.
4. Cook until the mixture thickens. This should take about 5 to 7 minutes.
5. When it starts to boil, keep stirring for another 1 to 2 minutes. This helps prevent sticking.
6. Once thickened, remove the saucepan from heat. Add 1 tablespoon of pure vanilla extract and stir well.
7. Let the pudding cool for about 10 minutes.
Layering the Banana Pudding
1. In a large serving dish or cups, create the first layer. Place a single layer of vanilla wafers on the bottom.
2. Next, add a layer of sliced bananas. Use 4 ripe bananas, sliced evenly.
3. Pour a generous amount of the warm pudding mixture over the bananas.
4. Repeat this process until all ingredients are used. Make sure the final layer is smooth pudding on top.
Final Steps Before Chilling
1. Cover the dish with plastic wrap. This keeps the pudding fresh while it chills.
2. Refrigerate for at least 4 hours. For the best flavor, chill overnight.
3. This resting time helps the layers meld together. The pudding will set nicely during this time.
Tips & Tricks
Essential Tips for Perfecting Your Banana Pudding
To avoid lumps in the pudding, whisk your dry ingredients well before adding them to the milk. Mix the sugar, cornstarch, and salt first. This will help blend them smoothly. Stir the mixture continuously while it cooks. This prevents the pudding from sticking to the pan and ensures a creamy texture.
For the right consistency, cook the mixture until it thickens but does not boil hard. Gently bubbling means it’s ready. Remove it from the heat once it thickens enough to coat the back of a spoon. This step is key to a smooth pudding.
Serving Suggestions
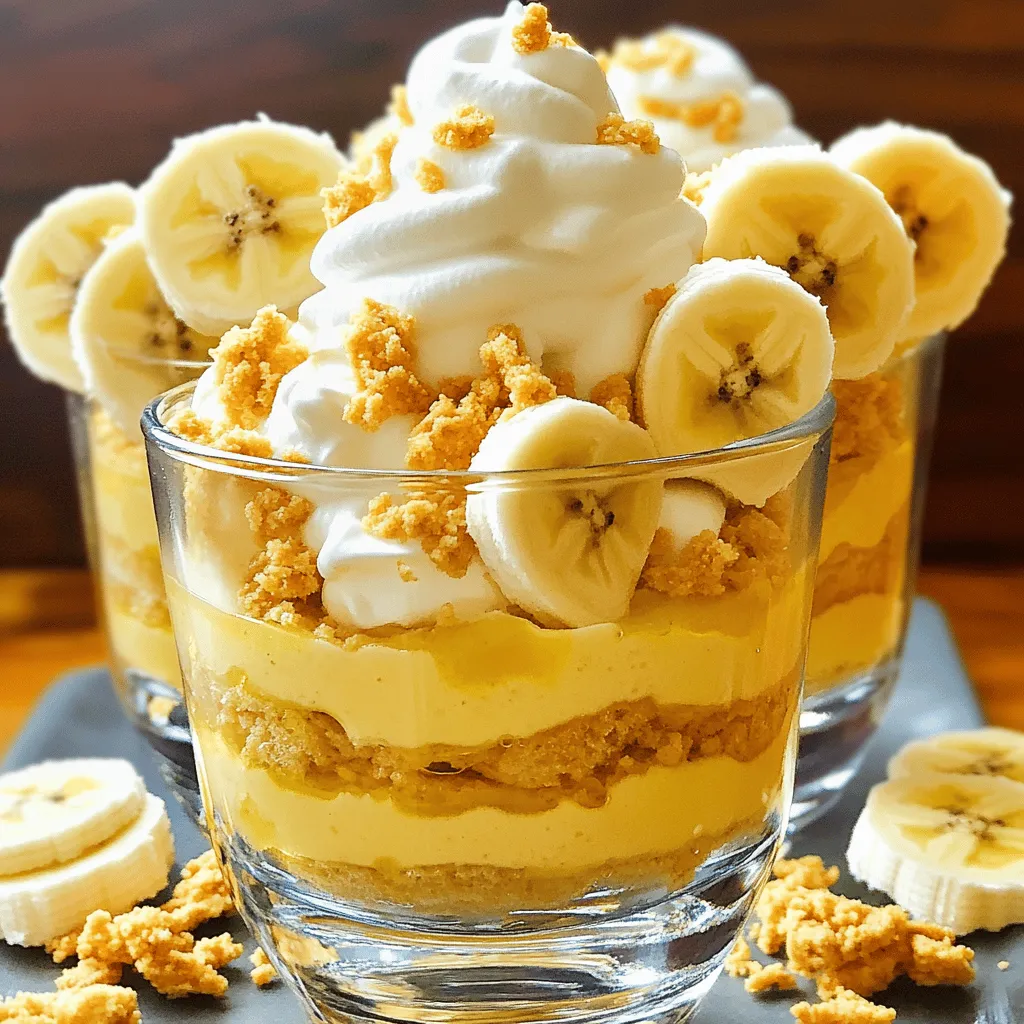
For a stunning presentation, use clear glass dishes. This allows everyone to see the beautiful layers of bananas and wafers. Layer the bananas, wafers, and pudding neatly for a colorful look. Top with whipped cream, banana slices, and crushed vanilla wafers for extra flair.
You can also serve individual cups for a fun twist. This makes it easy for guests to enjoy their own serving.
Common Mistakes to Avoid
One big mistake is not allowing enough chilling time. Your banana pudding needs at least four hours in the fridge. For the best flavor, chill it overnight.
Another common error is overcooking the pudding mixture. Keep an eye on it while cooking. If it boils too hard, it can get grainy. Stir and watch closely to ensure it stays creamy.
Follow these tips to create the best banana pudding. Enjoy your delicious creation!
{{image_4}}
Variations
Vegan Banana Pudding Option
To make a vegan banana pudding, we need to swap out dairy products. Use almond milk or coconut milk instead of whole milk. For the heavy cream, try using coconut cream. It adds a rich texture.
Next, let’s think about sweeteners. Instead of granulated sugar, use maple syrup or agave syrup. These options add a nice flavor while keeping it plant-based.
Gluten-Free Banana Pudding Recipe
For a gluten-free version, choose gluten-free vanilla wafers. These are easy to find in stores. They still give that classic crunch we love.
You might also want to add thickening agents. Instead of cornstarch, use arrowroot powder or tapioca starch. These work well to keep the pudding smooth and creamy.
Flavor Variations
You can make this banana pudding even more fun by adding flavors. Try mixing in chocolate. Just add some cocoa powder to the pudding mix. It creates a delicious chocolate banana pudding.
Peanut butter is another great addition. Swirl it into the pudding for a nutty twist.
Also, feel free to change the fruit layers. You can add strawberries, blueberries, or even mango. These fruits pair well with bananas and add a fresh touch.
Storage Info
How to Store Leftover Banana Pudding
To keep your banana pudding fresh, use an airtight container. This helps to prevent it from absorbing other flavors in the fridge. Make sure the lid fits snugly. The best temperature for storing banana pudding is in the refrigerator. It should stay cold, ideally below 40°F (4°C).
Freezing Banana Pudding
Can you freeze banana pudding? Yes, but it may change in texture. When you freeze it, the bananas can become mushy. To freeze, place the pudding in a freezer-safe container. Leave some space at the top since it will expand. Seal the lid tightly. When you’re ready to eat it, thaw it in the fridge overnight. This slow thaw helps maintain the best flavor.
Shelf Life Tips
How long does banana pudding last? It can stay fresh in the fridge for about 3 to 4 days. Keep track of its freshness by checking the smell and texture. If it smells sour or has a watery layer on top, it may be bad. Always trust your senses. It’s better to be safe than sorry!
FAQs
What is the best way to ripen bananas for banana pudding?
To ripen bananas quickly, you can use a few simple methods. Place them in a paper bag. This traps the ethylene gas and speeds up ripening. You can also keep them in a warm spot, like on top of the fridge. If you need them fast, you can use the oven. Wrap bananas in foil and bake at 300°F for about 15-20 minutes. Check them often to avoid overcooking.
Can I use other fruits in banana pudding?
Yes, you can switch out bananas for other fruits! Try adding strawberries, peaches, or blueberries. These fruits can add a fun twist to the classic taste. You can layer them with the pudding just like bananas. Keep in mind that different fruits may change the flavor and texture a bit.
How long can banana pudding sit out?
Banana pudding should not sit out for more than two hours. After that, bacteria can grow. It is best to keep it in the fridge when not serving. If it has sat out too long, it’s safer to throw it away. Always prioritize food safety to enjoy your dessert without worry.
In this blog post, we explored how to make the best banana pudding. We covered key ingredients, like ripe bananas and vanilla wafers, and the right types of dairy and sweeteners. You learned step-by-step instructions to create a rich pudding base, layer it, and chill it. We shared tips to avoid common mistakes and offered fun variations, including vegan and gluten-free options.
Banana pudding is simple to make and fun to share. Enjoy your delicious creation!


