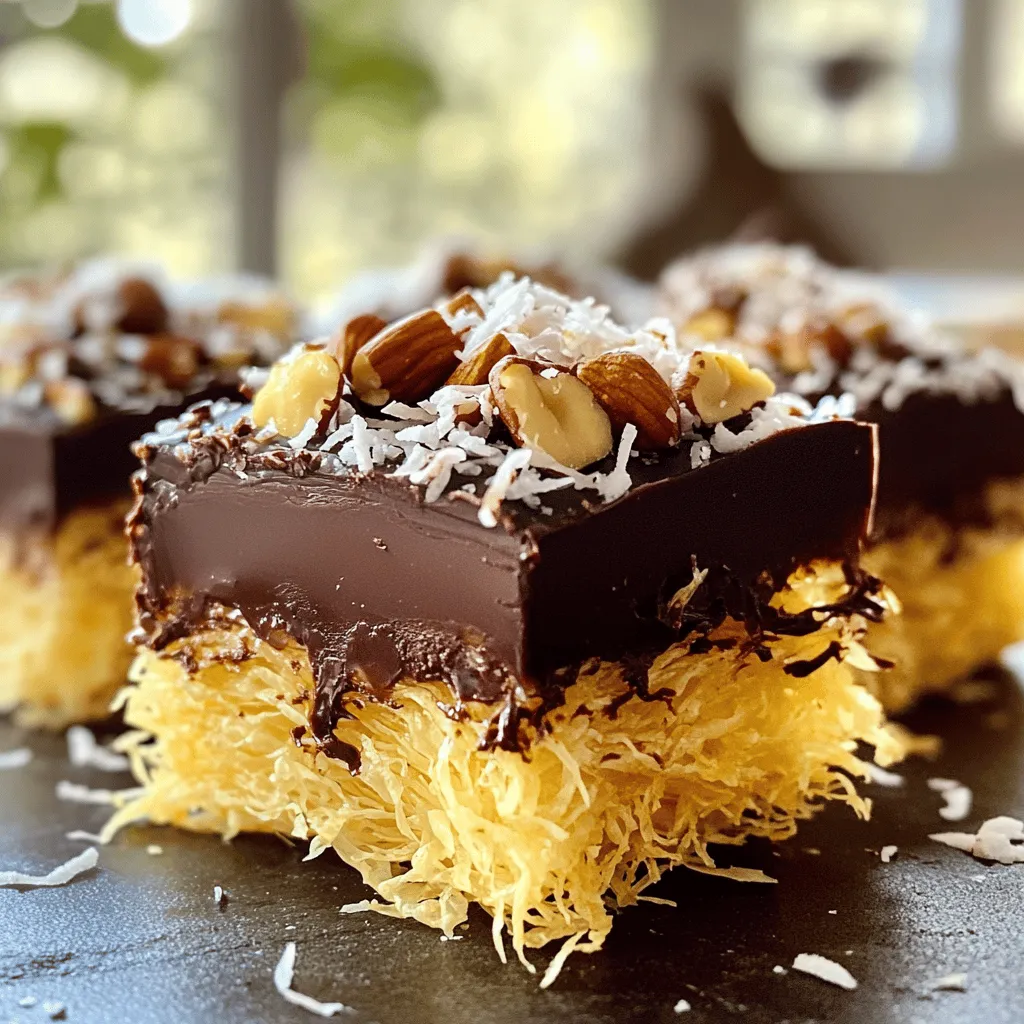
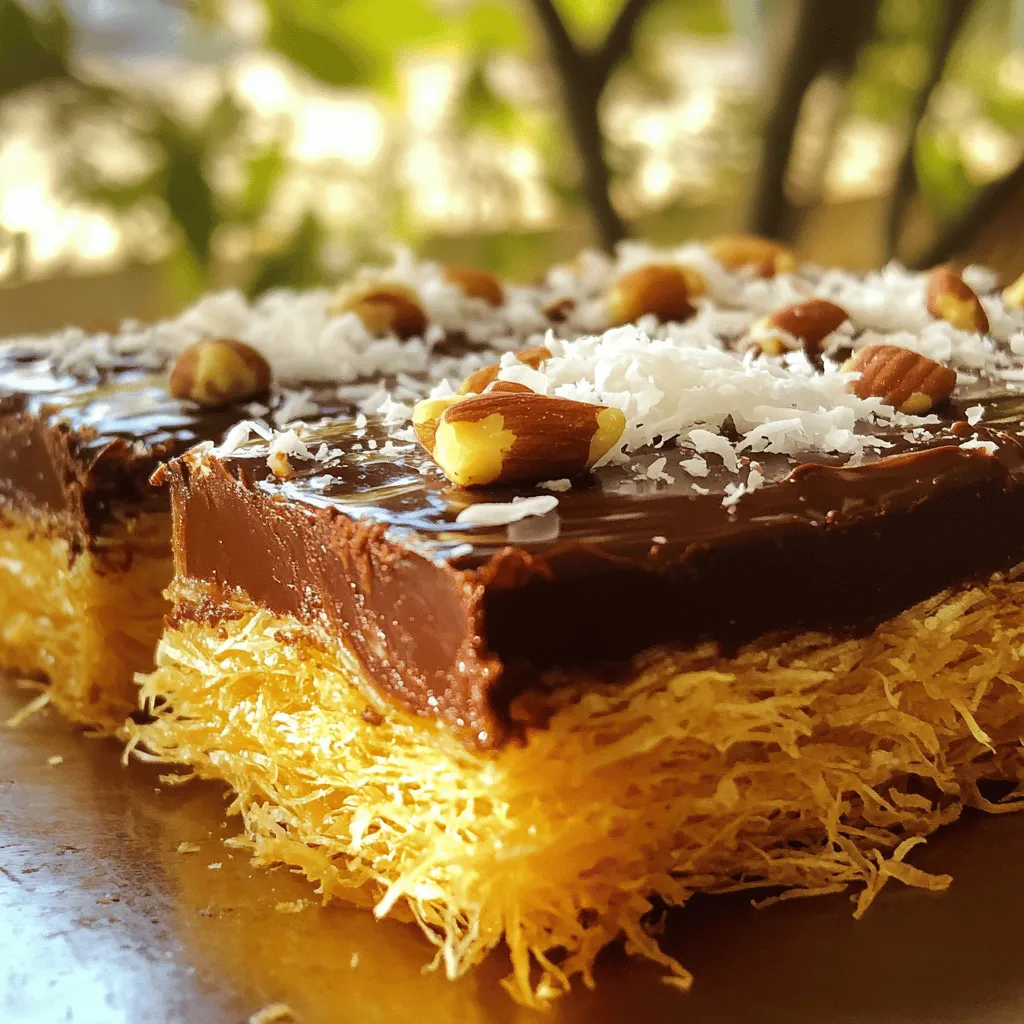
Do you have a sweet tooth that craves something special? Chocolate Kataifi Bars are a delightful treat that blend crispy layers of kataifi with rich chocolate. This recipe charms your taste buds with its unique texture and flavor. With simple steps and easy ingredients, you’ll be amazed at how quickly you can whip these up. Ready to indulge? Let’s dive into making your new favorite dessert!
Ingredients
Main Ingredients for Chocolate Kataifi Bars
– 200g kataifi (shredded phyllo dough)
– 100g unsalted butter, melted
– 150g dark chocolate, chopped
– 100g sweetened condensed milk
To make Chocolate Kataifi Bars, you need some key ingredients. The kataifi, a fine, shredded dough, creates a unique texture. Melted unsalted butter helps bind the kataifi and adds richness. Dark chocolate gives a deep flavor, while sweetened condensed milk adds sweetness and creaminess.
Optional Ingredients
– 50g chopped nuts (walnuts or pistachios work wonderfully)
– 50g shredded coconut (optional, for an extra crunchy topping)
– 1 teaspoon vanilla extract
– A pinch of salt
You can enhance your bars with optional ingredients. Chopped nuts add crunch and flavor. Shredded coconut gives extra texture and a tropical twist. Vanilla extract brings warmth, while salt balances sweetness. Feel free to mix and match these options to suit your taste.
Step-by-Step Instructions
Preparation Steps
1. Preheat your oven to 180°C (350°F). This ensures even baking.
2. Prepare an 8×8 inch square baking pan. Grease it with melted butter or use parchment paper for easy removal.
3. In a large bowl, combine kataifi with melted butter. Use your hands or a fork to coat each strand well.
Making the Chocolate Filling
1. Take chopped dark chocolate and place it in a heatproof bowl.
2. Melt it in the microwave in 30-second bursts. Stir after each burst until smooth.
3. Once melted, add sweetened condensed milk, vanilla extract, and a pinch of salt. Mix until the mixture is silky.
4. Fold in the chopped nuts. Make sure they spread evenly throughout the chocolate.
Assembling and Baking
1. Press half of the kataifi mixture into the bottom of the prepared pan. This will be your base layer.
2. Pour the chocolate filling over the pressed kataifi. Use a spatula to spread it evenly.
3. Sprinkle the remaining kataifi mixture over the chocolate layer. Press it down gently.
4. If you want an extra crunch, sprinkle shredded coconut on top.
5. Bake in the preheated oven for about 25 minutes. The top should turn golden brown, and the chocolate should set.
6. After baking, let it cool in the pan for at least 15 minutes. This helps with cutting the bars later.
Enjoy these delightful Chocolate Kataifi Bars!
Tips & Tricks
Baking Tips
To ensure even cooking, spread the kataifi evenly in the pan. Press it down firmly to create a solid base. This helps the bars cook uniformly. Bake until the top turns golden brown. This usually takes about 25 minutes. After baking, let the bars cool in the pan for at least 15 minutes. This cooling time makes slicing much easier.
Presentation Tips
For a lovely finish, dust the top with powdered sugar. This adds a nice touch and looks great. You can also sprinkle chopped nuts or coconut on top. This adds flavor and a pop of color. A few extra toppings make the bars more appealing.
Common Mistakes to Avoid
One common mistake is overheating the chocolate. Melt it slowly in the microwave, stirring often. This will keep the chocolate smooth. Another mistake is not mixing the ingredients well. Be sure to combine everything thoroughly. This ensures every bite is packed with flavor.
Variations
Flavor Variations
You can easily change the taste of your Chocolate Kataifi Bars. Adding different nuts or spices can give them a fun twist. Try using almonds, pecans, or even a pinch of cinnamon for warmth. You can also switch to milk chocolate for a sweeter taste. This will make the bars richer and appealing to those who love creamy flavors.
Dietary Variations
If you need gluten-free options, you can use alternative dough, like almond flour or gluten-free phyllo. This way, you can enjoy these treats without worry. For vegan substitutes, swap the butter with coconut oil. Use plant-based chocolate and omit the sweetened condensed milk or replace it with coconut cream. These changes make the recipe friendly for various diets.
Serving Suggestions
These bars taste amazing on their own, but pairing them with ice cream or whipped cream can elevate the experience. The cool cream complements the warm chocolate, creating a delightful mix. You can also serve these bars with a cup of coffee or tea. The rich flavors of the bars and the warmth of the drink make a perfect match. Enjoy every bite with your favorite beverage!
Storage Info
How to Store
To keep your Chocolate Kataifi Bars fresh, store them in the fridge. Place them in an airtight container. This helps to prevent them from drying out. They will stay fresh for up to a week. If you want to keep them longer, you can freeze them. Wrap each bar tightly in plastic wrap. Then, place them in a freezer-safe bag. They can last for up to three months when frozen.
Shelf Life
In the fridge, your bars last about one week. You will know they are spoiled if they smell off or have mold. If the texture changes and becomes hard or dry, it’s time to toss them. Always check before enjoying your sweet treat!
FAQs
How long do Chocolate Kataifi Bars last?
Chocolate Kataifi Bars stay fresh for about 5 days in the refrigerator. Keep them in an airtight container. You can also freeze them for up to 2 months. Just wrap them well to prevent freezer burn. When ready to enjoy, thaw in the fridge for a few hours.
Can I make these bars ahead of time?
Yes, you can make these bars ahead of time. Prepare them a day before serving. Just store them in the fridge, covered. This allows the flavors to blend and deepen. If you freeze them, let them thaw overnight in the fridge before serving.
What can I substitute for kataifi?
If you can’t find kataifi, you can use shredded phyllo dough. You can also try using shredded coconut or even finely grated bread as a base. These alternatives will give a different texture but still taste great.
How do I know when they are done baking?
You will know the bars are done when the top is golden brown. The edges should be slightly crispy. The chocolate filling should look set and not jiggly. This usually takes about 25 minutes in the oven.
You’ve learned how to make delicious Chocolate Kataifi Bars using simple steps and key ingredients. From the crispy kataifi to the rich chocolate filling, this treat is sure to impress. Remember to explore different flavors and variations to make it your own. With proper storage, your bars will stay fresh and tasty for days. Enjoy sharing these sweet delights with friends and family. Now it’s your turn to get in the kitchen and create something special. Happy baking!