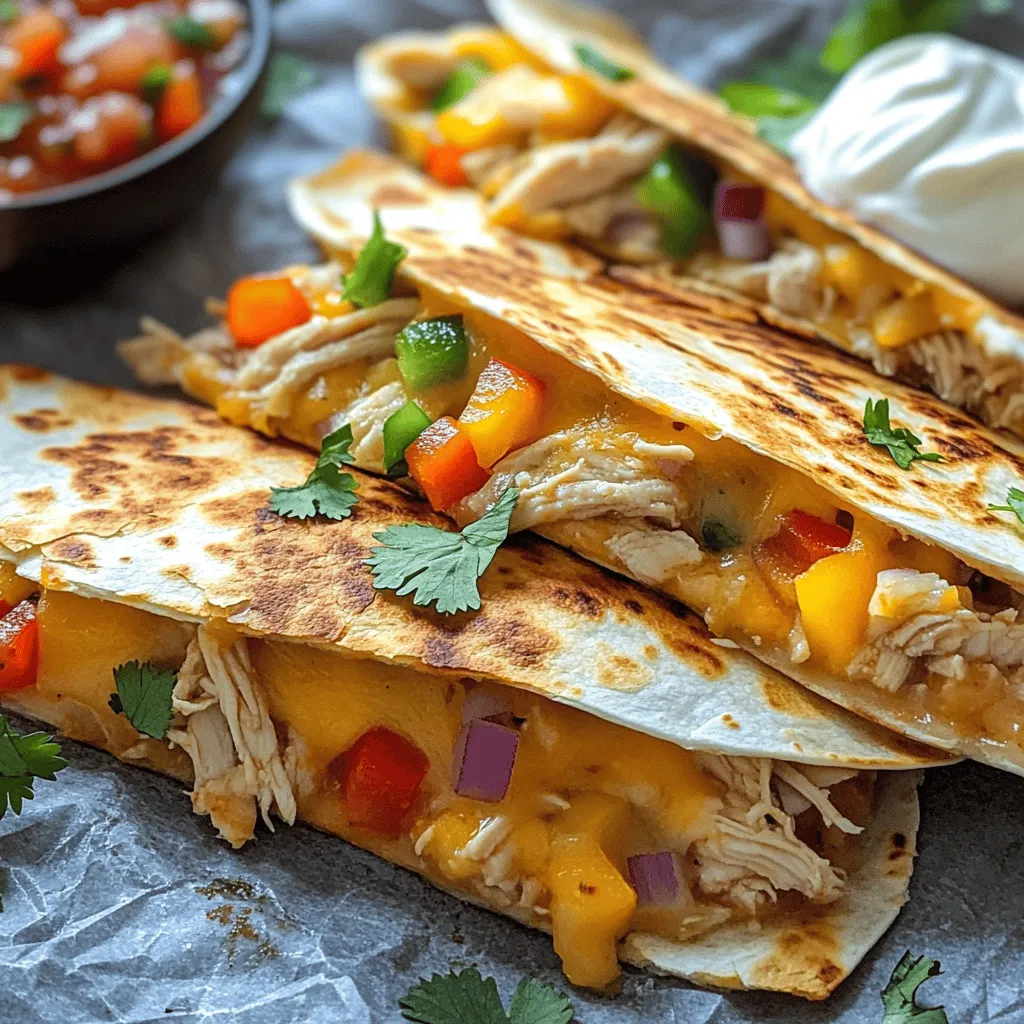
Looking for a quick and tasty meal? You’ve come to the right place! These Easy Chicken Quesadillas are packed with flavor and made in just minutes. With simple ingredients like cooked chicken, cheese, and fresh veggies, you’ll whip up a satisfying dish that everyone will love. Get ready to impress your family or friends with this hassle-free recipe that’s perfect for any day of the week!
Ingredients
Main Ingredients
– 2 cups cooked chicken, shredded
– 1 cup shredded cheddar cheese
– 1 cup shredded Monterey Jack cheese
– 4 large flour tortillas
Flavor Enhancers
– 1/2 cup bell peppers, diced
– 1/2 cup red onion, finely chopped
– 1/4 cup fresh cilantro, chopped
– 1 teaspoon ground cumin
– 1 teaspoon chili powder
– Salt and freshly ground black pepper to taste
Cooking Essentials
– 2 tablespoons olive oil
– Optional: sour cream and chunky salsa for serving
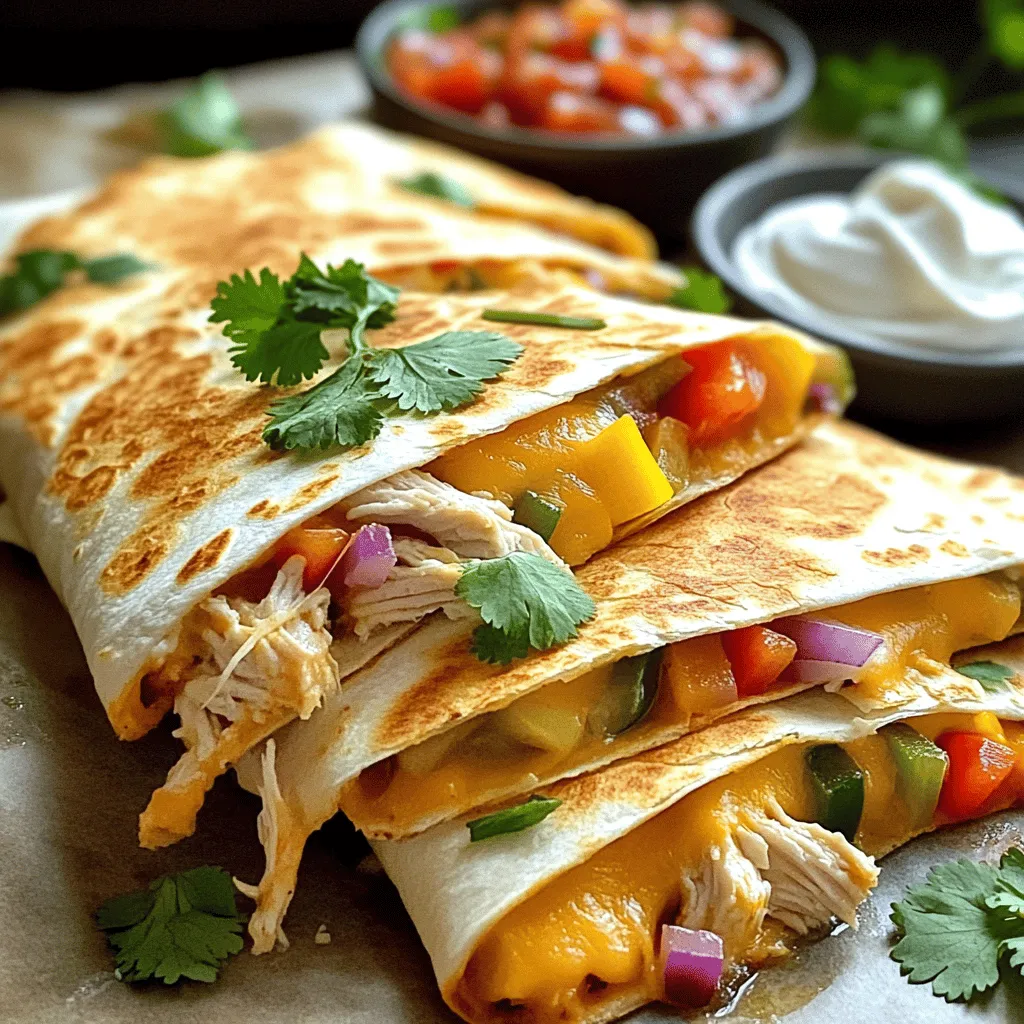
To make great chicken quesadillas, you need fresh ingredients. First, use two cups of cooked chicken. The chicken should be shredded for easy mixing. Next, add a cup each of cheddar and Monterey Jack cheese. These cheeses melt well and give a rich taste.
For flavor, use half a cup of diced bell peppers and half a cup of finely chopped red onion. These add crunch and sweetness. A quarter cup of fresh cilantro brightens the dish. Spice it up with a teaspoon of ground cumin and chili powder. Don’t forget to add salt and pepper to your taste.
You will also need flour tortillas. Four large ones work best. Lastly, have two tablespoons of olive oil ready for cooking. If you like, prepare sour cream and chunky salsa for dipping. This combination makes your quesadillas more fun and tasty.
Step-by-Step Instructions
Preparing the Filling
– Combine cooked chicken, cheese, bell peppers, red onion, cilantro, cumin, chili powder, salt, and pepper in a bowl.
– Mix all these ingredients until well combined. It should look colorful and delicious.
Cooking the Quesadillas
– Preheat your skillet over medium heat. Add 1 tablespoon of olive oil and let it heat.
– Once hot, place one flour tortilla in the skillet. Spread half of the chicken mixture evenly over the tortilla.
– Carefully place another tortilla on top. Press down gently with a spatula.
– Cook for about 3-4 minutes. The bottom should turn golden brown.
– Flip the quesadilla carefully with a spatula. If needed, add another tablespoon of olive oil.
– Cook for another 3-4 minutes. Look for a golden brown color and melted cheese.
Serving Suggestions
– Remove the quesadilla from the skillet and let it rest for one minute. This helps the cheese set.
– Slice the quesadilla into wedges using a sharp knife or pizza cutter.
– Arrange the wedges on a platter. Garnish with extra cilantro.
– Serve with sour cream and chunky salsa for dipping. Enjoy your meal!
Tips & Tricks
Cooking Tips
– Pant the skillet for even cooking: This means you should heat your skillet well before adding the quesadilla. It helps the bottom get nice and crispy. You want that tasty crunch!
– Adjust heat to prevent burning: Keep an eye on the heat. If it’s too high, the quesadilla can burn quickly. A medium heat works best for golden brown perfection.
Cheese Choices
– Use different cheese varieties for unique flavors: Cheese is key! You can mix cheddar, Monterey Jack, or even queso blanco. Each cheese adds its own twist.
– Consider a blend of mozzarella and pepper jack for spice: For a bit of a kick, try adding pepper jack. The mozzarella gives it that stretchy texture we all love!
Presentation Tips
– Garnish with cilantro before serving: A sprinkle of fresh cilantro makes the dish pop. It adds a bright flavor and looks great on the plate.
– Serve with colorful salsa for an appealing look: Pair your quesadillas with a vibrant salsa. The colors and flavors make it more fun to eat!
Variations
Protein Alternatives
You can switch up the protein in your quesadillas. Ground beef is a great choice if you want a classic flavor. Shrimp adds a fun twist. For a vegetarian option, try using tofu or black beans. These choices keep the dish tasty while catering to different diets.
Flavor Twists
Want to spice things up? Add jalapeños for some heat. You can also toss in other vegetables like mushrooms or zucchini for more color and taste. Consider incorporating spices like paprika or oregano to deepen the flavor. It makes each bite more exciting!
Dietary Modifications
For those who need gluten-free options, use gluten-free tortillas. They work just as well and keep the dish safe for everyone. If you’re looking for a healthier twist, swap in low-fat cheese. This keeps all the gooey goodness, but with fewer calories.
Storage Info
Storing Leftovers
After you make your quesadillas, let them cool down. This helps keep the texture nice. Once cool, place them in an airtight container. You can store them in the fridge for up to 3 days.
Freezing Instructions
If you want to save some for later, freeze the cooked quesadillas. Layer them with parchment paper to keep them from sticking together. This way, they stay nice and tasty. When you’re ready to eat them, reheat in the oven or skillet for the best texture.
Reheating Tips
To keep your quesadillas crispy, use a skillet or oven for reheating. This method warms them evenly and keeps the outside crunchy. It’s best to avoid the microwave, as it can make them soggy. Enjoy your meal with great texture!
FAQs
Can I make quesadillas ahead of time?
Yes, you can prep and assemble your quesadillas ahead of time. Just keep them in the fridge. When you are ready to eat, cook them in a skillet until they are warm and crispy.
What cheese is best for quesadillas?
A combination of cheddar and Monterey Jack is ideal for quesadillas. Cheddar adds sharpness, while Monterey Jack melts perfectly. Together, they create a creamy texture and rich flavor.
How do I prevent my quesadilla from getting soggy?
To keep your quesadilla crisp, ensure the filling is not too wet. Use moderate heat for cooking. This way, the tortillas stay crunchy, and the cheese melts well without making a mess.
This guide covers all you need to make delicious quesadillas. We explored key ingredients, cooking steps, and smart tips to make them shine. You learned to customize quesadillas with various proteins and spices. For storage, remember to cool them before refrigerating. Enjoy experimenting with flavors and presentation. Great quesadillas are fun to make and share. With this knowledge, you can impress friends and family alike. Happy cooking and enjoy every tasty bite!