Red Velvet Cake Simple and Fluffy Delight

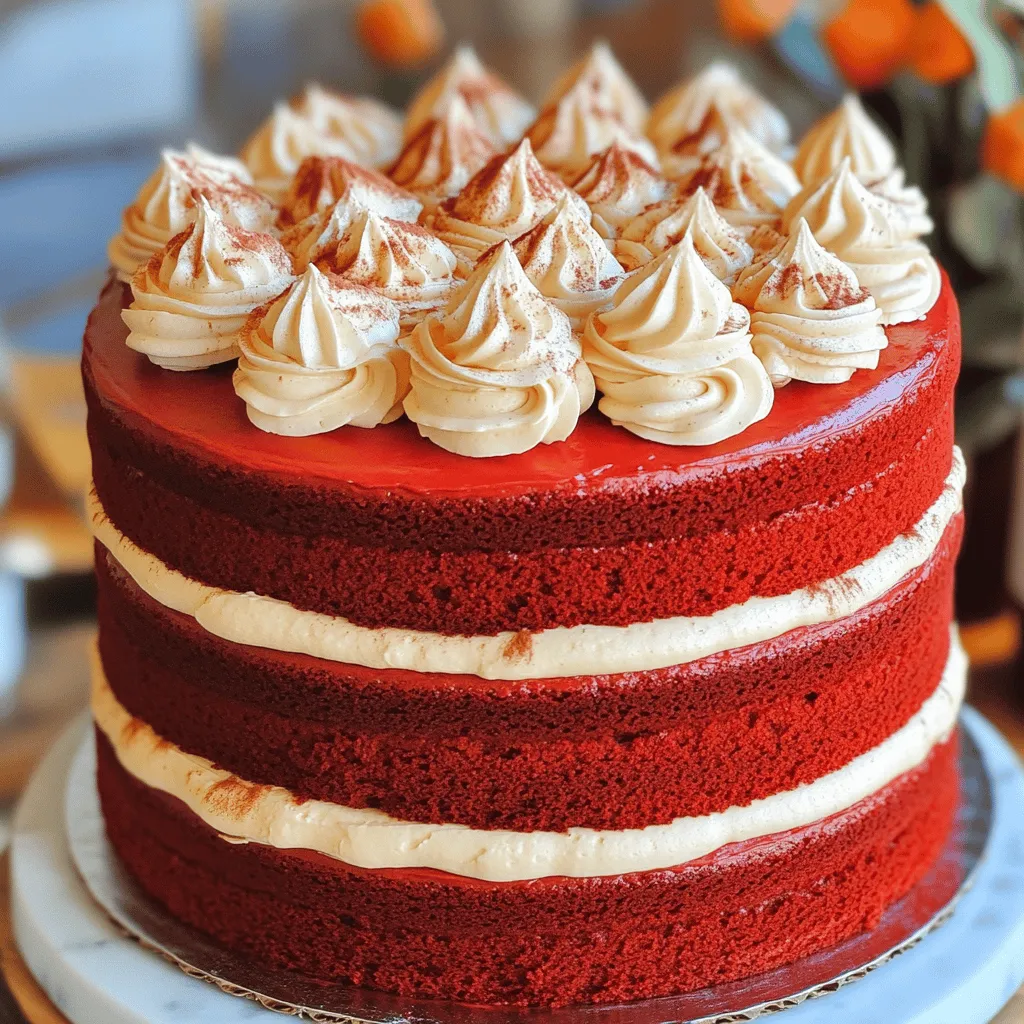
Red velvet cake is the ultimate treat for your next gathering. It’s a rich, fluffy delight that is both beautiful and delicious. With its vibrant color and creamy frosting, this cake is not just a feast for the eyes but also the taste buds. In this article, I’ll guide you through a simple recipe to create a moist red velvet cake that will impress your friends and family. Let’s get baking!

Ingredients

Here’s what you need for a rich red velvet cake.

– 2 ½ cups all-purpose flour

– 1 ½ cups granulated sugar

– 1 teaspoon baking soda

– 1 teaspoon salt

– 1 teaspoon cocoa powder

– 1 ½ cups vegetable oil

– 1 cup buttermilk, at room temperature

– 2 large eggs, at room temperature

– 2 tablespoons red food coloring

– 1 teaspoon vanilla extract

– 1 teaspoon white vinegar

– Cream cheese frosting (store-bought or homemade) for frosting

Gathering fresh ingredients makes all the difference. Use high-quality cocoa powder for a deeper flavor. Make sure your buttermilk and eggs are at room temperature. This helps the cake rise better and gives it a soft texture.

The vibrant red color comes from the food coloring. I prefer gel food coloring for a brighter shade. Each ingredient plays a role. The sugar adds sweetness, while the cocoa powder gives a hint of chocolate.

For frosting, I recommend cream cheese. It balances the sweetness of the cake perfectly. You can use store-bought or whip up your own. Either way, it adds a creamy finish.

Now you have your list of ingredients. Ready to bake? Check out the Full Recipe for all the steps!

Step-by-Step Instructions

Preheat and Prepare Cake Pans

– Preheat oven to 350°F (175°C).

– Grease and flour two 9-inch round cake pans.

Start by preheating your oven. This step is key for even baking. While it warms up, grease and flour your cake pans. This helps the cake come out easily. Use a paper towel to spread the grease. Dust the flour around to coat the sides and bottom well.

Combine Dry Ingredients

– Whisk together flour, baking soda, salt, cocoa powder, and granulated sugar.

In a large bowl, whisk the dry ingredients together. Add flour, baking soda, salt, cocoa powder, and sugar. Mix until there are no lumps. This step helps your cake rise nicely. It also adds a rich flavor.

Mix Wet Ingredients

– Combine oil, buttermilk, eggs, food coloring, vanilla, and vinegar until smooth.

In another bowl, combine the wet ingredients. Mix the vegetable oil, buttermilk, eggs, red food coloring, vanilla extract, and vinegar. Whisk until smooth. This mixture adds moisture and color. The vinegar also helps the cake rise.

Combine Mixtures

– Gradually fold the wet ingredients into the dry ingredients.

Slowly pour the wet mixture into the dry ingredients. Use a spatula to fold them together. Be gentle to avoid overmixing. Stop once there are no dry streaks. This helps keep your cake fluffy.

Bake the Cakes

– Distribute batter into pans and bake for 25-30 minutes.

Distribute the batter evenly into the prepared pans. Place them in your preheated oven. Bake for 25-30 minutes. Check for doneness with a toothpick. It should come out clean when the cakes are ready.

Cool and Frost

– Cool cakes on wire rack; frost with cream cheese frosting.

Once baked, remove the cakes from the oven. Let them cool for about 10 minutes in the pans. Then, turn them out onto a wire rack to cool completely. Frost your cooled cakes with cream cheese frosting. This adds a creamy, tangy flavor that pairs well with the cake. For the full recipe, check the ingredients and instructions above.

Tips & Tricks

Achieving the Perfect Red Color

To get that perfect red hue in your cake, use gel food coloring. Gel color gives a deeper shade than liquid types. This small change can make a big difference. Always make sure your ingredients are at room temperature. It helps the color blend better and gives a smoother batter.

Cake Texture Tips

When mixing your batter, avoid overmixing. Overmixing can make the cake dense. Mix just until the dry ingredients disappear. After baking, let the cakes cool completely before frosting. This step is key for a light and fluffy texture.

Frosting Techniques

For neat frosting layers, use an offset spatula. This tool helps you spread the frosting evenly. If the cake feels too soft, chill it in the fridge before decorating. Chilling makes it easier to handle and gives a neat finish. For more tips and steps, check out the Full Recipe.

Variations

Vegan Red Velvet Cake

You can easily make a vegan red velvet cake. Just swap the eggs for flax eggs. To create a flax egg, mix one tablespoon of ground flaxseed with three tablespoons of water. Let it sit for a few minutes until it thickens. For buttermilk, use plant-based milk mixed with vinegar. Combine one cup of almond milk or soy milk with one tablespoon of vinegar. Let it sit for five minutes. This gives your cake the same moist texture.

Gluten-Free Red Velvet Cake

If you need a gluten-free version, don’t worry! Just replace the all-purpose flour with a gluten-free flour blend. Many brands offer blends that work well in cakes. Be sure to check that it contains xanthan gum. This helps to mimic the texture of regular flour.

Decorations and Flavor Variations

Want to add a twist to your cake? Try adding chocolate chips or chopped pecans to the batter. This adds a lovely crunch. You can also top your cake with chocolate ganache. It gives a rich flavor that pairs well with the cake’s sweetness. Alternatively, use a different flavored frosting, like vanilla or raspberry, for a fun change.

For the Full Recipe, check the earlier sections of this article. Enjoy creating your own version of this classic cake!

Storage Info

Short-Term Storage

Store your red velvet cake in an airtight container. Keep it at room temperature for up to 3 days. This keeps the cake fresh and soft. If you notice it getting dry, you can add a slice of bread to the container. The bread will help keep the cake moist.

Long-Term Storage

For longer storage, refrigerate the cake. It stays good for up to a week. If you want to keep it even longer, freeze the slices. Wrap each slice tightly in plastic wrap and place them in a freezer-safe bag. You can freeze them for up to 3 months. Just be sure to label the bags with the date.

Thawing Instructions

When you’re ready to enjoy your frozen cake, thaw it safely. The best way is to put it in the refrigerator overnight. If you’re short on time, you can thaw it at room temperature for a few hours. Once thawed, the cake will taste just as good as when it was fresh. Enjoy your delicious red velvet cake any time!

FAQs

How can I make my red velvet cake fluffier?

To make your red velvet cake fluffier, keep these tips in mind. First, ensure all your ingredients are at room temperature. Cold ingredients can make the cake dense. Next, be careful not to overmix the batter. Overmixing can lead to a tough texture. Mix just until you see no dry ingredients. This way, your cake will rise light and fluffy.

Can I use food coloring alternatives?

Yes, you can use food coloring alternatives. Beet juice is a great natural option. It gives a nice red hue, but the taste and color may be different from traditional food coloring. You may need to adjust the amount based on how red you want the cake.

What frosting pairs best with red velvet cake?

The classic choice for red velvet cake is cream cheese frosting. Its tangy flavor pairs perfectly with the sweet cake. You can also use buttercream or whipped cream. Both can add a sweet twist and keep the cake light.

What’s the history behind red velvet cake?

Red velvet cake has a rich history. It became popular in the Southern United States. The cake’s roots trace back to the 1800s, where it was known for its unique color and flavor. It gained fame through various cookbooks and word of mouth. Today, it remains a favorite for many celebrations. If you want to try making this delightful dessert, check out the Full Recipe.

You learned how to make a delicious red velvet cake. This recipe uses simple ingredients and clear steps. I shared tips for great texture and vibrant color. You can even explore variations like vegan or gluten-free options. Proper storage ensures your cake stays fresh longer. With practice, you’ll create a stunning cake that impresses everyone. Remember, baking is about fun and creativity, so enjoy the process!

Here’s what you need for a rich red velvet cake. - 2 ½ cups all-purpose flour - 1 ½ cups granulated sugar - 1 teaspoon baking soda - 1 teaspoon salt - 1 teaspoon cocoa powder - 1 ½ cups vegetable oil - 1 cup buttermilk, at room temperature - 2 large eggs, at room temperature - 2 tablespoons red food coloring - 1 teaspoon vanilla extract - 1 teaspoon white vinegar - Cream cheese frosting (store-bought or homemade) for frosting Gathering fresh ingredients makes all the difference. Use high-quality cocoa powder for a deeper flavor. Make sure your buttermilk and eggs are at room temperature. This helps the cake rise better and gives it a soft texture. The vibrant red color comes from the food coloring. I prefer gel food coloring for a brighter shade. Each ingredient plays a role. The sugar adds sweetness, while the cocoa powder gives a hint of chocolate. For frosting, I recommend cream cheese. It balances the sweetness of the cake perfectly. You can use store-bought or whip up your own. Either way, it adds a creamy finish. Now you have your list of ingredients. Ready to bake? Check out the Full Recipe for all the steps! - Preheat oven to 350°F (175°C). - Grease and flour two 9-inch round cake pans. Start by preheating your oven. This step is key for even baking. While it warms up, grease and flour your cake pans. This helps the cake come out easily. Use a paper towel to spread the grease. Dust the flour around to coat the sides and bottom well. - Whisk together flour, baking soda, salt, cocoa powder, and granulated sugar. In a large bowl, whisk the dry ingredients together. Add flour, baking soda, salt, cocoa powder, and sugar. Mix until there are no lumps. This step helps your cake rise nicely. It also adds a rich flavor. - Combine oil, buttermilk, eggs, food coloring, vanilla, and vinegar until smooth. In another bowl, combine the wet ingredients. Mix the vegetable oil, buttermilk, eggs, red food coloring, vanilla extract, and vinegar. Whisk until smooth. This mixture adds moisture and color. The vinegar also helps the cake rise. - Gradually fold the wet ingredients into the dry ingredients. Slowly pour the wet mixture into the dry ingredients. Use a spatula to fold them together. Be gentle to avoid overmixing. Stop once there are no dry streaks. This helps keep your cake fluffy. - Distribute batter into pans and bake for 25-30 minutes. Distribute the batter evenly into the prepared pans. Place them in your preheated oven. Bake for 25-30 minutes. Check for doneness with a toothpick. It should come out clean when the cakes are ready. - Cool cakes on wire rack; frost with cream cheese frosting. Once baked, remove the cakes from the oven. Let them cool for about 10 minutes in the pans. Then, turn them out onto a wire rack to cool completely. Frost your cooled cakes with cream cheese frosting. This adds a creamy, tangy flavor that pairs well with the cake. For the full recipe, check the ingredients and instructions above. To get that perfect red hue in your cake, use gel food coloring. Gel color gives a deeper shade than liquid types. This small change can make a big difference. Always make sure your ingredients are at room temperature. It helps the color blend better and gives a smoother batter. When mixing your batter, avoid overmixing. Overmixing can make the cake dense. Mix just until the dry ingredients disappear. After baking, let the cakes cool completely before frosting. This step is key for a light and fluffy texture. For neat frosting layers, use an offset spatula. This tool helps you spread the frosting evenly. If the cake feels too soft, chill it in the fridge before decorating. Chilling makes it easier to handle and gives a neat finish. For more tips and steps, check out the Full Recipe. {{image_4}} You can easily make a vegan red velvet cake. Just swap the eggs for flax eggs. To create a flax egg, mix one tablespoon of ground flaxseed with three tablespoons of water. Let it sit for a few minutes until it thickens. For buttermilk, use plant-based milk mixed with vinegar. Combine one cup of almond milk or soy milk with one tablespoon of vinegar. Let it sit for five minutes. This gives your cake the same moist texture. If you need a gluten-free version, don't worry! Just replace the all-purpose flour with a gluten-free flour blend. Many brands offer blends that work well in cakes. Be sure to check that it contains xanthan gum. This helps to mimic the texture of regular flour. Want to add a twist to your cake? Try adding chocolate chips or chopped pecans to the batter. This adds a lovely crunch. You can also top your cake with chocolate ganache. It gives a rich flavor that pairs well with the cake's sweetness. Alternatively, use a different flavored frosting, like vanilla or raspberry, for a fun change. For the Full Recipe, check the earlier sections of this article. Enjoy creating your own version of this classic cake! Store your red velvet cake in an airtight container. Keep it at room temperature for up to 3 days. This keeps the cake fresh and soft. If you notice it getting dry, you can add a slice of bread to the container. The bread will help keep the cake moist. For longer storage, refrigerate the cake. It stays good for up to a week. If you want to keep it even longer, freeze the slices. Wrap each slice tightly in plastic wrap and place them in a freezer-safe bag. You can freeze them for up to 3 months. Just be sure to label the bags with the date. When you're ready to enjoy your frozen cake, thaw it safely. The best way is to put it in the refrigerator overnight. If you're short on time, you can thaw it at room temperature for a few hours. Once thawed, the cake will taste just as good as when it was fresh. Enjoy your delicious red velvet cake any time! To make your red velvet cake fluffier, keep these tips in mind. First, ensure all your ingredients are at room temperature. Cold ingredients can make the cake dense. Next, be careful not to overmix the batter. Overmixing can lead to a tough texture. Mix just until you see no dry ingredients. This way, your cake will rise light and fluffy. Yes, you can use food coloring alternatives. Beet juice is a great natural option. It gives a nice red hue, but the taste and color may be different from traditional food coloring. You may need to adjust the amount based on how red you want the cake. The classic choice for red velvet cake is cream cheese frosting. Its tangy flavor pairs perfectly with the sweet cake. You can also use buttercream or whipped cream. Both can add a sweet twist and keep the cake light. Red velvet cake has a rich history. It became popular in the Southern United States. The cake's roots trace back to the 1800s, where it was known for its unique color and flavor. It gained fame through various cookbooks and word of mouth. Today, it remains a favorite for many celebrations. If you want to try making this delightful dessert, check out the Full Recipe. You learned how to make a delicious red velvet cake. This recipe uses simple ingredients and clear steps. I shared tips for great texture and vibrant color. You can even explore variations like vegan or gluten-free options. Proper storage ensures your cake stays fresh longer. With practice, you'll create a stunning cake that impresses everyone. Remember, baking is about fun and creativity, so enjoy the process!

- Red Velvet Cake

Indulge your sweet tooth with a simple and fluffy red velvet cake that’s perfect for any occasion! This vibrant dessert combines rich flavors with a creamy frosting, making it a showstopper at gatherings. Follow our easy recipe to create a moist cake that will leave your friends and family begging for more. Ready to impress? Click through to explore the full recipe and unleash your baking creativity!

Ingredients
  

2 ½ cups all-purpose flour

1 ½ cups granulated sugar

1 teaspoon baking soda

1 teaspoon salt

1 teaspoon cocoa powder

1 ½ cups vegetable oil

1 cup buttermilk, at room temperature

2 large eggs, at room temperature

2 tablespoons red food coloring

1 teaspoon vanilla extract

1 teaspoon white vinegar

Cream cheese frosting (store-bought or homemade) for frosting

Instructions
 

Preheat the Oven: Start by preheating your oven to 350°F (175°C). Prepare two 9-inch round cake pans by greasing them thoroughly and dusting with flour, ensuring both the base and sides are well coated to prevent sticking.

    Combine Dry Ingredients: In a large mixing bowl, whisk together the all-purpose flour, baking soda, salt, cocoa powder, and granulated sugar. Mix until all the dry ingredients are evenly combined and there are no lumps.

      Mix Wet Ingredients: In another bowl, mix together the vegetable oil, buttermilk, eggs, red food coloring, vanilla extract, and white vinegar. Whisk these ingredients together until the mixture is smooth and uniform in color.

        Combine Wet and Dry Mixes: Gradually pour the wet ingredients into the bowl with the dry ingredients. Using a spatula or wooden spoon, fold the mixtures together gently. Be cautious not to overmix; stop as soon as there are no dry streaks remaining.

          Bake the Cakes: Distribute the batter evenly between the two prepared cake pans. Place the pans in your preheated oven and bake for 25-30 minutes. The cakes are done when a toothpick inserted into the center comes out clean.

            Cool the Cakes: Once baked, remove the cake pans from the oven and allow them to cool for about 10 minutes. After that, gently turn the cakes out onto a wire rack to cool completely. This step is crucial for preventing sogginess.

              Frosting the Cake: Once the cakes are completely cool, place one layer on a serving plate. Use a spatula to spread a generous layer of cream cheese frosting over the top of the first layer. Carefully add the second layer on top and continue to frost the top and sides of the entire cake.

                Decorate: For a beautiful finishing touch, create elegant swirls of additional cream cheese frosting on the top. You can also sprinkle cocoa powder or leftover red velvet cake crumbs around the edges for added visual appeal.

                  Prep Time: 30 minutes | Total Time: 1 hour 30 minutes | Servings: 12 slices

                    - Presentation Tips: Consider serving the cake on a decorative cake stand and accompany it with fresh raspberries or strawberries on the side for an extra touch of elegance. Enjoy your delightful creation!

                      Leave a Comment

                      Recipe Rating