Skip to content
DisclaimerTerms Of UseGDPR PolicyCookie Policy

eataroundit

  • Home
  • Drinks
  • Appetizers
  • Dinner
  • Dessert
  • About
  • Contact
  • Privacy Policy
DisclaimerTerms Of UseGDPR PolicyCookie Policy

NO-ING-IMG

To make delicious Garlic Herb Smashed Brussels Sprouts, gather these key ingredients: - 1 lb Brussels sprouts - 4 cloves garlic, minced - 3 tablespoons olive oil - 1 teaspoon dried thyme - 1 teaspoon dried rosemary - Salt and freshly ground black pepper, to taste - Zest of 1 lemon These ingredients are simple yet powerful. The Brussels sprouts bring a hearty base, while garlic adds a rich flavor. Olive oil helps everything come together, making the dish nice and crispy. For added flavor, you will need: - Fresh parsley, finely chopped (for garnish) Garnishing with fresh parsley not only brightens the dish but also adds a fresh taste. The lemon zest gives a hint of brightness that lifts the whole flavor profile. When preparing Garlic Herb Smashed Brussels Sprouts, consider these tips: - Use high-quality olive oil for the best taste. - Opt for fresh herbs when possible to enhance flavor. - A good lemon zester makes zesting quick and easy. These small changes can elevate your dish. Quality ingredients make a big difference, so choose wisely. Enjoy the process of cooking and experimenting with flavors! Start by washing the Brussels sprouts well. Trim off the stems and take off any brown leaves. This keeps them fresh and tasty. Make sure they are all about the same size for even cooking. Next, bring a large pot of salted water to a strong boil. Add the Brussels sprouts carefully. Blanch them for 8 to 10 minutes. They should be bright green and tender but still firm. This step helps them cook well in the oven later. While the sprouts are cooling, make the garlic herb mixture. In a small bowl, mix the minced garlic, olive oil, dried thyme, dried rosemary, salt, and black pepper. Add the zest of the lemon for a nice boost of flavor. Stir it all together until it blends well. Now, spread the blanched sprouts on a baking sheet. Use a glass or fork to gently smash each sprout. This helps them get crispy edges. Brush the garlic herb mixture over the smashed sprouts generously. Place the baking sheet in your preheated oven and roast for 20 to 25 minutes. Watch for crispy, golden edges. When done, sprinkle with fresh parsley for color and flavor. Enjoy your Garlic Herb Smashed Brussels Sprouts! To get crispy Brussels sprouts, start by smashing them gently. This helps create more edges to crisp up. Blanch them first in salted water. This step makes them tender and helps the outside get crispy in the oven. Roasting at 400°F is key. This temperature allows the sprouts to brown nicely. Make sure to coat them well with the garlic herb mixture. This adds flavor and helps with crispiness. One common mistake is overcrowding the baking sheet. If you place too many sprouts together, they steam instead of roast. Another mistake is not smashing them enough. If you don’t smash them, they won’t get crispy. Be careful not to burn the garlic in your herb mixture. Garlic can turn bitter if cooked too long. Lastly, avoid skipping the lemon zest. It brightens the dish and adds a fresh taste. Serve your smashed Brussels sprouts on a large platter. Drizzle any leftover garlic herb oil from the baking sheet on top. This adds extra flavor and looks great. You can also add lemon wedges on the side. This lets everyone squeeze fresh lemon juice over their sprouts. For garnish, sprinkle finely chopped parsley on top. This adds a pop of color and freshness. Enjoy your tasty dish! {{image_4}} You can switch up the herbs in this dish. Try adding basil, oregano, or dill for a fresh twist. Each herb brings unique flavors that can change the taste completely. Want a spicy kick? Add some red pepper flakes or a dash of paprika. Experimenting with different combinations lets you create a new dish each time. To make this dish vegan or dairy-free, simply skip the butter. The olive oil gives enough flavor and richness. You can also use nutritional yeast for a cheesy taste without dairy. This keeps your smashed Brussels sprouts tasty while meeting dietary needs. If you can’t find Brussels sprouts, try using cauliflower or broccoli instead. Both veggies work well with the same garlic herb mix. You can also use different oils, like avocado oil, for a distinct flavor. For a zesty touch, add lime zest instead of lemon. These swaps keep the dish fun and fresh! Store your leftover smashed Brussels sprouts in an airtight container. Let them cool first. This prevents moisture buildup, which can make them soggy. Place them in the fridge within two hours of cooking. If you want to keep them fresh longer, use the freezer. Just be sure to wrap them well in plastic wrap or foil. To reheat, the oven is best. Preheat your oven to 350°F (175°C). Spread the sprouts on a baking sheet. Heat them for about 10-15 minutes. This keeps them crispy and tasty. You can also use a skillet. Add a little olive oil and heat them over medium heat. Stir gently until they are hot. In the fridge, these sprouts last about 3-5 days. If frozen, they can last for up to 3 months. Just remember, the sooner you eat them, the better they taste! Enjoy them fresh for the best flavor and crunch. Yes, you can prepare them ahead of time. First, cook the Brussels sprouts and smash them. Then, store them in the fridge for up to two days. When ready to serve, coat them with the garlic herb mixture and roast as directed. This keeps the flavor fresh and tasty. Garlic Herb Smashed Brussels Sprouts pair well with many dishes. They complement roasted chicken, grilled fish, or a hearty steak. You can also serve them with quinoa or wild rice for a vegetarian option. The bright lemon zest adds a nice touch to balance rich flavors. To serve more people, simply double or triple the recipe. Use 2 to 3 pounds of Brussels sprouts and adjust the garlic, herbs, and oil accordingly. Make sure you have a large enough baking sheet. You want to keep the sprouts in a single layer for even cooking. If you need a substitute for olive oil, try using melted butter or avocado oil. Both options add a rich flavor. You can also use grapeseed oil for a lighter taste. Each substitute will still allow the garlic herbs to shine. Garlic Herb Smashed Brussels Sprouts are a tasty treat. You learned about essential ingredients, step-by-step prep, and storage tips. My main goal is to help you make this dish easy and fun. Remember to try different herbs for new flavors. With simple changes, you can impress your family and friends. Use the tips to ensure your sprouts come out perfect each time. Enjoy cooking these delicious sprouts, and share your results with others!

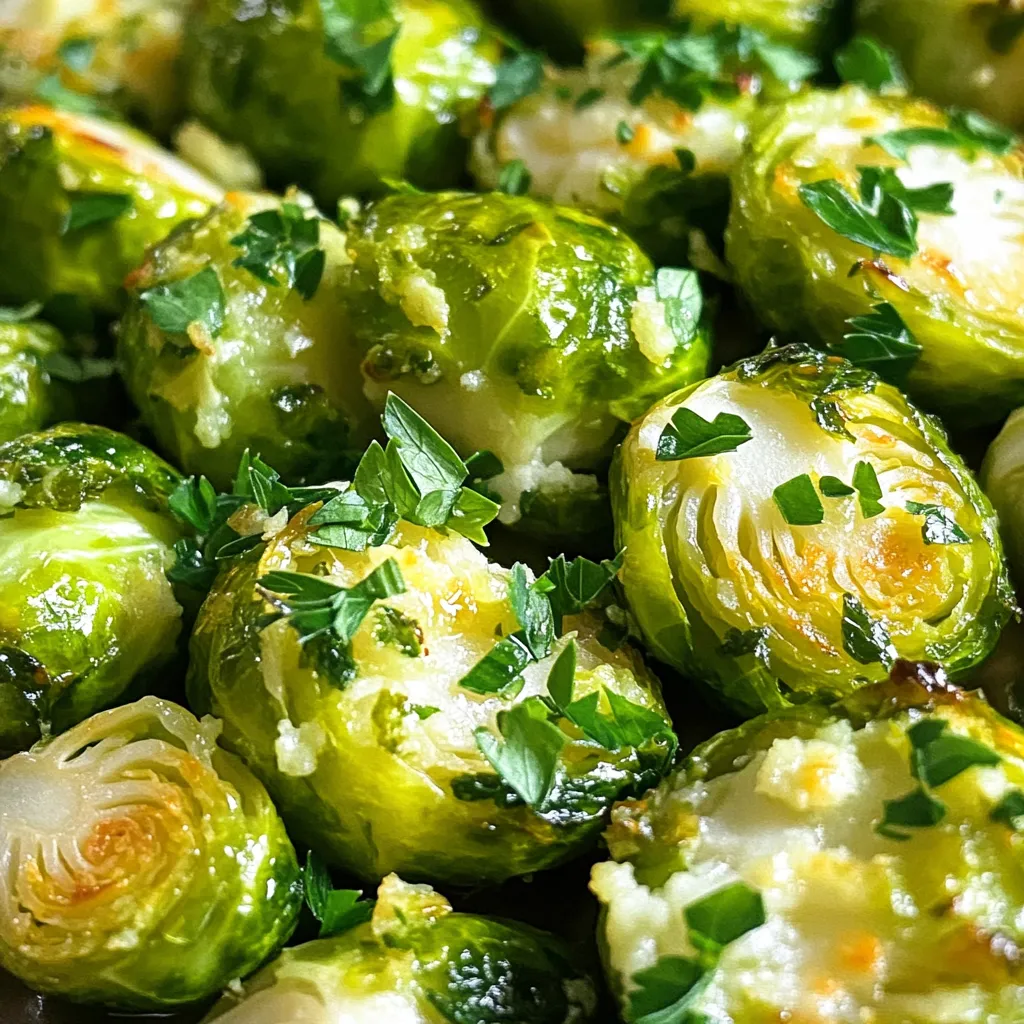
Garlic Herb Smashed Brussels Sprouts Tasty and Simple

If you’re looking for a tasty and simple way to enjoy Brussels sprouts, you’re in the right place! Garlic Herb

- 3 ripe bananas, thoroughly mashed - 1/3 cup melted coconut oil (or unsalted butter) - 1/2 cup pure maple syrup - 2 large eggs - 1 teaspoon vanilla extract - 1 teaspoon baking soda - 1/2 teaspoon salt - 1 teaspoon ground cinnamon - 1 1/2 cups all-purpose flour - 1/2 cup chopped walnuts or pecans (optional) - 1/4 cup maple sugar (optional, for topping) The ingredients for Maple Cinnamon Banana Bread are simple yet powerful. Start with three ripe bananas. The riper the bananas, the sweeter your bread will be. Mash them well to ensure even mixing. Next, you'll need melted coconut oil. It adds moisture and a hint of coconut flavor. If you prefer butter, you can use that instead. Pure maple syrup is a must. It sweetens the bread and adds a lovely flavor. You will also need two large eggs for binding. Vanilla extract enhances the taste. For the dry ingredients, you will need baking soda, salt, and ground cinnamon. These help the bread rise and bring out warmth. The all-purpose flour is the base of your loaf. If you like nuts, add chopped walnuts or pecans for crunch. Lastly, sprinkle maple sugar on top before baking. It gives a sweet crust. - 1/3 cup = 5 tablespoons + 1 teaspoon - 1/2 cup = 4 tablespoons - 1 teaspoon = 5 milliliters You can swap coconut oil for any vegetable oil or melted butter. For a dairy-free option, stick with coconut oil. Maple syrup can be replaced with honey or agave syrup if needed. Use flax eggs instead of real eggs for a vegan option. Just mix one tablespoon of ground flaxseed with three tablespoons of water per egg. These options allow for flexibility while keeping the essence of your banana bread intact. Feel free to get creative with your ingredients! Start by preheating your oven to 350°F (175°C). This temperature helps the bread bake evenly. Greasing the loaf pan is important. Use a bit of oil or butter to coat the inside. This prevents the bread from sticking. Next, take your ripe bananas and mash them until smooth. I find a fork works best for this. In a large bowl, mix the mashed bananas with melted coconut oil or butter, pure maple syrup, eggs, and vanilla extract. Stir until everything is well blended and smooth. In a separate bowl, combine the baking soda, salt, ground cinnamon, and all-purpose flour. Whisk these ingredients together until they are lump-free. Measuring accurately is key here. It ensures the right texture and flavor in your banana bread. Now it's time to mix the wet and dry ingredients. Gradually add the dry mix to the wet ingredients. Use a spatula to fold them together gently. Be careful not to overmix. Overmixing can make the bread tough, and we want a soft loaf. If you want, you can add chopped walnuts or pecans. Gently fold them into the batter until they are evenly spread. This adds a nice crunch and flavor to your banana bread. Pour the batter into the greased loaf pan. Smooth the top with a spatula. Bake in your preheated oven for about 55-65 minutes. The banana bread is done when a toothpick inserted in the center comes out clean. Once baked, let it cool in the pan for about 10 minutes. After that, transfer it to a wire rack to cool completely. This helps enhance the flavors. To get a soft and fluffy banana bread, use room temperature ingredients. Cold eggs or oil can lead to a dense loaf. Always mash the bananas until smooth. This helps them blend well. Mix the wet and dry ingredients just until combined. Overmixing makes the bread tough. Add a pinch of nutmeg for warmth alongside cinnamon. You can also try ginger for a spicy twist. For sweetness, start with a half cup of maple syrup. Taste the batter and adjust if you want it sweeter. Just remember that the bananas add natural sugar too. Slice the bread into thick pieces for serving. Warm slices taste best. Drizzle with maple syrup and sprinkle with cinnamon for a lovely look. You can add fresh banana slices or a dollop of butter on the side. This adds a nice touch to your serving plate. {{image_4}} You can make this banana bread healthier. For low-sugar options, use less maple syrup. You can also swap it for a sugar-free syrup. This keeps the sweet taste without the extra sugar. If you need gluten-free options, try almond flour or coconut flour. Both work well in banana bread. They add a nice flavor and texture, too. Want to mix things up? Add chocolate chips for a sweet twist. They melt into the bread, making each slice a treat. You can also add dried fruits like cranberries or raisins. Fresh berries like blueberries or strawberries can work great, too. They add moisture and flavor. When serving, try adding spreads. A bit of butter or cream cheese makes it tasty. You can also drizzle some more maple syrup on top for extra sweetness. For drinks, hot coffee or tea pairs well. A glass of cold milk is also a great choice. It balances the sweet taste of the bread. Enjoy your delicious banana bread with these simple ideas! To keep your banana bread fresh, store it in an airtight container. This method helps prevent it from drying out. You can also wrap it tightly in plastic wrap. Keep the bread at room temperature for best results. Avoid putting it in the fridge, as this can make it stale faster. If you have extra banana bread, freezing is a great option. First, let the bread cool completely. Then, wrap it tightly in plastic wrap. After that, place it in a freezer-safe bag or container. When you want to enjoy it, remove the bread from the freezer. Thaw it overnight in the fridge or at room temperature. To reheat, slice the bread and warm it in the oven for a few minutes. Banana bread lasts about three to four days at room temperature. To check for freshness, look for signs of mold or an off smell. If the bread feels very dry or hard, it’s time to toss it. A fresh loaf should feel soft and smell sweet. Yes, you can use unsalted butter if you prefer. Both options work well. Coconut oil adds a hint of flavor. Butter gives a rich taste. Choose what you enjoy more. Yes, ripe bananas are key. They add natural sweetness and moisture. Unripe bananas can make the bread dense and less sweet. Look for bananas with brown spots for the best flavor. Insert a toothpick into the center of the bread. It should come out clean or with a few moist crumbs. If it comes out sticky, bake a bit longer. Keep an eye on it as it nears the end of the baking time. Absolutely! You can add nutmeg or ginger for extra warmth. Just use a small amount to avoid overpowering the banana flavor. Get creative with spices that you enjoy! Serve it warm with a drizzle of maple syrup. You can also add a dollop of butter or cream cheese. Fresh fruit or a scoop of yogurt makes a tasty side too. Enjoy your delicious creation! This blog post guided you through making delicious Maple Cinnamon Banana Bread. You learned about each ingredient, measuring techniques, and mixing tips. We covered storing options and variations to enhance flavor or nutrition. Banana bread is easy and fun to make. With some simple steps, you can enjoy a tasty treat. Try the variations, add your favorite nuts, or mix in some chocolate chips. Happy baking!

Maple Cinnamon Banana Bread Delightful and Easy Recipe

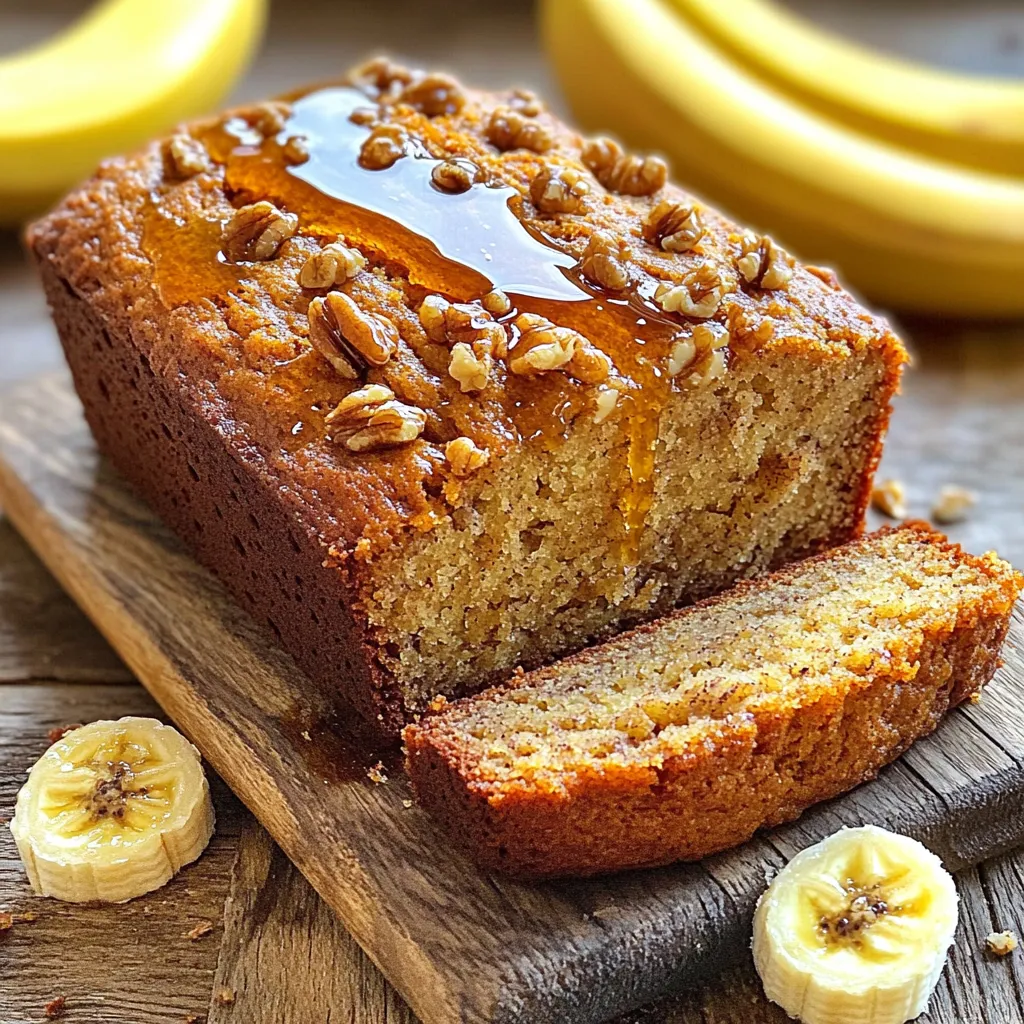
Are you ready to bake something truly wonderful? This Maple Cinnamon Banana Bread is not only easy to make but

- 1 lb ground chicken - 1 tablespoon vegetable oil - 3 cloves garlic, minced - 1 inch fresh ginger, grated - 1 red bell pepper, diced - 1 carrot, shredded - 3 green onions, finely chopped - 1/4 cup creamy peanut butter - 2 tablespoons soy sauce - 1 tablespoon honey - 1 tablespoon fresh lime juice - 1 teaspoon sriracha (adjust to personal spice preference) - 1 head of iceberg or butter lettuce, leaves carefully separated - Salt and pepper to taste - Chopped peanuts - Fresh cilantro These ingredients create a tasty and spicy filling. The ground chicken gives protein, while the veggies add crunch. The peanut butter sauce makes it creamy and rich. - Large skillet - Mixing bowl - Whisk - Spatula - Serving platter Gather these tools before you start cooking. They make the process smoother and more fun. {{ingredient_image_2}} Start by gathering your ingredients. You will need: - 1 lb ground chicken - 1 tablespoon vegetable oil - 3 cloves garlic, minced - 1 inch fresh ginger, grated - 1 red bell pepper, diced - 1 carrot, shredded - 3 green onions, finely chopped - 1/4 cup creamy peanut butter - 2 tablespoons soy sauce - 1 tablespoon honey - 1 tablespoon fresh lime juice - 1 teaspoon sriracha - 1 head of iceberg or butter lettuce - Salt and pepper to taste - Chopped peanuts and fresh cilantro for garnish Now, prepare your vegetables. Mince the garlic and grate the ginger. Dice the red bell pepper and shred the carrot. Chop the green onions finely. In a large skillet, heat the vegetable oil over medium heat. Add the minced garlic and grated ginger. Sauté for about 1 minute. You want it fragrant but not burnt. Next, add the ground chicken. Break it apart with a spatula. Cook for about 5-7 minutes until it turns brown and is fully cooked. Then, add the diced red bell pepper, shredded carrot, and chopped green onions. Stir well and cook for an extra 3-4 minutes. The veggies should soften but still have some crunch. In a small bowl, mix the creamy peanut butter, soy sauce, honey, lime juice, and sriracha. Whisk until smooth. Pour this peanut sauce over the chicken and veggies. Stir to coat everything. Cook for an extra 2 minutes. Taste and season with salt and pepper. Now comes the fun part! Take the lettuce leaves and spoon the spicy chicken mixture into each leaf. Top each wrap with chopped peanuts and fresh cilantro for extra flavor. Arrange the wraps on a platter. If you like, drizzle extra peanut sauce on top. Serve with lime wedges for a zesty kick. Enjoy your creation! To make the best peanut sauce, use smooth peanut butter. It blends well and gives a creamy texture. Mix the soy sauce, honey, lime juice, and sriracha in a bowl. Whisk until smooth. Adjust the sriracha to control the heat. If you like it spicy, add more. For a sweeter touch, add a bit more honey. When cooking the chicken, use medium heat to avoid burning. Start with garlic and ginger for flavor. Sauté them just until fragrant. Add the ground chicken next. Break it apart with a spatula to ensure even cooking. Cook until it turns brown and no pink shows. Then, add the veggies. Stir them in for about 3-4 minutes. They should be soft but still crunchy. For a beautiful presentation, choose a nice serving platter. Spoon the chicken mixture into the lettuce leaves. Arrange the wraps neatly on the platter. Drizzle extra peanut sauce on top for flair. Lastly, sprinkle chopped peanuts and cilantro for color. Serve with lime wedges for a fresh touch. This makes the dish not only tasty but also eye-catching. Pro Tips Prepping the Chicken: For even cooking, ensure the ground chicken is at room temperature before you start cooking. Customize Your Spice Level: Feel free to adjust the amount of sriracha based on your spice preference; start with less and add more as needed. Freshness Matters: Using fresh vegetables not only enhances flavor but also gives a better texture to your wraps. Garnishing Tips: To elevate the presentation, consider adding a drizzle of extra peanut sauce and a sprinkle of sesame seeds on top before serving. {{image_4}} You can switch the ground chicken for other meats. Ground turkey works well and has a mild flavor. You can also use ground beef for a richer taste. If you want something different, try diced shrimp. Each protein will give a unique twist to this dish. For a tasty vegetarian or vegan version, use crumbled tofu or tempeh. Both options absorb flavors well and can mimic the texture of meat. Add more veggies, like mushrooms or zucchini, to boost flavor and nutrition. Use a plant-based peanut butter to keep it vegan. To control the heat, adjust the sriracha in your sauce. If you love spice, add more sriracha or even some chili flakes. For less heat, cut back on the sriracha or leave it out. You can also serve the wraps with extra lime or fresh herbs to balance the heat. To keep your spicy peanut chicken fresh, place it in an airtight container. Make sure it cools down before sealing. Store it in the fridge for up to three days. Keep the lettuce leaves separate. This way, they stay crisp and fresh. When it's time to eat again, reheat the chicken mixture on the stove. Use a medium heat to warm it up. Stir it often to prevent burning. You can also microwave it, but cover it to keep moisture in. Heat for about one to two minutes. Check if it's hot enough before serving. You can freeze the chicken mixture if you want to save it for later. Place it in a freezer-safe bag or container. Remove as much air as possible to avoid freezer burn. It can last up to three months in the freezer. When ready to eat, thaw it in the fridge overnight before reheating. Yes, you can use different types of lettuce. Butter lettuce works well for wraps. It’s soft and holds the filling nicely. Romaine is another great choice. It has a nice crunch and sturdy leaves. You can even try cabbage if you want a different flavor and texture. Each type adds its unique touch to the dish. Making the peanut sauce ahead is easy. Just mix the peanut butter, soy sauce, honey, lime juice, and sriracha in a bowl. Whisk until smooth. Store the sauce in a sealed container in the fridge. It can last about a week. When ready to use, stir it again to mix the ingredients well. You can serve many tasty sides with these wraps. Some great options include jasmine rice or quinoa for a filling meal. A side salad with fresh veggies adds crunch and color. For a fun twist, serve spring rolls or egg rolls. These options complement the flavors of the wraps perfectly. You now have a clear path to making Spicy Peanut Chicken Lettuce Wraps. We covered key ingredients, step-by-step cooking, and smart tips. You learned about variations, storage, and answers to common questions. Feel free to explore new proteins or spice levels to find your perfect taste. Enjoy these wraps fresh or as leftovers. Cooking can be fun and easy with the right guidance. Dive in and make this dish your own!

Spicy Peanut Chicken Lettuce Wraps Flavorful Delight

Welcome to a flavor journey with my Spicy Peanut Chicken Lettuce Wraps! These delicious wraps bring together juicy chicken and

- 1 pound beef sirloin, thinly sliced against the grain - 2 tablespoons sesame oil - 1 cup broccoli florets (fresh or frozen) - 1 red bell pepper, thinly sliced - 1 small carrot, julienned or cut into matchsticks - 3 green onions, finely chopped (white and green parts separated) - 2 cloves garlic, minced - 1 teaspoon fresh ginger, grated - 1/4 cup low-sodium soy sauce - 2 tablespoons honey or maple syrup - 1 tablespoon rice vinegar - 1 tablespoon cornstarch mixed with 2 tablespoons water - Sesame seeds for garnish This recipe is simple yet packed with flavor. Each ingredient plays a key role in creating a tasty dish. I suggest using fresh ingredients for the best taste. The beef sirloin is tender and cooks quickly. The sesame oil adds a nutty flavor that enhances the dish. Broccoli, red bell pepper, and carrots give great color and texture. For the sauce, low-sodium soy sauce keeps it savory but not too salty. Honey or maple syrup adds a touch of sweetness. Rice vinegar adds a nice tang. The cornstarch slurry thickens the sauce, making it cling to the beef and veggies. Finally, a sprinkle of sesame seeds gives a lovely crunch. So gather these ingredients, and let’s get cooking! Heat a large skillet or wok over medium-high heat. Add 2 tablespoons of sesame oil. Wait until the oil is shimmering. This step is key for a good stir-fry. Next, add 1 pound of thinly sliced beef sirloin to the hot skillet. Spread it out in a single layer. Stir-fry for 2-3 minutes until the beef is browned. Once cooked, take the beef out and set it aside on a plate. In the same skillet, add 1 cup of broccoli florets, 1 thinly sliced red bell pepper, and 1 small carrot cut into matchsticks. Stir-fry these veggies for 3-4 minutes. The goal is to keep them tender yet crisp. Now, toss in 2 cloves of minced garlic and 1 teaspoon of grated ginger. Stir continuously for about 30 seconds. This will make your kitchen smell amazing! After that, pour in 1/4 cup of low-sodium soy sauce, 2 tablespoons of honey, and 1 tablespoon of rice vinegar. Mix everything well. Stir in the cornstarch slurry you made with 1 tablespoon of cornstarch and 2 tablespoons of water. Let it simmer for 2-3 minutes. The sauce will thicken and coat the beef and veggies nicely. Finally, take the skillet off the heat. Gently fold in 3 chopped green onions, mixing them into the dish. Serve it hot, garnished with sesame seeds for extra flavor and crunch. Enjoy your meal! To get the best beef, choose sirloin. Sirloin is tender and flavorful. Slice the beef against the grain. This helps make each bite easy to chew. A good slice will make all the difference. You can change up the veggies in this dish. Try adding snap peas, bell peppers, or even mushrooms. Each vegetable brings its own flavor. You can mix and match based on what you like. This way, you can make it your own! You can easily adjust the sauce to fit your taste. If you want more sweetness, add extra honey or maple syrup. For a tangy kick, increase the rice vinegar. Tasting as you go is key. This ensures the sauce is just right for you. {{image_4}} To make this dish gluten-free, swap out the soy sauce for tamari. Tamari tastes similar but has no gluten. This simple change lets you enjoy the same rich flavor without worry. Want to try something different? You can easily swap the beef for chicken, pork, or tofu. Each option brings its unique taste. Chicken gives a lighter flavor, while pork adds a slight sweetness. Tofu is perfect for a plant-based meal. Just cook it the same way as the beef. Make it a full meal by adding cooked rice or noodles. This not only adds substance but also makes the dish more filling. Simply stir in the rice or noodles at the end. It’s a quick way to boost your meal and makes it even tastier! Store any leftovers in an airtight container in the refrigerator. This keeps the beef and veggies fresh. Make sure to cool them down before sealing to prevent moisture build-up. To reheat, use a skillet over low heat. This warms the dish evenly without making it tough. You can also use a microwave until warm. Just cover it to keep moisture in. You can freeze portions in airtight bags for up to 2 months. This is great for meal prep. When ready to eat, thaw the beef in the fridge overnight before reheating. This keeps the flavors intact and tasty. Total preparation and cooking time is about 25 minutes. You get a quick meal that is delicious and satisfying. Start by prepping your ingredients. This way, you save time during cooking. Yes, just ensure the beef is thawed before slicing and cooking. Frozen beef can work well if you plan ahead. Thaw it in the fridge overnight for the best results. This keeps the meat tender and easy to slice. Serve over rice, noodles, or enjoy on its own with extra vegetables. Rice is a great base that soaks up the sauce. Noodles add a nice twist. You can even add a side of steamed veggies for more color and crunch. This blog post outlined a simple and tasty sesame teriyaki beef skillet recipe. We covered the main ingredients, including beef, fresh vegetables, and a flavorful sauce. I shared step-by-step instructions for cooking and suggested tips for perfecting your dish. Remember, you can customize it with different veggies or proteins. Whether you enjoy it as is or alongside rice, this dish is quick and satisfying. Get creative and make it your own!

Minute Sesame Teriyaki Beef Skillet Quick and Delicious

Craving a quick and tasty meal? Look no further than this Minute Sesame Teriyaki Beef Skillet! With tender beef, crisp

- 2 cups canned chickpeas, drained and rinsed - 1 large onion, diced - 2 garlic cloves, minced - 2 medium carrots, diced - 1 red bell pepper, diced - 1 zucchini, diced - 1 can (14 ounces) diced tomatoes - 2 cups vegetable broth - 2 teaspoons ground cumin - 2 teaspoons ground coriander - 1 teaspoon smoked paprika - ½ teaspoon ground cinnamon - ½ teaspoon cayenne pepper (optional for heat) - ¼ cup dried apricots, chopped - ¼ cup raisins - Fresh herbs: cilantro or parsley - Olive oil, salt, and pepper The main ingredients like canned chickpeas and fresh vegetables create a hearty base. The chickpeas add protein and fiber. Fresh veggies bring color and crunch. Diced tomatoes give the stew a vibrant base. Vegetable broth ties all the flavors together. Next, spices elevate this dish. Ground cumin and coriander add warmth and earthiness. Smoked paprika gives a subtle smokiness. Ground cinnamon introduces a touch of sweet spice. If you like heat, cayenne pepper adds a nice kick. Finally, garnishes finish the stew. Dried apricots and raisins add sweetness. Fresh herbs such as cilantro or parsley brighten the dish. A drizzle of olive oil and a sprinkle of salt and pepper enhance the flavors. Using these ingredients, you can make a tasty and filling Moroccan chickpea stew. Enjoy the rich flavors and vibrant colors in every bite. Start by heating olive oil in a pan over medium heat. Add the diced onion and sauté for about five minutes. You want the onion to turn soft and a bit golden. This step builds a great flavor base. Next, add the minced garlic and cook for one more minute. You will smell a lovely aroma. Transfer this mix to your slow cooker. This is where the magic begins. Now, layer in the canned chickpeas, diced carrots, red bell pepper, and zucchini. These veggies add color and texture. Pour in the can of diced tomatoes and the vegetable broth. Next, sprinkle the spices: ground cumin, ground coriander, smoked paprika, ground cinnamon, and cayenne pepper if you want some heat. Then, toss in the chopped dried apricots and raisins for some sweetness. Mix everything well. This step is vital for even flavor. You have two options for cooking your stew: low heat or high heat. If you choose low heat, let it cook for six to eight hours. If you're short on time, high heat will take three to four hours. Keep an eye out for signs of doneness. The vegetables should be tender, and the flavors will blend beautifully. Before serving, taste your stew and adjust the salt and pepper. Garnish with fresh cilantro or parsley for a pop of color. To make the best Moroccan chickpea stew, you need to balance the spices. Start with a base of cumin and coriander. These spices give warmth to the dish. Add smoked paprika for a hint of smokiness. If you like heat, sprinkle in some cayenne pepper. Taste as you go. Adjust the spices to your liking. Next, think about the stew's consistency. If it feels too thick, add more vegetable broth. A thinner stew is great for soaking up bread. If it’s too thin, let it cook a bit longer. The stew will thicken as it cooks. You can switch up the veggies in this stew. Try adding sweet potatoes or spinach for different flavors. Each vegetable brings its unique taste and texture. You can also add protein. Tofu works well for a vegan option. For meat lovers, chicken adds heartiness. Just cube it and stir it in with the veggies. Pair your stew with warm pita or fluffy couscous. Both sides soak up the flavors nicely. For a beautiful presentation, use vibrant bowls. Serve the stew in colorful dishes. Top it with fresh cilantro or parsley for a pop of color. This makes your meal look lively and inviting! {{image_4}} This stew shines as a vegan and gluten-free meal. The main ingredients are naturally plant-based and free of gluten. If you have allergies, you can adapt the recipe easily. - Use vegetable broth instead of chicken broth. - Swap out chickpeas for lentils if needed. - Replace dried apricots with any dried fruit you prefer, like cranberries. To boost the flavors in your stew, try these simple tricks. Adding citrus elements can brighten the dish. - Squeeze fresh lemon or lime juice before serving. - Zest some lemon or orange for an extra layer of flavor. Incorporating additional herbs also enhances the taste. - Fresh parsley or cilantro can add a fresh touch. - Try adding dried thyme or oregano for a unique twist. These easy changes will make your Slow Cooker Moroccan Chickpea Stew even more delicious! To keep your Slow Cooker Moroccan Chickpea Stew fresh, store it in airtight containers. This helps lock in flavor and moisture. Make sure to cool the stew before sealing it. Refrigerate within two hours of cooking for safety. Leftovers can last up to five days in the fridge. When you’re ready to enjoy your stew, reheat it on the stove or in the microwave. On the stove, use low heat and stir often. This keeps the stew from sticking and burning. If using a microwave, heat in short bursts, stirring in between. Always check the temperature to ensure it’s hot throughout. Enjoy your meal safely! How long does Slow Cooker Moroccan Chickpea Stew last in the fridge? This stew lasts about 4 to 5 days in the fridge. Store it in a sealed container. The flavors will deepen as it sits, making it even better! Can I freeze the stew? If so, how? Yes, you can freeze the stew! Let it cool completely, then pour it into airtight containers. Leave some space at the top for expansion. It can last up to 3 months in the freezer. What can I substitute for chickpeas? If you need a substitute for chickpeas, try cannellini beans or lentils. Both will add protein and texture. Keep in mind, cooking times may vary. Is this stew healthy or nutritious? Absolutely! The stew is packed with fiber, vitamins, and minerals. Chickpeas offer protein and keep you full. Fresh veggies add nutrients and flavor, making it a balanced meal. How can I adjust the recipe for lower calories? To lower calories, reduce the amount of olive oil or use less dried fruit. You can also add more vegetables. This keeps the stew filling without adding too many calories. In this blog post, I shared a simple recipe for Slow Cooker Moroccan Chickpea Stew. We covered key ingredients, from chickpeas to fresh veggies and spices. I also detailed step-by-step instructions to help you create this hearty dish effortlessly. Don't forget the tips for flavor, cooking variations, and proper storage. Experiment with spices and veggies to make the recipe your own. Enjoy each comforting bite, knowing it’s made with wholesome ingredients!

Slow Cooker Moroccan Chickpea Stew Flavor Boost

Are you ready to discover a hearty meal that warms your soul? This Slow Cooker Moroccan Chickpea Stew is packed

- 1 cup all-purpose flour - 1/2 cup granulated sugar - 2 teaspoons baking powder - 1/4 teaspoon salt - 1/4 teaspoon ground nutmeg - 1/2 teaspoon ground cinnamon (for batter) - 1/2 cup milk - 1 large egg - 2 tablespoons unsalted butter, melted - 1/2 teaspoon vanilla extract - 1/4 cup granulated sugar (for coating) - 1 tablespoon ground cinnamon (for coating) For this recipe, I use standard cups and tablespoons. Measuring accurately helps ensure the donut holes turn out perfect. Use a dry measuring cup for flour and sugar. A liquid measuring cup works best for milk. You can add a pinch of ground cloves for more spice. You may also swap vanilla extract with almond extract for a different twist. For a richer taste, consider adding a splash of orange zest. These options can take your donut holes to the next level! Start by gathering your dry ingredients. In a medium bowl, whisk together 1 cup of all-purpose flour, 1/2 cup of granulated sugar, 2 teaspoons of baking powder, 1/4 teaspoon of salt, 1/4 teaspoon of ground nutmeg, and 1/2 teaspoon of ground cinnamon. Mix until you see no lumps. This step is key for a fluffy donut hole. Now, grab another bowl. Here, whisk together 1/2 cup of milk, 1 large egg, 2 tablespoons of melted unsalted butter, and 1/2 teaspoon of vanilla extract. Make sure this mixture is smooth and well combined. This is where your donut holes will get their moisture and flavor. Next, combine the wet and dry mixtures. Gradually pour the wet ingredients into the dry bowl. Stir gently with a spatula until just mixed. Don't worry about a few lumps. This keeps your donut holes light and airy. Now, lightly grease your hands with oil. Scoop about a tablespoon of dough and roll it into a ball. Repeat until you shape all the dough. Before you cook, preheat your air fryer. Set it to 350°F (175°C) and let it warm up for about 5 minutes. This helps the donut holes cook evenly and get that lovely golden color. Now, place the rolled donut holes in a single layer in your air fryer basket. If needed, cook in batches. This keeps them from overcrowding. Cook for 5-7 minutes or until golden brown. Flip them halfway through for even cooking. You want them to be perfectly puffed and warm. While the donut holes cook, prepare the cinnamon sugar. In a small bowl, mix 1/4 cup of granulated sugar with 1 tablespoon of ground cinnamon. Once the donut holes are done, remove them from the air fryer. Toss them in the cinnamon sugar mixture while they are warm. This coating makes them extra delicious! - Use Fresh Ingredients: Always check your baking powder and spices. Fresh ingredients make a big difference in flavor. - Don’t Overmix: Mix until just combined. A few lumps in the batter are okay. This keeps the donut holes light and airy. - Preheat Your Air Fryer: Preheat for about 5 minutes. This ensures even cooking and that golden-brown color. - Shape Evenly: Roll the dough into uniform balls. This helps them cook evenly. - Crowding the Basket: Avoid placing too many donut holes in at once. Cook them in batches for the best texture. - Not Flipping: Flip the donut holes halfway through cooking. This helps both sides brown nicely. - Skipping the Coating: Don’t skip the cinnamon sugar coating. It adds a sweet touch that makes these treats special. - Serve Warm: Enjoy them right after cooking. Warm donut holes taste best! - Dipping Sauce: Pair with chocolate or caramel sauce. This adds a fun twist and extra flavor. - Presentation: Place the donut holes in a decorative bowl. A light dusting of cinnamon sugar on top makes them look even more inviting. {{image_4}} You can easily change the flavor of your donut holes. For a chocolate twist, add 1/4 cup of cocoa powder to the dry mix. This gives a rich chocolate taste. If you love fall flavors, try pumpkin spice. Replace the nutmeg and cinnamon in the batter with 2 teaspoons of pumpkin spice. You can also add a little pumpkin puree for moisture. Both options make delightful treats. Want to make these donut holes gluten-free? Swap the all-purpose flour with a gluten-free blend. Look for blends that include xanthan gum. This helps keep the texture light and fluffy. Make sure all other ingredients are gluten-free, too. With this change, everyone can enjoy the treat. While cinnamon sugar is classic, other coatings can add fun. You can use powdered sugar for a sweet and soft touch. Mix powdered sugar with a splash of vanilla for added flavor. For a unique twist, try a chocolate glaze. Melt chocolate chips with a bit of butter, then dip the warm donut holes. Each coating offers a new way to enjoy these bites! To keep your leftover donut holes fresh, place them in an airtight container. They stay tasty for about 1 to 2 days at room temperature. If you want to keep them longer, consider the next steps. To reheat your donut holes, preheat your air fryer to 300°F (150°C). Place the donut holes in the basket for about 3 to 4 minutes. This warms them up and keeps them crispy. You can also use a microwave for 10 to 15 seconds, but they may lose some crunch. You can freeze donut holes for later enjoyment. Allow them to cool completely first. Then, place them in a single layer on a baking sheet. Freeze for about an hour. Once frozen, transfer them to a freezer bag or container. They can last up to 2 months. To enjoy, reheat them in the air fryer as mentioned above. Yes, you can use whole wheat flour. It makes the donut holes denser. The flavor will change a bit, but it still works. You might want to add a little more liquid to keep the dough moist. You can bake these donut holes in a regular oven. Preheat your oven to 350°F (175°C). Place the donut holes on a greased baking sheet. Bake for about 12-15 minutes or until golden brown. Check with a toothpick to see if they are done. Yes, you can use non-dairy milk like almond, soy, or oat milk. Just make sure it is unsweetened. This will keep the flavor close to the original recipe while making it dairy-free. The donut holes are done when they turn golden brown. You can also check by inserting a toothpick into the center. If it comes out clean, they are ready to enjoy! You’ve learned how to make tasty air fryer cinnamon sugar donut holes. We discussed the ingredients, step-by-step instructions, and helpful tips. You can even explore fun flavor variations and smart storage options. These donut holes are fun, easy, and a great treat for everyone. With a little practice, your treat can always be a hit. Enjoy the process and share these delicious bites with friends!

Air Fryer Cinnamon Sugar Donut Holes Delight

Craving something sweet and easy? You’re in for a treat with these Air Fryer Cinnamon Sugar Donut Holes! They’re warm,

- All-purpose flour: 2 ½ cups provide the base for the cookies. - Baking soda and baking powder: 1 teaspoon each helps the cookies rise. - Salt and pumpkin pie spice: ½ teaspoon salt and 1 tablespoon pumpkin pie spice add flavor. - Unsalted butter: 1 cup, softened, gives a rich texture. - Sugars: 1 cup granulated sugar and 1 cup packed brown sugar sweeten the dough. - Eggs: 2 large eggs bind the ingredients together. - Vanilla extract: 1 teaspoon pure vanilla extract enhances the cookie taste. - Pumpkin purée: 1 cup, canned or fresh, forms the filling and adds moisture. - Filling ingredients: 1 cup powdered sugar, 1 teaspoon ground cinnamon, and ¼ teaspoon ground nutmeg sweeten and spice the pumpkin filling. These ingredients come together to create a warm, comforting treat. Each part plays a role in the cookie’s soft texture and rich flavor. Using fresh or canned pumpkin gives you options, so choose what you prefer! Start by mixing the filling ingredients. In a small bowl, combine 1 cup of pumpkin purée, 1 cup of powdered sugar, 1 teaspoon of ground cinnamon, and ¼ teaspoon of ground nutmeg. Whisk until smooth. This step is key for a creamy filling. After mixing, cover the bowl and chill it in the fridge for about 30 minutes. Chilling firms the filling, making it easier to handle later. Next, let's make the cookie dough. In a large mixing bowl, whisk together 2 ½ cups of all-purpose flour, 1 teaspoon of baking soda, 1 teaspoon of baking powder, ½ teaspoon of salt, and 1 tablespoon of pumpkin pie spice. This mix is your dry base. Set it aside. Now, in another bowl, cream 1 cup of softened unsalted butter with 1 cup of granulated sugar and 1 cup of packed brown sugar. Use an electric mixer on medium speed for about 3-5 minutes. The mixture should be light and fluffy. Add 2 large eggs to the butter mix, one at a time. Beat well after each addition. Then, stir in 1 teaspoon of pure vanilla extract. This adds rich flavor to your cookies. Combine the dry and wet ingredients. Gradually add the dry mix into the wet mixture. Stir gently with a spatula until just combined. Avoid overmixing, or your cookies may turn out tough. Chill the dough next. Wrap it in plastic wrap and place it in the fridge for at least 30 minutes to an hour. Chilling helps with handling the dough and reduces spreading during baking. While the dough chills, preheat your oven to 350°F (175°C). This ensures it's hot and ready for the cookies. Once chilled, take the dough out. Form tablespoon-sized balls and flatten each slightly in your palm. Place about a teaspoon of the chilled pumpkin filling in the center. Fold the edges of the dough around the filling, encasing it completely. Roll it into a smooth ball. Arrange the stuffed cookie balls on a parchment-lined baking sheet. Leave about 2 inches of space between each. Bake for 10-12 minutes. The edges should be lightly golden, while the centers remain soft. After baking, let the cookies cool on the baking sheet for 5 minutes. Then, transfer them to a wire rack to cool completely. Enjoy your delicious pumpkin pie stuffed cookies! To make perfect pumpkin pie stuffed cookies, keep these tips in mind: - Avoid tough cookies by not overmixing. When you mix your wet and dry ingredients, stir just until they come together. Overmixing makes the cookies dense and chewy instead of soft and tender. - Ensure cookies retain softness. Chilling the dough helps keep the cookies soft while baking. Once you bake them, do not overbake. The edges should be light golden, while the centers remain soft. Your cookies deserve to look as good as they taste. Here are some ideas: - Dusting with powdered sugar. After the cookies cool, sprinkle a light layer of powdered sugar on top. This adds a sweet touch and makes them look beautiful. - Serving suggestions with ice cream. Pair your cookies with a scoop of vanilla ice cream. The warm cookie and cold ice cream create a delightful mix of flavors and textures. Enjoy this treat during fall or any time of year! {{image_4}} You can change the spices in the pumpkin filling to make it your own. Instead of just pumpkin pie spice, try adding ginger or allspice. These spices give a nice kick to the filling. If you love chocolate, you can mix in some chocolate chips. Dark chocolate or white chocolate both work well. This twist adds sweetness and richness to each bite. For those needing gluten-free options, you can swap the all-purpose flour for a gluten-free blend. Make sure it works well in cookies. This change keeps the cookies soft and tasty. If you're looking for vegan adaptations, use plant-based butter instead of regular butter. You can replace the eggs with flaxseed meal mixed with water. This keeps the dough together without any animal products. Both options let everyone enjoy these cookies. To keep your baked cookies fresh, store them in an airtight container. Line the container with parchment paper to avoid sticking. This helps maintain their soft texture. You can keep them at room temperature for up to five days. If you want to save some cookie dough for later, freezing is a great option. Shape the dough into balls and place them on a baking sheet. Freeze them for about an hour until firm, then transfer to a zip-top bag. Keep the dough in the freezer for up to three months. When you’re ready to bake, you can bake them straight from the freezer. Just add a minute or two to the baking time. These cookies can stay fresh for about five days when stored properly. If you want to enjoy them longer, freezing is the best choice. If you find your cookies have gone stale, don't worry! You can revive them. Simply place a slice of bread in the container with the cookies. The cookies will absorb moisture from the bread and become soft again. This trick works great and brings back that fresh-baked taste! Can I use fresh pumpkin instead of canned? Yes, you can use fresh pumpkin. Just cook and puree it first. Make sure to remove excess water. This keeps the cookie filling from being too runny. How do I know when the cookies are done baking? Look for lightly golden edges. The centers should still be soft. You can gently press on a cookie; it should spring back slightly. Can these cookies be gluten-free? Yes, you can make them gluten-free. Use a gluten-free flour blend. Check for a mix that works well in baking to keep the texture nice. In this article, we covered how to make delicious pumpkin pie stuffed cookies. You learned about the key ingredients, step-by-step instructions, and tips for perfect cookies. We also explored variations and storage tips to keep your treats fresh. Baking these cookies is fun and rewarding. Enjoy sharing them with friends and family. They will love these tasty delights. Remember, good cookies can bring joy to any occasion. Happy baking!

Pumpkin Pie Stuffed Cookies Simple and Delicious Treat

Are you ready to combine two fall favorites into one tasty treat? Imagine biting into a soft cookie with a

- 1 lb cooked chicken breast, shredded - 1 cup BBQ sauce - 12 oz tortilla chips - 2 cups shredded cheddar cheese - 1 cup canned black beans, drained - 1 cup corn kernels - 1/2 red onion, sliced - 1 jalapeño, sliced (optional) - 1/2 cup fresh cilantro, chopped - 1 avocado, diced - Sour cream and lime wedges for serving Gathering your ingredients is the first step. I love using shredded chicken for its ease. Cooked chicken makes this dish quick. You can use leftover chicken or even store-bought rotisserie chicken. The BBQ sauce adds so much flavor. Choose your favorite brand for the best taste. Next, we need tortilla chips. They provide the perfect base for our nachos. I suggest a thicker chip to hold all the toppings well. The shredded cheddar cheese is a must. It melts beautifully and adds creaminess. Now, let's talk about the extras. Black beans and corn give a nice texture. They also add great nutrition. Sliced red onion adds a bit of crunch and flavor. If you like heat, toss in jalapeños. They can really spice things up. Lastly, garnishes are key. Chopped cilantro adds freshness. Diced avocado gives creaminess. Don't forget the sour cream and lime wedges. They bring everything together when you serve. With these ingredients, you are well on your way to a tasty meal. - Preheat oven to 400°F (200°C). - Prepare baking sheet with parchment paper. - Coat shredded chicken with BBQ sauce. - Layer tortilla chips on the baking sheet. - Distribute BBQ chicken over the chips. - Add black beans and corn on top. - Top with red onion and jalapeño slices. - Sprinkle cheddar cheese evenly. - Bake for 15-20 minutes until cheese is bubbly. Start by setting your oven to 400°F (200°C). This temperature will help melt your cheese perfectly. Next, grab a large baking sheet and line it with parchment paper. This step makes cleanup easy and helps prevent sticking. Now for the fun part! In a bowl, take your shredded chicken and pour in the BBQ sauce. Stir it well until every piece is covered. This will give your nachos a tasty, smoky flavor. Next, lay out your tortilla chips on the baking sheet. Make sure they are in a single layer with some space between them. This way, each chip gets some love. Once your chips are ready, spread the BBQ chicken mix on top. Try to cover as many chips as you can. Then, sprinkle the black beans and corn over the chicken. These ingredients add texture and flavor. Now, it’s time for the final touches! Add thin slices of red onion and jalapeños if you like some heat. Spread them evenly for a big flavor boost. Then, cover everything with a generous layer of shredded cheddar cheese. This will create that gooey, cheesy goodness. Pop the baking sheet into the preheated oven. Bake for 15-20 minutes. Keep an eye on it as the cheese melts and bubbles. When it’s ready, take it out and admire your work! For a burst of freshness, top the nachos with chopped cilantro and diced avocado. Serve it hot with sour cream and lime wedges on the side. Enjoy your easy family meal! You can serve your nachos right on the baking sheet. This gives a fun, rustic look. If you want something fancier, use a large platter. It makes sharing easy. Before serving, add extra toppings like cilantro or jalapeños. This adds color and flavor. Watch the nachos as they bake. They can go from bubbly to burnt quickly. It’s best to check them around the 15-minute mark. Make sure to spread toppings evenly. This helps each chip get a good flavor. No one likes a plain chip! Feel free to switch out the chicken. Pulled pork or beef also works great. This gives a new taste to the dish. You can also change the cheese. Try using pepper jack or a blend for a unique flavor. Experiment with what you like best! {{image_4}} To make a vegetarian version of sheet-pan BBQ chicken nachos, you can easily swap out the chicken. Replace it with grilled vegetables like bell peppers, zucchini, and mushrooms. These veggies add great flavor and texture. You can also add more beans, like pinto or kidney beans, for extra protein and heartiness. This way, you keep the dish filling and delicious without meat. Want to kick up the heat? A simple way to do this is by increasing the jalapeño quantity. You can add more slices on top of your nachos for a spicy bite. Another idea is to mix in some hot sauce into your BBQ chicken. This adds a nice zing and balances the sweetness of the BBQ sauce. You can control the spice level based on your taste. For a gourmet twist, consider adding unique toppings. Chopped olives or pickled jalapeños can add a nice briny flavor. They pair well with the richness of the cheese. You can also drizzle ranch dressing or spicy mayo over the nachos before serving. This extra step makes the dish feel more special and adds layers of flavor that everyone will love. - Store leftovers in an airtight container. - Consume within 2-3 days for best taste. When you have extra nachos, pack them up right away. This keeps them fresh. I suggest using glass containers or heavy-duty plastic. This helps avoid spills and keeps flavors intact. - Reheat in the oven for best texture. - Avoid microwave to prevent sogginess. To reheat, set your oven to 350°F (175°C). Spread the nachos on a baking sheet. Heat them for about 10 minutes. This helps the chips stay crispy. Microwaving makes them soft and chewy, which is not ideal. - Freeze assembled nachos before baking. - Bake straight from the freezer, adjusting time. If you want to save some nachos for later, freeze them! Just layer everything on a baking sheet, then cover with plastic wrap. When you're ready to eat, bake directly from the freezer. Just add a few extra minutes to the cooking time. Yes, prepare all ingredients and assemble just before baking. This keeps flavors fresh. To do this, shred the chicken and mix it with BBQ sauce. You can also slice the veggies and cheese. Store each item in separate containers. When you're ready, just layer everything on the chips and bake. This method saves time on busy nights. Try salsa, cheese sauce, or homemade sauces for different flavors. Each option adds a unique taste to your nachos. Salsa brings a fresh kick, while cheese sauce makes it creamy. If you want something special, blend your own sauce. Mix ketchup, mustard, brown sugar, and spices for a quick BBQ flavor. Yes, they can be made in batch and stored for quick meals. Make a large batch and keep it in the fridge. You can heat them up for lunch or dinner. Just remember to reheat in the oven to keep the chips crispy. This makes meal prep easy and fun for the whole family. Avoid overloading with toppings and serve immediately after baking. A good balance is key. Layer the chips first, then add toppings evenly. This method helps the chips stay crunchy. If you want extra crunch, bake the chips for a few minutes before adding toppings. Enjoy your perfect nachos! These Sheet-Pan BBQ Chicken Nachos are simple and fun to make. You only need a few main ingredients, like chicken, cheese, and tortilla chips. The steps are easy to follow, ensuring tasty nachos every time. Whether you make them spicy or add veggies, they work for any gathering. Remember to store any leftovers properly for the best flavor. Now, enjoy your delicious nachos and impress your friends!

Sheet-Pan BBQ Chicken Nachos for Easy Family Meal

Looking for a fun, easy dinner idea? Try my Sheet-Pan BBQ Chicken Nachos! This dish combines tender chicken, zesty BBQ

To make this tasty dish, gather these ingredients: - 12 oz. linguine or spaghetti - 1 lb. large shrimp, peeled and deveined - 4 cloves garlic, finely minced - 2 tablespoons extra virgin olive oil - 1 cup heavy cream - 1 cup low-sodium chicken broth - Zest and juice of 1 lemon - 1 cup cherry tomatoes, halved - 1 cup fresh spinach leaves - 1/2 cup grated Parmesan cheese - Salt and freshly ground black pepper to taste - Fresh parsley, chopped (for garnish) You can swap ingredients to fit diets. Here are some ideas: - Use whole wheat pasta instead of regular pasta for more fiber. - Swap shrimp for chicken or tofu for a different protein. - Use vegetable broth instead of chicken broth for a vegetarian option. - Replace heavy cream with coconut milk for a dairy-free version. - Try nutritional yeast instead of Parmesan for a vegan twist. Fresh shrimp taste great, but frozen shrimp are often just as good. They are usually frozen right after catch. This keeps their flavor and texture. When using frozen shrimp, thaw them overnight in the fridge or under cold water. Fresh shrimp can be more expensive, but they have a nice snap and flavor. Both options can work well in your creamy lemon garlic shrimp pasta. To start, heat 2 tablespoons of extra virgin olive oil in a large pot. Use medium heat. Once hot, add 4 cloves of minced garlic. Sauté for about 1 minute until it smells great. Be careful not to burn the garlic. This step adds a lot of flavor to your dish. Next, add 1 pound of peeled and deveined shrimp. Season with salt and freshly ground black pepper. Cook for 2-3 minutes. The shrimp will turn pink when done. Once cooked, take the shrimp out and set them aside. In the same pot, pour in 1 cup of low-sodium chicken broth. Add 1 cup of heavy cream, the zest, and juice of 1 lemon. Stir well and bring it to a gentle simmer. This creates a rich sauce. Add 12 ounces of linguine or spaghetti directly into the simmering sauce. Check the package for cooking time, usually 9-11 minutes. Stir occasionally to keep the pasta from sticking. Cook until the pasta is al dente. Once your pasta is cooked, fold in 1 cup of halved cherry tomatoes, 1 cup of fresh spinach, and the cooked shrimp. Mix it all together. The spinach will wilt in just 1-2 minutes. This step adds color and nutrition. Taste your dish and adjust seasoning. You might want more salt, pepper, or lemon juice for extra flavor. Serve your creamy lemon garlic shrimp pasta hot. Garnish with freshly chopped parsley for a beautiful finish. To cook shrimp perfectly, be mindful of their color. They should look pink and opaque. Avoid overcooking them, as they can become rubbery. Cooking for 2-3 minutes should be enough. Always remove them from the heat when they are just done. This keeps them tender and juicy. For a creamy sauce, the right ratio of chicken broth to cream is key. Use 1 cup of each. This balance helps create a rich texture. Stir well as the sauce simmers. The heat helps the sauce thicken. If it’s too thick, add a splash of chicken broth. If it’s too thin, let it simmer a bit longer. The goal is a smooth, luscious sauce that clings to the pasta perfectly. To make this creamy lemon garlic shrimp pasta, you need some key tools: - Large pot or deep skillet - Cutting board - Sharp knife - Measuring cups and spoons - Wooden spoon or spatula - Serving plates These tools will help you cook efficiently and serve the dish nicely. When cooking shrimp pasta, watch out for these common mistakes: - Overcooking shrimp: Cook shrimp for just 2-3 minutes until pink. - Burning garlic: Sauté garlic for only 1 minute to avoid bitterness. - Not salting the pasta water: This adds flavor to the pasta. - Adding shrimp too early: Cook shrimp last to keep them tender. Avoiding these mistakes will help you create a perfect dish every time. To add more flavor to your pasta, consider these herbs and spices: - Fresh basil: Adds a sweet aroma. - Red pepper flakes: Gives a nice heat. - Dried oregano: Adds depth and earthiness. - Fresh thyme: Offers a subtle, herbal note. Feel free to experiment with these to make your dish unique! {{image_4}} If you want a meat-free meal, switch the shrimp for firm tofu or chickpeas. Both add protein and texture. Use coconut cream or a vegan cream substitute for the sauce. You can still enjoy the lemon and garlic flavors. Just remember to sauté the garlic in olive oil before adding it to the cream. While linguine or spaghetti are great, other pasta types work too. Fusilli, penne, or even gluten-free pasta can all shine in this dish. Choose what you like best or what you have on hand. The key is to cook it until it's al dente. This way, it will soak up the creamy sauce perfectly. Boost the health of your meal by adding more veggies. Spinach is great, but you can also add zucchini, bell peppers, or broccoli. Just chop them small and toss them in with the pasta. This increases the vitamins and makes the dish even more colorful. You can enjoy a tasty meal while being healthy too! To keep your One-Pot Creamy Lemon Garlic Shrimp Pasta fresh, store it in an airtight container. Make sure it cools down to room temperature first. Then, place it in the fridge. It’s best to eat leftovers within three days. If you wait too long, flavors may change. When you’re ready to reheat, use the stove for the best results. Heat in a pan over medium-low heat. Add a splash of chicken broth or a bit of cream to keep it creamy. Stir often to avoid burning. If you use a microwave, cover the bowl to keep moisture in. Heat in short bursts, stirring in between. You can freeze this pasta, but it’s best to do so without the shrimp. Cooked shrimp can turn rubbery when frozen. Cool the pasta and sauce completely, then place in a freezer-safe container. It should last up to three months. When ready to eat, thaw in the fridge, then reheat on the stove. Yes, you can make this recipe ahead of time. Cook the pasta and shrimp. Then, mix them with the sauce just before serving. This keeps the pasta fresh and tasty. Store everything in the fridge for up to two days. Reheat gently in a pan on low heat. This helps avoid overcooking the pasta and shrimp. If your pasta is overcooked, you can try a few tricks. First, drain the pasta and rinse it under cold water. This stops the cooking process. Next, quickly reheat it in a pan with a bit of olive oil. This can help revive its texture. Adding sauce can also help hide the softness. Yes, you can use different types of cream. Half-and-half works well for a lighter option. You can also try coconut cream for a dairy-free choice. Keep in mind that the flavor and texture may change slightly. Adjust the amount to get the creaminess you want. This blog post covered how to make One-Pot Creamy Lemon Garlic Shrimp Pasta. We explored important ingredients, cooking steps, and tips for success. You learned about shrimp choices, substitutions, and variations to fit your needs. Remember, the right tools and methods make a big difference. Try adding more veggies or changing the pasta. With practice, you can create a dish that impresses and warms anyone's heart. Enjoy your cooking journey!

One-Pot Creamy Lemon Garlic Shrimp Pasta Delight

Get ready to impress with a dish that’s as easy as it is delicious! In this blog post, I will

- 1 cup graham cracker crumbs - 1/4 cup unsalted butter, melted - 2 cups cream cheese, softened at room temperature - 1 cup powdered sugar, sifted - 1/2 cup heavy whipping cream - 2 tablespoons matcha green tea powder - 1 teaspoon vanilla extract - Pinch of salt - Fresh berries (such as strawberries or blueberries) - Mint leaves Gather these simple ingredients. The graham crackers offer a sweet crunch. The melted butter helps bind the crust together. Cream cheese brings a rich and creamy texture. Powdered sugar adds sweetness without grittiness. Heavy whipping cream makes the cheesecake light and fluffy. Matcha green tea powder gives your cheesecake a unique flavor. It also adds a lovely green color. Vanilla extract enhances the other flavors. A pinch of salt balances the sweetness perfectly. For garnishes, fresh berries add a pop of color and freshness. Mint leaves bring a touch of elegance. You can mix and match your favorite berries for a fun twist. Now you're all set to create a delicious no-bake matcha cheesecake! To make the crust, start by mixing graham cracker crumbs and melted butter in a bowl. Use a fork or your hands to blend them until they look like wet sand. Next, press this mixture firmly into the bottom of a 9-inch springform pan. Make sure it is even and compact. This step is key for a solid base. Once done, chill the crust in the refrigerator while you prepare the filling. Now, let’s make the cheesecake filling. In a large bowl, beat the softened cream cheese with an electric mixer. Mix it until it is smooth and creamy. Then, slowly add the sifted powdered sugar. Keep mixing until no lumps remain. This makes it sweet and fluffy. In a small bowl, whisk together the matcha green tea powder and a pinch of salt. Add 2 tablespoons of warm water. Whisk until it is smooth. Slowly pour this matcha mixture into the cream cheese mix. Blend on low speed until the color is even and vibrant. Next, it’s time to whip the cream. In a clean bowl, whip the heavy cream with an electric mixer until soft peaks form. Be careful not to over-whip or it will become too stiff. Gently fold the whipped cream into the matcha cream cheese mixture using a spatula. This keeps the mixture light and airy. Finally, pour the silky matcha cheesecake filling over the chilled graham cracker crust in the springform pan. Use a spatula to smooth the top for an even finish. Cover the pan with plastic wrap and refrigerate the cheesecake for at least 4 hours. For the best results, let it chill overnight. When ready to serve, carefully remove the cheesecake from the springform pan. Use a sharp knife to slice it into pieces. For a beautiful touch, top each slice with fresh berries and sprinkle with mint leaves before serving. Enjoy this tasty no-bake matcha cheesecake! To get the best texture, start with softened cream cheese. This is key for a smooth filling. Cold cream cheese can create lumps. Let your cream cheese sit at room temperature for about 30 minutes to soften. Next, be careful not to over-whip the heavy cream. This can lead to a grainy texture in your cheesecake. Whip until you see soft peaks, then stop. Gently fold it into the cream cheese mix to keep it light and airy. For a more complex flavor, you can pair matcha with other tastes. Citrus zest, like lemon or orange, can brighten the cheesecake. A hint of almond extract also works well. When it comes to sweeteners, powdered sugar is great for smoothness. But you can try honey or agave syrup if you prefer. Just remember to adjust the amount to your taste. Presentation makes your cheesecake even more inviting. Serve it on a decorative platter to impress your guests. For garnishing, fresh berries are perfect. Strawberries and blueberries add color and flavor. A sprinkle of mint leaves adds a nice touch too. Drizzle honey or agave syrup on top for an elegant finish. This adds sweetness and visual appeal. {{image_4}} You can switch up the flavor of your no-bake matcha cheesecake. One fun idea is to add chocolate. Mix in some melted dark chocolate to your matcha cream cheese mixture. This gives you a rich matcha-chocolate delight. You can also try different fruit toppings. Fresh strawberries or blueberries add sweetness and color. Try mango or kiwi for a tropical twist. The options are endless! If you need a gluten-free version, no problem! Simply swap out the graham cracker crumbs with gluten-free alternatives. You can use almond flour or gluten-free cookie crumbs. Just make sure to mix them with melted butter as you would with regular crumbs. This will create a lovely crust without any gluten. Your dessert will still taste amazing! Want a vegan cheesecake? It’s easy! Use vegan cream cheese in place of regular cream cheese. For the whipped cream, use whipped coconut cream instead. Just chill a can of coconut milk overnight, then whip it up. This gives you the same creamy texture and flavor. Your guests won’t even know it’s vegan! Enjoy a tasty dessert that fits your diet. To keep your no-bake matcha cheesecake fresh, refrigerate it right away. Place the cheesecake in an airtight container or cover it well with plastic wrap. This prevents it from absorbing strong odors in the fridge. Your cheesecake will stay fresh for about 3 to 5 days. To freeze your cheesecake, first, cut it into slices. Wrap each slice tightly in plastic wrap, then place them in a freezer bag. This helps protect the texture and flavor. Your cheesecake can last up to two months in the freezer. When you’re ready to enjoy it, move the slices to the fridge. Allow about 4 to 6 hours for thawing. If you want to speed this up, place the slices at room temperature for about 30 minutes. This helps keep the creamy texture intact. Yes, you can! Some good alternatives are: - Granulated sugar (blend it to make it fine) - Coconut sugar (offers a rich flavor) - Maple syrup (adds a nice hint of sweetness) Each sweetener will change the taste a bit. Experiment with what you like best. The no-bake matcha cheesecake lasts about 5 days in the fridge. Keep it covered to keep it fresh. After that, it may lose its taste and texture. Absolutely! Here are some options: - Spirulina (for a green boost) - Chai powder (for a spiced flavor) - Cocoa powder (for a chocolatey twist) These options will change the taste but can be fun to try! You now know how to create a delicious no-bake matcha cheesecake. From the simple crust to the creamy filling, each step builds flavor and texture. Using fresh fruits and mint adds a delightful touch. Remember to follow the tips for the best results, like softening the cream cheese and choosing the right sweetener. Feel free to explore variations, too, to make this recipe your own. Enjoy making this treat that’s as pleasing to the eyes as it is to the taste buds!

No-Bake Matcha Cheesecake Tasty and Easy Delight

Looking for a dessert that’s both easy and delicious? You’ve found it! This No-Bake Matcha Cheesecake is a tasty delight

Older posts
Newer posts
← Previous Page1 … Page9 Page10 Page11 … Page83 Next →

dsad

© 2026 eataroundit • Built with GeneratePress

Our Policies

  • Copyright Policy
  • Cookie Policy
  • GDPR Policy
  • Privacy Policy
  • Disclaimer
  • Terms Of Use

More Information

  • Home
  • About
  • Contact
  • Appetizers
  • Dessert
  • Dinner
  • Drinks
©2026, eataroundit About Back To Top