Skip to content
DisclaimerTerms Of UseGDPR PolicyCookie Policy

eataroundit

  • Home
  • Drinks
  • Appetizers
  • Dinner
  • Dessert
  • About
  • Contact
  • Privacy Policy
DisclaimerTerms Of UseGDPR PolicyCookie Policy

NO-ING-IMG

- 1 block firm tofu, drained and pressed - 2 tablespoons cornstarch - 2 tablespoons vegetable oil Tofu is the star of this dish. I always use firm tofu for its great texture. First, press the tofu to remove excess water. This step helps the tofu become crispy when cooked. Cut the tofu into small cubes to ensure even cooking. Coat the tofu cubes with cornstarch for a crunchy finish. - 1 red bell pepper, finely diced - 1 medium carrot, grated - 3 green onions, sliced (whites and greens separated) Fresh veggies make this dish pop! I love using red bell pepper for its sweetness and color. Grated carrot adds a nice crunch, while green onions give a burst of flavor. Remember to separate the white and green parts of the onions. This adds depth to your meal. - 2 tablespoons sweet chili sauce - 1 tablespoon soy sauce - 1 teaspoon sesame oil The sauce ties everything together. Sweet chili sauce brings a delightful sweetness, while soy sauce adds umami. A little sesame oil gives a rich, nutty flavor. Mix these ingredients well to ensure every bite is packed with taste. To start, cut the pressed tofu into small cubes, about 1 inch wide. This size helps the tofu cook evenly. Use a paper towel to pat the cubes dry. This step is key. It removes moisture, which helps the tofu become crispy when cooked. Next, heat vegetable oil in a large skillet over medium-high heat. Wait until the oil shimmers, then add the tofu cubes. Cook for about 5-7 minutes. Turn the cubes often for even browning. You want them crispy and golden on all sides. Once the tofu is ready, add the diced red bell pepper, grated carrot, and the white parts of the green onions to the skillet. Sauté these for about 3-4 minutes. Stir them occasionally. You want the veggies tender but still crisp. In a small bowl, mix the sweet chili sauce, soy sauce, and sesame oil. Pour this sauce over the tofu and veggies. Stir gently to coat everything. Cook for another 1-2 minutes until it is all heated through. Remove the skillet from heat. Let the mixture cool for a few minutes. Then, take a leaf of butter lettuce. Place it on your plate. Spoon a generous amount of the tofu mix into the center of the leaf. Let some overflow for a fun look. To finish, add the green tops of the sliced green onions on top. Sprinkle fresh cilantro leaves over the cups. If you like, add sesame seeds for a nice touch. These garnishes make your dish pop with color and flavor! To make crispy tofu, start by pressing it well. Remove as much water as you can. Cut the tofu into small, even cubes. This helps them cook evenly. Pat the cubes dry with a paper towel. Next, coat the tofu in cornstarch. This creates a nice crunch when cooked. Heat vegetable oil in a skillet until it's hot. Carefully add the tofu and let it cook undisturbed for a few minutes. This way, it browns nicely on all sides. Turn the tofu gently to avoid breaking it. Cook until golden and crispy. For lettuce cups, I recommend butter lettuce or iceberg lettuce. Butter lettuce is soft and pliable, making it easy to fold. Iceberg has a nice crunch and keeps its shape well. Both types add great texture to your dish. When choosing lettuce, look for fresh, green leaves. Avoid any that are wilted or brown. Wash the leaves gently and pat them dry before use. This ensures they are clean and crisp when you serve. To serve your sweet chili tofu lettuce cups, arrange them on a big platter. It looks colorful and inviting. You can add extra sweet chili sauce in a small bowl for dipping. This gives everyone a chance to add more flavor if they want. For a fun twist, add some fresh herbs like cilantro on top. You can also sprinkle sesame seeds for a bit of crunch. These small touches make your dish even more appealing. Enjoy your tasty creation with friends or family! {{image_4}} You can swap tofu for other proteins. Tempeh is a great choice. It has a nutty flavor and is high in protein. You can also use cooked chicken for a meatier option. Just cut it into small pieces. Cook it until golden before adding the vegetables. This gives a nice texture. Feel free to change the veggies. You can add shredded cabbage for crunch. Mushrooms can add a nice umami flavor. Swap red bell pepper for zucchini or snap peas for a twist. Carrots can be replaced with radishes for a peppery kick. Be creative and use what you love! The sauce is key to flavor. You can adjust it based on your taste. Add lime juice for a zesty kick. Try hoisin sauce for a sweeter, richer taste. If you like it spicy, add some chili flakes or sriracha. Mix and match sauces to find your perfect blend! To store leftovers, place the tofu and vegetable mix in an airtight container. Make sure to separate the filling from the lettuce leaves. Store everything in the fridge for up to three days. This keeps the lettuce fresh and crisp. When ready to eat, gently reheat the tofu mixture. Use a skillet over low heat. Stir occasionally until warmed through. Avoid microwaving, as it can make the tofu soggy. Enjoy the freshness and flavor as if it were just made! You can freeze the tofu filling, but not the lettuce. Place the cooled mixture in a freezer-safe bag. Remove as much air as possible before sealing. It will last for up to two months. When ready to eat, thaw overnight in the fridge and reheat as described above. Yes, you can use frozen tofu. Freezing tofu changes its texture, making it spongy. This helps it soak up sauces better. Just remember to thaw it first. Drain the water and press it well before cooking. You can use a mix of honey and Sriracha as a substitute. This blend gives a sweet and spicy flavor. Alternatively, mix soy sauce with a little sugar for a milder taste. Adjust the amounts to match your taste. To make this dish vegan, simply replace the honey with maple syrup. Ensure the soy sauce is vegan-friendly. Most brands are, but it’s good to check. This keeps the flavors while meeting vegan needs. Yes, you can prepare the filling in advance. Cook the tofu and vegetables, then store them in the fridge. Just reheat before serving. This saves time and makes meal prep easy. Enjoy fresh lettuce cups any day! In this blog post, we explored making delicious tofu lettuce cups. We covered ingredient details, including tofu, veggies, and sauce. You learned step-by-step cooking instructions and tips for the perfect crispy tofu. We shared variations for protein and sauce, plus storage advice for leftovers. Tofu lettuce cups are fun and easy to make. They fit many diets and tastes. Enjoy experimenting with flavors and share your tasty results!

Sweet Chili Tofu Lettuce Cups Fresh Flavorful Treat

If you’re craving a fresh and tasty dish, try these Sweet Chili Tofu Lettuce Cups! They’re easy to make and

To make S’mores Rice Krispie Treats, you need simple and tasty ingredients. Here’s what you will need: - 4 cups Rice Krispies cereal - 3 cups mini marshmallows (plus additional for topping) - 5 tablespoons unsalted butter - 1 cup graham cracker crumbs - 1 cup milk chocolate chips (or chopped chocolate bars) - 1 teaspoon vanilla extract - Pinch of salt Each ingredient plays a key role. The Rice Krispies give a nice crunch. Mini marshmallows create the gooey texture we love. Butter makes everything stick together. Graham cracker crumbs add that classic s’mores flavor. Milk chocolate brings sweetness, while vanilla and salt enhance the taste. When you gather these ingredients, ensure they are fresh. Fresh ingredients help the flavors shine. You can also customize the chocolate type or add extras like nuts. Get ready to create a fun treat that everyone will enjoy! To start, take a large pot and put it on low heat. Add your unsalted butter. Stir it gently to keep it from browning. If butter browns, it can change the flavor. You want it to melt smoothly and stay golden. Once the butter melts, add the mini marshmallows. Use a wooden spoon or spatula to stir. Keep stirring until the marshmallows melt and blend into the butter. This part is key for a smooth mixture. It helps to combine the flavors well. After the marshmallows melt, take the pot off the heat. Stir in one teaspoon of vanilla extract. This adds a warm, sweet flavor. Then, add a pinch of salt. The salt balances out the sweetness and makes the treats taste even better. Next, it’s time for the Rice Krispies and graham cracker crumbs. Slowly fold in four cups of Rice Krispies and one cup of graham cracker crumbs. Make sure every piece gets coated with the marshmallow mix. This ensures every bite has that s’mores taste. Now, add one cup of milk chocolate chips. Gently fold them into the mixture. This helps to spread the chocolate evenly. You want pockets of melted chocolate in every square, giving a rich flavor. Lightly grease a 9x13 inch baking pan with butter. This keeps the treats from sticking. After greasing, pour the mixture into the pan. Use a spatula or your hands to press it down firmly. Make sure it’s even, so the treats cut nicely later. Sprinkle extra mini marshmallows on top of the pressed mixture. Gently press them down into the surface. This helps them stick when cooled. Let the treats cool at room temperature for about 30 minutes. This cooling time is important for setting them. After that, cut them into squares. Enjoy your delicious s’mores Rice Krispie treats! - Use fresh marshmallows for the best texture. - Melt butter on low heat to avoid browning. - Stir marshmallows slowly until smooth and creamy. - Press the mixture firmly into the pan for a solid treat. To achieve the best texture, you want a nice balance. The treats should be soft but not sticky. Using fresh marshmallows helps keep them fluffy. Also, when you melt the butter, keep the heat low. This stops the butter from browning, which can change the flavor. Stir the marshmallows slowly, so they melt evenly. Once mixed with the Rice Krispies, press the mixture firmly in the pan. This makes it easier to cut into squares later. - Try dark chocolate for a richer taste. - Add chopped nuts for a crunchy texture. - Mix in peanut butter for a nutty twist. - Use flavored marshmallows for extra fun. You can make these treats your own! If you like dark chocolate, swap it for milk chocolate. It gives a deeper flavor that many enjoy. Adding chopped nuts, like walnuts or almonds, brings a nice crunch. For a nutty twist, mix in some peanut butter with the melted marshmallows. You can even find flavored marshmallows, like s'mores or caramel, to give your treats a special touch. - Cut into fun shapes with cookie cutters. - Drizzle melted chocolate on top for flair. - Serve with extra graham cracker crumbs on the side. - Place treats on a colorful platter for a party vibe. When serving, make it fun! Use cookie cutters to create shapes like stars or hearts. Drizzle some melted chocolate on top to make them look fancy. You can also serve extra graham cracker crumbs on the side. This adds a fun crunch with each bite. If you're hosting, arrange the treats on a bright platter. It makes them look even more tempting! {{image_4}} You can make these treats gluten-free! Use gluten-free graham crackers and cereal. Many brands offer tasty options. Just check the labels to ensure they are certified gluten-free. It’s an easy switch and everyone can enjoy them! Want to make these treats vegan? Simply swap out the butter for coconut oil or vegan butter. For marshmallows, look for vegan marshmallows. They melt well and add that sweet touch. These changes keep the flavor while meeting dietary needs. You can mix things up with different flavors! Try using dark chocolate instead of milk chocolate. Add nuts, like pecans or walnuts, for a crunchy bite. You can even sprinkle in some peanut butter chips or mint chocolate for a fun twist. The options are endless, so get creative! To keep your S'mores Rice Krispie Treats fresh, store them in an airtight container. This helps maintain their chewy texture. Place a piece of parchment paper between layers to avoid sticking. Keep them at room temperature for up to three days. If you want them to last longer, consider freezing them. Freezing these treats is easy. First, let them cool completely in the pan. Once cool, cut them into squares. Wrap each square tightly in plastic wrap. Then place them in a freezer-safe bag or container. Label the bag with the date. They will stay fresh in the freezer for up to three months. When you’re ready to enjoy them, simply thaw at room temperature for a few hours. If you want to bring your treats back to life, you can reheat them. Place a square in the microwave for about 10-15 seconds. This softens them up nicely. Avoid overheating, as they can become too gooey. You can also warm them in the oven at a low temperature, around 200°F, for about 5-10 minutes. Enjoy them warm for a delightful treat! S'mores Rice Krispie Treats add graham cracker crumbs and chocolate to the mix. This gives them a rich flavor. Regular Rice Krispie Treats only use marshmallows and cereal. The extra ingredients make these treats taste like a campfire s'more. You get that sweet, gooey, and crunchy bite all in one! Yes, you can use different types of chocolate. Milk chocolate is classic, but dark chocolate adds a nice twist. White chocolate also works well if you want a sweeter taste. You can even mix chocolates for a fun flavor combo. Just make sure to chop chocolate bars into smaller pieces for better melting. These treats last for about 3 to 5 days at room temperature. Store them in an airtight container to keep them fresh. If you notice them getting hard, they may be on their way out. You can also refrigerate them for longer freshness, but they may become a bit chewy. Absolutely! You can make these treats a day or two ahead. Just keep them in an airtight container. This makes them great for parties or gatherings. You can also prepare the mixture and press it into the pan. Then, chill it just before serving. To prevent staleness, store them in an airtight container right after they cool. Avoid leaving them uncovered. You can also add a slice of bread to the container. This helps keep moisture in and keeps your treats soft. You now have all the steps to create the perfect S’mores Rice Krispie Treats. From gathering your ingredients to customizing flavors, each tip helps you make them great. Remember to store your treats properly so they stay fresh. This recipe is fun to make and share. I hope you enjoy every bite of your delicious treats. Now, get in the kitchen and start creating!

S’mores Rice Krispie Treats Fun and Easy Recipe

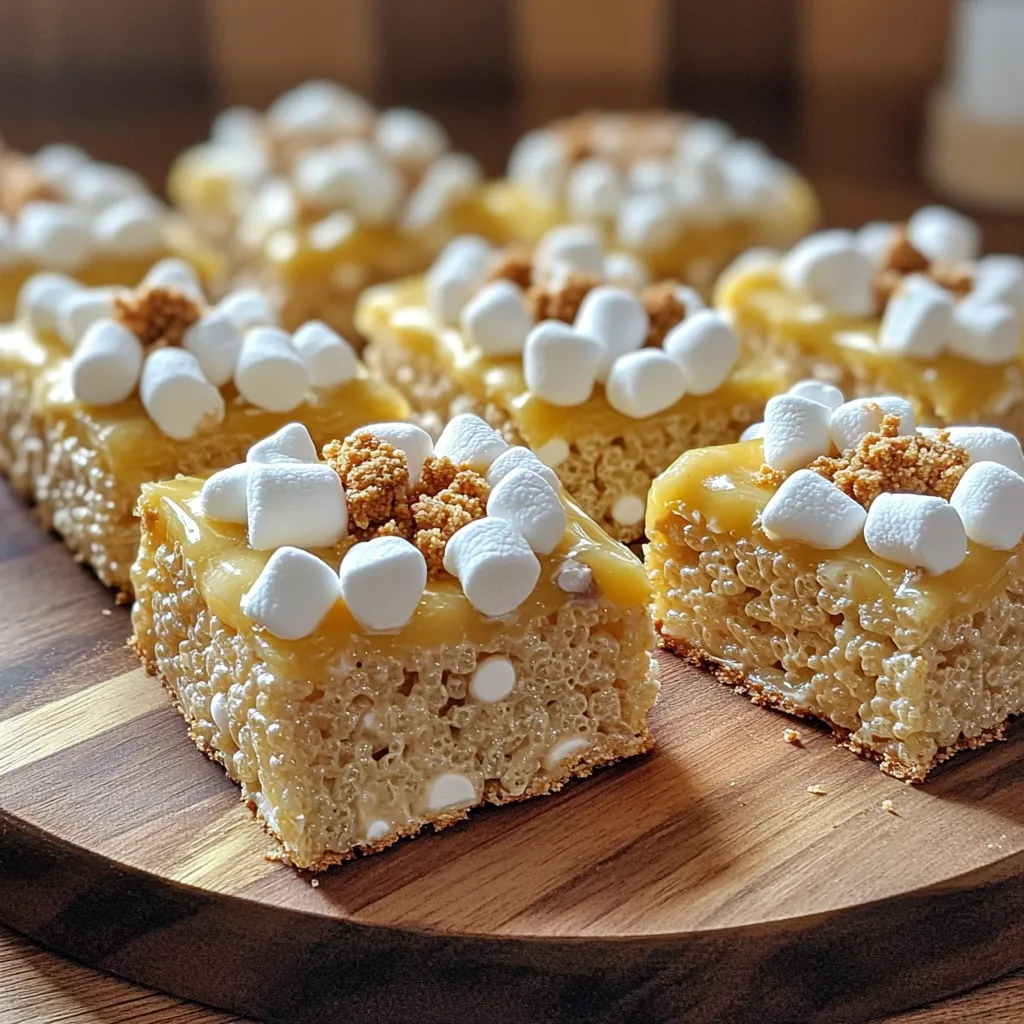
Get ready for a sweet twist on a classic treat! My S’mores Rice Krispie Treats combine gooey marshmallows, crunchy graham

To make Creamy Sun-Dried Tomato Orzo, gather these items: - 1 cup orzo pasta - 2 tablespoons extra-virgin olive oil - 3 cloves garlic, minced - 1 cup sun-dried tomatoes, finely chopped - 1 cup vegetable broth - 1 cup heavy cream (or coconut cream for a dairy-free alternative) - 1 cup fresh spinach, roughly chopped - 1/2 cup grated Parmesan cheese (or nutritional yeast for a vegan alternative) - Salt and freshly ground black pepper, to taste - Fresh basil leaves, for garnishing You can easily modify this recipe for dietary needs. If you're vegan, swap heavy cream for coconut cream. Instead of Parmesan cheese, use nutritional yeast. For gluten-free options, try gluten-free orzo or another gluten-free pasta. These swaps keep the dish delicious while fitting your diet. For the best flavor, I recommend these brands: - Orzo Pasta: Look for Barilla or DeLallo for good quality. - Olive Oil: Choose a high-quality extra-virgin olive oil like California Olive Ranch. - Sun-Dried Tomatoes: Opt for brands like Bella Sun Luci for rich taste. - Heavy Cream: If dairy-free, try So Delicious coconut cream. - Parmesan Cheese: For a good vegan substitute, check out Violife or nutritional yeast from Bragg. These choices will elevate your creamy orzo dish. Enjoy the wonderful flavors! First, bring a large pot of salted water to a boil. Add 1 cup of orzo pasta. Cook the orzo according to the package instructions until it is al dente. This usually takes about 8 to 10 minutes. Once done, drain the pasta and set it aside. In a large skillet, heat 2 tablespoons of extra-virgin olive oil over medium heat. Add 3 minced garlic cloves and sauté for 1 to 2 minutes. You want the garlic to get fragrant but not brown. If it browns, the flavor turns bitter. Next, add 1 cup of finely chopped sun-dried tomatoes. Cook for another 2 to 3 minutes to help release their flavors. Pour in 1 cup of vegetable broth and bring it to a gentle simmer. Let it simmer for about 5 minutes. This helps concentrate the flavors. Now, slowly stir in 1 cup of heavy cream. Bring the mixture back to a simmer. Add in 1 cup of roughly chopped fresh spinach. Stir until the spinach wilts and blends into the sauce. Once the spinach wilts, add the cooked orzo to the skillet. Mix it thoroughly with the creamy sauce and the vegetables. Sprinkle in 1/2 cup of grated Parmesan cheese. Stir until the cheese melts, creating a rich, creamy texture. Taste the dish and add salt and freshly ground black pepper as needed. Remove the skillet from heat and let it rest for a couple of minutes. This will help the sauce thicken. Serve your creamy sun-dried tomato orzo in deep bowls and garnish with fresh basil leaves. Enjoy your delicious creation! To get the creamiest orzo, use heavy cream. It gives the sauce a rich feel. If you want a lighter option, try coconut cream. Both work well. Stir in the cheese slowly. This helps it melt evenly. Let the dish sit after cooking. This allows the sauce to thicken nicely. Adding more flavors can make this dish shine. Try fresh herbs like thyme or oregano. These add a nice touch. You can also use olives for a salty bite. If you like heat, add red pepper flakes. Just a pinch can make a big difference. One mistake is overcooking the garlic. It can turn bitter fast. Keep an eye on it as you sauté. Another mistake is skipping the seasoning. Salt and pepper heighten the flavors. Always taste your dish before serving. Lastly, don't rush the sauce. Let it simmer a bit to bring out all the flavors. {{image_4}} You can easily make this dish vegan. Replace the heavy cream with coconut cream. This keeps the creamy texture while adding a subtle flavor. Use nutritional yeast instead of Parmesan cheese. It gives a cheesy taste without dairy. This way, everyone can enjoy the meal. Want to make this dish heartier? You can add proteins like chicken or shrimp. For chicken, use cooked, diced pieces. Stir them into the sauce before adding the orzo. For shrimp, sauté them in the skillet before adding the sun-dried tomatoes. Both options add great flavor and make it filling. Seasonal veggies can enhance this recipe. Think about adding zucchini, bell peppers, or asparagus. Cut them into small pieces and sauté them with the garlic. This adds color and nutrition. You can also use frozen peas for a quick option. These veggies will make your dish more vibrant and tasty. To keep your creamy sun-dried tomato orzo fresh, allow it to cool first. Then, transfer it to an airtight container. Store it in the fridge for up to three days. Make sure to label the container with the date. This way, you can enjoy it later without worry. When you’re ready to eat your leftovers, reheat them gently. You can use a microwave or stove. If using a microwave, place the orzo in a bowl and add a splash of water. This helps prevent it from drying out. Heat for one to two minutes, stirring halfway through. If using a stove, warm it in a pan over low heat, stirring often. Add a little cream or broth if it seems too thick. You can freeze this dish for up to three months. First, let it cool completely. Then, portion it into freezer-safe bags or containers. Squeeze out excess air before sealing. Label each bag with the date and contents. When ready to eat, thaw it overnight in the fridge. Reheat it as mentioned above for the best taste and texture. Yes, you can use other pasta types. Some good options are small shells, penne, or farfalle. These shapes hold the sauce well, just like orzo. Keep in mind, cooking times may vary. Always check the package for cooking details. You want your pasta al dente for the best texture. To add heat, try these simple tips: - Add red pepper flakes while cooking the garlic. - Mix in diced jalapeños with the sun-dried tomatoes. - Use spicy sausage instead of sun-dried tomatoes. These options will boost the heat without losing flavor. Taste as you cook to find your perfect spice level. Pair this dish with light sides. Here are some tasty options: - A fresh green salad with vinaigrette. - Roasted vegetables, like zucchini or asparagus. - Garlic bread for a comforting touch. These sides complement the creamy orzo and create a balanced meal. Enjoy experimenting with your favorites! This recipe for Creamy Sun-Dried Tomato Orzo guides you through every step. We covered ingredients, cooking methods, and clever tips. You can customize it to fit your tastes and needs. Remember to store leftovers properly and reheat carefully. This dish works well with many sides and variations. I hope you enjoy creating this tasty meal. Now, get cooking and impress your family or friends!

Creamy Sun-Dried Tomato Orzo Flavorful Dinner Delight

Are you ready to transform dinner into a flavorful feast? My Creamy Sun-Dried Tomato Orzo will delight your taste buds

- 1 lb ground beef or turkey - 1 medium onion, finely diced - 2 cloves garlic, minced - 1 can (15 oz) black beans, rinsed and drained - 1 can (15 oz) sweet corn, drained The main ingredients of this soup create a rich and hearty base. I love using ground beef for its flavor, but turkey works well too. The onion and garlic add depth and aroma. Black beans provide protein while sweet corn adds sweetness. Together, they form a perfect blend. - 2 cups beef broth or vegetable broth - 1 packet taco seasoning (about 1 oz) - 1 can (10 oz) diced tomatoes with green chilies For the broth, I often choose beef broth for a robust flavor. Vegetable broth is a lighter option if you prefer. Taco seasoning gives this soup its signature taste, while diced tomatoes with green chilies add a zesty kick. This combination makes the soup truly flavorful. - 1 cup sharp cheddar cheese, shredded - 1 cup Monterey Jack cheese, shredded - ½ cup sour cream - Tortilla chips, for topping - Sliced jalapeños, for garnish - Fresh cilantro, chopped, for garnish Toppings make this soup shine. I like to use sharp cheddar and Monterey Jack for a cheesy finish. Sour cream adds creaminess, while tortilla chips offer crunch. Sliced jalapeños bring heat, and fresh cilantro gives a burst of flavor. These toppings take the soup to the next level. First, you need to brown the meat and onions. In a medium skillet, heat it over medium heat. Add 1 pound of ground beef or turkey and 1 diced onion. Cook this mix for about 5 to 7 minutes. You want the meat to be fully brown and the onion to be soft. This step gives your soup great flavor. Next, it’s time to sauté the garlic. Add 2 minced garlic cloves to your pan. Stir and cook for about 1 minute. You’ll know it’s ready when you can smell the garlic. Now, transfer the cooked meat and onion mix to your slow cooker. This step is easy! Just scoop everything in. Then, add the beans, corn, broth, and seasoning. Use 1 can of black beans, 1 can of sweet corn, and 2 cups of beef broth. Don’t forget the 1 packet of taco seasoning and 1 can of diced tomatoes with green chilies. Stir everything together until it’s well mixed. Next, cover the slow cooker with its lid. Set it to cook on low heat for 5 hours or on high heat for 3 hours. This is where the magic happens! The flavors will blend beautifully during this time. About 30 minutes before you serve, take off the lid. Stir in both shredded cheeses: 1 cup of sharp cheddar and 1 cup of Monterey Jack. Keep cooking until the cheeses melt and the soup becomes creamy. Finally, right before serving, gently fold in ½ cup of sour cream. This adds an extra layer of creaminess. Now, your soup is ready! Ladle it into bowls and top with crunchy tortilla chips, sliced jalapeños, and fresh cilantro. Enjoy your tasty meal! To get the best seasoning for your soup, use taco seasoning. It adds a great kick. I suggest you taste as you go. Adjust the spices to fit your taste. For broth, choose beef broth for a rich flavor. If you want a lighter soup, use vegetable broth. This keeps it fresh and tasty. To make your soup creamier, mix in sour cream before serving. This adds a rich texture that feels good. If you want a thicker soup, let it cook longer. The longer it simmers, the more the flavors blend. You can also mash some black beans to help thicken it up. When you serve the soup, ladle it into fun bowls. Top each bowl with crunchy tortilla chips. Add a few slices of jalapeños for a spicy kick. Fresh cilantro on top adds color and flavor. For drinks, pair it with a cold soda or a light beer. It makes for a great meal! {{image_4}} You can switch the ground beef for chicken or turkey. This makes a lighter soup. If you use chicken, cook it until it's done. Ground turkey cooks at the same time as beef. Adjust your cooking time if you use whole chicken. Make sure the chicken reaches 165°F for safety. To make this soup gluten-free, use gluten-free broth and taco seasoning. Check the labels to ensure all ingredients fit. For vegan options, skip the meat and cheese. Use plant-based cheese and broth instead. You can add extra beans for protein. Want more flavor? Add spices like cumin or chili powder. You can also toss in extra veggies like bell peppers or zucchini. Toppings are fun too! Try avocado, green onions, or even hot sauce. Mix and match to find your favorite! After enjoying your loaded nacho soup, store the leftovers properly. Use airtight containers to keep the soup fresh. Glass or plastic containers with tight lids work great. Make sure to cool the soup to room temperature before sealing. This helps prevent steam buildup, which can lead to soggy soup. You can quickly reheat your nacho soup in the microwave or on the stovetop. For the microwave, pour the soup into a bowl and cover it with a plate. Heat it in short bursts, stirring in between. If you use the stovetop, warm the soup in a pot over low heat. Stir often to keep it from sticking. This way, you maintain the soup's flavor and creamy texture. To freeze nacho soup, let it cool completely. Pour the soup into freezer-safe bags or containers. Leave some space at the top for expansion. When you're ready to enjoy it again, thaw the soup overnight in the fridge. For reheating, pour it into a pot and warm it over low heat. Stir occasionally until hot. You can also use the microwave for this step, but be cautious to not overheat it. For ground beef, you can try ground turkey. It tastes great and is lighter. If you want a meat-free option, use lentils or mushrooms. Both add a nice texture and flavor to the soup. Yes, you can cook this soup on the stovetop! Just brown the meat and onions in a pot. Then, add all the other ingredients. Let it simmer for about 30-40 minutes. This will let the flavors mix well. You can keep nacho soup in the fridge for about 3-4 days. Look for signs of spoilage. If the soup smells sour or has mold, throw it away. Always store it in a sealed container to keep it fresh. In this blog, we explored how to make a delicious nacho soup. We covered the essential ingredients, the step-by-step cooking process, and tips for perfection. You learned about variations to suit different diets, and how to store leftovers properly. Enjoying nacho soup is easy and fun. It’s a versatile dish that can fit any meal. Get creative with flavors and toppings. Your next bowl will be the best yet.

Slow Cooker Loaded Nacho Soup Easy and Flavorful Dish

Do you crave a warm, hearty dish that’s easy to make? Look no further than my Slow Cooker Loaded Nacho

- 4 boneless, skinless chicken breasts - 1 cup balsamic vinegar - 3 tablespoons honey - 3 tablespoons extra virgin olive oil - 1 teaspoon dried oregano - 1 teaspoon garlic powder - Salt and freshly ground black pepper, to taste The main stars of this meal are the chicken breasts. They soak up the balsamic flavor well. Balsamic vinegar gives a sweet and tangy taste. Honey adds a nice touch of sweetness to balance it out. Extra virgin olive oil keeps everything moist while roasting. The dried oregano and garlic powder bring in savory notes. Salt and pepper are essential for seasoning. - 2 cups fresh broccoli florets - 1 red bell pepper, thinly sliced - 1 yellow bell pepper, thinly sliced - 1 zucchini, sliced into half-moons - Fresh basil leaves for garnish The veggies add color and nutrients. Broccoli florets are crunchy and healthy. Red and yellow bell peppers bring sweet and bright flavors. Zucchini is tender and mild, making it a perfect fit. When you roast them, they caramelize and deepen in flavor. The fresh basil at the end adds a pop of color and a hint of freshness. This combination makes your plate look and taste great. 1. Preheat your oven to 400°F (200°C). This is key for roasting the chicken and veggies well. 2. Make the marinade. In a small bowl, mix together the balsamic vinegar, honey, olive oil, oregano, garlic powder, salt, and pepper. Whisk until combined. 3. Place the chicken breasts in a zip-lock bag or shallow dish. Pour half of the marinade over the chicken. Make sure it's coated well. Seal the bag or cover the dish. Marinate in the fridge for at least 30 minutes. For more flavor, marinate up to 2 hours. 1. While the chicken marinates, prepare the veggies. On a large sheet pan, spread the broccoli florets, red and yellow bell peppers, and zucchini. 2. Drizzle with olive oil, then sprinkle with salt and pepper. Toss the veggies gently to coat them evenly. 3. After marinating, take the chicken out of the fridge. Discard any leftover marinade. Place the chicken on the sheet pan with the veggies. 4. Drizzle the remaining marinade over the chicken and veggies. This step boosts the flavor while they roast. 1. Place the sheet pan in the preheated oven. Bake for 25-30 minutes. The chicken should reach an internal temperature of 165°F (74°C). The veggies will be tender and caramelized. 2. When done, carefully take the sheet pan out of the oven. Let the chicken rest for about 5 minutes. This resting time keeps the chicken juicy and tender. For the best flavor, always marinate your chicken. Use a zip-lock bag or dish. This helps the chicken soak up all the tasty juices. The ideal marination time is at least 30 minutes. For more flavor, let it sit for up to 2 hours. This extra time lets the balsamic vinegar and honey work their magic. To ensure even cooking, spread the chicken and veggies out on the pan. Make sure they are not crowded. This allows hot air to circulate. Check the chicken's internal temperature with a meat thermometer. It should reach 165°F (74°C). This ensures it is safe to eat while staying juicy. Serving directly from the sheet pan looks rustic and fun. For a fancier touch, plate the chicken and veggies individually. Drizzle leftover juices over the top for extra flavor. This adds shine and boosts the dish's taste. Fresh basil leaves on top add color and a nice aroma. {{image_4}} You can change the veggies in this dish based on what you have. Try using asparagus or carrots instead of broccoli. Sweet potatoes or green beans also work well. Seasonal veggies add different tastes and colors. For fresh herbs, consider thyme or rosemary. They can give your meal a whole new vibe. If you want to swap the chicken, you have options. Try turkey breast for a lean choice. You can also use pork tenderloin for a different flavor. For a vegetarian dish, replace the chicken with firm tofu or chickpeas. These options bring their own tastes and textures while keeping it healthy. Want to up the flavor? Add spices like smoked paprika or cumin. A pinch can make a big difference. You can also mix in sauces like soy sauce or hot sauce for a kick. For a unique taste, use flavored balsamic vinegar. Varieties like fig or raspberry balsamic can make your dish stand out even more. To store leftover balsamic chicken and veggies, first let them cool. Once cool, transfer the food into an airtight container. Make sure to seal it well to keep moisture in and air out. Place the container in the fridge. Leftovers will stay fresh for up to three days. To keep flavors strong, try to eat them sooner. For long-term storage, you can freeze this dish. First, let the chicken and veggies cool down completely. Then, place them in a freezer-safe bag or container. Remove as much air as possible to prevent freezer burn. You can freeze the dish for up to three months. When ready to eat, thaw it overnight in the fridge. For reheating, place the chicken and veggies in the oven at 350°F (175°C) until heated through. This method helps keep the flavors rich and the chicken juicy. Enjoy your meal as if it were fresh! I recommend marinating the chicken for at least 30 minutes. For even better flavor, try to marinate for up to 2 hours. The longer you marinate, the more the chicken soaks up the tasty balsamic mix. Just remember to keep it in the fridge while it marinates to stay safe. Yes, you can! Feel free to swap chicken for turkey or pork. If you prefer a vegetarian option, use firm tofu or chickpeas. Each protein will soak up the balsamic flavors nicely. Just adjust your cooking time based on the protein you choose. If you don’t have balsamic vinegar, try apple cider vinegar or red wine vinegar. You can also mix vinegar with a bit of honey for a similar sweet touch. White vinegar can work too, but it’s more tart. Adjust the amount of honey to keep the balance right. To check if your chicken is done, use a meat thermometer. The internal temperature should reach 165°F (74°C). If you don’t have a thermometer, cut into the thickest part of the chicken. The juices should run clear, and the meat should look white, not pink. Balsamic chicken is simple and full of flavor. You start with key ingredients like chicken, balsamic vinegar, and colorful veggies. The step-by-step guide helps you marinate and bake them perfectly. You also learned tips for serving and storing leftovers well. In the end, feel free to customize your dish with different proteins or veggies. Enjoy experimenting with flavors to make it your own. This dish will impress your friends and family!

Sheet Pan Balsamic Chicken & Veggies Flavor Meal

Ready to transform dinner into a flavor bomb? My Sheet Pan Balsamic Chicken & Veggies is a game changer. It’s

- 2 medium zucchinis (approximately 1 pound) - 1/2 cup freshly grated Parmesan cheese - 1/2 cup almond flour - 1 teaspoon garlic powder - 1 teaspoon onion powder - 1/2 teaspoon smoked paprika - Salt and black pepper to taste - Olive oil spray - Fresh parsley for garnish I love using fresh zucchinis for this recipe. They are healthy and add a nice crunch. The Parmesan cheese gives these fries a rich flavor. Almond flour adds a nutty taste while keeping it gluten-free. Garlic and onion powders enhance the taste, and smoked paprika adds a unique touch. Using salt and pepper helps balance the flavors. A light spray of olive oil ensures the fries crisp up nicely in the air fryer. Finally, a sprinkle of fresh parsley adds color and freshness when serving. Gather all these ingredients for a fun, tasty, and healthy snack. You’ll be amazed at how easy it is to make delicious zoodle fries! Start by spiralizing the zucchinis. A spiralizer makes long, fun zoodles. If you don’t have one, slice the zucchinis into thin fry-shaped pieces. Ribbons also work well. The goal is to create shapes that cook evenly. Salting the zoodles is key. It pulls out extra moisture. Place the zoodles on a clean kitchen towel or paper towels. Sprinkle with salt and let them rest for 10-15 minutes. This step is crucial for crispiness. After resting, squeeze the zoodles gently. This helps remove even more moisture. You want them dry for the best texture. While the zoodles rest, preheat your air fryer. Set it to 375°F (190°C). This temperature is perfect for making the fries crispy without burning. In a bowl, mix the cheese and spices. Combine 1/2 cup of Parmesan, 1/2 cup of almond flour, 1 teaspoon of garlic powder, 1 teaspoon of onion powder, and 1/2 teaspoon of smoked paprika. Add a pinch of salt and black pepper for taste. Mix well until everything blends. Next, add the squeezed zoodles to the cheese mixture. Toss them carefully until they are fully coated. Look for even coverage on every strand. Lightly spray the air fryer basket with olive oil. This helps prevent sticking. Place the coated zoodle fries in a single layer. Avoid overcrowding; it leads to uneven cooking. Cook the fries for 10-12 minutes. Shake the basket halfway through. This helps them cook evenly. They are done when golden and crispy. Remove the zoodle fries and let them cool slightly. Garnish with freshly chopped parsley for color. Serve warm with dipping sauces like marinara or garlic aioli. These flavors enhance the dish and make it even more fun to eat. To make your zoodle fries crunchy, start with moisture removal. After spiralizing your zucchinis, sprinkle them with salt. Let them rest for 10-15 minutes. This draws out water, which helps with crispiness. Next, squeeze the zoodles gently in a clean towel. Remove as much water as you can. This step is key for a crispy bite. A good, even coating is also vital. Mix your Parmesan and almond flour well. Toss the zoodles until they are fully covered. This ensures every fry gets that cheesy crunch. Make your zoodle fries unique by adding spices. Try cayenne for heat or Italian herbs for a twist. You can also use garlic or onion powder for an extra kick. Feel free to incorporate different cheeses. Cheddar or mozzarella can add fun flavors. Just remember to adjust the amounts so your fries stay crispy. Serving your zoodle fries can be fun! Use rustic dishware for a homely touch. Line a basket with parchment paper for a nice look. Sprinkle extra Parmesan on top to impress. For a pop of color, add fresh parsley as a garnish. Pair them with a tasty dipping sauce like marinara or garlic aioli. This not only enhances the look but also adds flavor. Remember, we eat with our eyes first! {{image_4}} You can easily make zoodle fries gluten-free. If you want to switch out almond flour, try using oat flour. Oat flour is simple to make. Just blend rolled oats until they turn into a fine powder. You can also use chickpea flour. This adds protein and a nice nutty flavor. Want to boost your veggie intake? You can mix zoodles with other vegetables. Try adding carrots, bell peppers, or sweet potatoes. These can add color and crunch. To balance flavors, slice veggies thinly. This helps them cook evenly and blend well with the zoodles. If you're dairy-free, you can still enjoy these fries. Use vegan cheese options like nutritional yeast or cashew cheese. They offer a nice cheesy taste without dairy. For a lower fat option, try using part-skim mozzarella or a light cheddar. These still melt well and keep the fries tasty. To keep your zoodle fries fresh, use an airtight container. Glass containers work well. You can also use plastic ones, but make sure they seal tightly. Store them in the refrigerator for up to three days. This way, they stay nice and tasty. To reheat zoodle fries and keep them crispy, use your air fryer. Preheat it to 350°F (175°C) and cook for about 5 minutes. This method makes them warm and crunchy again. You can also use a toaster oven for the same effect. Freezing zoodle fries is easy. Start by allowing them to cool completely. Then, place them on a baking sheet in a single layer. Freeze for about an hour. Once frozen, transfer them to a freezer bag. This method helps to prevent clumping. Zoodle fries can last up to three months in the freezer. Yes, you can use regular potatoes. They will taste different but still be good. Just slice them thinly for fries. Keep in mind that regular potatoes will have more carbs. Zucchini adds a nice crunch and is lower in carbs. You can make zoodles without a spiralizer! Try using a sharp knife. Slice the zucchinis into long strips or thin ribbons. You can also use a box grater to create thin strands. Both methods work well for zoodle fries. Zoodle fries taste great with many dips! Some popular choices include: - Marinara sauce - Garlic aioli - Ranch dressing - Spicy mustard You can even make your own dip for fun. Enjoy experimenting with flavors! In this article, we explored making crispy zoodle fries using fresh zucchini and healthy ingredients. You learned how to prepare the zucchini, remove moisture, and air fry to perfection. I shared tips for customizing flavors and suggested ways to serve and store your fries. Zoodle fries are not just tasty; they fit into many diets. Try them as a fun treat or a healthy side. Get creative and enjoy your cooking journey!

Air Fryer Parmesan Zoodle Fries Crunchy and Tasty

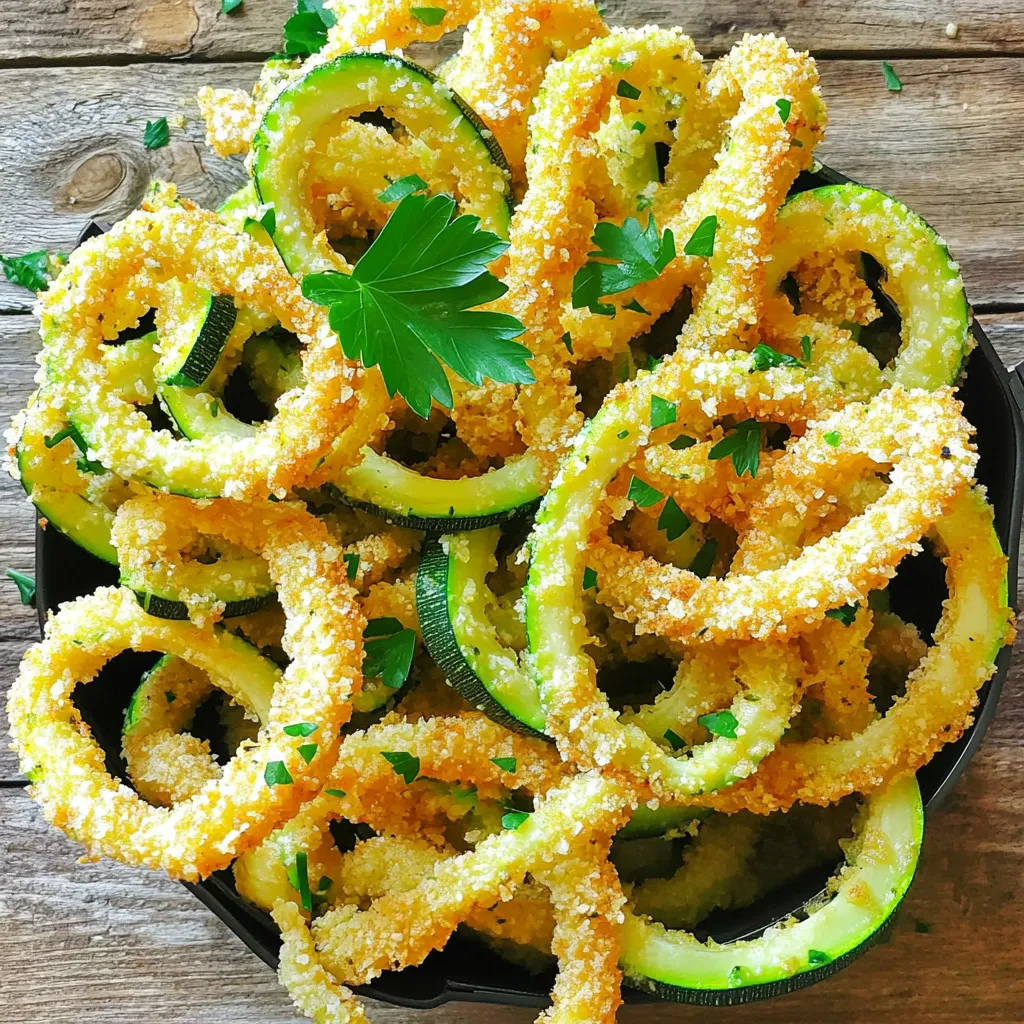
Craving a crunchy snack that’s both tasty and healthy? Look no further! Air Fryer Parmesan Zoodle Fries are your new

- 1 medium Granny Smith or Fuji apple - 1 ripe banana, pre-frozen - 1 cup unsweetened almond milk - 1/2 teaspoon ground cinnamon - 1/4 teaspoon freshly grated nutmeg - 1 tablespoon pure maple syrup - 1/4 cup rolled oats - 1 tablespoon almond butter - 1/2 teaspoon pure vanilla extract - Ice cubes (optional) For this Apple Pie Smoothie, I love using a Granny Smith or Fuji apple. These apples give a great tartness that balances the sweetness. The ripe banana adds creaminess and natural sweetness. You can use any milk you like, but I find unsweetened almond milk works best. Ground cinnamon and nutmeg add warmth, reminding us of fresh apple pie. Maple syrup sweetens it up, but you can adjust it to your taste. Rolled oats give it a smooth texture and keep you full. Almond butter adds protein and a nutty flavor, while vanilla extract rounds out the taste. If you want a thicker smoothie, toss in some ice cubes. You can make this smoothie in just ten minutes! - First, core and chop the apple into small pieces. This helps it blend easier. - Make sure your banana is fully frozen. A frozen banana gives a creamy texture. - In a high-speed blender, combine the chopped apple and frozen banana. - Add in the almond milk, ground cinnamon, nutmeg, maple syrup, rolled oats, almond butter, and vanilla extract. - Blend until you get a smooth and creamy mixture. Stop to scrape the sides if needed. - If you want a thicker smoothie, add a handful of ice cubes. Blend again until smooth. - Taste your smoothie. If you want it sweeter, stir in more maple syrup until it's just right. - Alternatives for almond milk: If you can't find almond milk, use oat milk or coconut milk. Both options add a nice flavor. - Nut butter options: Almond butter works great, but peanut butter is also tasty. You can even try cashew butter for a fun twist. - Adding protein powder: Boost your smoothie with a scoop of protein powder. It makes the drink more filling and nutritious. - Low-sugar options for sweetness: To reduce sugar, use less maple syrup. You can also add ripe bananas, which are naturally sweet. - Garnishing tips: Sprinkle some cinnamon on top for extra flavor. Thin apple slices look lovely and fresh. - Serving suggestions: Pour your smoothie into a tall glass or a bowl. This makes it look fancy and inviting. You can add a dollop of yogurt for creaminess. {{image_4}} You can make the apple pie smoothie even better. Try adding other fruits like pears or peaches. These fruits add a sweet and juicy twist. You can also spice things up with ginger. A small amount of fresh ginger gives a nice kick and warmth. For added texture, consider including chia seeds or flaxseeds. These seeds are healthy and give a nice crunch. You can also use different types of oats. Steel-cut oats will make it thicker, while instant oats add creaminess. Change the smoothie with the seasons. In fall, add pumpkin spice for a cozy flavor. This makes the smoothie taste like autumn. In summer, use tropical fruits like mango or pineapple. This gives it a refreshing and bright taste. To store your Apple Pie Smoothie in the fridge, pour it into a clean jar. Seal it tightly to keep out air. This helps it stay fresh. You can store it for up to 24 hours. Before serving, give it a good shake. This will mix the ingredients again. The smoothie might separate, but that is normal. You can freeze your smoothie for later use. Use freezer-safe jars or bags to avoid spills. Leave some space at the top of the container. This allows for expansion as it freezes. The best time to thaw is overnight in the fridge. You can keep it frozen for up to three months. To defrost, take the smoothie out of the freezer. Place it in the fridge overnight. When ready to enjoy, blend it again. This brings back its creamy texture. If it’s too thick after thawing, add a splash of almond milk and blend again. An Apple Pie Smoothie is a tasty drink that tastes like dessert. It combines apples, bananas, oats, and spices. You get a sweet and spicy flavor from cinnamon and nutmeg. The oats make it creamy and filling. This smoothie is a delightful way to enjoy the flavors of apple pie without baking. Yes, you can make this smoothie vegan! Use almond milk or any other plant-based milk. For the nut butter, choose almond or peanut butter that is dairy-free. You can also skip the maple syrup or use a vegan sweetener. This way, you keep all the flavors while sticking to a vegan diet. You can make your smoothie sweet without using sugar. Use ripe bananas for natural sweetness. Another option is to add more apples. They are sweet when ripe. You can also use stevia or other natural sweeteners. These options keep the smoothie healthy and tasty. This smoothie can be a meal replacement. It has fruits, oats, and nut butter, which provide energy and nutrients. The oats give you fiber, and the nut butter adds healthy fats. Together, these ingredients make the smoothie filling. However, check your hunger level to decide if you need more food. This blog shared a simple and tasty apple pie smoothie recipe. You learned about key ingredients, how to blend them, and tips for healthier options. I provided variations to keep it fresh, plus storage tips to save your leftovers. Smoothies are fun to make and a great way to stay healthy. Enjoy creating your own flavors and find what works best for you. With a little effort, you can have a delicious treat every day!

Apple Pie Smoothie Flavorful and Healthy Delight

Are you ready to enjoy the warm, comforting taste of apple pie in a healthy drink? My Apple Pie Smoothie

- 2 cups dark chocolate chips - 1 cup white chocolate chips - 1 cup freeze-dried strawberries - 1 teaspoon coconut oil - Sea salt for a finishing touch - Microwave-safe bowls - Baking sheet - Parchment paper - Spatula First, line a baking sheet with parchment paper. Let the paper hang over the edges. This makes it easy to lift the bark later. The parchment keeps the chocolate from sticking to the sheet. Next, take a microwave-safe bowl. Add the dark chocolate chips. If you want, add a teaspoon of coconut oil for smoothness. Microwave the bowl in 30-second bursts. Stir it well after each time. Keep going until the chocolate is silky and smooth. Now, carefully pour the melted dark chocolate onto the lined baking sheet. Use a spatula to spread it evenly. Aim for about a 1/4 inch thick layer. Now, melt the white chocolate chips in another bowl. Use the same microwave technique. Once smooth, drizzle the white chocolate over the dark layer. This creates a lovely marbled look. Evenly sprinkle the freeze-dried strawberries on top. Gently press them down to stick well to the chocolate. Lightly sprinkle sea salt over the entire bark. This adds a nice touch to the flavor. Place the baking sheet in the fridge for about 30 minutes. This helps the chocolate set. Once firm, lift the parchment paper to remove the bark. Break it into rustic pieces for a fun presentation. Using coconut oil helps chocolate melt smoother. When you mix it with dark chocolate chips, it gives a nice shine. This small addition makes your bark look great. If you skip it, the chocolate may not melt as well. Temperature plays a big role too. Make sure your chocolate isn’t too hot. If it is, it can burn and taste bad. Microwave in 30-second bursts. Stir between each burst. This keeps the heat even. Serve your chocolate bark on a nice platter. It looks great when you break it into rustic pieces. You can also pair it with fresh strawberries. The bright color adds charm. Scatter a few freeze-dried strawberries around for a fun touch. To make it special, use a decorative box. Wrap it with a ribbon for gifts. Everyone will love its look! You can add more toppings to make it your own. Try nuts, seeds, or mini marshmallows. Each adds a new twist to the bark. For chocolate variations, consider using milk chocolate chips. They give a sweeter taste. You can also mix different chocolates together. The more you experiment, the better it gets! {{image_4}} You can use different types of chocolate for this bark. Dark chocolate gives a rich taste. Milk chocolate is sweeter and creamier. If you want a fun twist, try using white chocolate. Each choice changes the flavor. You can mix and match them, too. This lets you create a bark that fits your taste. Adding toppings can make your bark even better. Nuts and seeds add crunch and flavor. Almonds and pecans work well. You can also try sunflower seeds for a nut-free option. Dried fruits are another great choice. Consider using cranberries or blueberries for a fruity kick. Each topping adds a unique taste and texture. You can customize your bark for different times of the year. For holidays, try fun designs. Use red and green sprinkles for Christmas or pastel colors for Easter. You can also shape the bark into hearts for Valentine’s Day. This makes your treat special for any occasion. Personalizing your bark will impress your friends and family. To keep your chocolate covered strawberry bark fresh, store it in an airtight container. This method helps prevent moisture from ruining the texture. You can keep it at room temperature for up to a week. Avoid placing it in direct sunlight or near heat sources. This will help maintain its taste and crunchiness. If you want to extend the shelf life, refrigerate the bark. In an airtight container, it can last for two weeks. Just remember to let it sit at room temperature for a few minutes before eating. This makes it taste better and easier to break apart. If you have leftover bark that has lost its shine, you can melt it down. Place it in a microwave-safe bowl. Heat it in short bursts of 15 seconds, stirring in between. This helps the chocolate melt evenly. Once melted, you can pour it into a new shape or mix in fresh ingredients to create something new! You can use fresh strawberries, but there are upsides and downsides. Fresh strawberries add great flavor and juice. However, they can make the bark soggy. This happens because fresh strawberries have more moisture than freeze-dried ones. If you still want to use them, slice them thin. Pat them dry with a paper towel. This helps reduce the moisture. Chocolate bark lasts about a week at room temperature. It stays fresh longer if you keep it in the fridge. In the fridge, it can last up to two weeks. Always store it in an airtight container. This keeps it safe from air and moisture. Yes, you can make this bark ahead of time. It is a great treat for parties or gifts. Make it one to two days before your event. Just store it properly in an airtight container. This way, it stays fresh and tasty. You can create delicious chocolate bark using simple ingredients and tools. With dark and white chocolate, plus freeze-dried strawberries, you can make a sweet treat. Remember to line your baking sheet and melt chocolate carefully. Add toppings like nuts for extra crunch. Overall, this recipe is fun and easy. It allows for creativity with flavors and presentation. Enjoy experimenting with variations and toppings. Your homemade chocolate bark will impress anyone! Store it right to keep it fresh and tasty. Now, get ready to share your treat!

Chocolate Covered Strawberry Bark Easy and Delicious Treat

If you’re looking for a fun and tasty treat, try making Chocolate Covered Strawberry Bark! This easy recipe combines rich

- 1 cup quinoa, thoroughly rinsed - 1 large onion, finely diced - 2 cloves garlic, minced - 2 medium carrots, diced - 2 celery stalks, diced - 1 can (15 oz) diced tomatoes, undrained - 6 cups vegetable broth (low-sodium recommended) - 1/4 cup freshly squeezed lemon juice (about 2 medium lemons) - 1 teaspoon dried thyme - 1 teaspoon dried oregano - 1/2 teaspoon freshly ground black pepper - Sea salt, to taste The main ingredients for this soup are simple yet packed with flavor. Quinoa acts as the base, bringing a nutty taste and a good source of protein. The vegetables—onion, garlic, carrots, and celery—add depth and texture. The diced tomatoes bring a hint of sweetness and acidity, while vegetable broth ties everything together. Adding lemon juice just before serving brightens the dish. Thyme and oregano bring herbal notes, while black pepper adds warmth. - Fresh parsley - Lemon slices - Olive oil For garnishes, fresh parsley adds color and a fresh taste. Lemon slices enhance the lemon flavor and look beautiful. Drizzling olive oil adds richness and a touch of luxury to each bowl. These ingredients create a comforting and nutritious soup that warms the soul. - Rinse quinoa under cold water. This removes the bitter coating. - Dice one large onion, two medium carrots, and two celery stalks. - Mince two cloves of garlic. - Add rinsed quinoa, onion, garlic, carrots, and celery to the slow cooker. - Pour in one can of diced tomatoes with juice. - Add six cups of low-sodium vegetable broth. - Sprinkle in one teaspoon of dried thyme and one teaspoon of dried oregano. - Add half a teaspoon of black pepper and sea salt to taste. - Stir all ingredients until well mixed. - Cover the slow cooker with its lid. - Set the cooker to low heat for six to eight hours. - Alternatively, set it to high heat for three to four hours. - Stir in one-fourth cup of freshly squeezed lemon juice during the last 20-30 minutes. - Taste the soup and adjust seasoning if needed. - Carefully ladle the soup into bowls. - Garnish each bowl with fresh parsley. - Add a slice of lemon on the side for a bright touch. - Serve with crusty bread or a fresh salad for a complete meal. To get the best texture from quinoa, rinse it well. This helps remove the bitter coating on the seeds. Cook it in the slow cooker until soft but not mushy. You want the quinoa to have a slight bite, adding a nice contrast to the soup. For balancing flavors, taste as you go. You might want more salt or lemon juice. Start with the recommended amounts and adjust based on your preferences. Fresh herbs can also brighten the soup, so feel free to add more parsley or even some basil. Using a slow cooker is easy, but there are tips to make it better. Always layer ingredients properly. Start with the grains, then add veggies, and finish with the liquid on top. This helps everything cook evenly. If you find your soup too watery, remove the lid for the last 30 minutes. This allows some liquid to evaporate and thicken the soup. If it’s too thick, just add a little more broth or water. {{image_4}} You can easily change this soup to fit your taste. Want more protein? Try adding diced chicken or a can of beans. Both work well and add great flavor. You can also switch up the veggies. If you have zucchini or bell peppers, toss them in! They add color and taste to the soup. Herbs and spices can change the soup's flavor too. Try using rosemary or dill instead of thyme. Each herb gives the soup a unique twist. This soup is very flexible for different diets. For a vegan version, just use vegetable broth and skip any meat. It stays tasty without losing its charm. If you need a gluten-free option, this recipe is already safe! Just make sure your broth is gluten-free. If you follow a paleo diet, you can add in more veggies and skip the quinoa. This keeps the soup light yet filling. To store soup leftovers, let the soup cool first. Then, transfer it to an airtight container. Make sure to cover it tightly. The soup will stay fresh in the fridge for up to four days. This is a great way to enjoy your tasty soup later! For freezing, use a freezer-safe container. Leave some space at the top for expansion. You can freeze the soup for up to three months. When you're ready to eat, take it out of the freezer. Thaw it in the fridge overnight. For reheating, warm it on the stove over medium heat. Stir often until it's hot. You can also microwave it in a microwave-safe bowl. Enjoy your delicious soup anytime! Can I make this soup on the stovetop? Yes, you can make this soup on the stovetop. Start by sautéing the onions and garlic in a pot. Then, add the carrots and celery. Cook until soft, about five minutes. Next, stir in the quinoa, diced tomatoes, and broth. Bring it to a boil, then lower the heat. Simmer for about 20 minutes until the quinoa is tender. How can I enhance the flavor? You can enhance the flavor in several ways. Try adding a bay leaf for depth. Fresh herbs like basil or dill also work well. A splash of hot sauce can add heat. You can also use homemade broth for richer taste. A squeeze of lemon at the end brightens the soup nicely. Is it possible to make this soup without quinoa? Yes, you can make this soup without quinoa. Substitute with rice or barley for a different texture. You can also use lentils for protein and fiber. Just adjust the cooking time as needed. Each option will give you a tasty twist on this soup. Health benefits of quinoa Quinoa is a superfood packed with nutrients. It has protein, fiber, and essential amino acids. It helps keep you full and satisfied. Quinoa is gluten-free, making it safe for those with gluten sensitivities. It also has antioxidants that help fight inflammation and support heart health. Soup's calorie count and macros Each serving of this soup is low in calories, around 200 per bowl. It has about 8 grams of protein and 5 grams of fiber. The healthy fats come from any olive oil you drizzle on top. This soup is a great option for a healthy meal any day. Where to find quality quinoa You can find quality quinoa at local grocery stores or health food shops. Look for brands that are organic and non-GMO. Check the package for a freshness date. Buying in bulk is also a great way to save money and ensure quality. Tips for selecting fresh produce Choose vegetables that are firm and bright in color. For carrots, look for smooth skin without blemishes. Celery should feel crisp and snap when bent. Onions should be dry and firm, with no soft spots. Fresh herbs should smell fragrant and have vibrant leaves for the best flavor. This blog explained how to make a tasty soup with quinoa and fresh veggies. I shared step-by-step instructions, tips for your slow cooker, and ideas for tasty variations. You can even adjust the recipe for different diets. Remember, cooking should be fun and creative. Feel free to mix and match ingredients to suit your taste. The right soup can warm your heart and fill your belly. Enjoy the process, and happy cooking!

Savory Slow Cooker Lemon Herb Quinoa Soup Recipe

Looking for a healthy, comforting dish? Try my Savory Slow Cooker Lemon Herb Quinoa Soup! It’s packed with bright lemon

- 4 boneless, skinless chicken thighs - 2 large oranges (one for fresh juice and zest, one for decorative slices) - 2 tablespoons fresh ginger, finely minced - 3 tablespoons soy sauce (substitute with tamari for gluten-free) - 1 tablespoon honey - 1 tablespoon sesame oil - 1 red bell pepper, thinly sliced - 1 cup snap peas, trimmed - 2 green onions, chopped for garnish In this dish, the chicken thighs shine. They are juicy and soak up flavor well. The oranges bring a sweet and zesty touch. Fresh ginger adds warmth and spice. The marinade blends these flavors perfectly. Soy sauce gives a salty depth. Honey balances it with sweetness. Sesame oil adds a nutty richness. Together, they create a mouthwatering glaze. The vegetables provide color and crunch. Red bell pepper adds crispness and sweetness. Snap peas offer a bright, fresh bite. Green onions bring a mild, oniony flavor to finish the dish. This mix of ingredients creates a vibrant meal. Each bite bursts with flavor and joy. It’s an easy way to impress at dinner. 1. First, preheat your oven to 400°F (200°C). This step gets your oven ready for roasting. 2. Next, take a large sheet pan and line it with parchment paper. This helps with easy cleanup later. 3. Now, let’s create the marinade. In a medium bowl, combine the juice and zest from one orange. 4. Add fresh minced ginger, soy sauce, honey, and sesame oil. Whisk until it mixes well. 1. Take your chicken thighs and season them generously with salt and pepper. 2. Place the chicken in the bowl with the marinade. Make sure each piece is well-coated. 3. Let the chicken marinate for at least 15 minutes. For even more flavor, refrigerate for up to 2 hours. 1. While the chicken marinates, prepare your veggies. Slice the second orange into pretty rounds. 2. Cut the red bell pepper into thin slices and trim the snap peas. Set them aside. 3. After marination, place the chicken thighs on one side of the sheet pan. 4. On the other side, spread the sliced bell pepper and snap peas for color. 5. Drizzle any leftover marinade over both the chicken and the vegetables. 1. Now it’s time to roast. Slide the sheet pan into your preheated oven. 2. Roast for about 25 to 30 minutes. Check that the chicken reaches an internal temperature of 165°F (75°C). 3. For a final touch, sprinkle toasted sesame seeds over the chicken and veggies in the last 5 minutes of roasting. 4. Once done, carefully take the pan from the oven. Let it rest for a few minutes. 5. Finally, garnish with chopped green onions for a fresh crunch. To make your Sheet Pan Orange Ginger Chicken truly shine, marination is key. I suggest marinating the chicken for at least 15 minutes. For the best flavor, let it sit in the fridge for up to 2 hours. This allows the chicken to soak up the orange, ginger, and soy sauce. Using fresh ingredients can boost the taste. Fresh ginger adds a zing that dried ginger cannot match. Always opt for ripe oranges for the best juice and zest. Their natural sweetness enhances the dish. To ensure even cooking, arrange the chicken and vegetables well on the sheet pan. Place the chicken on one side and the vegetables on the other. This spacing helps everything cook at the same rate. Avoid dryness in the chicken by checking its internal temperature. It should reach 165°F (75°C). Overcooking can dry it out, so set a timer for 25 minutes and check it. Pair your chicken with sides like steamed rice or fluffy quinoa. They soak up the delicious orange-ginger sauce well. For a colorful presentation, serve the chicken and veggies on a large platter. Garnish with extra toasted sesame seeds and fresh green onions. Add decorative orange slices for a bright and appealing look. This not only enhances the flavor but also makes the dish more inviting. {{image_4}} You can swap chicken for other proteins. Try using salmon, shrimp, or pork. Each option will bring its own taste and texture. Salmon cooks quickly and adds a rich flavor. Shrimp is light and tender, perfect for a quick meal. Pork can be juicy and pairs well with the marinade. If you want a vegetarian dish, use tofu or tempeh. Both are great options that absorb flavors well. For tofu, press it to remove extra water. This helps it soak in the marinade. Cut it into cubes and place it on the pan. Tempeh offers a nutty flavor and hearty texture. Slice it thin for even cooking. You can change the flavor with spices and herbs. Try adding garlic for a savory kick. Fresh herbs like cilantro or basil can brighten up the dish. A pinch of red pepper flakes adds heat. You can also experiment with citrus zest from lemons or limes. This gives a fresh twist to the sweet orange flavor. To store leftovers, let the dish cool completely. Place the chicken and vegetables in an airtight container. They will stay fresh for up to three days in the fridge. Make sure to label the container with the date. This helps you track freshness. For freezing, place the cooked chicken and vegetables in a freezer-safe bag or container. Squeeze out the air to prevent freezer burn. They can last for up to three months. When you're ready to eat, just thaw them overnight in the fridge. To reheat, preheat your oven to 350°F (175°C). Place the chicken and vegetables in a baking dish. Cover it with foil to keep them moist. Heat for about 15-20 minutes, or until warmed through. You can also use a microwave, but be careful not to overcook. Yes, you can use bone-in chicken. You will need to adjust the cooking time. Bone-in chicken takes longer to cook than boneless. Increase the roasting time to about 35-40 minutes. Always check the internal temperature. It should reach 165°F (75°C) for safety. I recommend marinating the chicken for at least 15 minutes. This helps the chicken absorb all the flavors. If you have more time, refrigerate it for up to 2 hours. This longer marination gives a richer taste. If you need a soy sauce substitute, try tamari. Tamari is a great gluten-free option. You can also use coconut aminos for a mild flavor. Both options work well without changing the dish too much. Yes, you can prepare this dish ahead of time. Marinate the chicken and chop the veggies a day before. Store them in the fridge. When you’re ready to cook, just assemble and roast. It saves time on busy nights! This blog post covered a delicious chicken recipe featuring juicy thighs, zesty oranges, and spicy ginger. We discussed an easy marinade that adds flavor and how to roast everything to perfection. I shared tips for enhancing flavor, cooking, and serving your dish. Whether you choose chicken, tofu, or customize with spices, there are many ways to enjoy this meal. Don't forget about storage options too! Enjoy making this recipe your own and impressing everyone at the table.

Sheet Pan Orange Ginger Chicken Flavorful Delight

If you’re craving a meal that bursts with flavor, look no further than Sheet Pan Orange Ginger Chicken. This easy

Older posts
Newer posts
← Previous Page1 … Page10 Page11 Page12 … Page83 Next →

dsad

© 2026 eataroundit • Built with GeneratePress

Our Policies

  • Copyright Policy
  • Cookie Policy
  • GDPR Policy
  • Privacy Policy
  • Disclaimer
  • Terms Of Use

More Information

  • Home
  • About
  • Contact
  • Appetizers
  • Dessert
  • Dinner
  • Drinks
©2026, eataroundit About Back To Top