Skip to content
DisclaimerTerms Of UseGDPR PolicyCookie Policy

eataroundit

  • Home
  • Drinks
  • Appetizers
  • Dinner
  • Dessert
  • About
  • Contact
  • Privacy Policy
DisclaimerTerms Of UseGDPR PolicyCookie Policy

NO-ING-IMG

- 3 large onions, thinly sliced - 2 tablespoons olive oil - 1 teaspoon sugar - 1/2 teaspoon salt - 1 cup Greek yogurt (preferably full-fat for creaminess) - 1/2 cup mayonnaise (for added richness) - 1 teaspoon garlic powder - 1 tablespoon fresh thyme leaves (or 1 teaspoon dried thyme for convenience) - Freshly ground black pepper, to taste - Chopped chives, for garnish You can swap some ingredients if needed. Use canola oil instead of olive oil. It works well for cooking. For a lighter dip, switch the full-fat Greek yogurt with low-fat yogurt. If you want a dairy-free option, use a plant-based yogurt. You can also replace mayonnaise with more Greek yogurt for a creamy dip. If you don’t have fresh thyme, dried thyme works just fine. Fresh chives can be replaced with green onions or parsley, too. When choosing onions, look for ones that are firm and heavy. They should have smooth skin with no soft spots. For Greek yogurt, pick a brand that has simple ingredients. Check the expiration date to ensure freshness. Fresh thyme should have vibrant green leaves and a strong aroma. Lastly, select chives that are bright and crisp. This will help your dip taste its best! First, grab three large onions. Slice them thinly. This helps them cook evenly. Heat two tablespoons of olive oil in a large skillet over medium heat. When the oil shimmers, add the onions. Stir in one teaspoon of sugar and half a teaspoon of salt. This helps the onions caramelize better. Cook the onions for about 30 to 40 minutes. Stir them occasionally. You want them to turn deep golden brown and soft. If they brown too fast, lower the heat. The slower they cook, the sweeter they get. Once they are caramelized, take the skillet off the heat. Let the onions cool for about 5 to 10 minutes. While the onions cool, get a mixing bowl. Add one cup of Greek yogurt and half a cup of mayonnaise to the bowl. The yogurt gives a nice tang, while the mayo adds creaminess. Sprinkle in one teaspoon of garlic powder and one tablespoon of fresh thyme leaves. If you use dried thyme, one teaspoon works too. Mix everything with a whisk or spatula until it’s smooth. Now, gently fold the cooled onions into the yogurt mixture. Make sure everything blends well. Season with freshly ground black pepper. Taste and adjust the flavor as needed. Spoon the dip into a serving bowl. For a fresh look, sprinkle chopped chives on top. For the best taste, cover the dip. Refrigerate it for at least 30 minutes. This lets all the flavors mix beautifully. Serve this dip with pita chips, veggie sticks, or warm baguette slices. To make great caramelized onions, start with the right onions. I recommend yellow or sweet onions. Slice them thinly for even cooking. Heat your skillet over medium heat and add olive oil. Once hot, toss in the onions, sugar, and salt. Stir them often, but not constantly. This way, they cook evenly. Cook for 30 to 40 minutes until they turn deep golden brown. Patience is key here; rushing leads to burnt bits. If you have leftover dip, store it properly. Place it in an airtight container and cover it tightly. This keeps it fresh and tasty. In the fridge, it can last up to four days. If you want to keep it longer, freeze it. Just remember to thaw it in the fridge before using. Stir it well after thawing to bring back its creamy texture. To make your dip shine at parties, serve it with tasty dippers. Crispy pita chips are a great choice. Fresh veggie sticks like carrots or cucumbers add crunch. You can even serve it with warm, toasted baguette slices for a gourmet touch. For a fun twist, try adding toppings like extra chives or some crumbled feta. This adds color and flavor, making your dip even more delightful. {{image_4}} If you like heat, try adding diced jalapeños or crushed red pepper flakes. Start with a small amount and taste as you mix. You can also use spicy Greek yogurt for an extra kick. This twist makes the dip perfect for game day or any gathering. Cheese can take your dip to the next level. Try adding cream cheese for a rich texture. You can also fold in shredded cheddar or crumbled feta cheese. Each cheese adds a unique flavor and makes the dip even creamier. Don't be afraid to mix different cheeses for fun flavors. Herbs can change the dip's flavor profile significantly. Fresh basil or parsley can give a bright taste. Dill or rosemary can add a savory note. Use fresh herbs for the best flavor. Just chop them finely and mix them in with the onions. Experiment with what you love! To store your caramelized onion dip, place it in an airtight container. Make sure the lid is on tight. This keeps the dip fresh and prevents it from absorbing other smells in the fridge. You can store it for up to 4 days. If you want to save some dip for later, freezing is a great option. Use a freezer-safe container, leaving some space at the top. The dip can last up to 3 months in the freezer. Avoid using glass containers, as they might crack in the cold. When you're ready to eat the frozen dip, move it to the fridge a day ahead to thaw. Once thawed, stir it well to mix any separated ingredients. If it feels a bit thick, add a splash of Greek yogurt to bring back the creaminess. Enjoy it with your favorite dippers! You can store caramelized onion dip in the fridge for up to five days. Just keep it in an airtight container. This helps keep the flavors fresh and tasty. If you notice any change in smell or texture, it’s best to toss it. Yes, you can make this dip in advance. In fact, making it a day ahead improves the taste. The flavors blend together beautifully when it sits in the fridge overnight. Just remember to cover it well before storing. This dip pairs well with many tasty options. Here are some great choices: - Crispy pita chips - Colorful veggie sticks like carrots and bell peppers - Warm, toasted baguette slices - Pretzels or crackers - Potato chips for a crunchy contrast These options add fun and flavor to your snack time! This blog covered how to make a rich caramelized onion dip. We explored ingredients, tips for perfecting onions, and ways to enhance flavors. You can try fun variations and learn how to store your dip for later. Remember, fresh ingredients shine in this recipe. With a few simple steps, you’ll impress anyone at your next gathering with this tasty treat. Enjoy experimenting with flavors, and make it your own!

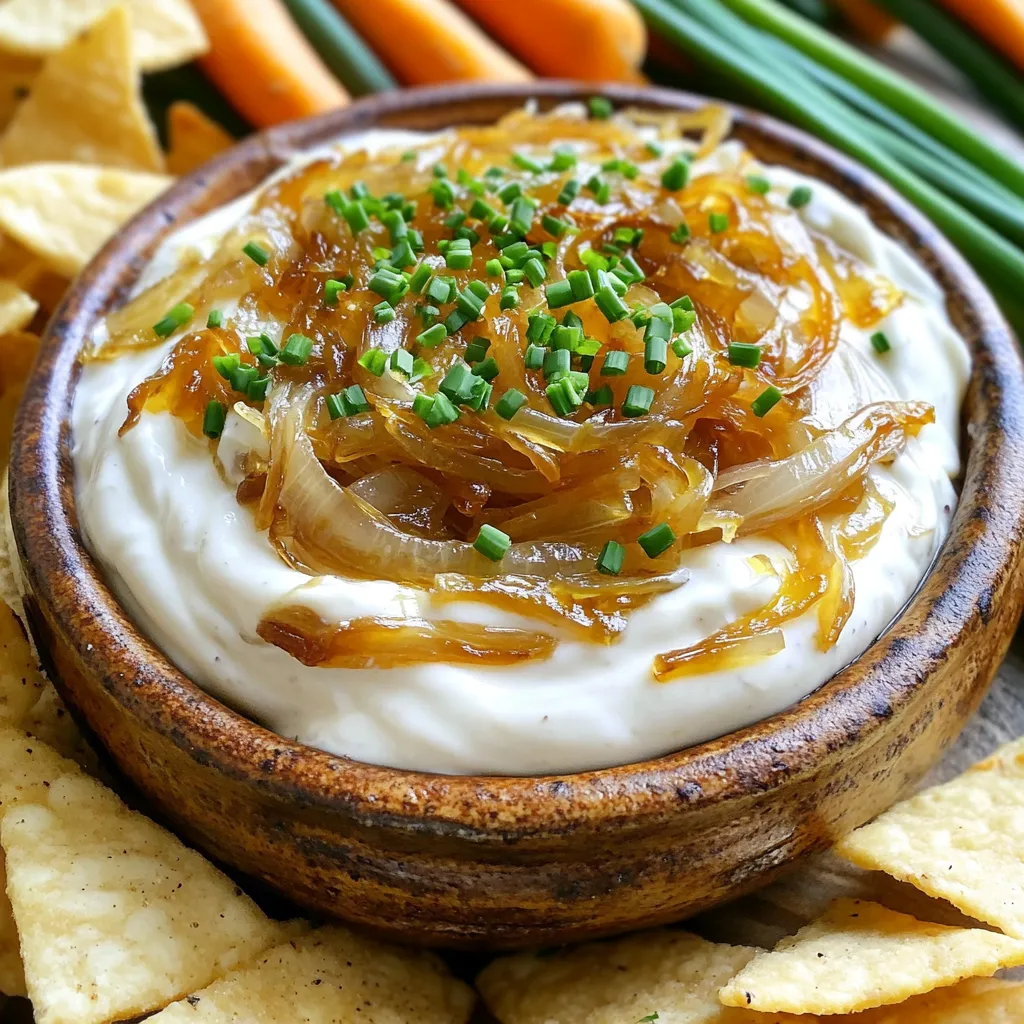
Caramelized Onion Dip with Greek Yogurt Delight

Looking to impress your guests with a tasty snack? My Caramelized Onion Dip with Greek Yogurt is a hit at

To make One Pot Creamy Pesto Tortellini, you'll need a few simple ingredients. Each one plays a key role in creating a rich and flavorful dish. Here’s what you will need: - 2 cups cheese tortellini (fresh or frozen) - 2 cups vegetable broth - 1 cup heavy cream - 1/2 cup pesto sauce (store-bought or homemade) - 1/2 cup cherry tomatoes, halved - 1/4 cup grated Parmesan cheese, plus extra for garnish - 1 tablespoon olive oil - 2 cloves garlic, minced - Salt and pepper to taste - Fresh basil leaves for garnish (optional) Each ingredient adds its own special touch. The cheese tortellini gives a nice bite and creaminess. The vegetable broth adds a savory base. Heavy cream brings richness, while pesto adds that fresh, herbaceous flavor. Cherry tomatoes offer a burst of sweetness. Grated Parmesan cheese melts into the sauce, enhancing its taste. Olive oil brings a smooth texture, and garlic gives a warm aroma. Finally, salt and pepper balance the flavors. Fresh basil leaves, if you choose to add them, brighten the dish. With these ingredients on hand, you are ready to create a delicious meal. First, heat the olive oil in a large pot over medium heat. Add the minced garlic. Sauté it for about one minute. You want it fragrant, not burnt. Keep an eye on it so it doesn't turn dark. Next, pour in the vegetable broth. Stir gently to mix. Then, add the cheese tortellini. Turn up the heat to bring it to a gentle boil. Once it boils, lower the heat to a simmer. Cook the tortellini for about 5 to 7 minutes. Stir occasionally until they become soft and tender. Once the tortellini is cooked, lower the heat again. Pour in the heavy cream and pesto sauce. Stir well to combine everything. Let it simmer for 2 to 3 minutes. This step makes the sauce creamy and warm. Now, gently fold in the halved cherry tomatoes and grated Parmesan cheese. Stir until the tomatoes are warm and the cheese melts. Taste your dish and add salt and pepper as needed. If the sauce is too thick, add a splash of vegetable broth. Let the pot sit for one minute before serving. This helps the flavors blend together. For creamy pesto tortellini, cheese tortellini shines. Both fresh and frozen work well. Fresh tortellini offers a soft bite. Frozen options save time and are easy to find. Check your local store for both. Choose what fits your time and taste. The sauce should be creamy but not too thick. If it feels heavy, add a splash of vegetable broth. Stir well and check if it meets your liking. You want it smooth and velvety to coat the tortellini perfectly. This balance makes each bite delightful. Want to take flavors up a notch? Add a pinch of red pepper flakes for heat. You can also toss in some spinach or kale for color and nutrition. Fresh basil not only garnishes but adds a burst of flavor too. Try different toppings like toasted pine nuts for a crunch. {{image_4}} You can make your One Pot Creamy Pesto Tortellini even better with veggie add-ins. Try adding fresh spinach or kale. These greens cook down nicely and add nutrition. You might also like to toss in bell peppers or zucchini. They bring a nice crunch and bright color. Mushrooms add a lovely umami flavor too. Just sauté them with the garlic at the start. This way, they soak up that yummy garlic taste. If you want more protein, chicken or shrimp works great. Cook bite-sized pieces of chicken in the pot before adding garlic. For shrimp, add them in after the tortellini. They'll cook fast and stay tender. You could also use beans or lentils for a meatless protein boost. Chickpeas are a tasty choice too. They add texture and fiber to your dish. Switching up the sauce can give your dish a new twist. You can use sun-dried tomato pesto for a rich, tangy flavor. Alfredo sauce is another great option. It makes the dish super creamy. You could even try a simple marinara for a classic taste. Just remember to adjust the seasoning based on the sauce you choose. This way, every bite stays delicious! To keep your One Pot Creamy Pesto Tortellini fresh, first let it cool. Use an airtight container for storage. Make sure to store it in the fridge. This dish is best when eaten within three days. If you have a lot left, consider freezing some. Reheating is easy! Simply place the leftovers in a pot over low heat. Stir often to avoid sticking. You may need to add a splash of broth or cream to help it warm up. Heat until it's hot throughout. You can also use the microwave. Just cover your bowl and heat in short bursts, stirring in between. If you want to freeze, use a freezer-safe container. Store it for up to three months. When ready to eat, thaw overnight in the fridge. Reheat as mentioned above, adding a bit of liquid if needed. This keeps the tortellini creamy and delicious, just like when you first made it! Yes, you can use homemade pesto. In fact, I love making my own! It adds a fresh taste. To make it, blend fresh basil, garlic, pine nuts, Parmesan, and olive oil. This mix gives your dish a vibrant flavor that store-bought pesto can’t match. Use the same amount as the recipe calls for, about half a cup. If you need a substitute for heavy cream, try whole milk with butter. Mix 3/4 cup of whole milk with 1/4 cup of melted butter. This mix gives you a creamy texture. You could also use coconut milk for a dairy-free option. Just keep in mind, it will change the flavor a bit. This dish lasts about 3 to 5 days in the fridge. Be sure to store it in an airtight container. When you reheat it, add a splash of broth or water. This helps bring back the creaminess. Enjoy it as a quick meal or lunch! This blog covered a delicious cheese tortellini dish. We discussed key ingredients like vegetable broth and pesto, and shared easy steps for making it. I shared tips for choosing the best tortellini and offered tasty variations. You can store leftovers safely and enjoy them later. With these ideas, you can create a fun meal for any occasion. Try mixing in your favorite flavors to make it your own. Enjoy your cooking!

One Pot Creamy Pesto Tortellini Flavorful Delight

Are you ready for a quick, tasty meal? This One Pot Creamy Pesto Tortellini is a flavor-packed dish that’s perfect

- 4 salmon fillets (about 6 oz each) - 3 tablespoons soy sauce - 2 tablespoons honey - 1 tablespoon freshly grated ginger - 2 garlic cloves, minced - 1 tablespoon sesame oil - 1 tablespoon rice vinegar - 2 tablespoons toasted sesame seeds - 2 green onions, sliced (for garnish) - Salt and freshly ground black pepper to taste When making Air Fryer Sesame Ginger Salmon, you need fresh and good-quality ingredients. The salmon is the star here, so choose fillets that look bright and firm. The soy sauce adds saltiness, while honey brings a touch of sweetness. Freshly grated ginger gives a warm, spicy kick. Minced garlic rounds out the flavor nicely. The sesame oil adds richness, and rice vinegar provides a tangy note. Don't forget the toasted sesame seeds! They add a nice crunch and nutty flavor. Green onions are perfect for garnish, giving your dish a pop of color and freshness. Make sure to have salt and pepper on hand to season your salmon well. A good balance of these ingredients creates a dish that is not only tasty but also visually appealing. - In a medium bowl, whisk together: - 3 tablespoons soy sauce - 2 tablespoons honey - 1 tablespoon freshly grated ginger - 2 minced garlic cloves - 1 tablespoon sesame oil - 1 tablespoon rice vinegar - Season each salmon fillet with salt and pepper. - Place the fillets in a shallow dish or bag. Pour the marinade over the salmon. Make sure each piece is coated well. Cover it and chill in the fridge for at least 30 minutes. This gives the flavors time to mix. - Preheat your air fryer to 400°F (200°C). This takes about 5 minutes. - Once heated, take the salmon out of the marinade. Save the marinade for later. - Arrange the salmon fillets skin-side down in the air fryer basket. This helps them cook evenly. - Air fry the salmon at 400°F for 10 to 12 minutes. - Check for doneness. The salmon should be flaky and cooked through. If it’s still raw in the middle, cook it a few more minutes. - While the salmon cooks, pour the saved marinade into a small pot. - Bring it to a gentle boil, then reduce to a simmer. Let it thicken for about 2 to 3 minutes, stirring often. - Once the salmon is ready, carefully take it out of the air fryer. - Drizzle the thickened marinade over each fillet. - Add a garnish of toasted sesame seeds and sliced green onions for extra flavor and color. To get the best taste from your salmon, marinating is key. I suggest marinating for at least 30 minutes. This time allows the flavors to soak into the fish. You can adjust the marinade ingredients to match your taste. For example, if you love ginger, add a bit more. If you prefer less sweetness, cut down on the honey. For even cooking, always place the salmon skin-side down in the air fryer. This helps create a nice crust while keeping the fish moist. You should also check the internal temperature. Salmon is perfectly cooked when it reaches 145°F. This small step ensures you enjoy flaky, tender salmon every time. I love serving this dish over rice or quinoa. Both options soak up the flavors well. You can also add sautéed greens as a side. Bok choy or spinach works great here. For a fun twist, include a lime wedge. The acidity from the lime brightens up the whole meal and makes it even better. {{image_4}} You can swap salmon for chicken or tofu. Both options offer unique flavors. Chicken has a mild taste, and tofu absorbs marinades well. Use the same marinade for chicken. For tofu, press it to remove extra moisture. This helps the marinade soak in better. Adjust cooking time based on thickness. Chicken may take longer, while tofu cooks quickly. Want to mix it up? Add citrus like orange or lime to your marinade. This gives a fresh twist. You might also spice things up with sriracha or chili flakes. These options add heat and depth. Experiment with different combinations to find what you love most. Don't be afraid to play with flavors! If you need gluten-free options, swap soy sauce for tamari. Tamari has a similar taste and works great in this recipe. For a vegan version, use plant-based salmon substitutes. You can also try chickpeas or lentils for a hearty meal. These changes help everyone enjoy this dish, no matter their diet. To keep your air fryer sesame ginger salmon fresh, place leftovers in an airtight container. This helps prevent any unwanted smells from other foods. You can store the salmon in the fridge for up to three days. Make sure to let it cool before sealing the container. Reheating this salmon can be tricky. The best way to do this is by using the air fryer again. Set it to 350°F (175°C) and heat for about 5 to 7 minutes. This method keeps the salmon crispy and tasty. If you don’t have an air fryer, you can use a skillet on low heat. Add a splash of water to keep the fish moist. Avoid using the microwave as it can dry out the salmon, making it less enjoyable. You should marinate the salmon for at least 30 minutes. This time helps the flavors mix well. If you have more time, marinate for up to 2 hours for a stronger taste. Just keep it in the fridge while it marinates. If your salmon is overcooked, don’t worry! You can still use it in other dishes. Try flaking it and mixing it into a salad. You can also add it to a stir-fry or pasta dish. This way, the flavors blend nicely with other ingredients. Yes, you can freeze cooked air fryer salmon. Let it cool completely first. Then, wrap it tightly in plastic wrap or foil. Place it in an airtight container or freezer bag. When you want to eat it, thaw it in the fridge overnight. Reheat it in the oven or microwave for best results. This blog post guides you through making delicious air-fryer salmon. You learned about the key ingredients, marinating techniques, and cooking steps to achieve juicy fillets. Remember, marinating well and cooking at the right temperature are key. Feel free to customize with different proteins and flavors to suit your taste. Enjoy your meal over rice or with greens. This recipe not only saves time but boosts flavor, making your kitchen adventures rewarding. Happy cooking!

Air Fryer Sesame Ginger Salmon Flavorful and Easy Recipe

Are you ready to bring restaurant-quality flavor to your kitchen? This Air Fryer Sesame Ginger Salmon recipe is both simple

- 4 medium-sized Yukon Gold potatoes - 4 tablespoons unsalted butter, melted - 4 cloves of garlic, finely minced - 2 teaspoons fresh rosemary, finely chopped - 2 teaspoons fresh thyme, finely chopped - Fresh parsley, finely chopped (for garnish) - 1 teaspoon kosher salt - ½ teaspoon black pepper - 1 tablespoon extra virgin olive oil Gather these simple ingredients to create your Crispy Garlic Herb Hasselback Potatoes. Yukon Gold potatoes are perfect for this dish. Their creamy texture makes them ideal for roasting. You will need unsalted butter to add rich flavor. The minced garlic brings a wonderful aroma and taste. Fresh herbs like rosemary and thyme give a pop of flavor. Kosher salt and black pepper enhance all the tastes. Finally, extra virgin olive oil helps the potatoes crisp up nicely. Once you have everything, you are ready to start cooking. Trust me, every bite of these potatoes will be a delight. - Preheat the oven to 425°F (220°C). This helps the potatoes get crispy. - Rinse and dry the Yukon Gold potatoes. Clean them well to remove dirt. - Create thin slits in each potato using chopsticks as guards. This keeps your cuts even. - Cut down to about ¼ inch from the base. Avoid slicing all the way through. - Combine butter, garlic, herbs, salt, and pepper in a bowl. Use 4 tablespoons of melted butter. - Add 4 cloves of finely minced garlic. Toss in 2 teaspoons each of chopped rosemary and thyme. - Stir well until all ingredients mix together. This butter adds great flavor. - Brush potatoes with garlic herb butter. Make sure to coat the slits well for flavor. - Drizzle with 1 tablespoon of extra virgin olive oil. This helps them crisp up nicely. - Bake for 45-55 minutes. Baste halfway through for more flavor. - Check when they’re golden brown and crispy. Let them rest a few minutes before serving. Preheating the oven is key for crispy potatoes. Set your oven to 425°F (220°C) before you start. This ensures the heat is perfect for crisping. Basting is also important. Halfway through baking, spoon extra garlic herb butter over the potatoes. This adds more flavor and helps them brown nicely. To slice the potatoes evenly, use chopsticks as guides. Place a chopstick on each side of the potato. This keeps your knife from cutting all the way through. Use a sharp knife for clean cuts. A chef's knife works best for this task. It helps you cut thin slits without breaking the potato. Serve the potatoes on a rustic wooden board or a colorful platter. This makes them look appealing. Drizzle a bit of extra virgin olive oil on top for shine. Garnish with fresh parsley to add color. You can also place sprigs of rosemary around them for a beautiful finish. {{image_4}} You can make these potatoes even better. Adding cheese gives a rich twist. Try grating some sharp cheddar or Parmesan. It melts into the slits and mixes with the garlic. You can also mix in different herbs or spices. Basil and oregano work well. A pinch of smoked paprika adds a nice kick. You can cook these potatoes in an air fryer. This method cuts the time in half. It gives them a crispy finish with less oil. Just set it to 375°F (190°C) and cook for 25-30 minutes. If you want a smoky flavor, try grilling them. Wrap them in foil and place them on the grill. Cooking this way adds a nice char and taste. If you are vegan, you can swap the butter. Use coconut oil or olive oil instead. This keeps the flavor and makes it plant-based. For gluten-free options, you are already safe. The ingredients in this recipe are gluten-free, so enjoy without worry. To store leftover potatoes, let them cool first. Place them in an airtight container. They stay fresh for up to three days. When reheating, use an oven or toaster oven. This keeps the potatoes crispy. Heat them at 350°F (175°C) for about 15 minutes. You can add a drizzle of olive oil before reheating for extra crispiness. You can freeze Hasselback potatoes, but they may lose some texture. To prepare for freezing, let them cool completely. Wrap each potato tightly in plastic wrap. Then, place them in a freezer bag. Remove as much air as possible before sealing. They will last in the freezer for about one month. In the fridge, your leftover potatoes last three days. In the freezer, they can keep for up to one month. Look for signs of spoilage like mold or an off smell. If they feel mushy or have dark spots, it’s best to toss them. Crispy Garlic Herb Hasselback Potatoes take about 45 to 55 minutes to cook. The exact time varies based on your oven and the size of the potatoes. A good test is to poke a potato with a fork. If it goes in easily, they are ready. Preheating your oven to 425°F (220°C) helps achieve a crispy finish. The hot air cooks the potatoes evenly, making them tender inside with a crispy outside. Yes, you can use other types of potatoes. Yukon Gold is my favorite as it has a creamy texture. You can also try Russet or red potatoes. Each type gives a different taste and texture. Just keep in mind that cooking times may change slightly with different potatoes. Hasselback potatoes pair well with many dishes. Try serving them with grilled chicken, steak, or roasted vegetables. A fresh salad also balances the meal. You can add a creamy sauce or salsa on the side for extra flavor. The potatoes are versatile and complement many flavors. Crispy Garlic Herb Hasselback Potatoes are easy and fun to make. We explored key ingredients, including Yukon Gold potatoes, fresh herbs, and garlic butter. You learned tips for crispy results and ways to serve these tasty treats. Remember, you can tweak flavors or cooking methods to fit any diet. Store leftovers properly for later enjoyment. Whether you use the oven or air fryer, you can impress friends and family with this dish. Experiment and find your favorite twist on this classic recipe!

Crispy Garlic Herb Hasselback Potatoes Delight

Looking for the perfect side dish that’s both crispy and packed with flavor? You’re in the right place! These Crispy

- 2 cups fresh blackberries - 2 cups fresh peaches, sliced - 1 tablespoon freshly squeezed lemon juice Fresh blackberries bring a sweet and tart flavor. Their juicy essence adds depth to the cobbler. Peaches add a soft, sweet contrast. Use ripe peaches for the best taste. Lemon juice brightens the fruit flavor. It gives a nice zing that balances the sweetness. - 1 cup granulated sugar, divided - 1 cup all-purpose flour - 1 tablespoon baking powder - ½ teaspoon salt - 1 teaspoon ground cinnamon Granulated sugar sweetens the fruit and batter. Dividing it helps balance flavors. All-purpose flour gives structure to the cobbler. Baking powder helps it rise and become fluffy. Salt enhances the overall taste. Ground cinnamon adds warmth and a hint of spice. - 1 cup whole milk - ½ cup unsalted butter, melted - 1 teaspoon pure vanilla extract Whole milk keeps the batter moist. It adds richness to each bite. Unsalted butter, when melted, gives a lovely flavor and texture. Vanilla extract adds a sweet aroma that ties everything together. These wet ingredients create a luscious batter that pairs perfectly with the fruit. 1. Preheat the oven: Set your oven to 350°F (175°C) to get it warm. This step is key for a well-cooked cobbler. 2. Prepare the fruit mixture: In a large bowl, mix 2 cups of blackberries and 2 cups of sliced peaches. Add ½ cup of sugar, a tablespoon of lemon juice, and a teaspoon of vanilla extract. Gently toss the fruit to coat it evenly. Let it sit for about 10 minutes. This helps the fruit release its sweet juices. 1. Combine flour, sugar, baking powder, and spices: In another bowl, whisk together 1 cup of flour, the remaining ½ cup of sugar, 1 tablespoon of baking powder, ½ teaspoon of salt, and 1 teaspoon of ground cinnamon. Mix well to ensure all dry ingredients are blended. 1. Mix milk and butter: In a new bowl, pour in 1 cup of whole milk and ½ cup of melted unsalted butter. Stir until the mixture is well combined. 2. Combine wet and dry mixtures: Gradually pour the wet mix into the dry ingredients. Stir gently until just combined. It’s okay if the batter has a few lumps. This keeps your cobbler light and fluffy. Now you're ready to assemble your delicious blackberry peach cobbler! To achieve the perfect golden brown top on your cobbler, keep an eye on the oven. Bake it for 30-35 minutes. The top should look crisp and golden. If you want extra color, turn on the broiler for a minute or two. Just watch it closely to avoid burning. You’ll know the cobbler is done when a toothpick inserted into the batter comes out clean. You can also check if the edges pull away from the skillet slightly. These signs mean your dessert is ready to enjoy! The best pairing for this cobbler is creamy vanilla ice cream. The cold ice cream melts into the warm cobbler, creating a delightful mix. You can also try whipped cream for a lighter option. For a beautiful presentation, serve the cobbler warm straight from the skillet. Scoop it into bowls for a more formal look. Top each serving with ice cream and drizzle some of the sweet juices over it. This makes it extra special and inviting! {{image_4}} You can switch up the fruit in your cobbler. Use other berries like raspberries or blueberries. They add a nice twist to the flavor. If you prefer stone fruits, try plums or cherries. They blend well with the sweet filling. Each fruit brings its own taste, making the dish unique. You can also mix different fruits for more fun. Just keep the same amount of fruit as the original recipe. For those who need gluten-free options, you can use gluten-free flour. It works well in the same amount as all-purpose flour. This way, you can still enjoy a tasty dessert without gluten. If you want vegan adaptations, replace the milk with almond or oat milk. Use a plant-based butter instead of regular butter. You can also swap the granulated sugar for coconut sugar. These changes keep the dessert delicious while meeting different dietary needs. To keep your blackberry peach cobbler fresh, follow these steps: - Let the cobbler cool completely. - Cover it tightly with plastic wrap or foil. - Place it in the fridge for up to three days. - For longer storage, freeze the cobbler. Wrap it well, then store it in an airtight container. Warming up your leftovers is simple. Here are two effective methods: 1. Oven Method: - Preheat your oven to 350°F (175°C). - Place the cobbler in an oven-safe dish. - Cover it with foil to keep it moist. - Heat for about 15-20 minutes until warm. 2. Microwave Method: - Place a slice on a microwave-safe plate. - Heat on high for 30 seconds to 1 minute. - Check to see if it is warm enough. Add more time if needed. No matter how you reheat, serve it warm with vanilla ice cream for the best taste! Yes, you can use frozen fruit for this cobbler. Just remember to thaw and drain any excess liquid. This keeps your cobbler from getting too watery. Frozen fruit is a great option when fresh fruit is out of season. It saves time and still gives a tasty result! You can tell when your cobbler is done by checking the top. It should be golden brown. Insert a toothpick into the batter; if it comes out clean, your cobbler is ready. If it has wet batter on it, give it a few more minutes in the oven. No worries! You can use any oven-safe skillet or even a baking dish. Just be sure to adjust the baking time if you use a different dish. A 9x9-inch baking dish works well too. The key is to ensure the dish can handle the heat without cracking. We covered how to make a delicious cobbler with fresh fruit and simple ingredients. I shared tips for baking and serving that will impress your guests. Remember, you can substitute fruits and adjust for dietary needs. Store leftovers properly to keep them tasty later. Whether you want to impress at a gathering or enjoy a cozy night in, this cobbler will not disappoint. Enjoy trying out these steps and make your own version today!

Blackberry Peach Cobbler Skillet Tasty and Warm Dessert

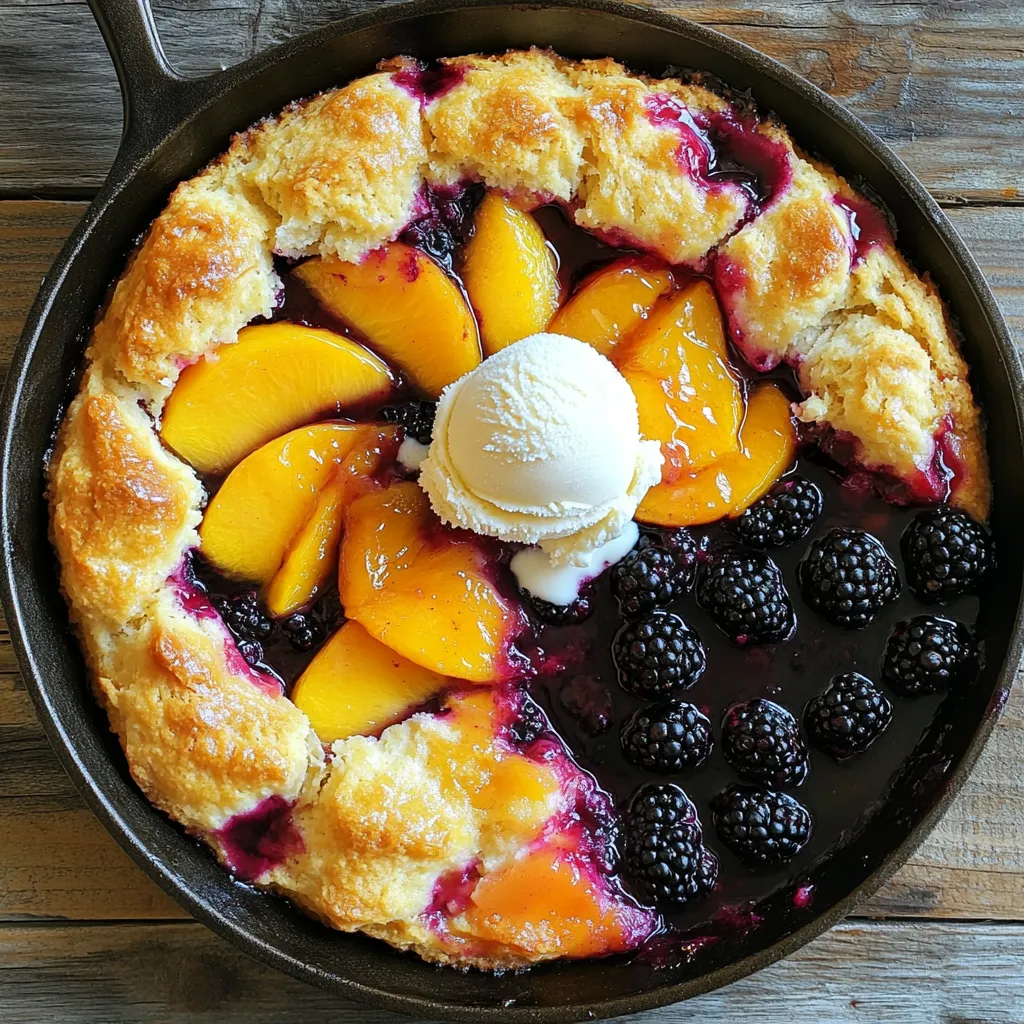
Craving a warm dessert that’s easy to make and bursting with flavor? This Blackberry Peach Cobbler Skillet hits the spot!

- 1 cup graham cracker crumbs - 4 tablespoons unsalted butter, melted - 1 (8-ounce) package cream cheese, softened to room temperature - 1/2 cup powdered sugar - 1 teaspoon vanilla extract - 1 cup heavy whipping cream - 1 cup ripe mango puree (can be made from fresh mangoes or use canned) - 1 tablespoon gelatin powder (optional, for a firmer texture) - 2 tablespoons warm water (to dissolve gelatin) - Fresh mango slices - Mint leaves For this recipe, you will need some simple yet tasty ingredients. You will start with graham cracker crumbs. These make the crust. Next, use unsalted butter to hold the crumbs together. Cream cheese gives that smooth texture we love. Don't forget the powdered sugar for sweetness and vanilla extract for a nice flavor. For the filling, heavy whipping cream is key. It adds lightness. Mango puree brings the fresh taste of summer. If you want a firmer texture, you can use gelatin powder. Just mix it with warm water to dissolve it. Finally, for garnish, fresh mango slices and mint leaves add a pop of color and flavor. You can enjoy this treat with friends and family anytime! To make the crust, start with 1 cup of graham cracker crumbs. In a bowl, mix them with 4 tablespoons of melted unsalted butter. Stir well until all the crumbs are coated with butter. This will give your crust a rich flavor. Next, take about 2 tablespoons of this mixture and place it in each cup. Press it down firmly with a spoon to make an even layer. Set the cups aside for now. For the filling, grab 1 package of softened cream cheese. Add 1/2 cup of powdered sugar and 1 teaspoon of vanilla extract to a mixing bowl. Beat these together with an electric mixer until smooth. There should be no lumps. In another bowl, whip 1 cup of heavy cream. Mix it until stiff peaks form. This will make your cheesecake light and fluffy. Now, gently fold the whipped cream into the cream cheese mixture. Use a spatula for this, and be careful not to deflate the cream. Once combined, add 1 cup of ripe mango puree. If you want a firmer texture, dissolve 1 tablespoon of gelatin in 2 tablespoons of warm water, then fold it into the mixture. Next, fill the cups with your yummy cheesecake filling. Make sure to divide it evenly among all the cups. After that, place the filled cups in the refrigerator. Allow them to chill for at least 4 hours. For the best results, let them set overnight. Enjoy the anticipation of a delicious treat! You can enhance your No Bake Mango Cheesecake Cups with simple toppings. - Drizzle additional mango puree on top for a fresh burst of flavor. - A light dusting of powdered sugar adds a sweet touch and makes it look pretty. If you want a firmer cheesecake, use gelatin. Dissolve 1 tablespoon of gelatin powder in warm water, then fold it into the mixture. This gives it more structure. You can also adjust the cream-to-mango ratio. More cream makes it creamier, while more mango boosts the fruity flavor. Presentation matters! Serve your cheesecake cups on a decorative platter for a stunning display. Pair these cups with refreshing drinks like iced tea or coconut water for a tasty balance. {{image_4}} You can change the flavor of your mango cheesecake cups easily. Try using different fruit purees, like strawberry or raspberry, for a twist. Each fruit brings its unique taste and color. If you want more warmth, add spices like cardamom or cinnamon. These spices can make the dessert feel cozy and special. If you have dietary needs, there are good options. For a gluten-free crust, use crushed gluten-free cookies instead of graham crackers. You can also make it dairy-free. Use a plant-based cream cheese and coconut cream instead of regular cream cheese and heavy cream. These swaps keep the taste rich without dairy. Want to serve more guests? You can easily scale up the recipe. Just double the ingredients for a bigger batch. If you want mini portions, use smaller cups or shot glasses. These smaller servings work great for parties or gatherings. They let more people enjoy this tasty treat! To keep your leftover cheesecake cups fresh, store them in the fridge. Use an airtight container or cover each cup with plastic wrap. This helps prevent them from drying out or absorbing other smells. The cheesecake cups stay tasty for about three days when stored properly. After that, they may lose their creamy texture and flavor. Yes, you can freeze these cheesecake cups! Just make sure they are fully set. Place them in a freezer-safe container, and they can last for up to two months. When ready to enjoy, take them out and thaw them in the fridge. This method keeps the flavor and texture intact. Avoid thawing at room temperature, as it may cause the cheesecake to become too soft. Yes, you can skip the gelatin. The cheesecake will be softer but still tasty. If you want a firmer texture, use gelatin. Just remember, it helps hold the filling together. You can enjoy a creamy dessert without it, but the texture will change. The cheesecake lasts about 3 to 5 days in the fridge. Store it in an airtight container. It stays fresh and delicious during this time. After that, the quality may fade. Always check for any off smells or changes in texture before serving. Absolutely! Store-bought mango puree works well. It saves time and effort. Just make sure it has no added sugars or preservatives. This allows you to keep the natural mango flavor. Fresh mango puree offers a vibrant taste, but store-bought is a great option too. You can use cookies like digestive biscuits or vanilla wafers. For a gluten-free option, try almond flour or gluten-free cookies. Just crush them and mix with melted butter. This will give you a tasty base for your cheesecake cups. Enjoy experimenting with different flavors! This blog post covered how to make no-bake mango cheesecake cups. We explored the key ingredients, including graham cracker crumbs, cream cheese, and mango puree. I provided step-by-step instructions for preparing the crust and cheesecake filling. We also reviewed useful tips, variations, and storage methods. Making these cups is both easy and fun. You can enjoy them for any occasion. Try adding fresh mango slices or different flavors, too. Your homemade treats will impress everyone!

No Bake Mango Cheesecake Cups Easy and Delicious Treat

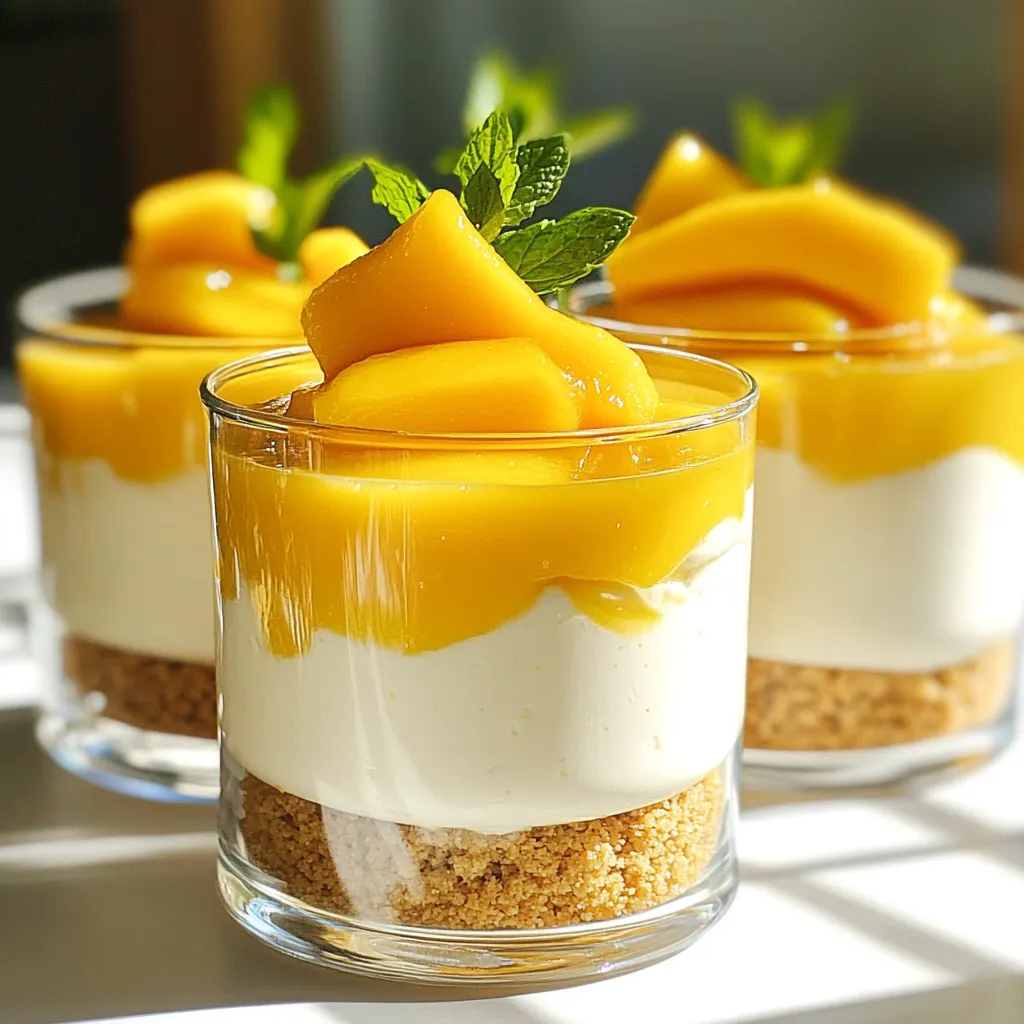
Craving a sweet treat that’s quick and simple? You’re in for a delight! My No Bake Mango Cheesecake Cups are

- Ripe banana - Large eggs - Rolled oats - Vanilla protein powder - Baking powder - Ground cinnamon - Salt - Almond milk (or preferred milk) - Honey or maple syrup (optional) - Cooking spray or coconut oil To create these delicious banana bread protein pancakes, you need simple ingredients. Start with a ripe banana. This gives the pancakes natural sweetness. Next, grab two large eggs. They add protein and help bind the mix. You will also need half a cup of rolled oats. These give the pancakes a hearty texture. Then, use half a cup of vanilla protein powder. This boosts the protein content and adds flavor. A teaspoon of baking powder is vital. It helps the pancakes rise and become fluffy. Ground cinnamon adds warmth and a hint of spice. Use half a teaspoon for the best taste. Salt is important too. Just a pinch enhances the flavors. For the liquid, use half a cup of almond milk, or any milk you like. This keeps the batter smooth. If you want a touch of sweetness, add a tablespoon of honey or maple syrup. This is optional but tasty! Lastly, you need cooking spray or coconut oil. This helps cook the pancakes without sticking. Gather these ingredients, and you're ready to make a healthy breakfast delight! 1. Mashing the banana: Take one ripe banana and place it in a large bowl. Use a fork to mash it well. Aim for a smooth and creamy texture. This will give your pancakes a sweet flavor. 2. Whisking the eggs: Crack two large eggs into the bowl with the mashed banana. Whisk them together until the mixture looks smooth. This step helps blend the flavors. 3. Combining dry ingredients: In a separate bowl, mix together 1/2 cup of rolled oats, 1/2 cup of vanilla protein powder, 1 teaspoon of baking powder, 1/2 teaspoon of ground cinnamon, and 1/4 teaspoon of salt. Stir these dry ingredients well so they combine evenly. 1. Gradually incorporating the dry mixture: Slowly add the dry mixture to the banana and egg blend. Stir gently until everything is combined. You want a smooth batter without lumps. 2. Adding almond milk and sweetener: Pour in 1/2 cup of almond milk. If you like sweetness, add 1 tablespoon of honey or maple syrup now. Stir until your batter is smooth and creamy. 3. Allowing batter to thicken: Let the batter sit for about five minutes. This helps it thicken a bit, making your pancakes fluffier. 1. Preheating the skillet: Heat a non-stick skillet over medium heat. Lightly coat it with cooking spray or coconut oil to prevent sticking. 2. Pouring and flipping pancakes: Use a ladle or measuring cup to pour about 1/4 cup of batter onto the skillet for each pancake. Cook until you see bubbles forming on top, about 2-3 minutes. Then, flip the pancake and cook for another 2-3 minutes until golden brown. 3. Final cooking and serving: Once cooked, carefully remove the pancakes from the skillet. Repeat this with the remaining batter until all pancakes are done. Enjoy your warm, fluffy pancakes stacked high on a plate! To make the best Banana Bread Protein Pancakes, focus on the skillet's temperature. Preheat your skillet over medium heat. A hot skillet helps the pancakes cook evenly and get a nice golden color. When flipping, wait for bubbles to form on top. This means they are ready to flip. Use a thin spatula to slide under the pancake. Flip it gently to avoid breakage. Cook the other side until it is golden brown too. Spices can make your pancakes even better. Add a pinch of nutmeg or a dash of vanilla extract for extra flavor. You can also mix in chopped nuts or chocolate chips for added texture. If you want to change your protein powder, use whey, casein, or pea protein. Each type brings a unique taste and texture. Keep in mind that this may change the flavor and consistency of your batter. {{image_4}} You can change the texture and taste of your pancakes by swapping ingredients. Here are some simple ideas: - Alternative flours: Use whole wheat flour for more fiber. If you need gluten-free, try almond or coconut flour. - Different types of protein powder: You can use chocolate or unflavored protein powder. This change can add unique flavors to your pancakes. Want to make your pancakes even tastier? Add fun mix-ins! Here are some options: - Chocolate chips: These add sweetness and a rich flavor. - Nuts: Walnuts or pecans give a crunchy texture. - Dried fruit: Try raisins or cranberries for a fruity burst. How you serve your pancakes can make them even better! Here are some ideas: - Toppings and syrups: Drizzle with maple syrup or honey. Add fresh banana slices or berries on top. - Pairing ideas for a balanced meal: Serve with yogurt or a smoothie. This adds protein and makes your breakfast more filling. To store your leftover Banana Bread Protein Pancakes, follow these tips: - Refrigeration tips: Place the pancakes in an airtight container. They will stay fresh for 3-4 days in the fridge. Stack them with parchment paper to prevent sticking. - Freezing instructions: For longer storage, freeze the pancakes. Lay them flat on a baking sheet. Once frozen, transfer them to a freezer bag. They can last up to 3 months in the freezer. When it's time to enjoy your pancakes again, you have options: - Microwave: Place pancakes on a microwave-safe plate. Heat in 30-second intervals until warm. This method is quick and easy. - Stove options: For a crispier texture, reheat on the stove. Use a skillet over low heat. Cook for about 1-2 minutes on each side until warmed through. This will help maintain their delicious flavor and texture. To make these pancakes vegan, replace the eggs with flax eggs. Mix one tablespoon of ground flaxseed with three tablespoons of water. Let it sit for five minutes until it thickens. You can also use almond milk or any plant-based milk instead of regular milk. Use maple syrup or agave for sweetness if desired. This way, you keep the taste and texture while making it vegan. Yes, you can use other fruits! Try applesauce for a similar sweetness and moisture. You can also use mashed sweet potatoes or pumpkin puree for a fun twist. Each fruit brings its own flavor, so feel free to experiment. Just remember to adjust the sweetness based on the fruit you choose. If you don't have protein powder, try using ground oats instead. Blend rolled oats in a food processor until fine. You can also use nut flour, like almond or peanut flour, for added flavor. Adjust the liquid in the recipe if you use nut flour since it absorbs more moisture. This keeps your pancakes tasty and healthy. To make your pancakes fluffier, add an extra half teaspoon of baking powder. Make sure to let the batter rest for five minutes before cooking. This allows air bubbles to form. You can also separate the egg whites from the yolks. Whip the whites until fluffy and fold them into the batter gently. This adds extra lift to your pancakes. You now have a simple guide for making Banana Bread Protein Pancakes. We covered each ingredient and step, making it easy to follow. I shared tips to help you cook perfect pancakes. You learned how to store and reheat leftovers, too. These pancakes are not just tasty; they are healthy and packed with protein. Try your own flavor twists and share them with friends. Enjoy your cooking!

Banana Bread Protein Pancakes Healthy Breakfast Delight

Looking for a tasty breakfast that fuels your day? I’ve got just the recipe for you—Banana Bread Protein Pancakes! These

To make One Pot Creamy Sun-Dried Tomato Orzo, gather these simple ingredients: - 1 cup orzo pasta - 2 tablespoons extra-virgin olive oil - 1 small onion, finely diced - 3 cloves garlic, minced - 1 cup sun-dried tomatoes, chopped (preferably packed in oil) - 4 cups vegetable broth (low-sodium recommended) - 1 cup heavy cream (or coconut cream for a dairy-free option) - 1 teaspoon dried basil - 1 teaspoon dried oregano - Salt and freshly cracked pepper, to taste - 1 cup fresh spinach, roughly chopped - 1/2 cup grated Parmesan cheese (or nutritional yeast for a dairy-free option) - Fresh basil leaves, for garnish You can swap some ingredients based on your needs: - Use whole wheat or gluten-free orzo for a healthier option. - Olive oil can be replaced with avocado oil. - If you want a lighter dish, use half-and-half instead of heavy cream. - For a nut-free version, skip the Parmesan cheese or use a nut-free cheese alternative. - Add any leafy greens like kale if you don’t have spinach. Selecting the right ingredients makes a big difference. Here are my tips: - Orzo Pasta: Look for high-quality brands. They have a better texture. - Sun-Dried Tomatoes: Choose those packed in oil. They add more flavor and moisture. - Cream: Use fresh heavy cream for the best taste. Check the expiration date. - Fresh Herbs: Opt for fresh basil over dried for a bright flavor. - Spinach: Pick vibrant green leaves. Avoid any that look wilted or yellow. I hope these details help you create a delicious dish! Happy cooking! First, gather your ingredients. You will need orzo pasta, olive oil, onion, garlic, sun-dried tomatoes, vegetable broth, heavy cream, dried herbs, salt, pepper, spinach, Parmesan cheese, and fresh basil. Next, finely dice the onion and mince the garlic. Chop the sun-dried tomatoes into small pieces. This way, each bite will have great flavor. Heat the olive oil in a large pot over medium heat. Once it shimmers, add the diced onion. Sauté it for about 3-4 minutes until soft and translucent. This builds a strong base for flavor. Add the minced garlic and chopped sun-dried tomatoes. Cook this mixture for 1-2 minutes. The aroma will be amazing. Now, stir in the uncooked orzo pasta. Make sure it gets coated in the oil and mix well. Then slowly pour in the vegetable broth while stirring gently. Bring the pot to a gentle boil. Once boiling, reduce the heat to low. Cover the pot and let it simmer for 10-12 minutes. Stir occasionally to prevent the orzo from sticking to the pot. After the orzo is tender, stir in the heavy cream, dried basil, and oregano. Let it simmer uncovered for 2-3 minutes. This helps the mixture thicken and become creamy. Always taste the dish before serving. Adjust the seasoning with salt and cracked pepper to your liking. Gently fold in the chopped spinach and let it wilt in the warm orzo. This adds color and freshness. Lastly, stir in the grated Parmesan cheese until it melts. Serve the creamy orzo right away. Don't forget to garnish with fresh basil leaves for a delightful touch! To get creamy orzo right, follow these steps: - Use the right pot: A large pot helps heat evenly. - Prep ingredients first: Chop onion, garlic, and sun-dried tomatoes before starting. - Stir often: This prevents the orzo from sticking to the bottom. - Monitor heat: Keep it low once boiling. This lets the orzo cook through without burning. - Add cream last: Mix in the heavy cream after cooking the orzo. This ensures it stays rich and creamy. Watch out for these common pitfalls: - Rushing the cooking time: Take your time. Orzo needs about 10-12 minutes to cook well. - Skipping the stirring: Stirring is key. It keeps the dish creamy and prevents sticking. - Overcooking the spinach: Add spinach at the end. Just let it wilt for a fresh taste. - Forgetting to taste: Always taste and adjust seasoning. A little salt can make a big difference. Here are my favorite ways to serve this dish: - Garnish with fresh basil: This adds color and flavor. - Pair with grilled chicken or shrimp: Adding protein makes it a complete meal. - Serve with crusty bread: It’s perfect for soaking up the creamy sauce. - Add a side salad: A simple green salad brightens the meal. {{image_4}} You can easily modify this dish to suit your diet. For a dairy-free version, swap heavy cream for coconut cream. It gives a rich taste without dairy. Use nutritional yeast instead of Parmesan cheese for a cheesy flavor. If you need gluten-free options, choose gluten-free orzo pasta. This way, you can enjoy the dish without worry. Want to make your orzo heartier? Add proteins like cooked chicken, shrimp, or chickpeas. These options boost the meal's nutrition and flavor. You can toss in vegetables too. Try bell peppers, zucchini, or mushrooms. They add color and crunch to your dish. Just add them when you sauté the onions for the best results. Feel free to experiment with different flavors! Instead of sun-dried tomatoes, use roasted red peppers. They give a sweet, smoky taste. You can also swap dried basil and oregano for Italian seasoning or fresh herbs. Each change brings a new taste to the dish. Don't hesitate to mix and match based on what you like! To keep your creamy orzo fresh, store it in an airtight container. Let it cool down first. Place it in the fridge, where it can last for up to three days. If you notice any liquid, just give it a good stir before serving again. When you're ready to enjoy leftovers, reheat the orzo in a pot over low heat. Stir in a splash of vegetable broth or cream to restore creaminess. Heat it until warm, about 5 to 7 minutes. You can also use the microwave. Just cover it and heat in short bursts, stirring in between. If you want to freeze the orzo, do so before adding the spinach and cheese. Pour the cooled dish into freezer-safe bags or containers. Make sure to remove as much air as possible. It can last in the freezer for up to three months. To thaw, move it to the fridge overnight. Reheat it gently on the stove with a bit of broth to get that creamy texture back. Yes, you can use other pasta shapes. I suggest using small shapes like shells or penne. These shapes hold the sauce well. Just adjust the cooking time based on the pasta you choose. You want it tender but not mushy. Always check the package for cooking times. To make this dish vegan, swap the heavy cream for coconut cream. It adds a nice richness. You can also replace Parmesan cheese with nutritional yeast. This gives a cheesy flavor without dairy. Make sure your vegetable broth is vegan-friendly too. These changes keep the dish creamy and tasty. This dish pairs well with a fresh salad. A simple green salad with lemon dressing is perfect. You can also serve it with garlic bread for a hearty meal. For protein, grilled chicken or shrimp makes a great addition. Enjoy this dish any way you like! We covered the key ingredients and options for making creamy orzo. You learned about ingredient choices and substitutions, cooking steps, and timing tips. We discussed ways to enhance flavors and avoid common errors. You also found useful tips for storage and reheating. As you make this dish your own, remember that practice leads to perfect orzo. Enjoy the process and have fun experimenting with flavors!

One Pot Creamy Sun Dried Tomato Orzo Delight

If you’re looking for a simple yet tasty meal, my One Pot Creamy Sun Dried Tomato Orzo Delight is for

- 1 cup unsweetened almond milk - 1 ripe banana - 1 scoop vanilla whey protein powder - 1 tablespoon almond butter - 1 teaspoon ground cinnamon - 1/2 teaspoon pure vanilla extract - 1 tablespoon maple syrup (optional, to taste) - 1/4 cup rolled oats - Ice cubes (to achieve desired thickness) Each ingredient in the High Protein Snickerdoodle Smoothie plays a key role. - Almond Milk: This keeps the smoothie light and dairy-free. - Banana: It adds natural sweetness and creaminess. - Whey Protein Powder: This is the star for protein. It helps build and repair muscles. - Almond Butter: This gives a rich flavor and adds healthy fats. - Cinnamon: This spice offers warmth and enhances the snickerdoodle taste. - Vanilla Extract: It provides a sweet aroma and depth of flavor. - Maple Syrup: This is optional but gives a touch of sweetness if you want it. - Rolled Oats: These add fiber and make the smoothie filling. - Ice Cubes: These help achieve the perfect thickness. Choosing good-quality ingredients makes a difference. Here are some suggestions: - Almond Milk: Look for brands with no added sugar, such as Califia Farms or Silk. - Whey Protein Powder: Opt for brands like Optimum Nutrition or Quest for quality. - Almond Butter: Try brands like Justin's or MaraNatha, known for their pure nut butters. - Maple Syrup: Use pure maple syrup for the best flavor, like Grade A or B. - Rolled Oats: Choose certified gluten-free oats if needed, like Bob's Red Mill. Feel free to swap out the almond butter for peanut butter if you prefer. First, grab your blender. I recommend a high-speed blender for this smoothie. It helps mix everything well. Start by pouring in 1 cup of unsweetened almond milk. This is your base. Next, peel and break the ripe banana into chunks. Add it to the blender. It adds natural sweetness and creaminess. Now, it’s time to add the protein. Scoop in 1 serving of vanilla whey protein powder. This boosts the protein level in your drink. Spoon in 1 tablespoon of almond butter for a nutty flavor. Don't forget the spices! Sprinkle in 1 teaspoon of ground cinnamon and 1/2 teaspoon of pure vanilla extract. If you like a sweeter taste, drizzle in 1 tablespoon of maple syrup. Toss in 1/4 cup of rolled oats for added texture. With all the ingredients in the blender, blend on high speed. Do this until you achieve a smooth and creamy mix. If your smoothie seems a bit thin, add a handful of ice cubes. Blend again until it is thick and smooth. To get the right consistency, make sure all ingredients are fresh. If you want a thicker smoothie, add more oats or ice. For a thinner smoothie, add a bit more almond milk. Always taste your smoothie before pouring it out. If it needs more sweetness, add more maple syrup and mix again. Finally, pour the smoothie into a tall glass. For a nice touch, sprinkle a pinch of cinnamon on top. Enjoy your high protein snickerdoodle smoothie! This high protein snickerdoodle smoothie packs a punch. It has about 350 calories per serving. Here’s a quick look at the macronutrients: - Protein: 25 grams - Carbohydrates: 45 grams - Fat: 10 grams - Fiber: 7 grams The protein comes mainly from the whey protein powder and almond butter. The carbs mostly come from the banana and oats. This balance makes it a great snack or quick meal. High protein smoothies offer many benefits. They help build muscle, aid in recovery, and keep you full. Here are some key points: - Sustained Energy: The protein and healthy fats give you long-lasting energy. - Muscle Repair: Protein helps repair muscles after exercise. - Nutrient-Rich: Packed with vitamins and minerals from fruits and oats. - Weight Management: High protein content can support weight loss goals. When you compare this smoothie to traditional snickerdoodle cookies, the difference is clear. A typical cookie has more sugar and fewer nutrients. Here’s how they stack up: - Calories: One cookie can have around 100 calories, while the smoothie has 350. - Protein: Cookies have little to no protein, unlike our smoothie. - Sugar: Cookies often have added sugars, while this smoothie uses natural sweetness from banana and maple syrup. Overall, this smoothie is a healthier choice, giving you the joy of snickerdoodles without the guilt. {{image_4}} To make your smoothie really creamy, use frozen bananas. These give a thick, rich texture. You can also add more almond butter. A little extra can enhance creaminess and flavor. If you like, try adding a bit of Greek yogurt. This adds protein and smoothness to your drink. Taste your smoothie before serving. If it’s not sweet enough, add more maple syrup. Start with a small amount, then blend and taste again. Remember, you can always add more, but you can’t take it out. You can also try using honey or agave syrup for a different flavor. Want to boost nutrition? Add a handful of spinach or kale. These greens blend well and don’t change the taste much. Use baby spinach for a milder flavor. You can also try adding avocado. It makes the smoothie creamy and adds healthy fats. Always blend well to keep the texture smooth. To make a vegan high protein snickerdoodle smoothie, swap the whey protein. Use a plant-based protein powder instead. Almond milk is already vegan, so keep that. Replace almond butter with peanut butter if you prefer. This keeps it creamy and delicious. You can also add a date for sweetness. Blend until smooth, and enjoy your vegan treat! Chocolate lovers can add cocoa powder to the smoothie. One tablespoon will do the trick for a rich taste. For a peanut butter twist, replace almond butter with peanut butter. This gives the smoothie a fun flavor. You can mix both cocoa and peanut butter for an indulgent treat. Just remember to adjust the sweetness if needed! If you have nut allergies, don't worry. Use sunflower seed butter instead of almond butter. This keeps the creaminess without the nuts. Swap almond milk for oat milk or coconut milk. Both options keep it tasty and smooth. You can still enjoy a high protein snickerdoodle smoothie without nuts. Yes, you can meal prep this smoothie. Just blend all the ingredients and store it in the fridge. You can keep it for up to two days. Just give it a quick shake or stir before drinking. If you want to avoid separation, blend it fresh when you can. To make your smoothie more filling, add more rolled oats or nut butter. You can also use Greek yogurt as a base for extra creaminess and protein. Chia seeds are another great option. They expand in liquid and add fiber, making your smoothie heartier. Toppings can make your smoothie extra special! Try adding a sprinkle of cinnamon, crushed nuts, or granola. You can also add a swirl of almond butter on top for extra flavor. Sliced bananas or a few chocolate chips would be delicious too. In this post, we covered how to make a high-protein snickerdoodle smoothie. We explored the right ingredients, step-by-step blending, and nutritional benefits. I also shared tips to enhance flavor and texture. Remember, you can customize this recipe to fit your diet. Experiment with flavors and find what you like best. A delicious and protein-packed smoothie can be easy and fun to make. Enjoy every sip and boost your health!

High Protein Snickerdoodle Smoothie Recipe Delight

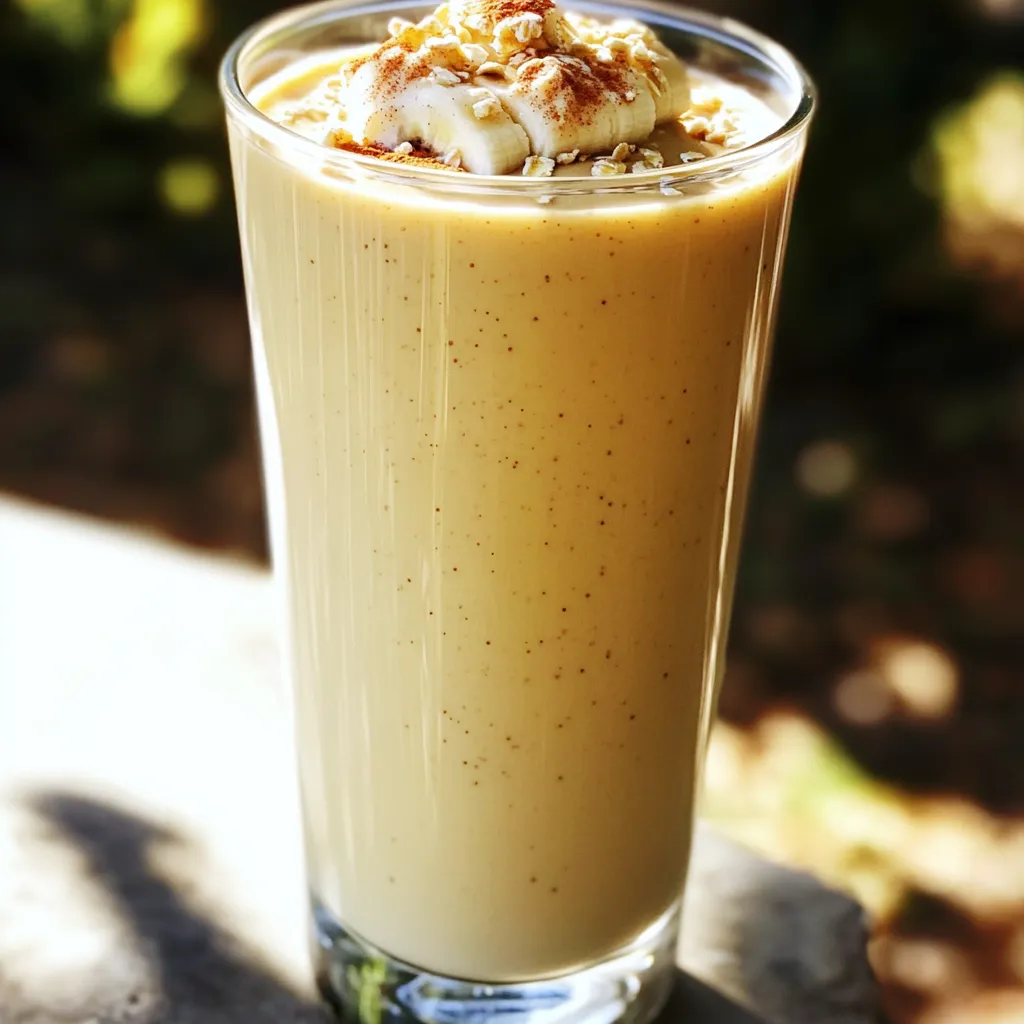
Craving a sweet treat that packs a protein punch? Let’s whip up a High Protein Snickerdoodle Smoothie that satisfies your

- 1 lb sirloin steak, cut into 1-inch cubes - 4 tablespoons unsalted butter - 3 cloves garlic, finely minced - 2 teaspoons fresh rosemary, finely chopped - 2 teaspoons fresh thyme, finely chopped - Salt and freshly ground black pepper, to taste - 1 tablespoon unsalted olive oil - Fresh parsley, finely chopped (for garnish) The ingredients for Garlic Herb Butter Steak Bites are simple yet packed with flavor. The star of this dish is the sirloin steak. I love sirloin because it is tender and juicy. Cutting the steak into 1-inch cubes ensures they cook evenly. Next, we have unsalted butter. This ingredient adds richness and a smooth texture. Garlic is a must for this recipe. Mince it finely to release all its tasty oils. Herbs elevate the dish. Fresh rosemary and thyme add depth to the flavor. Don't forget salt and pepper. These basic seasonings bring everything together. Finally, we need olive oil for cooking and fresh parsley for garnish. The parsley not only adds color but also gives a fresh touch. With these ingredients, you will create a dish that delights your taste buds. Begin by patting dry the steak cubes with a paper towel. This step helps to remove excess moisture. It ensures a nice crust when cooking. Next, season the steak cubes with salt and freshly ground black pepper. Make sure to coat all sides evenly. This seasoning enhances the natural flavors of the beef. Heat the olive oil in a large skillet over medium-high heat. You want the oil to shimmer before adding the steak. Carefully place the seasoned steak cubes in the skillet. Avoid overcrowding the pan; this helps them cook evenly. Cook the cubes for about 2-3 minutes on one side. You want a rich brown crust to form. Then, flip the cubes and cook for another 2-3 minutes. Aim for your preferred level of doneness, but medium-rare is often best. Once cooked, transfer the steak bites to a plate and set aside. Lower the heat to medium in the same skillet. Add the unsalted butter and let it melt completely. Once melted and bubbly, add the minced garlic. Stir in the finely chopped rosemary and thyme. Keep stirring for about 1-2 minutes. You want the garlic to become fragrant but not browned, as it can taste bitter. This mixture will create a rich, aromatic butter for your steak bites. To get steak bites cooked just right, aim for medium-rare. Cook the steak cubes for 2-3 minutes on one side. This forms a nice crust. Flip them and cook for another 2-3 minutes. Use a meat thermometer if you want. Medium-rare is around 130°F (54°C). Avoid overcrowding the skillet. If you add too many pieces at once, they won't cook evenly. Cook in batches if needed. This keeps the heat high and ensures a good sear. Feel free to experiment with herbs. You can try basil or oregano in place of rosemary or thyme. Each herb gives a different taste. Mix and match until you find your favorite combo. Adjust the garlic levels based on your taste. If you love garlic, add an extra clove. If you prefer a milder flavor, cut back a bit. You control the flavor here, so have fun! Garnish your steak bites with fresh parsley. This adds color and a burst of flavor. A sprinkle on top makes your dish look professional. For serving, place them on a platter with a side salad or roasted vegetables. This makes a complete meal. You can also serve them as an appetizer with toothpicks. It’s a great way to share with friends. {{image_4}} You can use different cuts of steak in this recipe. Ribeye and tenderloin are great choices. They both bring rich flavors and tenderness. Just remember, each cut cooks a bit differently. - Ribeye: This cut has more fat, giving it a juicy taste. Cook it for about 2-4 minutes on each side for medium-rare. - Tenderloin: This cut is very tender but lean. It cooks quickly. Aim for 2-3 minutes on each side. Adjust your cooking time based on the thickness of the steak cubes. A thicker cube needs more time, while a thinner one cooks faster. You can easily change the flavors in your steak bites. Adding red pepper flakes gives a nice kick. This spice pairs well with garlic and herbs. Just sprinkle in a pinch when you cook the garlic herb butter. You can also play with oils for a unique taste. Olive oil is great, but you can try avocado oil or even sesame oil. Each oil brings its own flavor to the dish, making it fun to experiment. Consider how you want to serve these steak bites. They make a great appetizer. Just put them on toothpicks for easy eating. If you want a main course, serve them with sides. Roasted vegetables, a fresh salad, or mashed potatoes work well. Pair your meal with a nice red wine or a cold beer. This makes your dining experience even better. After enjoying your Garlic Herb Butter Steak Bites, let them cool before storing. Place the bites in a container with a tight lid. This keeps them fresh and tasty. You can store them in the fridge for up to three days. Make sure to use them within that time for the best flavor. To reheat your steak bites, use a skillet over low heat. This method warms them gently. It keeps the steak juicy and full of flavor. Avoid using high heat. High heat may cook the steak more and make it tough. Stir them occasionally to heat evenly. If you want to save steak bites for later, freezing is a great option. Place the cooled bites in a freezer-safe bag. Remove as much air as possible before sealing. They can stay in the freezer for up to three months. When you’re ready to eat, thaw them in the fridge overnight. Reheat them in a skillet for the best taste. To check doneness without a thermometer, look for color and texture. A good rule is to press the steak with your finger. If it feels soft and yields easily, it’s rare. If it’s firm but still has some give, it’s medium-rare. For medium, it should feel firm. You can also cut one bite in half to check the inside color. Yes, you can use frozen steak. For best results, thaw it overnight in the fridge. If you’re short on time, place the steak in a sealed bag and submerge it in cold water for about an hour. Once thawed, pat the steak dry before seasoning and cooking. This helps achieve a nice crust. These steak bites go well with many sides. Here are some popular choices: - Mashed potatoes - Roasted vegetables - Garlic bread - A fresh garden salad - Rice pilaf These sides will complement the rich flavors of the steak bites nicely. You now have a clear guide to making Garlic Herb Butter Steak Bites. Start with quality ingredients and follow the steps for delicious results. Pay attention to cooking times and seasonings to get your steak bites just right. Remember, presentation matters as well; garnish and serve with your favorite sides. Enjoy experimenting with flavors and techniques to make this dish your own. Happy cooking!

Garlic Herb Butter Steak Bites Flavorful and Simple Meal

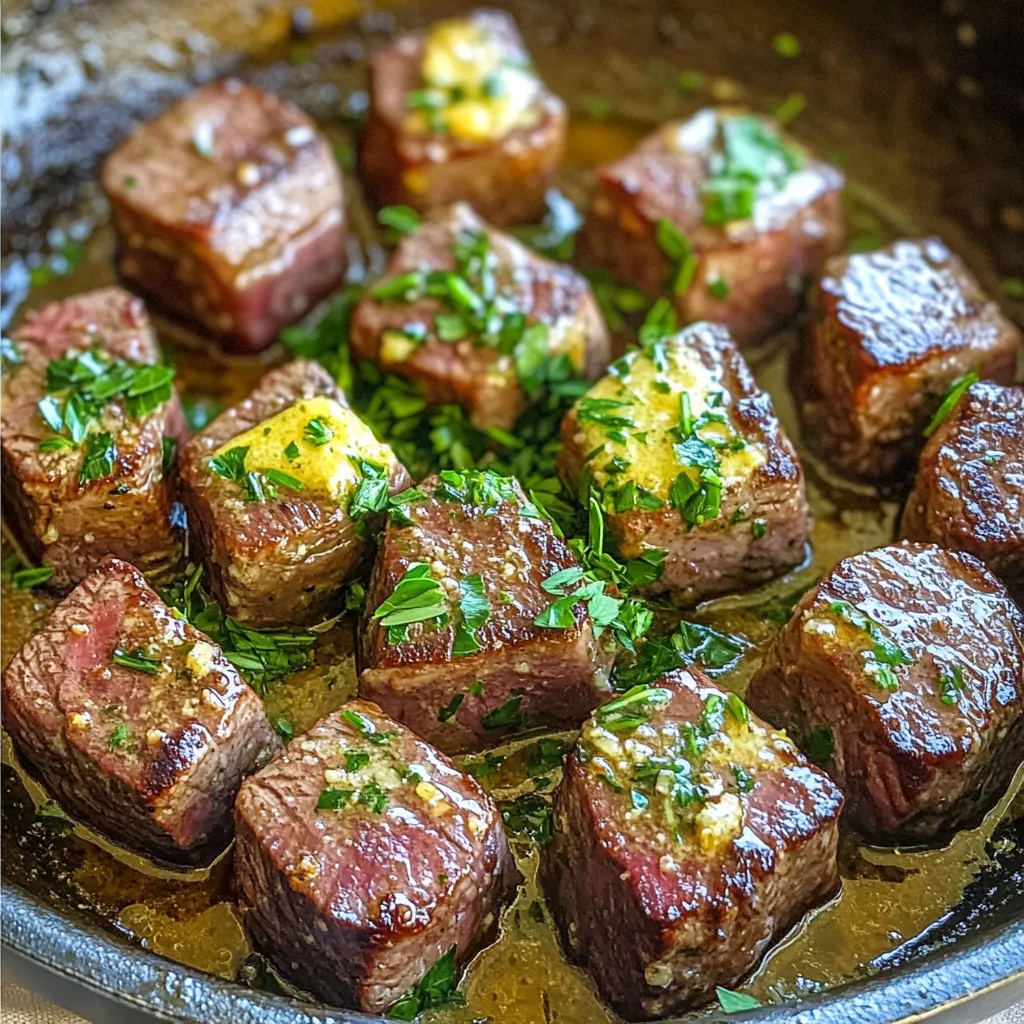
If you’re craving a quick and tasty meal, Garlic Herb Butter Steak Bites are the answer. This dish brings together

Older posts
Newer posts
← Previous Page1 … Page11 Page12 Page13 … Page83 Next →

dsad

© 2026 eataroundit • Built with GeneratePress

Our Policies

  • Copyright Policy
  • Cookie Policy
  • GDPR Policy
  • Privacy Policy
  • Disclaimer
  • Terms Of Use

More Information

  • Home
  • About
  • Contact
  • Appetizers
  • Dessert
  • Dinner
  • Drinks
©2026, eataroundit About Back To Top