Skip to content
DisclaimerTerms Of UseGDPR PolicyCookie Policy

eataroundit

  • Home
  • Drinks
  • Appetizers
  • Dinner
  • Dessert
  • About
  • Contact
  • Privacy Policy
DisclaimerTerms Of UseGDPR PolicyCookie Policy

NO-ING-IMG

To make these Peanut Butter Banana Breakfast Cookies, you need just a few simple ingredients. Each one adds flavor and texture to the cookies. Here is the list of what you'll need: - 2 ripe bananas - 1 cup natural peanut butter - ½ cup rolled oats - 1/4 cup honey or maple syrup - 1/2 teaspoon vanilla extract - 1/2 teaspoon baking powder - 1/4 teaspoon salt - 1/4 cup dark chocolate chips (optional) - 1/4 cup chopped nuts (optional) The bananas should be ripe to give the cookies a natural sweetness. You can choose between smooth or crunchy peanut butter based on your taste. Honey adds a nice touch, but maple syrup works well for a vegan option. The oats provide a hearty base, while the baking powder helps the cookies rise a bit. If you like, toss in some dark chocolate chips or nuts for extra flavor and crunch. These simple ingredients come together to make wholesome breakfast cookies that are quick and tasty! First, set your oven to 350°F (175°C). This temperature helps the cookies bake just right. Next, line a baking sheet with parchment paper. This step makes cleanup easy and stops the cookies from sticking. In a big bowl, add the mashed bananas and peanut butter. Use a fork or spatula to mix them until the blend is smooth. Then, add the honey or maple syrup and vanilla extract. Stir until everything is mixed well. This mixture brings out the sweet and nutty flavors. In another medium bowl, whisk together the rolled oats, baking powder, and salt. Make sure they are mixed evenly. This step ensures the cookies have the right texture and rise well during baking. Now, slowly add the dry mix to the wet mixture. Stir gently until just combined. If you want, fold in the dark chocolate chips and chopped nuts. These add extra flavor and crunch to your cookies. Using a spoon or cookie scoop, drop rounded tablespoons of dough onto the lined baking sheet. Space them apart because they will spread a bit. Press each cookie down lightly with a fork or your hand. The cookies won’t spread much on their own. Bake them for 10-12 minutes until the edges are light golden brown. After baking, take the cookies out and let them cool on the sheet for about 5 minutes. Then, move them to a wire rack to cool completely. This step helps the cookies become chewy yet firm. When serving, arrange them on a colorful plate. A drizzle of melted dark chocolate and fresh banana slices make the perfect finish! Pick natural peanut butter for the best flavor. It has no added sugar or oils. You can choose between smooth and crunchy styles. Smooth peanut butter makes a creamy texture, while crunchy adds a nice bite. Both options work well in the recipe. If you prefer, you can also try almond or cashew butter. They offer a unique taste, too. The key to chewy cookies lies in the banana and peanut butter mix. Make sure your bananas are very ripe. Ripe bananas add natural sweetness and moisture. Mash them well to avoid lumps. Mix the peanut butter until it’s smooth. This helps the cookies hold together during baking. The oats also play a part in texture. Use rolled oats for a great chewiness. You can easily change up the flavor of your cookies. Adding 1 teaspoon of cinnamon gives a warm spice. For a nutty kick, try adding chopped walnuts or pecans. If you love chocolate, add more dark chocolate chips. You can also mix in dried fruit, like raisins or cranberries. Each variation brings a new twist to your breakfast cookies. Enjoy experimenting! {{image_4}} If you want to make these cookies vegan, it is easy. Use maple syrup instead of honey. You can also swap the dark chocolate chips for dairy-free ones. This keeps the cookies sweet and tasty without animal products. For those with nut allergies, you can skip the peanut butter. Instead, use sunflower seed butter. It has a similar texture and flavor. Make sure to check that all other ingredients are nut-free, especially chocolate chips and any nuts you may add. Adding flavor can make these cookies even better. Try mixing in a bit of cinnamon for warmth. A dash of vanilla extract enhances the sweetness. You can also experiment with other flavors, like almond extract or even a pinch of sea salt for a salty-sweet taste. These small changes can transform your breakfast cookies into something special! Store leftover cookies in an airtight container. This keeps them fresh for longer. Place parchment paper between layers to prevent sticking. They stay tasty for about three days at room temperature. If you want them to last longer, refrigeration is a good option. Just note that they might become a bit firmer. To freeze these cookies, first let them cool completely. Then, place cookies in a single layer on a baking sheet. Freeze them for about an hour. Once frozen, transfer them to a freezer bag or container. Date the bag so you remember when you made them. They can last up to three months in the freezer. When you're ready to enjoy, just thaw them at room temperature or microwave for a few seconds. To reheat cookies, use your oven for the best texture. Preheat the oven to 350°F (175°C). Place cookies on a baking sheet and warm for about 5 minutes. If you're in a hurry, the microwave works too. Heat for 10 to 15 seconds at a time until warm. Enjoy them soft and gooey! Yes, you can! If you prefer, use agave syrup or coconut sugar. These will add a nice sweetness. Remember, each sweetener has a unique flavor, so choose what you like best. To make these cookies gluten-free, replace rolled oats with gluten-free oats. Check the label to ensure they meet gluten-free standards. This swap keeps the cookies tasty while meeting dietary needs. If you don’t have bananas, try unsweetened applesauce or mashed pumpkin. Both will add moisture and sweetness. The flavor will change slightly, but they still make great cookies. For larger cookies, increase the baking time by about 2-4 minutes. Keep an eye on them until they turn golden brown. Make sure they feel firm to the touch before taking them out. Absolutely! You can skip both if you prefer. The cookies will still taste great with just peanut butter and banana. Feel free to add raisins or dried fruit for extra flavor if you want. We explored a simple recipe for tasty banana peanut butter cookies. You learned about key ingredients, baking steps, and helpful tips for success. We also discussed storage and answered common questions. Remember, you can customize this recipe to fit your taste. Enjoy experimenting with flavors and textures. Your cookies will delight family and friends. Happy baking!

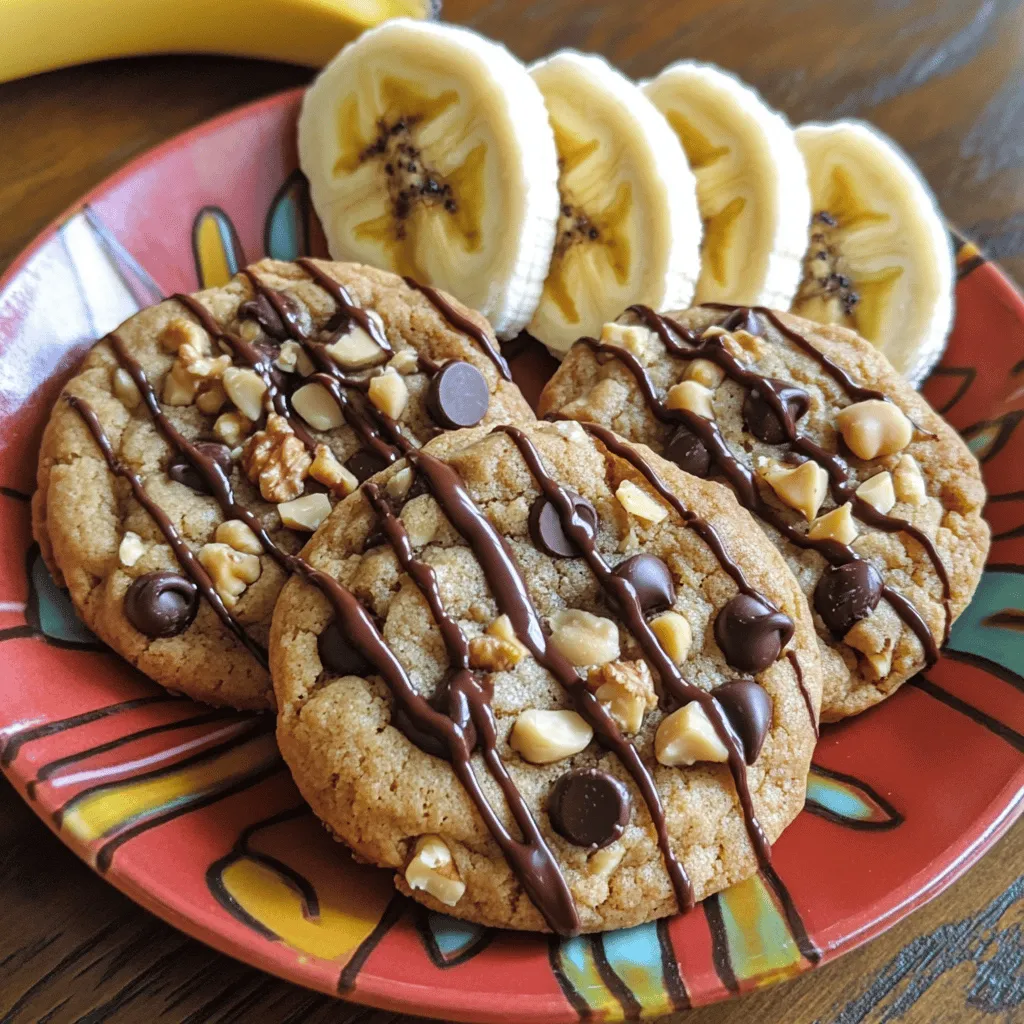
Peanut Butter Banana Breakfast Cookies Quick and Tasty

Start your day right with these Peanut Butter Banana Breakfast Cookies! They’re quick, easy, and delicious. You only need a

To make a Mint Chocolate Chip Protein Smoothie, you will need the following ingredients: - 1 large ripe banana, peeled and sliced - 1 cup fresh spinach leaves, thoroughly washed - 1 cup almond milk (or your favorite plant-based milk) - 1 scoop chocolate-flavored protein powder - 1 tablespoon natural almond butter for creaminess - 1/2 teaspoon peppermint extract for a refreshing flavor - 1/4 cup dark chocolate chips, semi-sweet or dairy-free - 1 tablespoon chia seeds (optional for added nutrition) - Ice cubes, to achieve your desired thickness These ingredients work together to create a smoothie that is both tasty and nutritious. The banana adds natural sweetness, while the spinach packs in vitamins without altering the flavor much. Almond milk keeps it creamy and dairy-free. The chocolate protein powder gives a rich taste and boosts your protein intake. Almond butter adds a creamy texture, and peppermint extract gives that fresh mint kick. Dark chocolate chips provide a delightful crunch, and chia seeds are optional but can enhance the nutrition. Ice cubes help create the perfect smoothie texture. Begin by peeling and slicing the large ripe banana. Place the banana, one cup of fresh spinach leaves, and one cup of almond milk into a high-speed blender. Blend on high until smooth. You want a mix that has no bits of leafy spinach. This creates a bright green base that is nutritious and tasty. Next, add one scoop of chocolate-flavored protein powder, one tablespoon of natural almond butter, and half a teaspoon of peppermint extract. If you want, you can also include one tablespoon of chia seeds for extra nutrition. Blend again on high until everything is creamy and well mixed. This step gives the smoothie its rich taste and smooth texture. Now, add a quarter cup of dark chocolate chips and a handful of ice cubes to the blender. Pulse briefly, just enough to chop the chocolate chips into smaller pieces. This keeps some crunch in the smoothie. Taste your creation and adjust if needed. If you want it sweeter or with more mint flavor, add another slice of banana or a drop more peppermint extract. Pour the smoothie into a tall glass. For a nice look, sprinkle some extra chocolate chips on top. Enjoy this energizing treat! You can switch almond milk for oat milk or soy milk. Both options work well. If you don’t have chocolate protein powder, use vanilla. You can also add cocoa powder for a rich chocolate taste. If you need a nut-free choice, try sunflower seed butter instead of almond butter. To make your smoothie thicker, add more ice cubes or a little more banana. If you want it thinner, add more milk. For sweetness, add honey or a date. You can also increase the mint flavor by adding more peppermint extract. Start with a drop, then taste, and adjust as needed. Make your smoothie look great! Sprinkle extra chocolate chips on top. A sprig of fresh mint adds a nice touch. You can also serve it in a fun glass or with a colorful straw. This makes your drink more inviting and special. {{image_4}} You can switch up your protein source easily. If you want a vegan option, try pea protein or brown rice protein. Both blend well and taste great. For a creamier smoothie, use soy protein. You can also use hemp protein for a nutty flavor. Each choice adds unique benefits to your smoothie. Want to boost the mint or chocolate flavor? Try adding fresh mint leaves. They give a strong, refreshing taste. You can also mix in cocoa powder for extra chocolate richness. If you like it sweeter, add a splash of vanilla extract. Each of these choices makes your smoothie even more delicious. You can make this smoothie special with seasonal fruits or greens. In summer, add fresh berries like strawberries or blueberries. They add a nice sweetness and color. In the fall, try adding pumpkin puree for a tasty twist. You can also mix in kale during winter for added nutrients. Each season brings new tasty options for your smoothie. To store your leftover mint chocolate chip protein smoothie, use an airtight container. Glass jars or BPA-free plastic bottles work well. Keep the smoothie in the fridge. It stays fresh for up to two days. If you notice any separation, just give it a good shake before drinking. You can freeze portions of this smoothie for later. Pour your smoothie into ice cube trays or freezer-safe bags. Freeze in small portions for easy use. When you want a quick smoothie, just grab a few cubes. They are great for smoothies on busy days. When you’re ready to enjoy your frozen smoothie, thaw it in the fridge overnight. If you need it fast, leave it out for about 30 minutes. Once thawed, blend it again to get a creamy texture. If it's too thick, add a splash of almond milk to help it blend smoothly. This smoothie offers many health benefits. - Banana: It provides potassium and quick energy. - Spinach: Packed with vitamins A and C, it boosts your immune system. - Almond milk: A low-calorie option that is rich in calcium. - Protein powder: Supports muscle growth and keeps you full longer. - Almond butter: Adds healthy fats and protein, making it creamy. - Chia seeds: They are high in fiber and omega-3 fatty acids. - Peppermint extract: It aids digestion and adds a refreshing flavor. - Dark chocolate chips: They provide antioxidants and a touch of sweetness. This smoothie is a great way to fuel your day with nutrients. Yes, you can prepare this smoothie ahead of time. - Pre-prepare: Slice the banana and wash the spinach. Store them in an airtight container in the fridge. - Blend and chill: You can blend all ingredients and store the smoothie in the fridge for later. - Keep it fresh: Drink it within 24 hours for the best taste and nutrition. This makes it easy to grab a quick snack on busy mornings. Yes, it is a kid-friendly recipe! - Taste: Kids love the sweet chocolate and mint flavors. - Adjustments: You can reduce the amount of chocolate chips for less sugar. - Add fruits: Mix in other fruits like berries or mango for added sweetness. This smoothie can be a fun and healthy treat for the whole family. This smoothie recipe blends healthy ingredients for a tasty treat. You learned how to create a base with banana and spinach, add flavor with protein powder and almond butter, then finish with chocolate. Remember, you can switch ingredients based on your taste or what's in season. Store any leftovers properly for later enjoyment. With these tips, making this smoothie can be easy and fun. Enjoy the health benefits while treating yourself!

Mint Chocolate Chip Protein Smoothie Energizing Treat

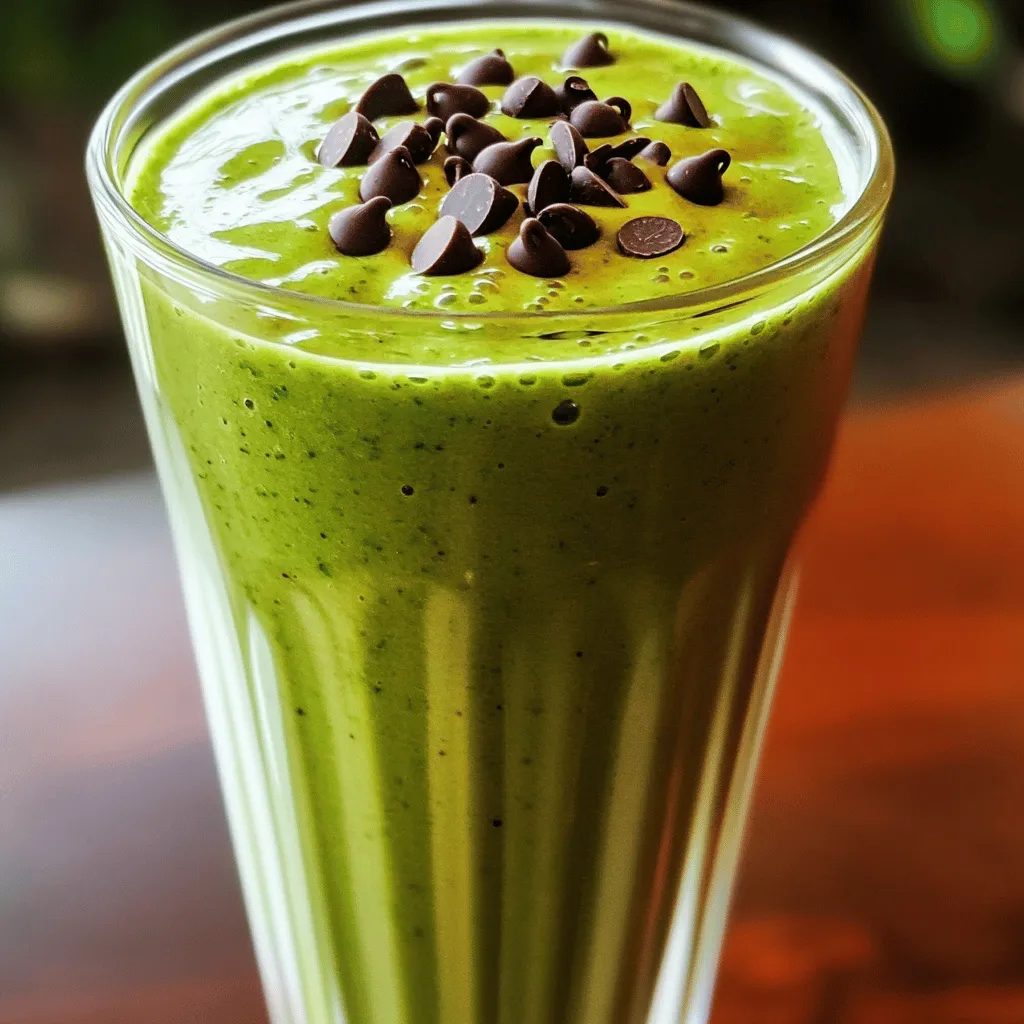
Looking for a tasty way to boost your energy? Try my Mint Chocolate Chip Protein Smoothie! This drink is packed

To make these wraps, gather these key ingredients: - 1 can (15 oz) chickpeas, drained and rinsed - 3 tablespoons hot sauce (adjust according to your spice preference) - 1 tablespoon extra virgin olive oil - 1 teaspoon smoked paprika - 1 teaspoon garlic powder - Salt and black pepper to taste - 4 whole wheat or spinach wraps - 1 cup shredded romaine or iceberg lettuce - 1 cup diced celery for extra crunch - ½ cup Greek yogurt or a plant-based yogurt alternative - 1 tablespoon fresh lemon juice - Optional: sliced avocado for a creamy topping You can make these wraps your own with some fun extras: - Sliced jalapeños for added heat - Chopped green onions for freshness - Diced tomatoes for extra flavor - Shredded carrots for a pop of color - A sprinkle of feta cheese for creaminess Each wrap has around 300 calories and 10 grams of protein. This meal is packed with nutrients from chickpeas and veggies. If you add avocado, it boosts healthy fats, making these wraps even better! First, grab a medium bowl. Open your can of chickpeas and drain them well. Rinse them under cold water to remove extra salt. Use a fork or a potato masher to mash the chickpeas. Leave some pieces whole for texture. You want a mix of creamy and chunky. Now, add hot sauce, olive oil, smoked paprika, garlic powder, salt, and pepper to the mashed chickpeas. Stir well until all the chickpeas are coated. Heat a non-stick skillet over medium heat. Once hot, pour in the chickpea mix. Cook for about 5-7 minutes. Stir often to get some crispy bits on the edges. Lay each wrap flat on a clean surface. Spread a generous spoonful of yogurt sauce in the center. This sauce adds a nice creaminess. Next, layer your shredded lettuce on top. Add the warm chickpea mixture. Sprinkle diced celery for a crunchy bite. If you like, add sliced avocado on top. Fold the sides of the wrap in and roll it up tightly from the bottom. Slice each wrap in half for a great presentation. Enjoy with extra hot sauce or yogurt for dipping! To change the heat in your wraps, start with less hot sauce. Try two tablespoons first. Taste the mixture and add more if you want it spicier. You can also switch to a milder sauce if you prefer less heat. Another great option is to add a bit of honey to balance the spice. When mashing chickpeas, use a fork or potato masher. Aim for a chunky texture. This makes the wraps hearty and satisfying. If you mash them too much, they will turn into a paste. Leave some whole chickpeas for a nice bite. Mixing in some spices while mashing helps the flavor spread evenly. Serve your wraps with fresh veggies on the side. Carrot sticks, cucumber slices, or bell pepper strips add crunch. For a drink, try iced tea or a light soda. You can also serve extra hot sauce or yogurt for dipping. For a sweet touch, offer fresh fruit like apple slices or grapes. {{image_4}} If you want to swap chickpeas, consider using other legumes. Black beans or lentils work great. Both offer a nice texture and absorb flavors well. You can also try shredded chicken or tofu for a different taste. Each option brings a unique twist to your wrap. Feel free to mix up the sauce for your wraps. Instead of Greek yogurt, try ranch or tahini sauce. You can even use guacamole for a creamy texture. For a zesty kick, add a squeeze of lime juice or a dash of sriracha. Each sauce can change the flavor profile significantly. If you need a gluten-free wrap, look for rice paper or corn tortillas. Lettuce leaves make a fresh, low-carb option. This way, you still get all the great flavors without the carbs. Try different wraps to find your favorite way to enjoy these spicy fillings! To store leftover wraps, wrap them tightly in plastic wrap or foil. Place them in an airtight container. This keeps them fresh and tasty. Store in the fridge for up to three days. If you want them to stay crisp, keep the filling separate from the wrap. To reheat your wraps, unwrap them carefully. Heat a skillet over medium heat. Place the wrap in the skillet for about 2-3 minutes on each side. This warms the filling and makes the wrap crispy again. You can also microwave them. Just cover the wrap with a damp paper towel and heat for about 30 seconds to a minute. If you want to freeze your wraps, assemble them first but do not add the yogurt sauce. Wrap each one tightly in plastic wrap and then place in a freezer bag. They can last up to three months in the freezer. When ready to eat, thaw them in the fridge overnight. Then reheat as described above. Yes, you can prepare Spicy Buffalo Chickpea Wraps ahead. Cook the chickpeas and store them in the fridge. Keep the wraps and yogurt sauce separate. When ready to eat, assemble them fresh. This keeps everything crunchy and tasty. You can use plant-based yogurt as a substitute for Greek yogurt. Options include almond, coconut, or soy yogurt. These alternatives work well and keep the dish creamy. You can also use cashew cream for a richer taste. Yes, these wraps can be vegan-friendly. Just replace Greek yogurt with a plant-based yogurt. This keeps the dish free from animal products. Enjoy a tasty meal that fits your diet! In this blog post, we explored how to make Spicy Buffalo Chickpea Wraps. We covered key ingredients, step-by-step instructions, and helpful tips. You can customize your wraps by adjusting spice levels and trying different sauces. We also looked at storage options to keep your leftovers fresh. These wraps are tasty, healthy, and easy to make. Try them out for a quick meal. You won’t be disappointed!

Spicy Buffalo Chickpea Wraps Easy and Flavorful Dish

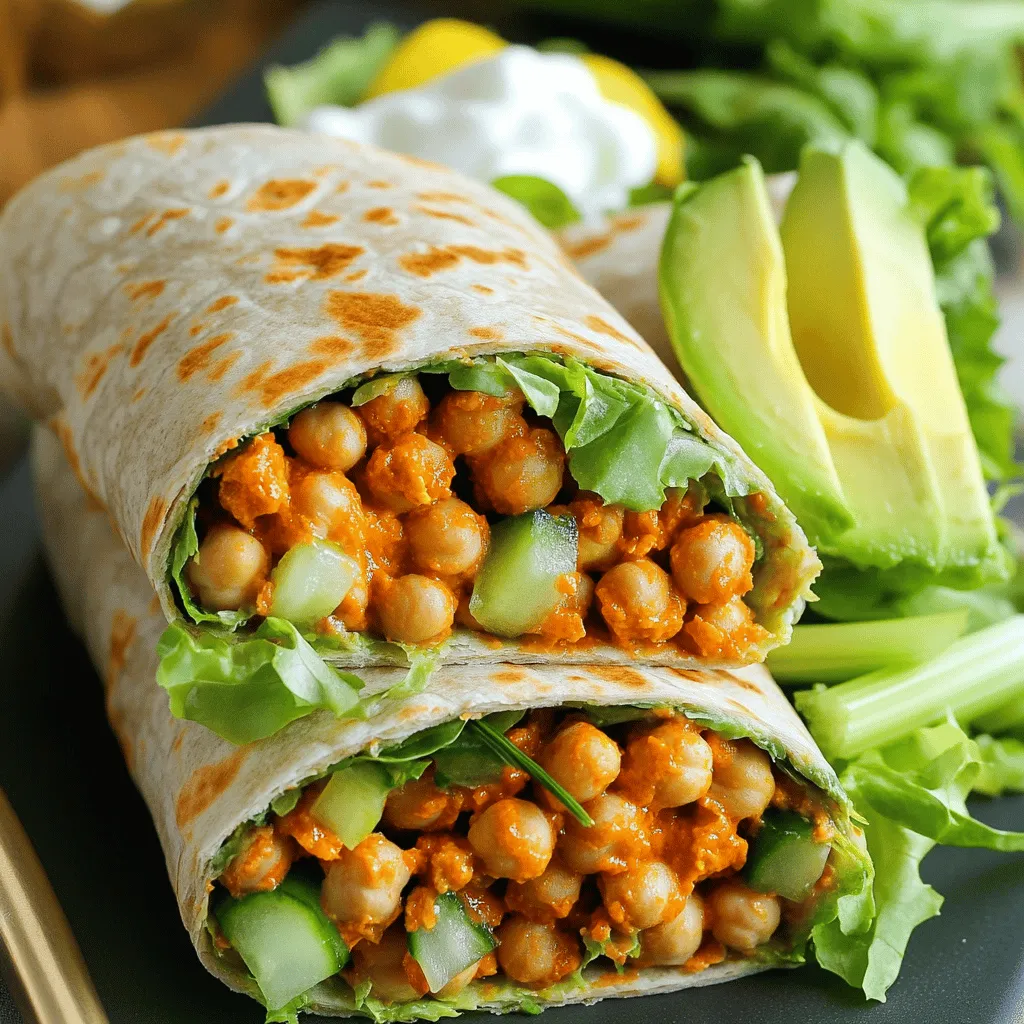
Looking for a quick and tasty meal? These Spicy Buffalo Chickpea Wraps will check every box! Packed with flavor and

To create the best Crispy Sesame Ginger Salmon, gather these fresh ingredients: - 4 salmon fillets (approximately 6 oz each) - 2 tablespoons sesame oil - 2 tablespoons fresh ginger, finely grated - 3 cloves garlic, minced - 3 tablespoons low-sodium soy sauce - 2 tablespoons honey - 1 tablespoon rice vinegar - 1 tablespoon sesame seeds - Salt and pepper to taste - 2 green onions, sliced (for garnish) - Cooked jasmine rice (for serving) These ingredients work together to give the salmon a rich, bold flavor. The sesame oil adds depth, while ginger and garlic bring a fresh kick. The honey balances everything with a touch of sweetness. Low-sodium soy sauce adds umami without too much salt. For garnish, green onions add color and a mild onion taste. Serving it over fluffy jasmine rice makes the dish a complete meal. Enjoy this delightful combination for a flavorful dinner! First, grab a small mixing bowl. Add 2 tablespoons of sesame oil. Next, add 2 tablespoons of finely grated fresh ginger. Then, toss in 3 minced garlic cloves. Pour in 3 tablespoons of low-sodium soy sauce. Now, mix in 2 tablespoons of honey and 1 tablespoon of rice vinegar. Whisk this all together until smooth. This marinade is key for flavor. Now, take 4 salmon fillets. Place them in a shallow dish, spaced out evenly. Pour half of your marinade over the fillets. Make sure they are fully coated. Cover the dish with plastic wrap. Refrigerate for at least 30 minutes. This helps the flavors sink deep into the fish. Save the other half of the marinade for later. After marinating, take the salmon out of the fridge. Heat a non-stick skillet over medium-high heat. Remove the salmon from the marinade, shaking off extra liquid. Season both sides with salt and pepper. Place the fillets skin-side down in the hot skillet. Sear for about 4-5 minutes. You want the skin to be crispy and golden brown. Now, carefully flip the fillets using a spatula. Pour the reserved marinade over the salmon fillets. Cover the skillet with a lid. Let the salmon cook for another 3-4 minutes. It should become opaque and flake easily with a fork. This step ensures your salmon is cooked perfectly. Once the salmon is done cooking, sprinkle sesame seeds on top. Let them toast in the skillet for about a minute. This adds a nice nutty flavor and crunch to the dish. To serve, place each salmon fillet on a bed of fluffy jasmine rice. Drizzle any leftover sauce from the skillet over the top. Finish with fresh sliced green onions for a pop of color. This dish looks as good as it tastes! To make the best marinade, use fresh ginger and garlic. These flavors stand out. Mix sesame oil, soy sauce, honey, and rice vinegar well. This balance of sweet and savory is key. Marinate the salmon for at least 30 minutes. This time helps the fish absorb all the tasty goodness. If you want more flavor, try marinating longer but not more than two hours. Crispy skin makes the salmon shine. Start with a hot skillet. Place the salmon skin-side down in the pan. Do not move it too much; let it cook. This helps the skin become crisp and golden. Season with salt and pepper before cooking. Flip the fillet carefully after 4-5 minutes. Pour the reserved marinade over the fish to keep it moist while cooking. Pair your crispy salmon with fluffy jasmine rice. This rice soaks up the extra sauce nicely. You can also serve it with steamed broccoli or sautéed green beans. These sides add color and nutrients to your meal. For a fresh touch, sprinkle sliced green onions on top. Enjoy this dish with family or friends; it’s sure to impress! {{image_4}} You can swap salmon for other proteins. Try using chicken breasts or tofu. Both options work well with the same marinade. Chicken gives a nice flavor, while tofu absorbs all the tasty spices. Always adjust cooking times based on the protein you choose. The marinade has great flavor, but you can mix it up. Use lime juice instead of rice vinegar for a zesty kick. You can also add orange juice for a sweeter twist. If you want a spicy kick, try adding red pepper flakes or sriracha. These small changes can create a whole new dish. Garnishes make your dish look great and add flavor. In place of green onions, use fresh cilantro or basil for a fresh taste. Chopped nuts, like peanuts or cashews, can give a nice crunch. A sprinkle of chili flakes can also add some heat. Choose garnishes that match your flavor profile. Store any leftover crispy sesame ginger salmon in an airtight container. Keep it in the fridge for up to three days. Always let the salmon cool down before sealing it. This helps keep the fish fresh and safe to eat. If you plan to eat it later, try to consume it within this time frame to enjoy the best flavor. If you want to freeze the salmon, wrap each fillet tightly in plastic wrap. Place them in a freezer-safe bag or container. Remove as much air as possible to prevent freezer burn. You can freeze the salmon for up to three months. When ready to eat, thaw it in the fridge overnight for best results. To reheat, place the salmon in a preheated oven at 350°F (175°C). Heat for about 10-15 minutes, or until it is warmed through. You can also use a microwave, but be careful not to overcook it. Heat in short bursts until just warm. Enjoy it on fresh jasmine rice or with a side of veggies for a quick meal! You should marinate the salmon for at least 30 minutes. This lets the flavors soak in. For a stronger taste, you can marinate it for up to 2 hours. Just remember to keep it in the fridge while it marinates. Yes, you can use frozen salmon fillets. Just make sure to thaw them first. The best way is to leave them in the fridge overnight. If you’re in a hurry, you can put them in a sealed bag and run cold water over them for quicker thawing. Crispy Sesame Ginger Salmon goes well with many sides. Here are some great options: - Cooked jasmine rice - Steamed broccoli - Roasted asparagus - Sautéed spinach - A fresh cucumber salad These sides add color and flavor to your meal. Yes, this recipe is perfect for meal prep. You can cook the salmon in advance and store it in the fridge. Just keep the salmon in a sealed container. It will stay fresh for up to three days. You can reheat it in the microwave or eat it cold. Pair it with rice or veggies for a quick meal. This blog showed you how to make Crispy Sesame Ginger Salmon. I shared a list of fresh ingredients, easy steps, and helpful tips to make it just right. You learned about storing and reheating, along with some fun variations. Cooking can be simple and tasty. With this recipe, you can impress anyone. So grab your ingredients and enjoy making this dish! Happy cooking!

Crispy Sesame Ginger Salmon Flavorful Dinner Delight

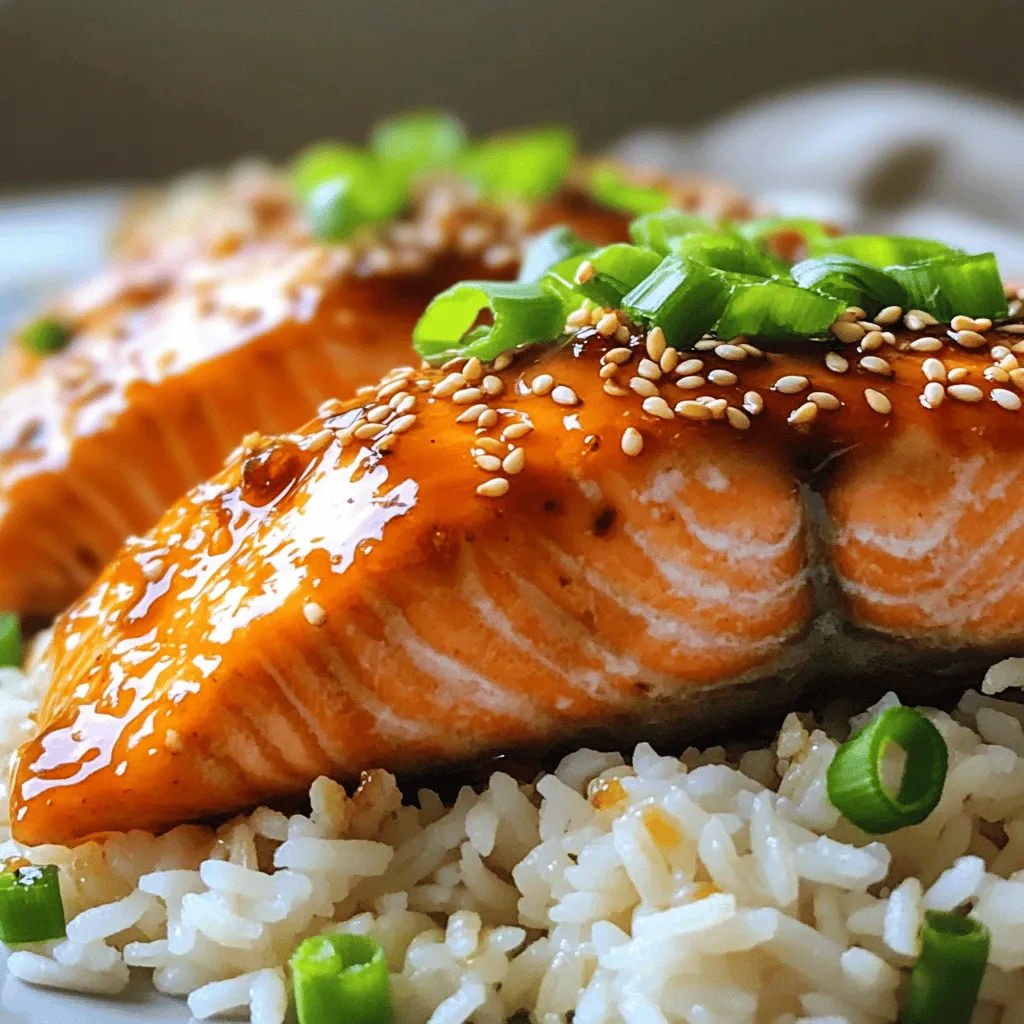
If you’re looking for a quick dinner that bursts with flavor, you’re in the right spot! Crispy Sesame Ginger Salmon

- 1 cup unsalted butter (2 sticks) - 1 cup granulated sugar - 1 cup packed brown sugar - 4 large eggs - 2 teaspoons pure vanilla extract - 1 cup all-purpose flour - 1 cup unsweetened cocoa powder - 1/2 teaspoon fine sea salt - 1 cup chocolate chips (milk or dark) - 8-10 Oreo cookies, roughly chopped - 1/2 cup white chocolate chips (optional) You can swap unsalted butter for coconut oil if you want a dairy-free option. Use brown sugar only if you want a deeper flavor. If you lack eggs, try using a mix of ground flaxseed and water. For flour, substitute with almond flour for a gluten-free treat. - Butter: Use high-fat butter for a rich taste. - Cocoa Powder: Choose Dutch-processed for a smoother flavor. - Chocolate Chips: Go for high-quality brands for the best melt. - Oreos: Look for fresh Oreos; they add crunch and flavor. - Vanilla Extract: Always use pure vanilla for the best results. Using quality ingredients makes your brownies taste amazing. Each bite should be rich and flavorful, making it hard to resist! First, preheat your oven to 350°F (175°C). While the oven heats, grab a 9x13-inch baking dish. Lightly grease it with butter or cooking spray. Next, line the bottom with parchment paper. This step helps you lift the brownies out easily after baking. Now, let’s melt the butter. In a medium saucepan, melt 1 cup of unsalted butter over low heat. Once it’s melted, remove it from heat. Allow it to cool slightly until warm. In a large bowl, mix the melted butter with 1 cup of granulated sugar and 1 cup of packed brown sugar. Use a whisk or spatula to combine these until smooth. Add 4 large eggs one at a time, stirring well after each. Then, mix in 2 teaspoons of pure vanilla extract. In a separate bowl, whisk together 1 cup of all-purpose flour, 1 cup of unsweetened cocoa powder, and 1/2 teaspoon of fine sea salt. Slowly add this dry mix to the wet ingredients. Stir gently until just combined; don’t overmix. Now, it’s time for the fun part! Fold in 1 cup of chocolate chips and 8-10 roughly chopped Oreo cookies. You can also add 1/2 cup of white chocolate chips if you like. Make sure everything is evenly mixed. Pour the brownie batter into your prepared baking dish. Spread it evenly into all corners. Place it in the preheated oven and bake for 25-30 minutes. To check if they’re done, insert a toothpick into the center. It should come out with a few moist crumbs. Once baked, remove the brownies and let them cool in the pan on a wire rack for 20-30 minutes. Then, lift them out using the parchment paper and slice them into squares. To make fudgy brownies, use less flour and add more chocolate. This gives them a rich, moist texture. For cake-like brownies, add a bit more flour and bake them longer. The key is to check them often. Insert a toothpick; it should have a few moist crumbs for fudgy ones. For cake-like brownies, the toothpick should come out clean. To keep brownies fresh, store them in an airtight container. This helps to lock in moisture and flavor. You can also wrap them tightly in plastic wrap. For longer storage, place them in the fridge. Just remember to let them come to room temperature before enjoying. This ensures the best taste and texture. For a fun twist, serve your brownies with a scoop of vanilla ice cream on top. The cold ice cream pairs perfectly with the warm brownies. You can also sprinkle some powdered sugar on top for a nice look. For extra flair, add a drizzle of chocolate or caramel sauce. This adds sweetness and makes your dessert even more appealing. {{image_4}} You can make these brownies even more fun by adding different treats. Try mixing in nuts like walnuts or pecans for a crunch. Add caramel bits for a sweet, gooey surprise. You can also change the chocolate type. Use dark chocolate chips for a richer flavor or white chocolate chips for a sweeter taste. Each addition gives new life to your brownies. Want to make these brownies gluten-free? Swap out the all-purpose flour with a gluten-free flour blend. Make sure the blend contains xanthan gum. This will help the brownies hold together. Always check labels on your chocolate chips and Oreos. Some brands offer gluten-free options, ensuring your brownies stay safe and delicious. For a vegan version, you can replace the eggs with flax eggs. Mix one tablespoon of ground flaxseed with three tablespoons of water for each egg. Let it sit for five minutes to thicken. Use vegan butter instead of regular butter. Choose dairy-free chocolate chips and Oreos to keep it vegan. These swaps will still give you yummy, fudgy brownies that everyone will love. To keep your brownies fresh, store them properly. Use an airtight container. This helps maintain moisture. Place parchment paper between layers to avoid sticking. Store at room temperature for up to three days. If you want to keep them longer, refrigeration is a good option. Just remember, cold brownies can lose their gooey texture. Freezing is a great way to save brownies for later. First, let them cool completely. Then, cut them into squares. Wrap each square tightly in plastic wrap. Place them in a freezer-safe bag or container. Label with the date. They can stay in the freezer for up to three months. When you’re ready to enjoy, just thaw at room temperature. Reheating brownies can bring back their warm, gooey goodness. Place a brownie on a microwave-safe plate. Heat it for about 10-15 seconds. Check the center to see if it’s warm. If you want a crispy top, you can use an oven. Preheat the oven to 350°F (175°C). Heat for about 5-10 minutes. Enjoy your warm, chocolatey treat! These brownies are triple chocolate because they use three types of chocolate. We have unsweetened cocoa powder, chocolate chips, and optional white chocolate chips. This mix gives the brownies rich layers of flavor. Each bite bursts with chocolate goodness. You'll love the deep taste and soft texture. Yes, you can use different cookies! Try chocolate sandwich cookies or any favorite cookie. Just chop them up like you would Oreos. This adds a fun twist to the recipe. Keep in mind that the flavor may change slightly, but it will still be tasty. To check if the brownies are done, insert a toothpick in the center. If it comes out with a few moist crumbs, they are ready. Avoid overbaking, as this makes them dry. The perfect brownie should be soft and fudgy in the middle. Here are some common mistakes to watch for: - Overmixing the batter: This makes brownies tough. Mix just until combined. - Using cold eggs: Cold eggs can create a lumpy batter. Let them sit at room temp first. - Not checking the oven temperature: An oven that's too hot can burn the edges. Use an oven thermometer for accuracy. - Cutting brownies too soon: Let them cool for at least 20 minutes before slicing. This helps them hold their shape. This article covered key aspects of making triple chocolate Oreo brownies. We explored essential ingredients, easy instructions, tips for perfect results, and delicious variations. Choosing quality ingredients sets the stage for great flavor. Remember to store your brownies properly for maximum freshness. With these tips, you can create tasty brownies every time. Whether you prefer fudgy or cake-like, there’s a method for you. Enjoy baking and sharing your delicious treats!

Irresistible Triple Chocolate Oreo Brownies Recipe

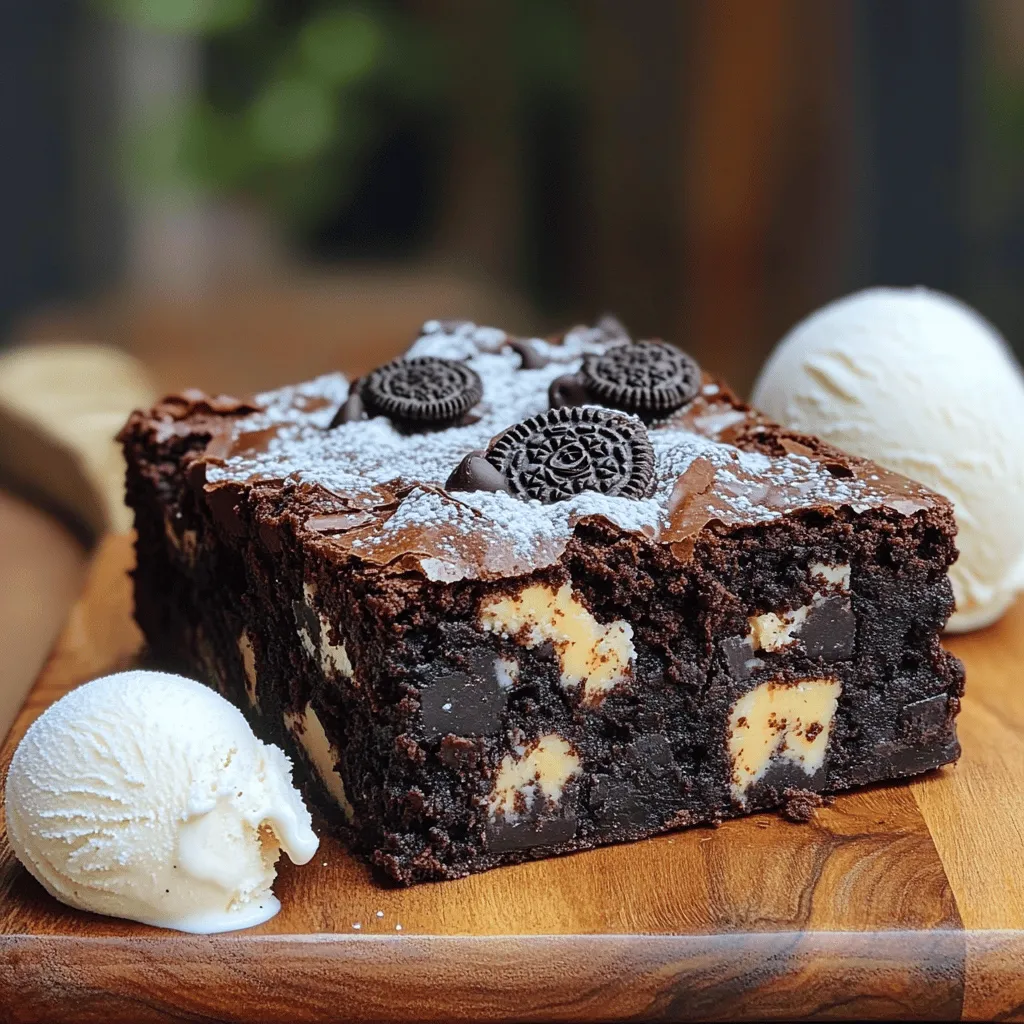
Craving something rich and chocolatey? You’ve found the perfect treat! This Irresistible Triple Chocolate Oreo Brownies recipe combines creamy chocolate,

To create these tasty Brussels sprouts, you need: - 1 lb Brussels sprouts, trimmed and halved - 2 tablespoons extra virgin olive oil - 2 tablespoons pure maple syrup (preferably grade A) - 1 tablespoon smooth Dijon mustard - 1 tablespoon quality balsamic vinegar - 2 cloves fresh garlic, finely minced - Salt and freshly ground black pepper, to taste These ingredients work together to create a bright and flavorful dish. The Brussels sprouts provide a great base, while the maple syrup brings sweetness. The Dijon mustard adds a bit of tang. Balsamic vinegar rounds out the flavor with a hint of acidity. You can add more texture and taste with: - ¼ cup chopped pecans (optional, for added texture) - Fresh parsley, chopped, for garnish Pecans add a nice crunch, which contrasts well with the tender sprouts. Fresh parsley not only adds color but also a fresh taste. This dish is not only delicious but also healthy. Here’s a quick look at the nutritional benefits: - Brussels sprouts are high in vitamins C and K. - Maple syrup is a natural sweetener with antioxidants. - Olive oil provides healthy fats. These ingredients make the dish nutritious without losing flavor. Enjoying Maple Dijon Roasted Brussels Sprouts gives you a tasty way to get your greens! Start by trimming and halving your Brussels sprouts. This step helps them cook evenly. Aim for a pound of fresh sprouts. Rinse them well under cold water to remove dirt. Dry them with a towel to ensure they roast nicely. In a large bowl, mix together the olive oil, maple syrup, Dijon mustard, and balsamic vinegar. Add two minced garlic cloves to the mix for extra flavor. Season with salt and black pepper. Whisk until everything blends well. This glaze will coat the sprouts and give them a sweet and tangy taste. Preheat your oven to 400°F (200°C). Spread the Brussels sprouts on a lined baking sheet. Make sure they sit in a single layer. Roast them for about 20 to 25 minutes. Stir them halfway through for even cooking. If you want some crunch, add pecans in the last five minutes. When they’re done, they should be tender and crispy. Let them cool for a few minutes. Before serving, sprinkle fresh parsley on top for color and flavor. Enjoy your flavorful delight! To get the best Brussels sprouts, start with fresh ones. Choose firm, green sprouts without brown spots. Trim the ends and cut them in half for even cooking. Preheat your oven to 400°F (200°C). A hot oven helps them roast well. Spread the sprouts on the baking sheet in a single layer. This keeps them from steaming and ensures crispiness. Stir them halfway through roasting. This helps them cook evenly. You can easily change this recipe to fit your taste. Want more sweetness? Add an extra tablespoon of maple syrup. For a bit of heat, mix in some red pepper flakes. If you love tanginess, add a splash of lemon juice. For nut lovers, try different nuts like walnuts or almonds. Each choice adds its own flavor and texture, making your dish unique. Serve your Maple Dijon roasted Brussels sprouts on a large platter. Drizzle any leftover glaze from the baking sheet over them. This adds extra flavor and looks great! You can also garnish with fresh parsley for color. Pair them with roasted meats for a perfect meal. They also work well as a side for holiday dinners. Enjoy the blend of sweet and savory flavors in every bite! {{image_4}} You can add nuts or seeds to enhance texture. Pecans add a sweet crunch. You may also try walnuts or almonds for a different taste. Seeds like sunflower or pumpkin seeds work great too. Just sprinkle them on during the last five minutes of roasting. This way, they toast up nicely without burning. Why stop at Brussels sprouts? You can mix in other veggies. Carrots, sweet potatoes, or cauliflower roast well. Cut them into even pieces so they cook at the same rate. Toss them in the same maple-Dijon glaze. This adds more color and flavor to your dish. Spices and herbs can change the flavor profile. Add a pinch of cayenne for heat. Try thyme or rosemary for a fresh taste. You can also use smoked paprika for a deeper flavor. Experiment with what you have at home. Each addition can make your dish unique and exciting. To keep your Maple Dijon roasted Brussels sprouts fresh, let them cool first. Place them in an airtight container. You can store them in the refrigerator. They stay good for about 3 to 4 days. Make sure to label the container with the date. This helps you track freshness. When you are ready to eat, reheating is easy. Preheat your oven to 350°F (175°C). Spread the sprouts on a baking sheet. Heat them in the oven for about 10 to 15 minutes. This method keeps them crispy. You can also use a microwave if you are in a hurry. Place the sprouts in a microwave-safe dish. Heat them for 1 to 2 minutes. Stir halfway for even heating. For long-term storage, freezing is a great option. First, let the Brussels sprouts cool completely. Arrange them in a single layer on a baking sheet. Freeze them for about 1 hour until firm. Once frozen, transfer them to a freezer-safe bag. Remove as much air as possible to prevent freezer burn. They can be stored for up to 3 months. When you’re ready to eat, just reheat them from frozen. You can roast or microwave them for a quick meal. You can pair these sprouts with many dishes. They go well with roasted chicken or pork. Try serving them beside quinoa or wild rice for a healthy meal. You may also enjoy them with a fresh salad or as part of a veggie platter. They add a vibrant touch to any plate. Yes, you can easily make this recipe vegan. The main ingredients are already plant-based. Just ensure you use maple syrup and olive oil. The Dijon mustard is also vegan-friendly. You can skip the pecans if you wish, but they add a nice crunch. When selecting Brussels sprouts, look for bright green, firm sprouts. They should feel heavy for their size. Avoid any that are yellow or wilted. Smaller sprouts tend to be sweeter and more tender. If you can, buy them fresh from a local market. If you don't have Dijon mustard, you can use yellow mustard. It has a milder flavor but works well. Another option is whole grain mustard, which adds texture. You can also try using honey mustard for a sweeter twist, though it will change the sauce a bit. Leftovers of Maple Dijon Roasted Brussels sprouts are good for about 3 to 4 days. Store them in an airtight container in the fridge. When reheating, use the oven to keep them crispy. You can also microwave them, but they may lose some texture. Maple Dijon roasted Brussels sprouts can be a delicious side. We explored ingredients, prep steps, and cooking tips. You now know how to enhance flavor and store leftovers. Try adding nuts, spices, or even other veggies for fun twists. Keep it simple or get creative. Whatever you choose, enjoy bringing this dish to your table!

Maple Dijon Roasted Brussels Sprouts Flavorful Delight

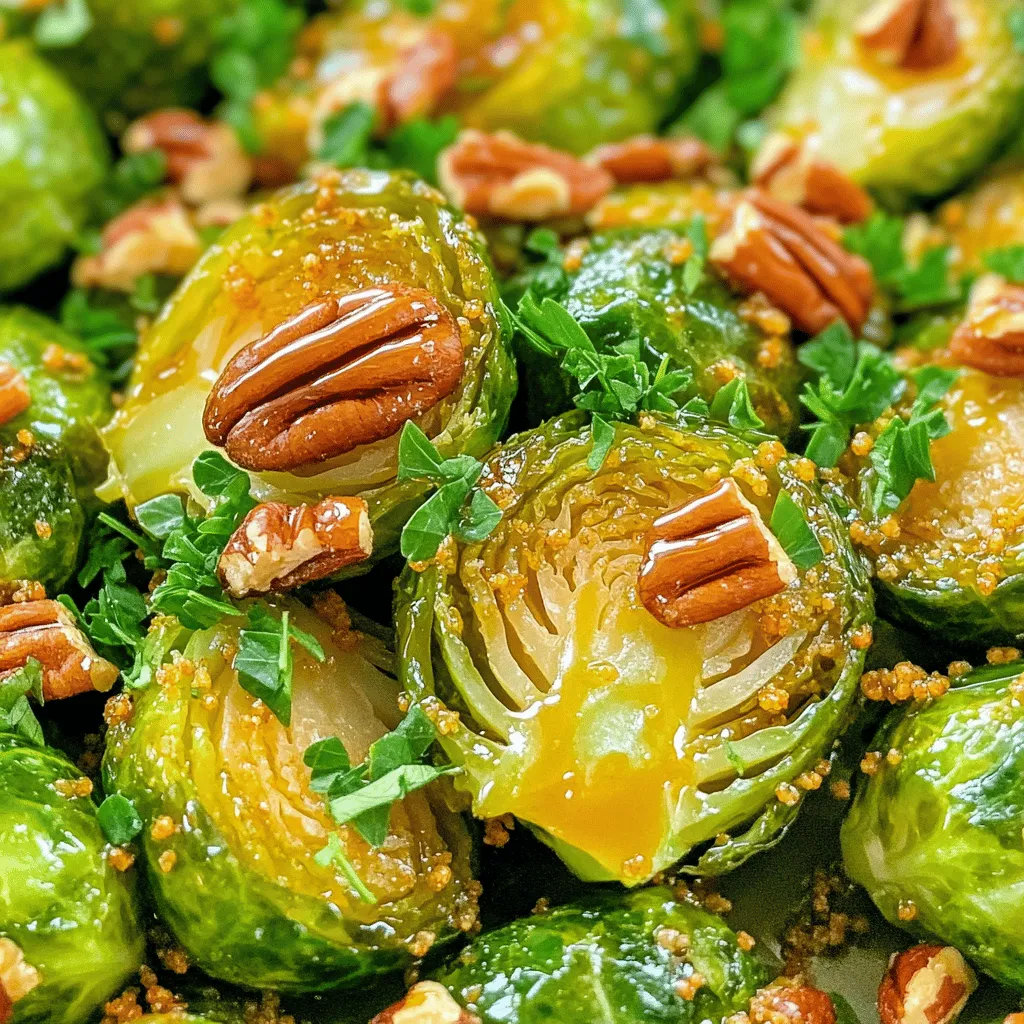
Looking for a delicious side dish that’s easy to make? Try my Maple Dijon Roasted Brussels Sprouts! This recipe combines

To make creamy avocado pesto pasta, you'll need: - 2 ripe avocados, peeled and pitted - 1 cup fresh basil leaves, packed - 2 cloves garlic, peeled - 1/4 cup pine nuts (you can use walnuts instead) - 1/2 cup extra virgin olive oil - 1 tablespoon freshly squeezed lemon juice - Salt and freshly cracked pepper to taste - 300g of your favorite pasta (spaghetti or fettuccine work great) - 1/4 cup grated Parmesan cheese (or nutritional yeast for a vegan option) These ingredients come together to create a rich and creamy sauce. You can enhance your dish with fun garnishes and swaps: - Handful of cherry tomatoes, halved (for garnish) - Extra basil leaves, for garnish If you want a nut-free version, try using sunflower seeds instead of pine nuts or walnuts. For this recipe, I suggest using either spaghetti or fettuccine. Both types hold the sauce well and make every bite tasty. You can also try whole wheat or gluten-free pasta for a healthier or allergy-friendly option. Start by filling a large pot with water. Add a good amount of salt to the water. This helps flavor the pasta. Bring the pot to a rolling boil. Once it boils, add your favorite pasta. I love spaghetti or fettuccine for this dish. Cook the pasta as per the package instructions until it's al dente. Before you drain it, save about one cup of the pasta water. This will help later. Drain the pasta and set it aside until you're ready to mix in the pesto. Grab your food processor for the next step. Add the ripe avocados, fresh basil leaves, garlic cloves, and pine nuts into the bowl. Pulse this mix until everything is finely chopped. It should look mixed but still a bit chunky. Next, while the processor runs, slowly drizzle in the extra virgin olive oil. This helps create that creamy texture we want. Keep mixing until your pesto is smooth. Now, take a large mixing bowl and add the cooked pasta. Pour the creamy avocado pesto over the pasta. Toss it gently so the pasta gets coated evenly. If your pesto feels too thick, add a bit of the reserved pasta water. Mix it in until you reach your desired consistency. Taste and adjust the seasoning with salt and pepper as needed. Now, your creamy avocado pesto pasta is ready to serve! To get the right creamy texture in your avocado pesto, start by using ripe avocados. They should yield slightly when you press them. Next, pulse the avocados, basil, garlic, and nuts in a food processor. As you blend, slowly drizzle in the olive oil. This helps create a smooth sauce. If your pesto is too thick, add a little of the reserved pasta water. Mix it in slowly until you reach the smoothness you like. If you have leftover creamy avocado pesto pasta, store it in an airtight container. Keep it in the fridge and eat it within two days. To prevent browning, add a thin layer of olive oil on top. You can also put plastic wrap directly on the surface of the pesto. When you're ready to eat it again, just give it a quick stir. If it’s too thick, add a splash of water or olive oil to loosen it up. Seasoning your avocado pesto is key to a tasty dish. Always start with salt and pepper. You can also add a squeeze of lemon juice for brightness. If you want a bit more flavor, try adding crushed red pepper for heat. Fresh herbs like parsley or extra basil can make it pop. Experiment with these options to find your favorite blend! {{image_4}} You can make this dish vegan by using nutritional yeast. Replace the Parmesan cheese with 1/4 cup of nutritional yeast. It gives a cheesy flavor without dairy. Nutritional yeast is also packed with vitamins. This swap keeps the creamy texture while staying plant-based. If you need a nut-free option, you can use sunflower seeds. They blend well and add a nice crunch. You can also use pumpkin seeds instead. Both seeds keep the pesto rich without nuts. Just blend these seeds with the other ingredients as you would with nuts. Want to make your pasta more filling? Add proteins like grilled chicken or chickpeas. Cook the chicken separately and slice it thin. For chickpeas, use canned ones for quick prep. Toss them into the pasta before serving. This boosts protein and fills you up nicely. Creamy avocado pesto pasta pairs well with many flavors. Here are some great options: - Grilled Chicken: The juicy chicken adds protein and balances the creamy sauce. - Shrimp: Light and tender shrimp complement the dish beautifully. - Toasted Garlic Bread: Crunchy bread brings a nice texture contrast. - Fresh Salad: A crisp salad with a light vinaigrette refreshes the palate. You can enhance your meal with tasty sides. Consider serving: - Steamed Vegetables: Broccoli or asparagus add vibrant colors and nutrients. - Bruschetta: Tomato and basil on toasted bread give a fresh kick. - Roasted Potatoes: Crispy potatoes offer a hearty side that pairs well. - Caprese Salad: Mozzarella, tomatoes, and basil provide a classic touch. Make your dish look as good as it tastes. Here are some tips: - Use a Large Bowl: This allows the pasta to shine and gives it room to breathe. - Drizzle Olive Oil: A light drizzle adds gloss and rich flavor. - Garnish Generously: Top with halved cherry tomatoes and extra basil leaves. - Add Lemon Wedges: Place lemon on the side for color and a zesty touch. These tips will help you serve a beautiful and delicious creamy avocado pesto pasta. Enjoy sharing this delightful dish with friends and family! Yes, you can! While basil gives a nice flavor, you can try other herbs. Cilantro or parsley work well too. Mixing herbs can add a new twist to your pesto. Just keep the same amount so the taste stays strong. You can even blend different flavors for fun! Absolutely! This creamy avocado pesto pasta is great for meal prep. You can cook it ahead of time and store it. Just keep the pasta and pesto in separate containers. When you're ready to eat, just combine them. You can warm it up in the microwave or on the stove. The dish stays tasty for up to three days in the fridge. To make this dish gluten-free, simply swap regular pasta for gluten-free pasta. Many brands offer great gluten-free options now. Just cook it like regular pasta. That way, you can enjoy creamy avocado pesto without gluten. You can create a delicious creamy avocado pesto pasta with just a few steps. We covered key ingredients, tips for perfect texture, and tasty variations. Remember, you can customize it with your favorite herbs or proteins. Don't forget about the best sides for a well-rounded meal. Enjoy experimenting and finding your perfect mix! This dish is not just tasty; it’s easy to make. Perfect for any dinner or gathering, creamy avocado pesto pasta will impress everyone.

Creamy Avocado Pesto Pasta Rich and Tasty Dish

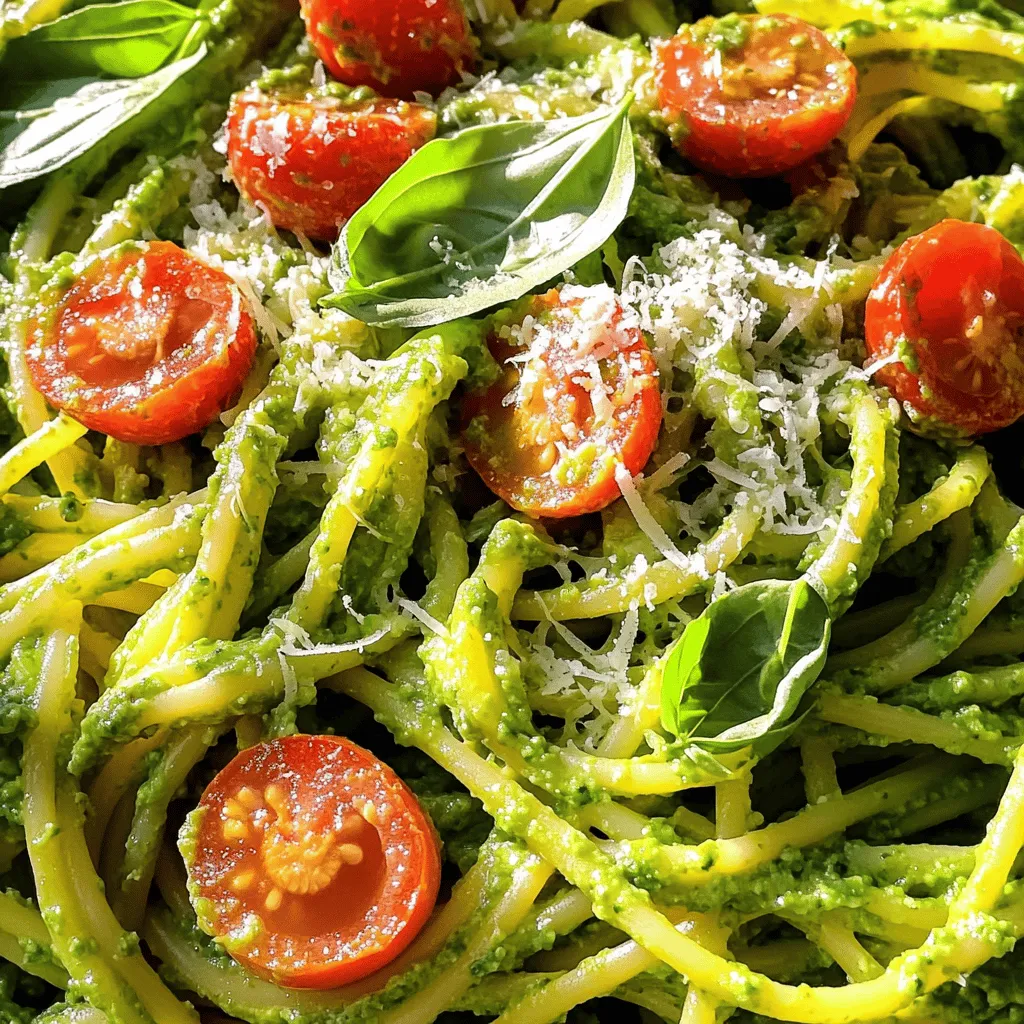
Are you ready to transform your pasta dinner into something amazing? My Creamy Avocado Pesto Pasta is rich, tasty, and

To make these bites, you need a few simple ingredients: - 1 cup creamy pumpkin puree - 1 cup rolled oats - 1/2 cup almond butter (or your choice of nut/seed butter) - 1/4 cup honey or pure maple syrup - 1 teaspoon natural vanilla extract - 2 teaspoons chai spice blend (or a mix of ground cinnamon, ginger, cardamom, and nutmeg) - 1/4 teaspoon fine sea salt These core ingredients create a smooth and flavorful base. The pumpkin puree adds moisture and a rich taste. The oats provide a hearty texture. Almond butter binds everything and gives a nutty flavor. You can customize your bites with these optional add-ins: - 1/2 cup finely chopped walnuts or pecans (for added crunch) - 1/4 cup unsweetened shredded coconut (for a tropical touch) These add-ins boost texture and flavor. Nuts offer a nice crunch, while coconut adds a hint of sweetness. You can easily adapt the recipe for different diets: - Swap almond butter for sunflower seed butter for a nut-free option. - Use agave syrup instead of honey for a vegan choice. - Replace rolled oats with gluten-free oats for a gluten-free treat. These substitutions keep the bites tasty while catering to various dietary needs. Feel free to mix and match to suit your preferences! Start by gathering your ingredients. In a large bowl, add 1 cup of creamy pumpkin puree, 1 cup of almond butter, 1/4 cup of honey, and 1 teaspoon of vanilla extract. Mix these ingredients well using a spatula or wooden spoon. You want the mixture to be smooth and creamy. Take your time to blend everything together. This base will give your bites their rich flavor. Next, it’s time to add the oats and spices. Gradually stir in 1 cup of rolled oats, 2 teaspoons of chai spice blend, and 1/4 teaspoon of sea salt. If you love a crunch, add in 1/2 cup of chopped walnuts or pecans too. Mix everything until the oats are well coated. If you want a tropical touch, now is the time to fold in 1/4 cup of shredded coconut. This will add extra flavor and texture to your bites. Now, it’s time to shape your mixture into bites. With clean, slightly damp hands, take small portions and roll them into balls about 1 inch in diameter. The moisture from your hands helps reduce stickiness. Place the formed bites on a parchment-lined baking sheet or a plate. Once you finish rolling all the bites, refrigerate them for at least 30 minutes. This makes them firm and perfect for snacking. Enjoy these tasty bites chilled, and store any leftovers in an airtight container in the fridge. To roll perfect bites, use slightly damp hands. This helps the mixture stick less. Take a small amount of the mix and roll it between your palms. Aim for about one inch in size. If the mix is too sticky, chill it for a bit. This makes it easier to shape. If you're making many, keep your hands damp to save time. Chai spice blend adds warmth and depth. You can also adjust the spice levels to your taste. If you want more heat, add extra ginger or cardamom. For a sweeter touch, sprinkle in more cinnamon. Always taste as you go. This helps you find the perfect balance. Experimenting with spices can lead to fun new flavors. Store your bites in an airtight container. This keeps them fresh for up to one week. Make sure to chill them before storing. This helps maintain their shape. If you want to keep them longer, freeze them. Just place them in a single layer on a baking sheet first. Once frozen, transfer them to a bag. This way, you can enjoy them anytime! {{image_4}} You can change the taste of your No Bake Chai Pumpkin Bites by using different nut butters. Almond butter adds a mild flavor. Peanut butter gives a rich and bold taste. Cashew butter is smooth and creamy, while sunflower seed butter is great for nut allergies. Each nut butter brings its own twist, so don’t be afraid to experiment! For special occasions, think about adding seasonal flavors. During fall, you can mix in some finely chopped apples or dried cranberries. In winter, try adding a bit of orange zest for a bright taste. For a summer twist, consider adding some fresh berries or mango bits. These additions not only enhance flavor but also make your bites festive! Making these bites gluten-free is easy. Use certified gluten-free oats. To make them vegan, swap honey for maple syrup. Both ingredients keep the bites sweet and delicious. If you want a nut-free option, use sunflower seed butter instead of nut butters. This way, everyone can enjoy these tasty treats, regardless of diet! You can serve No Bake Chai Pumpkin Bites in fun and tasty ways. Place them on a big, colorful platter. You can mix them with fresh fruit like apple slices or berries. This adds a pop of color and flavor. For a fun twist, stick a toothpick in each bite. This makes them easy to grab at parties. If you want to make them even more special, drizzle some honey or maple syrup on top. These bites pair well with many drinks. A warm cup of chai tea matches the spices in the bites. You can also serve them with coffee for a cozy treat. For something cool, iced tea or almond milk works great too. If you want a refreshing option, try sparkling water with a splash of lemon. Each drink brings out the flavors of the bites. To impress your guests, present the bites neatly. Arrange them on a fancy plate and sprinkle extra chai spice on top. You can add a small bowl of honey or maple syrup nearby for dipping. Using mini cupcake liners can add a cute touch. This makes each bite look like a treat. For a festive look, add some seasonal decorations around the platter. These simple tips will make your No Bake Chai Pumpkin Bites the star of any gathering. Yes, you can use canned pumpkin puree. It saves time and works well. Just make sure to choose 100% pure pumpkin, not pumpkin pie filling. This puree gives your bites a smooth texture and rich taste. These bites can last up to one week in the fridge. Store them in an airtight container. This keeps them fresh and tasty. Just take them out when you’re ready to enjoy a snack. You can freeze these bites for later. Place them in a single layer on a tray. Once they are frozen, transfer them to a freezer-safe bag. They can last up to three months in the freezer. Just thaw them in the fridge before eating. In this blog post, we explored making No Bake Chai Pumpkin Bites. We covered essential ingredients and optional add-ins for extra flavor. I shared easy steps for mixing, shaping, and chilling the bites. You learned how to enhance the bites with tips and variations. Finally, I offered serving suggestions. These bites are tasty and fit many diets. Enjoy making them for yourself or sharing with friends!

No Bake Chai Pumpkin Bites Tasty and Simple Treat

Looking for a quick and tasty snack? You’re in the right place! My No Bake Chai Pumpkin Bites are easy

To make this dish, you need: - 1 cup Arborio rice - 2 cups vegetable broth - 1 cup fresh spinach, finely chopped - 1 cup heavy cream - 1 cup freshly grated Parmesan cheese - 1 small onion, diced - 2 cloves garlic, minced - 2 tablespoons olive oil - Salt and pepper to taste These ingredients work together to create a rich and creamy dish. The Arborio rice provides the perfect base, soaking up flavors. The Parmesan cheese adds a wonderful, cheesy depth. Fresh spinach not only adds color but also a nice hint of earthy taste. You can elevate your dish with: - A pinch of nutmeg (optional) - Fresh parsley, finely chopped (for garnish) Nutmeg adds a warm undertone. Fresh parsley brings a burst of freshness and color, making your dish look beautiful. For this recipe, you will need: - Medium saucepan - Large non-stick skillet - Ladle for broth - Wooden spoon for stirring These tools help you cook the rice evenly and mix in the creamy goodness. A non-stick skillet ensures nothing sticks, making cleanup easy. Start by gathering all your ingredients. You will need: - 1 cup Arborio rice - 2 cups vegetable broth - 1 cup fresh spinach, finely chopped - 1 cup heavy cream - 1 cup freshly grated Parmesan cheese - 1 small onion, diced - 2 cloves garlic, minced - 2 tablespoons olive oil - Salt and pepper to taste - A pinch of nutmeg (optional) - Fresh parsley, finely chopped (for garnish) Make sure to chop the spinach and onion finely. This helps them mix well in the dish. Mince the garlic, so it releases its flavor quickly. In a medium saucepan, warm the vegetable broth over low heat. Keep it simmering while you cook the rice. This helps the rice absorb the broth better. Next, heat 2 tablespoons of olive oil in a large, non-stick skillet over medium heat. Once hot, add the diced onion. Sauté it for about 3-4 minutes. Stir it often until the onion turns soft and clear. Add the minced garlic to the skillet with the onion. Cook for one more minute, stirring constantly. The garlic should smell nice, but be careful not to burn it. Now, add the Arborio rice to the skillet. Stir well to coat the rice with the onion and garlic. Toast the rice for about 2 minutes. This step gives the rice a nice nutty flavor. Gradually add the warm vegetable broth to the rice. Use a ladle to add one scoop at a time. Stir the rice continuously until most of the liquid is absorbed before adding more. Repeat this for about 18-20 minutes. The rice should be creamy and tender but still have a slight bite. Once the rice is ready, reduce the heat to low. Stir in the heavy cream, grated Parmesan cheese, and chopped spinach. Mix gently until the spinach wilts and the cheese melts, creating a rich, creamy sauce. Season the dish with salt, freshly cracked pepper, and a pinch of nutmeg if you like. The nutmeg adds a warm touch to the flavor. Take the skillet off the heat and let the creamy rice rest for a few minutes. This helps it thicken a bit before you serve it. For a lovely presentation, serve the creamy spinach rice in shallow bowls. Garnish with freshly chopped parsley and a sprinkle of grated Parmesan on top. Enjoy your delicious meal! To make your creamy Parmesan spinach rice truly luscious, focus on the cream and cheese. Use heavy cream for rich texture. Freshly grated Parmesan melts better than pre-grated. Stir in the cream and cheese slowly. This helps create a smooth and velvety sauce. A pinch of nutmeg adds warmth and depth. Taste as you mix to get your perfect flavor. Cooking Arborio rice is key to achieving that creamy texture. Start by toasting the rice for about two minutes. This enhances the nutty flavor. Use warm vegetable broth, adding it gradually. Stir continuously as you add broth. This releases the rice's starches, which creates creaminess. Cook until the rice is tender yet still slightly firm, known as al dente. For a beautiful presentation, serve the rice in shallow bowls. This lets the creamy sauce shine. Garnish with freshly chopped parsley for color. A sprinkle of extra Parmesan adds a nice touch. You can also pair this dish with grilled chicken or roasted vegetables for a complete meal. Enjoy the blend of flavors and textures in every bite! {{image_4}} You can make this dish your own by adding extra ingredients. Try tossing in some cooked chicken or shrimp for protein. You could also add sun-dried tomatoes for a burst of flavor. Another great option is to mix in some sautéed mushrooms for an earthy taste. If you want to switch up the grains, try using quinoa or farro. These grains add a nutty flavor and a different texture. For dairy, you can swap heavy cream for coconut milk for a lighter version. Nutritional yeast is an excellent dairy-free cheese option, giving the dish a cheesy taste without using actual cheese. Use seasonal veggies to keep the dish fresh and exciting. In spring, add asparagus or peas. During summer, zucchini or bell peppers work well. In fall, consider using roasted butternut squash or kale. These adjustments not only change the taste but also boost the dish’s nutrition. To keep your creamy Parmesan spinach rice fresh, let it cool first. Once cool, pack it in an airtight container. Store the container in the fridge. This dish is best eaten within three days for the best flavor and texture. When ready to eat, reheat the rice gently. You can use the microwave or a skillet. If using the microwave, place the rice in a bowl and add a splash of broth or cream. Heat in short bursts, stirring often. For the skillet, add a bit of broth over low heat. Stir until heated through. This keeps the rice creamy and avoids dryness. You can freeze creamy Parmesan spinach rice for later meals. Place cooled rice in a freezer-safe bag or container. Remove as much air as possible before sealing. Label the bag with a date. It can stay frozen for up to three months. To use, thaw it in the fridge overnight, then reheat as mentioned above. Yes, you can make Creamy Parmesan Spinach Rice ahead of time. Cook the dish, then let it cool down. Store it in an airtight container in the fridge. It will stay fresh for about three days. When you want to serve it, reheat it gently on the stove or in the microwave. Add a splash of broth or cream to help it regain its creamy texture. If you can't find Arborio rice, you can use short-grain rice or sushi rice. These types have a similar texture and will create a creamy dish. You could also use Carnaroli rice, which has a bit more starch. Just keep in mind that cooking times may vary slightly, so check the rice for doneness as you go. To make this dish gluten-free, ensure your vegetable broth is certified gluten-free. Most brands offer this option. The other ingredients, like rice and cheese, are naturally gluten-free. So, as long as your broth is safe, you can enjoy this creamy meal without worry. This blog post shared easy steps to make Creamy Parmesan Spinach Rice. We explored key ingredients, essential tools, and detailed cooking instructions. I offered tips to achieve that perfect creaminess and ideas for custom variations. In closing, enjoy making this dish your own. It’s versatile and simple. You'll want to make it again and again. Start your cooking adventure today!

Creamy Parmesan Spinach Rice Simple Flavorful Dish

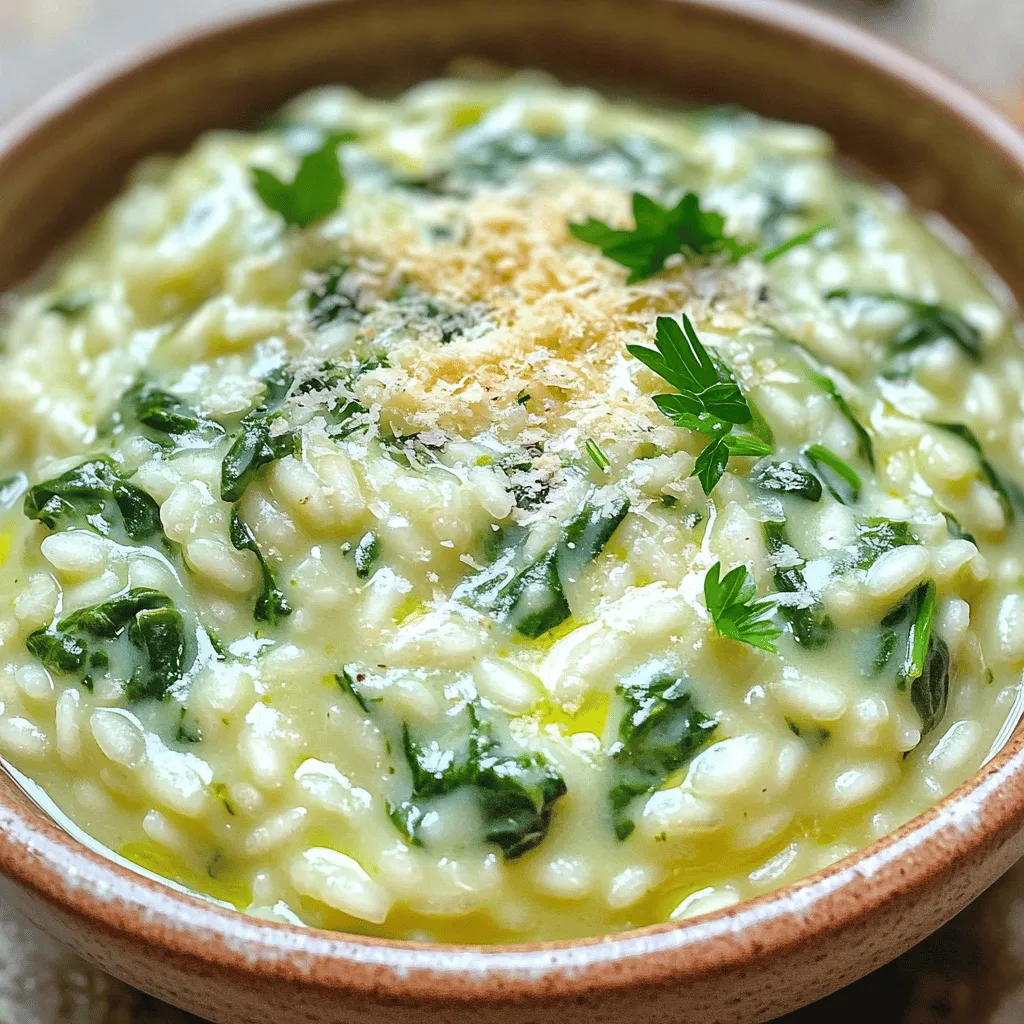
Looking for a quick and tasty dinner? You’ll love this Creamy Parmesan Spinach Rice! It’s simple to make and packed

- 1 cup all-purpose flour - 2 tablespoons granulated sugar - 1 teaspoon baking powder - 1/2 teaspoon baking soda - 1/4 teaspoon fine salt - 1 cup buttermilk - 1 large egg - 2 tablespoons unsalted butter - 1 teaspoon pure vanilla extract - 1/2 cup cream cheese - 1/4 cup powdered sugar - 1 cup fresh strawberries - Whipped cream for serving For these strawberry cheesecake pancakes, we need some key ingredients. First, all-purpose flour gives the pancakes structure and fluff. The granulated sugar adds sweetness. Baking powder and baking soda make them rise and stay light. Salt balances the sweetness and enhances flavor. We also need buttermilk for moisture and tenderness. A large egg binds everything together. Melted unsalted butter adds richness and flavor. To bring in the cheesecake flavor, we use cream cheese and powdered sugar. The vanilla extract gives a warm, sweet note. Fresh strawberries are a must for that fruity taste and bright color. Finally, whipped cream makes the pancakes feel extra special. Gather these ingredients, and you are ready to create a delicious breakfast treat! First, take a large mixing bowl. In it, whisk together these dry ingredients: - 1 cup all-purpose flour - 2 tablespoons granulated sugar - 1 teaspoon baking powder - 1/2 teaspoon baking soda - 1/4 teaspoon fine salt Make sure everything is well mixed and free of lumps. This step is key for fluffy pancakes. Next, grab another bowl. Combine the following wet ingredients: - 1 cup buttermilk - 1 large egg - 2 tablespoons unsalted butter, melted and slightly cooled - 1 teaspoon pure vanilla extract Whisk until the mixture is smooth. This will add moisture and flavor to your pancakes. Now, pour the wet mixture into the dry ingredients. Gently fold them together using a spatula. It's fine if the batter has a few lumps. Over-mixing can lead to tough pancakes, so be careful! In a small bowl, beat together: - 1/2 cup cream cheese, softened to room temperature - 1/4 cup powdered sugar, sifted Mix until smooth and creamy. Then, gently fold in 1 cup of diced strawberries. This filling is what makes these pancakes special. Preheat a non-stick skillet over medium heat. Lightly grease the skillet with cooking spray or a small pat of butter. For each pancake, pour about 1/4 cup of batter onto the skillet. Cook for 2-3 minutes. Look for bubbles forming on the surface. When the edges start to look set, it’s time to flip. Once your pancakes are golden brown, stack them on a serving plate. Between each pancake, spread a generous spoonful of the cream cheese and strawberry mixture. Finally, top the whole stack with more fresh strawberries and a swirl of whipped cream. This makes for a stunning breakfast! To make your pancakes soft, keep the batter lumpy. Over-mixing can make them tough. Mix the wet and dry ingredients gently. A few lumps are just fine. This will give you that fluffy pancake texture that everyone loves. Heat is key to cooking pancakes right. Keep an eye on the skillet to avoid burning. If your pancakes cook too fast, lower the heat. If they take too long, raise it a bit. Perfecting this helps you get that beautiful golden brown color. A tall stack of pancakes looks amazing. Layer each pancake with a spoonful of cream cheese and strawberry filling. Drizzle some on top for flair. Add more fresh strawberries and a dollop of whipped cream. This makes your dish not just tasty but also stunning to see. {{image_4}} You can add chocolate chips or nuts to the batter. Chocolate chips give a rich taste. Nuts add crunch and flavor. Both mix well with the sweet strawberries. Try different types of nuts like walnuts or pecans. Each choice changes the pancake's taste. If you want a lighter option, use almond milk instead of buttermilk. This swap keeps the batter smooth and tasty. Adjust the sugar if you want it sweeter. You can also use different flours, like whole wheat, for a healthier twist. Each change can make the pancakes unique. In summer, use fresh blueberries or ripe bananas. Blueberries burst with juice when you bite them. Bananas add a sweet and creamy texture. You can even mix fruits together for a fun flavor. This keeps the pancakes fresh and exciting all year round. To store leftover pancakes, let them cool completely. Place them in an airtight container. You can refrigerate them for up to 2 days. If you want to keep them fresh, separate the layers with parchment paper. This prevents sticking and keeps them neat. For longer storage, freeze the pancakes. First, let them cool down. Then, stack them with parchment paper in between each pancake. Wrap the stack tightly in plastic wrap. Place this in a freezer bag. You can store them for up to 2 months. When you want to enjoy them again, just thaw them in the fridge overnight. When it's time to eat your pancakes, you have a few options for reheating. For quick results, use the microwave. Heat them for about 30 seconds. Check if they are warm enough; if not, heat in 10-second bursts. If you prefer a crispier texture, use a skillet. Heat the skillet over medium heat. Place the pancakes in the skillet for about 1-2 minutes on each side. This method makes them warm and a bit crispy. Enjoy your delicious pancakes! Strawberry cheesecake pancakes are a sweet twist on a classic breakfast. They combine fluffy pancakes with a rich cream cheese filling and fresh strawberries. Main ingredients include: - 1 cup all-purpose flour - 2 tablespoons granulated sugar - 1 teaspoon baking powder - 1/2 teaspoon baking soda - 1/4 teaspoon fine salt - 1 cup buttermilk - 1 large egg - 2 tablespoons unsalted butter - 1 teaspoon pure vanilla extract - 1/2 cup cream cheese - 1/4 cup powdered sugar - 1 cup fresh strawberries These pancakes are soft and flavorful, perfect for a special breakfast. Yes, you can. To make things easier, you can prepare the pancake batter ahead. Store it in the fridge for up to 24 hours. This way, you save time in the morning. For cooked pancakes, let them cool first. Place them in an airtight container. You can store them in the fridge for two days. If you want to keep them longer, freeze them. They last up to three months. To reheat, use a microwave or skillet. Just warm them up until hot. They will taste fresh again. These pancakes shine on their own, but you can add more to your plate. Here are some great sides and drinks to pair: - Crispy bacon or sausage for a savory touch - Fresh fruit salad for a light side - Maple syrup for extra sweetness - A dollop of whipped cream for added richness - A glass of fresh orange juice or coffee for a refreshing drink These sides make your breakfast even more delicious and fun! This blog post shared a simple recipe for Strawberry Cheesecake Pancakes. We covered essential ingredients, step-by-step instructions, and tips for perfect pancakes. You learned how to mix dry and wet components, prepare the cream cheese filling, and cook the pancakes to a golden brown. Incorporating variations and storage tips helps customize and preserve your pancakes. Enjoying this dish is easy and fun! I hope you try this recipe and make it your own. Happy cooking!

Strawberry Cheesecake Pancakes Irresistible Breakfast Delight

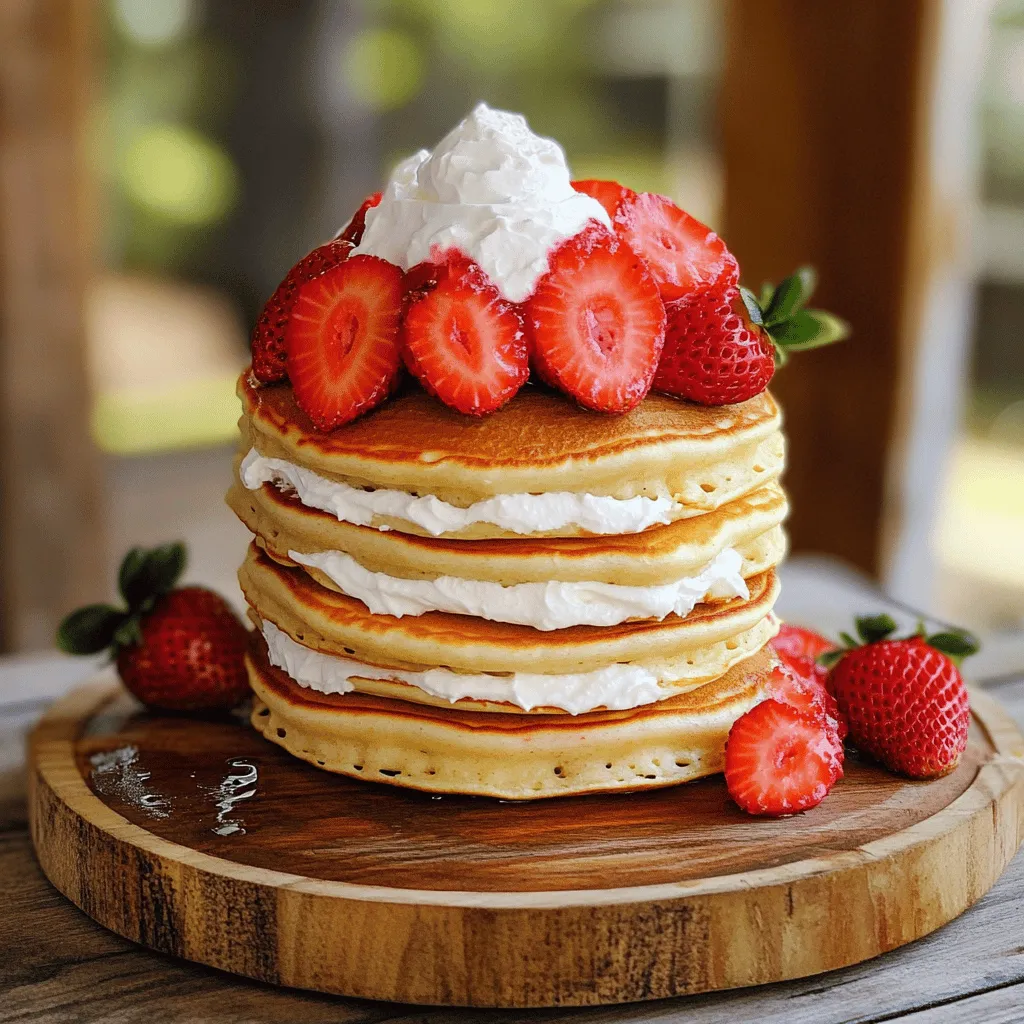
Looking for a breakfast that’s both delicious and fun? Strawberry Cheesecake Pancakes are a perfect treat! These fluffy pancakes blend

Older posts
Newer posts
← Previous Page1 … Page21 Page22 Page23 … Page83 Next →

dsad

© 2026 eataroundit • Built with GeneratePress

Our Policies

  • Copyright Policy
  • Cookie Policy
  • GDPR Policy
  • Privacy Policy
  • Disclaimer
  • Terms Of Use

More Information

  • Home
  • About
  • Contact
  • Appetizers
  • Dessert
  • Dinner
  • Drinks
©2026, eataroundit About Back To Top