Skip to content
DisclaimerTerms Of UseGDPR PolicyCookie Policy

eataroundit

  • Home
  • Drinks
  • Appetizers
  • Dinner
  • Dessert
  • About
  • Contact
  • Privacy Policy
DisclaimerTerms Of UseGDPR PolicyCookie Policy

NO-ING-IMG

- 1 pound large shrimp, peeled and deveined - 2 tablespoons olive oil - 1 tablespoon Cajun seasoning - ½ teaspoon garlic powder - ½ teaspoon onion powder - ½ teaspoon smoked paprika - ½ teaspoon black pepper - ½ teaspoon salt - ¼ teaspoon cayenne pepper (adjust according to your heat preference) - Lemon wedges, for serving Gather these items before you start cooking. The large shrimp will be the star of this dish. Make sure they are fresh and cleaned. Olive oil adds richness and helps the seasoning stick. Cajun seasoning gives the shrimp that bold flavor. Garlic powder and onion powder add depth. Smoked paprika brings warmth and color. Black pepper and salt enhance all the flavors. Finally, cayenne pepper lets you control the heat. Serve with lemon wedges for a zesty finish. - In a large bowl, mix 2 tablespoons of olive oil with 1 tablespoon of Cajun seasoning. Add ½ teaspoon each of garlic powder, onion powder, smoked paprika, black pepper, salt, and ¼ teaspoon of cayenne pepper. Stir the mix well. This blend gives the shrimp a zesty kick. - Next, add 1 pound of peeled and deveined shrimp to the bowl. Toss the shrimp gently in the marinade until each piece is well coated. For the best flavor, let the shrimp sit for at least 15 minutes at room temperature. - Preheat your air fryer to 400°F (200°C). This step takes about 5 minutes and helps the shrimp get crispy. - Place the marinated shrimp in a single layer in the air fryer basket. Avoid crowding the shrimp. If needed, cook in batches. This ensures they cook evenly. - Air fry the shrimp for 8 to 10 minutes. Halfway through, shake the basket to help with crispiness. The shrimp should turn golden brown. They should reach an internal temperature of 120°F (49°C) when done. Watch closely to avoid overcooking. Marinating shrimp adds depth to the dish. I recommend letting the shrimp sit in the marinade for at least 15 minutes. This time allows the flavors to soak in. If you have more time, marinate for up to an hour for an even richer taste. Preheating your air fryer is key. Set it to 400°F (200°C) for about 5 minutes. This step ensures the shrimp cook evenly and get that nice crunch. Avoid overcrowding the basket. Lay the shrimp in a single layer to let the hot air circulate. If you have too many shrimp, cook in batches. Presentation matters! Serve the shrimp on a vibrant platter. Garnish with fresh parsley or cilantro for color. Arrange the lemon wedges around the shrimp. This adds a nice touch and enhances the dish's appeal. Enjoy your flavorful creation! {{image_4}} You can easily change the heat of your crispy Cajun shrimp. If you want a milder dish, skip the cayenne pepper. Instead, use a pinch of paprika for flavor. For a spicier version, add more cayenne pepper. You can also try adding hot sauce to the marinade for an extra kick. Cajun seasoning is great, but don't feel limited to that. Try using Old Bay seasoning for a seafood twist. You can also mix in some Italian herbs for a different flavor. Experiment with taco seasoning for a fun, zesty take. Each blend gives your shrimp a unique taste. Air-frying shrimp with vegetables can enhance your meal. Try adding bell peppers, zucchini, or asparagus. Cut them into bite-sized pieces and toss them in the same marinade. Place them alongside the shrimp in the air fryer. This method cooks everything at once, making it a colorful and tasty dish. To keep your crispy Cajun shrimp fresh, store them in an airtight container. First, let the shrimp cool to room temperature. Then, place them in the container and refrigerate. They will stay good for up to two days. Avoid stacking them too high to keep them from getting soggy. To reheat your shrimp, use the air fryer again for best results. Preheat the air fryer to 350°F (175°C). Place the shrimp in a single layer and heat for about 3-5 minutes. This method helps to keep them crispy. If you use a microwave, the shrimp may become chewy and lose their crunch. Yes, you can use frozen shrimp. Just make sure to thaw them first. I recommend placing them in the fridge overnight or running them under cold water for a quick thaw. After thawing, pat the shrimp dry with paper towels. This step is key to getting a crispy finish. Then, follow the same marinating and cooking steps as fresh shrimp. Some great Cajun seasoning brands are Tony Chachere's, Zatarain's, or Slap Ya Mama. Each brand has its own unique flavor. I suggest tasting a bit of each to find your favorite. You can also make your own blend. Mix paprika, cayenne, garlic powder, and thyme for a fresh taste. Adjust the heat level to fit your taste. Look for a few signs to tell if shrimp are done. First, they should turn from gray to pink. Second, they will curl into a C shape. If they form an O shape, they may be overcooked. Lastly, check the internal temperature. It should reach 120°F (49°C). Use a meat thermometer for accuracy. In this blog post, we covered how to make tasty air-fried Cajun shrimp. We discussed the key ingredients, the steps to prepare and cook them, and tips for the best flavor. Don't forget to marinate your shrimp for full taste and avoid overcrowding your air fryer for crispiness. Feel free to adjust the spice levels and add veggies for more variety. By following these tips, you can create a delicious meal that impresses everyone. Enjoy your cooking journey!

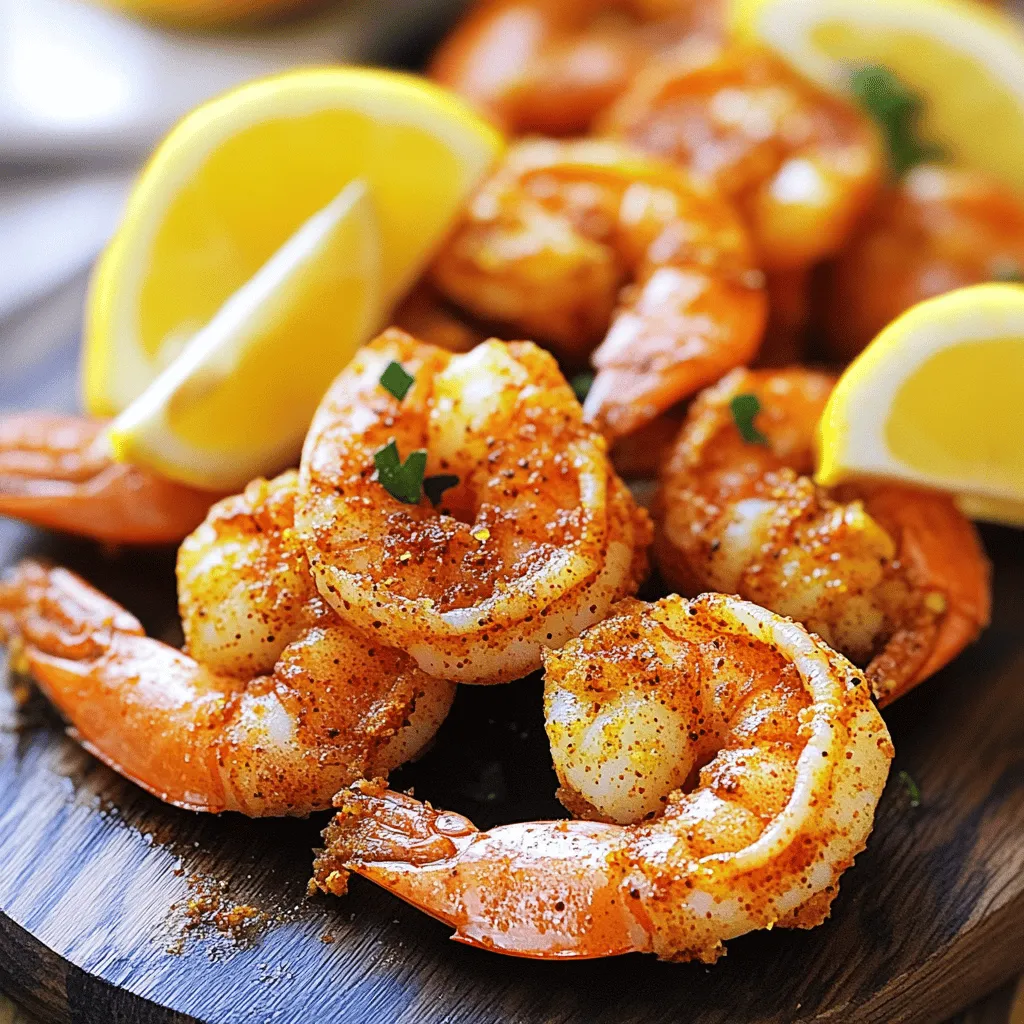
Crispy Cajun Shrimp Air Fryer Quick and Flavorful Dish

Are you craving a quick and tasty meal? Look no further! My Crispy Cajun Shrimp Air Fryer recipe delivers bold

- 2 cups all-purpose flour - 1/3 cup granulated sugar - 1 tablespoon baking powder - 1/2 teaspoon salt - 1/2 cup unsalted butter, cold and cut into small cubes - 1/2 cup fresh raspberries (or frozen) - Zest of 1 lemon - 1/2 cup heavy cream - 1 large egg - 1 teaspoon vanilla extract - 1 tablespoon fresh lemon juice - Turbinado sugar, for topping You can switch out some items in this recipe. Here are some ideas: - Alternative sweeteners: Use honey or maple syrup instead of granulated sugar. - Dairy-free options: Swap heavy cream with coconut cream or almond milk. - Seasonal fruit variations: Try blueberries or strawberries in place of raspberries. Using these options can make the scones more personal and fit your taste. Each choice still keeps the scones tasty and fun! - Preheat the oven to 400°F (200°C). - Prepare the baking sheet with parchment paper. - In a large bowl, combine the all-purpose flour, granulated sugar, baking powder, and salt. Mix until blended. - Add cold, cubed butter to the flour. Use your fingers to work it into the flour. Stop when you see small pea-sized bits of butter. - Gently fold in the fresh raspberries and lemon zest. Be careful not to smash the raspberries. - In another bowl, mix the heavy cream, egg, vanilla extract, and fresh lemon juice. Whisk until smooth. - Pour the wet mix into the dry mix. Stir gently with a spatula until just combined. The dough will be a bit sticky. - Turn the dough onto a floured surface. Gently knead it a few times. Pat it down to about 1 inch thick. - Cut the dough into triangles or rounds using a sharp knife. Place the scones on the prepared baking sheet. - Brush the tops with extra heavy cream. Sprinkle turbinado sugar on top for crunch. - Bake for 15-20 minutes. Look for golden brown tops and a cooked inside. To make fluffy scones, keep these tips in mind: - Use cold butter. Cold butter makes the scones rise well. - Don’t over-mix the dough. Mix until just combined. This keeps the scones light. - Gently fold in the raspberries to keep them whole. Cold ingredients are key. When you use cold butter, it helps create steam during baking. This steam lifts the dough and gives you that perfect rise. For a delightful treat, pair your scones with clotted cream or lemon curd. These rich toppings bring out the lemon flavor. When serving, present the scones warm. You can dust them with powdered sugar for a touch of sweetness. Add extra raspberries for a pop of color. This makes your serving plate look appealing and fun. Enjoy every bite! {{image_4}} You can boost your scone's taste with simple tweaks. Adding herbs like fresh basil or mint gives a unique twist. A pinch of cinnamon or ginger could also work well, warming up the flavor profile. Consider using different fruits too. Instead of raspberries, try blueberries or chopped strawberries. You can even mix fruits for a colorful treat. These changes keep your scones exciting and fresh. If you need gluten-free scones, swap the all-purpose flour for a gluten-free blend. Use a mix that includes xanthan gum to help with texture. The rest of the recipe stays the same, giving you a safe option for gluten-free diets. For vegan scones, replace the heavy cream with coconut milk or almond milk. Use flaxseed meal mixed with water instead of the egg. This keeps the scone's structure while fitting a vegan lifestyle. To keep your lemon raspberry scones fresh, store them in an airtight container. They stay good at room temperature for up to two days. Just place them in a cool, dry spot. If you want to keep them longer, freezing is a great option. Wrap each scone tightly in plastic wrap and then place them in a freezer bag. They can last for up to three months in the freezer. When you’re ready to enjoy, just remove the scone from the freezer and let it thaw at room temperature. To reheat your scones, the best method is the oven. Preheat it to 350°F (175°C). Place the scones on a baking sheet and cover them loosely with foil. Heat for about 10 minutes, or until warm. This helps keep the scones soft and fresh. You can also use a microwave, but this may make them a bit chewy. If using the microwave, heat for about 15-20 seconds. Enjoy your warm scones, and they will taste just as good as when you first baked them! How do I know when the scones are fully baked? You can tell when the scones are done by their color. They should be golden brown on top. You can also insert a toothpick into the center. If it comes out clean, the scones are ready. Can I make the dough ahead of time? Yes, you can prepare the dough ahead of time. Wrap it tightly in plastic wrap and chill it in the fridge. Use it within 24 hours for the best taste and texture. What’s the best way to avoid soggy scones? To avoid soggy scones, use cold butter and cream. Also, do not overmix the dough. This helps keep them light and fluffy. How long do lemon raspberry scones last? Lemon raspberry scones last about 2 days at room temperature. You can store them in an airtight container. For longer storage, freeze them for up to a month. Can I use dried raspberries instead of fresh? Yes, you can use dried raspberries. Soak them in warm water for about 10 minutes to plump them up. This helps keep them moist in the scone. You now have all you need to make delicious lemon raspberry scones. We covered the ingredients, cooking steps, and helpful tips for perfect results. Remember to use cold butter and fresh ingredients for the best texture and flavor. Don't hesitate to experiment with different fruits and dietary options. Scones are versatile and fun to make. Whether you enjoy them warm or with clotted cream, these treats will impress everyone. Now, gather your ingredients and start baking! Enjoy your kitchen adventure!

Lemon Raspberry Scones Bakery Tasty Treat Recipe

Welcome to your new favorite recipe: Lemon Raspberry Scones! These scones are soft, sweet, and full of flavor. The zesty

For a tasty Creamy Chickpea Tikka Masala, here’s what you need: - 2 cups canned chickpeas (drained and rinsed) - 1 medium onion, finely chopped - 3 cloves garlic, minced - 1 tablespoon fresh ginger, grated - 1 can (15 oz) crushed tomatoes - 1 cup coconut milk - 2 tablespoons tikka masala spice blend - 1 tablespoon garam masala - 1 teaspoon turmeric powder - 1 teaspoon cumin powder - 1 tablespoon olive oil - Salt and pepper to taste - Fresh cilantro, chopped (for garnish) - Cooked basmati rice or warm naan, for serving These ingredients create a rich and creamy dish. The chickpeas add protein and texture. Spices play a big role in this recipe. The tikka masala spice blend gives warmth and depth. Garam masala adds sweetness and aroma. Turmeric brings a nice color and earthy taste. Cumin enhances the flavor with its nutty notes. Using fresh ginger and garlic, adds brightness to the dish. They also help with digestion. A dash of salt and pepper rounds out the taste. Adjust these to fit your liking. Serve your creamy tikka masala hot. I love it over fluffy basmati rice or with warm naan. Both options soak up the sauce well. For a special touch, drizzle some coconut cream on top. This makes the dish look nice and adds more flavor. Finally, sprinkle chopped cilantro for freshness. This adds a pop of color and a hint of herbal taste. Enjoy your meal! First, gather your ingredients. This dish needs simple items that pack flavor. You will need: - 2 cups canned chickpeas (drained and rinsed) - 1 medium onion, finely chopped - 3 cloves garlic, minced - 1 tablespoon fresh ginger, grated - 1 can (15 oz) crushed tomatoes - 1 cup coconut milk - 2 tablespoons tikka masala spice blend - 1 tablespoon garam masala - 1 teaspoon turmeric powder - 1 teaspoon cumin powder - 1 tablespoon olive oil - Salt and pepper to taste - Fresh cilantro, chopped (for garnish) - Cooked basmati rice or warm naan, for serving Chop your onion finely. Mince the garlic and grate the ginger. Make sure you rinse the chickpeas well. This step removes extra salt and helps them blend better in the dish. Now, let’s get cooking! Start by heating olive oil in a skillet over medium heat. When the oil is hot, add the chopped onion. Cook for about 5 minutes until it turns soft and clear. Next, stir in the minced garlic and grated ginger. Cook for another 2 minutes. This gives your dish a nice, rich aroma. Once that is done, transfer everything into the slow cooker. Add the chickpeas, crushed tomatoes, and coconut milk. Then, sprinkle in the tikka masala spice blend, garam masala, turmeric, and cumin. Season with salt and pepper. Mix well to combine all the flavors. Cover the slow cooker with its lid. Cook on low for 6-8 hours or on high for 3-4 hours. The chickpeas should be tender, and the flavors will meld together beautifully. When the cooking time is up, check the seasoning. Taste your dish and adjust the salt or spices if needed. Serve the creamy tikka masala hot over warm basmati rice or with naan. For a lovely touch, garnish with fresh cilantro. You can also drizzle a bit of coconut cream on top for extra richness. Enjoy this delightful meal! To make your creamy chickpea tikka masala shine, focus on the spices. Fresh spices boost flavor. When you add the tikka masala blend, consider using a mix of fresh and dried spices. This adds depth. You can also add a squeeze of lemon juice before serving. It brightens the dish and balances the creaminess. If you want a milder dish, reduce the tikka masala blend. Start with one tablespoon. Taste as you cook. If you want more heat, add a pinch of cayenne pepper or some chopped green chilies. You can also serve yogurt on the side. This cools off the spice if it gets too hot. To make your dish even creamier, use full-fat coconut milk. It adds richness and smoothness. For an extra creamy texture, blend a portion of the chickpeas before adding them to the slow cooker. This creates a thicker sauce. You can also drizzle coconut cream on top before serving for a stunning finish. {{image_4}} If you can't find chickpeas, you can try white beans. They have a nice texture. You can also use lentils. They will cook faster but still taste great. Other beans, like black beans, can work too. Just adjust the cooking time as needed. You can boost flavor and nutrition by adding veggies. Spinach adds color and nutrients. You can toss in bell peppers for crunch. Sweet potatoes add sweetness and creaminess. Just chop them small so they cook well in the slow cooker. Add them halfway through the cooking time for the best results. This dish is already vegan if you use coconut milk. For vegetarians, you can add yogurt for creaminess. Just stir it in at the end. Both versions taste amazing! You can cater to your guests by offering both options. Everyone will enjoy this creamy chickpea tikka masala. Store leftover creamy chickpea tikka masala in an airtight container. This keeps it fresh and tasty. Make sure it cools down before sealing. It can last up to four days in the fridge. Always check for changes in smell or color before eating. If it seems off, throw it away. You can freeze this dish for longer storage. Use a freezer-safe container or bag. Be sure to leave some space for the sauce to expand. The tikka masala will stay good for about three months. When ready to eat, let it thaw in the fridge overnight. Reheat your chickpea tikka masala on the stove for the best results. Heat it over medium-low heat, stirring often. This ensures even warming. You can also use the microwave if you're in a hurry. Just heat it in short bursts, stirring in between. Add a splash of coconut milk if it seems thick. This keeps the dish creamy and delicious. Yes, you can! You can cook this dish on the stove. First, sauté onion, garlic, and ginger in a pot. Then, add the chickpeas, crushed tomatoes, and coconut milk. Stir in the spices and simmer for about 20-30 minutes. This method keeps the flavors rich and delicious. Creamy chickpea tikka masala lasts about 4-5 days in the fridge. Make sure to store it in an airtight container. This helps keep it fresh and tasty. When you're ready to eat it again, just reheat on the stove or in the microwave. You can serve this dish with cooked basmati rice or warm naan. Both options soak up the sauce well. For a fresh touch, top it with chopped cilantro. You could also add a side salad for crunch. This makes a complete and satisfying meal. You now have a complete guide to making creamy chickpea tikka masala. We covered key ingredients, preparation steps, and cooking tips. I shared how to adjust flavors and spice levels. You can explore fun variations and storage tips, too. This dish is easy, tasty, and flexible. Now, you can enjoy a great meal while trying new things in the kitchen. Get cooking and impress everyone with your new skills!

Creamy Chickpea Tikka Masala Slow Cooker Delight

Get ready to enjoy a dish that’s rich, creamy, and oh-so-satisfying: Creamy Chickpea Tikka Masala! In this blog post, I’ll

- 1 cup rolled oats - 2 cups almond milk (or your preferred milk) - 2 tablespoons unsweetened cocoa powder - 3 tablespoons chocolate hazelnut spread (such as Nutella) - 1 tablespoon chia seeds - 1 tablespoon maple syrup (if desired) - 1/2 teaspoon vanilla extract - A pinch of sea salt These ingredients come together to create a rich and creamy delight. The rolled oats provide a hearty base, making you feel full and satisfied. Almond milk or any milk you choose adds creaminess without extra calories. Cocoa powder gives a deep chocolate flavor, and hazelnut spread adds sweetness and richness. Chia seeds boost nutrition, adding fiber and healthy fats. Maple syrup is optional, but it brings extra sweetness if you like. A dash of vanilla and a pinch of salt round out the flavor. - Sliced banana - Chopped hazelnuts - Dark chocolate shavings Toppings make this dish even better. Sliced banana adds natural sweetness and creaminess. Chopped hazelnuts give a nice crunch and enhance the nutty flavor. Dark chocolate shavings add elegance and a rich finish. Feel free to mix and match toppings based on your taste. Each bite can be a new experience with different textures and flavors. - In a medium mixing bowl, combine: - 1 cup rolled oats - 2 tablespoons unsweetened cocoa powder - 1 tablespoon chia seeds - A pinch of sea salt - Stir these dry ingredients well. This ensures they are mixed evenly. - In another bowl, whisk together: - 2 cups almond milk - 3 tablespoons chocolate hazelnut spread - 1 tablespoon maple syrup (optional) - 1/2 teaspoon vanilla extract - Mix until smooth and creamy. - Slowly pour the wet mixture into the dry ingredients. - Stir vigorously until everything is well combined. There should be no lumps left. - Carefully divide the mixture into: - Two jars or airtight containers. - Make sure each jar is evenly filled and seal them tightly. - Refrigerate the jars overnight. You can also soak them for at least 4 hours. - This soaking time lets the oats and chia seeds absorb the liquid and soften. - For best texture, let them sit overnight. Enjoy the creamy delight when you’re ready! - Adjust sweetness levels with maple syrup. If you want your oats sweeter, add more syrup. Start with one tablespoon and taste. You can always add more. - Ensuring a creamy texture with proper mixing. It’s key to mix well. This helps the oats soak up the milk. No lumps should remain. Stir until everything blends smoothly. - Using quality ingredients for optimal flavor. Choose fresh oats and good cocoa powder. High-quality chocolate hazelnut spread makes a huge difference. It adds rich flavor to your oats. - Serving in glass jars for visual appeal. Clear jars show off all the layers. It looks fancy and inviting. Plus, it’s easy to grab and go! - Adding aesthetic toppings for a gourmet look. Use sliced banana, chopped hazelnuts, and dark chocolate shavings. This not only tastes great but also looks beautiful. A drizzle of extra chocolate hazelnut spread adds a nice touch. {{image_4}} You can switch up flavors in your chocolate hazelnut overnight oats. One easy way is to use different nut butters. Almond butter or peanut butter can add a unique taste. You might even try sunflower seed butter for a fun twist! Another way to change the flavor is by using flavored protein powders. Chocolate protein powder boosts the chocolate taste. Vanilla protein powder adds a nice, sweet touch. Just remember to adjust the sweetness if you add flavored powders. If you need dairy-free options, look for vegan chocolate hazelnut spreads. Brands like Nutiva or Justin's offer great choices. These spreads give you the same creamy texture without dairy. For gluten-free oats, use certified gluten-free rolled oats. Many brands offer oats that meet this standard. This way, you can enjoy your meal without worry. To keep your Chocolate Hazelnut Overnight Oats fresh, use airtight containers. Glass jars work best since they seal tightly. You can also use plastic containers if you prefer. Store them in the fridge for up to 3 days. This keeps the oats creamy and tasty. You can enjoy these oats cold or warm. If you want to heat them, do so gently. Place the oats in a microwave-safe bowl. Heat in short bursts of 20 seconds. Stir well between each burst to keep the texture smooth. For a cozy breakfast, serving them warm adds a nice touch. If you like them cold, just stir and add your favorite toppings. Yes, you can make these overnight oats ahead of time. I recommend prepping them the night before. This gives the oats time to soak and become creamy. Store them in airtight containers in the fridge. They stay fresh for up to 3 days. You can enjoy them cold or let them sit out for a few minutes before eating. To boost the protein in your overnight oats, add a scoop of protein powder. You can use vanilla or chocolate-flavored powder for extra taste. Greek yogurt is another great option; just mix it in with the wet ingredients. Nut butter, like almond or peanut butter, also adds protein and flavor. Chia seeds are a good source of protein, so you can add a little more if you like. Yes, overnight oats are very healthy! They provide a great balance of fiber and protein. Rolled oats are a whole grain that helps with digestion. Chia seeds add healthy omega-3 fats. Almond milk is low in calories and high in vitamins. The chocolate hazelnut spread gives flavor, but you can use it in moderation to keep the sugar low. Adding banana and nuts as toppings gives you vitamins and healthy fats. This makes a tasty and nutritious breakfast or snack! This blog post covered how to make delicious overnight oats. We looked at the main ingredients, like oats and almond milk, and how to combine wet and dry mixes. I shared tips to adjust sweetness and create a great texture. You can even try variations with different nut butters or toppings for extra fun. In the end, these oats are easy, tasty, and can fit any diet. Enjoy making this simple, healthy meal!

Chocolate Hazelnut Overnight Oats Protein Delight

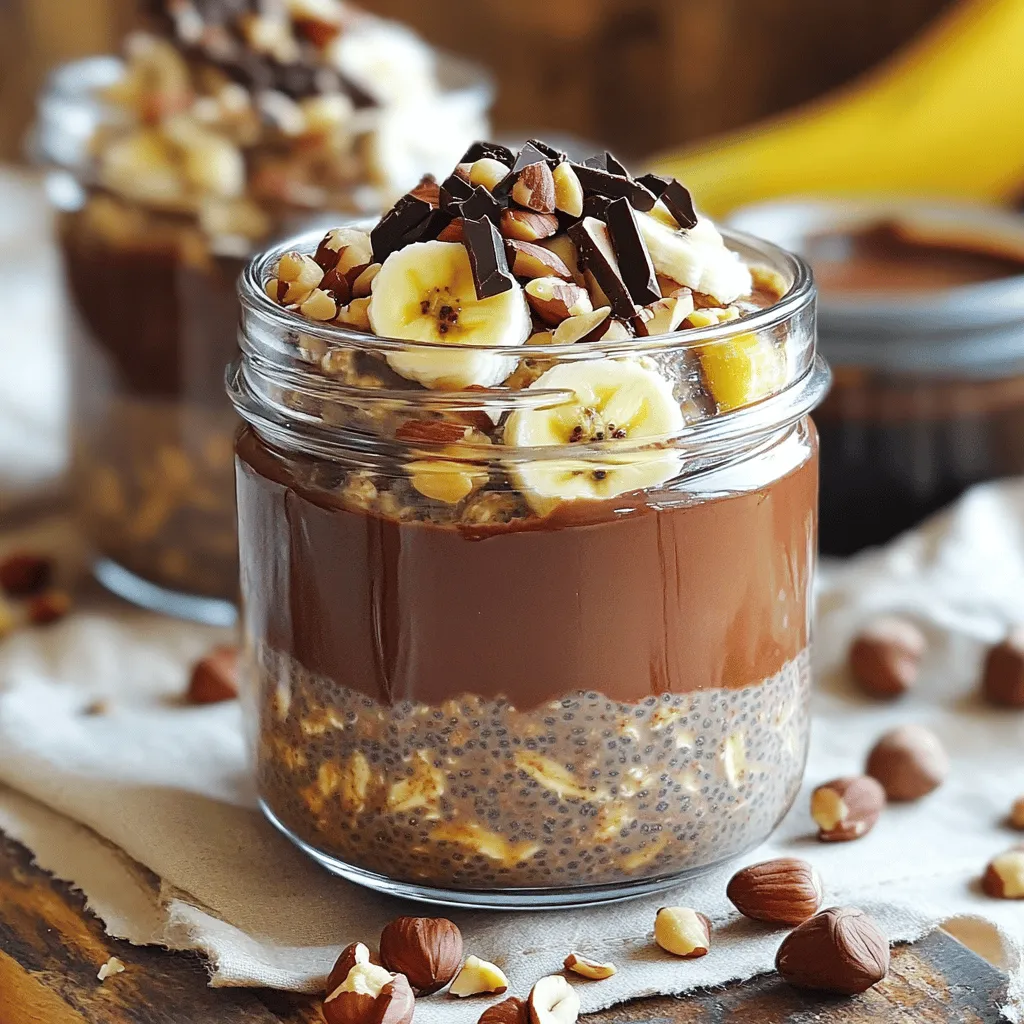
Imagine starting your day with a bowl of chocolate hazelnut bliss! My Chocolate Hazelnut Overnight Oats Protein Delight packs nutrition

- 1 pound frozen cheese tortellini - 4 cups crushed tomatoes (canned or fresh) - 1 cup vegetable broth - 1 medium onion, finely diced - 3 cloves garlic, minced - 1 teaspoon dried basil - 1 teaspoon dried oregano - 1 teaspoon sugar - 1 cup heavy cream - 1 cup spinach (fresh or frozen) - Salt and pepper to taste - Grated Parmesan cheese for serving - Fresh basil leaves for garnish For this recipe, I use frozen cheese tortellini because it cooks perfectly in the slow cooker. The crushed tomatoes give a rich and tasty base. You can use canned or fresh tomatoes; both work well. Vegetable broth adds depth and flavor to the sauce. I like to include diced onion and minced garlic for a savory kick. Dried herbs like basil and oregano bring a nice aroma to the dish. A bit of sugar balances the acidity of the tomatoes. Heavy cream makes the sauce creamy and smooth, while spinach adds color and nutrients. When you season, go easy on the salt and pepper at first. You can always add more later. For toppings, I recommend fresh grated Parmesan cheese and basil leaves. They make the dish look great and taste even better. Remember, this dish is all about comfort and flavor. With these simple ingredients, you can create a meal that warms your heart. 1. In your slow cooker, add the crushed tomatoes, vegetable broth, diced onion, and minced garlic. This mix forms the base of your creamy sauce. 2. Sprinkle in dried basil, dried oregano, and sugar. The sugar helps balance the acidity of the tomatoes. Stir everything well to combine. 3. Carefully add the frozen cheese tortellini. Make sure they are fully submerged in the tomato mixture. This helps them cook evenly and soak up flavor. 1. Cover your slow cooker with its lid. Set it to cook on low for 4 hours or on high for 2 hours. The tortellini should be tender and cooked through. 2. After the cooking time is complete, gently stir in the heavy cream and spinach. Mix until the spinach wilts and the cream blends into the sauce. 3. Taste your dish and add salt and pepper as needed. Let it cook on low for an extra 10-15 minutes to heat everything through. This process makes your dish creamy and full of flavor, ready to be served hot. When making Slow Cooker Creamy Tomato Tortellini, you can make a few smart swaps. For a fresh taste, use ripe tomatoes instead of canned ones. Chop them finely and add them right to your slow cooker. Fresh tomatoes bring a bright flavor that is hard to beat. To ensure your tortellini turn out perfect, make sure they are fully submerged in the sauce. This helps them cook evenly and stay tender. Stir the mixture gently after adding the tortellini to coat them well in the sauce. Serving is just as important as cooking. Use shallow bowls for your creamy tortellini. This way, everyone can enjoy the dish's beauty. Drizzle some olive oil over the top for a glossy finish. Add a sprinkle of red pepper flakes to give it a nice kick. For extra flair, garnish your dish with grated Parmesan cheese and fresh basil leaves. The green from the basil adds color and a fresh aroma. These little touches will impress your guests and make your meal look like it came from a fancy restaurant. {{image_4}} You can swap proteins in this recipe. Try using diced chicken or crumbled Italian sausage. Both options add a nice flavor boost. Chicken gives a lighter touch, while sausage offers a savory bite. You can also change the type of tortellini you use. Go for spinach tortellini or mushroom-filled ones. Each will bring a new taste to your creamy dish. Experiment with different flavors and find your favorite. If you're looking for gluten-free options, choose gluten-free tortellini. Many brands offer tasty choices that fit this diet. You won’t lose any of the creamy goodness. For a vegan twist, replace the heavy cream and cheese. Use coconut milk or cashew cream instead. Nutritional yeast can give a cheesy flavor without dairy. These changes keep the dish delicious and creamy while meeting dietary needs. To store leftover creamy tomato tortellini, first let it cool. Place it in an airtight container. This step helps keep it fresh. Store the container in your fridge. It should last for about three to four days. If you want to freeze it, use freezer-safe bags. Make sure to squeeze out the air. Label the bags with the date. This way, you’ll know how long it has been stored. Frozen tortellini can last up to three months. To reheat your creamy tomato tortellini, use a microwave or stove. If using a microwave, place it in a bowl. Heat it on medium power for two to three minutes. Stir halfway to heat it evenly. If you prefer the stove, use a saucepan. Add a splash of broth or cream. This keeps the dish creamy. Warm it over medium heat, stirring often until hot. Avoid high heat to stop it from separating. Enjoy your meal just as delicious as the first time! Yes, you can use fresh tortellini. Fresh tortellini cooks faster than frozen. Reduce the cooking time to about 30 minutes on high or 1 hour on low. Check the tenderness before serving. Fresh tortellini can add a nice texture. You can store leftover creamy tomato tortellini in the fridge. Keep it in an airtight container for up to 3 days. The dish may thicken as it cools. Add a splash of broth or cream when reheating to restore creaminess. You can serve this dish with a side salad or garlic bread. A simple green salad adds freshness. Garlic bread complements the creamy sauce well. You might also enjoy a sprinkle of red pepper flakes for some heat. You learned how to make creamy tomato tortellini in a slow cooker. We covered the vital ingredients like tortellini, tomatoes, and herbs. I shared step-by-step instructions for perfect results. I also provided tips to enhance your dish, including ingredient swaps and presentation ideas. You can adapt this recipe for dietary needs or different tastes. Remember, it’s simple to store leftovers and reheat them without losing flavor. Enjoy this warm, tasty meal with family or friends. Happy cooking!

Slow Cooker Creamy Tomato Tortellini Easy and Tasty

Are you ready to whip up a delicious meal with minimal effort? My Slow Cooker Creamy Tomato Tortellini is an

For Caramel Chocolate Pretzel Cookies, you'll need to gather these ingredients: - 1 cup unsalted butter, softened to room temperature - 1 cup packed brown sugar - 1/2 cup granulated sugar - 2 large eggs, at room temperature - 2 teaspoons pure vanilla extract - 3 cups all-purpose flour - 1 teaspoon baking soda - 1/2 teaspoon fine sea salt - 1 cup semi-sweet chocolate chips - 1 cup mini pretzels, roughly chopped - 1/2 cup caramel bits - Sea salt flakes, for finishing Each ingredient plays a key role in creating the perfect balance of flavors. The unsalted butter provides a rich base. Brown and granulated sugars give sweetness and a nice texture. Eggs help bind everything together, while vanilla adds warmth. All-purpose flour forms the cookie structure. Baking soda helps the cookies rise and stay soft. Fine sea salt enhances the sweetness, making the cookies taste even better. The semi-sweet chocolate chips add a gooey, chocolatey bite. Mini pretzels bring crunch and saltiness. Caramel bits melt into the dough, providing sweet pockets of flavor. Finally, a sprinkle of sea salt flakes on top rounds out the taste, giving a final touch to these delicious cookies. Gathering these ingredients will set you up for cookie success! - Set temperature to 350°F (175°C). - Prepare baking sheet with parchment paper. Start by preheating your oven. This step is key for even baking. Lining your baking sheet with parchment paper helps the cookies not to stick. - In a large bowl, combine butter, brown sugar, and granulated sugar. - Use an electric mixer on medium speed for 3-4 minutes. Now, cream the softened butter with both sugars. Mix until it is light and fluffy. This will give your cookies a great texture. - Add eggs one at a time. - Mix well after each egg. - Then, add vanilla extract and combine. Next, add the eggs to the bowl one by one. Make sure to mix well after each egg. Then, pour in the vanilla extract. This adds a nice flavor to your cookies. - In another bowl, whisk together flour, baking soda, and sea salt. - Gradually add this dry mix to the wet mix. In a separate bowl, whisk the flour, baking soda, and fine sea salt. Slowly add this dry mix to the wet ingredients. Be careful not to overmix. This prevents tough cookies. - Gently fold in chocolate chips, pretzels, and caramel bits. Now, it's time for fun! Fold in the chocolate chips, chopped pretzels, and caramel bits. Use a spatula to mix everything evenly. - Use a tablespoon or cookie scoop to drop dough. - Leave about 2 inches of space between each ball. Next, scoop rounded balls of dough onto your baking sheet. Make sure to space them out to allow for spreading while baking. - Sprinkle a pinch of sea salt flakes on top of each dough ball. Before baking, add a small pinch of sea salt to each dough ball. This helps balance the sweet and salty flavors. - Let cookies cool on the baking sheet for 5 minutes. - Then transfer cookies to a wire rack to cool completely. Once baked, remove the cookies from the oven. Let them cool on the baking sheet for about 5 minutes. Then, move them to a wire rack to finish cooling. Enjoy the sweet and salty goodness! To get the best cookie texture, follow these steps: - Use room-temperature butter for easy mixing. - Cream butter and sugars until light and fluffy. - Measure flour accurately to avoid dense cookies. - Don’t overmix the dough once you add flour. - Let the cookies cool on a wire rack for the best texture. Many home bakers make these common mistakes: - Overmixing can lead to tough cookies. - Baking too long makes cookies hard instead of soft. - Not spacing the dough balls can cause cookies to merge. - Forgetting to sprinkle sea salt can dull the flavor. Make your cookies look as good as they taste: - Stack them high on a pretty plate. - Drizzle extra melted caramel on top for flair. - Add mini pretzels and chocolate chips as a garnish. - Serve them warm for a cozy treat experience. {{image_4}} You can easily make a nut-free version of these cookies. If you want to swap out the pretzels, try using potato chips for crunch. They will give a nice salty touch, too. For add-ins, use sunflower seeds or pumpkin seeds. They add texture without nuts. To make your cookies even tastier, add different flavor extracts. Almond or peppermint extract can give a unique twist. You could also mix in a little cinnamon or nutmeg for warmth. These spices will enhance the sweet and salty mix of the cookies. If you're looking for a healthier option, consider using low-sugar chocolate chips. You can also swap all-purpose flour with a gluten-free blend. This way, you keep the flavor without the gluten. Reducing the sugar in the recipe helps make the cookies lighter. To keep your Caramel Chocolate Pretzel Cookies fresh, store them in an airtight container. Line the bottom with parchment paper. This step helps absorb any moisture. Place a layer of cookies in the container. You can use wax paper between layers to prevent sticking. Store them at room temperature for the best texture and taste. If you want to enjoy these cookies later, freezing works well. First, let the cookies cool completely. Next, place them in a single layer on a baking sheet. Freeze them for about an hour. After they are firm, transfer the cookies to a freezer-safe bag. Squeeze out excess air and seal tightly. To enjoy, thaw the cookies in the fridge overnight or at room temperature for a few hours. When stored correctly, these cookies last about one week at room temperature. If you freeze them, they can last up to three months. Always check for any signs of freezer burn before eating. Proper storage keeps your cookies tasting fresh and delicious! Yes, you can use other types of chocolate. Dark chocolate, milk chocolate, or white chocolate work well too. Each type gives a different taste. If you love a richer flavor, dark chocolate is great. For a sweeter treat, use milk chocolate. Experiment and find your favorite mix! These cookies take about 10 to 12 minutes to bake. Keep an eye on the edges. They should turn lightly golden. The centers look a bit soft, but that is okay. They will firm up as they cool. If you don’t have caramel bits, use soft caramel candies. Cut them into small pieces. You can also try toffee bits for a crunchy twist. Each option adds a unique flavor. Just make sure the size is right for even melting. You’ve learned how to make delicious cookies with a unique mix of flavors. We’ve covered each ingredient and the steps to make them perfect. I shared tips to avoid common mistakes and ideas for variations. With the right storage, your cookies will stay fresh longer. Remember, baking is about having fun and experimenting. Try new flavors and adjust as you go. Enjoy baking and sharing these tasty treats!

Caramel Chocolate Pretzel Cookies Irresistible Treat

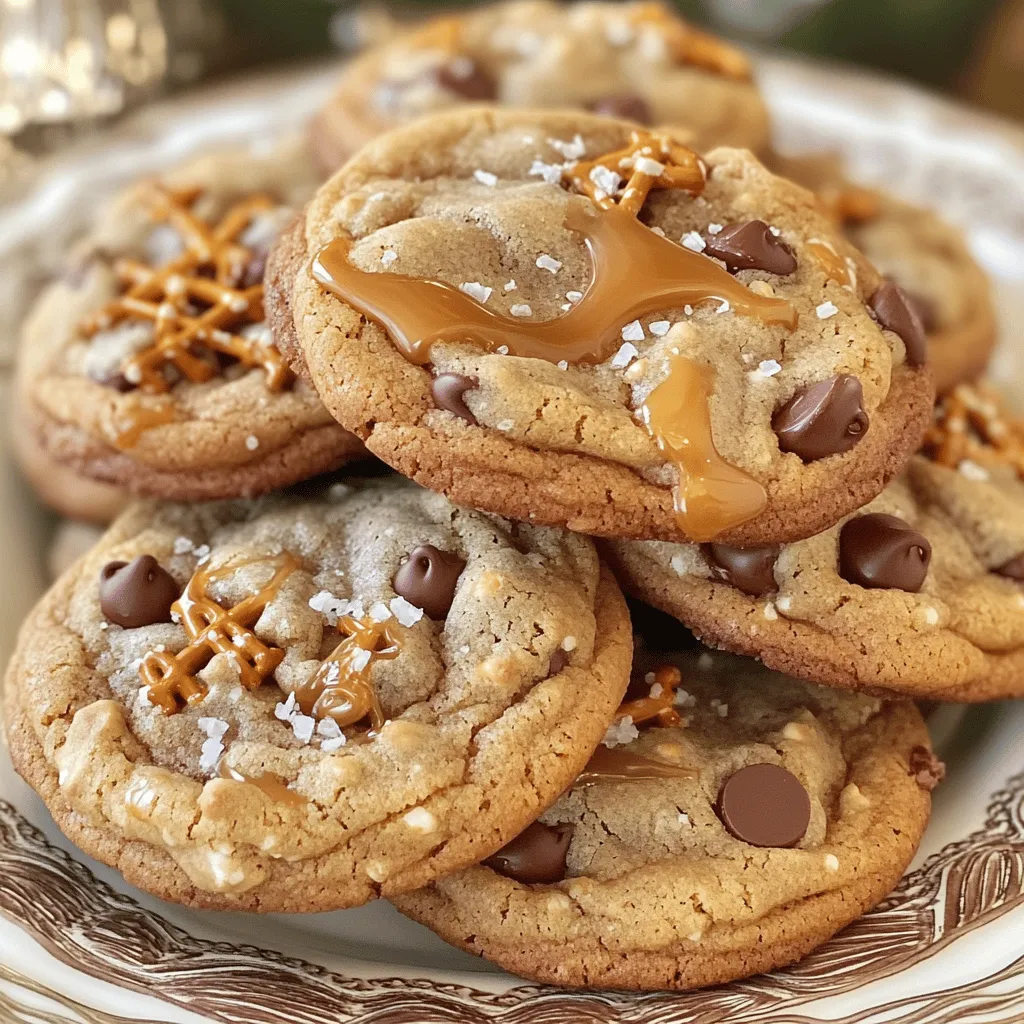
Craving a sweet snack that combines salty, sweet, and chewy? Look no further! These Caramel Chocolate Pretzel Cookies are your

- 2 cups all-purpose flour - 1 cup granulated sugar - 1 tablespoon baking powder - 1 teaspoon baking soda - 1/2 teaspoon salt - 1 teaspoon ground cinnamon - 1/2 cup unsalted butter, melted - 1 cup buttermilk (or homemade version: 1 cup milk + 1 tablespoon vinegar, mixed and allowed to sit for 5 minutes) - 2 large eggs - 1 teaspoon vanilla extract - 1/2 cup brown sugar, packed - 1 tablespoon cinnamon (for the topping) - 1/4 cup granulated sugar (for the topping) - Optional: 1/2 cup chopped nuts (pecans or walnuts) To create these delightful donuts, start by gathering your ingredients. For the dry ingredients, I use all-purpose flour, which gives the donuts a soft texture. Granulated sugar adds sweetness, while baking powder and baking soda help them rise. Don't forget the salt and ground cinnamon, which add depth and flavor. Next, for the wet ingredients, I melt unsalted butter to keep the donuts rich. Buttermilk adds moisture and a slight tang. If you do not have buttermilk, a mix of milk and vinegar works great. The eggs bind everything together, and vanilla extract gives a lovely aroma. Finally, for the toppings, I mix brown sugar, cinnamon, and granulated sugar. This creates a sweet, crunchy coating. If you like, add chopped nuts for extra texture and flavor. These ingredients come together to make a sweet treat that you will love! - Preheat the oven to 350°F (175°C). - Grease the donut pan with non-stick spray. - In a large bowl, combine flour, sugar, baking powder, baking soda, salt, and cinnamon. - In a separate bowl, whisk together melted butter, buttermilk, eggs, and vanilla until smooth. - Gently mix the wet ingredients into the dry ingredients. Stir until just combined. It's okay if there are small lumps. If you want nuts, fold them in now. - Fill each donut pan cavity about 3/4 full with batter. - Bake for 12 to 15 minutes. - Check for doneness by inserting a toothpick into the center. It should come out clean. To get the best texture, you must avoid overmixing the batter. Mix it just until combined. A few lumps are okay. This keeps your donuts light and fluffy. Also, ensure your oven temperature is accurate. An oven thermometer can help. If your oven is too hot, donuts may bake too fast and dry out. Let your donuts cool in the pan for about five minutes. This helps them set without breaking. After that, move them to a wire rack. While still warm, roll each donut in the cinnamon sugar mix. Make sure they are fully coated. This adds a sweet crunch. For a great display, use a bright platter. Arrange your donuts in a circle or stack them. Dust with more cinnamon sugar for flair. You can even drizzle a simple glaze. Mix powdered sugar with a bit of milk to create a sweet topping. This adds a nice shine and extra sweetness. Enjoy your beautiful donuts with coffee! {{image_4}} You can easily change the flavor of your donuts. Adding spices like nutmeg or cardamom gives a warm twist. Nutmeg adds a sweet aroma, while cardamom offers a hint of citrus. You can also use flavored extracts. Almond or maple extracts can give your donuts a unique taste. Just replace part of the vanilla extract with your chosen flavor. If you need gluten-free options, substitute all-purpose flour with a gluten-free blend. Make sure it contains xanthan gum for best results. For vegan substitutions, use plant-based butter and replace eggs with flax eggs. Mix one tablespoon of ground flaxseed with three tablespoons of water. Let it sit until it thickens. This simple swap keeps your donuts tasty. Toppings can change the whole look and taste of your donuts. Instead of cinnamon sugar, try a chocolate glaze. Melt chocolate chips with a bit of cream for a rich topping. You can also explore different sugar coatings. Maple sugar or even chocolate sprinkles add a fun twist. Experiment with what you love for a personal touch. To keep your donuts fresh, store them properly. Place leftover donuts in an airtight container. This helps maintain their soft texture. Store them at room temperature for up to three days. If you want to keep them longer, follow these tips: - Wrap each donut in plastic wrap. - Place wrapped donuts in a freezer-safe bag. - Donuts can freeze for up to three months. When you’re ready to enjoy your donuts again, reheating is key. Here are the best methods: - Microwave: Heat each donut for about 10 to 15 seconds. This warms them up quickly. - Oven: Preheat your oven to 350°F (175°C). Place donuts on a baking sheet. Heat for about 5 minutes. This keeps them soft and delicious. To maintain the texture, avoid overheating. Overheating can make the donuts dry. Enjoy your warm, cinnamon-sugar-covered treats just like they were fresh! These donuts stay fresh for about 2 to 3 days when stored correctly. To keep them at their best, place them in an airtight container. Store them in a cool, dry place. Avoid leaving them out, as they can dry out quickly. Yes, you can make these donuts ahead of time. Bake them, let them cool, and then store them in an airtight container. They will stay fresh for up to 2 days. If you want to keep them longer, freeze the donuts. Wrap each one tightly in plastic wrap and place them in a freezer bag. They can last up to 3 months in the freezer. You can use regular milk mixed with vinegar as a buttermilk substitute. For every cup of buttermilk, mix 1 cup of milk with 1 tablespoon of vinegar. Let it sit for 5 minutes. This mixture will mimic the acidity of buttermilk, giving your donuts that tender texture. You can also use plain yogurt or sour cream, thinned with a little water, as another option. In this post, we explored how to make delicious homemade donuts. We covered the ingredients, both dry and wet, and what toppings to consider. I shared step-by-step instructions and tips for perfect texture. We also looked at fun variations, storage options, and answered common questions about making donuts. Now, you have the tools to create tasty treats. Enjoy experimenting with flavors and toppings. Soon, you'll impress everyone with your baking skills!

Bakery-Style Cinnamon Sugar Coffee Cake Donuts Delight

Welcome to the sweet world of bakery-style cinnamon sugar coffee cake donuts! If you want a treat that’s soft, fluffy,

- 1 tablespoon olive oil - 1 medium onion, finely diced - 3 cloves garlic, minced - 1 bell pepper (choose red or green), diced - 1 jalapeño pepper, seeded and finely minced I start with olive oil as my base. It adds a rich, smooth flavor. Sautéing the onion brings out its sweetness. After five minutes, I add garlic, bell pepper, and jalapeño. This mix smells amazing and sets the stage for the soup. - 1 can (15 oz) black beans, thoroughly rinsed and drained - 1 can (15 oz) pinto beans, thoroughly rinsed and drained - 1 can (15 oz) diced tomatoes with green chilies (include juices) - 4 cups vegetable broth Beans are the heart of this soup. Black beans and pinto beans give it texture and protein. The diced tomatoes add a nice tang. Vegetable broth ties everything together and adds depth to the flavor. - 1 tablespoon chili powder - 1 teaspoon ground cumin - 1 teaspoon smoked paprika - Sea salt and freshly cracked black pepper, to taste Spices make this soup special. Chili powder gives heat, while cumin adds warmth. Smoked paprika brings a hint of smokiness. I always taste it and adjust salt and pepper to make it just right. - 1 cup corn (can be fresh, frozen, or canned) - Juice of 1 lime - Fresh cilantro, roughly chopped (for garnish) - Slices of ripe avocado (for garnish) - Shredded cheese (optional, for serving) Garnishes make the soup pop. Corn adds sweetness and color. Lime juice brightens the flavor. I love adding fresh cilantro and creamy avocado on top. A sprinkle of cheese gives a nice finish, too. Start by warming one tablespoon of olive oil in a large soup pot over medium heat. Toss in one finely diced onion. Cook the onion for about five minutes. You want it to become soft and clear. This step builds a great base for your soup. Next, add three minced garlic cloves, one diced bell pepper, and a finely minced jalapeño pepper. Stir the mix for three to four minutes. The smell will be amazing as the peppers soften and the garlic cooks. This is where the flavor really begins! Now, it’s time to combine the main ingredients. Add one can each of black beans and pinto beans. Make sure to rinse and drain them well. Add one can of diced tomatoes with green chilies, including all the juices. Pour in four cups of vegetable broth for a rich flavor. Then, sprinkle in one tablespoon of chili powder, one teaspoon of ground cumin, one teaspoon of smoked paprika, and a good amount of sea salt and black pepper. Stir everything well and bring the soup to a gentle simmer. Let the soup simmer for about 20 minutes. Stir occasionally to keep things moving. This simmering time helps all the flavors mix together. You’ll notice how the soup thickens and becomes even more fragrant. After 20 minutes, stir in one cup of corn, whether fresh, frozen, or canned. Squeeze in the juice of one lime for a burst of freshness. Cook for an additional five minutes to heat everything through. The corn adds a nice sweetness and texture to the dish. Now, taste your soup. Adjust the seasoning as needed. You might want to add more salt, pepper, or lime juice. This step allows you to make the soup just right for your taste buds. Ladle the hot soup into bowls. For a beautiful finish, top with fresh cilantro, creamy avocado slices, and shredded cheese if you like. For a nice touch, serve the soup in deep bowls. A drizzle of olive oil and a sprinkle of cilantro make it look even nicer. Enjoy it with crunchy tortilla chips on the side for an extra treat! To boost the taste of your Cozy Enchilada Bean Soup, try these simple tips: - Add fresh herbs: Use fresh cilantro or parsley for a bright touch. - Use homemade broth: If you can, make your own vegetable broth for deeper flavor. - Squeeze lime: Adding lime juice at the end brightens the soup and lifts the flavors. - Try different beans: Mix in kidney beans or chickpeas for varied texture and taste. Avoid these common slip-ups to make sure your soup shines: - Skip rinsing beans: Rinse canned beans to remove excess sodium and improve taste. - Don’t overcook the peppers: If peppers are too soft, they lose their crunch and flavor. - Neglect seasoning: Always taste and adjust seasoning as you cook for the best results. - Skip the simmering time: Letting the soup simmer allows flavors to meld, making it tastier. For a well-rounded meal, consider these serving ideas: - Pair with tortilla chips: Serve crunchy chips on the side for a satisfying crunch. - Add a salad: A fresh salad can balance the warmth of the soup. - Include rice or quinoa: Serve soup over cooked rice or quinoa for added substance. - Offer toppings: Provide options like sour cream or hot sauce for guests to customize their bowls. {{image_4}} This soup can easily fit into a vegetarian or vegan diet. All the ingredients in this recipe are plant-based. You can enjoy the beans, veggies, and spices without any meat. If you want to add extra protein, consider using lentils or chickpeas. Both work well and add great flavor. If you like spice, add more jalapeño or use a hotter chili. For milder soup, leave out the jalapeño or use less chili powder. Remember to taste as you go. You can always add more heat, but you can’t take it away once it’s in! You can swap out some ingredients based on what you have. If you don’t have black beans, use kidney beans or navy beans. Canned tomatoes can be replaced with fresh tomatoes if needed. For the broth, any vegetable or chicken broth works fine. Adjusting these can give your soup a unique twist while keeping it cozy. After enjoying your Cozy Enchilada Bean Soup, let it cool down. Once cooled, transfer it to an airtight container. Store it in the fridge for up to four days. This soup tastes even better the next day as the flavors blend together. Make sure to stir it well before serving again. To freeze the soup, first cool it completely. Pour the soup into freezer-safe containers or bags. Leave some space at the top for expansion. You can freeze it for up to three months. When ready to eat, thaw it in the fridge overnight or use the microwave for a quick thaw. To reheat, pour the soup into a pot. Heat it over medium-low heat. Stir often to prevent sticking. You can also use the microwave. Put the soup in a microwave-safe bowl and heat in 30-second bursts, stirring in between. Make sure it’s hot all the way through before serving. Enjoy your cozy meal again! Yes, you can add meat to the Cozy Enchilada Bean Soup. Chicken or ground beef work well. Just cook the meat first before adding it to the soup. This step makes sure the meat is safe to eat and adds flavor to the dish. If you don’t have vegetable broth, you can use chicken broth instead. It will still keep the soup tasty. You can also use water, but the flavor won’t be as rich. To boost the taste, add a bit more seasoning when using water. This soup lasts about 3 to 4 days in the fridge. Make sure to store it in an airtight container. Let it cool down before putting it in the fridge to keep it fresh longer. Yes, you can make this soup in a slow cooker. Start by sautéing the onion and garlic on the stove. Then, add all the ingredients to the slow cooker. Set it on low for 6 to 8 hours or high for 3 to 4 hours. This method will let the flavors blend nicely. This blog post explored how to make delicious Cozy Enchilada Bean Soup. We covered key ingredients, step-by-step instructions, and tips to enhance flavor. I shared variations and storage info to fit different needs. Making soup can be fun and rewarding. You can create it your way. Use this guide to make something warm and tasty. Enjoy your cooking adventure!

Cozy Enchilada Bean Soup Comforting and Simple Recipe

Cold weather calls for warmth and comfort, and nothing hits the spot like Cozy Enchilada Bean Soup. This simple recipe

- Firm tofu (14 oz) - Low-sodium soy sauce - Pure maple syrup - Rice vinegar - Toasted sesame oil - Garlic - Fresh ginger - Cornstarch - Sesame seeds - Green onions To make Air Fryer Teriyaki Tofu Bites, start with firm tofu. I use a 14-ounce block. This type holds its shape well. Next, low-sodium soy sauce brings that savory depth. Pure maple syrup adds a perfect touch of sweetness. Rice vinegar balances the mix with a nice tang. For flavor, add toasted sesame oil. This oil gives a nutty taste. Fresh garlic and ginger bring brightness. Mince the garlic finely and grate the ginger. These ingredients make the dish pop with flavor. When it comes to coating, I use cornstarch. This helps the tofu form a crispy layer. For garnishing, sprinkle some sesame seeds on top. They add crunch and visual appeal. Finally, slice some green onions. These will brighten the dish when served. Gather these ingredients, and you're set to create a tasty dish! To start, you need to press the tofu. This means placing a weight on it for at least 30 minutes. Pressing helps remove excess water, giving the tofu a firmer texture. After pressing, cut the tofu into uniform bite-sized cubes. Make sure the pieces are even to cook well. Next, we will make the marinade. In a medium bowl, whisk together these ingredients: - 1/4 cup low-sodium soy sauce - 1/4 cup pure maple syrup - 1 tablespoon rice vinegar - 1 tablespoon toasted sesame oil - 2 cloves garlic, finely minced - 1 teaspoon fresh ginger, finely grated Mix until fully combined. This marinade will give the tofu a tasty teriyaki flavor. Now it’s time to marinate the tofu. Transfer the cubed tofu into a resealable bag or a bowl. Pour the marinade over the tofu, ensuring each piece gets coated. Seal the bag or cover the bowl with plastic wrap. Refrigerate for a minimum of 30 minutes. If you have more time, let it marinate for up to 2 hours for a richer taste. After marinating, use a slotted spoon to take out the tofu cubes. Let the excess marinade drip off. Place the tofu in a separate bowl and gently toss it in 1 tablespoon of cornstarch. This step is key for a crispy exterior. Before cooking, preheat your air fryer to 375°F (190°C). Arrange the cornstarch-coated tofu cubes in a single layer in the air fryer basket. Avoid overcrowding to ensure even cooking. Cook for 15-20 minutes. Remember to shake the basket halfway through to promote even browning. The tofu should be golden and crispy when done. Once the tofu is cooked, carefully take it out of the air fryer. Immediately sprinkle sesame seeds over the hot tofu bites to help them stick. For a lovely presentation, garnish with thinly sliced green onions just before serving. Enjoy these bites warm, on their own or with a side of rice or salad. Pressing the tofu is key. It helps get rid of extra water. This step makes the tofu firmer. Without pressing, the tofu can become mushy. Press it with a weight for at least 30 minutes. After pressing, cut it into uniform cubes. This shape helps it cook evenly. To achieve a crispy exterior, coat the tofu cubes in cornstarch. This adds a nice crunch when you air fry them. Toss the cubes gently to cover them fully. The cornstarch creates a great texture that you will love. For the best flavor infusion, marinate the tofu well. I suggest marinating for at least 30 minutes. If you have time, let it sit for two hours. This really deepens the flavor. You can adjust the sweetness and saltiness too. If you want a sweeter taste, add more maple syrup. If you prefer more salt, add more soy sauce. Taste your marinade before using it. Avoid overcrowding the basket when air frying. If you put too many cubes in, they won’t cook evenly. I recommend cooking in a single layer. This allows hot air to circulate around each piece. Shake the basket halfway through cooking. This helps the tofu brown evenly. It also keeps the texture nice and crispy. Following these tips will make your Air Fryer Teriyaki Tofu Bites a hit! {{image_4}} You can spice things up by adding sriracha to the marinade. This adds a nice kick. If you want to try something new, use different marinades. You can mix things like ginger soy or honey mustard. Each option gives a unique taste to the tofu. These teriyaki tofu bites pair well with rice or a fresh salad. You can serve them as a tasty appetizer or as a filling main dish. They fit perfectly in a wrap or on a plate with veggies. This recipe is naturally vegan and gluten-free. Use tamari instead of soy sauce for a gluten-free option. Want to reduce sodium? Choose a low-sodium soy sauce. These tweaks keep the flavor while fitting your dietary needs. To store your leftover Air Fryer Teriyaki Tofu Bites, place them in the fridge. Use an airtight container to keep them fresh. This method helps maintain their flavor and texture. - Airtight container: Choose a sturdy container that seals well. - Refrigeration time: These bites stay good for about 3-5 days. When you're ready to enjoy your leftovers, reheating is key. You want to keep the tofu crispy and tasty. - Best practice: Use the air fryer to reheat. Set it to 375°F (190°C) and cook for about 5-7 minutes. This keeps the outside crunchy. - Microwave option: If you're in a hurry, you can use the microwave. However, this may make the tofu a bit soggy. You can freeze your tofu bites if you have extra. This is a great way to save them for later. - Freezing tips: First, let the tofu cool completely. Place the bites in a single layer on a baking sheet. Freeze until solid, then transfer to a freezer bag. - Thawing and reheating: When you're ready to eat, thaw them in the fridge overnight. Reheat in the air fryer for the best texture. No, it’s best to use firm tofu. Firm tofu has a denser texture. This texture holds up well during cooking. Soft tofu can break apart easily. It also lacks the crispy texture we want. I recommend marinating for at least 30 minutes. This time allows the tofu to soak up flavors. For an even richer taste, marinate for up to 2 hours. Just remember to keep it in the fridge while marinating. These tofu bites pair well with many sides. You can serve them with steamed rice. A fresh salad also complements the dish nicely. You might even try them with stir-fried vegetables for extra crunch. Yes! These tofu bites are great for meal prep. Store them in an airtight container in the fridge. They stay tasty for up to four days. For reheating, the air fryer works best. It keeps the tofu crispy and delicious. You now have all the steps to make delicious air fryer teriyaki tofu bites. We covered the ingredients, from firm tofu to flavorful seasonings. You learned how to prepare, marinate, and cook the tofu for the best results. Remember to experiment with flavors and serve with your favorite sides. With these tips, you can enjoy crispy tofu that’s tasty and healthy. Happy cooking!

Air Fryer Teriyaki Tofu Bites Flavorful and Simple Recipe

Are you ready to elevate your tofu game? This Air Fryer Teriyaki Tofu Bites recipe is not only flavorful but

To make these blondies, gather these key ingredients: - 1 cup unsalted butter - 1 cup packed brown sugar - 1/2 cup granulated sugar - 2 large eggs - 1 teaspoon vanilla extract - 2 cups all-purpose flour - 1 teaspoon baking powder - 1/2 teaspoon baking soda - 1/2 teaspoon salt - 1 teaspoon ground cinnamon - 1 1/2 cups peeled and diced apples (about 2 medium apples) - 1/4 cup pure maple syrup These ingredients work together to create a rich and sweet treat. The apples add moisture, while the spices bring warmth. The brown butter gives a nutty flavor, raising the dessert to another level. You can add more depth with these optional ingredients: - 1/2 cup chopped pecans or walnuts Nuts add a crunchy texture. They also enhance the flavor profile. If you like nuts, feel free to toss them in. If you prefer a nut-free version, skip this step. Choosing fresh ingredients makes a big difference. Here are some tips: - Butter: Use high-quality unsalted butter for the best flavor. - Apples: Choose firm apples like Granny Smith or Honeycrisp. They hold up well in baking. - Sugars: Go for fresh brown sugar. It should feel soft and moist. - Maple Syrup: Use pure maple syrup for a rich taste. Avoid imitation syrup. Fresh ingredients lead to a better texture and taste. Always opt for the best quality you can find. Start by melting the unsalted butter in a medium saucepan over medium heat. Stir it often. Keep an eye on it as it heats. The butter will foam, then turn golden brown. This process takes about 5 to 7 minutes. You’ll know it’s ready when it smells nutty and sweet. Remove it from the heat and let it cool a bit. Next, grab a large mixing bowl. Pour in your browned butter. Add the packed brown sugar and granulated sugar. Whisk these together until the mixture is smooth. This step helps create a nice base for your blondies. Now, add the eggs one by one. Beat well after each egg. Finally, mix in the vanilla extract until everything is creamy. Take a separate bowl and whisk together the all-purpose flour, baking powder, baking soda, salt, and ground cinnamon. This step ensures even mixing. Slowly add this dry mixture to your wet ingredients. Stir gently until just combined. Be careful not to overmix here; a few lumps are okay. Now it’s time for the fun part! Fold in your diced apples carefully. If you want, add in chopped nuts too. Mix just enough to combine everything. Then, pour the maple syrup over the top of the batter. Use a spatula to swirl it in lightly. This creates a pretty marbled effect. Preheat your oven to 350°F (175°C). Grease a 9x13-inch baking dish. Pour your blondie batter into the dish. Spread it out evenly. Bake for 25 to 30 minutes. Check for doneness by inserting a toothpick in the center. It should come out clean or have a few crumbs. Once baked, let the blondies cool in the pan for at least 15 minutes. This helps them firm up. After cooling, slice them into squares or rectangles. For a delightful treat, serve them warm with a scoop of vanilla ice cream or a sprinkle of powdered sugar. Enjoy your delicious creation! To get the best flavor, use fresh apples. I like to choose crisp varieties, like Granny Smith or Honeycrisp. Their tartness adds a great balance to the sweet blondies. Brown your butter slowly. This step is key! Stir it often until it turns a rich, golden brown. This adds a deep, nutty flavor that makes your blondies special. Also, don’t skip the maple syrup. It gives a sweet finish that ties all the flavors together. One common mistake is overmixing the batter. You want to mix just until the dry and wet ingredients are combined. Overmixing makes the blondies tough, and we want them soft! Another mistake is not cooling the butter enough. If it’s too hot, it can cook the eggs. Let it cool for a few minutes before adding it to the sugar. Lastly, be careful with the baking time. Check for doneness with a toothpick. If it comes out clean or with a few crumbs, they are ready. For even baking, preheat your oven fully before putting in the blondies. A hot oven helps them rise evenly. Use a light-colored baking pan if you can. Dark pans can cook the edges too fast. Keep an eye on them during the last few minutes of baking. If the edges look set and the center is slightly soft, it’s a good sign. After baking, let them cool in the pan. This helps them firm up before slicing. {{image_4}} You can easily make these blondies nut-free. Just skip the chopped nuts in the recipe. You won’t lose flavor or texture. Instead, try adding more apples or a bit of chocolate chips. This change keeps the blondies rich and tasty for everyone. Apples are great, but you can switch things up. Try using pears or peaches for a unique twist. Chop them into small pieces like you do with apples. You can also mix fruits, like adding some cranberries for a tart contrast. These small changes can bring new flavors to your blondies. Think about adding spices or extracts to boost flavor. A pinch of nutmeg can add warmth. You could also try allspice for a cozy taste. If you want a hint of almond, swap vanilla extract for almond extract. These simple swaps can create a new taste sensation in your blondies. Store your blondies in an airtight container. This keeps them fresh and moist. You can leave them at room temperature for up to three days. For longer storage, the fridge is best. The cool air helps them last up to a week. To freeze blondies, wrap them tightly in plastic wrap. Then, place them in a freezer-safe bag or container. They can last for up to three months in the freezer. When you want to enjoy them, thaw in the fridge overnight. Reheat the blondies in the oven for about 10 minutes at 350°F. This warms them up nicely while keeping them soft. You can also use the microwave. Heat them in 10-second bursts until warm. Enjoy with a scoop of ice cream for extra delight! Yes, you can! To make these blondies vegan, replace the butter with a plant-based butter. Use flax eggs or applesauce instead of regular eggs. Flax eggs are made by mixing one tablespoon of ground flaxseed with two and a half tablespoons of water. Let it sit for five minutes until it thickens. Applesauce works well too; use one-quarter cup for each egg. If you need a substitute for all-purpose flour, try using almond flour or oat flour. Almond flour adds a nutty taste. Oat flour is light and fluffy. For a gluten-free option, use a gluten-free flour blend. Just keep in mind that the texture may change slightly. To check if the blondies are done, insert a toothpick into the center. If it comes out clean or with a few crumbs, they are ready. If the toothpick has wet batter, bake them a few more minutes. Keep an eye on the edges; they should be slightly golden. Absolutely! Flavored maple syrup can add a fun twist to your blondies. Try using cinnamon or vanilla-flavored syrup. Just remember that it may change the final taste, so choose a flavor you love. Leftovers can last for about three to five days. Store them in an airtight container at room temperature. If you want them to last longer, place them in the fridge. For best taste, eat them within a few days! You learned how to make delicious brown butter maple apple blondies. We discussed essential and optional ingredients, plus tips to pick the best ones. I shared steps from browning the butter to baking and cooling. You now have tricks to avoid common mistakes and ways to store or freeze them. For great blondies, keep trying new flavors. Experiment with fruits and spices. Enjoy sharing these sweet treats with friends and family. They will impress everyone!

Brown Butter Maple Apple Blondies Delightful Dessert

If you’re craving a sweet treat that’s cozy and satisfying, you’re in for a real delight. These Brown Butter Maple

Older posts
Newer posts
← Previous Page1 … Page26 Page27 Page28 … Page83 Next →

dsad

© 2026 eataroundit • Built with GeneratePress

Our Policies

  • Copyright Policy
  • Cookie Policy
  • GDPR Policy
  • Privacy Policy
  • Disclaimer
  • Terms Of Use

More Information

  • Home
  • About
  • Contact
  • Appetizers
  • Dessert
  • Dinner
  • Drinks
©2026, eataroundit About Back To Top