Skip to content
DisclaimerTerms Of UseGDPR PolicyCookie Policy

eataroundit

  • Home
  • Drinks
  • Appetizers
  • Dinner
  • Dessert
  • About
  • Contact
  • Privacy Policy
DisclaimerTerms Of UseGDPR PolicyCookie Policy

NO-ING-IMG

- 4 cups of day-old bread (French or Italian), cut into 1-inch cubes - 3 tablespoons extra-virgin olive oil - 2 teaspoons garlic powder - 1 teaspoon dried oregano - 1 teaspoon dried thyme - 1 teaspoon dried parsley - Salt and freshly cracked black pepper to taste You only need a few items to make these tasty croutons. Day-old bread works best because it has a firmer texture. I like to use French or Italian bread, but feel free to experiment. You need olive oil to coat the bread. It helps with crispness and flavor. Garlic powder adds that strong, savory punch. Dried herbs like oregano, thyme, and parsley bring freshness. They mix well with the garlic. Finally, don’t forget salt and black pepper. They enhance all the flavors. - Alternative bread types (sourdough, whole grain) - Different seasoning options (Parmesan cheese, chili flakes) Want to switch things up? Try sourdough or whole grain bread for a different taste. You can also add cheese like Parmesan for a rich flavor. If you like heat, sprinkle some chili flakes for a kick. The possibilities are endless. Make these croutons your own! First, set your air fryer to 325°F (160°C). Preheating is key for crispiness. When you preheat, you create the right cooking environment. This helps the croutons turn golden and crunchy. It only takes a few minutes, but it's worth it! Next, grab your day-old bread. I prefer French or Italian bread for the best taste. Cut the bread into 1-inch cubes. This size ensures even cooking. If your bread is stale, it will hold shape and get crispy. Fresh bread can become soggy, which we want to avoid. In a large bowl, add your bread cubes. Drizzle 3 tablespoons of extra-virgin olive oil over them. Use your hands to toss the cubes gently. Make sure each piece gets coated in oil. This step is crucial for flavor. Next, sprinkle 2 teaspoons of garlic powder, 1 teaspoon of dried oregano, 1 teaspoon of dried thyme, 1 teaspoon of dried parsley, salt, and pepper. Toss again to mix everything well. Every cube should be seasoned evenly. Now, arrange the seasoned bread cubes in a single layer in the air fryer basket. Avoid overcrowding; this helps the croutons cook evenly. If you have too many, cook in batches. Air fry for 8-10 minutes. Halfway through, give the basket a shake. This promotes even browning. Look for a golden brown, crispy texture. Once done, take them out and let them cool. They will harden a bit more as they cool. Enjoy these croutons on salads or soups for a tasty crunch! To get that perfect crunch, avoid overcrowding the air fryer basket. When you place too many croutons together, they can steam instead of crisp. Always arrange them in a single layer. If you have a lot, fry them in batches. Shake the basket halfway through cooking for an even golden brown. This ensures each crouton gets a chance to crisp up nicely. To take your croutons up a notch, consider adding garlic butter. You can melt some butter and mix in minced garlic. Drizzle this over your croutons after tossing them with olive oil. You can also explore different spices, like smoked paprika or chili flakes, for a kick. If you need gluten-free croutons, use gluten-free bread options. This way, everyone can enjoy a tasty crunch. These croutons pair well with salads and soups. Sprinkle them on a fresh Caesar salad for added texture or toss them into a warm bowl of tomato soup. You can get creative too! Use croutons in casseroles or as a topping for creamy pasta dishes. They can add a delightful crunch and boost flavor in many meals. {{image_4}} You can easily switch up your crouton game with seasonal herbs. Try using fresh basil in summer. It adds a bright, fresh taste. In the fall, switch to rosemary for a warm flavor. Adjust your spices too. For holidays, think of adding a pinch of nutmeg or cinnamon. These spices can give your croutons a festive kick. If you follow a vegan diet, use bread that has no dairy. Most French and Italian breads fit this plan. You can also make gluten-free croutons. Just pick a gluten-free bread. For those on low-carb diets, try cloud bread or almond flour bread. These options still make tasty croutons without the carbs. To keep your croutons fresh, place them in an airtight container. This helps block moisture and keeps them crispy. Store them at room temperature, away from direct sunlight. If you want them to last longer, you can also store them in the fridge, though they may lose some crunch. Add a small piece of paper towel inside the container to absorb any extra moisture. This trick keeps them crispy for even longer. If you have leftover croutons, you can easily bring back their crunch. Use your air fryer or an oven for the best results. - Air Fryer Method: Preheat your air fryer to 300°F (150°C). Put the croutons in the basket and heat for about 3-5 minutes. Check them often to avoid burning. - Oven Method: Preheat your oven to 350°F (175°C). Spread the croutons on a baking sheet and bake for 5-7 minutes. Keep an eye on them, so they don’t get too dark. Both methods work well to restore that crispy texture you love. Enjoy them on salads or soups, and elevate your meals! Croutons stay fresh for about a week when stored properly. To keep them fresh, use an airtight container. If you see any signs of mold or a stale smell, it's time to toss them out. You can use fresh bread, but your croutons will be chewy, not crunchy. Stale bread has less moisture, which helps achieve that perfect crisp. For the best texture, stick with day-old bread. The best bread for croutons is French or Italian. These types have a nice crust and good structure. You can also use sourdough or whole grain for a twist. Each type brings its own flavor and texture. Yes, you can make croutons in the oven or on the stove. For the oven, preheat to 375°F (190°C), spread the bread on a baking sheet, and bake for 10-15 minutes. For the skillet, heat oil over medium heat and toast the bread cubes until golden. Both methods work well for tasty croutons. In this blog post, we explored the simple joy of making croutons at home. Using day-old bread and your favorite seasonings, you can create crispy, tasty bites. Remember to preheat your air fryer for a perfect crunch. Experiment with different bread types and flavors, and don’t forget the storing tips to keep them fresh. Making croutons is easy and fun, and they add a delicious touch to salads and soups. Enjoy your creations and customize them to your liking!

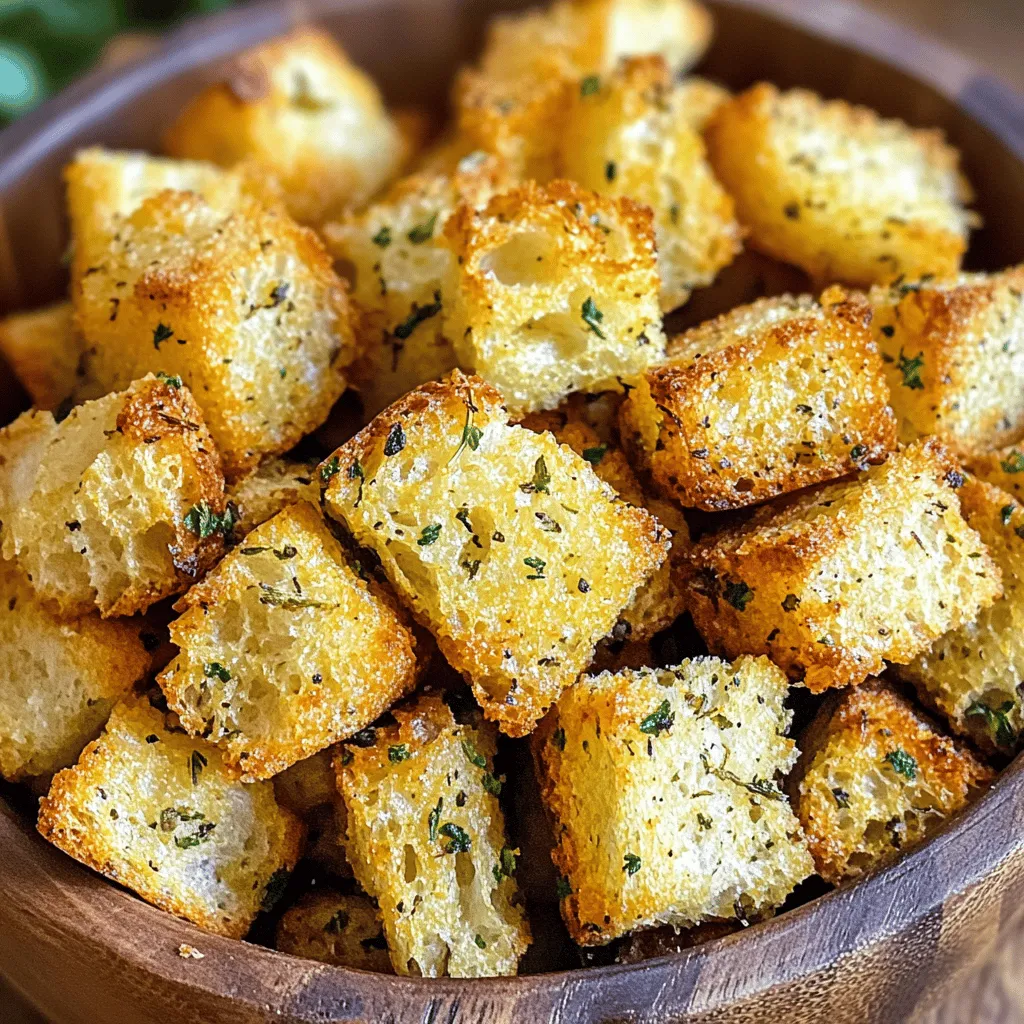
Air Fryer Garlic Herb Croutons Crunchy Flavor Boost

Looking for a tasty way to boost your meals? These Air Fryer Garlic Herb Croutons are your answer! They add

- 1 cup rolled oats - 1 ½ cups almond milk (or any milk of your choice) - 1 sweet apple, diced (such as Fuji or Honeycrisp for optimal sweetness) - 1 tablespoon chia seeds - 1 teaspoon ground cinnamon - 1 tablespoon maple syrup (or honey for sweetness) - ½ teaspoon pure vanilla extract - Pinch of salt - Toppings: Chopped nuts (walnuts or pecans), additional diced apple, and a dusting of cinnamon To make Apple Cinnamon Overnight Oats, gather these ingredients. Rolled oats serve as the base. They soak up the almond milk overnight. This creates a creamy, soft texture. Use almond milk or any milk you prefer. It blends well with oats and sweet apple. The sweet apple, like Fuji or Honeycrisp, adds a nice crunch and flavor. Dicing the apple lets it mix well into the oats. Chia seeds give a boost of nutrition. They also help thicken the mixture. Ground cinnamon brings warmth and spice, perfect for the apple. Maple syrup or honey adds natural sweetness. A tiny bit of pure vanilla extract enhances the overall flavor. Finally, a pinch of salt balances the sweetness. For toppings, think nuts for crunch. Chopped walnuts or pecans work well. You may also add more diced apple and a sprinkle of cinnamon. These toppings make the dish even more delightful. This list makes it easy to create a tasty breakfast. Each ingredient plays a role in flavor and texture. Enjoy the process of making this simple dish! 1. First, grab a medium bowl or a mason jar. 2. Combine 1 cup of rolled oats with 1 ½ cups of almond milk. 3. Add 1 tablespoon of chia seeds, 1 teaspoon of ground cinnamon, and 1 tablespoon of maple syrup. 4. Pour in ½ teaspoon of pure vanilla extract and a pinch of salt. 5. Mix everything well. Ensure the oats get coated with the milk and flavors. 6. Next, gently fold in the diced sweet apple. Save a few pieces for later. 7. Seal the bowl or jar tightly with a lid or plastic wrap. 8. Place it in the fridge. Let it chill for at least 4 hours, or overnight is best. 1. In the morning, take the jar from the fridge. 2. Stir the oats well before serving. If it's too thick, add a splash of milk. 3. Serve the oats in bowls, or eat straight from the jar. 4. Top with the reserved diced apple, chopped nuts, and a sprinkle of cinnamon. Enjoy your tasty Apple Cinnamon Overnight Oats! Choosing the right apple When picking apples, go for sweet types like Fuji or Honeycrisp. They will make your oats taste great. You can also try Granny Smith if you like a tart kick. Just remember, sweeter apples mean a sweeter dish. Alternatives to sweeteners If you want to skip maple syrup, try honey or agave nectar. You can even use mashed bananas for a natural touch. Each option brings its own unique flavor. Just adjust the amount based on your taste. Storing oatmeal in jars Storing oatmeal in mason jars is simple and fun. Each jar can hold one serving of oats. This keeps your breakfast ready to go. Just seal the jars tightly and place them in the fridge. Tips for meal prep Meal prep saves time in the morning. Make a batch of overnight oats for the week. You can mix different flavors in each jar for variety. Use different toppings each day to keep it exciting. This way, breakfast stays fresh and fun! {{image_4}} You can make apple cinnamon overnight oats even more fun by adding other fruits. Try bananas, berries, or peaches for a fresh twist. Each fruit gives a unique taste. You can also add spices like nutmeg or ginger to enhance the flavor. Nut butter is another great addition. Almond, peanut, or cashew butter adds creaminess and protein. A spoonful of nut butter can also make your oats more filling. It’s a simple way to change up the taste and boost nutrition. When making overnight oats, you can use quick oats instead of rolled oats. Quick oats soak up liquid faster. They will give your dish a softer texture. If you like a bit more chew, stick with rolled oats. Incorporating yogurt is a great way to add creaminess. Greek yogurt also increases protein content. Swirl in some yogurt before serving for a smooth finish. This adds a lovely tang that pairs well with the sweetness of the apples. To keep your apple cinnamon overnight oats fresh, store them in the fridge. Use an airtight container to prevent any odors from getting in. If you made extra, jars work well too. Just make sure the lid is on tight. This helps the oats stay creamy and tasty. For the best flavor and texture, eat your oats within five days. Always check for freshness. If you see any mold or a sour smell, toss them out. Your health is important! If the oats seem dry or hard, they may not taste good anymore. Enjoy your oats while they are still fresh and delicious! Yes, you can easily make this recipe vegan. Just use almond milk or any plant-based milk. Maple syrup is already vegan, so you are good to go. You can keep these overnight oats in the fridge for up to 5 days. Just make sure you store them in a sealed container. After a few days, the oats may become softer, but they'll still taste great! Using instant oats is possible, but the texture will change. Instant oats soak up liquid faster, so your oats may be too mushy. Stick with rolled oats for the best results. They stay firm and give a nice bite. You can create a healthy and tasty breakfast with simple ingredients. We covered the main ingredients, steps to prepare, and tips to customize. You can add different fruits or nut butters for flavor. Remember to store your oats properly for the best freshness. With these easy steps, you can enjoy delicious overnight oats any time. Experiment and find your favorite combinations! Enjoy a quick, nutritious meal that fits your lifestyle.

Apple Cinnamon Overnight Oats Simple and Tasty Dish

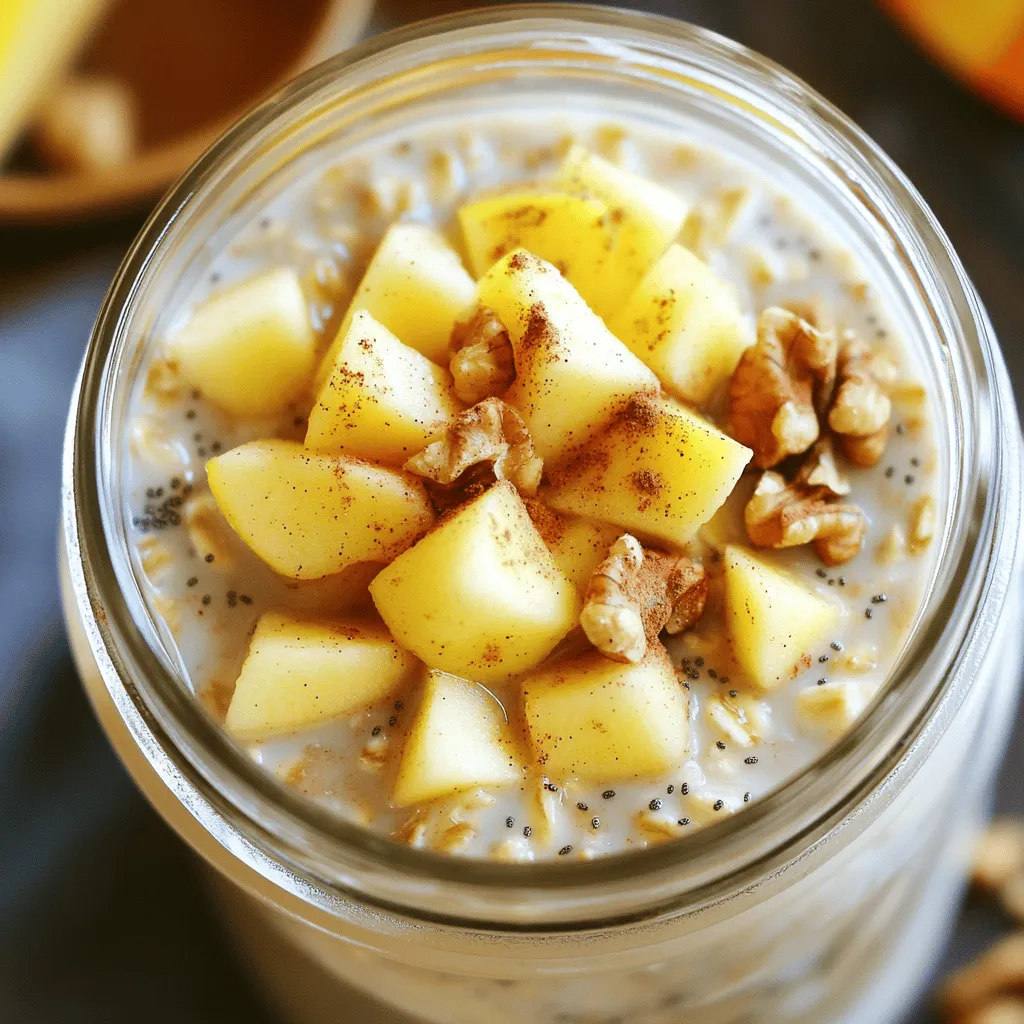
Looking for a simple and tasty breakfast? Apple Cinnamon Overnight Oats might be your new favorite dish! This recipe combines

To make Lemon Dill Salmon Cakes, gather these simple ingredients: - 1 can (14.75 oz) wild-caught salmon, drained and flaked - 1/2 cup panko breadcrumbs - 1 large egg, beaten until frothy - 2 tablespoons fresh dill, finely chopped - 1 tablespoon lemon zest (from about 1 lemon) - 2 tablespoons fresh lemon juice - 1 green onion, finely sliced - 1/4 teaspoon garlic powder - 1/4 teaspoon freshly cracked black pepper - 1/2 teaspoon sea salt - 2 tablespoons olive oil (for frying) You can add a few extra flavors to elevate your salmon cakes: - A pinch of cayenne pepper for heat - A teaspoon of Dijon mustard for a tangy kick - Fresh parsley for extra freshness - A dash of Worcestershire sauce for depth These seasonings can enhance the taste and make your cakes unique. Lemon Dill Salmon Cakes are not just tasty, they are also nutritious. Here’s a breakdown per serving: - Calories: 250 - Protein: 20g - Carbohydrates: 15g - Fat: 12g - Fiber: 1g These salmon cakes offer a good source of protein and healthy fats. They make for a balanced meal or snack. Enjoy making these cakes and feel good about what you eat! Start by gathering your ingredients. You’ll need a can of wild-caught salmon, panko breadcrumbs, a large egg, fresh dill, lemon zest, lemon juice, green onion, garlic powder, black pepper, and sea salt. 1. Mix the Base: In a large bowl, combine the drained salmon, panko breadcrumbs, and beaten egg. Gently mix so the salmon stays flaked. 2. Add Flavor: Next, stir in the chopped dill, lemon zest, lemon juice, sliced green onion, garlic powder, black pepper, and sea salt. Mix until everything is well combined. 3. Check Consistency: If the mixture feels too dry, add a splash of lemon juice. If it’s too wet, mix in more breadcrumbs. 1. Shape the Patties: Take the mixture and form it into small patties, about 2-3 inches wide. Press gently to help them hold their shape. 2. Heat the Oil: In a large skillet, heat olive oil over medium heat. Wait until the oil shimmers, which means it's hot enough. 3. Fry the Cakes: Place the patties in the skillet, making sure not to overcrowd the pan. You may need to fry them in batches. Cook for about 4-5 minutes on each side until they are golden brown and crispy. 4. Drain Excess Oil: Once cooked, transfer the salmon cakes to a plate lined with paper towels to absorb any extra oil. Serve the salmon cakes warm. For a fresh touch, add lemon wedges and a dollop of tartar sauce or yogurt on the side. For a nice presentation, arrange the cakes on a platter with extra lemon wedges and sprinkle more dill on top. Enjoy your flavorful meal! To get the best texture, start by mixing the salmon gently. You want to keep those flakes intact. Use panko breadcrumbs; they add a nice crunch. If your mixture feels dry, add more lemon juice. If it's too wet, mix in more breadcrumbs. Aim for a consistency that holds shape but is not too stiff. You can switch some ingredients to change the flavor. Try using fresh herbs like parsley or cilantro instead of dill. For a spicy kick, add a dash of cayenne pepper. If you don’t have lemon, lime juice works well too. Each change brings a new twist to the dish while keeping it delicious. Frying gives the best crispiness. Use a non-stick skillet for easy flipping. Make sure the oil is hot before adding the cakes. This helps form a nice crust. Cook each side for about 4-5 minutes until golden brown. Avoid overcrowding the pan to ensure even cooking. {{image_4}} You can switch out the salmon for other fish. Try using tuna or crab. For a vegetarian option, use chickpeas or cooked quinoa. Each choice gives a new twist. You can also swap panko for crushed crackers or cornmeal for a different texture. Change the herbs to mix up the taste. Try parsley, cilantro, or basil. You can also add spices like paprika or cayenne for heat. If you like a smoky flavor, use smoked salmon. Add a splash of hot sauce for a kick. These changes keep the dish exciting and fresh. Serve the salmon cakes as sliders. Use small buns and add lettuce and tomato. They make great appetizers for parties too. You can also top a salad with the cakes for a healthy meal. Pair them with a dip like tzatziki or aioli. Enjoy them with fresh veggies or a side of rice for a full meal. To keep leftover lemon dill salmon cakes fresh, place them in an airtight container. Make sure they cool down first. Store them in the fridge for up to three days. If you want to keep them longer, freezing is a great option. When it's time to reheat, I recommend using the oven or a skillet. For the oven, preheat it to 350°F (175°C). Place the salmon cakes on a baking sheet and heat for about 10-15 minutes. In a skillet, heat a little olive oil over medium heat. Cook the cakes for about 3-4 minutes on each side. This method keeps them crispy. If you want to freeze the salmon cakes, do so before cooking them. Form the patties and place them in a single layer on a baking sheet. Freeze them for about two hours, then transfer them to a freezer bag. They can stay in the freezer for up to three months. When you’re ready to cook, just thaw them in the fridge overnight and then fry as usual. You can make salmon cakes without egg by using a binder. Try mashed potatoes or breadcrumbs mixed with a bit of water. This will help hold the cakes together. You can also use ground flaxseed mixed with water. This mix is a great substitute and keeps the cakes moist. Yes, you can use fresh salmon instead of canned. Just cook the salmon first. Then, flake it and follow the same steps in the recipe. Fresh salmon adds a rich flavor and a tender texture to the cakes. Be sure to remove any bones and skin before mixing. Lemon dill salmon cakes pair well with many sides. Try serving them with a fresh salad for a light meal. You can also add roasted vegetables for more flavor. Tartar sauce or yogurt makes a great dip. Lemon wedges on the side add a nice touch of zest. This guide covers all you need to know about making salmon cakes. We explored ingredients, tips, cooking steps, and variations. You learned how to enhance flavor and achieve the perfect texture. Plus, we discussed storage options so you can enjoy your cakes later. Salmon cakes are simple and fun to make. Experiment with flavors and enjoy the process!

Lemon Dill Salmon Cakes Flavorful and Easy Recipe

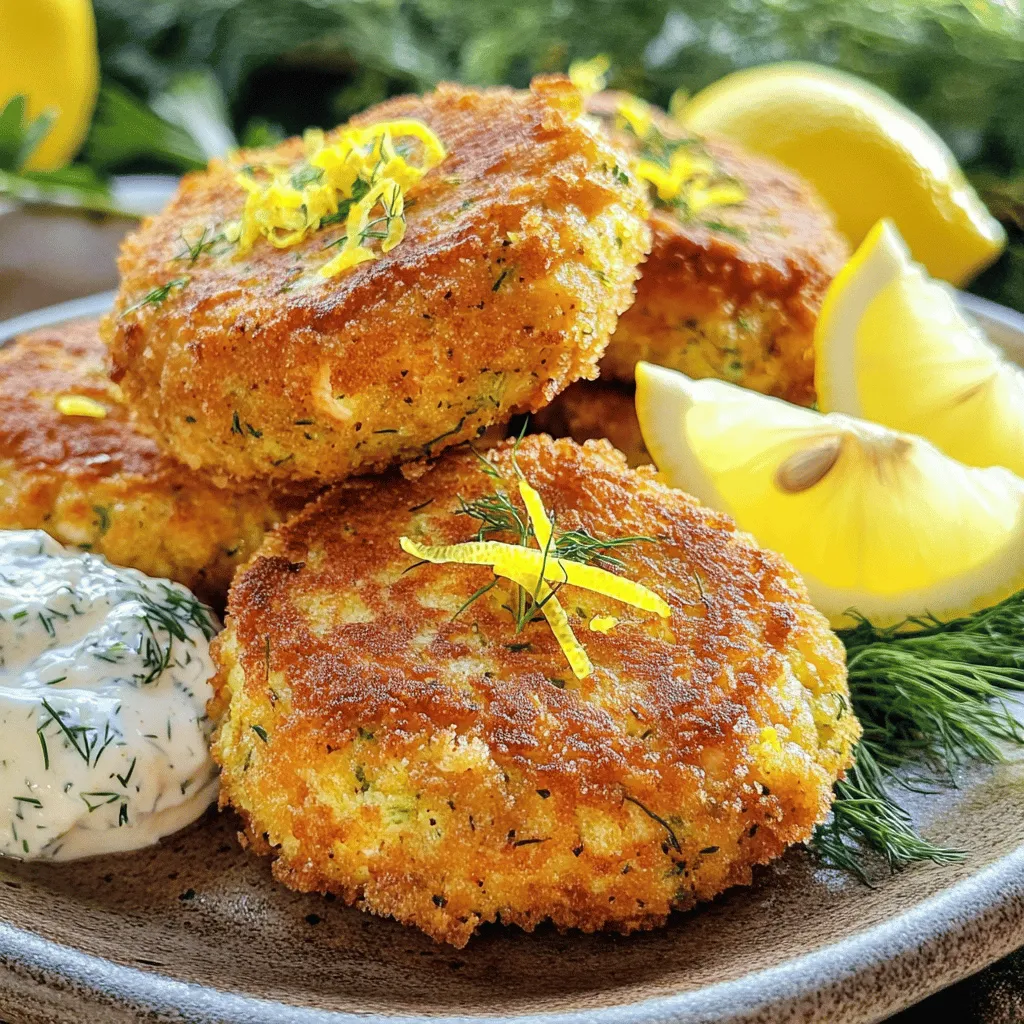
Get ready to elevate your dinner with my Lemon Dill Salmon Cakes! This easy recipe bursts with bright flavors and

- 1 ripe mango, expertly diced into small cubes - 1 ripe avocado, diced with care to maintain its shape - 1 cup canned black beans, thoroughly rinsed and drained - 1/2 medium red onion, finely chopped for a burst of flavor - 1 jalapeño, deseeded and minced for a kick of heat - 1/4 cup fresh cilantro, chopped to add freshness - Juice of 2 limes, freshly squeezed for brightness - 1 tablespoon extra virgin olive oil to enhance richness - Salt and freshly cracked pepper to taste Fresh ingredients make this salsa shine. The ripe mango adds sweetness, while the avocado brings creaminess. Each component plays a role in flavor and texture. Fresh cilantro adds a burst of green. Fresh lime juice brightens every bite. Using canned black beans keeps prep simple but tasty. When you choose fresh, you boost flavor and nutrition. This salsa packs a nutritional punch. Mangoes are rich in vitamins A and C. Avocados provide healthy fats and fiber. Black beans add protein and iron. One serving offers a good blend of nutrients. This dish is colorful and healthy. It fits well into many diets. Enjoying it means fueling your body with good stuff. First, gather all your ingredients. You need a ripe mango, a ripe avocado, canned black beans, a red onion, a jalapeño, fresh cilantro, limes, olive oil, salt, and pepper. Dice the mango and avocado into small cubes. Be gentle with the avocado; you want it to stay intact. Rinse the black beans well and drain them. Chop the red onion finely and mince the jalapeño after removing the seeds. In a large mixing bowl, add the diced mango and avocado. Next, toss in the black beans, chopped red onion, and minced jalapeño. Make sure everything is mixed evenly. Then, gently fold in the chopped cilantro for a fresh taste. In a small bowl, whisk together the lime juice and olive oil. Pour this mixture over the salsa. Season it with salt and cracked pepper to your liking. Stir gently to mix all the flavors without mashing the fruits. Cover the bowl with plastic wrap or a lid. Let the salsa sit at room temperature for about 10 minutes. This rest time allows the flavors to blend nicely. The lime juice will also help to bring out the taste of each ingredient. After resting, give it a quick stir and taste it again. Adjust seasonings if needed. This step is crucial for a well-balanced salsa. When choosing mangoes, look for ones that feel slightly soft. They should not be mushy. A ripe mango has a sweet smell near the stem. For avocados, press gently. They should yield to your touch but not feel overly soft. Color matters too; a darker green avocado is often ripe. Check for any dark spots as they may mean the fruit is overripe. Mixing is a key step in making salsa. You want flavors to blend well but keep textures. Start by adding your diced mango and avocado to a large bowl. Use a gentle folding motion to combine. This keeps the fruit intact. Add black beans and onion, folding them in carefully. Lastly, mix in cilantro and your dressing. Avoid stirring too hard; this way, the salsa stays fresh and appealing. Spice level is all about balance. If you like heat, use more jalapeño. For a milder taste, reduce the amount or remove seeds. Another option is to add a pinch of cayenne pepper. Taste your salsa after mixing. If it needs more spice, adjust slowly. Remember, you can always add more, but it’s hard to take away. Enjoy experimenting until you find your perfect flavor! {{image_4}} You can change up the ingredients to suit your taste. If you want a sweeter salsa, try adding pineapple. It adds a nice twist. For a creamier texture, mix in a dollop of Greek yogurt. You can also swap the black beans for chickpeas for a different flavor. If you like more heat, add more jalapeño or even some diced serrano peppers. You can use lime zest as a fun touch, too. Serve your salsa in fun ways to impress guests. Use half of a hollowed-out avocado or mango as a bowl. This makes a perfect presentation. You can also layer the salsa in a glass with tortilla chips. This way, it looks fancy and is easy to grab. For a cool treat, try serving it with grilled fish or chicken. The freshness of the salsa adds a great contrast. This salsa pairs well with many dishes. It’s great with tortilla chips for a crunchy snack. You can also enjoy it on top of tacos or burritos for added flavor. If you like salads, try it as a topping. It adds color and taste to any green salad. The combination of flavors makes each bite special. To keep your Mango Avocado Black Bean Salsa fresh, store it in an airtight container. This helps prevent air from getting in and keeps flavors intact. If you have leftovers, eat them within a day or two for the best taste. Always check for any browning on the avocado before enjoying it again. If the salsa begins to change color, it may not taste as fresh. Avocados turn brown quickly after being cut. To slow this down, add lime juice to the exposed flesh. The acid in lime helps keep the color bright and fresh. You can also store cut avocado in water. Just place the half in a bowl and cover it with water. This method keeps it green for a bit longer. Always cover any unused salsa tightly to help keep the avocado from browning. Mango Avocado Black Bean Salsa can last in the fridge for up to three days. After that, it may lose its flavor and texture. If you notice any off smell or color, it's best to toss it out. For longer storage, consider freezing the salsa without avocado. When you are ready to eat it, thaw and add fresh avocado later for the best taste. Yes, you can make this salsa ahead of time. I suggest preparing it a few hours before serving. This allows the flavors to mix well. Just keep it in the fridge until you're ready to eat. However, add the avocado close to serving time to keep it fresh. If you need a substitute for black beans, try pinto beans or chickpeas. Both options work great. They add similar textures and flavors. You can also use corn for a sweeter taste, but it will change the flavor profile. This salsa lasts about 2 to 3 days in the fridge. To keep it fresh, store it in an airtight container. The lime juice helps slow down browning, but the avocado may brown over time. If it does, just mix it well before serving. Yes, you can use frozen mango, but avoid frozen avocado. Frozen mango will work well if thawed properly. Fresh avocado is best for flavor and texture. Frozen avocado often becomes mushy and may not hold up in the salsa. Absolutely! If you like more heat, add extra jalapeño or even some diced serrano peppers. You can also include a pinch of cayenne pepper for an added kick. Just remember to start small, then taste as you go. Yes! This salsa is perfect for meal prep. It’s healthy and easy to make. You can pair it with tacos, grilled chicken, or salads. It adds a fresh touch to many meals. Yes, you can add fruits! Pineapple or peaches work really well. They add a nice sweetness and contrast to the beans. Just be sure to cut them small so they mix in nicely. To make your salsa more colorful, add diced bell peppers. Red, yellow, or orange peppers not only brighten the dish but also add flavor. You can also sprinkle some diced radishes on top for a pop of color. We covered the key parts of making a great mango avocado black bean salsa. Fresh ingredients matter for the best taste and nutrition. Preparing and storing your salsa right keeps it tasting fresh longer. I shared tips for picking ripe fruit and adjusting spice levels. You can easily customize the salsa to fit your taste. With these steps and tricks, you can make a crowd-pleasing dish every time. Enjoy your salsa and let it bring flavor to your meals!

Mango Avocado Black Bean Salsa Fresh and Flavorful Mix

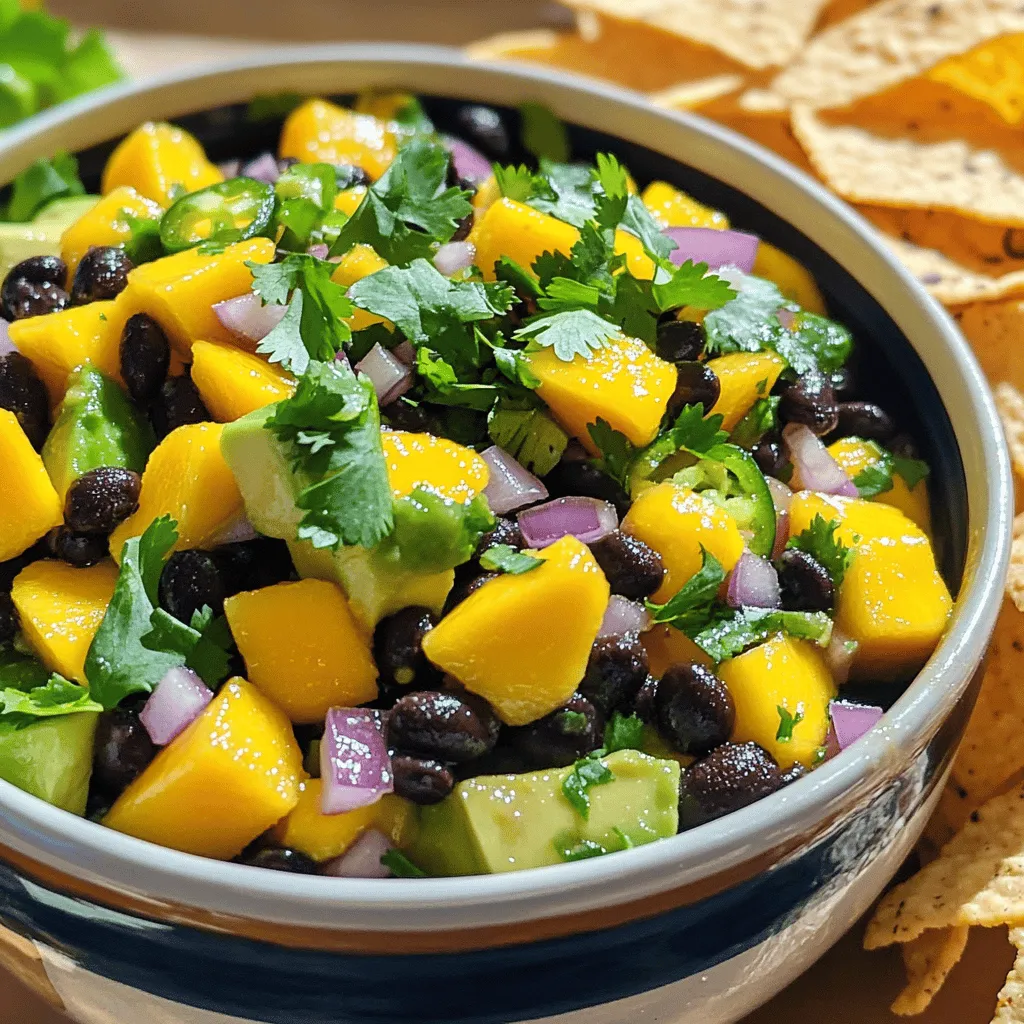
Craving a fresh, vibrant dish to zing up your meals? Look no further than Mango Avocado Black Bean Salsa! This

- Firm tofu (14 oz, pressed and cubed) - Assorted bell peppers (2 cups, sliced) - Broccoli florets (1 cup) - Snap peas (1 cup, trimmed) - Soy sauce or tamari (3 tablespoons) - Pure maple syrup (2 tablespoons) - Sesame oil (1 tablespoon) - Garlic (2 cloves, minced) - Fresh ginger (1 teaspoon, grated) - Sesame seeds (for garnish) - Green onions (3, thinly sliced, for garnish) - Cooked rice or quinoa (for serving) When I think of making this dish, I always start with the main ingredients. The firm tofu is key. It holds its shape and soaks up the teriyaki sauce well. Pressing it removes extra water, which helps it absorb flavors. Next, I pick vibrant bell peppers. I like using red, yellow, and green for color. They add sweetness and crunch. Broccoli florets also add a nice texture. They stay bright green and crisp after roasting. Snap peas are another favorite. They add a fresh pop of sweetness. Now, let’s talk teriyaki sauce. I use soy sauce or tamari for a gluten-free option. The pure maple syrup gives the sauce a sweet note that balances the saltiness. Sesame oil adds a nutty depth. I always add minced garlic and grated ginger for a rich aroma and flavor. For garnishing, I sprinkle sesame seeds on top. They add a nice crunch. Thinly sliced green onions give a fresh bite. I love serving this dish over rice or quinoa. It makes the meal filling and adds more texture. - Preheat oven to 400°F (200°C). - Line a large sheet pan with parchment paper. This step helps your food cook evenly. The parchment paper makes cleaning easy. - Whisk together soy sauce, maple syrup, sesame oil, garlic, and ginger. Mix these ingredients well in a bowl. This sauce adds a tasty kick to your dish. The garlic and ginger bring great flavor. - Coat tofu with half of the teriyaki sauce and marinate. - Arrange marinated tofu and vegetables on the sheet pan. Start by tossing the tofu in the sauce. Let it sit for about 10 minutes. This helps the tofu soak up the flavor. Then, spread the tofu and chopped vegetables evenly on the sheet pan. - Drizzle remaining sauce and toss to coat. - Bake for 25-30 minutes, stirring halfway. Pour the rest of the sauce over everything. Stir gently to coat. Then, place the pan in the oven. Stir the mixture halfway to help it cook evenly. - Sprinkle with sesame seeds and green onions after baking. Once it’s done baking, take it out. Add sesame seeds and sliced green onions on top. This makes your dish look pretty and adds a nice crunch. - How to press tofu effectively: Start with firm tofu. Wrap it in a clean kitchen towel. Place a heavy item on top. This helps extract moisture. Let it sit for about 15-20 minutes. Pressed tofu absorbs flavors better. - Tips for cutting tofu evenly: After pressing, use a sharp knife. Cut the tofu into 1-inch cubes. This size ensures even cooking. Uniform pieces help with flavor absorption too. - Marination time recommendations: For the best flavor, marinate the tofu for at least 10 minutes. This gives it time to soak in the teriyaki sauce. You can marinate longer for a richer taste. - Importance of even sauce distribution: When mixing the tofu and veggies, ensure the sauce covers everything. An even coat allows all ingredients to absorb the flavor. Don’t skip this step; it makes a big difference! - How to achieve golden-brown tofu: Bake the tofu at 400°F (200°C). This high heat helps create a crisp outside. Stir halfway through to ensure all sides brown nicely. Watch closely to avoid burning. - Stirring for even roasting: About halfway through cooking, gently stir the tofu and veggies. This helps them cook evenly. It also promotes that lovely golden color. Don’t rush this step; it’s key for great results! {{image_4}} You can use seasonal veggies for your sheet pan. Try carrots, zucchini, or asparagus. Each option adds its unique taste and texture. If you want a different flavor profile, consider using mushrooms or kale. These veggies soak up the teriyaki sauce well and give a nice twist to the dish. If you want more protein, try adding chickpeas or edamame. These plant-based options work great with teriyaki flavors. For non-vegetarians, shrimp or chicken are excellent choices. Just add them to the pan with the tofu and veggies. They will cook quickly and soak up the sauce. Preparing ingredients ahead of time saves you effort during busy days. Chop your veggies and cube the tofu in advance. Store them in the fridge until you are ready to cook. For serving, place the cooked dish over rice or quinoa. This adds a hearty base and makes it a complete meal. To store your tasty leftovers, let them cool first. This step helps prevent moisture build-up. Place the cooled tofu and veggies in an airtight container. Make sure the lid seals well to keep out air. You can also use glass containers for better storage. They do not stain and help keep your food fresh. For easy reheating, use either the oven or the microwave. If you choose the oven, preheat it to 350°F (175°C). Spread the tofu and veggies on a baking sheet. Heat for about 10-15 minutes, stirring halfway to warm evenly. If using a microwave, place a portion in a microwave-safe bowl. Cover it loosely and heat for about 1-2 minutes. Check to see if it’s hot enough, then enjoy! Your leftovers will last about 3 to 4 days in the fridge. Be sure to label the container with the date. This way, you can keep track of freshness. If you want to save them longer, consider freezing the dish. It can last up to 3 months in the freezer. Just thaw it overnight in the fridge before reheating. Yes, you can easily make this dish gluten-free. Use tamari instead of soy sauce. Tamari is a great alternative that offers the same rich flavor without gluten. Always check labels to ensure your ingredients are gluten-free. To achieve crispy tofu, follow these steps: - Press the tofu well to remove excess water. This helps it become crispier. - Cut the tofu into even cubes to ensure uniform cooking. - Bake at a high temperature, like 400°F (200°C), for even browning. - Toss the tofu halfway through to help it crisp on all sides. You can try several sauces to mix things up: - Hoisin sauce adds a sweet and tangy flavor. - Peanut sauce gives a nutty taste that pairs well with veggies. - Sweet chili sauce provides heat and sweetness for a fun twist. Experiment with these options to find your favorite flavor! Absolutely! This recipe works great for meal prep. Here are some tips: - Cook a larger batch and store it in airtight containers. - Refrigerate for up to four days. - Reheat portions in the oven or microwave before serving. This makes it easy to enjoy healthy meals all week! This guide walks you through making teriyaki tofu, from ingredients to cooking steps. You learned about preparing firm tofu, colorful veggies, and a tasty sauce. Follow the tips to get great flavor and texture. Remember, you can customize this dish with different veggies or proteins. Enjoy the meal fresh or as a meal prep option. I hope you feel excited to try this recipe and impress your taste buds!

Sheet Pan Teriyaki Tofu & Veggies Flavorful Delight

Are you ready to whip up a meal that pleases both taste buds and eyes? My Sheet Pan Teriyaki Tofu

- 4 chicken thighs, skin-on and bone-in - 2 tablespoons honey - 4 cloves garlic, minced - 2 tablespoons soy sauce (preferably low sodium) - 1 tablespoon apple cider vinegar - 1 tablespoon olive oil - 1 teaspoon fresh ginger, grated - Salt and pepper to taste Chicken thighs are my go-to for this dish. They stay juicy and tender. The marinade is the star. Honey adds sweetness, while garlic gives it a rich flavor. Soy sauce adds umami, and vinegar balances it all. Olive oil keeps the chicken moist. - 2 cups broccoli florets - 2 cups baby carrots For the veggies, I use broccoli florets and baby carrots. They cook well and add color. Toss them in olive oil, salt, and pepper before roasting. This simple step makes them tasty and crisp. - Sesame seeds for garnish - Fresh cilantro or parsley, chopped, for garnish After cooking, sprinkle sesame seeds on top. They add crunch and flavor. Chopped fresh herbs, like cilantro or parsley, give a nice touch. They make the dish look bright and fresh. Preheating the oven is vital for even cooking. It helps the chicken cook through while keeping it juicy. Set your oven to 400°F (200°C). Wait until it’s fully hot before adding your dish. In a small bowl, mix the marinade. Combine 2 tablespoons of honey, 4 minced garlic cloves, and 2 tablespoons of soy sauce. Add 1 tablespoon of apple cider vinegar, 1 tablespoon of olive oil, and 1 teaspoon of grated ginger. Season with salt and pepper. Whisk well to blend all the flavors. This marinade gives the chicken a sweet and savory taste. Place the chicken thighs in a large bowl or a zip-top bag. Pour half of the marinade over the chicken. Make sure each piece is well coated. Let it marinate for at least 30 minutes. For even more flavor, refrigerate it for up to 4 hours. If you're short on time, 30 minutes works well, too! Get your vegetables ready while the chicken marinates. On a large sheet pan, spread 2 cups of broccoli florets and 2 cups of baby carrots. Drizzle a little olive oil over them. Season with salt and pepper, then toss until they are coated. This helps the veggies get nice and tender when roasted. After marinating, take the chicken out of the marinade and place it on the sheet pan with the vegetables. Arrange the chicken thighs skin-side up. Brush the remaining marinade over the chicken and veggies for extra flavor. Bake in the preheated oven for about 35-40 minutes. The chicken should reach 165°F (75°C) internal temperature, while the veggies should be tender and crisp. Once done, take the sheet pan out of the oven. Let the dish rest for about 5 minutes. This helps the juices settle. When ready to serve, sprinkle sesame seeds and fresh herbs like cilantro or parsley on top. This adds a nice touch and makes your meal look inviting. Enjoy this easy and tasty family dish! - Recommended internal temperature: Cook chicken thighs to 165°F (75°C). This keeps the meat safe to eat and moist. Use a meat thermometer to check the temperature easily. - Tips for avoiding dryness: Marinate the chicken for at least 30 minutes. This adds moisture and flavor. Make sure to coat the chicken well in the marinade. Also, do not overcook the chicken. It will dry out quickly if cooked too long. - Marinating alternatives: Try using orange juice or maple syrup in place of honey. Both add unique flavors to the chicken. You can also use yogurt for a tangy taste. - Suggested spices and herbs: Add a pinch of cayenne for heat. Fresh thyme or rosemary can give a nice aroma. Experiment with spices like paprika for a smoky profile. - Meal prep tips: Prepare the marinade the night before. Store chicken in the marinade overnight for deeper flavor. Chop the vegetables ahead of time to cut down on cooking time. - Shortcut suggestions for busy cooks: Use pre-cut vegetables from the store. They save time and effort. You can also buy pre-marinated chicken for a quick meal option. {{image_4}} You can easily swap chicken thighs for other proteins. If you prefer, use chicken breast. It cooks faster and is leaner. Just keep an eye on the cooking time to avoid dryness. For a twist, try pork tenderloin. It pairs well with the honey garlic sauce. Cut it into bite-sized pieces to ensure even cooking. If you're looking for plant-based options, tofu works great too. Press it first to remove excess water. Then, marinate and roast just like the chicken. The sauce will make it flavorful and satisfying. Feel free to change up the vegetables in this dish. Green beans or bell peppers are good choices. They add color and taste. You can also use seasonal veggies. In summer, try zucchini or cherry tomatoes. In fall, butternut squash or Brussels sprouts work well. Each season brings a new flavor to enjoy. To change the flavor, play with the marinade. You can use teriyaki sauce instead of honey for a different taste. If you like spice, add red pepper flakes for a kick. You can also add a splash of lime juice for brightness. Adjust the sweetness by using less honey or adding more garlic. This way, you can customize it to your liking. To store leftovers, let the dish cool first. Place the chicken and veggies in an airtight container. They can last in the fridge for about 3 to 4 days. Always try to eat them within this time for the best taste and safety. To freeze cooked chicken, let it cool completely. Wrap it tightly in foil or plastic wrap. Place it in a freezer-safe bag. It can stay fresh for up to 3 months. For thawing, move it to the fridge overnight. If you're in a hurry, you can use the microwave. Just ensure it’s heated evenly. When reheating, the oven works best. It keeps the chicken crispy and moist. Heat it at 350°F (175°C) for about 15-20 minutes. Check that the internal temperature reaches 165°F (75°C) to ensure it's safe to eat. Avoid reheating in the microwave if possible, as it can make the chicken rubbery. Yes, you can use boneless chicken thighs. Boneless chicken cooks faster and is easier to eat. However, it may dry out more easily. Bone-in chicken adds flavor and keeps moisture. If you choose boneless, watch the cooking time closely. Aim for an internal temperature of 165°F to ensure it is safe to eat. If you don’t have honey, you have options. Maple syrup or agave nectar work well as substitutes. You can also use brown sugar mixed with water. Just remember, these options change the flavor a bit. Adjust the amount to taste, since some are sweeter than honey. To make this dish gluten-free, use tamari instead of soy sauce. Tamari has a similar taste but is gluten-free. Always check the label to ensure it meets your needs. You might also want to use fresh garlic instead of garlic powder, as some brands add gluten. Yes, you can prepare this dish ahead of time. Marinate the chicken up to 4 hours in advance. For meal prep, chop the veggies and store them in the fridge. The flavors improve with time, but don’t marinate too long. Cook it fresh for the best taste. When ready, just assemble and roast it. This blog post showed you how to make a tasty chicken dish. You learned about the main ingredients, like chicken thighs and tasty marinades. We covered how to prepare veggies, assemble the dish, and add garnishes. I shared tips to ensure your chicken is juicy and flavorful. You can even customize the recipe with different proteins and vegetables. Remember to store leftovers properly. Now, with all this knowledge, enjoy making your delicious meal and impress your family or friends. Happy cooking!

Sheet Pan Honey Garlic Chicken Easy Family Meal

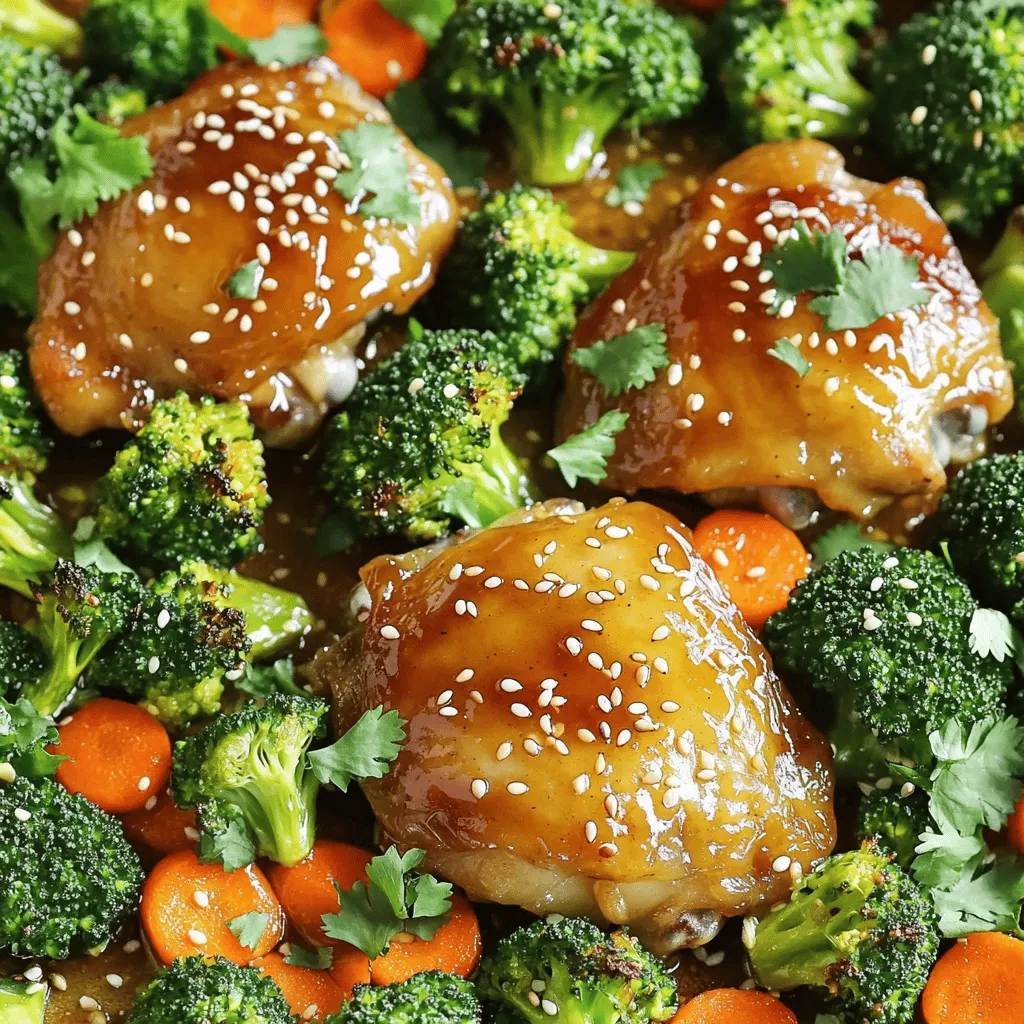
Looking for an easy family meal that’s both tasty and quick? You’ve found it! My Sheet Pan Honey Garlic Chicken

- 1 cup Arborio rice - 4 cups whole milk - 1/2 cup granulated sugar - 1 vanilla bean or 2 teaspoons pure vanilla extract - 1/4 teaspoon salt The main ingredients create the base of this dish. Arborio rice gives a nice creamy texture. Whole milk adds richness and flavor. Sugar sweetens the pudding just right. Vanilla bean or extract gives a warm, sweet aroma. A pinch of salt balances all the flavors. - 2 large egg yolks - 1 teaspoon cornstarch - 1/2 teaspoon ground cinnamon - Fresh berries or toasted coconut Optional ingredients can enhance your pudding. Egg yolks add more creaminess and richness. Cornstarch helps thicken the pudding if you want it extra smooth. Ground cinnamon adds a hint of spice. Fresh berries or toasted coconut can make a lovely topping. They add color and texture, making the dessert even more delightful. 1. First, grab a large saucepan. Combine 1 cup of Arborio rice, 4 cups of whole milk, 1/2 cup of granulated sugar, and 1/4 teaspoon of salt. Stir it all well. Make sure everything mixes evenly. 2. Now, let’s activate that lovely flavor. If you use a vanilla bean, split it in half with a sharp knife. Scrape out the seeds and add them to the saucepan. Toss in the empty pod too. This step boosts the vanilla flavor. If you have pure vanilla extract, save it for later. 3. Place the saucepan on medium heat. Keep stirring now and then. Watch for bubbling; we want it to simmer gently. 4. Once it simmers, lower the heat. Cook the rice pudding for about 25-30 minutes. Stir it often. The rice should become tender, and the mixture thickens into a creamy pudding. 5. While the pudding cooks, take 2 large egg yolks and whisk them in a bowl. If you want extra creaminess, add 1 teaspoon of cornstarch. Mix until smooth. 6. To temper the yolks, ladle one cup of hot pudding into the yolks. Whisk fast! This step stops the yolks from cooking too quickly. 7. Slowly pour the yolk mixture back into the saucepan with the pudding. Stir as you pour. Cook for another 5 minutes. This makes the pudding even thicker. 8. Remove the saucepan from heat. If you used a vanilla pod, take it out now. Stir in 1/2 teaspoon of ground cinnamon and your vanilla extract if you’re using it. 9. Allow the pudding to cool for a bit. Then, transfer it to bowls or ramekins. Now you have a creamy, delicious vanilla bean rice pudding ready to serve! To achieve the best texture for your rice pudding, you can adjust the cooking time. If you want a thicker pudding, let it cook a bit longer. Keep stirring to prevent sticking and burning. If it seems too thick, add a splash of milk to loosen it up. Using cornstarch can also help. Mix 1 teaspoon of cornstarch with the egg yolks. This makes your pudding even creamier. It thickens the pudding without changing the flavor. Choosing the right vanilla is key. Look for high-quality vanilla beans. The seeds have more flavor than extract. Split the bean and scrape the seeds for the best taste. If you use extract, add it at the end of cooking for a fresh flavor. Experiment with spices too. A dash of nutmeg can add warmth. You can also try cardamom for a unique twist. These spices boost the flavor and make your pudding exciting. Serving your rice pudding beautifully makes it more inviting. Use small bowls or elegant ramekins for a nice touch. You can layer the pudding with berries for added color. A sprinkle of toasted coconut adds crunch and style. For a final flourish, dust the top with cinnamon. This not only looks great but also adds flavor. Remember, first impressions matter, even in desserts! {{image_4}} You can easily make this rice pudding dairy-free. Use plant-based milk like almond or coconut milk. These milks give a nice flavor. You can also try oat milk for a creamier texture. If you want to skip the egg yolks, use a vegan egg replacer. This keeps the pudding rich. Want to add a twist? Try adding citrus zest. Lemon or orange zest gives a bright taste. You can also mix in some chocolate. Just melt it and stir it in as the pudding cooks. Other spices like nutmeg or cardamom can add warmth too. Be creative and play with flavors. You can serve your pudding hot or cold. Hot pudding is creamy and comforting. Cold pudding is refreshing, great for warm days. For toppings, think beyond berries and coconut. Try crushed nuts or a drizzle of honey. A sprinkle of cinnamon on top looks pretty and tastes good too. To keep your vanilla bean rice pudding fresh, refrigerate it right away. Use a clean, airtight container. This helps prevent any odors from other foods in the fridge. Keep the pudding at a temperature below 40°F (4°C). If you want, you can cover the pudding with plastic wrap. Place it directly on the surface to reduce skin formation. If you want to save rice pudding for later, freezing works well. First, let it cool completely. Then, scoop it into freezer-safe containers. Leave some space at the top because it will expand as it freezes. To thaw, move it to the fridge overnight. For reheating, warm it gently in a saucepan on low heat or in the microwave. Add a splash of milk for creaminess if it seems too thick. Homemade rice pudding lasts about 4-6 days in the fridge. Check for any off smells or discoloration. If it looks strange or has mold, it’s best to toss it out. Enjoy your delicious dessert while it’s fresh! How do I make rice pudding creamy? To make rice pudding creamy, use Arborio rice. This type of rice has high starch. Cook it slowly with whole milk for rich texture. Stir often while cooking. Adding egg yolks helps thicken it. Cornstarch is optional for extra creaminess. Can I use other types of rice? You can use other rice types, but results may vary. Long-grain rice yields a less creamy pudding. Short-grain rice can work but may not be as rich. Arborio rice is best for a smooth and creamy dessert. What is the origin of rice pudding? Rice pudding has roots in many cultures. It dates back to ancient times. Different regions add unique ingredients. In Europe, it’s a comfort food. In Asia, it often has coconut milk. Each version reflects local tastes. How is vanilla bean rice pudding served around the world? People serve rice pudding in many ways. In Italy, it’s often topped with fruit. In India, it is called kheer and flavored with cardamom. In the U.S., it's a classic dessert enjoyed warm or chilled. What to do if the pudding is too thick? If your pudding is too thick, add a splash of milk. Stir it in slowly until you reach the desired creaminess. Heat gently to mix well. Avoid adding too much at once. How to fix curdled rice pudding? If your pudding curdles, remove it from heat immediately. Stir in a splash of cold milk. This helps cool it down and smooth the texture. If needed, blend it to make it creamy again. In this blog, we explored making delicious rice pudding. We covered the main and optional ingredients, step-by-step instructions, tips, and variations. You can easily adjust for taste or dietary needs. Remember, using quality vanilla and perfecting the texture can make a big difference. If you follow these steps, your rice pudding will impress. Enjoy your creation and feel free to share it with friends and family!

Vanilla Bean Rice Pudding Creamy Dessert Delight

Are you ready to indulge in a creamy dessert that brings joy with every spoonful? Vanilla Bean Rice Pudding is

- 4 boneless, skinless chicken breasts - 1 cup fresh spinach, finely chopped - 1 cup canned artichoke hearts, drained and coarsely chopped - 1 cup cream cheese, softened - 1/2 cup sour cream - 1 cup shredded mozzarella cheese, divided - 1/2 cup grated Parmesan cheese - 2 cloves garlic, minced - 1 teaspoon onion powder - 1 teaspoon Italian seasoning - Salt and pepper to taste - Olive oil for greasing You can add a pinch of red pepper flakes for heat. A sprinkle of smoked paprika gives a nice depth. Fresh herbs like parsley or basil can brighten the dish. If you can't find artichoke hearts, use chopped mushrooms instead. For a lighter option, swap cream cheese with Greek yogurt. You can also use chicken thighs if you prefer darker meat. 1. Preheat your oven to 375°F (190°C). This step warms the oven for even cooking. 2. Grease the bottom and sides of your baking dish with olive oil. This helps prevent sticking. 3. Season the chicken breasts on both sides with salt, pepper, and onion powder. Use enough seasoning for great flavor. 4. Place the seasoned chicken breasts in a single layer at the bottom of the dish. Make sure they do not overlap. 5. In a bowl, mix fresh spinach, artichoke hearts, minced garlic, cream cheese, sour cream, and half of the mozzarella. This mixture adds flavor and creaminess. 6. Stir until the mixture is smooth and well combined. You want a nice, thick spread. 7. Spread the spinach and artichoke mix evenly over the chicken. Make sure every piece is covered. 1. Sprinkle the remaining mozzarella and Parmesan cheese on top of the mixture. This will create a cheesy crust. 2. Cover the baking dish tightly with aluminum foil. This keeps moisture in while baking. 3. Bake in the oven for 25 minutes. This step cooks the chicken and melts the cheese. 4. After 25 minutes, remove the foil. Allow the cheese to brown for 15 more minutes. 5. Check the chicken's internal temperature; it should be 165°F (75°C). The cheese should be golden and bubbling. - Use a meat thermometer to check the chicken's temperature. This gives you the best reading. - If you don't have a thermometer, cut into a thick part of the chicken. The juices should run clear, not pink. - Let the dish cool for a few minutes before serving. This makes it easier to slice. For the best cheese blend, mix mozzarella and Parmesan. These cheeses melt well and add flavor. You can also try gouda for a smoky taste. Cream cheese brings creaminess and richness to the dish. Mixing these cheeses elevates the bake to a new level. Boost the flavor with fresh herbs. Basil or parsley can add brightness. You may also use lemon juice for a zesty kick. Garlic adds depth, so don’t skip it! Adding a pinch of red pepper flakes gives a nice heat. Adjust these ingredients based on your taste preferences. Avoid overcooking the chicken. Use a meat thermometer to check if it reaches 165°F. This keeps the meat juicy. Don't rush mixing the cheese and veggies; a smooth blend makes a better dish. Lastly, remember to cover the bake with foil initially. This keeps it moist and tender while baking. {{image_4}} You can make this dish lighter without losing flavor. Use skinless chicken thighs instead of breasts. They stay juicy and tender. Swap out cream cheese for Greek yogurt. This gives you a creamy texture with fewer calories. You can also use low-fat mozzarella cheese. This change cuts fat while keeping that gooey goodness. If you want a vegetarian version, simply leave out the chicken. Replace it with hearty vegetables. Try using mushrooms or zucchini for great texture. You can also add cooked quinoa for extra protein. The spinach and artichoke mix still shines without the meat. This option is perfect for a meatless meal. Want to step up the flavor? Add some red pepper flakes for heat. A squeeze of lemon juice brightens the dish, too. Fresh herbs like basil or dill can make it more aromatic. For a smoky twist, try adding smoked paprika. These small changes can turn a classic into something new and exciting. After enjoying your Spinach Artichoke Chicken Bake, let leftovers cool. Place them in an airtight container. Keep the container in the fridge. This dish stays fresh for up to three days. Make sure to seal it well. This keeps the flavors locked in and prevents any odors from mixing. When you are ready to eat leftovers, preheat your oven to 350°F (175°C). Place the chicken bake in a baking dish. Cover it with foil to keep it moist. Heat it for about 20–25 minutes. Check that it is warm all the way through. If you want a crispy top, remove the foil for the last 5 minutes. To freeze, cut the dish into portions. Wrap each piece in plastic wrap, then place them in freezer bags. Remove as much air as possible. This helps to avoid freezer burn. You can freeze it for up to three months. When you're ready to eat, thaw it in the fridge overnight before reheating. Enjoy your tasty meal later! Yes, you can use frozen spinach. Just make sure to thaw it first. Squeeze out any extra water after defrosting. This helps keep your dish from being too watery. Frozen spinach works well in many recipes. It is a great time-saver and still offers good flavor. This dish pairs well with many sides. Here are some ideas: - Fluffy quinoa for a nutty flavor. - A crisp garden salad for freshness. - Garlic bread to soak up the cheesy sauce. - Steamed vegetables for added color and nutrition. Feel free to mix and match based on your taste! To check if the chicken is done, use a meat thermometer. The internal temperature should reach 165°F (75°C). This ensures that the chicken is safe to eat. If you don’t have a thermometer, cut into the chicken. The meat should be white and the juices should run clear. Always check in the thickest part of the chicken breast for accuracy. This post covered key steps for making a delicious Spinach Artichoke Chicken Bake. We explored the ingredients, from cheese combos to optional seasonings. The step-by-step guide ensured you understand preparation and baking. I shared tips for perfect doneness and common mistakes to avoid. Lastly, I offered variations, storage advice, and answered popular questions. Cooking is fun, and now you know how to create something special. Enjoy making this dish and share it with friends!

Spinach Artichoke Chicken Bake Flavorful and Easy Meal

Are you ready to dive into a dish that’s both tasty and easy to make? Spinach Artichoke Chicken Bake is

- 3 ripe bananas, thoroughly mashed - 1/2 cup creamy peanut butter - 1/4 cup honey or maple syrup - 1 cup all-purpose flour - 1 teaspoon baking powder - 1/2 teaspoon baking soda - 1/4 teaspoon salt - 1/2 cup chocolate chips - 1/2 cup chopped walnuts These ingredients make the muffins rich and tasty. Ripe bananas add natural sweetness and moisture. Creamy peanut butter adds a nutty flavor and a smooth texture. Honey or maple syrup can sweeten your muffins to your liking. For the dry ingredients, all-purpose flour gives the muffins structure. Baking powder and baking soda help them rise, while salt balances the flavors. You can choose to add chocolate chips for a sweet surprise. Chopped walnuts add a nice crunch and extra flavor. Feel free to mix and match these ingredients to make your muffins unique. First, set your oven to 350°F (175°C). This is the perfect temperature for baking. Next, grab a muffin tin. You can line it with paper liners or spray each cup lightly with non-stick spray. This helps the muffins pop out easily. Take three ripe bananas and mash them well. Use a fork or potato masher for this. You want them smooth without lumps. Now, mix in 1/2 cup of creamy peanut butter. Stir this until it blends nicely with the bananas. Next, add 1/4 cup of honey or maple syrup along with 1/4 cup of brown sugar. Crack in one large egg and pour in one teaspoon of pure vanilla extract. Mix everything until it's uniform. In a separate bowl, whisk together 1 cup of all-purpose flour, 1 teaspoon of baking powder, 1/2 teaspoon of baking soda, and 1/4 teaspoon of salt. Make sure they are well combined. Now, slowly add the dry mix into the wet mixture. Stir gently until just combined. Be careful not to over-mix; this keeps your muffins light and fluffy. Using a spoon or muffin scoop, fill each muffin cup about three-quarters full. This allows space for rising. Place the muffin tin in your preheated oven and bake for 18 to 22 minutes. To check if they are done, insert a toothpick into the center of a muffin. If it comes out clean, your muffins are ready! Let them cool in the tin for about 5 minutes before moving them to a wire rack. Enjoy the warm scent as they cool! To get the best texture, avoid over-mixing your batter. Mix just until the flour disappears. If you over-mix, the muffins can turn out tough. For mashing bananas, use a fork or potato masher. Make sure to mash them until they are smooth. This helps the bananas blend well into the batter. You can adjust the sweetness using honey or maple syrup. If you want less sugar, use a little less honey or syrup. You can also try other sweeteners like coconut sugar or stevia. Just remember to keep the balance so it tastes great. To make the muffins even better, add spices like cinnamon or nutmeg. A splash of almond extract can add a lovely twist. For serving, you can drizzle chocolate syrup on top or add more peanut butter. Enjoy these muffins warm for the best flavor! {{image_4}} You can easily make these muffins nut-free. Simply skip the chopped walnuts. Use sunflower seed butter instead of peanut butter. This will keep the flavor rich and creamy without any nuts. To make these muffins dairy-free, swap out the egg. Use a flaxseed egg instead. Mix one tablespoon of ground flaxseed with three tablespoons of water. Let it sit for five minutes until it thickens. This works great in baked goods! You can add spices to change the flavor. A dash of cinnamon or nutmeg adds warmth. Just a half teaspoon can make a big difference. For chocolate lovers, try different types of chocolate chips. Dark, semi-sweet, or even white chocolate can work. Each type will bring its own unique taste to the muffins. To keep your muffins fresh, store them in an airtight container. This helps prevent them from drying out. You can leave them at room temperature for up to three days. If you want to keep them longer, refrigerate them. Muffins can stay fresh in the fridge for about a week. Just remember to bring them back to room temperature before enjoying. Freezing muffins is simple. First, let them cool completely. Then, wrap each muffin tightly in plastic wrap. Place the wrapped muffins into a freezer bag and seal it well. This protects against freezer burn. Muffins can last for up to three months in the freezer. To thaw, just take a muffin out and leave it at room temperature for about an hour. You can also heat it in the microwave for 10-15 seconds for a warm treat. Enjoy your delicious muffins even after some time! Yes, you can use very ripe bananas. In fact, the brown ones are sweeter. They mash easily and add great flavor to muffins. Check the muffins at 18 minutes. Insert a toothpick in the center. If it comes out clean, they are done. If it has batter, bake a little longer. Yes, almond butter works well. It will change the flavor slightly but still tastes great. Just use the same amount as peanut butter. To reheat muffins, use the microwave. Heat for about 10-15 seconds. You can also warm them in the oven at 350°F for 5-10 minutes. This makes them soft and tasty again! In this article, we explored how to make delicious peanut butter banana muffins. We covered key ingredients, like ripe bananas and creamy peanut butter, and detailed steps to ensure perfect muffins. I shared tips for the right texture, sweetness, and flavor. Remember, you can customize your muffins with add-ins or variations. Enjoy storing and freezing them for later. Baking can be fun and simple, so I encourage you to try this recipe out. Great muffins await you!

Peanut Butter Chocolate Chip Banana Muffins Delight

If you love the sweet taste of banana and the rich flavor of peanut butter, you’ll adore my Peanut Butter

- 8 oz fettuccine or linguine pasta - 1 lb large shrimp, peeled and deveined - 1 cup smoked sausage, sliced (andouille or kielbasa preferred) - 1 bell pepper, diced (choose either red or green for aesthetics) - 1 small onion, finely chopped - 3 cloves garlic, minced - 2 tablespoons Cajun seasoning (you can use homemade or store-bought) - 1 cup heavy cream - Fresh parsley, finely chopped (for garnish) - Grated Parmesan cheese (optional, for serving) The main ingredients in this dish are pasta, shrimp, and sausage. I prefer fettuccine or linguine for their great texture. The shrimp adds a lovely, sweet flavor, and the sausage brings a smoky kick. For vegetables and seasonings, I love using bell peppers and onions. They add color and crunch. Garlic adds aroma and depth to the dish, while Cajun seasoning gives it that unique, spicy flair. Don't forget the heavy cream! It makes the sauce rich and smooth. For garnish, I like to use fresh parsley. It adds a pop of color and freshness. Grated Parmesan cheese is optional but offers a nice touch. Start by filling a large pot with water. Add salt and bring it to a boil. This should take a few minutes. When the water is boiling, add 8 ounces of fettuccine or linguine. Cook the pasta for about 8-10 minutes, or until it is al dente. After cooking, drain the pasta well. Keep it warm by covering it or placing it back in the pot. Grab a large skillet and set it over medium heat. Pour in 1 tablespoon of olive oil. Let the oil heat up for a moment. While it heats, slice your smoked sausage into pieces. Add the sausage to the skillet and sauté for 4-5 minutes. Stir it often to ensure it browns nicely. Once done, remove the sausage from the skillet and set it aside. In the same skillet, add another tablespoon of olive oil. Toss in the diced bell pepper and chopped onion. Sauté them for about 3-4 minutes. You want the onion to look translucent, and the peppers should soften. Next, add 3 cloves of minced garlic and cook for just 1 more minute. Now, add the shrimp to the skillet. Sprinkle 2 tablespoons of Cajun seasoning over the shrimp. Cook for about 3-4 minutes, until the shrimp turns pink and opaque. Return the cooked sausage to the skillet. Add 1 can of drained diced tomatoes. Stir gently to mix everything well. Pour in 1 cup of heavy cream and heat for another 2-3 minutes. Taste the mixture and add salt and pepper as needed. Carefully add the cooked pasta to the skillet. Toss everything together until the pasta is well-coated in the creamy sauce. Make sure the pasta heats through. To serve, plate the Cajun shrimp and sausage pasta. Garnish with fresh parsley. If you like, sprinkle some grated Parmesan cheese on top for extra flavor. Adjusting Cajun seasoning You can change the heat by adding more or less Cajun seasoning. Start with two tablespoons. If you like it spicy, add more. If you want it mild, use less. Taste as you go. This keeps the dish just how you like it. Choosing the right sausage The sausage you select makes a big difference. I prefer andouille for its rich, smoky flavor. Kielbasa works too, giving a milder taste. Try both and see which you enjoy more. The sausage adds depth to the whole dish. Avoiding overcooking shrimp Shrimp cooks quickly. Watch closely! They turn pink when done. Cook them for about three to four minutes. Overcooked shrimp can become rubbery. Remove them from heat as soon as they change color. Ensuring creamy texture For a smooth sauce, add the heavy cream gently. Stir it in after combining the veggies and sausage. This helps mix flavors well. Heat it on low so it does not curdle. You want a creamy sauce that clings to the pasta. Serving ideas and dish enhancements Serve the pasta in deep bowls. This makes it look fancy and keeps it warm. Add a sprinkle of Cajun seasoning on top for color. A lemon wedge on the side brightens the dish and adds a fresh touch. Pairing with sides Crispy garlic bread is a great side. It soaks up the creamy sauce too. A simple green salad can balance the meal. It adds freshness to the rich pasta. Enjoy your delicious Cajun shrimp and sausage pasta! {{image_4}} You can easily change the protein. If you don't like shrimp, try chicken or tofu. Chicken adds a nice texture and flavor. Tofu is perfect for a plant-based option. For pasta, you can use penne or even zucchini noodles. This swap keeps the dish lighter and gluten-free. Do you like it spicy? You can add more Cajun seasoning or some crushed red pepper. This adds a great kick to your meal. If you want it mild, use less seasoning. You can also skip the hot spices and stick to the savory flavors. For a gluten-free meal, use gluten-free pasta. Many brands offer tasty options that cook well. If you need a dairy-free dish, consider coconut cream instead of heavy cream. This gives a nice richness without dairy. These swaps let everyone enjoy your Cajun shrimp and sausage pasta. To keep your Cajun shrimp and sausage pasta fresh, use airtight containers. Glass or plastic containers work well. Make sure to cool the pasta to room temperature before sealing. Store it in the fridge for up to three days. This keeps flavors intact and prevents spoilage. When you want to eat leftovers, use the stove or microwave. Stir well to heat evenly. If using the stove, add a splash of water or cream. This helps keep the pasta moist. In the microwave, cover it with a damp paper towel. This prevents drying out while heating. You can freeze leftovers too! Place the cooled pasta in a freezer-safe container. It lasts up to three months in the freezer. To enjoy, thaw it overnight in the fridge. Reheat it on the stove or microwave, adding a little cream or water to keep it creamy. You can use several great substitutes for heavy cream. If you're looking for a non-dairy option, try coconut cream. It adds a rich texture and flavor. You can also use almond milk mixed with a bit of olive oil for a lighter choice. If you prefer an alternative cream option, consider using half-and-half. It has a similar texture and creaminess. Another option is Greek yogurt. Just mix it with some milk for a smooth result. Yes, you can prepare Cajun shrimp and sausage pasta in advance. Cook the pasta and the sauce separately. Store them in airtight containers. This keeps the pasta from getting mushy. When you're ready to eat, combine the two in a skillet. Heat over medium until warmed through. It’s quick and easy! To make this dish spicier, add extra Cajun seasoning. You can also mix in some cayenne pepper. Start with a little and taste as you go. For a zesty kick, try a few dashes of your favorite hot sauce. Brands like Tabasco or Louisiana hot sauce work well. Just remember, a little goes a long way! Yes, you can lighten this dish easily! Start by using whole wheat pasta. It has more fiber and nutrients. You can also reduce the amount of sausage or use turkey sausage instead. For a healthier sauce, substitute heavy cream with Greek yogurt. This way, you cut calories without losing flavor. Add more vegetables for extra nutrients and flavor, too! This blog post covered how to make Cajun Shrimp and Sausage Pasta. We explored key ingredients like pasta, shrimp, and sausage. You learned step-by-step instructions for cooking and combining flavors. Tips on perfecting flavor and presentation were included. We also discussed variations for different diets. Finally, we shared storage and reheating methods for leftovers. With these guidelines, you can create a delicious dish that impresses. Enjoy your cooking journey and have fun experimenting with flavors and ingredients!

Cajun Shrimp and Sausage Pasta Flavorful Meal Idea

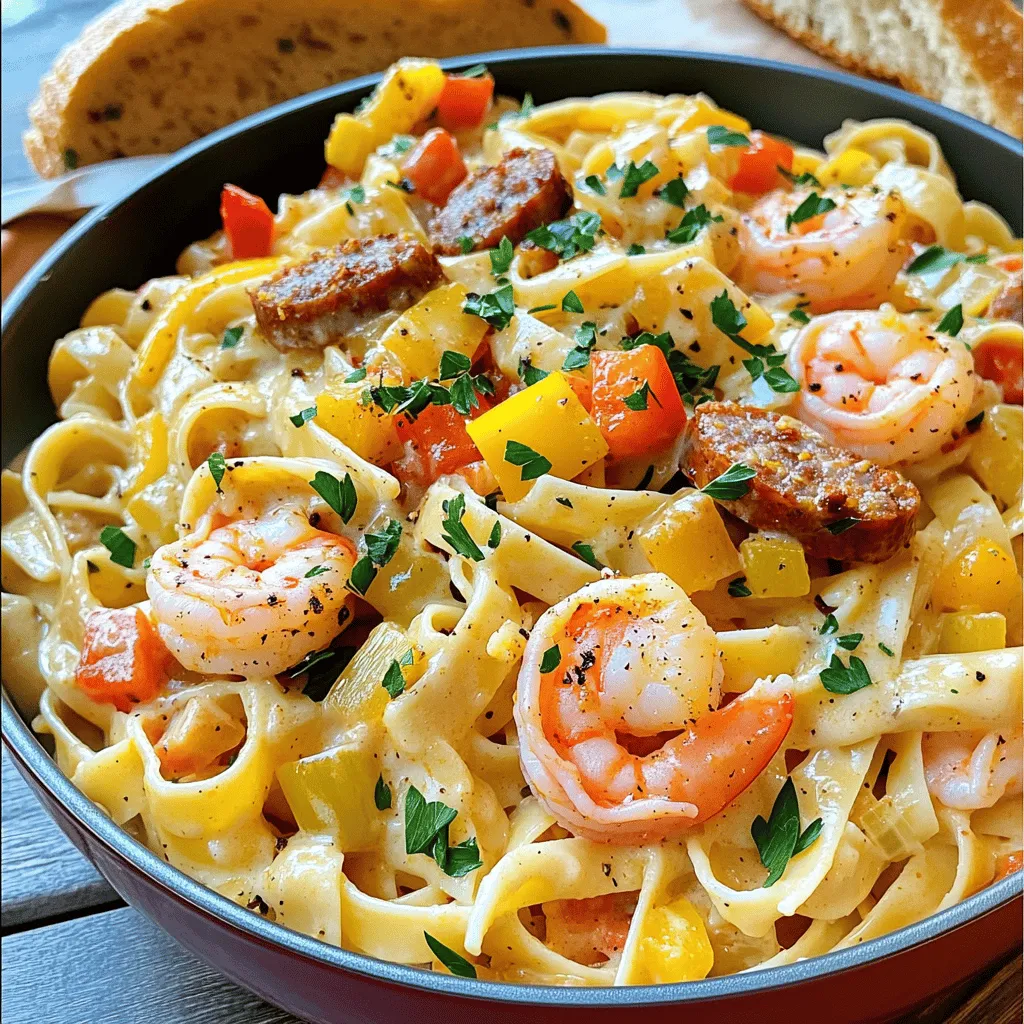
Are you ready to spice up your dinner routine? This Cajun Shrimp and Sausage Pasta packs bold flavors into every

Older posts
Newer posts
← Previous Page1 … Page30 Page31 Page32 … Page83 Next →

dsad

© 2026 eataroundit • Built with GeneratePress

Our Policies

  • Copyright Policy
  • Cookie Policy
  • GDPR Policy
  • Privacy Policy
  • Disclaimer
  • Terms Of Use

More Information

  • Home
  • About
  • Contact
  • Appetizers
  • Dessert
  • Dinner
  • Drinks
©2026, eataroundit About Back To Top