Skip to content
DisclaimerTerms Of UseGDPR PolicyCookie Policy

eataroundit

  • Home
  • Drinks
  • Appetizers
  • Dinner
  • Dessert
  • About
  • Contact
  • Privacy Policy
DisclaimerTerms Of UseGDPR PolicyCookie Policy

NO-ING-IMG

To make creamy mushroom risotto, you need the following ingredients: - 1 cup Arborio rice - 4 cups vegetable broth - 2 tablespoons extra virgin olive oil - 1 small onion, finely chopped - 2 cloves garlic, minced - 8 oz mixed mushrooms (like cremini and shiitake), sliced - 1/2 cup freshly grated Parmesan cheese - 1/4 cup heavy cream - 2 tablespoons freshly chopped parsley - Salt and freshly ground black pepper to taste The key ingredients for this recipe include Arborio rice, vegetable broth, and mushrooms. - Arborio rice is perfect for risotto. It absorbs liquid well and gives a creamy texture. - Vegetable broth adds depth to the flavor. You can use homemade or store-bought. - Mushrooms are the star of this dish. They bring umami and richness. You can customize your risotto with these optional ingredients: - Different cheeses: Swap Parmesan for Pecorino or a vegan cheese for plant-based diets. - Herbs: Add thyme or rosemary for an extra flavor boost. - Vegetables: Toss in peas or spinach for added color and nutrition. Feel free to mix and match based on what you have at home. Enjoy your cooking! 1. Gather all your ingredients. You will need: - 1 cup Arborio rice - 4 cups vegetable broth - 2 tablespoons extra virgin olive oil - 1 small onion, finely chopped - 2 cloves garlic, minced - 8 oz mixed mushrooms, sliced - 1/2 cup freshly grated Parmesan cheese - 1/4 cup heavy cream - 2 tablespoons freshly chopped parsley - Salt and freshly ground black pepper 2. Heat the vegetable broth in a medium saucepan over low heat. Keep it warm but do not let it boil. 1. In a large skillet, pour in the extra virgin olive oil. Heat it over medium heat until hot. 2. Add the chopped onion to the skillet. Sauté it for about 3-4 minutes. You want it to be translucent and fragrant. 3. Next, add the minced garlic and sliced mushrooms. Cook this mixture for 5-7 minutes. Stir often until the mushrooms soften and release their moisture. 4. Now, it's time to add the Arborio rice. Stir well and toast the rice for 1-2 minutes. This step helps the rice soak up the flavors. 5. Begin adding the warm vegetable broth to the rice. Use one ladle at a time. Stir continuously. Wait until most of the liquid is absorbed before adding more. Keep this up for about 20-25 minutes. The rice should be creamy and al dente. 1. When the rice is cooked, lower the heat. Mix in the freshly grated Parmesan cheese and heavy cream. Stir until the risotto is rich and creamy. 2. Season with salt and freshly ground black pepper to taste. Adjust the seasoning as you like. 3. Finally, fold in the freshly chopped parsley. This adds a burst of flavor and a pop of color. 4. For a nice presentation, dish the risotto into shallow bowls. Garnish each bowl with extra parsley and a dusting of Parmesan cheese. Serve it hot for the best texture and flavor. To get the creamiest risotto, use Arborio rice. This rice has a high starch content. The starch helps make the dish smooth and rich. Stirring often also helps release more starch. When you add broth, do it slowly. This lets the rice absorb the liquid fully. Keep stirring until the rice is creamy and tender. Mixing in heavy cream and Parmesan cheese at the end gives it a delightful finish. For better flavor, sauté the onions and mushrooms well. Cook them until they are soft and fragrant. You can add herbs like thyme or rosemary for a fresh taste. Tasting as you cook is key. Adjust salt and pepper to your liking. A squeeze of lemon juice at the end brightens the dish. You can also top the risotto with more cheese or fresh herbs for extra flavor. One common mistake is adding too much broth at once. This can make the rice gummy. Always add it gradually and stir. Another mistake is not stirring enough. This can prevent the rice from becoming creamy. Finally, avoid cooking the rice too long. It should be al dente, with a slight bite. If you remember these tips, your risotto will be perfect every time! {{image_4}} You can easily make this risotto vegetarian or vegan. Start by skipping the Parmesan cheese and heavy cream. Instead, use nutritional yeast for a cheesy flavor. You can also add coconut cream for extra creaminess. The vegetable broth already makes this dish a great choice. Just check the broth to ensure it is vegan. If you want to add protein, consider cooked chicken, shrimp, or even tofu. These add a nice texture and flavor. For a heartier meal, mix in peas, spinach, or bell peppers. These veggies complement the mushrooms well. Just add them during the last few minutes of cooking to keep them fresh. Herbs and spices can elevate your risotto. Fresh thyme or rosemary adds a lovely aroma. You can also try a pinch of chili flakes for a kick. If you love garlic, add more minced garlic while sautéing the onions. Don’t be afraid to experiment with flavors that you enjoy! To keep your leftover risotto fresh, place it in an airtight container. Make sure to cool the risotto to room temperature before sealing it. This step helps prevent moisture build-up, which can lead to spoilage. Store the container in the fridge for up to three days. If you notice any off smells or changes in texture, it's best to toss it out. When you're ready to enjoy your leftover risotto, reheating it properly is key. Start by adding a splash of broth or water to a saucepan. This addition helps restore creaminess. Heat the risotto over low heat, stirring often. This method keeps it from sticking and ensures even warmth. If you prefer, you can use a microwave. Just add a bit of liquid, cover it, and heat in short bursts, stirring in between. If you want to keep risotto longer, freezing works well. First, make sure the risotto is completely cool. Then, portion it into freezer-safe bags or containers. Remove as much air as possible before sealing. Label the bags with the date. You can freeze risotto for up to three months. When you're ready to eat it, thaw it in the fridge overnight before reheating. Keep in mind, the texture may change slightly, but the flavor will still be delicious. The best rice for risotto is Arborio rice. This rice is short-grained. It has a high starch content. This helps create a creamy texture in your risotto. You can also use Carnaroli or Vialone Nano. These rice types are also good for risotto. They have a nice bite and absorb flavors well. You can make risotto in advance, but it’s best fresh. When it cools, it becomes thicker. To store, let it cool and place it in a container. Keep it in the fridge for up to three days. When reheating, add a splash of broth. This helps restore its creamy texture. Risotto is done when it is creamy and the rice is al dente. This means it should be tender but still firm. You can taste a few grains to check. If it is too hard, cook it for a few more minutes. Stir often and add broth to keep it creamy. In this blog post, we explored making creamy mushroom risotto. We reviewed essential ingredients, cooking steps, and tips for a perfect dish. You learned about variations, storage, and answers to common questions. Remember, risotto is flexible; feel free to add your twist. Use what you love, and don’t stress over mistakes. With practice, you’ll master this dish. Enjoy your cooking journey and savor every bite of your delicious risotto!

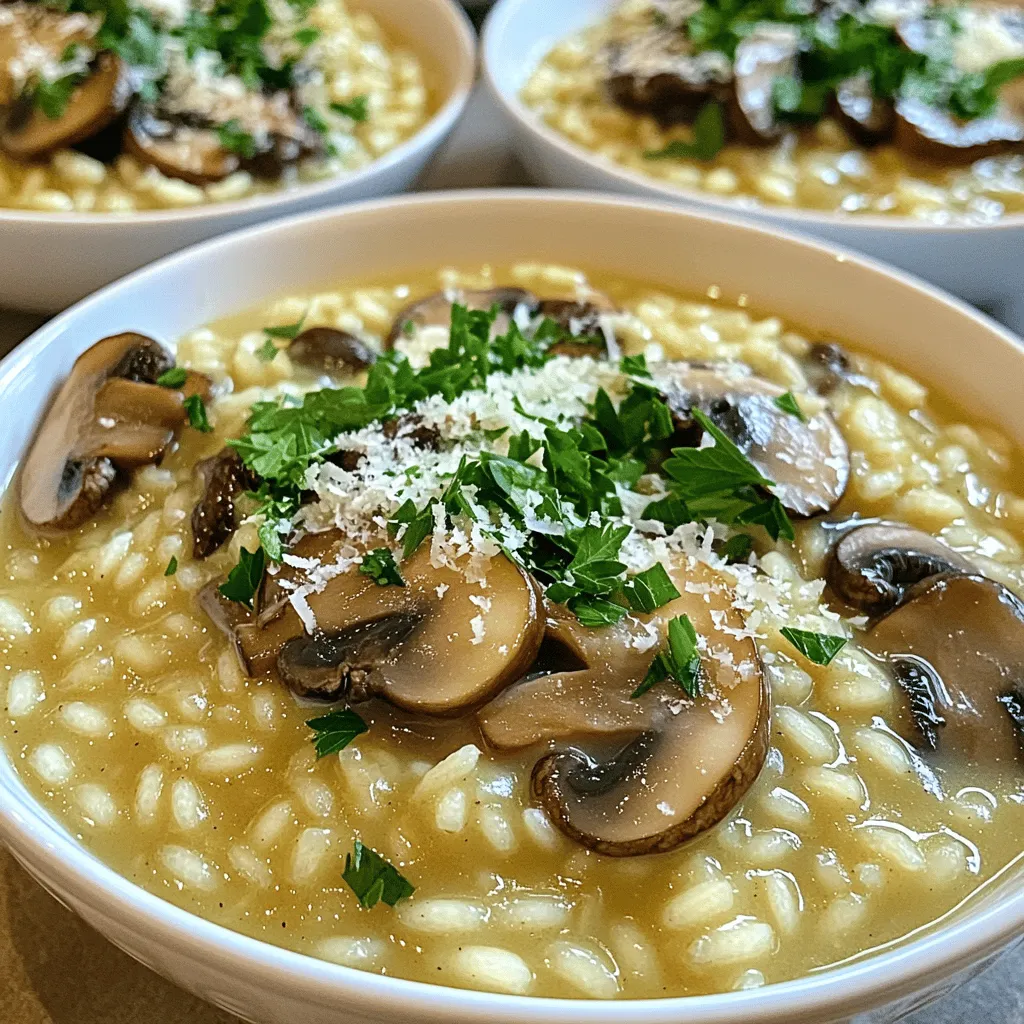
Creamy Mushroom Risotto Simple and Delicious Meal

If you love creamy, comforting meals, then creamy mushroom risotto is a must-try! This dish combines rich flavors and smooth

- 2 cups cooked chicken breast, shredded - 4 cups mixed greens (spinach, arugula, romaine) - 1 cup cherry tomatoes, halved - 1/2 cup red onion, thinly sliced - 1 cup corn (canned or freshly grilled) - 1/2 cup black beans, rinsed and drained - 1/2 cup shredded cheese (cheddar or pepper jack) - 1/4 cup ranch dressing - 1/4 cup BBQ sauce - Salt and freshly cracked pepper to taste - Optional: Crunchy tortilla strips for garnish When I select ingredients for BBQ Ranch Chicken Salad, I focus on freshness. Always choose bright, crisp greens. They make your salad come alive. Look for ripe cherry tomatoes; they should be firm and fragrant. For corn, I love grilling it for a smoky flavor. If you use canned corn, rinse it well. Black beans should be rinsed and drained for better taste and texture. Choose cheese that melts well, like cheddar for creaminess. If you don’t have chicken, try using grilled tofu for a plant-based option. You can swap mixed greens for kale or spinach. If you can’t find cherry tomatoes, diced bell peppers add nice color. Instead of red onion, green onions work well for a milder flavor. Use Greek yogurt mixed with ranch dressing for a healthier twist. For a fun crunch, use croutons instead of tortilla strips. To start, grab a large mixing bowl. Add 2 cups of shredded chicken. Pour in 1/4 cup of BBQ sauce and a pinch of salt and pepper. Mix well until the chicken is coated. In another bowl, combine 1/4 cup of ranch dressing with a tablespoon of BBQ sauce. Whisk it together to make a tasty blend. Now, take a big salad bowl. Layer 4 cups of mixed greens at the bottom. Next, arrange 1 cup of halved cherry tomatoes, 1/2 cup of thinly sliced red onion, 1 cup of corn, 1/2 cup of black beans, and 1/2 cup of shredded cheese on top. Then, spread the BBQ chicken mixture over these colorful ingredients. Finally, drizzle the ranch and BBQ dressing over the salad. Gently toss everything together, but be careful not to break the greens. You can serve this salad in individual bowls or on a nice platter. For a crunchy finish, sprinkle some tortilla strips on top. This adds texture and looks great. Enjoy this fresh and tasty BBQ Ranch Chicken Salad as a light meal or a delicious side dish. Marinating chicken makes it juicy and full of flavor. Start with cooked chicken, as it’s easy to shred. For the best taste, use BBQ sauce and a pinch of salt. Let the chicken sit in the marinade for at least 30 minutes. If you have time, marinate it overnight. This gives the chicken a deeper flavor. You can also add spices like garlic powder or onion powder for extra zest. To boost the salad's flavor, mix ranch dressing with a bit of BBQ sauce. This combo adds a nice tang. Use fresh ingredients like cherry tomatoes and red onions. They bring crunch and sweetness. Fresh herbs, like cilantro or parsley, can also brighten the dish. For a touch of heat, add diced jalapeños. This creates a nice balance with the creamy dressing. You can make this salad even better with healthy add-ons. Try adding sliced avocado for creaminess and healthy fats. You can also toss in some cucumber for extra crunch. For a protein boost, add chickpeas or extra black beans. If you're feeling adventurous, swap the mixed greens for kale or spinach. These greens offer more nutrients and a different texture. Don't forget to make it your own! {{image_4}} You can easily make this salad vegetarian. Swap the chicken for grilled tofu or chickpeas. Both options add protein and texture. You can also add roasted veggies like bell peppers or zucchini for a tasty twist. Use the same BBQ sauce and ranch dressing to keep those bold flavors alive. For a low-carb option, skip the corn and beans. You can add more greens instead. Try using lettuce wraps instead of a bowl. Choose a sugar-free BBQ sauce to keep carbs low. You can also use shredded cheese as a topping to add flavor without the carbs. While ranch and BBQ are a classic mix, you can explore other dressings. A tangy vinaigrette can brighten the salad. You might also enjoy a creamy avocado dressing for a rich taste. For a spicy kick, consider using a chipotle ranch. Each dressing changes the flavor and keeps things fun! To keep your BBQ Ranch Chicken Salad fresh, store leftovers in the fridge. Use an airtight container. This way, the salad stays crisp and tasty for up to three days. If you know you won’t eat it all, consider storing the chicken and veggies separately. This prevents sogginess from the dressing. Choose glass or BPA-free plastic containers. Glass is great because it doesn’t stain and keeps odors away. Look for containers with tight-fitting lids. This helps keep the air out and the flavors in. If you want to take your salad on the go, use smaller containers for easy packing. Most salads are best cold, but if you want to heat the chicken, do it gently. Place the chicken in a microwave-safe dish. Heat it on low for about 30 seconds. Stir and check the temperature. Make sure it’s warm, not hot. Add the warm chicken back to the salad just before serving. Enjoy your flavorful meal! BBQ Ranch Chicken Salad has about 400 to 500 calories per serving. This depends on how much cheese and dressing you use. To make it lighter, use less cheese or dressing. Yes, you can make BBQ Ranch Chicken Salad ahead of time. It tastes great if you chill it for a few hours. Just remember to keep the dressing separate until you are ready to eat. This keeps the greens fresh and crunchy. Some tasty side dishes to serve with BBQ Ranch Chicken Salad include: - Grilled corn on the cob - Garlic bread - Fresh fruit salad - Potato chips for crunch These sides enhance your meal and add variety. Absolutely! BBQ Ranch Chicken Salad is perfect for meal prep. You can store it in individual containers. Just keep the dressing separate to maintain freshness. Enjoy it for lunch or dinner throughout the week! You now have all the tools to make a great BBQ Ranch Chicken Salad. We covered ingredients, tips, and variations. Remember to choose fresh items for the best taste. Try different dressings or healthy add-ons to match your style. Store any leftovers in tight containers for later. With these steps, you'll impress your family or guests. Enjoy your flavorful, satisfying salad!

BBQ Ranch Chicken Salad Flavorful Summer Delight

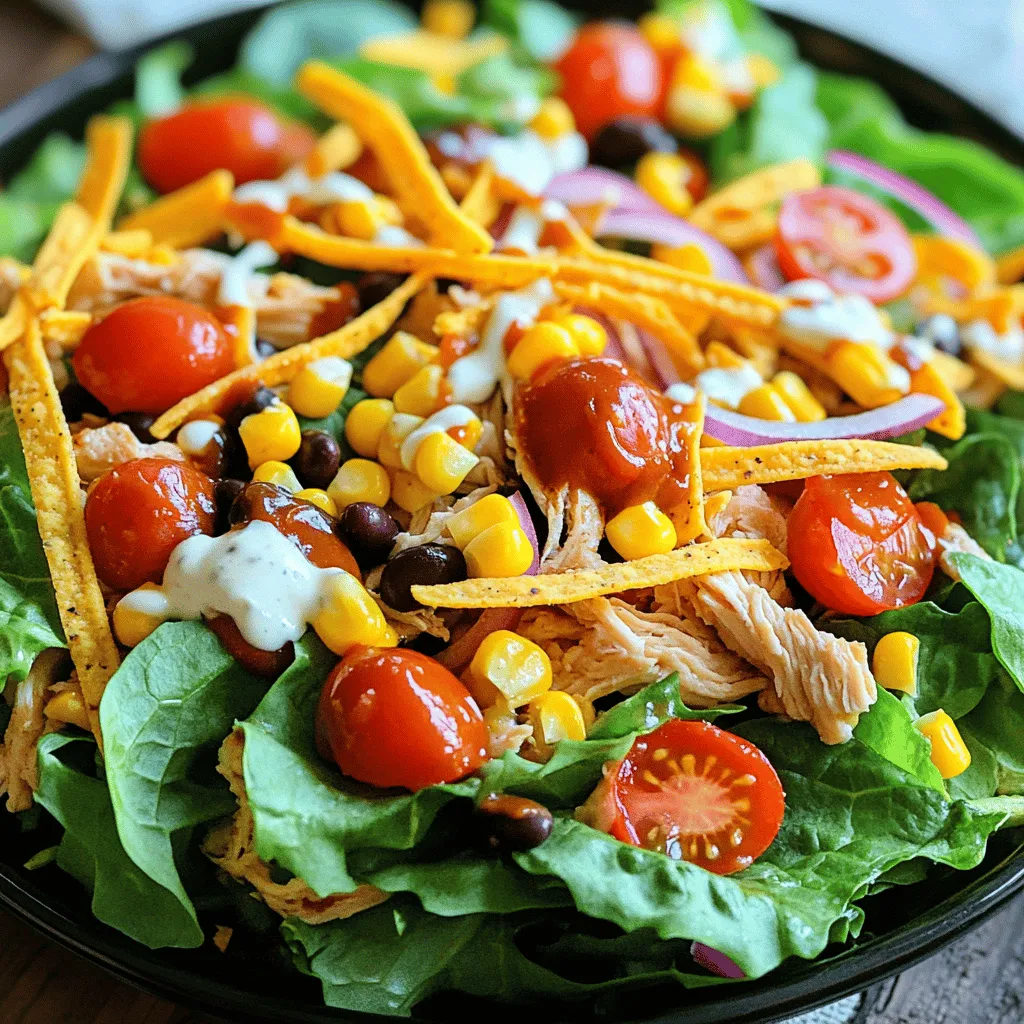
Looking for a fresh and tasty meal to enjoy this summer? This BBQ Ranch Chicken Salad is just what you

To make these delightful Raspberry White Chocolate Scones, you need a few simple ingredients. Here’s what you'll need: - 2 cups all-purpose flour - 1/4 cup granulated sugar - 1 tablespoon baking powder - 1/2 teaspoon salt - 1/4 cup cold unsalted butter, cut into cubes - 1/2 cup heavy cream - 1 large egg - 1 cup fresh raspberries (or frozen, thawed) - 1/2 cup white chocolate chips - 1 teaspoon vanilla extract - Coarse sugar, for sprinkling Each ingredient plays a key role. The all-purpose flour gives the scones structure. Granulated sugar adds sweetness, while baking powder helps them rise. Salt enhances flavor. Using cold unsalted butter makes the scones flaky. Heavy cream adds richness, and the egg binds the dough. Raspberries bring a burst of tartness, while white chocolate chips add sweetness. Vanilla extract rounds out the flavors. Coarse sugar on top gives a nice crunch. This mix creates a perfect balance of flavors and textures. You’ll love how these scones turn out! First, set your oven to 400°F (200°C). This temperature helps the scones rise well. Next, line a baking sheet with parchment paper. This keeps the scones from sticking and makes cleanup easy. In a large bowl, combine 2 cups of all-purpose flour, 1/4 cup of granulated sugar, 1 tablespoon of baking powder, and 1/2 teaspoon of salt. Whisk them together until blended. This mix forms the base of your scones. Now, take 1/4 cup of cold unsalted butter, cut into small cubes. Add this butter to your flour mixture. Use your fingertips or a pastry cutter. Work the butter into the flour until it looks like coarse crumbs. This gives the scones a flaky texture. In another bowl, whisk together 1/2 cup of heavy cream, 1 large egg, and 1 teaspoon of vanilla extract. Mix them until they are well combined. This creates a rich flavor and helps bind the dough. Pour your wet mixture into the dry ingredients. Stir gently with a spatula until just combined. Be careful not to overmix. This keeps your scones light and fluffy. Now it's time to add 1 cup of fresh raspberries and 1/2 cup of white chocolate chips. Gently fold them into the dough. Make sure they are well-distributed without breaking the raspberries too much. This adds bursts of flavor. Transfer the dough to a lightly floured surface. Knead it gently a few times to bring it together. Form the dough into a circle about 1 inch thick. This helps create even scones. Using a sharp knife or a round biscuit cutter, cut the dough into wedges or rounds. Arrange them on the prepared baking sheet, leaving space between each scone. This allows them to expand while baking. Place the baking sheet in your preheated oven. Bake for 15-20 minutes. Look for a golden brown color on top. This means your scones are perfectly baked. To make the best scones, you must avoid overmixing. This is key to keeping them light and fluffy. When you mix the wet and dry ingredients, stir just enough to combine them. A few lumps are okay! Using cold butter is also very important. Cold butter creates little pockets of air in the dough. This makes your scones rise nicely while baking. Cut the butter into small cubes before adding it to the flour. You’ll know your scones are done when they turn golden brown on top. The edges should look crisp, but the centers will still be soft. If you touch them lightly, they should spring back. Every oven cooks a bit differently. If your scones are not browning at 15 minutes, bake them for a few more minutes. Keep an eye on them to get the perfect bake. Serve your scones warm for the best taste. A dollop of clotted cream or butter on top brings out the flavors. It makes a delightful pairing! Garnish your scones with fresh raspberries. This adds a pop of color and freshness. Not only do they look great, but they also taste amazing! {{image_4}} You can change the fruit in these scones. Instead of raspberries, try blueberries, cranberries, or strawberries. Each fruit gives a new taste. For a tropical twist, add chopped pineapple or mango. Just remember to keep the amount of fruit the same. If you need gluten-free scones, use a gluten-free flour blend. Many brands work well for baking. Follow the instructions on the package for best results. For a dairy-free version, swap heavy cream with coconut cream or almond milk. Use dairy-free butter for a tasty and smooth texture. You can add spices to match the season. In fall, try cinnamon or nutmeg for warmth. In winter, a hint of ginger can brighten flavors. For spring and summer, fresh herbs like mint or basil add a refreshing twist. Feel free to get creative with the flavors you love! To store your scones at room temperature, place them in an airtight container. This keeps them fresh for up to two days. If you want to keep them from getting dry, add a piece of bread to the container. The bread helps maintain moisture. For long-term storage, freezing is best. Allow the scones to cool completely first. Wrap each scone tightly in plastic wrap. Then, place them in a freezer-safe bag. They can stay fresh for up to three months. When you’re ready to enjoy them, just take out what you need. To reheat scones, use an oven for the best results. Preheat your oven to 350°F (175°C). Place the scones on a baking sheet. Heat them for about 5 to 10 minutes. This helps restore their soft, fluffy texture. You can also use a microwave, but the oven is better for taste. Yes, you can use frozen raspberries. They work well in scones, but there are pros and cons. Pros: - Frozen raspberries are available year-round. - They often cost less than fresh berries. - They save prep time since you skip washing and picking. Cons: - They may release more juice, making the dough wetter. - You could lose some of the berry's shape when mixing. - Fresh raspberries taste brighter and more vibrant. Check for key signs to know your scones are ready. - They should be golden brown on top. - You can gently press them; they should feel firm. - A toothpick inserted in the center should come out clean. If they look pale, give them a few more minutes. Each oven is different, so keep an eye on them! Yes, you can prepare the dough ahead. It saves time for busy mornings. - Make the dough, shape it, and cut it into pieces. - Wrap each piece tightly in plastic wrap. - Store the wrapped dough in the fridge for up to 24 hours. When ready to bake, just place the scones on a baking sheet and bake as directed. Enjoy fresh scones in no time! Now you know how to make delicious raspberry scones. We covered the key ingredients and step-by-step instructions. I shared tips for perfect texture and baking time. You also learned about variations and how to store them. Making scones is fun and rewarding. These treats can brighten any day. Enjoy them warm with cream or fresh raspberries. Happy baking!

Raspberry White Chocolate Scones Delightful Breakfast Treat

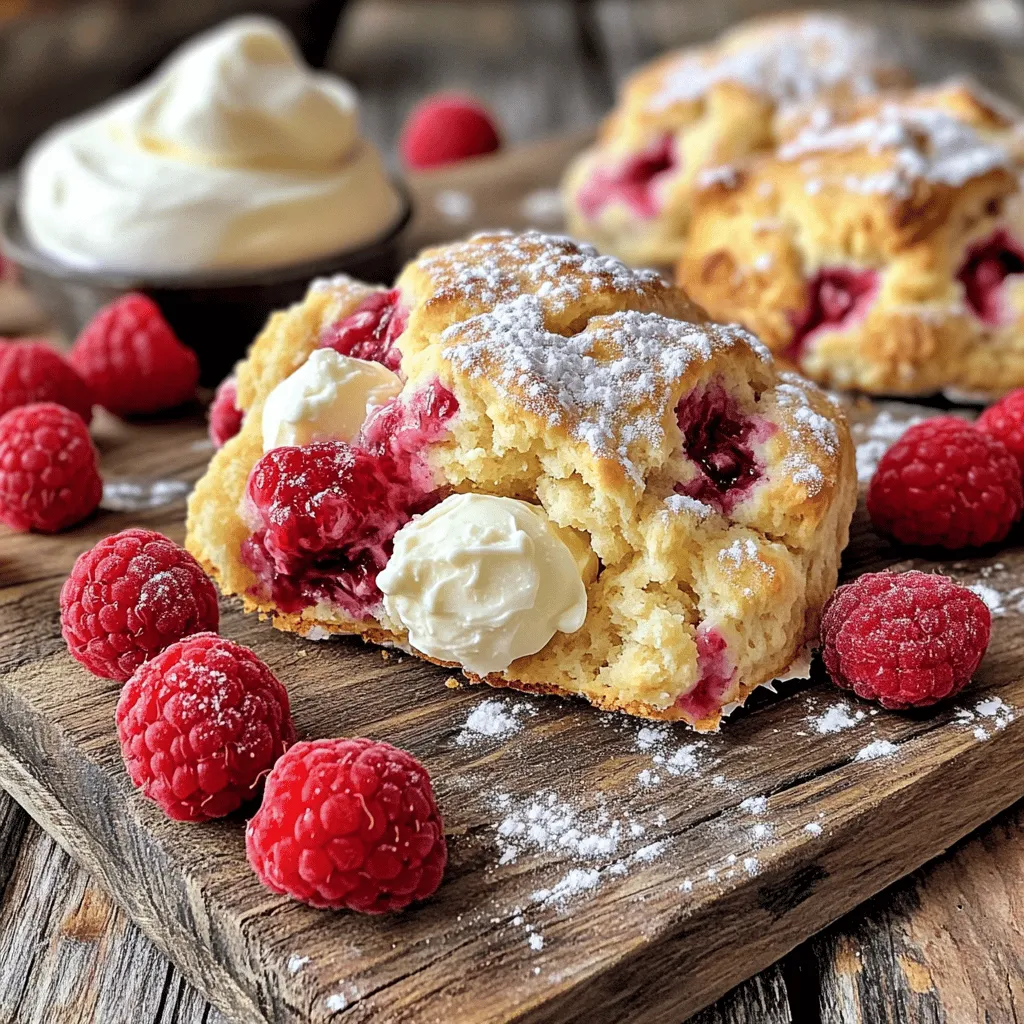
Start your mornings off right with these Raspberry White Chocolate Scones! Bursting with juicy berries and creamy chocolate, they make

- 1 lb ground chicken - 2 tablespoons fresh ginger, finely grated - 2 cloves garlic, minced - Zest of 1 orange plus juice from 1 orange - 3 tablespoons soy sauce (or tamari for a gluten-free option) - 2 tablespoons honey - 1 tablespoon sesame oil - 1 red bell pepper, finely diced - 1 cup water chestnuts, diced - 1 head of butter lettuce or iceberg lettuce, leaves carefully separated - 1 green onion, thinly sliced (for garnish) These ingredients are simple yet powerful. The ground chicken provides a hearty base, while the ginger and garlic add bold flavors. The orange zest and juice brighten the dish, making it fresh and lively. For sauces, soy sauce gives a salty kick, while honey adds sweetness. Sesame oil brings a nutty taste that ties it all together. In terms of vegetables, the red bell pepper and water chestnuts add crunch and color. The lettuce wraps serve as a perfect vessel for this tasty filling. Don't forget the green onions; they add a nice touch on top! Gather these ingredients, and you're ready to create a delightful meal that’s quick and easy! Start by heating a large skillet over medium heat. Add 1 tablespoon of sesame oil to the skillet. Once the oil is hot, add 2 tablespoons of finely grated ginger and 2 cloves of minced garlic. Sauté them for 1-2 minutes, stirring often. You want them fragrant but not burnt. Next, add 1 pound of ground chicken to the skillet. Use a wooden spoon to break the chicken apart. Cook it for about 5-7 minutes, until there is no pink left. Make sure it cooks evenly. Now it’s time to add flavor. Incorporate the zest of 1 orange and the juice from that same orange. Add 3 tablespoons of soy sauce and 2 tablespoons of honey. Stir this mixture well. Let it simmer for 3-5 minutes. This allows the sauce to thicken and flavors to meld. After the chicken is done cooking, gently fold in 1 finely diced red bell pepper and 1 cup of diced water chestnuts. Cook for 2 more minutes to warm them up while keeping their crunch. Once done, take the skillet off the heat. Allow the mixture to cool for a few minutes. To assemble the wraps, take a leaf of lettuce. Place a generous spoonful of the chicken mixture in the center. Fold the sides over the filling. Garnish with sliced green onions for extra flavor. Enjoy your wraps fresh! To ensure your chicken is fully cooked, check for no pink inside. Ground chicken should reach an internal temperature of 165°F. Keep the heat over medium to avoid burning the ginger and garlic. Cook them just until fragrant, about 1-2 minutes, stirring often. This way, you keep their great flavor without the bitterness of burnt bits. Arranging your wraps on a colorful platter adds life to your meal. Place each wrap neatly, with the green lettuce contrasting the orange chicken mix. Drizzle some extra orange juice over the top for a shiny finish. You can also add extra orange wedges on the side. They not only look great but also add a fresh touch. For dips or sauces, consider a light soy sauce or spicy chili sauce. These will add another layer of flavor. To elevate the taste, chop fresh herbs like cilantro or basil and sprinkle them on top. Fresh herbs will brighten up the wraps and bring a burst of freshness to each bite. {{image_4}} You can easily adapt this recipe to fit specific diets. For a gluten-free option, swap regular soy sauce with tamari. Tamari has a similar flavor but is safe for those avoiding gluten. If you want a vegetarian option, use crumbled tofu or tempeh instead of chicken. Both options absorb flavors well and add protein. Adjust the sweetness or spice levels to suit your taste. If you prefer it sweeter, add more honey. To spice it up, include some red pepper flakes or a dash of sriracha. You can also mix in different vegetables like carrots or snap peas. Nuts like chopped cashews or peanuts will add crunch and richness. These wraps are great as a light meal or an appetizer. Pair them with a fresh salad or a side of steamed rice for a full meal. For meal prep, you can store the chicken mixture separately from the lettuce. This method keeps the wraps fresh and crunchy when you are ready to eat. To keep your orange ginger chicken mixture fresh, place it in an airtight container. Store it in the fridge for up to three days. Make sure the chicken is cool before sealing. For the lettuce, store it separately. Wrap the leaves in a damp paper towel, then place them in a plastic bag. This keeps them crisp and fresh. To safely reheat the chicken mixture, use a skillet over medium heat. Stir frequently until it heats through. This helps keep its juicy texture. Do not microwave the chicken, as it can dry out the meat. For the lettuce wraps, avoid reheating them. They are best served fresh and cool, so assemble them right before eating. Yes, you can freeze the chicken mixture. Place it in a freezer-safe container and seal tightly. It will keep for about three months. When ready to use, thaw it in the fridge overnight. To reheat, warm it in a skillet as explained earlier. Never freeze the lettuce, as it does not thaw well. Always prepare fresh lettuce wraps for the best taste and texture. Butter lettuce is great for wraps. It has a soft texture and a sweet taste. Iceberg lettuce is also good. It is crisp and holds its shape well. Butter lettuce gives a more tender bite, while iceberg adds crunch. Choose based on your taste. Both types work well for holding the Orange Ginger Chicken filling. Yes, you can prepare this dish ahead. Cook the chicken mixture and store it in the fridge. It stays fresh for up to three days. Keep the lettuce separate to keep it crisp. When you're ready to eat, fill the lettuce leaves with the chicken mixture. This makes for a quick meal. To add heat, try a few options. Add red pepper flakes when cooking the chicken. You can also mix in some sriracha or chili sauce. For a fresh kick, chop jalapeños and fold them in. Adjust the spice to fit your taste, and enjoy your wraps with a fiery twist. These wraps go well with many sides. Try a simple side salad or steamed rice. You could also serve fruit, like sliced oranges, for a refreshing touch. For drinks, green tea or sparkling water pairs nicely. Choose sides that balance the flavors of the wraps for a complete meal. In this post, we explored how to make Orange Ginger Chicken Lettuce Wraps. We covered main ingredients, cooking tips, and serving suggestions. I shared step-by-step instructions to ensure your success. Remember to try different ingredients to suit your taste. You can store leftovers easily and make these wraps ahead of time. Enjoy your flavorful, healthy meal with family and friends. With these tips, you are ready to create a delicious dish. Happy cooking!

Orange Ginger Chicken Lettuce Wraps Quick and Easy Meal

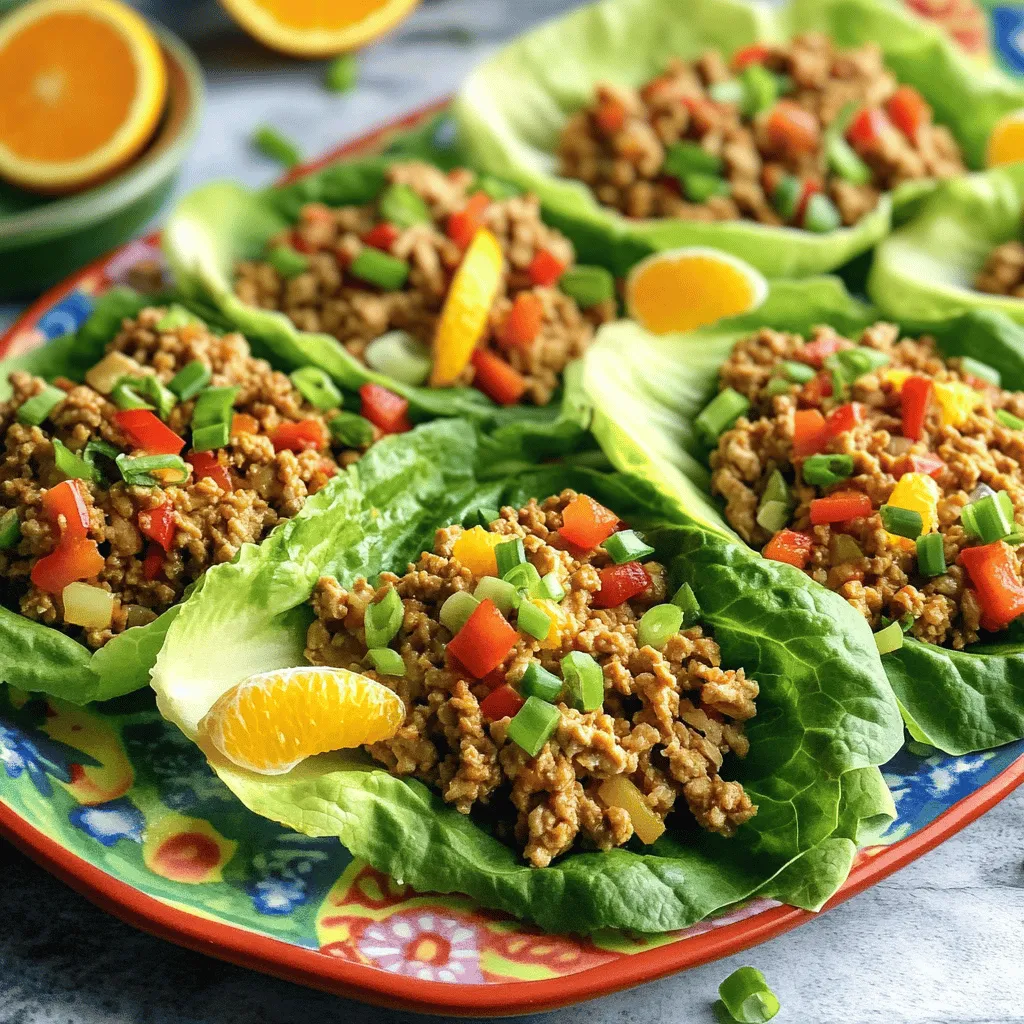
Are you ready for a quick and tasty meal that’s packed with flavor? These Orange Ginger Chicken Lettuce Wraps are

To make Lemon Garlic Grilled Zucchini, you will need a few simple, fresh ingredients. Here’s the list: - 4 medium zucchini, sliced into 1/4-inch rounds - 3 tablespoons olive oil - 3 cloves garlic, finely minced - 1 teaspoon fresh lemon zest - 2 tablespoons freshly squeezed lemon juice - 1 teaspoon dried oregano - Salt and freshly ground black pepper, to taste - Fresh parsley, chopped, for garnish Each ingredient plays a key role. The zucchini brings a mild flavor and great texture. Olive oil adds richness, while garlic gives a delightful kick. Lemon zest and juice brighten the dish, making it fresh and zesty. Dried oregano adds depth and a hint of earthiness. Finally, salt and pepper enhance all the flavors. Fresh parsley as a garnish adds color and freshness. With these ingredients, you can create a dish that is both simple and full of flavor. Trust me, every bite will taste like summer on your plate. In a mixing bowl, combine these ingredients: - 3 tablespoons olive oil - 3 cloves garlic, finely minced - 1 teaspoon fresh lemon zest - 2 tablespoons freshly squeezed lemon juice - 1 teaspoon dried oregano - Salt and freshly ground black pepper, to taste Whisk them together until they blend well. You want a smooth mix that will coat the zucchini nicely. Now, add the sliced zucchini to the bowl. Toss gently to coat every slice with the marinade. This will help the zucchini soak up all those great flavors. Let it sit for 15 minutes. This step is key for the best taste. While the zucchini marinates, preheat the grill to medium-high heat. You want it hot, around 400°F (200°C). Once it’s ready, place the marinated zucchini slices on the grill. Grill them for 3 to 4 minutes on each side. Keep an eye out for grill marks. You want the zucchini tender but still a bit crisp. Enjoy the sizzle and aroma! For the best results, aim for a grill temperature of around 400°F (200°C). This heat helps the zucchini cook evenly while getting nice grill marks. Grill each side for about 3-4 minutes. Keep an eye on the zucchini to avoid overcooking. You want it tender but still slightly crisp. To add even more flavor, consider mixing in some spices like red pepper flakes or smoked paprika. You can also sprinkle some feta cheese on top after grilling for a creamy touch. For dips, a tangy yogurt sauce or a garlic aioli pairs well. These additions can elevate your dish and surprise your guests. For a beautiful presentation, serve the grilled zucchini on a rustic cutting board. Drizzle some extra olive oil over the top to make it shine. Adding a sprinkle of lemon zest and fresh parsley gives it a pop of color. This makes your dish look gourmet and inviting, perfect for impressing friends and family. {{image_4}} You can grill other veggies for a tasty twist. Try bell peppers, eggplant, or asparagus. These add color and flavor to your dish. You can also mix zucchini with these options. This way, you create a vibrant veggie medley. To change the taste, add fresh herbs like basil or thyme. You can also squeeze in lime juice for a different citrus kick. Marinades can be fun too. Try adding balsamic vinegar or soy sauce for unique flavor notes. The key is to experiment and find what you love. For vegan options, use only plant-based ingredients. This dish is naturally gluten-free too. If you want low-sodium options, skip the added salt. Fresh herbs help boost flavor without the salt. You can still enjoy yummy grilled veggies while meeting your dietary needs. To store leftovers, place the grilled zucchini in an airtight container. Keep it in the fridge. It will stay fresh for about three days. After that, the texture may change. Always check for any signs of spoilage before eating. You can freeze grilled zucchini for later use. Allow it to cool completely before freezing. Place it in a freezer-safe bag or container. When stored correctly, it can last for up to three months. To reheat, thaw it in the fridge overnight, then warm it in a skillet over low heat. This keeps the zucchini tender and flavorful. This recipe is great for meal prep. You can grill a large batch at once. Store it in the fridge for quick meals. Pair it with grilled chicken or pasta for a complete dish. You can also add it to salads for a fresh crunch. With these tips, you can enjoy Lemon Garlic Grilled Zucchini all week! Yes, you can use other types of zucchini. The most common types are: - Yellow zucchini - Crookneck squash - Pattypan squash These varieties have a similar texture and flavor. They grill well and absorb the marinade nicely. Just slice them into 1/4-inch rounds like regular zucchini. Each type adds a unique color and taste to your dish. Lemon Garlic Grilled Zucchini pairs well with many dishes. Here are some great options: - Grilled chicken or fish - Quinoa or rice - A fresh green salad - Pasta with olive oil and herbs These sides enhance the meal's flavor and make it more filling. Mix and match based on your taste! Yes, you can make this recipe in the oven. Here’s how: 1. Preheat your oven to 400°F (200°C). 2. Place the marinated zucchini on a baking sheet. 3. Bake for about 15-20 minutes. 4. Turn the slices halfway to ensure even cooking. Oven-baking gives a nice roasted flavor. You won’t get grill marks, but the taste will still be great! In this post, we explored how to make Lemon Garlic Grilled Zucchini. We covered the ingredients, marinade prep, grilling steps, and storage tips. Grilling zucchini is simple and tasty. You can even mix in other veggies or spices to fit your taste. Remember to store leftovers in the fridge or freeze them for later. Try this quick and healthy recipe next time you grill. Enjoy delicious zucchini that is fresh and bright!

Lemon Garlic Grilled Zucchini Flavorful and Simple Dish

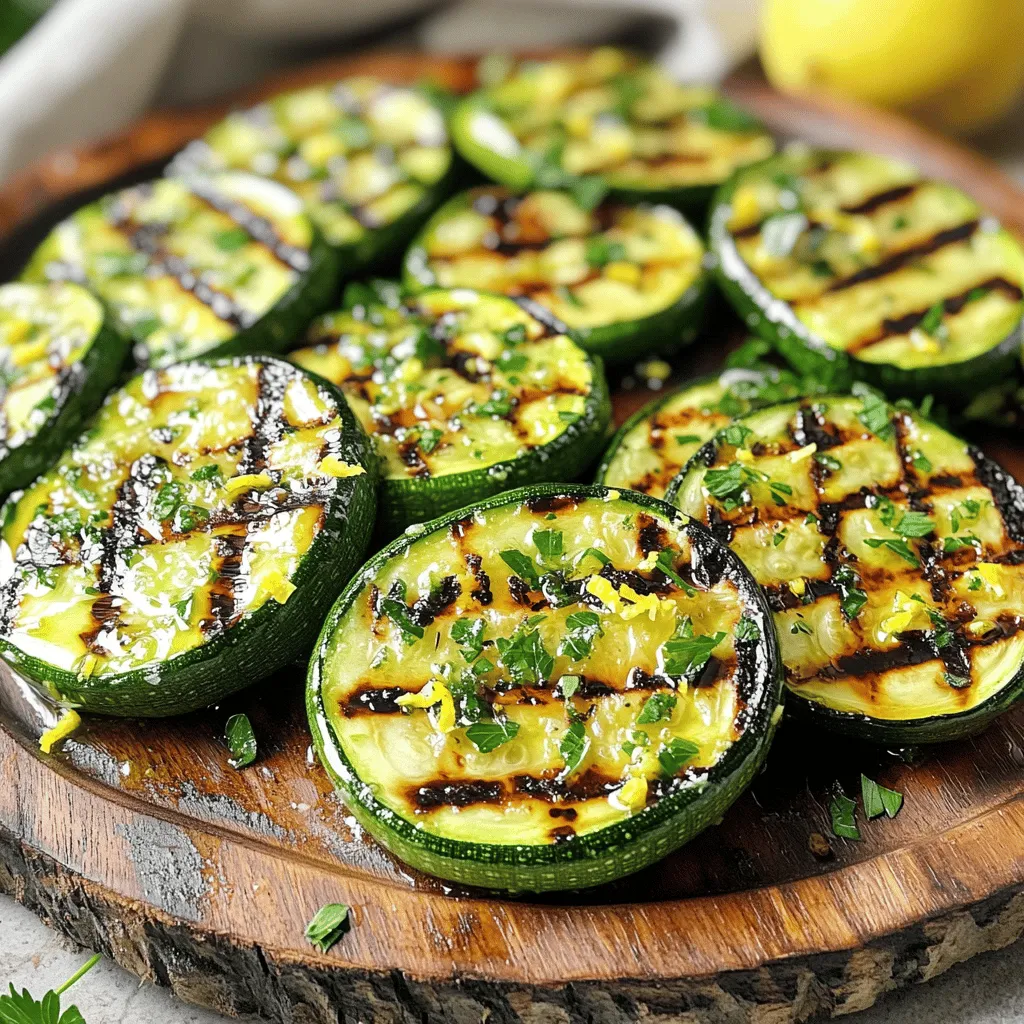
Are you ready to amp up your summer barbecues? Try my Lemon Garlic Grilled Zucchini! This dish is simple yet

To make Sweet Chili Chicken Lettuce Wraps, you need: - 1 lb (450g) ground chicken - 1 tablespoon vegetable oil - 1 red bell pepper, finely diced - 1 cup carrots, grated - 4 green onions, sliced thinly - 2 cloves garlic, minced - 1 tablespoon fresh ginger, finely grated - 1/4 cup soy sauce - 1/4 cup sweet chili sauce - 1 tablespoon rice vinegar - 1 teaspoon sesame oil - 1 head of butter or iceberg lettuce, leaves carefully separated - Sesame seeds for garnish - Fresh cilantro, roughly chopped, for garnish Using fresh ingredients brings the best flavors. Fresh garlic and ginger add a zing that dried forms can’t match. The crunch of fresh veggies makes each bite exciting. Fresh cilantro adds a bright note that balances the sweet chili sauce. Dried ingredients can work in a pinch, but they won’t deliver the same taste. If you don’t have ground chicken, try ground turkey. It works well in this recipe. For a vegetarian option, use crumbled tofu or tempeh. If you want a spicy kick, add some red pepper flakes to the sauce. Don’t have sesame oil? Use olive oil instead. You can swap soy sauce with tamari for a gluten-free option. Each substitution still keeps the dish tasty and fun. First, gather all your ingredients. You need ground chicken, vegetable oil, red bell pepper, carrots, green onions, garlic, ginger, soy sauce, sweet chili sauce, rice vinegar, sesame oil, and lettuce. 1. Heat the vegetable oil in a large skillet over medium heat. 2. Add minced garlic and grated ginger. Sauté for about 1 minute. 3. Next, add the ground chicken. Break it apart as it cooks. 4. Cook until the chicken is browned, about 5-7 minutes. 5. Stir in red bell pepper, grated carrots, and green onions. Cook for 3-4 minutes. 6. In a small bowl, whisk together soy sauce, sweet chili sauce, rice vinegar, and sesame oil. 7. Pour the sauce over the chicken mixture. Stir well and cook for another 2-3 minutes. 8. Remove the skillet from heat. Let the mixture cool a bit before serving. Take a lettuce leaf and add a generous spoonful of the chicken mixture. Top with sesame seeds and fresh cilantro. For a bright display, arrange the wraps on a colorful platter. Drizzle any leftover sauce from the skillet over the wraps for extra flavor. To boost the taste of your Sweet Chili Chicken Lettuce Wraps, use fresh ingredients. Fresh ginger and garlic bring a stronger taste than dried ones. Adjust the sweet chili sauce to suit your taste. If you like it sweet, add more sauce. For a spicy kick, mix in some red pepper flakes. Start with a hot skillet to brown the chicken well. This step adds a nice depth of flavor. Stir often to ensure even cooking. When adding vegetables, don’t overcook them. You want them tender but still crisp. This keeps the wraps bright and fresh. Make your wraps look great by using a colorful platter. Arrange the filled lettuce leaves neatly. Drizzle extra sauce over the wraps for a shiny finish. Sprinkle sesame seeds and cilantro on top for a pop of color. This makes the dish inviting and fun to eat. {{image_4}} You can easily make sweet chili chicken lettuce wraps gluten-free. Just swap soy sauce for tamari. This small change keeps your meal safe for those with gluten issues. For a low-carb version, use more veggies and less sauce. You can also cut out the rice vinegar if you want to lower carbs even further. Ground chicken is great, but you can use other proteins. Ground turkey works just as well and has a similar taste. If you prefer a plant-based option, try crumbled tofu. Tofu absorbs flavors well and gives a nice texture. You can also use ground pork or even shrimp for a seafood twist. The sweet chili sauce adds a nice kick. However, you can mix it up! Try adding sriracha for heat or hoisin sauce for a sweet twist. If you want a smoky flavor, add a touch of smoked paprika. Experiment with fresh herbs like basil or mint for unique tastes. Each change can give your lettuce wraps a new life! After making Sweet Chili Chicken Lettuce Wraps, let them cool to room temperature. Place any leftover chicken mixture in an airtight container. Store it in the fridge for up to 3 days. The lettuce leaves should stay separate. Wrap them in a damp paper towel to keep them crisp. You can freeze the chicken mixture for later use. Place it in a freezer-safe container. It will last for up to 3 months. When ready to eat, thaw it overnight in the fridge. Do not freeze the lettuce leaves, as they will become soggy. To reheat the chicken mixture, use a skillet over medium heat. Stir often until it is hot. You can also use a microwave. Heat in short bursts, stirring in between, until warm. Serve in fresh lettuce leaves for a crunchy wrap. Yes, you can use other types of lettuce. Romaine or butter lettuce works well. Each type gives a different crunch and taste. You can also try cabbage leaves for a firmer wrap. To add heat, use more sweet chili sauce or add red pepper flakes. You can also mix in chopped fresh chili peppers. For a zesty kick, try a dash of hot sauce. Adjust the spice level to your taste. Serve these wraps with rice or noodles for a complete meal. A side salad adds freshness too. You can also offer extra sauce for dipping. Fresh fruit or spring rolls make great sides as well. This blog post covered key ingredients for your dish, including fresh versus dried options and substitutions. You learned step-by-step instructions for prep, cooking, and serving. We explored tips for better flavor, techniques, and presentation. I shared ways to adapt the recipe for different diets and proteins, along with storage and reheating tips. Remember, cooking is fun and flexible. Feel free to experiment and make it your own!

Sweet Chili Chicken Lettuce Wraps Flavorful and Fresh

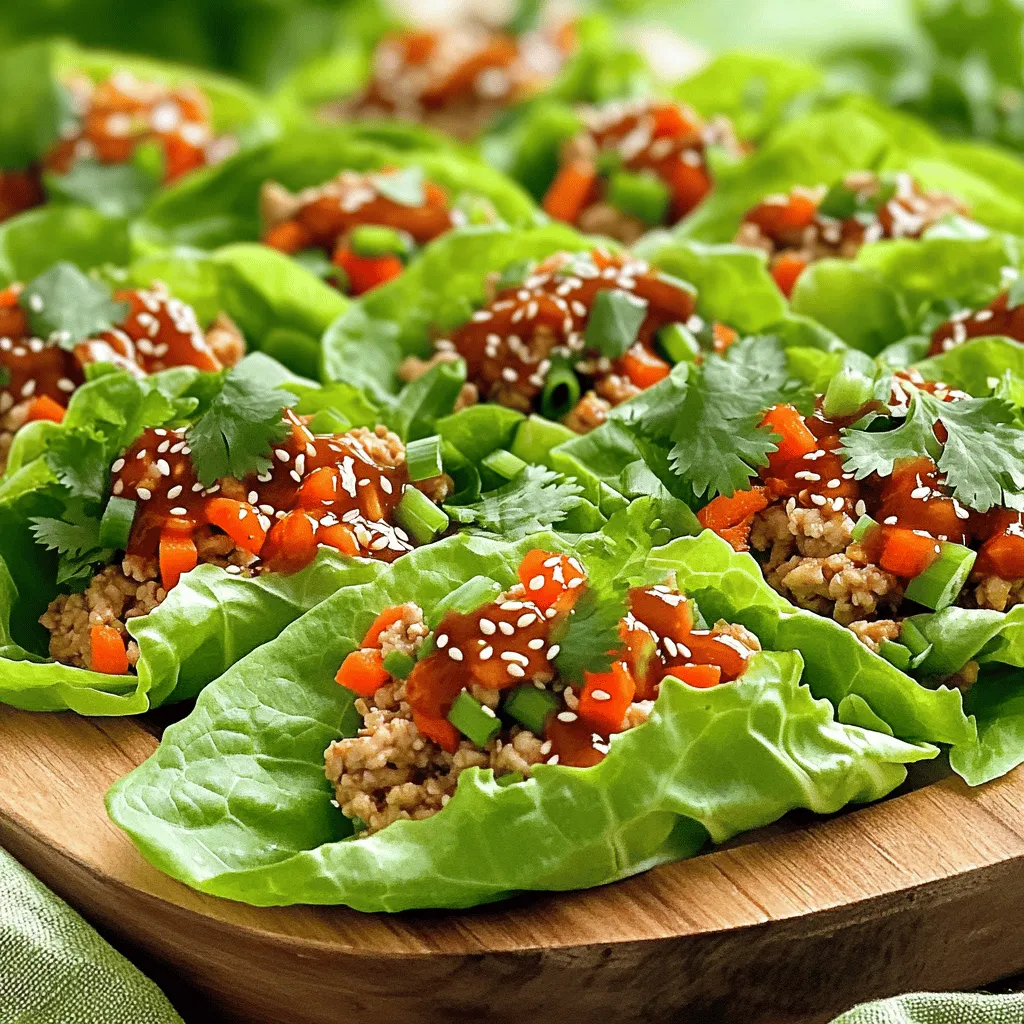
If you’re craving a meal that’s fresh, flavorful, and fun to eat, try Sweet Chili Chicken Lettuce Wraps. This dish

- 1 cup all-purpose flour - 1 cup whole wheat flour - 1 teaspoon baking powder - 1 teaspoon baking soda - 1 teaspoon ground cinnamon - 1/2 teaspoon ground nutmeg - 1/2 teaspoon ground ginger - 1/2 teaspoon salt I love using both all-purpose and whole wheat flour. It gives the muffins a nice texture. Baking powder and baking soda help the muffins rise. The spices add warmth and depth, making every bite delicious. - 1 cup canned pumpkin puree - 1/2 cup brown sugar, packed - 1/4 cup granulated sugar - 1/2 cup vegetable oil - 2 large eggs - 1 teaspoon vanilla extract Canned pumpkin puree is easy and adds great flavor. Brown sugar makes the muffins sweet and moist. Granulated sugar adds a nice crunch. Vegetable oil keeps the muffins tender. Eggs help bind everything, while vanilla gives a delightful aroma. - 4 oz cream cheese, softened - 1/4 cup powdered sugar - 1/2 teaspoon vanilla extract The cream cheese filling is the star of this recipe. Cream cheese adds a rich, creamy texture. Powdered sugar sweetens it just right. A touch of vanilla makes the filling even better. You can choose to add pumpkin seeds or chopped pecans on top for a crunchy finish. 1. Begin by preheating your oven to 350°F (175°C). Line a muffin tin with paper liners or grease it lightly. This will help prevent sticking. 2. In a medium bowl, mix together the all-purpose flour, whole wheat flour, baking powder, baking soda, cinnamon, nutmeg, ginger, and salt. Make sure it is well combined. Set this dry mixture aside. 3. In a large bowl, combine the canned pumpkin puree, brown sugar, granulated sugar, vegetable oil, eggs, and vanilla extract. Blend until smooth with a whisk or mixer. 1. Gradually fold the dry mixture into the wet ingredients. Use a spatula and mix gently. 2. Be careful not to overmix, as this keeps your muffins tender and fluffy. 1. In a small bowl, beat the cream cheese with powdered sugar until smooth. 2. Add the remaining vanilla extract and mix until creamy with no lumps. 1. Fill each muffin cup about two-thirds full with pumpkin batter. 2. Add a dollop of cream cheese filling on top. Cover the filling with a bit more batter, making sure it's well hidden. 3. If you wish, sprinkle some pumpkin seeds or chopped pecans on top for added texture. 1. Bake your muffins for 18-20 minutes. Check for doneness by inserting a toothpick into the center. It should come out clean. 2. After baking, let the muffins cool in the pan for about 5 minutes. Then, carefully transfer them to a wire rack to cool completely. To make the best pumpkin cream cheese muffins, start with room temperature ingredients. This helps the batter mix well and rise nicely. Use cold eggs and cream cheese directly from the fridge, and let them sit out for about 30 minutes. This small step can make a big difference in texture. To avoid dense muffins, mix your ingredients gently. Overmixing leads to tough muffins. Stir just until you can’t see any dry flour. Remember, lumps are okay. They will bake out, leaving you with soft, fluffy muffins. For a beautiful presentation, dust your muffins with powdered sugar. This adds a sweet touch and looks lovely. Arrange them on a cake stand. You can also sprinkle fresh pumpkin seeds or cinnamon on top for extra flair. When it comes to drinks, pair your muffins with coffee or tea. A warm chai latte complements the spices well. If you prefer something cold, try a glass of apple cider. Both drinks enhance the fall flavors in your muffins. One common mistake is overmixing the batter. This can make your muffins dense and chewy instead of light and airy. Always mix just until combined. Another mistake is not letting the muffins cool properly. Allow them to cool in the pan for about five minutes. Then transfer them to a wire rack. This prevents soggy bottoms and keeps them from getting too moist. Enjoy your delicious muffins! {{image_4}} You can spice up your Pumpkin Cream Cheese Muffins with fun flavors. Adding chocolate chips or nuts gives a delightful crunch. I love using semi-sweet chocolate chips for a sweet twist. If you want a nutty flavor, try chopped pecans or walnuts. You can also explore different spices. Adding allspice or cardamom can create a warm, cozy taste. Mix and match to find your perfect blend! If you have dietary needs, you can still enjoy these muffins. For a gluten-free version, swap all-purpose flour with a gluten-free blend. Make sure it has a good binding agent. For a vegan option, replace eggs with flaxseed meal or applesauce. You can use a dairy-free cream cheese for the filling. These swaps keep the taste and texture just right. Seasonal changes can inspire new flavors. Adding dried cranberries or orange zest gives a festive touch. The tartness of cranberries pairs well with pumpkin. Orange zest adds brightness to the muffins. You can also use different types of squash, like butternut or acorn squash. Sweet potatoes work great too. Each variation brings a unique flavor to your muffin experience! After baking, let your muffins cool completely. Store them at room temperature in an airtight container. They stay fresh for about two days this way. If you live in a humid area, keep them in the fridge. This helps prevent mold. Wrap them well in plastic wrap or place them in a sealed bag. For long-term storage, freezing is a great option. First, let the muffins cool completely. Then, wrap each muffin in plastic wrap. Place them in a freezer bag or container. This keeps them fresh for up to three months. When you want to eat one, simply take it out. Thaw it in the fridge overnight or leave it at room temp. You can warm it in the microwave or oven for a few minutes. These muffins taste best within a few days. At room temperature, they last for about two days. In the fridge, they can stay good for up to a week. Look for signs of spoilage like a dry texture or mold spots. If they smell off, it's best to toss them. Enjoy your muffins while they are fresh for the best flavor! Yes, you can make these muffins ahead of time! They store well and remain tasty. - Storage: Once cooled, put them in an airtight container. - Room Temperature: They stay fresh for up to three days. - Refrigeration: For longer storage, keep them in the fridge for about a week. - Reheating: Warm them in the microwave for 10-15 seconds before serving. If you need a substitute for cream cheese, there are options. - Greek Yogurt: This is a great choice. It has a similar texture. - Silken Tofu: Blend it until smooth for a dairy-free option. - Vegan Cream Cheese: Many brands offer this option for vegans. - Cottage Cheese: Blend it to create a smooth filling, too. You can use fresh pumpkin! Just follow these tips. - Preparation: Peel and chop the pumpkin into pieces. - Cook: Steam or boil until soft. - Puree: Blend it until smooth to mimic canned pumpkin. - Measurement: Use the same amount as you would for canned pumpkin. We explored how to make delicious pumpkin muffins. You learned about key ingredients like flour and canned pumpkin. I shared step-by-step instructions to blend the batter and add a creamy filling. You also discovered tips for perfecting your muffins and ways to store them. Remember, keep your ingredients at the right temperature and avoid overmixing. You can mix in fun flavors, too! Enjoy baking fresh muffins that warm your home and delight your tastebuds.

Pumpkin Cream Cheese Muffins Moist and Flavorful Delight

If you’re craving a warm, cozy treat, these Pumpkin Cream Cheese Muffins are a must-try! Packed with cozy spices and

- 4 large russet potatoes, peeled and cut into fry shapes - 3 tablespoons extra-virgin olive oil - 4 cloves fresh garlic, minced finely - 1/2 cup freshly grated Parmesan cheese - 1 teaspoon garlic powder - 1 teaspoon smoked paprika - 1/2 teaspoon freshly cracked black pepper - Sea salt, to taste - Fresh parsley, chopped (for garnish) When making Garlic Parmesan Air Fryer Fries, I always start with fresh, high-quality ingredients. The russet potatoes give the best texture. Their starchy nature makes them perfect for frying. I prefer to peel them, but you can leave the skin on if you like a rustic vibe. Extra-virgin olive oil is my go-to for its rich flavor. It helps the fries crisp up nicely in the air fryer. Fresh garlic brings a strong, vibrant taste. I mince it finely to ensure that every bite packs a punch. The Parmesan cheese needs to be freshly grated. Pre-grated cheese can be drier and won’t melt as well. Garlic powder adds depth to the garlic flavor, while smoked paprika gives a hint of warmth and color. The black pepper adds just the right amount of bite, and sea salt is key for seasoning. Lastly, fresh parsley not only adds color but also a nice herbal note. These ingredients come together to create a crispy and flavorful treat that you and your guests will love. Start by soaking the cut potatoes in cold water for 30 minutes. This step helps remove excess starch, making your fries crispier. After soaking, drain the fries and spread them out on a clean kitchen towel. Make sure they dry thoroughly to achieve that perfect crunch. In a large mixing bowl, combine the dried potato fries with three tablespoons of olive oil, four cloves of finely minced garlic, one teaspoon of garlic powder, one teaspoon of smoked paprika, half a teaspoon of freshly cracked black pepper, and a sprinkle of sea salt. Mix everything with your hands or a spatula until the fries are evenly coated. This blend of flavors will make your fries pop! Preheat your air fryer to 400°F (200°C) for a few minutes. Once it’s hot, arrange the seasoned fries in a single layer in the basket. Be careful not to overcrowd them. Cook the fries for 15 to 20 minutes. Remember to shake the basket halfway through. This step ensures even cooking and that every fry gets crispy. After your fries turn a beautiful golden-brown, take them out of the air fryer. Immediately sprinkle half a cup of freshly grated Parmesan cheese over the hot fries. Toss them gently to help the cheese stick. Return the fries to the air fryer for an extra 2 to 3 minutes, just to let the cheese melt slightly. Carefully transfer your cheesy, crispy fries to a serving platter. For a fresh touch, sprinkle chopped parsley over the fries before serving. This adds a pop of color and makes the dish look even more inviting. Enjoy your Garlic Parmesan Air Fryer Fries with a side of your favorite dipping sauce! To make your fries crispy, soak the potatoes in cold water for 30 minutes. This step helps remove starch, leading to a crunchier fry. After soaking, drain the fries and spread them on a clean towel. Dry them well; moisture can lead to soggy fries. You can adjust the garlic and spices to fit your taste. If you love garlic, add more minced garlic or garlic powder. You might also try different spices like cayenne pepper for heat or herbs like rosemary for a fresh twist. For cheese, feel free to swap Parmesan with cheddar or a dairy-free option. When making more fries, cook in smaller batches. This allows hot air to circulate, ensuring even cooking. Avoid overcrowding the air fryer basket, as this can make the fries unevenly crispy. If you need to make a lot, keep the first batch warm in the oven while you cook the rest. {{image_4}} You can make your Garlic Parmesan Air Fryer Fries even tastier. Try adding bacon bits for a salty crunch. Simply sprinkle cooked bacon on top after air frying. You can also add a dollop of sour cream for creaminess. Other great toppings include green onions, jalapeños, or even guacamole. Get creative with what you love! If you enjoy a kick, turn up the heat! Add hot sauce before cooking. You can also sprinkle chili flakes for extra spice. Adjust the spice level to your taste. Start with a little and add more if you want. It's all about finding that perfect balance between garlic and heat. You can still enjoy these fries if you're vegan. Use vegan cheese instead of Parmesan. Nutritional yeast is a great option for a cheesy flavor without dairy. Modify the seasonings to keep them dairy-free. This way, everyone can enjoy these crispy fries! To keep your garlic parmesan air fryer fries fresh, store them properly. Place the cooled fries in an airtight container. This helps prevent moisture loss and keeps them crispy. You can also use a resealable plastic bag. Make sure to squeeze out excess air before sealing. Store them in the fridge for up to three days. Reheating fries can be tricky. You want to keep them crispy, not soggy. The best method is to use the air fryer again. Preheat it to 400°F (200°C) and cook the fries for about 5 minutes. This will help restore their crunch. If you don't have an air fryer, you can use a toaster oven. Avoid the microwave, as it makes fries soft and chewy. You can freeze fries before or after cooking. If you freeze them raw, soak and dry the cut fries first. Then, toss them in olive oil and seasonings. Spread them out on a baking sheet and freeze until firm. Once frozen, store them in a bag or container. To reheat frozen fries, cook them directly in the air fryer at 400°F (200°C) for about 15-20 minutes. Shake them halfway through for even cooking. Cook your fries for 15 to 20 minutes. The time varies based on thickness. For thin fries, check around 15 minutes. For thicker fries, you may need the full 20 minutes. Remember to shake the basket halfway through. This helps to cook the fries evenly and makes them crispier. Yes, you can try different potatoes. Sweet potatoes are a great option. They add a nice sweetness and work well with garlic and Parmesan. Yukon gold potatoes are another choice. They are creamy and have a rich flavor. Experiment with different types to find your favorite! Extra-virgin olive oil is my top pick. It has a wonderful flavor and works well in air fryers. You can also use avocado oil; it has a high smoke point. Canola oil is another option, but it has a milder taste. Choose any oil that fits your flavor preference! This blog covers how to make crispy garlic Parmesan fries in an air fryer. We shared a list of key ingredients, detailed step-by-step instructions, and clever tips for better results. You can even explore variations to suit your taste. When storing leftovers, remember to use the right containers for freshness. Enjoy experimenting with flavors and techniques. Your air fryer can lead to delicious, healthier fries every time. Happy cooking!

Garlic Parmesan Air Fryer Fries Crispy and Flavorful

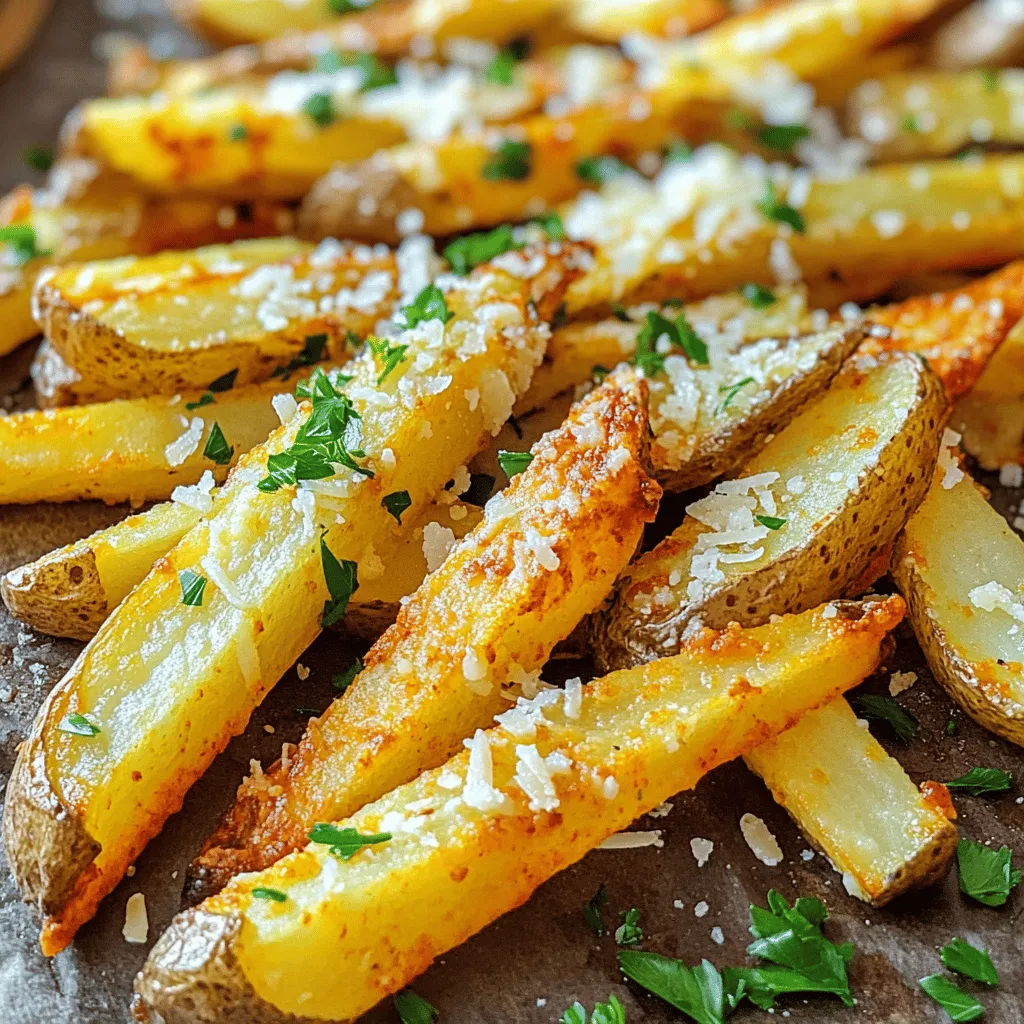
If you’re craving a delicious side dish that’s both crispy and flavorful, look no further! My Garlic Parmesan Air Fryer

- 1 cup rolled oats - 1/2 cup almond flour - 1/2 cup whole wheat flour - 1/3 cup brown sugar - 1/2 teaspoon baking powder - 1/4 teaspoon baking soda - 1/2 teaspoon salt - 1/2 teaspoon ground cinnamon - 1/3 cup almond butter - 1/4 cup honey or pure maple syrup - 1 large egg - 1 teaspoon vanilla extract - 1 cup fresh or frozen blueberries - 1/4 cup sliced almonds Each ingredient plays a key role in the taste and texture of these cookies. The rolled oats give a hearty base. Almond flour adds a nice nutty flavor and keeps the cookies moist. Whole wheat flour adds more fiber. Brown sugar provides sweetness and a hint of caramel. The baking powder and baking soda work together to help the cookies rise. Salt enhances the flavors, while ground cinnamon adds warmth. Almond butter brings creaminess and a rich taste. Honey or maple syrup adds natural sweetness. The egg binds everything together, keeping the cookies chewy. Vanilla extract adds depth to the flavor. Blueberries burst with juice, making each bite fresh. Finally, sliced almonds on top offer a delightful crunch. - Preheat oven to 350°F (175°C) - Line a baking sheet with parchment paper Start by preheating your oven. Set it to 350°F (175°C). This step ensures the cookies bake evenly. Next, grab a baking sheet and line it with parchment paper. This helps keep the cookies from sticking. - Mix oats, almond flour, whole wheat flour, brown sugar, baking powder, baking soda, salt, and cinnamon In a large bowl, mix together the dry ingredients. Add 1 cup of rolled oats, 1/2 cup of almond flour, and 1/2 cup of whole wheat flour. Then, add 1/3 cup of brown sugar, 1/2 teaspoon of baking powder, and 1/4 teaspoon of baking soda. Don’t forget 1/2 teaspoon of salt and 1/2 teaspoon of ground cinnamon. Stir well to combine. This mix gives your cookies texture and flavor. - Whisk together almond butter, honey (or maple syrup), egg, and vanilla extract In a separate bowl, whisk the wet ingredients. Combine 1/3 cup of almond butter with 1/4 cup of honey or maple syrup. Crack in 1 large egg and add 1 teaspoon of vanilla extract. Mix until smooth. This blend adds moisture and sweetness to your cookies. - Mix wet and dry ingredients, then gently fold in blueberries Now, pour the wet mixture into the dry mix. Stir until just combined. Be careful not to overmix. Next, gently fold in 1 cup of fresh or frozen blueberries. Use a spatula to avoid smashing the berries. This step adds a burst of flavor in each bite. - Use a tablespoon to scoop dough and place on the baking sheet, leaving space between cookies Use a tablespoon to scoop out the dough. Place each scoop on the baking sheet, leaving about 2 inches between them. This space helps the cookies spread while baking. Lightly flatten each scoop with the back of the spoon for even baking. - Sprinkle sliced almonds on top and bake for 12-15 minutes Before baking, sprinkle 1/4 cup of sliced almonds on top of each cookie. This adds a nice crunch. Place the baking sheet in the oven and bake for 12-15 minutes. Watch for the edges to turn light golden brown. When done, let them cool for a few minutes before moving them to a wire rack. To get the best cookies, flatten them before baking. This helps them bake evenly. If you want to check if they are done, use a toothpick. Stick it in the middle of a cookie. If it comes out clean, they are ready! If you don't have almond butter, you can use peanut butter or sunflower seed butter. Both will work well in this recipe. For sweeteners, honey and maple syrup are great options. Honey gives a floral taste, while maple syrup adds a nice caramel flavor. You can add spices to make your cookies extra special. A pinch of nutmeg or ginger can bring a warm flavor. Want more texture? Consider adding chocolate chips or your favorite nuts. These small changes can make your breakfast cookies unique! {{image_4}} You can make these cookies gluten-free. Just swap the whole wheat flour with a gluten-free flour blend. Look for one that works well in baking. Almond flour is already gluten-free, so you can keep that. The texture may change a bit, but the taste will still be great. If you want a vegan version, replace the egg. You can use chia seeds or flaxseeds instead. Mix 1 tablespoon of chia seeds or ground flaxseeds with 2.5 tablespoons of water. Let it sit for a few minutes until it gets thick. Use this mix to replace the egg in the recipe. Your cookies will still be tasty and healthy! Feel free to get creative with flavors! Instead of blueberries, you can try raspberries or cranberries. These fruits will give your cookies a new twist. You can even mix and match fruits for a fun flavor combo. Your breakfast cookies will be exciting every time you make them! After baking, let your cookies cool on the baking sheet for about 5 minutes. This helps them firm up. Then, transfer them to a wire rack. Cooling is key to keeping them from getting soggy. Let them cool completely before storing. To keep cookies fresh, use airtight containers. This keeps moisture out and flavor in. If you want to store them longer, freezing is a great option. Place cookies in a single layer in a freezer-safe bag. You can also place parchment paper between layers. They can last up to three months in the freezer. At room temperature, these cookies can last for about a week. Store them in an airtight container to keep them soft. If you store them in the fridge, they can last a bit longer, around two weeks. Just remember that refrigeration can change their texture slightly. Enjoy your delicious cookies fresh or saved for later! Yes, you can use frozen blueberries. There’s no need to thaw them. Just add them straight into the dough. This keeps them juicy and fresh. Frozen berries also help the cookies stay moist. You can tell the cookies are done when the edges turn light golden brown. They should look set, not wet. A toothpick inserted in the center should come out clean. If it has wet dough on it, bake for a few more minutes. Yes, you can prepare the dough ahead of time. Just cover it and store it in the fridge. It will stay fresh for up to 24 hours. When ready, scoop and bake as directed. Each cookie has about 150 calories. They contain healthy fats from almond butter and fiber from oats. The blueberries add vitamins and antioxidants. This makes them a nutritious breakfast choice. To boost protein, try adding a scoop of protein powder to the dough. You can also use more almond butter or add nuts. This will give you a filling breakfast with extra protein. These blueberry almond breakfast cookies are simple and fun to make. You learned about the right mix of dry and wet ingredients. We covered baking tips and variations for gluten-free and vegan options. I shared storage tips, so your cookies stay fresh longer. Try these cookies for a tasty breakfast or snack. They are healthy and quick to prepare. Enjoy your baking adventure!

Blueberry Almond Breakfast Cookies Easy and Delicious

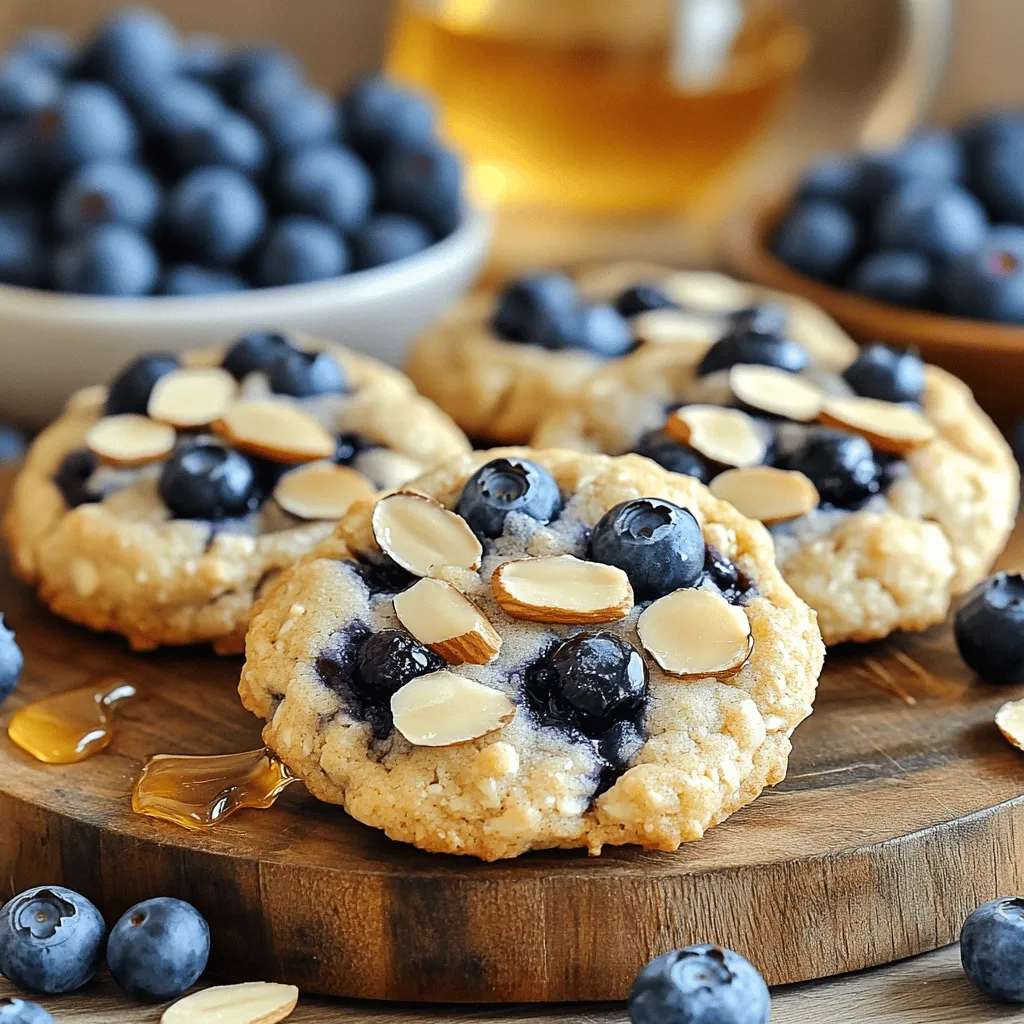
Start your mornings with a burst of flavor from Blueberry Almond Breakfast Cookies! These easy-to-make treats are perfect for anyone

- 1 cup sushi rice - 1 1/4 cups water - 1 tablespoon rice vinegar - 1 tablespoon granulated sugar - 1 teaspoon sea salt - 1 can (6 oz) tuna packed in water, drained - 2 tablespoons mayonnaise (preferably Japanese Kewpie for a richer flavor) - 1 tablespoon sriracha (adjust to taste for desired spice level) - 1 ripe avocado, sliced - 1 cucumber, thinly sliced - 1 medium carrot, julienned - 2 green onions, chopped (white and green parts separated) - Seaweed salad (for garnish) - Sesame seeds (for garnish) - Soy sauce (for serving) The main ingredients for a spicy tuna sushi bowl include sushi rice, canned tuna, and fresh veggies. Sushi rice is sticky and perfect for building a base. I recommend using canned tuna packed in water. It’s easy and quick. Mayonnaise adds creaminess. I suggest Kewpie mayonnaise for extra flavor. Sriracha gives the dish its spicy kick. Adjust the amount based on your taste. Fresh vegetables like avocado, cucumber, and carrot add color and crunch. Green onions add brightness and flavor. Don’t forget the seaweed salad and sesame seeds for garnish! - Additional sauces and spices - Alternative garnishes You can add more sauces for extra flavor. Try a drizzle of spicy mayo or ponzu sauce. You can also mix in sesame oil or wasabi for more heat. For garnishes, consider adding radish or pickled ginger. These can enhance the dish and add a nice zing. - Health benefits of sushi rice and fish - Nutritional value of avocado and veggies Sushi rice is a good source of carbs. It gives you energy without being heavy. Canned tuna is packed with protein and omega-3 fatty acids. These are great for your heart and brain health. Avocado is rich in healthy fats, vitamins, and fiber. The veggies like cucumber and carrot provide vitamins and minerals. They also add hydration and crunch to the bowl. Eating these ingredients can boost your overall health while enjoying a tasty meal! Start by rinsing the sushi rice. Place it in a bowl and cover it with cold water. Swirl the rice gently, then drain the water. Repeat this until the water runs clear. This step is vital. It removes excess starch, ensuring fluffy rice. Next, cook the rice. In a medium pot, combine the rinsed rice with 1 1/4 cups of water. Bring it to a boil over medium heat. Once it boils, reduce the heat to low. Cover the pot and let it simmer for 18-20 minutes. After cooking, remove the pot from heat and let it sit, covered, for an additional 10 minutes. While the rice steams, season it. In a small bowl, whisk together 1 tablespoon of rice vinegar, 1 tablespoon of sugar, and 1 teaspoon of sea salt. Once the rice is ready, gently fold this mixture into the rice using a fork. This adds flavor to the rice and helps it cool. To make the spicy tuna, drain the canned tuna. In a mixing bowl, add the tuna, 2 tablespoons of mayonnaise, and 1 tablespoon of sriracha. Stir well until the tuna is fully coated. Taste the mixture. If you want more heat, add more sriracha. This step is all about balancing spice for your taste. Now, it’s time to assemble your sushi bowls. Divide the seasoned sushi rice evenly between two bowls. This rice forms the base of your dish. Then, add a generous scoop of the spicy tuna mixture on top of the rice. Next, add fresh ingredients for color and crunch. Arrange sliced avocado, cucumber, and julienned carrot around the tuna. Don’t forget to sprinkle chopped green onions on top. This adds a vibrant look and fresh flavor. Finally, garnish the bowls. Add a side of seaweed salad and sprinkle sesame seeds on top. This not only enhances the dish's appeal but also adds a nutty flavor. Serve with soy sauce on the side. This allows everyone to drizzle it over their bowls as they like. Enjoy your vibrant and tasty spicy tuna sushi bowls! To make sushi rice, start by rinsing it well. Rinse the rice under cold water until the water runs clear. This helps remove extra starch. Extra starch can make the rice gummy. Cook the rice in a pot with a lid. Use a ratio of 1 cup of rice to 1 1/4 cups of water. Bring it to a boil, then lower the heat. Cover and let it simmer for 18-20 minutes. Do not lift the lid while it cooks. After cooking, let it sit for 10 minutes to steam. Common mistakes include: - Not rinsing the rice enough. - Lifting the lid too soon. - Not letting the rice steam. When serving your sushi bowls, think about colors and arrangement. Use a nice bowl to show off the bright ingredients. Layer the rice first, then the spicy tuna mixture. Add colorful veggies like avocado, cucumber, and carrots around the tuna. Sprinkle chopped green onions on top for a fresh look. Use seaweed salad and sesame seeds as garnish for extra flair. For serving style, consider using wooden or ceramic platters. This adds an authentic touch. Don't forget chopsticks for fun! If you have leftovers, store them properly. Keep the sushi rice in an airtight container in the fridge. It stays fresh for up to two days. For the spicy tuna, keep it in a separate container. This keeps the rice from getting soggy. When reheating the sushi rice, add a little water. Microwave it covered with a damp paper towel. This helps to keep the rice moist without making it mushy. {{image_4}} You can make this bowl without tuna. Use plant-based protein instead. Options include chickpeas or tofu. For a creamy texture, try using avocado or a vegan mayo. Look for brands that are rich in flavor. You can also mix in some tahini for a nutty taste. If you want a different flavor, use salmon or shrimp. Both seafoods work well in this dish. You can also try smoked salmon for a unique taste. Combine flavors like garlic and ginger to boost the dish. Add a dash of lime juice for freshness. Explore different tastes by mixing up spices. You can add more sriracha for heat or a touch of honey for sweetness. Incorporating seasonal ingredients makes it fun. Try adding mango in summer or squash in fall. Each season brings new tastes to enjoy. To keep your sushi bowls fresh, store them in the fridge. Place the bowls in airtight containers. This helps prevent the rice from drying out. Try to consume them within two days for the best taste. You can freeze the rice and spicy tuna mixture if needed. However, fresh veggies do not freeze well. Use glass or plastic airtight containers for storage. These containers keep air out and help maintain freshness. It's best to keep the components separate. Store the rice, tuna, and veggies in different containers. This way, everything stays fresh and full of flavor. When reheating sushi rice, add a splash of water. This helps steam the rice and keeps it moist. You can microwave it for about 30 seconds. Stir, then heat for another 30 seconds if needed. For tuna, gently warm it in a pan over low heat. This preserves its texture and flavor. Avoid microwaving the tuna, as it can become rubbery. For sushi bowls, you can use both canned and fresh tuna. Canned tuna is easy and quick. I suggest using tuna packed in water for a lighter taste. Look for brands that focus on sustainability. Fresh tuna gives a better texture and taste. It’s best to use sushi-grade tuna. This means it’s safe to eat raw. Yes, you can prepare spicy tuna sushi bowls ahead of time. Cook the sushi rice and let it cool. Store it in the fridge. Mix the spicy tuna right before serving for the best taste. You can chop the veggies and keep them in separate containers. This keeps them fresh and crunchy. Just assemble the bowls when you're ready to eat. To adjust the spice level, start with less sriracha. You can add it slowly until you reach the taste you want. For a milder dish, try using less sriracha or mix in some plain mayo. You can also add a bit of honey for sweetness. If you like it hot, add more sriracha or even some chili flakes. Spicy tuna sushi bowls are fun to make and eat. We covered key ingredients like sushi rice, tuna, and veggies. You learned how to prepare each part step-by-step, ensuring tasty results. We explored tips for presentation and storage to keep your bowls fresh. You can even try variations for different diets. Embrace your creativity in the kitchen. With these skills, you’ll create delicious meals everyone will enjoy!

Spicy Tuna Sushi Bowls Flavorful and Simple Delight

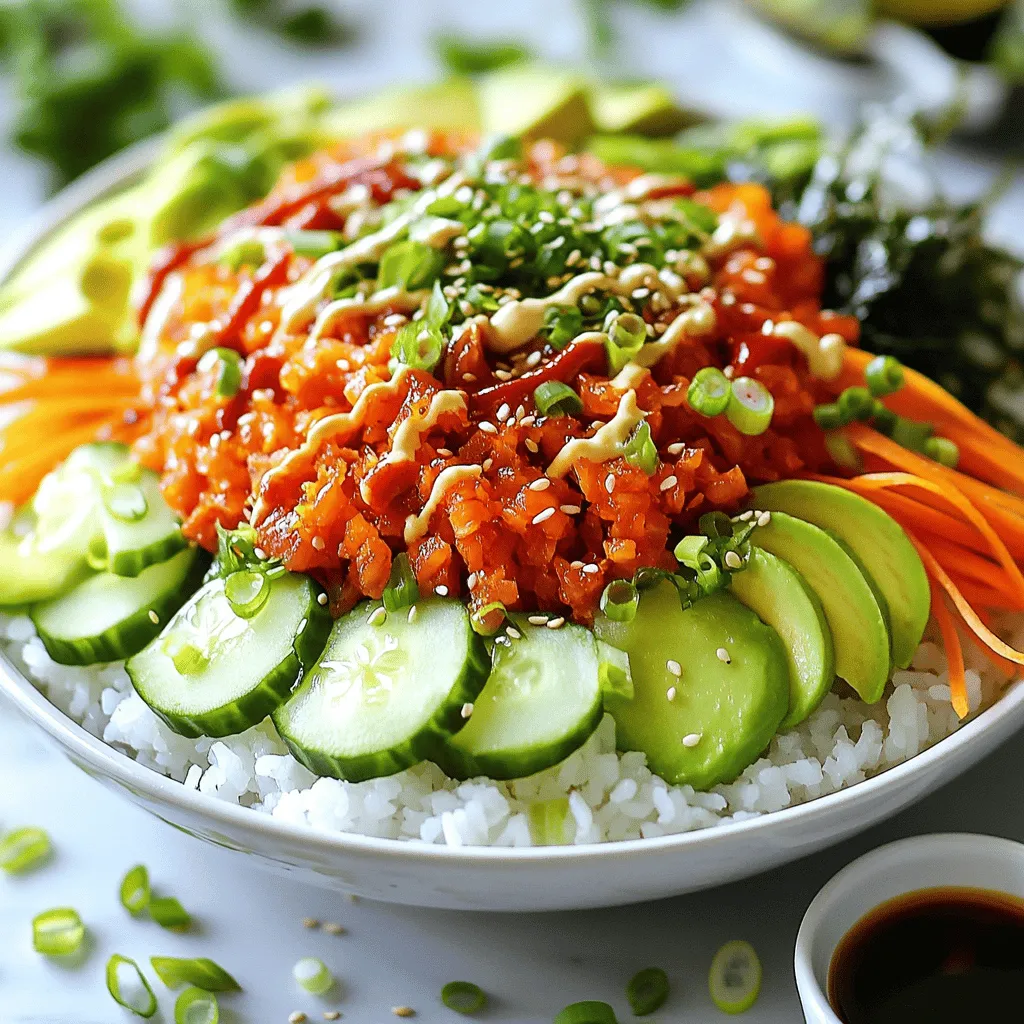
Craving a delicious and quick meal? Let me introduce you to spicy tuna sushi bowls! This tasty dish is both

Older posts
Newer posts
← Previous Page1 … Page33 Page34 Page35 … Page83 Next →

dsad

© 2026 eataroundit • Built with GeneratePress

Our Policies

  • Copyright Policy
  • Cookie Policy
  • GDPR Policy
  • Privacy Policy
  • Disclaimer
  • Terms Of Use

More Information

  • Home
  • About
  • Contact
  • Appetizers
  • Dessert
  • Dinner
  • Drinks
©2026, eataroundit About Back To Top