Skip to content
DisclaimerTerms Of UseGDPR PolicyCookie Policy

eataroundit

  • Home
  • Drinks
  • Appetizers
  • Dinner
  • Dessert
  • About
  • Contact
  • Privacy Policy
DisclaimerTerms Of UseGDPR PolicyCookie Policy

NO-ING-IMG

To make honey garlic glazed carrots, gather these simple ingredients: - Baby carrots (1 lb) - Honey (3 tablespoons) - Unsalted butter (2 tablespoons) - Minced garlic (3 cloves) - Fresh thyme leaves (1 teaspoon) - Salt and pepper (to taste) - Fresh lemon juice (1 tablespoon) - Fresh parsley (for garnish) These ingredients create a sweet and savory dish. The baby carrots give a nice crunch. Honey adds sweetness, while garlic brings a rich flavor. Butter helps everything blend well together. Fresh thyme adds a hint of earthiness. Lemon juice brightens the dish with a zing. Parsley makes a lovely garnish that adds a pop of color. Each ingredient has its role in making these carrots shine. The balance of flavors is what makes this dish special. Trust me, you will love how these flavors come together! Start by boiling the carrots. Fill a large pot with water and bring it to a boil. Add 1 lb of peeled baby carrots to the water. Cook them for about 5-7 minutes. You want them tender but still a bit crisp. Once done, drain the carrots and set them aside. Next, we sauté the garlic. In a large skillet over medium heat, add 2 tablespoons of unsalted butter. Let the butter melt completely. Then, add 3 cloves of minced garlic to the melted butter. Sauté the garlic for 1-2 minutes. Stir it continuously until it smells great but be careful not to burn it. Now, it’s time to make the sauce. To the sautéed garlic, add 3 tablespoons of honey and 1 teaspoon of fresh thyme leaves. Stir everything well. This will create a sweet and fragrant sauce that will coat the carrots perfectly. Once your sauce is ready, it’s time to glaze the carrots. Carefully add the drained carrots to the skillet. Toss the carrots in the honey garlic sauce. Make sure each carrot is well-coated. This step brings all the flavors together. Next, we caramelize the carrots. Cook the coated carrots for another 4-5 minutes. This helps enhance their natural sweetness. As they cook, season them with salt and pepper to taste. Adjust to your liking for the best flavor. Finally, add the finishing touches. Remove the skillet from heat and drizzle 1 tablespoon of fresh lemon juice over the carrots. Toss them gently to mix everything. For a pop of color, garnish with chopped fresh parsley before serving. Enjoy this simple and tasty dish! To make your honey garlic glazed carrots even better, adjust the seasoning to your taste. Adding a pinch of salt or a dash of pepper can make a big difference. You can also try using alternative herbs and spices. For example, basil or rosemary can add a nice twist to the dish. Boiling carrots correctly is key to getting the best texture. Start by bringing a large pot of water to a vigorous boil. Add your carrots and cook for about 5-7 minutes. They should be tender yet still crisp. This helps keep their bright color and fresh flavor. For caramelization, ensure you let the glazed carrots cook for an extra 4-5 minutes. This will give them a lovely, sweet finish. How you present your dish can make it stand out. Serve your honey garlic glazed carrots in a decorative bowl. Arrange them in a fan shape for a beautiful look. This not only makes the dish appealing but also highlights the vibrant orange of the carrots. Consider a white serving dish to contrast the rich colors. This will catch the eye and whet the appetite! {{image_4}} You can use different types of carrots for this dish. If baby carrots aren't available, try using regular carrots. Just cut them into small pieces. This change will still give you a sweet and tasty bite. Other vegetables also work well with the honey garlic glaze. Try using parsnips for a sweet twist. You can also add broccoli or green beans for some crunch. These additions make your meal colorful and fun. If you want to switch things up, consider using maple syrup instead of honey. Maple syrup has a unique flavor that pairs well with garlic. You can also try agave nectar or coconut sugar. These natural sweeteners offer different tastes and can suit your needs. To make this dish a bit lighter, reduce the butter. You can use just one tablespoon instead of two. This way, you keep the flavor but cut some fat. You can also add more vegetables to boost nutrition. Adding bell peppers or zucchini gives extra vitamins and fiber. This makes your meal healthier and more filling. After enjoying your honey garlic glazed carrots, store any leftovers in the fridge. Place them in an airtight container. This keeps the carrots fresh for about three days. Make sure to cool them down before sealing. This helps prevent condensation and sogginess. Freezing is a great option if you want to save these delicious carrots. First, let them cool completely. Then, pack them in a freezer-safe bag. Remove as much air as possible to avoid freezer burn. Label the bag with the date. These carrots can last up to three months in the freezer. However, for the best taste, use them within one month. When it's time to enjoy your carrots again, choose the best reheating method. The microwave works well, but it can make them soggy. Instead, reheat them in a skillet over medium heat. Add a splash of water or broth to help steam them. This keeps the glaze intact and flavorful. Stir occasionally to ensure even heating. Enjoy these sweet and savory treats just like fresh! Yes, you can use frozen carrots. However, they may not have the same crunch. Frozen carrots often lose some texture. Fresh baby carrots are firmer and sweeter. If you choose frozen, cook them for a shorter time. This helps keep some bite. To add heat, try these options: - Add a pinch of red pepper flakes to the sauce. - Mix in some minced jalapeño when you sauté the garlic. - Use a hot sauce or chili oil while glazing the carrots. Each choice adds a new flavor layer without overwhelming the dish. These glazed carrots pair well with many dishes, such as: - Grilled chicken or pork chops - Roast beef or lamb - Quinoa or rice for a vegetarian option They add a sweet touch to any meal, making them a versatile side. Yes, you can prepare the dish ahead. Cook the carrots and make the sauce. Store them separately in the fridge. When ready, just reheat the carrots in the sauce. This keeps the flavors fresh. You can even make it a day before serving. This recipe for honey garlic glazed carrots brings out the best in this simple vegetable. You learned about the ingredients, preparation steps, and tips to enhance flavor and presentation. Exploring variations and storage methods ensures you can enjoy these carrots anytime. Keep experimenting and adjusting to suit your taste. Use this dish to impress guests or brighten your family meals. With practice, you will master this delicious side!

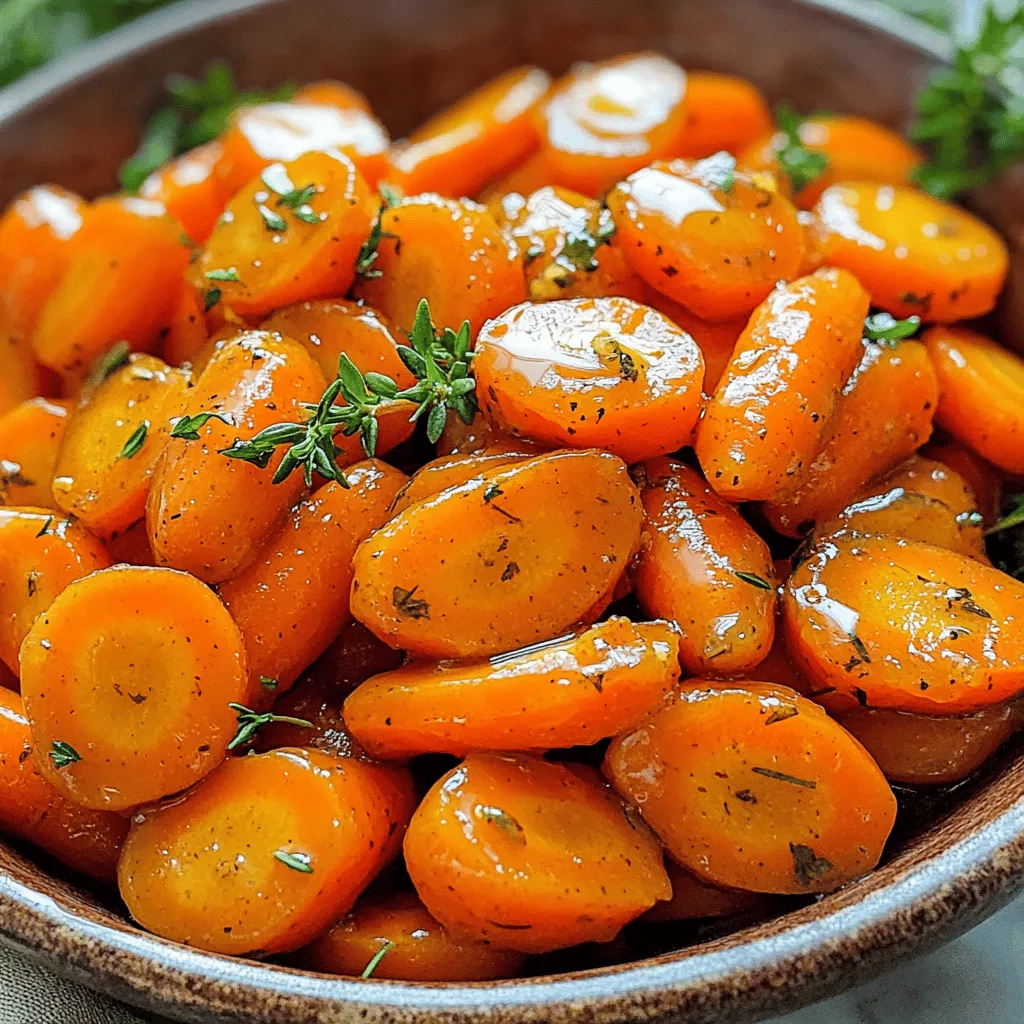
Honey Garlic Glazed Carrots Simple and Flavorful Treat

Are you ready to transform baby carrots into a sweet and savory delight? Honey Garlic Glazed Carrots are a simple

- 1 can (15 oz) black beans, drained and rinsed - 1/2 cup cooked quinoa - 1/2 cup breadcrumbs (gluten-free optional) The base of your burger is black beans. They bring protein and flavor. Quinoa adds a nutty taste and boosts nutrition. Breadcrumbs help bind the mixture. You can use gluten-free ones if needed. - 1 small onion, finely chopped - 2 cloves garlic, minced - 1 jalapeño, deseeded and finely minced - 1 teaspoon ground cumin - 1 teaspoon smoked paprika - 1 tablespoon fresh lime juice - 1/2 teaspoon sea salt - 1/4 teaspoon black pepper - 1/4 teaspoon cayenne pepper (adjust according to heat preference) - 2 tablespoons fresh cilantro, finely chopped Onions and garlic give your burger a great base flavor. Jalapeño adds spice, while cumin and smoked paprika bring warmth. Fresh lime juice brightens the taste. Adjust cayenne pepper for your heat level. - Burger buns (your choice) - Fresh lettuce, ripe tomato slices, and creamy avocado for serving Choose your favorite burger buns. Fresh toppings are key for a tasty bite. Crisp lettuce, juicy tomatoes, and creamy avocado will make your burger shine. Enjoy every delicious layer! 1. First, take your can of black beans. Drain and rinse them well. 2. In a large bowl, mash the black beans with a fork or potato masher. Keep some chunks for texture. 3. Next, add the cooked quinoa and breadcrumbs. 4. Mix in the finely chopped onion, minced garlic, and jalapeño. 5. Sprinkle in the ground cumin, smoked paprika, sea salt, black pepper, and cayenne pepper. 6. Squeeze in the fresh lime juice and toss in the chopped cilantro. 7. Stir until everything is well blended. If it feels too wet, add more breadcrumbs. 8. Divide the mixture into four equal parts and shape them into patties. 1. Heat a splash of olive oil in a skillet over medium heat. 2. Once the oil is hot and shimmering, gently place the patties in the skillet. 3. Cook for about 5 to 7 minutes on each side. You want a crispy outside. 4. Make sure they are heated through before removing them from the pan. 1. While cooking the patties, toast your burger buns in the skillet for about one minute. 2. Once golden brown, take the bottom half of the bun. Place a black bean patty on it. 3. Add fresh lettuce, juicy tomato slices, and creamy avocado on top. 4. Finally, cap it with the top half of the bun. Enjoy your creation! Managing moisture levels is key in this recipe. Too much moisture makes your patties fall apart. After mashing the black beans, look for a mostly smooth mix with some chunks. If the mix seems too wet, add breadcrumbs until it holds together. You can also try alternative binding agents. Flaxseed meal or chia seeds are great options. Mix one tablespoon of either with three tablespoons of water. Let it sit for a few minutes to create a gel-like texture. This helps bind the mix well. Adjusting heat levels is easy. If you like it spicier, add more cayenne pepper or jalapeño. Start with a little bit, taste the mix, and add more if needed. For suggested seasonings, consider adding onion powder or chili powder. These spices deepen the flavor. You can also mix in some fresh herbs like parsley or basil for a fresh twist. For complementary sides and dips, serve your burgers with crispy sweet potato fries. Guacamole is a great dip as well. Both add flavor and texture to your meal. For presentation tips, use a rustic wooden board. Place the burgers on it, surrounded by fries and a small bowl of guacamole. This creates a feast for both the eyes and the palate. Enjoy your meal! {{image_4}} You can switch up the beans in your burger for fun. Pinto beans work great instead of black beans. They give a creamy texture and lovely flavor. You can also try chickpeas. They add a nutty taste and are packed with protein. Lentils are another cool choice. They cook fast and mix well with spices. Simply replace the black beans with your choice and follow the same steps. Want more heat? Add extra jalapeños to your mix. Just chop them up and toss them in. You can also use hot sauce for a kick. Drizzle it into the mix or top your burger with it. Try different spices too! Chipotle powder or chili flakes can add unique flavors. Don't be afraid to experiment; the spice is all about your taste. Making your burger vegan? Use plant-based toppings like avocado and lettuce. You can also add vegan mayo or hummus for extra creaminess. If you need gluten-free options, grab gluten-free buns. Many brands offer tasty choices now. You can even use lettuce wraps for a fresh twist. Just layer your ingredients and enjoy a lighter meal. To keep your leftover spicy black bean patties fresh, store them in the fridge. Use an airtight container to avoid drying out. They can last up to four days. If you want to save them longer, freeze the patties. Wrap each one in plastic wrap and place them in a freezer bag. They can stay good in the freezer for up to three months. When reheating, you have two main options: the oven or a skillet. For the oven, preheat it to 350°F. Place the patties on a baking sheet and warm them for about 10-15 minutes. This method keeps them crispy. If you prefer a skillet, heat a little olive oil over medium heat. Cook each patty for about 4-5 minutes on each side. This method adds a nice crisp. The shelf life of these patties depends on how you store them. In the fridge, they last four days. If frozen, they last up to three months. Always check for any signs of spoilage before cooking. To make Spicy Black Bean Burgers gluten-free, swap regular breadcrumbs for gluten-free ones. You can also use crushed corn chips or oats. Both options work well in this recipe. Make sure to check all labels for hidden gluten. Yes, you can grill these patties! Preheat your grill to medium heat. Lightly brush each patty with olive oil. Place them on the grill for about 5-7 minutes on each side. This gives them a nice char and smoky flavor. You can serve Black Bean Burgers with a variety of sides. Some great options include: - Crispy sweet potato fries - Fresh salad with lime vinaigrette - Roasted veggies - A side of guacamole or salsa for dipping These sides add color and flavor, making your meal complete. In this blog post, we covered how to make spicy black bean burgers. We discussed main ingredients like black beans and quinoa, plus flavor boosters like onions and spices. You learned step-by-step instructions for making, shaping, and cooking your patties, along with tips for texture and taste. We explored variations and storage tips for leftovers. Overall, making these burgers is easy and fun. You can customize them to fit your needs. Enjoy your cooking and share these tasty burgers with friends!

Spicy Black Bean Burger Flavorful and Easy Recipe

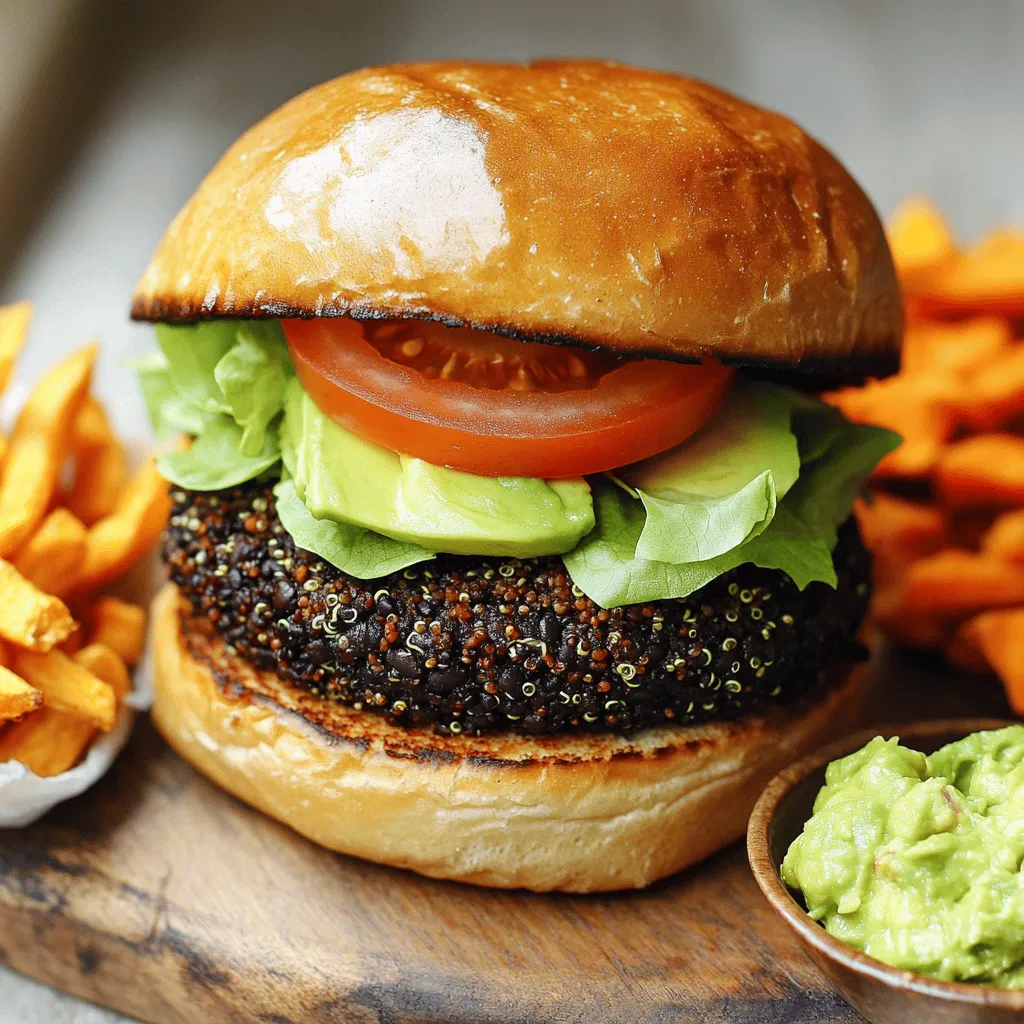
Are you ready to spice up your meals? This Spicy Black Bean Burger recipe is both flavorful and easy to

- 1 lb boneless, skinless chicken thighs - 1 tablespoon vegetable oil - 1/4 cup teriyaki sauce - 1 tablespoon honey - 1 clove garlic, finely minced - 1 teaspoon fresh ginger, grated - 1/2 cup bell peppers, diced - 1/4 cup green onions, thinly sliced - 1/4 cup water chestnuts, finely chopped - Butter or romaine lettuce leaves - Sesame seeds for garnish Gathering fresh and tasty ingredients makes your meal pop. Start with chicken thighs. They stay juicy and tender. The teriyaki sauce adds a sweet, savory kick. Honey enhances this flavor and brings a nice glaze. Minced garlic and grated ginger offer warmth and depth. For crunch, add diced bell peppers and water chestnuts. They provide a great texture contrast. Slice the green onions thinly for a fresh bite. Finally, use butter or romaine lettuce leaves as your wrap. They hold the filling well and add a crisp touch. Don’t forget the sesame seeds! They add a lovely finish. Each ingredient plays a role in making this dish delightful. Enjoy preparing your teriyaki chicken lettuce wraps! - Heat 1 tablespoon of vegetable oil in a large skillet over medium heat. - Once the oil is hot, add 1 pound of bite-sized chicken thighs. - Cook the chicken for about 5 to 7 minutes. - Stir the chicken often until it turns golden brown and is cooked through. - In a small bowl, mix together 1/4 cup of teriyaki sauce, 1 tablespoon of honey, 1 clove of minced garlic, and 1 teaspoon of grated ginger. - Once the chicken is done, pour this tasty sauce over it. - Stir well to coat the chicken evenly. - Let it simmer on low heat for about 2 to 3 minutes. This thickens the sauce a bit. - Now it's time to add some crunch! - Toss in 1/2 cup of diced bell peppers and 1/4 cup of finely chopped water chestnuts. - Stir everything together and cook for 2 more minutes. The peppers should stay crisp. - Take the skillet off the heat and let it cool for a moment. - To assemble, take a lettuce leaf and spoon in the delicious chicken mix. - Top it with the remaining sliced green onions and a sprinkle of sesame seeds. - Fold the sides of the lettuce over the filling and enjoy your yummy wraps! To adjust the sweetness of the teriyaki sauce, you can add more honey. Taste the sauce as you mix it. If it's too sweet, add a splash of soy sauce. This will balance the flavors well. Marinating the chicken helps enhance its taste. Try to marinate for at least 30 minutes. For better results, aim for two hours. Use a mix of teriyaki sauce, garlic, and ginger for a deep flavor. When you serve the wraps, arrange them on a nice platter. This makes them look inviting. Place the lettuce wraps close together, leaving space for dipping sauce. For a pop of color, add extra sesame seeds on top. You can also sprinkle some sliced green onions for a fresh look. These simple garnishes make a big difference in presentation. These wraps pair well with several dips. A small bowl of extra teriyaki sauce is a great choice. It adds more flavor and moisture to each bite. You can also serve them with a side of pickled vegetables. This adds a nice crunch and tang. Consider pairing with steamed rice or quinoa for a complete meal. {{image_4}} You can switch the chicken for turkey or tofu. Both options work well and taste great. Turkey offers a lean protein, while tofu adds a nice texture. For veggies, feel free to get creative. Use carrots, cucumbers, or snap peas. These will add crunch and color to your wraps. You can choose between homemade and store-bought teriyaki sauce. Making your own gives you control over flavors. Store-bought is quick and easy if you're short on time. For other sauce options, try hoisin or sweet chili sauce. These can add a fun twist to your wraps. You can serve these wraps in different types of leaves. Try using cabbage or collard greens for a new taste. If you have leftovers, think outside the box. Use the filling in tacos or over rice. These ideas keep your meals exciting and fresh. To keep your teriyaki chicken fresh, store the leftovers in an airtight container. Place it in the fridge within two hours of cooking. This helps to keep the chicken tasty. It’s best to eat leftovers within three days. If you want to enjoy them later, consider freezing instead. Yes, you can freeze teriyaki chicken filling! Just let it cool first. Transfer the cooled filling to a freezer-safe bag or container. Make sure to remove as much air as possible. This helps prevent freezer burn. The chicken can stay good in the freezer for up to three months. To reheat, use the microwave or stovetop. If using a microwave, heat on medium power to avoid overcooking. Stir occasionally and check for even heating. On the stovetop, warm in a skillet over low heat. Add a splash of water or extra teriyaki sauce to keep it moist. Enjoy the great taste of your wraps again! Yes, you can make teriyaki chicken lettuce wraps ahead of time. Here are some tips to help you prep: - Cook the chicken: You can prepare the chicken filling a day in advance. Store it in the fridge. - Keep the lettuce fresh: Wash and dry the lettuce leaves. Store them in a sealed container with a paper towel to absorb moisture. - Assemble before serving: Wait to put the wraps together until you're ready to eat. This keeps the lettuce crisp. Pair your wraps with these tasty options: - Rice: Serve with steamed jasmine or brown rice for a hearty meal. - Salad: A simple cucumber salad adds a nice crunch. - Drinks: Light drinks like iced tea or sparkling water work well. Yes, teriyaki chicken lettuce wraps are a healthy choice. Here’s why: - Lean protein: Chicken thighs provide protein without too much fat. - Vegetables: Bell peppers and water chestnuts add vitamins and crunch. - Low-carb option: Using lettuce instead of bread cuts down on carbs. Absolutely! Other types of lettuce that work well include: - Romaine: Crisp and sturdy, great for holding filling. - Iceberg: Crunchy with a refreshing bite. - Butter lettuce: Soft and easy to wrap, perfect for a tender touch. Feel free to mix and match according to your taste! This blog post covers how to make delicious teriyaki chicken lettuce wraps. We explored the key ingredients, cooking steps, and helpful tips for flavor and presentation. I shared variations using different proteins and vegetables, plus how to store and reheat leftovers. You now have all the tools to create tasty wraps your family will love. Enjoy experimenting and make this dish your own! You’ll impress everyone with your new skills in the kitchen.

Teriyaki Chicken Lettuce Wraps Tasty and Simple Meal

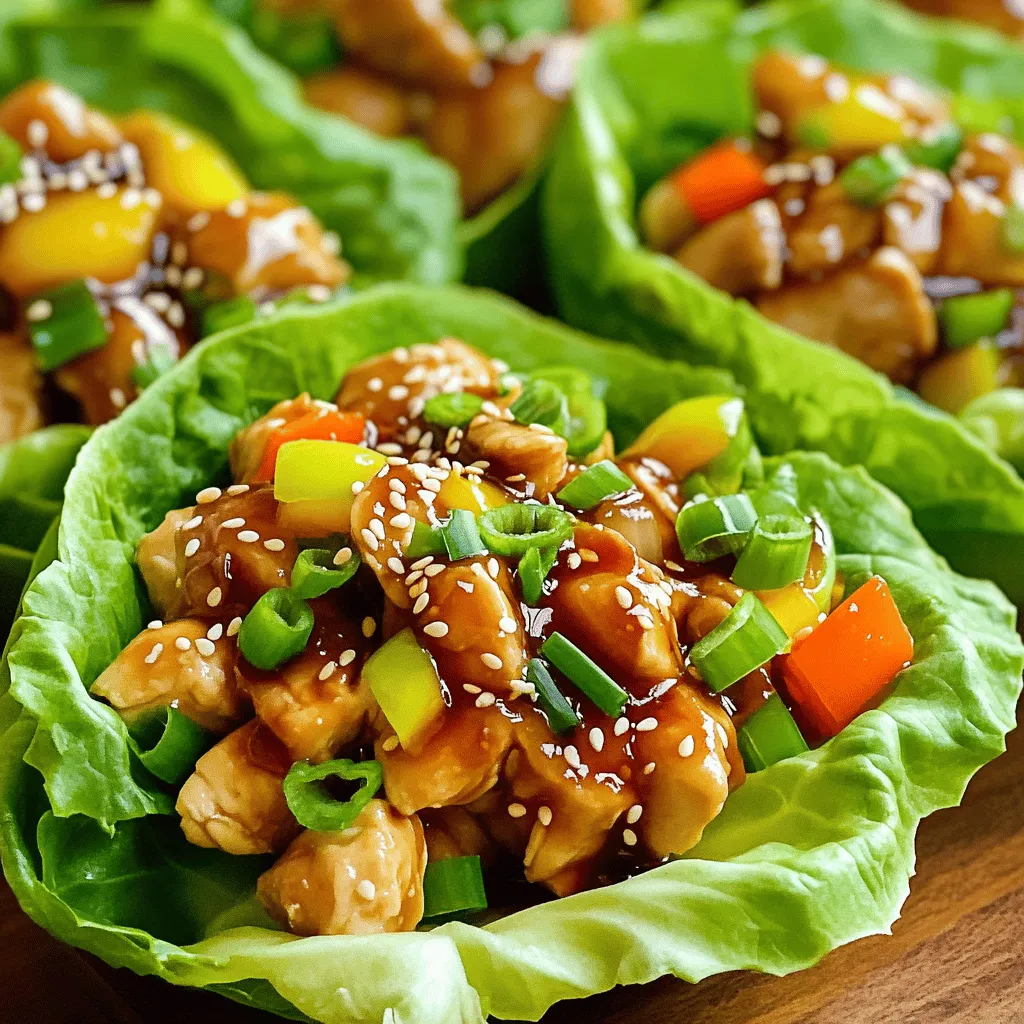
Looking for a quick meal that packs a punch of flavor? Teriyaki chicken lettuce wraps are your answer! These tasty

- 1 ½ cups graham cracker crumbs - ½ cup unsalted butter, melted - 1 cup granulated sugar - 1 can (14 ounces) sweetened condensed milk - ½ cup freshly squeezed lemon juice (about 3-4 lemons) - Zest of 2 lemons - 1 teaspoon pure vanilla extract - 1 cup heavy whipping cream - Optional: Lemon slices and fresh mint leaves for garnish For the graham cracker crumbs, I like using Nabisco or Honey Maid. They give a great flavor. When choosing butter, opt for brands like Land O'Lakes or Kerrygold for rich taste. For sweetened condensed milk, Carnation is a solid choice. Fresh lemons are key; try to get organic ones for the best juice and zest. For whipped cream, Horizon Organic makes a nice option. If you want a gluten-free option, use gluten-free graham crackers. Coconut cream can replace heavy whipping cream for a dairy-free pie. For a lower sugar version, try using a sugar substitute like Stevia in the filling. If you are vegan, swap the condensed milk with coconut condensed milk and the heavy cream with a vegan whipping cream. To start, gather your ingredients. You need 1 ½ cups of graham cracker crumbs and ½ cup of melted unsalted butter. In a mixing bowl, combine the crumbs and butter. Stir until the mix looks like damp sand. Press this mixture into a 9-inch pie pan. Make sure to cover the bottom and sides well. This creates a sturdy crust. Now, place the crust in the fridge for 15 to 20 minutes. Chilling helps it firm up nicely. Next, you’ll make the lemon filling. In a large bowl, mix 14 ounces of sweetened condensed milk, 1 cup of granulated sugar, ½ cup of freshly squeezed lemon juice, the zest of 2 lemons, and 1 teaspoon of pure vanilla extract. Use a whisk to blend until smooth. Make sure there are no lumps. This step is key for a creamy filling. The combination of lemon juice and zest gives the filling a fresh taste. Now it’s time to whip the cream. In a clean bowl, pour 1 cup of heavy whipping cream. Use an electric mixer on medium-high speed. Beat the cream until stiff peaks form. This adds lightness to your filling. Once whipped, gently fold the cream into the lemon mixture. Use a spatula for this. Be careful and fold until you see no white streaks. This keeps the mixture airy and fluffy. Now, pour the lemon filling into your chilled crust and smooth the top with a spatula. To get the best whipped cream, start with very cold heavy cream. Cold cream whips better and faster. Use a clean bowl and beaters. Beat the cream on medium-high speed. Keep an eye on it as you whip. Stop when you see stiff peaks form. This means the cream holds its shape well. Gently fold the whipped cream into your lemon mixture. This keeps it light and fluffy. For a smooth filling, mix the sweetened condensed milk and sugar first. Use a whisk to blend them well. Add the lemon juice and zest next. Make sure to mix until no lumps are left. If you see lumps, keep whisking until smooth. This step is key for a creamy filling that tastes great. Chill your pie in a clean fridge. Cover it with plastic wrap to keep it fresh. Let it chill for at least four hours. This helps the filling set and makes it easier to slice. For best results, chill it overnight if you can. The longer it chills, the better your pie will taste. {{image_4}} You can switch up the crust for your No-Bake Lemon Icebox Pie. Instead of graham crackers, try using crushed vanilla wafers or even Oreo cookies. Both options add a unique twist. You can also make a nut crust with ground almonds or pecans mixed with melted butter. This crust adds a rich flavor and a fun crunch. Adding berries can elevate your pie. Fresh blueberries, raspberries, or strawberries work well. You can mix them into the lemon filling or layer them on top. For a tropical twist, consider adding coconut flakes. You might also try a hint of mint for a refreshing taste. These additions can make your pie even more delightful. If you need a vegan version, replace the sweetened condensed milk with coconut cream and use maple syrup as a sweetener. For a gluten-free option, ensure you use gluten-free graham crackers or nuts for the crust. These changes keep the essence of the pie while catering to dietary needs. Enjoy experimenting! To store leftover pie, cover it tightly with plastic wrap. Place the pie in the fridge. This keeps it fresh and helps maintain its creamy texture. You can also use a pie dish cover if you have one. Enjoy your pie within three to four days for the best taste. The lemon flavor shines brightest when fresh. After that, the crust may become a bit soft. If you store it correctly, it can last up to a week, but the texture may change. No need to reheat this pie! It’s best served cold. If you want to refresh a slice, try adding a dollop of whipped cream on top. Fresh lemon slices or mint leaves also brighten the pie. Just be sure to enjoy it while it’s still fresh! Yes, you can freeze this pie. Wrap it tightly in plastic wrap. Place it in an airtight container to protect it from freezer burn. It will keep well for about two months. Thaw it in the fridge overnight before serving. This way, you can enjoy its refreshing taste anytime. To keep your crust crisp, make sure the graham cracker crumbs are finely crushed. Mix them well with melted butter. After pressing the crust into the pan, chill it in the fridge for at least 15-20 minutes. This helps it set and hold its shape. Avoid adding too much filling too fast, as this can make the crust soggy. Pair this pie with fresh fruit like strawberries or blueberries. A scoop of vanilla ice cream adds a rich touch. You can also serve it with whipped cream. Mint leaves and lemon slices make great garnishes too. These options enhance the pie's bright flavors and make your dessert table more inviting. This blog post covered everything you need for a perfect no-bake lemon icebox pie. We discussed the key ingredients, helpful tips, and how to achieve great texture. You learned about variations to suit different diets and how to store leftovers. Remember, this pie is versatile and easy to make! Experiment with flavors and crusts. Enjoy your dessert, and don’t hesitate to share it with friends. You can always create new twists on this classic recipe. Happy pie-making!

No-Bake Lemon Icebox Pie Tasty and Effortless Delight

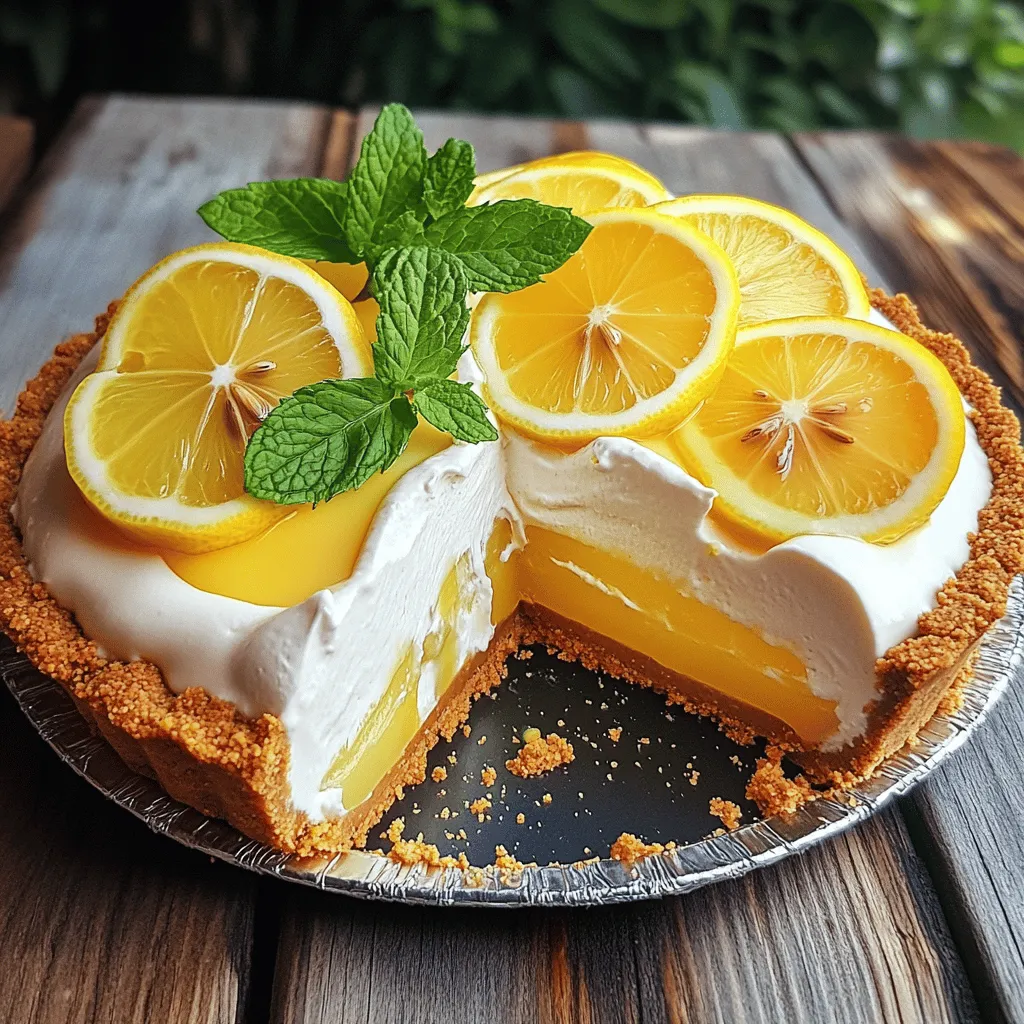
Looking for a quick and delicious dessert? This No-Bake Lemon Icebox Pie is your answer! I’ll guide you through a

To make a tasty Roasted Garlic Tomato Soup, you need: - 6 large ripe tomatoes, quartered - 1 whole bulb of garlic - 1 medium onion, diced - 2 tablespoons olive oil (divided) - 4 cups vegetable broth - 1 teaspoon dried basil - Salt and pepper to taste - 1 tablespoon balsamic vinegar - Fresh basil leaves for garnish - A dollop of crème fraîche or yogurt for serving (optional) These ingredients bring out the rich flavors in the soup. The ripe tomatoes are key for sweetness, while roasted garlic adds depth. Each serving of this soup has about 150 calories. It’s low in fat, with healthy fats from olive oil. Key nutrients in this soup include: - Vitamin C from tomatoes and garlic - Fiber from tomatoes and onion - Antioxidants from garlic and basil This soup is not just tasty; it also helps boost your immune system and supports digestion. Enjoying this soup can be a delicious way to get nutrients! 1. Preheat oven and prepare ingredients First, preheat your oven to 400°F (200°C). This helps the tomatoes and garlic roast well. Next, quarter 6 large ripe tomatoes. Take 1 whole bulb of garlic and peel the cloves. 2. Roasting tomatoes and garlic Spread the quartered tomatoes and garlic cloves on a baking sheet. Drizzle 1 tablespoon of olive oil over them. Season with salt and pepper. Toss them gently to coat. Roast in the oven for 30-35 minutes. Wait until the tomatoes are caramelized and the garlic is soft. 1. Sautéing onions and combining ingredients While the tomatoes and garlic roast, heat 1 tablespoon of olive oil in a large pot over medium heat. Add 1 medium diced onion. Cook until it becomes soft and translucent, about 5-7 minutes. This creates a nice base for your soup. 2. Blending and finishing touches Once the tomatoes and garlic are ready, add them to the pot. Squeeze the roasted garlic out of its skin into the mix. Pour in 4 cups of vegetable broth and add 1 teaspoon of dried basil. Bring the soup to a gentle simmer and cook for 10 minutes. Now, use an immersion blender to puree the soup until smooth. If you don't have one, you can transfer it to a regular blender in batches. After blending, stir in 1 tablespoon of balsamic vinegar. Taste and add more salt and pepper if needed. Serve the soup hot. Garnish with fresh basil leaves and a dollop of crème fraîche or yogurt if you like. Enjoy your delicious Roasted Garlic Tomato Soup! To get the best flavor, you want to achieve perfect caramelization. Caramelization happens when sugars in the tomatoes and garlic cook slowly. This brings out their natural sweetness. Here are some tips: - Always use ripe tomatoes. They should feel firm but slightly soft to the touch. - Cut the tomatoes into quarters. This helps them roast evenly and caramelize well. - Spread them out on the baking sheet. This prevents steaming and helps them brown nicely. When selecting ripe tomatoes, look for these signs: - Bright color, usually red or deep pink. - No bruises or blemishes on the skin. - A sweet aroma near the stem. This indicates freshness. Blending your soup can change the texture. You can use either an immersion blender or a regular blender. Each has its perks. With an immersion blender, you can blend right in the pot. This makes clean-up easier. Just remember to move it around to blend evenly. If you use a regular blender, you must be careful. Hot soup can splatter. Blend in small batches and let some steam escape. This keeps you safe. To achieve the desired soup texture, aim for a smooth, velvety finish. If you prefer it chunkier, blend less. You can even leave some tomato pieces intact for added texture. {{image_4}} You can change the soup's texture and taste with simple swaps. Adding cream makes the soup rich and smooth. If you prefer a dairy-free option, try coconut milk. It adds a lovely sweetness. Herbs and spices can also change the flavor. Try adding fresh thyme or oregano for a twist. A pinch of red pepper flakes can give it a nice kick. Experiment with different flavors to find your favorite mix. Pairing this soup with bread makes it a hearty meal. A crusty baguette or grilled cheese sandwich works great. You can even add croutons for a crunchy bite. Garnishes can make your soup stand out. Fresh basil leaves add color and flavor. A drizzle of olive oil gives a nice finish. For an extra touch, add a dollop of crème fraîche or yogurt. This adds creaminess and a beautiful look to your dish. Store leftover soup in the fridge. Use an airtight container for best results. Let the soup cool before sealing it. It can last up to five days. Just make sure to label it with the date. This helps you keep track of freshness. You can freeze this soup for later. Use freezer-safe containers, leaving room for expansion. Divide it into smaller portions for easy use. The soup will stay good for about three months. To thaw, place the container in the fridge overnight. For quick defrosting, use the microwave. When reheating, heat it on the stove over low heat. Stir it often to keep it smooth and creamy. Enjoy your soup anytime! Can I use canned tomatoes instead of fresh? Yes, you can use canned tomatoes. Choose whole or diced tomatoes in juice. Drain the tomatoes and roast them for a rich flavor. This saves time and still gives good taste. How can I make this soup vegan? To make this soup vegan, use vegetable broth and skip the crème fraîche or yogurt. You can add a splash of coconut milk for creaminess. This keeps the soup rich and satisfying without any dairy. What are the best toppings for this soup? Top your soup with fresh basil leaves for color and taste. You can also add croutons for crunch. A drizzle of olive oil adds a nice finish. If you want more creaminess, add a dollop of plant-based yogurt. Roasted Garlic Tomato Soup brings rich flavor and great nutrition. You need fresh ingredients and pantry staples to create a tasty dish. Roasting tomatoes and garlic brings sweetness, while blending offers a smooth texture. Experiment with variations like adding cream or different herbs to boost flavor. Store leftovers well in containers, or freeze for later use. This soup is easy, delicious, and a perfect meal for any day. Enjoy making it your own!

Roasted Garlic Tomato Soup Flavorful and Easy Recipe

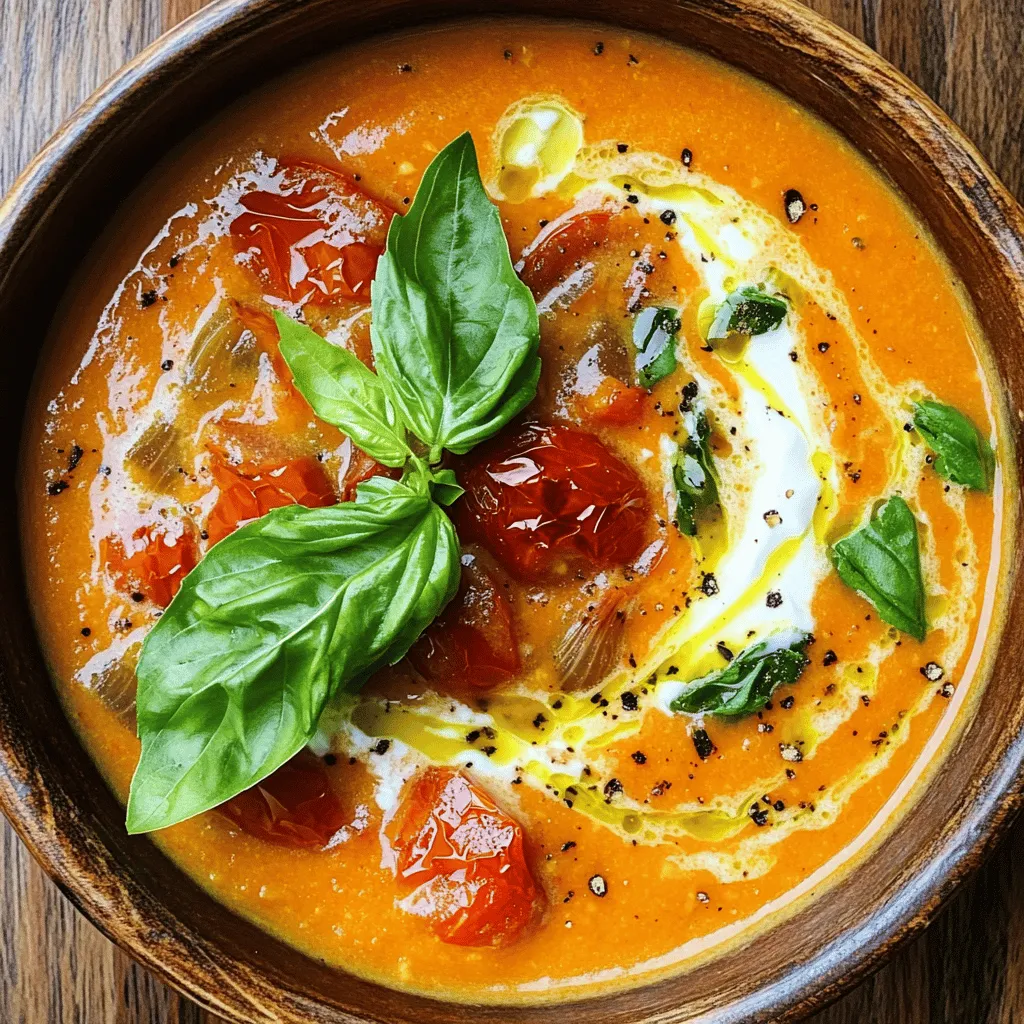
Are you craving a warm, comforting bowl of soup? My Roasted Garlic Tomato Soup hits all the right notes. This

- Grated zucchini: Use one medium zucchini, which makes about one cup when grated. Measure it carefully. This ingredient adds moisture and nutrition without strong taste. Squeeze out extra moisture with a towel to avoid sogginess in your bread. - Types of chocolate chips: You need three kinds—semi-sweet, milk, and white chocolate. Each type adds its own flavor. Semi-sweet chips give a rich taste, while milk chocolate adds sweetness. White chocolate offers a creamy touch. Using all three creates a great balance. - Key dry ingredients: You will need one cup of all-purpose flour and half a cup of unsweetened cocoa powder. Cocoa gives depth and richness. Don't forget the leavening agents: ½ teaspoon of baking soda and ½ teaspoon of baking powder. These help the bread rise and stay fluffy. - Possible gluten-free alternatives for flour: You can replace all-purpose flour with almond flour or a gluten-free blend. This makes the bread gluten-free. Adjust the amount to match the consistency of regular flour. - Sugar substitutes for a healthier version: You can use coconut sugar or stevia. These options lower the sugar content. Just remember that different sugars can change the flavor slightly. Adjust to taste for the best results. 1. Preheat your oven to 350°F (175°C). This step is crucial for even baking. 2. Prepare your loaf pan. Lightly grease a 9x5-inch pan or line it with parchment paper. This helps with easy removal. 3. Grate the zucchini using a box grater or food processor. You need about 1 cup when grated. 4. Drain the zucchini to avoid sogginess. Place the grated zucchini in a clean kitchen towel. Squeeze out any excess moisture. Set the drained zucchini aside. 1. Combine dry ingredients. In a medium bowl, whisk together all-purpose flour, cocoa powder, baking soda, baking powder, and sea salt. Mixing them well ensures even flavor. 2. Mix wet ingredients. In a large bowl, blend granulated sugar, brown sugar, and vegetable oil until smooth. Add the eggs one at a time, mixing well after each. Stir in the vanilla extract. 3. Combine wet and dry. Gently add the dry mix to the wet ingredients. Fold them together until just combined. Avoid overmixing to keep the bread light. 4. Add zucchini and chocolate. Carefully fold in the drained zucchini and all three types of chocolate chips. This ensures every slice has a burst of flavor. 1. Pour the batter into the prepared loaf pan. Use a spatula to smooth the top for even baking. 2. Bake the bread in your preheated oven for 50-60 minutes. 3. Test for doneness using a toothpick. Insert it into the center. It should come out clean or with a few moist crumbs. This means your bread is perfect. To make your Triple Chocolate Zucchini Bread light and fluffy, follow these steps: - Use room temperature eggs. They blend better with other ingredients. - Do not overmix the batter. Mix until just combined. This keeps your bread airy. - Squeeze out extra moisture from the zucchini. This prevents a soggy loaf. For a beautiful presentation, slice the bread and place it on a nice platter. You can add fun garnishes, like: - A drizzle of melted chocolate on top. - Shavings of white chocolate for a fancy look. This bread pairs perfectly with: - A hot cup of coffee or tea. - A scoop of vanilla ice cream for a sweet treat. These simple touches make your dish look great and taste even better! {{image_4}} You can change the flavors in your triple chocolate zucchini bread. Adding nuts gives a nice crunch. Walnuts or pecans work well. You can also add spices for warmth. A pinch of cinnamon or nutmeg enhances the taste. Using different types of chocolate makes it fun. Try dark chocolate chips for a rich flavor. You can also mix in flavored chocolate, like orange or mint. Each variation brings a new twist to your bread. To make a healthier version, reduce the sugar. You can use unsweetened applesauce instead of some sugar. This keeps the bread moist and sweet. Another option is to use whole wheat flour. This adds fiber and nutrients. You can also try nut flours, like almond flour. These alternatives give a unique taste and boost nutrition. Experimenting with these variations can make your triple chocolate zucchini bread even more delightful! To keep your Triple Chocolate Zucchini Bread fresh, store it at room temperature. Wrap it in plastic wrap or place it in an airtight container. This keeps moisture in and helps prevent it from drying out. Aim to eat it within three days for the best taste. If you want to store it longer, refrigerate it. Place the bread in an airtight container or wrap it tightly in plastic wrap. It can last up to a week in the fridge. Just remember, refrigeration can change the texture a bit, making it slightly denser. To freeze your zucchini bread, let it cool completely first. Once cooled, wrap it tightly in plastic wrap. Then, place it in a freezer-safe bag or container. This keeps out air and helps prevent freezer burn. Your bread can last for up to three months in the freezer. When you’re ready to enjoy it, thaw the bread in the fridge overnight. For a warm treat, pop slices in the microwave for about 15 seconds. You can also use an oven set to 350°F (175°C) for about 10 minutes. Enjoy that fresh-baked taste again! Can I use frozen zucchini for this recipe? Yes, you can use frozen zucchini. Just thaw it first and drain excess water. This will help keep your bread from being too soggy. Fresh zucchini works great, but frozen is a good option too. How long does Triple Chocolate Zucchini Bread last? Triple chocolate zucchini bread can last for about 3 to 4 days at room temperature. Keep it in an airtight container to keep it fresh. You can also store it in the fridge for up to a week. What’s the difference between regular and chocolate zucchini bread? Regular zucchini bread is often flavored with spices like cinnamon and nutmeg. Chocolate zucchini bread uses cocoa powder and chocolate chips, which give it a rich, sweet taste. Both have the same moist texture, but the flavors are quite different. This blog post covered all you need for making Triple Chocolate Zucchini Bread. You learned about key ingredients like grated zucchini and chocolate chips. We explored substitutions and shared step-by-step baking instructions. Tips for texture and serving suggestions will enhance your bread. You can also try variations for flavor and health. Finally, we discussed storage options to keep it fresh. Happy baking! Enjoy your delicious, chocolatey twist on classic zucchini bread!

Triple Chocolate Zucchini Bread Flavorful Delight Recipe

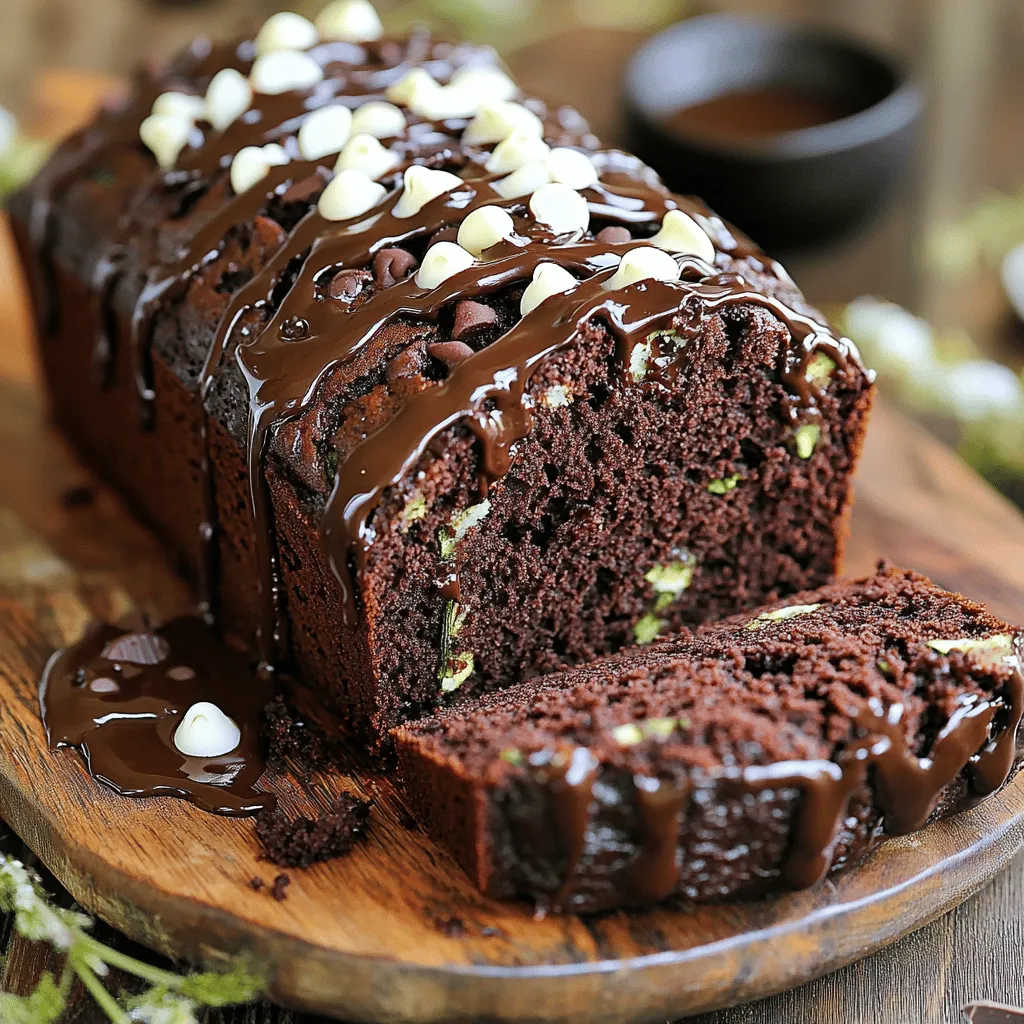
Welcome to the world of Triple Chocolate Zucchini Bread, where health meets indulgence! This tasty treat hides veggies, satisfying your

- 2 Ahi tuna steaks (approximately 6 oz each) - 1/4 cup mixed sesame seeds (black and white) - 1 tablespoon soy sauce - 1 tablespoon sriracha sauce - 1 tablespoon extra virgin olive oil - 1 teaspoon freshly grated ginger - 1 clove garlic, minced - Sea salt and freshly cracked black pepper to taste - 2 green onions, thinly sliced (for garnish) - 1 ripe avocado, thinly sliced (for serving) - 2 cups fresh mixed greens (for serving) - Additional herbs for garnish (cilantro, mint) - Avocado dressing or vinaigrette - Rich in Omega-3 fatty acids - High protein content - Low in calories Ahi tuna is a star in this dish. It’s not just tasty; it's also healthy. Ahi tuna gives you omega-3 fats, which are good for your heart. Each steak is packed with protein, which helps you feel full. Plus, it's low in calories, making it a great choice. The sesame seeds add a nice crunch. They also bring healthy fats and nutrients. Using both black and white seeds makes the dish look pretty too. The soy sauce and sriracha give a spicy and savory kick. Fresh ginger and garlic add depth to the flavor. Don’t forget the avocado! It’s creamy and balances the dish. Mixed greens add freshness and color. You can use any greens you like, such as spinach or arugula. For a special touch, you can add herbs like cilantro or mint. A drizzle of vinaigrette or avocado dressing can enhance the flavors even more. This dish is not just quick; it's also colorful and full of flavor. - Combine marinade ingredients in a bowl. - Marinate Ahi tuna steaks for 15 minutes. Start by mixing the soy sauce, sriracha, olive oil, ginger, garlic, sea salt, and black pepper in a small bowl. Whisk until smooth. This mixture adds a spicy kick and depth to the tuna. After mixing, place your Ahi tuna steaks in a shallow dish. Pour the marinade over them, making sure they are well coated. Let them soak up the flavors for about 15 minutes. - Press tuna steaks into sesame seeds. - Sear tuna steaks in a skillet for 1-2 minutes per side. - Rest and slice the tuna against the grain. Once the tuna has marinated, take it out and press each steak into the mixed sesame seeds. This creates a nice crust. Next, heat a non-stick skillet over medium-high heat. Drizzle a bit of olive oil into the pan. Carefully add the sesame-crusted tuna steaks. Cook them for about 1 to 2 minutes on each side. This gives a nice sear, while keeping the inside rare. After cooking, let the tuna rest for about a minute. Then, slice it thinly against the grain to keep it tender. - Arrange mixed greens and avocado on plates. - Garnish with green onions. For a beautiful plate, start by placing a handful of fresh mixed greens on each plate. Next, add thin slices of ripe avocado beside the greens. Finally, fan out the sliced Ahi tuna on top. To finish, sprinkle thinly sliced green onions over the dish. This adds color and a burst of flavor. Enjoy your spicy sesame crusted Ahi tuna! For the perfect sear on your Ahi tuna, the cooking time is key. Sear each side for 1-2 minutes for a rare finish. If you prefer it more cooked, add 30 seconds to each side. Keep a close eye while cooking. Overcooking can dry out the tuna. The goal is a warm center with a nice crust. To prevent overcooking, make sure your skillet is hot before adding the tuna. This helps create a quick sear, locking in moisture. Use a non-stick skillet to ensure a smooth flip. Trust me, a little patience goes a long way here! Marinating Ahi tuna is easy. Combine soy sauce, sriracha, olive oil, ginger, and garlic. Let the tuna soak for 15 minutes. This time allows the flavors to seep in without overpowering the fish. If you want to switch things up, try different marinades. You can substitute soy sauce with tamari for a gluten-free option. Add some lime juice for a zesty kick, or swap sriracha for a sweeter sauce like teriyaki. A beautiful plate makes food more appealing. For an elegant look, layer your Ahi tuna in a fan shape on a large white dish. This lets the colors pop. Next, add avocado slices on the side. The green from the avocado pairs well with the pink tuna. For an extra touch, drizzle any leftover marinade over the mixed greens. This adds flavor and makes the dish visually appealing. Remember, we eat with our eyes first! {{image_4}} You can make the Spicy Sesame Crusted Ahi Tuna even more exciting. One way is to add extra chili flakes to the sesame crust. This gives your tuna an extra kick. If you prefer sweetness, try a sweet sesame variant. Just add a hint of honey to the marinade. This balances the heat and adds a nice flavor. Serving Ahi tuna with different greens can change the meal. You can use arugula for a peppery taste or spinach for a mild flavor. Pairing the tuna with jasmine rice is also a great idea. The soft rice soaks up the juices, making every bite delicious. For those who need gluten-free options, use tamari instead of soy sauce. This keeps all the flavor without the gluten. If you want a vegan alternative, try using tofu instead of tuna. Press the tofu to remove water and follow the same steps for marinating and searing. This way, everyone can enjoy a tasty meal! To keep your spicy sesame crusted Ahi tuna fresh, store it in the fridge. Use an airtight container for best results. Place a piece of parchment paper between the tuna and the lid to absorb moisture. This method helps maintain flavor and texture. You can safely consume leftovers for up to two days. After that, the quality may decline. Always check for any off smells or changes in texture before eating. When reheating Ahi tuna, aim to keep it moist. The best way is to use the stovetop. Heat a non-stick pan over low heat. Add a drop of oil and place the tuna in the pan. Heat for just a minute on each side. This method helps preserve the texture. Avoid using the microwave, as it can dry out the tuna. If you must use it, cover the tuna with a damp paper towel to keep moisture in. Yes, you can freeze raw Ahi tuna. Wrap each steak tightly in plastic wrap. Then place them in a freezer bag. This prevents freezer burn and keeps them fresh. You can safely freeze raw tuna for up to three months. For cooked tuna, wait until it cools completely. Wrap it in plastic wrap and then in foil. This helps to keep the flavors intact. Cooked tuna can be frozen for up to one month. Always label your bags with the date for easy tracking. I love searing Ahi tuna. Searing gives a nice crust. It locks in flavor and keeps the inside tender. Grilling is another option. It adds a smoky taste. However, grilling can dry out the fish if not watched closely. For perfect searing, heat your skillet until it's hot. Then, add a little olive oil. Cook each side for 1-2 minutes. Adjust time for your doneness preference. Always remember, Ahi tuna is best served rare or medium-rare. Yes, Ahi tuna can be eaten raw. In fact, sushi-grade Ahi tuna is safe to eat raw. Sushi-grade means it meets high standards for freshness. You can find it at fish markets or specialty stores. Always ask your fishmonger about its quality. If you are unsure, you can freeze it first to kill any parasites. This step adds safety for raw consumption. Enjoy it in sushi or sashimi for the best experience. When choosing Ahi tuna, look for bright color. Fresh Ahi has a deep red hue. It should feel firm to the touch, not mushy. A fresh fish will also have a clean, ocean-like smell. Avoid any fish that smells strong or off. For sustainability, check for eco-friendly labels. Look for tuna caught using sustainable methods. This choice helps protect our oceans. I recommend serving Ahi tuna with fresh mixed greens. They add crunch and freshness. You can also add slices of ripe avocado for creaminess. For a light touch, a citrus vinaigrette enhances the dish. Regarding wine, a crisp white wine works well. A Sauvignon Blanc or a light Pinot Grigio pairs nicely. This combination balances the spice of the tuna. Enjoy your meal! You can create a delicious Spicy Sesame Crusted Ahi Tuna dish using simple ingredients and easy steps. Marinating tuna adds great flavor, and searing gives it a tasty crust. Remember to include fresh greens and avocado for a healthy touch. With its rich Omega-3s and protein, this meal benefits your diet. Whether you enjoy it like this or try different flavor twists, it’s sure to impress. Enjoy experimenting with this dish in your kitchen! Your taste buds will thank you.

Spicy Sesame Crusted Ahi Tuna Flavorful and Quick Dish

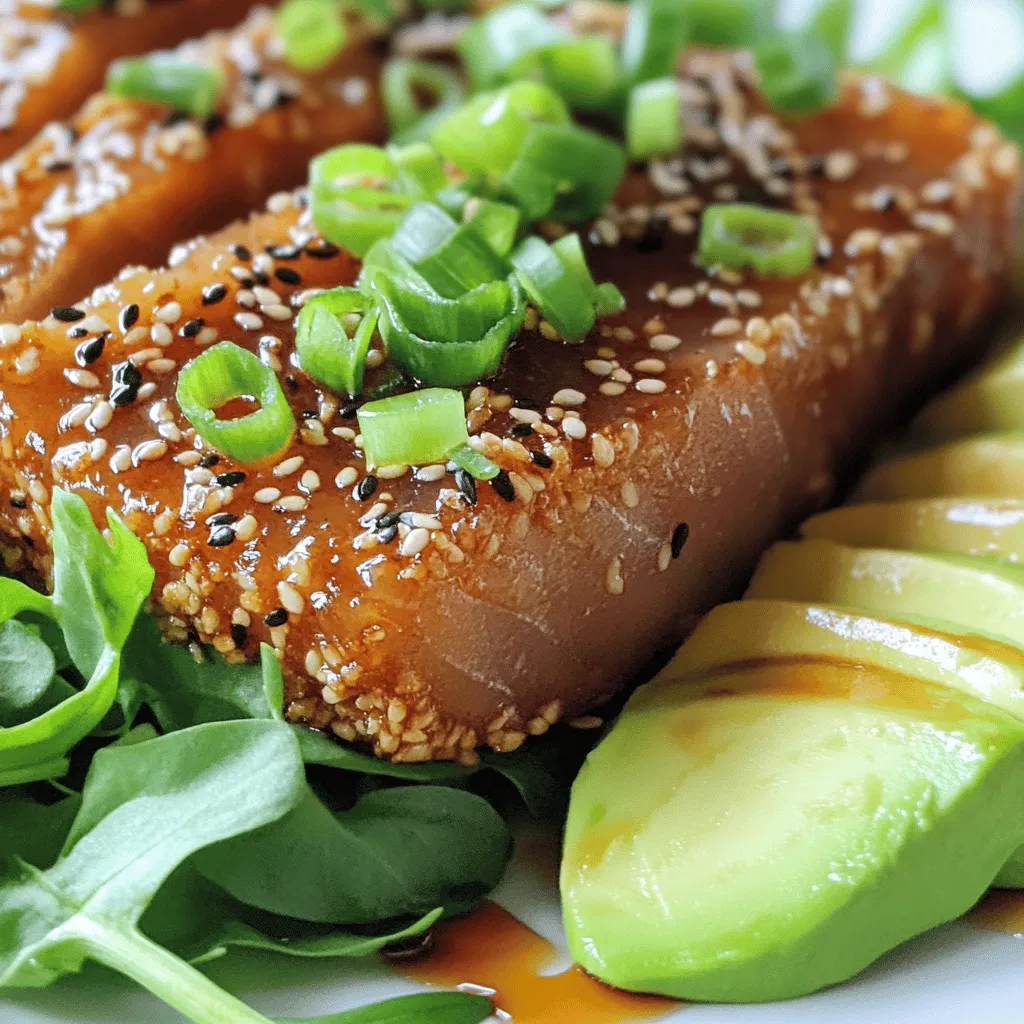
Looking for a quick and tasty dish? I’ve got the perfect recipe for you: Spicy Sesame Crusted Ahi Tuna. This

- 12 oz pasta (penne or fettuccine) - 2 large red bell peppers, roasted - 1 cup heavy cream (or coconut cream for a vegan option) For this dish, the main ingredients set a strong base. The pasta is your canvas. I love using penne or fettuccine. They hold the sauce well and give each bite a creamy texture. The roasted red peppers bring a sweet and smoky flavor. You can roast them yourself or use jarred ones if you're in a hurry. The heavy cream adds richness. If you want a vegan option, coconut cream works great too. - 1 small onion, diced - 2 cloves garlic, minced - 1 teaspoon smoked paprika - Salt and black pepper to taste Aromatics are key to flavor. Diced onion adds sweetness. I sauté it until soft. Garlic brings a punch, so I mix it in just before the onion is done. Smoked paprika adds depth. It gives the sauce a warm taste. Always taste and adjust with salt and black pepper. This step makes the dish pop. - ¼ cup grated Parmesan cheese (omit for vegan) - Fresh basil leaves for garnish - 1 tablespoon olive oil Toppings make everything better. Grated Parmesan cheese adds a salty kick. If you're vegan, just skip this step. Fresh basil leaves bring brightness and color. I love a drizzle of olive oil for a smooth finish. It ties all the flavors together and makes the dish look inviting. - Preheat the oven to 450°F (230°C). - Place whole red bell peppers on a baking sheet. - Roast for about 20-25 minutes until the skin is charred and blistered. - After roasting, cover the peppers with foil for 10 minutes. - This steams them and makes peeling easier. - Once cooled, peel off the skin and remove the seeds. - In a large pot, bring salted water to a boil. - Add 12 oz of pasta, like penne or fettuccine. - Cook according to package instructions until al dente. - Reserve ½ cup of the pasta water before draining. - In a skillet, heat 1 tablespoon of olive oil over medium heat. - Add 1 small diced onion and sauté until soft. - This takes about 5 minutes. - Next, add 2 minced cloves of garlic. - Sauté for another minute until fragrant. - In a blender, combine the roasted red peppers with the sautéed onion and garlic. - Add 1 cup of heavy cream and blend until smooth. - Season with salt and black pepper to taste. - Blend again to ensure the seasoning is mixed well. - Pour the sauce back into the skillet over low heat. - If the sauce is too thick, stir in some reserved pasta water. - Add ¼ cup of grated Parmesan cheese if desired. - Mix until well combined and melted. - Toss the drained pasta into the sauce, coating it evenly. - Plate the creamy pasta and garnish with fresh basil leaves. - Serve immediately for the best flavor and enjoyment. To make the sauce creamier, add more heavy cream. If you want a vegan option, use coconut cream instead. You can also play with spices. For extra warmth, try adding a bit of cayenne pepper. Want a hint of sweetness? Just add a pinch of sugar. I love using penne or fettuccine for this dish. Both types hold the sauce well. Other choices include rigatoni or farfalle. To get the perfect al dente pasta, cook it until it's firm to the bite. Follow the package instructions closely and taste it a minute or two before the time is up. Roasting red peppers is key for flavor depth. The charred skin gives a rich taste. Roast them until they blister. This process brings out their natural sweetness. For the aromatics, sauté the onion until it's soft. This step builds a solid flavor base. Add garlic last to keep it fragrant and golden. {{image_4}} To make this dish vegan, you can swap heavy cream for coconut cream. Coconut cream adds a rich flavor and silky texture. Simply blend it with the roasted peppers and spices. Omit the Parmesan cheese for a fully vegan meal. This makes the dish creamy without losing taste. Want to boost your meal? Add protein! Grilled chicken or shrimp pairs well with the sauce. Cook them separately and toss them in with the pasta. You can also use chickpeas for a plant-based option. They add a nice texture and protein kick. Add more veggies for extra nutrition. Spinach or kale can be stirred in at the end. They wilt nicely in the warm pasta. Zucchini is another great choice. Sauté it with the onions for added flavor. This way, you make the dish healthier but still tasty. To store creamy roasted red pepper pasta, let it cool first. Place it in an airtight container. This keeps the pasta fresh. You can refrigerate it for up to three days. Make sure to store any sauce separately if possible. This will help keep the pasta from getting soggy. When you reheat the pasta, do it slowly on the stove. Add a splash of water or cream to help it stay creamy. Stir often to heat evenly and avoid burning. If you use a microwave, cover it loosely. Heat in short bursts and stir in between. This keeps the flavor and texture nice. You can freeze creamy roasted red pepper pasta, too! Portion it out into freezer-safe containers. Leave some space at the top for expansion. It will last for about two months in the freezer. To defrost, move it to the fridge overnight before reheating. This helps keep the flavor fresh when you enjoy it later. Yes, you can use jarred roasted red peppers. They save time and are easy to find. However, jarred peppers may taste different. Freshly roasted peppers have a deeper, smokier flavor. If you use jarred peppers, rinse them first to remove excess brine. This helps to balance the taste in your sauce. I suggest a fresh salad to brighten your meal. A simple green salad with lettuce, cucumber, and a light vinaigrette works well. Garlic bread is also a great side. The crunchy bread complements the creamy pasta. If you want protein, grilled chicken or shrimp pairs nicely too. You can add roasted vegetables like zucchini or asparagus for extra flavor. To make creamy roasted red pepper pasta gluten-free, choose gluten-free pasta. Many brands offer good options like rice or chickpea pasta. Just cook the pasta according to package instructions. The rest of the recipe stays the same. This way, you still get the same delicious taste without gluten. This blog post covered how to make creamy roasted red pepper pasta step by step. We talked about ingredients, cooking techniques, and ways to customize the dish. Remember, you can use vegan options or add protein like chicken or chickpeas. Store leftovers properly, and don’t forget to reheat carefully. This dish is both satisfying and versatile, making it perfect for any meal. Try it out and enjoy your delicious creation!

Creamy Roasted Red Pepper Pasta Rich and Flavorful Dish

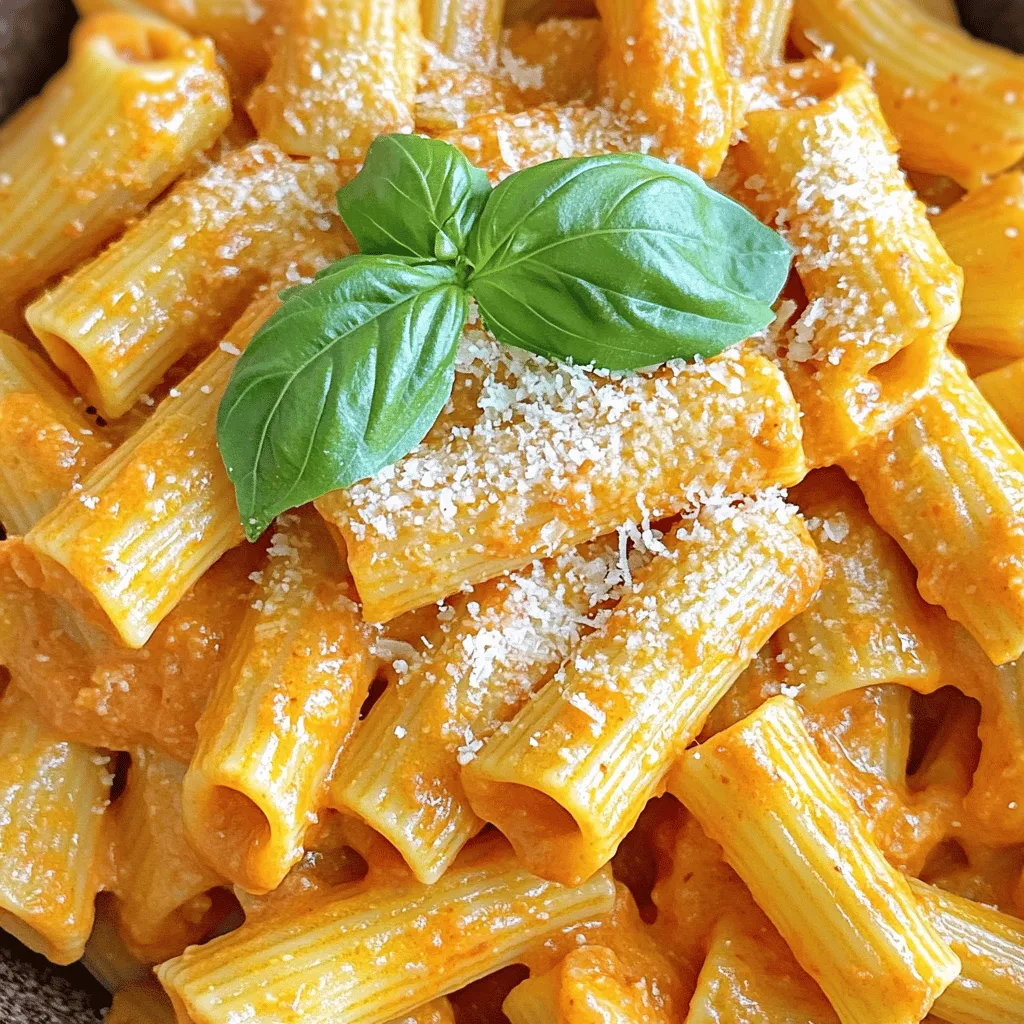
Are you ready to thrill your taste buds? My creamy roasted red pepper pasta is the ultimate comfort dish. With

- 1 ½ cups graham cracker crumbs - 1/4 cup granulated sugar - 1/3 cup unsalted butter, melted - 2 (8 oz) packages cream cheese, softened at room temperature - 1 cup granulated sugar - 1 teaspoon vanilla extract - 2 large eggs, at room temperature - 2 medium apples, peeled, cored, and diced - 1 teaspoon ground cinnamon - 1/4 cup caramel sauce (plus extra for drizzling) - A pinch of salt To make these caramel apple cheesecake bars, start with simple ingredients. You need graham cracker crumbs for the crust. Mixing them with sugar and melted butter gives a delightful base. Next, cream cheese is key for the filling. Use two packages, softened to room temp for smooth mixing. You will also add sugar, vanilla, and two eggs for a rich taste. Don't forget the apples! Peel and dice two medium ones. I like Granny Smith or Honeycrisp for their crispness and flavor. A sprinkle of cinnamon adds warmth and spice. Lastly, a touch of caramel sauce brings sweetness. Make sure to reserve some for drizzling on top! A pinch of salt rounds out the flavors perfectly. With these ingredients, you set the stage for a delicious dessert. - Preheat your oven to 325°F (163°C). - Line an 8x8-inch baking pan with parchment paper. - Combine graham cracker crumbs, 1/4 cup granulated sugar, and 1/3 cup melted butter. - Press the mixture into the bottom of the prepared baking pan. - Bake for 10 minutes and let it cool slightly. - Beat 2 packages of softened cream cheese until smooth. - Gradually add 1 cup of granulated sugar and mix until smooth. - Incorporate 1 teaspoon of vanilla extract and 2 large eggs, mixing well. - Gently fold in 2 diced apples and 1 teaspoon of ground cinnamon. - Add 1/4 cup of caramel sauce and a pinch of salt, mixing gently. - Pour the filling over the pre-baked crust. - Bake for 30-35 minutes until the edges are set. - Let the cheesecake cool to room temperature. - Chill in the refrigerator for at least 2 hours before serving. Using room temperature ingredients is key. It helps the cream cheese mix smoothly. This step makes the filling creamy and rich. Always take your eggs and cream cheese out ahead of time. It makes mixing easier. Also, avoid overmixing the filling. Too much mixing can add air and make the bars fluffy. You want a dense, creamy texture that holds its shape. Granny Smith and Honeycrisp apples work best for this dessert. Their tartness balances the sweet cheesecake. Granny Smith apples add a nice crunch. Honeycrisp apples bring a juicy sweetness. The texture of the apples matters too. Diced apples should be firm, not mushy. This keeps the bars from becoming too wet. Serving the bars well makes them more tempting. Arrange the cheesecake bars on a pretty platter. Add thin slices of fresh apple on top for color. A dusting of ground cinnamon adds a nice touch. For a fun twist, drizzle extra caramel sauce on each bar. You can also place small bowls of caramel on the side. This way, guests can enjoy dipping their bars! {{image_4}} You can mix in other fruits for unique flavors. Try using pears for a softer bite. Berries like raspberries or blueberries add a nice tartness. Each fruit brings its own taste and texture. Just remember to adjust the amount to keep the balance. If you need a gluten-free option, use gluten-free graham cracker crumbs. You can also use almond flour mixed with a little sugar and melted butter for the crust. This keeps the bars tasty and safe for gluten-sensitive eaters. For a lighter version, swap cream cheese with Greek yogurt. It adds creaminess but cuts calories. You can also use honey or maple syrup instead of sugar. These natural sweeteners can enhance the flavor and give a healthier twist. To keep your caramel apple cheesecake bars fresh, store them properly. First, let the bars cool completely to room temperature. Then, slice them into squares. Place the squares in an airtight container. You can also use plastic wrap to cover them tightly. This helps prevent drying out. For longer storage, freeze the bars. Wrap them well in plastic wrap or foil, then place them in a freezer bag. In the fridge, these bars will stay fresh for up to five days. They taste best when enjoyed within this time. If you freeze them, they can last up to three months. Just make sure they are well-wrapped to avoid freezer burn. When you are ready to eat them, thaw them in the fridge overnight. To enjoy your cheesecake bars warm, you can reheat them in the oven. Preheat your oven to 300°F (150°C). Place the bars on a baking sheet. Heat for about 10 to 15 minutes. This gently warms them without drying them out. If you prefer the microwave, heat them for 10 to 15 seconds. Keep an eye on them to avoid overcooking. A warm caramel drizzle on top makes them even better! Yes, you can make these bars ahead of time. I recommend preparing them one day before you plan to serve. This allows the flavors to meld and improves the taste. After baking and chilling, simply cover them tightly with plastic wrap. Store them in the refrigerator until you are ready to serve. You can use a vegan cream cheese. Brands like Tofutti or Kite Hill work well. Keep in mind that the flavor and texture may change slightly. The bars may be less creamy but still delicious. Adjust your expectations for the final taste. Both homemade and store-bought caramel sauces are great options. Homemade sauce offers a rich flavor, but it requires more time. If you’re short on time, a store-bought caramel works just fine. Look for one that has simple ingredients for the best taste. Yes, chilling is crucial for flavor and texture. It helps the bars set properly. A cool cheesecake is easier to cut and will hold its shape better. Chilling them for at least two hours ensures they taste their best. The edges should look set while the center remains slightly jiggly. This means the bars will firm up as they cool. Avoid overbaking, as this can lead to a dry texture. Trust your instincts; they will look perfect when they are ready! You can create delicious Caramel Apple Cheesecake Bars with just a few steps. We covered the ingredients, the process, and tips for the best results. Remember to use fresh apples and room temperature ingredients for great texture. Try adding other fruits or making gluten-free versions to switch things up. Store leftovers properly for enjoyment later. Baking is fun, so enjoy each bite of your tasty bars!

Caramel Apple Cheesecake Bars Delightful Dessert Treat

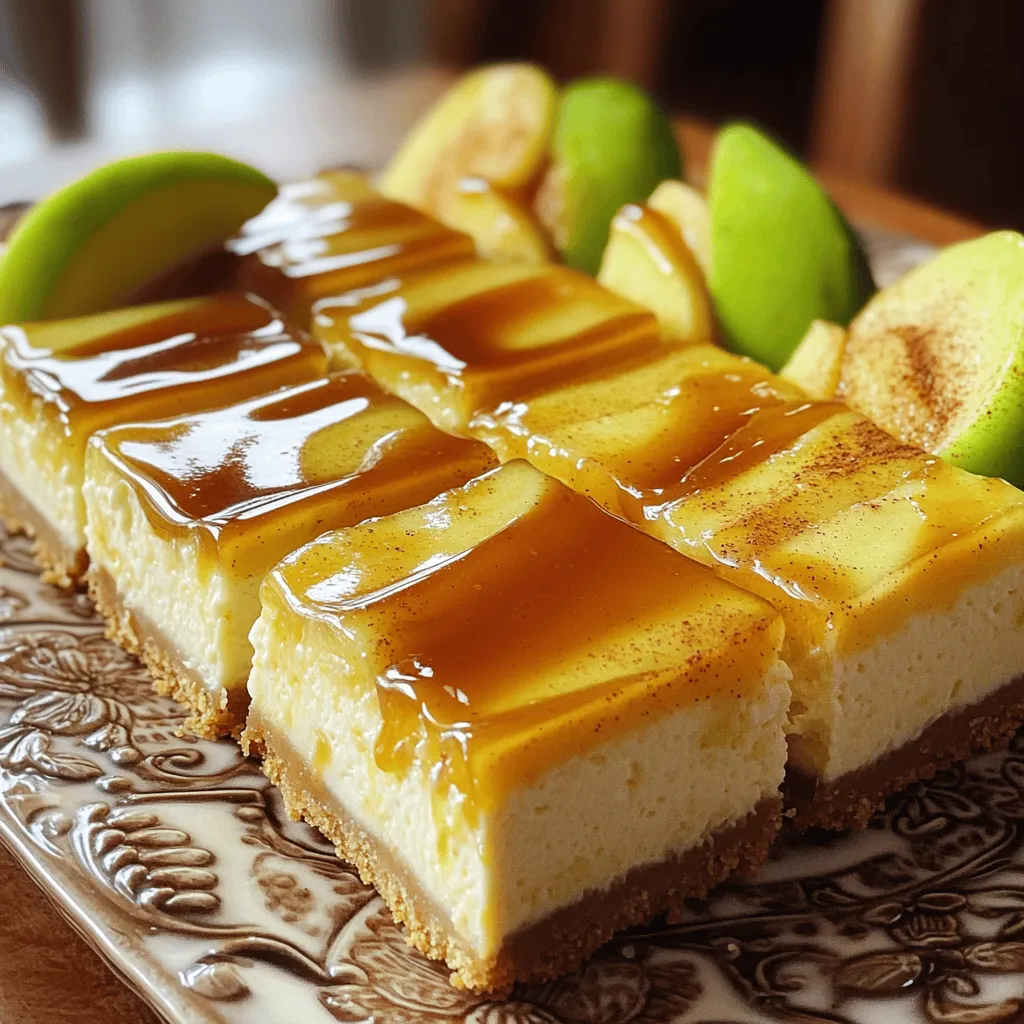
Ready to treat your taste buds? These Caramel Apple Cheesecake Bars are a delightful mix of creamy cheesecake, tart apples,

- 2 boneless, skinless chicken breasts - 1 cup jasmine rice - 1 ½ cups chicken broth - 1 cup black beans, rinsed and drained - 1 cup cherry tomatoes, halved - 1 ripe avocado, diced - 1 cup corn (fresh, frozen, or canned) - 1 lime, zested and juiced - ½ cup fresh cilantro, finely chopped - 2 tablespoons extra virgin olive oil - 1 teaspoon ground cumin - 1 teaspoon garlic powder - Sea salt and freshly cracked black pepper, to taste - Optional toppings: sour cream, sliced jalapeños, additional cilantro When making cilantro lime chicken burrito bowls, you need fresh ingredients. Each one adds flavor and texture. The chicken breasts are tender and juicy, making them the star of the dish. Jasmine rice serves as a fluffy base, soaking up all the flavors. Black beans add protein and fiber. Cherry tomatoes bring a burst of color and sweetness. Diced avocado adds creaminess and healthy fats. Corn gives a nice crunch, whether fresh or frozen. The lime juice and zest brighten the whole dish. Fresh cilantro adds a fragrant touch. Olive oil helps the marinade stick to the chicken, enhancing its taste. For seasoning, ground cumin and garlic powder provide warmth and depth. Don't forget sea salt and black pepper! They balance all the flavors perfectly. Optional toppings like sour cream or jalapeños can make your bowl even better. They let you customize each serving. Enjoy building your burrito bowl with these fresh ingredients! To start, you'll want to marinate the chicken. In a medium bowl, mix together 2 tablespoons of olive oil, the juice and zest of 1 lime, 1 teaspoon of ground cumin, 1 teaspoon of garlic powder, and a pinch of sea salt and black pepper. Whisk these together until well combined. Next, add the 2 boneless, skinless chicken breasts to the bowl. Make sure they are fully coated in the marinade. Cover the bowl and place it in the fridge for at least 30 minutes. If you have more time, letting it sit for up to 2 hours will boost the flavor. Now, let’s cook the jasmine rice. Start by rinsing 1 cup of jasmine rice under cold running water. You want the water to run clear. This step helps remove excess starch and makes the rice fluffy. In a medium saucepan, bring 1 ½ cups of chicken broth to a rolling boil. Once boiling, add the rinsed rice. Cover the pot with a lid and reduce the heat to low. Let the rice simmer for 15 to 18 minutes until it’s tender and the liquid is absorbed. After that, remove it from heat and fluff it gently with a fork. Set the rice aside and let it cool. While the rice cools, it’s time to grill the chicken. Preheat your grill or grill pan to medium-high heat. Once hot, take the chicken out of the marinade and place it on the grill. Cook the chicken for about 6 to 7 minutes on each side. You want it to reach an internal temperature of 165°F. Once it’s done, remove the chicken from the grill. Let it rest for about 5 minutes before slicing it into strips. This makes the chicken juicy and tender. Now comes the fun part—assembling your bowls! Take four individual serving bowls and evenly distribute the cooked jasmine rice as the base. On top of the rice, add portions of 1 cup of black beans, 1 cup of corn, and 1 cup of halved cherry tomatoes. Next, layer in the diced avocado and the sliced grilled chicken. This colorful mix not only looks good but also tastes amazing. For the final touch, sprinkle each bowl with ½ cup of finely chopped fresh cilantro. Squeeze some fresh lime juice over the top for a zesty flavor. You can also add optional toppings like sour cream or sliced jalapeños to customize your bowl. For a beautiful presentation, arrange the ingredients in distinct sections. Serve with lime wedges on the side, inviting everyone to add a splash of freshness! To get the best flavor from your cilantro lime chicken, marinate the chicken for at least 30 minutes. I prefer to let it sit for up to 2 hours. This deepens the flavor as the spices and lime juice soak in. Grilling is key. Preheat your grill to medium-high heat. This helps seal in the juices and gives a nice char. Cook the chicken for 6-7 minutes on each side. Use a meat thermometer to check for 165°F to ensure perfect doneness. These bowls are great on their own, but you can add extra fun toppings. Consider using: - Sour cream for creaminess - Sliced jalapeños for heat - Extra cilantro for freshness - Shredded cheese for richness Pair your bowl with tortilla chips for some crunch or a side of pico de gallo for added flavor. Make your bowls look inviting! Arrange the ingredients in colorful sections. Start with a base of rice and layer on the beans, corn, tomatoes, and avocado. Place the sliced chicken on top for a nice finish. Add lime wedges on the side. This invites your guests to add a fresh squeeze right before eating. A great way to make your meal pop is to use a wide, shallow bowl. It shows off all the colors beautifully! {{image_4}} You can swap chicken for many proteins. Here are some great choices: - Tofu: Use extra-firm tofu for a plant-based option. Press it to remove moisture, then marinate and grill just like chicken. - Shrimp: Shrimp cooks fast and adds a nice flavor. Grill or sauté until pink and opaque. - Ground turkey: Season and cook it in a skillet. It’s lean and works well in the bowl. - Tempeh: This fermented soy product adds a nutty taste. Marinate and grill for a hearty texture. Switching up the rice can add more flavor and nutrition. Try these options: - Quinoa: This grain cooks quickly and is high in protein. Use the same broth to cook it. - Brown rice: A whole grain that adds fiber. It takes longer to cook, so adjust the time. - Cauliflower rice: A low-carb choice. Sauté it in a pan for a few minutes until tender. - Farro: It has a chewy texture and nutty flavor. Cook it in broth for added taste. Toppings can elevate your burrito bowls. Here are fun ideas: - Sour cream: Adds creaminess and tang. Greek yogurt is a great swap for health. - Sliced jalapeños: For heat, add fresh or pickled jalapeños. - Cheese: Crumbled feta or shredded cheddar can add a salty bite. - Pico de gallo: Fresh tomato salsa brings zest to the dish. - Olives: Sliced black or green olives add a briny flavor. Feel free to mix and match these options to create your perfect bowl! Store your leftover cilantro lime chicken burrito bowls in airtight containers. Keep them in the fridge for up to three days. This helps keep the flavors fresh. Make sure the chicken is in a separate container if you want it to stay juicy. Avoid letting the rice sit too long to prevent it from drying out. To freeze, separate the components. Place the chicken, rice, and toppings in their own containers. Use freezer-safe bags or containers. The chicken and rice can last in the freezer for up to three months. Just remember to cool them completely before freezing. This prevents ice crystals from forming. For reheating, use the microwave or stovetop. If using a microwave, heat in short bursts. Stir in between to ensure even warming. For stovetop, add a splash of water to the pan. This keeps the rice moist. Aim for an internal temperature of 165°F for the chicken. Enjoy your meal as if it was just made! To make cilantro lime chicken burrito bowls, follow these steps: 1. Marinate the chicken with olive oil, lime juice, cumin, garlic powder, salt, and pepper. 2. Cook jasmine rice in chicken broth until tender. 3. Grill the marinated chicken until it reaches 165°F, then slice it. 4. Assemble the bowls with rice, black beans, corn, tomatoes, avocado, and chicken. 5. Garnish with cilantro and lime juice before serving. You can substitute chicken with: - Tofu - Shrimp - Beef - Pork - Tempeh - Seitan To make these bowls healthier, try these tips: - Use brown rice instead of jasmine rice for more fiber. - Add more veggies like bell peppers or spinach. - Use grilled fish instead of chicken for a lighter option. - Skip high-calorie toppings like sour cream. Leftovers will last in the fridge for 3 to 4 days. Store them in an airtight container. Make sure to let them cool before sealing. Yes, you can prepare this dish in advance. Here are some tips: - Marinate the chicken a day ahead for better flavor. - Cook the rice and beans in advance and store separately. - Assemble the bowls just before serving to keep ingredients fresh. In this post, we covered the key ingredients for making cilantro lime chicken burrito bowls. I shared step-by-step instructions, cooking tips, and ways to personalize your dish. Remember, you can swap proteins or grains easily. Store leftovers properly for future meals. This dish offers great flavor and nutrition while being flexible to fit your taste. Enjoy crafting these bowls that fill your belly and delight your senses. Happy cooking!

Cilantro Lime Chicken Burrito Bowls Flavorful Meal Prep

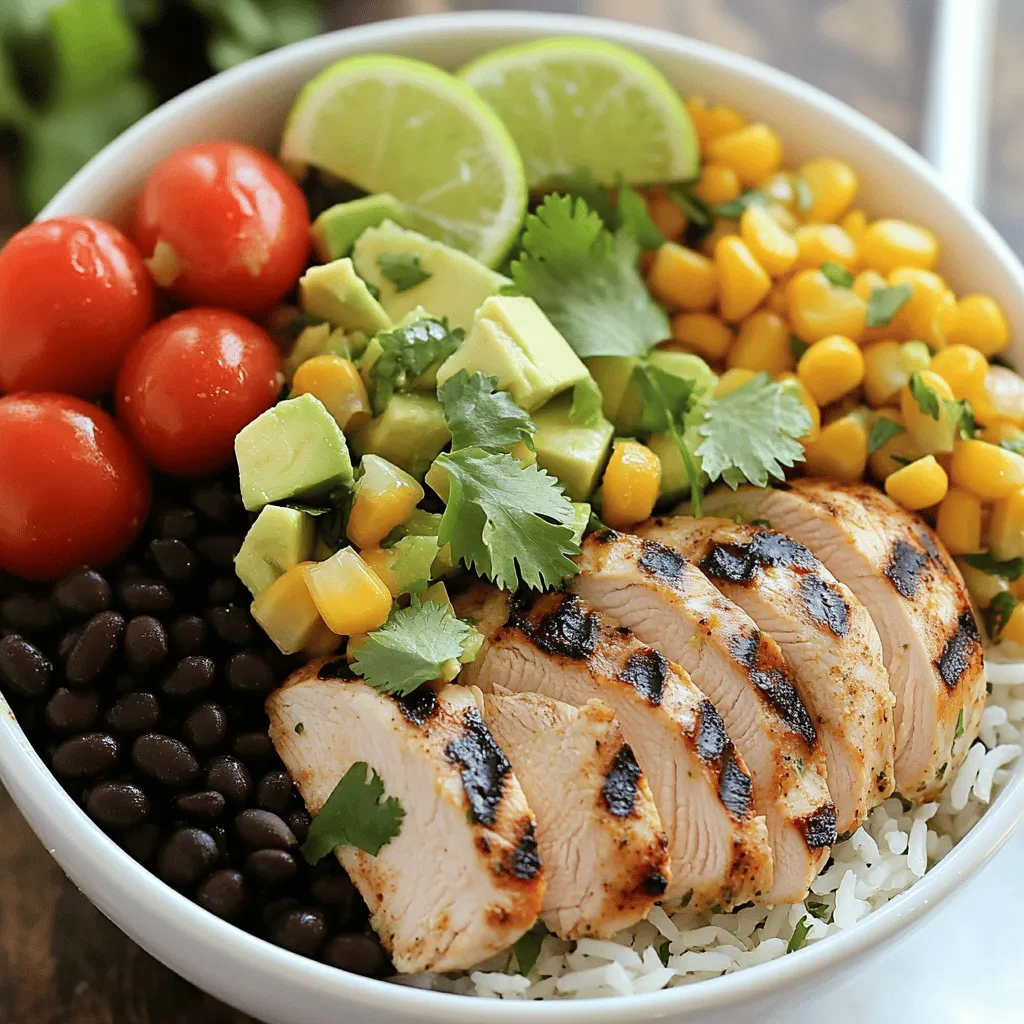
Looking for a meal prep that’s quick, tasty, and packed with flavor? Let me introduce you to Cilantro Lime Chicken

Older posts
Newer posts
← Previous Page1 … Page35 Page36 Page37 … Page83 Next →

dsad

© 2026 eataroundit • Built with GeneratePress

Our Policies

  • Copyright Policy
  • Cookie Policy
  • GDPR Policy
  • Privacy Policy
  • Disclaimer
  • Terms Of Use

More Information

  • Home
  • About
  • Contact
  • Appetizers
  • Dessert
  • Dinner
  • Drinks
©2026, eataroundit About Back To Top