Skip to content
DisclaimerTerms Of UseGDPR PolicyCookie Policy

eataroundit

  • Home
  • Drinks
  • Appetizers
  • Dinner
  • Dessert
  • About
  • Contact
  • Privacy Policy
DisclaimerTerms Of UseGDPR PolicyCookie Policy

NO-ING-IMG

- 1 cup canned pumpkin puree - 8 oz cream cheese, softened - 1/2 cup powdered sugar - 1/2 cup packed brown sugar - 1 teaspoon pure vanilla extract - 1 teaspoon ground cinnamon - 1/2 teaspoon ground nutmeg - 1/4 teaspoon ground ginger - 1/2 cup whipped cream (optional) - Gingersnap cookies for dipping Gather these simple ingredients to create your Pumpkin Cheesecake Dip. The pumpkin puree gives it a rich flavor. The cream cheese adds creaminess, while the sugars sweeten it up. Vanilla extract brings warmth, and spices like cinnamon, nutmeg, and ginger add depth. Using whipped cream is optional but makes the dip lighter. Don’t forget the gingersnap cookies for dipping. They add a spicy crunch that perfectly complements the dip. - Combine 8 oz of softened cream cheese and 1 cup of canned pumpkin puree. - Blend until the mix is smooth and creamy. This step is key for a great dip. - Gradually add 1/2 cup of powdered sugar and 1/2 cup of packed brown sugar. - Mix until everything is silky and fully integrated. Don’t rush; scraping the bowl helps. - Include 1 teaspoon of pure vanilla extract, 1 teaspoon of ground cinnamon, 1/2 teaspoon of ground nutmeg, and 1/4 teaspoon of ground ginger. - Mix again on low speed until all spices blend well. This will enhance the flavor. - If you want a lighter dip, fold in 1/2 cup of whipped cream gently. - Transfer the dip to a serving bowl and chill. Let it sit for at least 30 minutes. This helps flavors meld. To avoid lumps in your dip, use room-temperature cream cheese. Cold cream cheese mixes poorly. Blend the cream cheese and pumpkin puree well until smooth. An electric mixer works best for this task. Scrape down the sides of the bowl often to catch any lumps. For folding in whipped cream, use a spatula. Gently lift the cream from the bottom and fold it over the dip. This method keeps the dip light and fluffy. Don't stir too hard; you want to keep that airy texture. To enhance flavor, consider adding more spices. A pinch of allspice or cloves can bring warmth. You can also adjust the sweetness by adding more powdered sugar or brown sugar to taste. Start with small amounts and mix before tasting. Each person has a different preference, so make it yours! Serve your pumpkin cheesecake dip in a charming bowl. A light dusting of cinnamon on top adds visual appeal. Arrange whole gingersnap cookies around the edges. This makes it look inviting and fun! Present extra gingersnaps on the side for endless dipping. It's perfect for sharing at parties! {{image_4}} You can make this dip dairy-free or vegan with simple swaps. Use a dairy-free cream cheese instead of regular cream cheese. Look for brands that offer a creamy texture. You can also replace whipped cream with coconut cream. Just chill a can of coconut milk, scoop out the cream, and whip it up. These changes keep the dip rich and tasty. Feel free to get creative with flavors! You can play with different spices. Try adding cardamom or allspice for a unique twist. If you love chocolate, swirl in some melted dark chocolate. For a sweet touch, drizzle caramel on top. These small changes can transform the dip into something new and exciting. While gingersnaps are classic, other options work great too. Try using graham crackers for a sweeter bite. Apples and pears add a fresh crunch. You can even use pretzels for a salty twist. Each choice adds a different flavor that makes the dip even more fun to enjoy. To keep your pumpkin cheesecake dip fresh, store it in an airtight container. This will help prevent any strong odors from the fridge getting into your dip. If you use plastic wrap, make sure it touches the dip's surface to keep moisture in. This way, the dip stays creamy and tasty. You can store it in the fridge for up to five days. Can you freeze pumpkin cheesecake dip? Yes, you can! Freezing the dip is a great way to save it for later. To do this, transfer the dip into a freezer-safe container. Leave some space at the top, as it may expand when frozen. When you are ready to enjoy the dip again, thaw it in the fridge overnight. After it thaws, give it a good stir to bring back its creamy texture. If it seems a bit thick, you can mix in a little whipped cream for a fluffier feel. Serve it with fresh gingersnap cookies for a delightful treat! Pumpkin cheesecake dip lasts about 3 to 5 days in the fridge. To keep it fresh, store it in an airtight container. If you notice any change in smell or texture, it’s best to toss it. Yes, you can make the dip ahead of time. This dip is great when made a day before. Just cover it and chill it in the fridge. Letting it sit allows the flavors to blend well. You can substitute with other cookies like graham crackers or speculoos biscuits. If you want something healthier, use apple slices or pretzels. Each option gives a unique taste to the dip. Yes, this recipe can be made gluten-free. Use gluten-free gingersnap cookies or any gluten-free alternative. Always check labels to ensure no gluten is present in your ingredients. This pumpkin cheesecake dip combines simple ingredients for big flavor. You start by blending pumpkin with cream cheese, then add sugars and spices. Don't forget tips for perfecting the texture and presenting your dip. Variations let you swap ingredients for a fun twist. In the end, this dip is versatile and easy. You can serve it at any gathering. Enjoy every creamy bite with gingersnaps or your favorite snack! It’s a treat you won't want to miss.

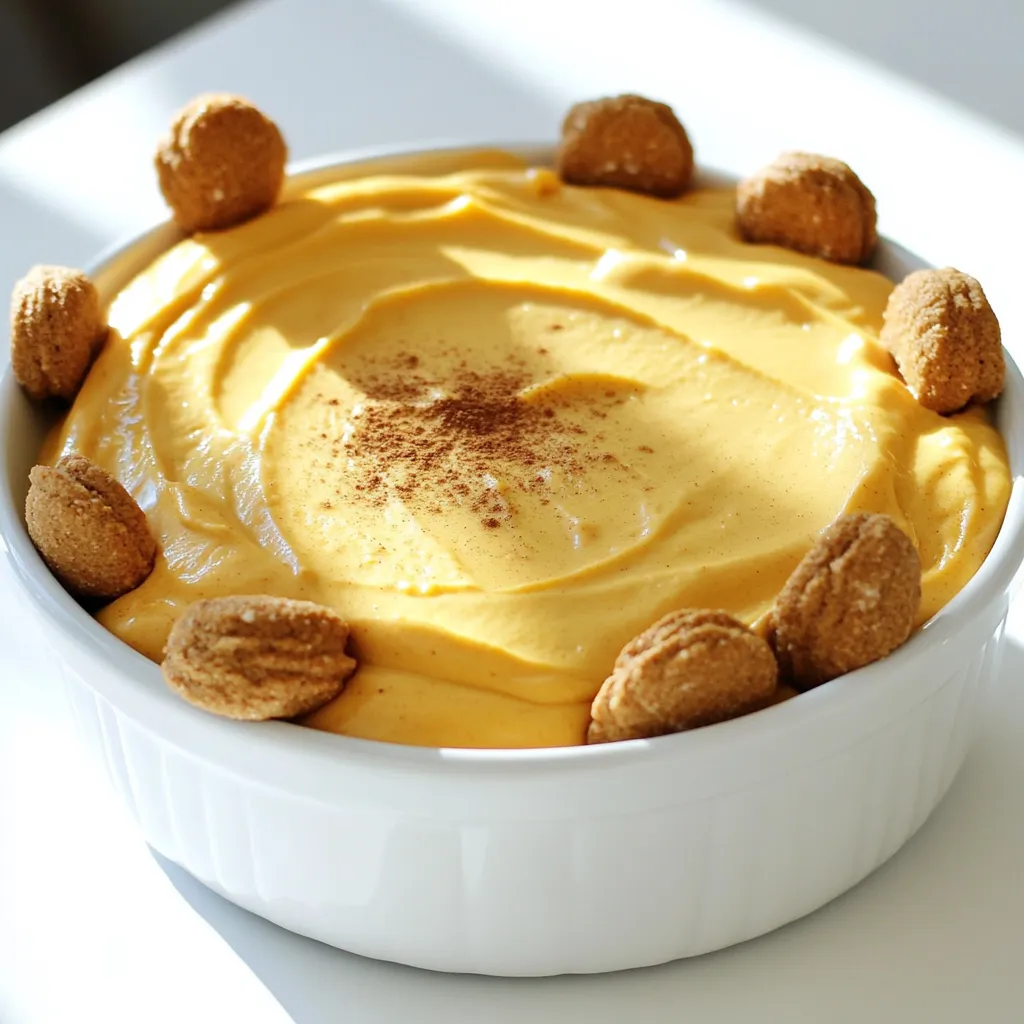
Pumpkin Cheesecake Dip with Gingersnaps Delight

Get ready for a treat that captures the essence of fall! My Pumpkin Cheesecake Dip with Gingersnaps is creamy, sweet,

For a delicious Brown Butter Apple Spice Cake, gather these ingredients: - 1 cup (2 sticks) unsalted butter, browned - 1 1/2 cups all-purpose flour - 1 teaspoon baking powder - 1/2 teaspoon baking soda - 1 teaspoon ground cinnamon - 1/2 teaspoon ground nutmeg - 1/4 teaspoon ground ginger - 1/4 teaspoon salt - 1 cup packed brown sugar - 2 large eggs - 1 teaspoon vanilla extract - 2 medium apples, peeled, cored, and diced (preferably Granny Smith or Honeycrisp) - 1/2 cup chopped walnuts (optional) - Powdered sugar for dusting These ingredients ensure a rich flavor and moist texture. The apples add a nice sweetness and crunch. You can make a few changes based on what you have: - Use coconut oil instead of butter for a dairy-free option. - Replace walnuts with pecans or leave them out entirely. - Swap brown sugar for white sugar if needed. - Add raisins or cranberries for extra flavor and texture. These swaps can help match your taste and dietary needs. Quality ingredients make a big difference in taste. Fresh apples give the best flavor and texture. Unsalted butter allows you to control the salt level. Using good-quality spices enhances the cake's overall taste. Always check the freshness of your baking powder and soda. This helps the cake rise properly and stay fluffy. When you use high-quality ingredients, you create a cake that everyone will love. Start by gathering your tools. You need a 9-inch round cake pan, medium saucepan, and mixing bowls. Grease the cake pan with butter and dust it with flour. This helps the cake release easily later. Set your oven to 350°F (175°C) to preheat. While it warms up, you can prepare the rest. In a medium saucepan, place your unsalted butter. Heat it over medium heat. Stir it often to prevent burning. Watch for the color change. After about 5-7 minutes, it will turn a golden brown. You’ll know it’s ready when it smells nutty and delicious. Remove the pan from the heat and let the butter cool for a few minutes. In a large mixing bowl, whisk together the flour, baking powder, baking soda, cinnamon, nutmeg, ginger, and salt. This step ensures even flavor. Set this bowl aside. In a separate bowl, mix the browned butter and packed brown sugar. Stir well until it’s smooth. Add the eggs one by one, mixing thoroughly. Finally, stir in the vanilla extract. Now, combine the dry mix with the wet mix. Add it slowly and mix gently. Be careful not to overmix. Fold in the diced apples and optional walnuts. This adds great texture and flavor to your cake. To make the best brown butter, use unsalted butter. Heat it in a medium saucepan over medium heat. Stir constantly to avoid burning. Watch for the color change; it should turn golden brown. You will smell a nutty aroma when it's ready. Remove it from heat and let it cool a bit. This step adds depth to your cake’s flavor. Overmixing the batter can lead to a dense cake. Mix just until the ingredients combine. Also, do not skip sifting the dry ingredients. This helps to avoid lumps and ensures even rising. Make sure your oven is preheated. A cold oven can cause uneven baking. Lastly, check your cake with a toothpick. If it comes out clean, your cake is done! For added flavor, try using different spices such as allspice or cloves. You can also add a splash of apple cider for a fruity twist. Consider folding in raisins or cranberries for extra texture. To make it creamier, serve with whipped cream or vanilla ice cream. Adding a sprinkle of cinnamon on top can elevate its taste beautifully. {{image_4}} You can easily adjust this cake for different diets. If you're dairy-free, use plant-based butter instead of unsalted butter. For a gluten-free option, replace all-purpose flour with a gluten-free blend. You can also use applesauce instead of eggs for a vegan version. Just make sure to check ingredient labels for any hidden allergens. Want to mix things up? Add different spices! A pinch of cardamom can give a warm twist. Try adding a splash of almond extract for a nutty flavor. If you love citrus, fold in some orange zest. Each change can bring a new layer of taste to the cake. You don’t have to stick with a single cake! You can make mini cakes or cupcakes instead. Just adjust the baking time. Mini cakes usually take about 20-25 minutes, while cupcakes bake in about 18-20 minutes. This way, you can share the delight with friends or enjoy a single-serving treat. Store your Brown Butter Apple Spice Cake in an airtight container. This helps keep it moist and fresh. If you have leftover cake, let it cool completely before wrapping it. Use plastic wrap or aluminum foil to cover it tightly. Always keep the cake in a cool, dry place away from sunlight. The cake lasts about four to five days at room temperature. If you want to keep it longer, freezing is a great option. Wrap the cake tightly in plastic wrap, then place it in a freezer bag. This helps prevent freezer burn. When stored this way, the cake can last up to three months in the freezer. To refresh your cake, start by taking it out of the freezer. Let it thaw in the fridge overnight or at room temperature for a few hours. If the cake feels a bit dry, warm it in the oven at 350°F (175°C) for about 10 minutes. This will bring back its soft texture. You can also add a dusting of powdered sugar or a drizzle of glaze for extra flavor. The best apples for this cake are Granny Smith or Honeycrisp. Granny Smith apples add a tangy flavor that balances the sweetness of the brown sugar. Honeycrisp apples offer a nice crunch and sweetness. Both types keep their shape well during baking, which is key for texture. Yes, you can make this cake ahead of time. It stays fresh for several days when stored properly. After baking, let the cake cool completely. Wrap it tightly in plastic wrap or store it in an airtight container. This helps keep it moist and delicious. The cake is done when a toothpick inserted in the center comes out clean. It should also spring back when lightly pressed. If the top is golden brown and the edges pull away from the pan, that’s a good sign too. Make sure not to open the oven door too early, as this may cause the cake to sink. This blog post explored making a Brown Butter Apple Spice Cake, focusing on ingredients and methods. Quality ingredients ensure the best flavor, while clear steps guide the baking process. I shared tips to avoid common mistakes and enhance the cake’s taste. Consider variations for dietary needs or flavors. Lastly, proper storage keeps your cake fresh. Enjoy baking this cake and experiment with its many possibilities!

Brown Butter Apple Spice Cake Delightful and Easy

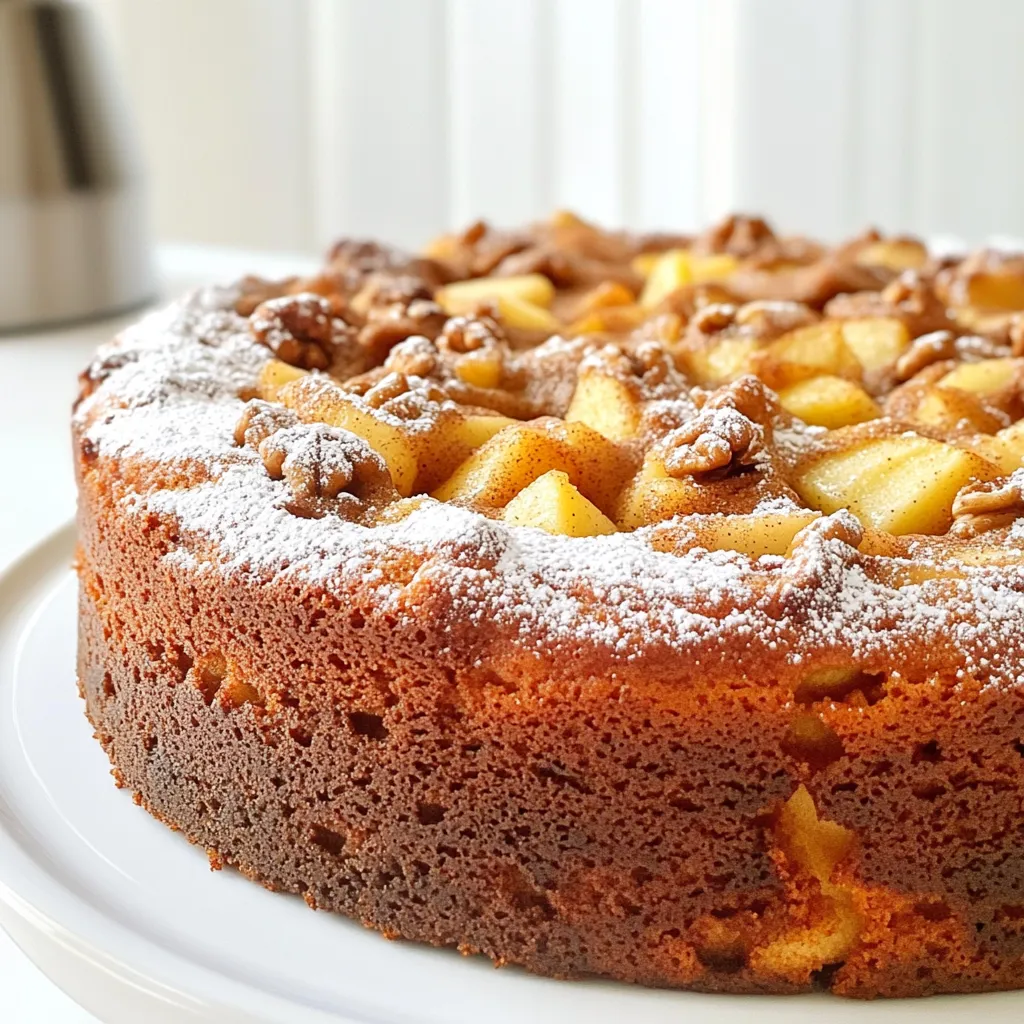
Welcome to a delightful treat that’s simple to bake: Brown Butter Apple Spice Cake! This cake combines warm spices and

To make a Coconut Pineapple Upside Down Cake, gather these fresh ingredients: - 1 cup all-purpose flour - 1 cup granulated sugar - 1/2 cup unsweetened shredded coconut - 1/2 cup unsalted butter, melted - 1/2 cup buttermilk (or substitute with 1/2 cup of milk mixed with 1/2 tablespoon vinegar) - 2 large eggs - 1 teaspoon baking powder - 1/2 teaspoon baking soda - 1/4 teaspoon salt - 1 teaspoon vanilla extract - 1 can (20 oz) pineapple slices in juice, drained (reserve the juice) - 1/2 cup brown sugar - 1/4 cup unsweetened coconut milk Each ingredient plays a key role in creating the perfect balance of flavors. The all-purpose flour gives the cake structure. Granulated sugar adds sweetness, while brown sugar provides a rich, caramel note. Unsweetened shredded coconut and coconut milk bring a delightful tropical twist. Buttermilk keeps the cake moist, and the eggs help it rise. Baking powder and baking soda work together to give the cake lightness. The salt balances the sweetness and enhances the flavors. Lastly, vanilla extract adds depth. With these ingredients ready, you will create a treat that is both fun to make and delicious to eat! {{ingredient_image_2}} Start by preheating your oven to 350°F (175°C). This step is key. A hot oven helps the cake rise well. Grease a 9-inch round cake pan with cooking spray or softened butter. This helps the cake come out easily after baking. In a small bowl, mix the brown sugar with 1/4 cup of the reserved pineapple juice. Stir until smooth. Pour this sweet mix into the bottom of your greased cake pan. Next, lay the pineapple slices on top. You can make a pretty circle. Now sprinkle the shredded coconut over the pineapple. This adds great texture and flavor. In a large bowl, whisk the flour, granulated sugar, baking powder, baking soda, and salt. In another bowl, combine melted butter, buttermilk, eggs, and vanilla extract. Whisk these wet ingredients until they blend well. Slowly add the wet mix to the dry ingredients. Stir gently until just mixed. Avoid overmixing to keep the cake tender. Carefully pour the batter over your pineapple and coconut in the cake pan. Use a spatula to smooth the top. This helps the cake bake evenly. Place the cake in the preheated oven. Bake for 30-35 minutes. To check if it’s done, insert a toothpick into the center. It should come out clean. The top should be golden brown and springy. Once the cake is baked, take it out of the oven. Let it cool in the pan for about 10 minutes. This helps it firm up. Use a knife to run along the edges of the cake to loosen it. Now, gently place a serving plate on top of the pan. Flip the cake over. Tap the pan lightly to release the cake. The caramelized sugar and pineapple will look amazing. Drizzle the coconut milk over the top of the cake. This boosts the tropical taste. For an extra treat, sprinkle more shredded coconut on top. Enjoy your delicious Coconut Pineapple Upside Down Cake! - Always preheat your oven. This ensures even baking. - Use room temperature eggs and buttermilk. They mix better into the batter. - Grease your pan well. This helps the cake come out easily. - Measure your flour correctly. Too much can make the cake dry. - Avoid overmixing the batter. Mix until just combined for a tender cake. - Don’t skip the cooling step. It helps the cake set up. - Watch the baking time. Each oven is different. - Make sure to drain the pineapple well. Extra juice can make the cake soggy. - Don’t rush the flipping process. Let it cool a bit first. - Use fresh ingredients for the best flavor. Stale items can ruin your cake. - Serve warm for a cozy treat. - Add a scoop of vanilla ice cream for extra delight. - Top with toasted coconut for crunch. - A cherry on top adds a fun touch. - Pair with fresh fruit to brighten the plate. Pro Tips Use Fresh Ingredients: For the best flavor, opt for fresh pineapple instead of canned. This will elevate the overall taste and texture of your cake. Let it Cool: Allow the cake to cool in the pan for at least 10 minutes before flipping. This helps the caramel stay intact and prevents the cake from breaking apart. Experiment with Toppings: Don’t hesitate to add other tropical fruits like mango or banana on top of the pineapple for a colorful twist. Storage Tips: Store any leftovers in an airtight container at room temperature for up to 3 days. For longer storage, refrigerate for up to a week. {{image_4}} To make a gluten-free version, swap the all-purpose flour for a gluten-free blend. Many brands work well, so choose one that you like. This way, you can still enjoy the cake without gluten. For a vegan version, use plant-based butter and replace eggs with flaxseed meal. Mix 1 tablespoon of flaxseed with 2.5 tablespoons of water to create one egg. Use almond or soy milk instead of buttermilk. This keeps the cake moist while being completely plant-based. You can add fun tropical flavors. Consider mixing in chopped mango, banana, or even macadamia nuts. Each will bring a new taste to your cake. Try adding a splash of rum extract for an extra tropical kick. Experiment and find your favorite combination! To keep your Coconut Pineapple Upside Down Cake fresh, cover it tightly. Use plastic wrap or foil to seal it. Store it at room temperature for up to two days. If you want it to last longer, place it in the fridge. It can stay there for about five days without losing flavor. If you want to freeze the cake, let it cool completely. Then, wrap it well in plastic wrap and aluminum foil. This will help avoid freezer burn. Your cake can stay in the freezer for up to three months. When you are ready to eat it, thaw it in the fridge overnight. To reheat the cake, preheat your oven to 350°F (175°C). Place the cake in an oven-safe dish. Cover it with foil to avoid drying out. Heat it for about 10-15 minutes. You can also microwave a slice for about 30 seconds. Just be careful not to overheat it, or it may become dry. Enjoy your cake warm for the best taste! You can easily make your own buttermilk. Just mix 1/2 cup of milk with 1/2 tablespoon of vinegar. Let it sit for about five minutes. This gives you a similar tangy flavor. Yes, you can make this cake a day in advance. Store it in an airtight container. This helps the flavors blend and improves the taste. Grease your pan well with butter or cooking spray. You can also line the bottom with parchment paper. This ensures easy release after baking. Yes, fresh pineapple works great! Slice it into rings. Make sure to reserve the juice for the topping mix. You can add toasted coconut for extra crunch. A cherry on top adds a nice pop of color. A scoop of vanilla ice cream pairs well too! You learned about making a delicious Coconut Pineapple Upside Down Cake. We covered the essential ingredients, step-by-step instructions, and tips to perfect your baking. You can even explore gluten-free or vegan options. Remember to store leftovers properly and reheat them well. This cake makes any gathering special. Happy baking! Enjoy sharing this tasty treat with others.

Coconut Pineapple Upside Down Cake Delicious Delight

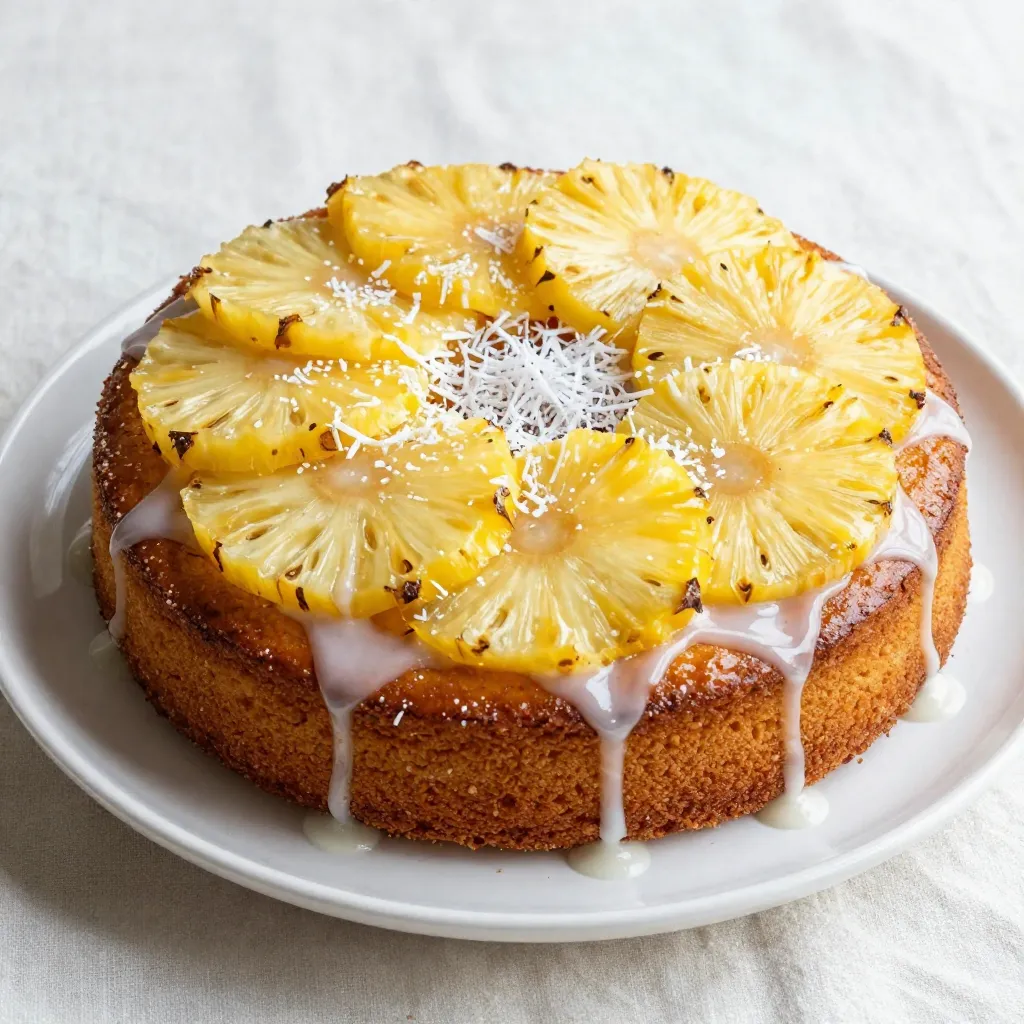
Get ready to indulge in a slice of paradise with my Coconut Pineapple Upside Down Cake! This treat bursts with

To make Spicy Korean Beef Bowls, you'll need some key ingredients. Here’s your list: - 1 lb ground beef - 1 tablespoon vegetable oil - 4 cloves garlic, minced - 1 tablespoon fresh ginger, minced - 3 tablespoons gochujang (Korean chili paste) - 2 tablespoons soy sauce - 1 tablespoon sesame oil - 2 tablespoons brown sugar - 1 teaspoon freshly ground black pepper - 4 green onions, finely chopped - 1 cup cooked white rice (preferably jasmine or sushi) - 1 cup steamed broccoli florets - 1 tablespoon sesame seeds for garnish These ingredients bring together bold flavors. The gochujang gives a spicy kick. The sesame oil adds a nutty taste. Using fresh garlic and ginger enhances the dish's aroma. To elevate your meal, consider these optional garnishes: - Additional chopped green onions - Sliced cucumbers for crunch - Extra sesame seeds for texture These garnishes add color and freshness to your dish. They also bring a nice crunch to each bite. If you don’t have some ingredients, here’s what you can use: - Ground turkey or chicken instead of beef - Honey or maple syrup instead of brown sugar - Coconut aminos instead of soy sauce for a gluten-free option These substitutions keep the dish tasty while catering to your dietary needs. Remember, cooking is all about using what you have on hand! First, gather all your ingredients. This makes cooking smooth and fun. You will need: - 1 lb ground beef - 1 tablespoon vegetable oil - 4 cloves garlic, minced - 1 tablespoon fresh ginger, minced - 3 tablespoons gochujang (Korean chili paste) - 2 tablespoons soy sauce - 1 tablespoon sesame oil - 2 tablespoons brown sugar - 1 teaspoon freshly ground black pepper - 4 green onions, finely chopped - 1 cup cooked white rice (preferably jasmine or sushi) - 1 cup steamed broccoli florets - 1 tablespoon sesame seeds for garnish Having everything ready saves time. Chop the garlic and ginger finely. This helps release their great flavors. Next, heat a large skillet over medium heat. Add the vegetable oil and let it shimmer. Now, add the minced garlic and ginger. Sauté them for about 1 minute. You want them fragrant but not burnt. Once that’s done, add the ground beef. Use a spatula to break it apart. Cook it until it’s fully browned, which should take about 5-7 minutes. Make sure there is no pink left in the beef. After the beef is cooked, it’s time to add flavor. Stir in the gochujang, soy sauce, sesame oil, brown sugar, and black pepper. Mix well to coat the beef. Let it cook for an extra 3-5 minutes. This helps the flavors blend together nicely. Now, it’s time to build your spicy Korean beef bowls! Start with a generous scoop of cooked white rice at the bottom. Then pile on the beef mixture. Next, add the bright green steamed broccoli florets on top. Drizzle any leftover sauce from the skillet over your bowl. Finally, sprinkle sesame seeds on top for some crunch. You can also add a few extra green onions for color. This meal not only looks great but tastes amazing! Enjoy your delicious creation. To cook ground beef right, you need a hot skillet. Heat your skillet over medium heat first. Then, add the vegetable oil and let it shimmer. Once hot, add your minced garlic and ginger. Cook them for one minute until fragrant. Next, add the ground beef. Break it apart with a spatula as it cooks. Brown the beef for about 5 to 7 minutes. Make sure there is no pink left. This gives you juicy, tasty beef. Gochujang is key for bold flavor. This Korean chili paste adds heat and depth. When you add it to the beef, mix it well to coat every bit. It blends perfectly with soy sauce, sesame oil, and brown sugar. This mix creates a rich sauce that makes the dish shine. If you like it spicy, feel free to add more gochujang. Presentation matters in making meals fun. Start with a generous scoop of rice in each bowl. Then, add the spicy beef mixture on top. Next, layer in vibrant steamed broccoli. Drizzle any leftover sauce over the dish. For a beautiful finish, sprinkle sesame seeds and chopped green onions. You can also add sliced cucumbers on the side. This adds a fresh taste and a pop of color. Enjoy making your bowl look as good as it tastes! {{image_4}} You can switch the ground beef for other proteins. Chicken works great. Use ground chicken for a lighter dish. Tofu is a wonderful choice for a vegetarian option. Press and crumble firm tofu to mimic the beef's texture. Cook it the same way, and it will soak up all the flavors. Feel free to mix in different veggies. Bell peppers add a sweet crunch. Carrots bring color and a bit of sweetness. Snap peas provide a nice snap. You can even use zucchini or mushrooms. Just sauté them along with the garlic and ginger for best results. If you like it hotter, add more gochujang. A little goes a long way, so start small. You can also add fresh chili peppers or chili flakes for extra heat. If you prefer it milder, reduce the gochujang. You can balance the spice with a touch of honey or more sugar. Remember, cooking is all about your taste! To store your leftover spicy Korean beef, let it cool first. Place it in an airtight container. You can keep it in the fridge for up to three days. Make sure to cover it well to keep it fresh. When you’re ready to eat, reheat the beef in a skillet over medium heat. Stir it often until it’s hot. You can also use the microwave. Just place it in a bowl and cover it with a lid. Heat it for one to two minutes, stirring halfway through. If you want to freeze the beef, put it in a freezer-safe bag. Squeeze out the air before sealing it. You can freeze it for up to three months. When you’re ready to enjoy it again, thaw it in the fridge overnight before reheating. Gochujang is a thick Korean chili paste. It adds heat and flavor to dishes. You can find gochujang in Asian grocery stores. It is also available online. Look for it in the international aisle at major supermarkets. Yes, you can prepare Spicy Korean Beef Bowls ahead. Cook the beef mixture and store it in the fridge. It stays fresh for up to three days. Reheat it on the stove or in the microwave. You can also cook the rice ahead, but it's best served fresh. Jasmine rice or sushi rice works best with Spicy Korean Beef Bowls. Both types complement the beef well. They are sticky and absorb the sauce nicely. You can use any white rice if you prefer. Just make sure it's cooked and fluffy! We explored how to make Spicy Korean Beef Bowls, from key ingredients to cooking steps. You learned about essential ingredients like gochujang and how to substitute them. I shared tips for cooking ground beef perfectly and serving beautifully. We discussed tasty variations, storage options, and answered common questions. Now, you have all the tools to create this delicious dish. Enjoy cooking and impress others with your skills!

Spicy Korean Beef Bowls Quick and Flavorful Meal

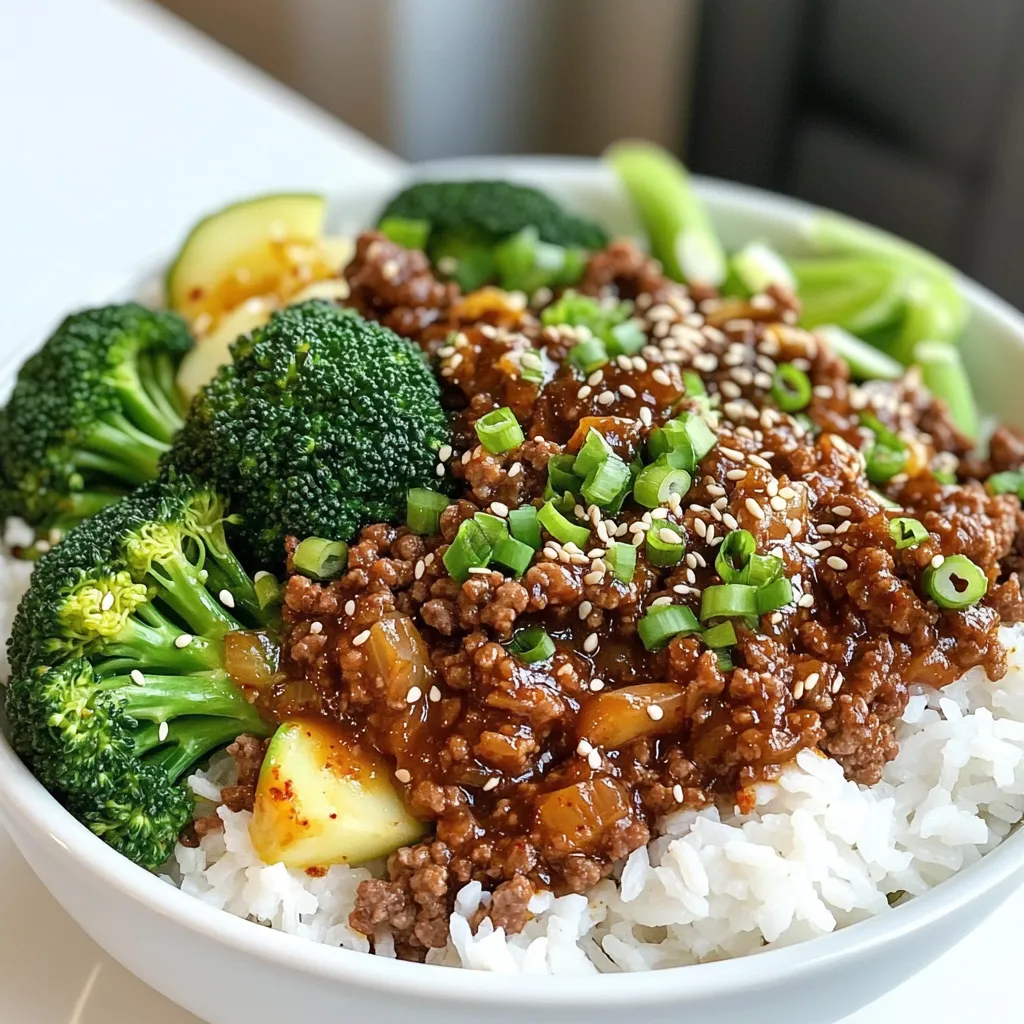
Are you ready to spice up your dinner routine? In just a few simple steps, you can whip up delicious

- 1 pound boneless, skinless chicken breast, cut into 1-inch cubes - 1 ripe mango, pureed (approximately 1 cup) - 1/4 cup freshly squeezed lime juice (about 3 limes) - 2 tablespoons honey - 1 tablespoon extra virgin olive oil - 2 cloves garlic, minced - 1 teaspoon ground cumin - 1 teaspoon paprika - Salt and freshly ground black pepper, to taste - Skewers (use wooden or metal) If you want to switch up the chicken, use turkey breast or firm tofu. Both work well in this recipe. For those avoiding sweeteners, try agave syrup or maple syrup instead of honey. These options keep the flavors bright and fresh. Each serving of these skewers has around 250 calories. They provide protein from the chicken and vitamins from the mango and lime. You also get healthy fats from the olive oil. This dish is not only tasty but also nutritious, making it great for any meal. Start by making your marinade. In a large bowl, mix one cup of pureed mango with 1/4 cup of fresh lime juice. Add two tablespoons of honey, one tablespoon of olive oil, and two minced garlic cloves. Then, sprinkle in one teaspoon of ground cumin and one teaspoon of paprika. Don’t forget salt and pepper to taste. Whisk everything together well. Whisking helps blend the flavors and makes a smooth mix. A smooth marinade coats the chicken better. Now it’s time to marinate the chicken. Take one pound of boneless, skinless chicken breast and cut it into 1-inch cubes. Add these chicken pieces to the marinade. Use a spatula or your hands to make sure each piece is covered completely. Cover the bowl with plastic wrap and place it in the fridge. For the best flavor, let it marinate for at least 30 minutes. If you have more time, marinate for up to two hours. Longer marination means more flavor in the chicken. While the chicken marinates, preheat your grill to medium-high heat. This step is important for even cooking. If you use wooden skewers, soak them in water for 15 minutes. This keeps them from burning on the grill. After marinating, take the chicken out of the fridge. Carefully thread the chicken cubes onto the soaked skewers, leaving space between them. Place the skewers on the hot grill. Cook for about 12-15 minutes. Turn the skewers often until the chicken is fully cooked. Check that the internal temperature reaches 165°F (75°C) for safety. Once done, let the skewers rest for a few minutes before serving. This helps keep the juices inside. Skewering chicken can be simple and fun. Here are some key tips: - Choose the right skewers: Use wooden or metal skewers. If you pick wooden ones, soak them in water for 15 minutes. This helps prevent burning. - Cut chicken evenly: Cut the chicken into 1-inch cubes. This ensures even cooking. - Space the pieces: Leave small gaps between each chicken piece on the skewer. This helps heat circulate, making sure everything cooks well. Avoid common mistakes to get juicy chicken: - Don't overcrowd the grill: Give each skewer enough space. This allows for proper heat flow. - Check the heat: Make sure your grill is medium-high before cooking. Too low can lead to dry chicken. Want to spice up your skewers? Here are some ideas: - Add spices: Consider adding cayenne pepper or chili flakes for heat. This pairs well with the sweet mango. - Try different marinades: Mix in soy sauce or ginger for a unique twist. You can also use yogurt for a creamy texture. For garnishing, fresh herbs work wonders: - Use cilantro or parsley: These herbs add color and flavor. - Drizzle with mango puree: This not only enhances the look but also gives more sweetness. Pair your Mango Lime Chicken Skewers with tasty sides: - Rice or quinoa: These are great bases to soak up flavors. - Grilled veggies: Skewer bell peppers, onions, or zucchini for a colorful plate. For dipping, consider these sauces: - Sweet chili sauce: This adds a nice kick to the meal. - Garlic aioli: Creamy and rich, it complements the skewers well. {{image_4}} You can mix up the fruit in your skewers. Pineapple adds a sweet touch. Bell peppers bring a nice crunch. Use ripe fruit for the best flavor. Combining these can create a tropical twist. You can experiment with other fruits, too. Think about peaches or nectarines. They can enhance the taste and make it fun! Try using shrimp or tofu instead of chicken. Shrimp cooks quickly and absorbs flavors well. For tofu, use firm or extra-firm for the best results. Adjust the marination time based on what you choose. Shrimp needs just 15-30 minutes. Tofu can marinate for 1-2 hours. This way, you get tasty skewers no matter what protein you pick! You don’t have to grill outside. You can use your oven or stovetop, too. Preheat your oven to broil for a good option. Place the skewers on a baking sheet. Broil them for about 10-15 minutes, turning halfway. This method gives you the same great flavor. It makes cooking indoors simple and reliable! After enjoying your mango lime chicken skewers, store leftovers in the fridge. Place them in an airtight container. This helps keep them fresh. Leftovers will stay good for up to three days. Always cool the skewers to room temperature before sealing them. To reheat your skewers, use the oven or a grill. This keeps the chicken moist and tasty. If using the oven, set it to 350°F (175°C). Heat for about 10 minutes. Make sure the internal temperature reaches 165°F (75°C) for safety. Avoid microwaving, as it can make the chicken dry. You can freeze the skewers for future meals. Wrap each skewer in plastic wrap or foil. Place them in a freezer bag to prevent freezer burn. They can last up to three months in the freezer. When ready to eat, thaw in the fridge overnight for the best taste. For the best taste, marinate the chicken for at least 30 minutes. However, if you want deeper flavor, aim for 2 hours. The longer the chicken sits in the mango lime marinade, the more it absorbs the sweet and tangy notes. Yes, you can use frozen chicken. Just remember to thaw it completely before marinating. This ensures the marinade coats the chicken well. Thawing in the fridge overnight is best. If you’re in a hurry, you can use the microwave, but make sure it’s fully thawed. These skewers pair well with many sides. Here are some great options: - Grilled vegetables like zucchini or bell peppers - Coconut rice or jasmine rice - Fresh green salad with lime vinaigrette - Creamy avocado dip or salsa - Quinoa salad with black beans and corn These sides will enhance your meal and balance the flavors of the skewers. Enjoy exploring these options to complete your dish! This blog post covered all you need for tasty Mango Lime Chicken Skewers. We explored the best ingredients, cooking steps, and storing tips to keep your skewers fresh. Remember, you can swap chicken for shrimp or tofu and try different fruits for fun flavors. Don't forget about the side dishes; they can make a big difference. Enjoy making this dish and impressing friends with your skills. Happy grilling!

Mango Lime Chicken Skewers Flavorful Grilling Delight

If you’re looking to spice up your grilling game, try my Mango Lime Chicken Skewers! This recipe combines sweet mango

- 1 cup unsalted butter, softened to room temperature - 3/4 cup packed brown sugar - 1/4 cup granulated sugar - 2 teaspoons pure vanilla extract - 2 cups all-purpose flour (ensure it has been heat-treated for safety) - 1 can (14 oz) sweetened condensed milk - 1 cup mini chocolate chips - 1 1/2 cups semi-sweet chocolate chips (for coating) - Sea salt (for garnish, optional) Heat-treated flour is key for safety. Regular flour can have bacteria, which may be harmful. Heating flour kills germs. You can heat it by spreading it on a baking sheet and baking at 350°F for five minutes. This step makes your truffles safe to eat. You can add fun garnishes to your truffles. A sprinkle of sea salt adds a nice touch. It balances the sweetness. You can also drizzle more melted chocolate on top. These small details make your truffles look fancy and taste even better. First, gather your ingredients. You need butter, sugars, vanilla, flour, and sweetened condensed milk. In a large bowl, cream the softened butter, brown sugar, and granulated sugar. Use an electric mixer on medium speed. Mix until the mixture is light and fluffy, which takes about 2-3 minutes. Next, add in the vanilla extract. Mix until it's well combined. Now, it’s time to add the flour. Make sure the flour is heat-treated for safety. Gradually sift it into the bowl while mixing on low speed. This helps avoid overworking the dough. Once the flour is mixed in, pour in the sweetened condensed milk. Mix until the dough is smooth. Finally, fold in the mini chocolate chips with a spatula or spoon. Make sure they are evenly spread throughout the dough. After mixing, it’s time to shape the dough. Use a small cookie scoop or your hands to portion the dough. Aim for balls about 1 inch wide. Place these balls on a parchment-lined baking sheet. Once you’ve formed all the truffles, put the baking sheet in the freezer. Let them chill for about 30 minutes. This makes the dough easier to handle and helps keep their shape. While the truffles chill, melt the semi-sweet chocolate chips. Use a microwave-safe bowl and heat in 30-second intervals, stirring after each time. Keep heating until the chocolate is smooth. Once the truffles are firm, take them out of the freezer. Dip each truffle into the melted chocolate. Make sure each one is fully coated. Let any extra chocolate drip off before placing them back on the parchment-lined sheet. For an extra touch, sprinkle a tiny bit of sea salt on each one for a sweet and salty blend. Finally, return the baking sheet to the fridge. Chill for another 30 minutes so the chocolate can set perfectly. To get the right texture for your truffles, follow these steps. First, cream the butter and sugars well. This step adds air and makes your dough fluffy. When adding the flour, do it slowly. Mix just until combined. Overmixing can lead to tough truffles. After adding the sweetened condensed milk, the dough should feel smooth and soft. If it seems too sticky, chill it in the fridge for a few minutes before forming the balls. If you have leftover dough, store it right. Place it in an airtight container. You can keep it in the fridge for up to a week. To make it last longer, freeze it. Roll the dough into balls and freeze them on a tray. Once frozen, transfer them to a freezer-safe bag. They can stay good for up to three months. Just thaw them in the fridge before dipping in chocolate. Melting chocolate can be tricky. Here’s how to do it well. Use a microwave-safe bowl. Heat the chocolate in short bursts—about 30 seconds at a time. Stir between each burst. This method helps avoid burning. If you see lumps, keep stirring. The heat of the melted chocolate will help melt them. For a smooth coating, let the melted chocolate cool slightly before dipping the truffles. {{image_4}} You can make your truffles more fun by changing the flavors. Try adding nuts like walnuts or pecans for a nutty twist. You can also mix in mint extract for a fresh taste. If you enjoy spices, cinnamon or espresso powder can add warmth and depth. Each flavor will give a new life to your truffles. The coating can change the look and taste of your truffles. You can use white chocolate instead of semi-sweet chocolate for a sweeter treat. Sprinkles can also make them festive and fun. For a crunch, try crushed nuts or cookie crumbs. These coatings add both taste and style to your delightful treats. If you need to adapt the recipe, there are options for everyone. For a gluten-free version, use gluten-free flour. You can also make vegan truffles by using coconut oil instead of butter and plant-based milk instead of condensed milk. These changes keep the flavor intact while meeting dietary needs. To keep your chocolate chip cookie dough truffles fresh, store them in an airtight container. This prevents moisture and keeps them tasty. Place a piece of parchment paper between layers for easy access. If you leave them out, they might become dry or lose their charm. Freezing is a great way to extend the life of these treats. After forming the truffles and before coating them, place them on a baking sheet. Freeze them for about 30 minutes. Once firm, transfer them to an airtight bag. They can last up to three months in the freezer. Just remember to label the bag with the date! I recommend using glass or plastic containers with tight-fitting lids. These work best to keep your truffles fresh. You can also use silicone bags for saving space. Avoid using metal containers, as they can alter the taste over time. Yes, you can eat cookie dough truffles raw. The dough is safe because we use heat-treated flour. This process kills harmful bacteria. To heat-treat flour, spread it on a baking sheet and bake it for about five minutes at 350°F (175°C). This step is key for safety. Chocolate chip cookie dough truffles last about one week in the fridge. Store them in an airtight container to keep them fresh. You can also freeze them for up to three months. Just make sure they are in a freezer-safe container. They taste great even after freezing! If you need a substitute for condensed milk, you have options. You can mix equal parts of milk and sugar. For a dairy-free option, try coconut cream with a bit of sweetener. Almond milk with sugar also works well. These substitutes keep the truffle's creamy texture. This blog post covered how to make delicious cookie dough truffles. We talked about the key ingredients, including heat-treated flour, and why they matter. I gave clear steps for mixing, forming, and coating the truffles. You learned helpful tips for the best consistency and how to store leftovers. We also explored fun variations to please any taste. In closing, enjoy experimenting with these truffles. They are easy and fun to make!

Chocolate Chip Cookie Dough Truffles Easy Delightful Treat

Craving a sweet treat that’s easy to make and totally delicious? Look no further than these Chocolate Chip Cookie Dough

To make Loaded Veggie Nacho Sheet Pan, you need the right ingredients. Here’s what you will need: - Tortilla Chips - Black Beans - Corn Kernels - Red Bell Pepper - Green Bell Pepper - Red Onion - Jalapeño - Shredded Cheddar Cheese - Shredded Mozzarella Cheese - Avocado - Fresh Cilantro - Lime - Sour Cream or Greek Yogurt - Salt and Pepper Each ingredient brings its own flavor and texture. The tortilla chips form a crunchy base. Black beans add protein, while corn kernels bring sweetness. Bell peppers give crunch and color. Red onion adds a sharp bite, and jalapeño provides heat. Cheddar and mozzarella create a gooey layer of cheese. Avocado offers creaminess, and fresh cilantro adds a burst of flavor. Lime juice brightens the dish, while sour cream or Greek yogurt gives a tangy finish. With these ingredients, you’ll create a fun and tasty dish that everyone will love. First, set your oven to 400°F (200°C). This warm temperature helps the cheese melt nicely. Next, take a large sheet pan. Spread the tortilla chips evenly across the pan. Make sure they form a solid base for your nachos. In a mixing bowl, combine the following: - 1 can black beans, rinsed and drained - 1 cup corn kernels (fresh or frozen) - 1 red bell pepper, diced - 1 green bell pepper, diced - 1 small red onion, diced - 1 jalapeño, sliced (adjust to your spice level) Season your mixture with salt and pepper. Stir it well to mix all the flavors. Now, evenly distribute the veggie mixture over the chips. Make sure every chip gets some toppings. Then, sprinkle both shredded cheddar and mozzarella cheeses on top. Place the sheet pan in your preheated oven. Bake for about 10-12 minutes. Look for melted cheese that is bubbling. After baking, let the nachos cool for a minute. Top them with diced avocado and sprinkle fresh cilantro on top. This adds color and flavor. Serve warm with lime wedges and a dollop of sour cream or Greek yogurt. Enjoy your delicious nachos! To adjust the spice levels, start with less jalapeño. If you want more heat, add more slices. You can also remove the seeds for less spice. This lets you control just how spicy your nachos get. Keep in mind that each pepper varies in heat. Taste as you go to find your perfect balance. Layering cheese is key. Start with a base of cheese on the chips. Then add your veggie mix, followed by more cheese on top. This helps all the cheese melt evenly. Bake at 400°F until bubbly and golden. You want a nice, gooey texture that pulls perfectly when you take a chip. For a fun look, serve nachos right from the sheet pan. This gives a rustic vibe. If you prefer a fancier style, move them to a large platter. Make it pop with extra cilantro on top. A drizzle of sour cream or Greek yogurt adds a creamy touch. Lime wedges on the side add color and zest. Enjoy the feast! {{image_4}} You can easily boost the protein in your nachos. Try adding cooked chicken, ground beef, or turkey. If you prefer plant-based options, add lentils or chopped tofu. These choices pack a flavorful punch and make the dish more filling. You can mix these proteins into the veggie mixture or layer them on top. This way, everyone gets a taste of the good stuff. If you're looking for dairy-free cheese, you have options! Many brands offer tasty plant-based cheeses. Look for ones made from nuts or soy. You can also try using a mix of different cheeses. Feta or gouda can add a unique twist. Just remember to melt the cheese well for that gooey delight everyone loves. Extra toppings can elevate your nacho game. Consider adding sliced olives for a briny kick. Fresh salsa or pico de gallo adds brightness and zest. A drizzle of hot sauce can spice things up. You can also sprinkle some pickled jalapeños for added heat. Don’t forget the lime wedges for a fresh squeeze on top! Store your leftover nachos in an airtight container. This keeps them fresh for longer. Make sure to refrigerate them within two hours of cooking. They can last up to three days in the fridge. If you want to keep them longer, consider freezing them. To reheat your nachos, use the oven. This helps keep them crunchy. Preheat your oven to 350°F (175°C). Spread the nachos on a baking sheet. Heat for about 10 minutes. Keep an eye on them to avoid burning. You can also use an air fryer for a quicker method. Yes, you can freeze loaded nachos. However, the quality may change. To freeze, place the nachos in a sealed bag or container. Remove as much air as possible. They can last up to two months in the freezer. When ready to eat, thaw them in the fridge overnight before reheating. Yes, you can prep some parts ahead. You can chop the veggies and mix the beans. Keep them in the fridge. Just bake the nachos when you are ready to serve. This keeps them fresh and crispy. To make nachos without cheese, try using a creamy avocado dip or a cashew cheese. You can also use salsa or guacamole as toppings. This way, you still enjoy great flavors without cheese. If you want a change, use pita chips or veggie chips. You can also bake sliced sweet potatoes or zucchini for a healthy twist. These options give a fun crunch to your nachos. Leftovers last about 2-3 days in the fridge. Store them in an airtight container. When you reheat, the chips may get soft. You can try baking them again for some crunch. Absolutely! Feel free to add any veggies you like. Zucchini, mushrooms, or spinach work well. Just chop them up and mix them in. This gives your nachos even more flavor and color. Loaded veggie nachos are fun and tasty. You learned about the right ingredients and how to make them step-by-step. We also covered tips for spice levels and cheese. You can add protein or try different toppings to mix things up. Don’t forget about storage tips for leftovers. Enjoy making your nachos just the way you like! Experiment with flavors and find your perfect combo. Now, you are ready to create a delicious snack for your next get-together.

Loaded Veggie Nacho Sheet Pan Flavorful and Fun Dish

Get ready for a flavorful and fun dish that’s perfect for sharing: Loaded Veggie Nacho Sheet Pan! This easy recipe

The right ingredients make the best white chocolate cranberry fudge. Here’s what you need: - 2 cups white chocolate chips - 1 (14-ounce) can of sweetened condensed milk - 1 teaspoon pure vanilla extract - 1 ½ cups dried cranberries, roughly chopped - ½ cup chopped walnuts or pistachios (optional) - 1 pinch of sea salt These ingredients blend together to create a creamy, sweet treat. The white chocolate chips give a rich flavor. Sweetened condensed milk adds sweetness and creaminess. Vanilla extract enhances the taste, while cranberries bring a tangy twist. If you want extra crunch, add chopped walnuts or pistachios. The pinch of sea salt balances the sweetness. This simple list makes a delightful holiday treat that everyone loves. First, line an 8-inch square baking pan with parchment paper. Make sure the paper hangs over the edges. This helps you lift the fudge out later. Next, spray the parchment lightly with non-stick cooking spray. This step ensures the fudge does not stick. In a medium saucepan, combine 2 cups of white chocolate chips and a 14-ounce can of sweetened condensed milk. Heat this mixture over low flame. Stir continuously as it melts. Keep an eye on it to avoid burning. You want it to be smooth and creamy. Once the chocolate melts, take the pan off the heat. Add 1 teaspoon of pure vanilla extract and a pinch of sea salt. Stir well to mix these flavors into the fudge. This enhances the taste and makes it even more delicious. Gently fold in 1 ½ cups of roughly chopped dried cranberries. If you like, add ½ cup of chopped walnuts or pistachios for extra crunch. Make sure these add-ins are well distributed. This ensures a burst of flavor in every bite. Pour the fudge mixture into the lined baking pan. Use a spatula to spread the mixture evenly into the corners. Aim for a smooth and level surface. This makes for a nice presentation later. Now, place the pan in the refrigerator. Chill it for about 2 hours. You want the fudge to be firm to the touch. This step is crucial for the perfect texture. When the fudge is set, lift it out of the pan using the parchment paper. Place it on a cutting board. Use a sharp knife to cut it into squares or rectangles. Be sure to clean the knife between cuts for neat edges. Enjoy your delicious holiday treat! To get the best fudge, you need to melt the chocolate right. Start with low heat. Stir the mixture often. If you let it get too hot, it can burn. This will ruin the taste. Once melted, it should be smooth and creamy. To keep that creamy texture, mix well after adding the vanilla and sea salt. This helps blend the flavors fully. The right mix will make your fudge rich and smooth. When it comes to serving, presentation matters. Place your fudge squares on a pretty platter. For a pop of color, sprinkle extra cranberries and nuts on top. This makes it look fancy. If you want to gift fudge, wrap each piece in clear cellophane. Tie it with a nice ribbon. It shows you care and makes the gift special. Want to jazz up your fudge? Try adding citrus zest. A bit of orange or lemon zest can brighten the flavor. If you don’t like nuts, you can skip them. You can also swap in dried fruits like cherries or raisins. This gives your fudge a new twist and keeps it exciting. {{image_4}} You can change the dried cranberries for other fruits. Dried cherries or raisins work well here. These swaps can add new flavors to your fudge. You can also mix in different nuts. Try using chopped pecans or almonds for a twist. Each nut brings its own taste and crunch. While this recipe uses white chocolate, you can switch it up. Dark or milk chocolate can make this treat even richer. The darker chocolate will give a deeper flavor, while milk chocolate is sweeter. You can adjust the sweetness based on the type you choose. Just keep the same amounts for the other ingredients. Adding spices can make this fudge extra special. Cinnamon and nutmeg are perfect for the holidays. Just a pinch can bring warmth to the dish. You can also try adding orange zest for a fresh kick. These small changes can make the fudge feel festive and unique. To keep your white chocolate cranberry fudge fresh, use an airtight container. This helps to prevent air from drying out the fudge. You can also wrap individual pieces in plastic wrap. This way, you can grab a piece whenever you want a sweet treat. In the fridge, your fudge lasts about two weeks. Keep it in a cool place to maintain its texture and flavor. If you notice any changes in smell or appearance, it’s best to toss it out. You can freeze fudge for longer storage. First, cut it into squares. Then, wrap each piece in plastic wrap. Place them in a freezer bag or airtight container. To thaw, just take out a piece and let it sit at room temperature for about an hour. Enjoy your fudge later without losing any of its yummy flavor! Yes, you can use chocolate bars instead of chips. To melt chocolate bars, chop them into small pieces. This helps them melt evenly. Use the same amount as chips, about 2 cups. Melt them slowly over low heat, just like you do with chips. Stir well to keep it smooth. Yes, you can make this fudge vegan. Instead of white chocolate chips, look for dairy-free white chocolate. You can also use coconut milk or almond milk in place of sweetened condensed milk. Find a brand that matches the sweetness you like. This way, you keep the creamy texture. If your fudge is too soft, chill it longer. Place it back in the fridge for another hour. If it stays soft, try adding more white chocolate. Melt a little more and mix it in. This will help firm it up. You can make fudge without sweetened condensed milk using other ingredients. Try using coconut cream or cashew cream as a base. Mix these with a sweetener like maple syrup or agave. This will create a similar sweet and creamy texture. You learned how to make a creamy white chocolate fudge. We covered the ingredients, steps, and tips to perfect your treat. Remember to customize with your favorite nuts or dried fruits. Store it properly to keep it fresh. Enjoy sharing the fudge with friends and family or savoring it yourself. Fudge is versatile, and you can make it your own. Try different flavors or seasonal touches for fun. Happy baking!

White Chocolate Cranberry Fudge Tempting Holiday Treat

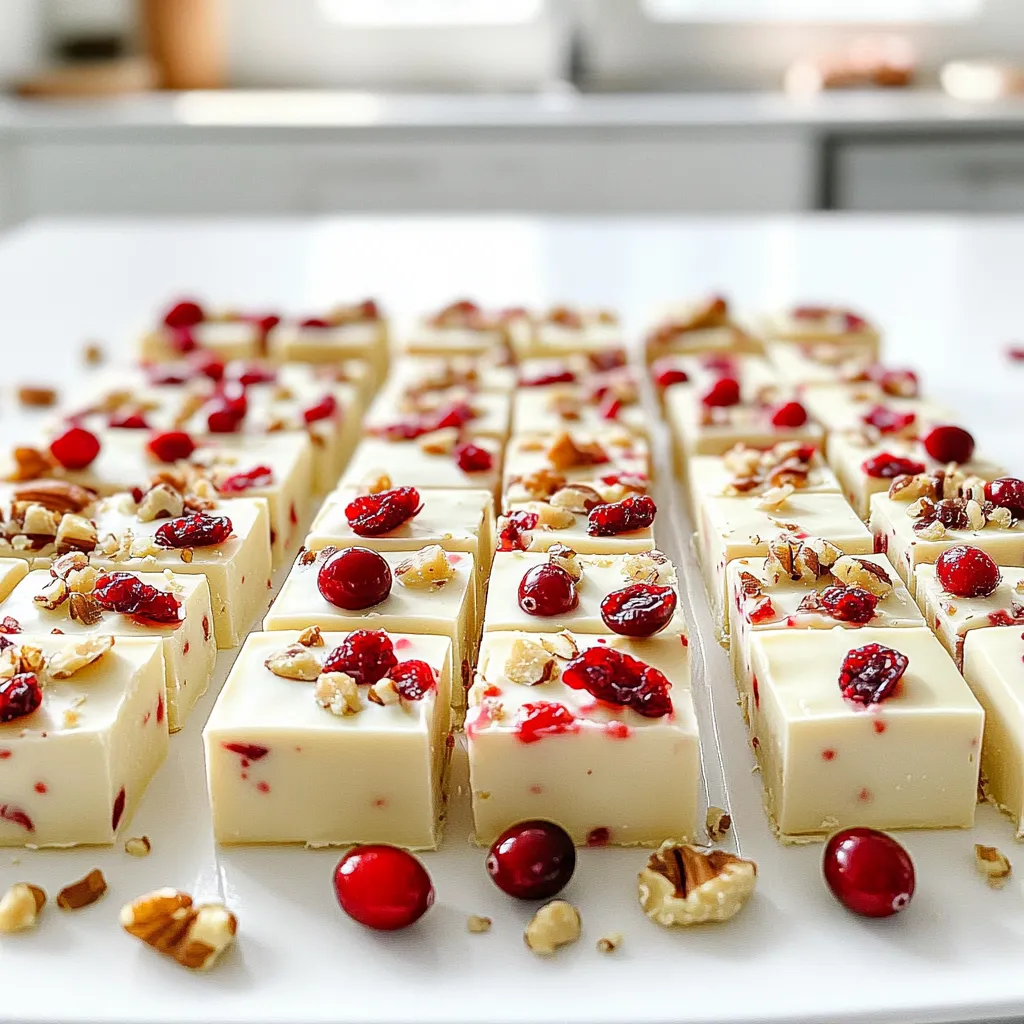
Are you ready to impress friends and family with a sweet holiday treat? This White Chocolate Cranberry Fudge is rich,

- 1 pound ground chicken - 2 tablespoons sesame oil - 1 tablespoon fresh ginger, finely minced - 3 cloves garlic, finely minced - 2 tablespoons soy sauce - 1 tablespoon honey - 1 tablespoon rice vinegar - 1 medium carrot, finely grated - 1 bell pepper (any color), diced - 3 green onions, thinly sliced - 1/4 cup water chestnuts, finely chopped - 1 head of butter or Romaine lettuce, leaves carefully separated - Toasted sesame seeds for garnish - Fresh cilantro leaves for garnish - Sesame oil - Skillet or wok - Spatula Each ingredient plays a key role in the taste and texture of the wraps. Ground chicken gives a rich flavor and a good protein boost. Fresh ginger and garlic add brightness and depth. Soy sauce, honey, and rice vinegar blend sweet and savory notes. The veggies bring crunch and color. Carrots and bell peppers add a sweet bite, while water chestnuts offer a satisfying crunch. Lettuce leaves serve as the perfect, low-carb vessel for the filling. To cook, you need a skillet or wok and a spatula. Sesame oil is essential for sautéing and infusing flavor. Use these ingredients to create a dish that is both wholesome and delicious. 1. Start by heating 2 tablespoons of sesame oil in a large skillet over medium heat. Wait until it shimmers. 2. Add 1 tablespoon of minced ginger and 3 cloves of minced garlic. Sauté for about 1 minute until fragrant. Don't let it brown. 3. Next, add 1 pound of ground chicken. Use a spatula to break it up. Cook for 5-7 minutes, stirring until the chicken is browned and cooked through. 1. Pour in 2 tablespoons of soy sauce, 1 tablespoon of honey, and 1 tablespoon of rice vinegar. Stir well to mix the flavors. 2. Let this cook for another 2 minutes to deepen the taste. 3. Now add 1 grated carrot, 1 diced bell pepper, 3 sliced green onions, and 1/4 cup of chopped water chestnuts. Stir everything together. Cook for an extra 3-4 minutes until the veggies soften slightly. 1. Remove the skillet from heat and let the chicken mixture cool for a few moments. 2. Take individual lettuce leaves and spoon in the chicken mixture. Each leaf will become your wrap. 3. For the final touch, sprinkle toasted sesame seeds and add a few cilantro leaves on top of each wrap. This gives extra flavor and looks great! To get the best flavor, start with the chicken. Heat sesame oil in your skillet until it shimmers. This means it’s hot enough. Add minced ginger and garlic. Sauté it for about one minute. You want it fragrant but not browned. When you add the ground chicken, break it into small pieces. Cook it for 5 to 7 minutes until it turns brown. This browning gives the chicken great flavor. Next, add your veggies. Mix in the carrot, bell pepper, green onions, and water chestnuts. Cook for about 3 to 4 minutes. Don’t overcook them! You want some crunch and color in your wraps. Presentation is key! Arrange the filled lettuce wraps on a nice platter. This makes your meal look extra special. For added fun, include small bowls of dipping sauces. Soy sauce is a classic choice. You can also offer a spicy chili sauce for those who like heat. This lets everyone customize their flavor. If you are gluten-free, swap soy sauce for tamari. This gives you the same salty flavor without gluten. For nut allergies, stay clear of any sauces with nuts. Sesame oil is safe, but always check labels. You can still enjoy these wraps without worry! {{image_4}} You can switch the ground chicken for turkey if you prefer. Turkey has a lighter taste but works well with the same flavors. For a plant-based option, use ground meat made from soy or pea protein. These alternatives still provide great texture and taste. Feel free to add your favorite spices or sauces. A dash of sriracha adds heat, while a sprinkle of five-spice powder can enhance the dish's depth. You might also try teriyaki sauce for a sweeter twist. These small changes can give your wraps a whole new vibe. Lettuce is the star, but you can use other greens too. Try collard greens for a sturdier wrap or spinach for a softer bite. You can also mix in extra veggies. Chopped mushrooms or diced zucchini add more flavor and nutrition. Let your creativity shine with these swaps! Store your leftover wraps in an airtight container. This keeps them fresh and tasty. If you have the mixture and lettuce separate, it will last longer. Place the chicken mix in one container and the lettuce in another. This method helps keep the lettuce crisp. To freeze your wraps, cool the chicken mixture first. Then, place it in a freezer-safe bag or container. Squeeze out the air to avoid freezer burn. For best results, eat the frozen mix within three months. To reheat, thaw it overnight in the fridge. Heat in a skillet over medium heat until hot. Serve with fresh lettuce. These wraps will last about three days in the fridge. After that, the chicken may spoil. Check for any off smells or changes in texture before eating. Enjoy them while they are fresh for the best flavor and safety. For these wraps, I recommend using butter or Romaine lettuce. Both provide a nice crunch and are sturdy enough to hold the filling. Butter lettuce has a soft, tender leaf that is easy to bite into. Romaine offers a bit more crunch and a sturdy base. You can also try iceberg lettuce for a crispier option. Just ensure the leaves are fresh and whole for the best wrap experience. Yes, you can prepare the chicken mixture in advance! Cook the mixture and let it cool. Then, store it in an airtight container in the fridge. It will stay fresh for up to three days. When you are ready to serve, just reheat it on the stove over low heat. This makes it a great option for meal prep or quick dinners. To add some heat, you can mix in a bit of sriracha or chili paste when you combine the chicken with the soy sauce. You can also sprinkle red pepper flakes on the chicken mixture. For an extra kick, try adding sliced jalapeños to the mix. Don’t forget to adjust the spice to your liking! You now have a clear path to make delicious sesame ginger chicken lettuce wraps. We discussed the essential ingredients, from fresh chicken to vibrant veggies. You learned to cook the chicken well and assemble the wraps for a great meal. Remember, don't overcook the veggies for the best texture. Feel free to experiment with flavors and substitutes. Whether you want gluten-free options or new veggies, these wraps are adaptable. Enjoy making these tasty wraps and impress your friends and family with your cooking skills. Happy cooking!

Savory Sesame Ginger Chicken Lettuce Wraps Recipe

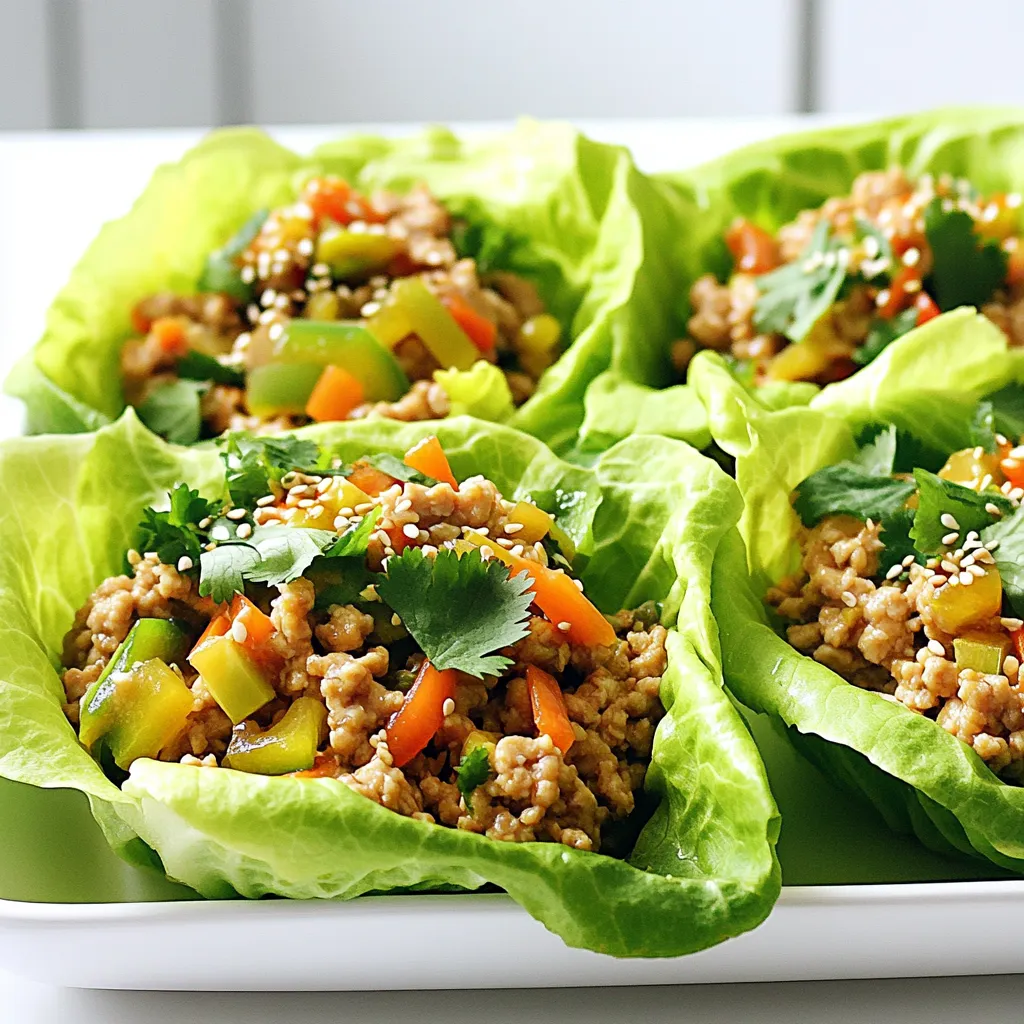
Looking for a quick and tasty meal? Try these Savory Sesame Ginger Chicken Lettuce Wraps! This fun recipe combines juicy

- 8 oz cream cheese - 1 cup powdered sugar - 1/2 cup sour cream - 1 tablespoon fresh lemon juice - Zest of 1 lemon - 1 teaspoon pure vanilla extract - 1 cup fresh raspberries When making Lemon Raspberry Cheesecake Dip, the ingredients are simple yet key. First, cream cheese gives the dip its rich and creamy base. I always use 8 oz, softened to room temp. This helps create a smooth texture. Next, I mix in 1 cup of powdered sugar. This adds sweetness and balances the tang from the lemon. For creaminess, I add 1/2 cup of sour cream. It makes the dip light and fluffy. The fresh lemon juice is a must. Just 1 tablespoon adds a bright tang. I also include the zest of 1 lemon for extra flavor. The zest makes the dip smell amazing and taste fresh. Finally, I add 1 teaspoon of pure vanilla extract. This deepens the flavor and complements the lemon and raspberry. Speaking of raspberries, I use 1 cup of fresh ones. They add color and a burst of juicy flavor. Make sure to save a few for garnish! - Graham crackers - Vanilla wafers - Fruit garnishes When it comes to serving, I like to keep it fun and easy. Graham crackers and vanilla wafers are perfect for dipping. They add a crunchy texture that pairs well with the creamy dip. I also love to decorate the dip with fresh fruit garnishes. Slices of lemon and extra raspberries make the dish pop. Not only does it look good, but it also invites guests to dig in. Enjoy this delightful and simple treat! - Step 1: Beat cream cheese Start by taking your softened cream cheese. Place it in a medium bowl. Use an electric mixer on medium speed. Beat for about 2-3 minutes until it is smooth and creamy. - Step 2: Incorporate powdered sugar Gradually add the sifted powdered sugar into the bowl. Mix on low speed until it is well combined. This step helps avoid lumps in your dip. - Step 3: Add remaining ingredients Now, add the sour cream, fresh lemon juice, lemon zest, and vanilla extract. Mix on medium speed again for 1-2 minutes. You want everything to blend well and become fluffy. - Step 4: Fold in raspberries Take fresh raspberries and carefully fold them into the mixture. Use a spatula for this. Keep some whole berries for texture and flavor bursts. - Step 5: Transfer and garnish Transfer the dip to a decorative serving bowl. Smooth the top with your spatula for a clean look. Garnish with extra raspberries and a sprinkle of lemon zest. - Presentation ideas Serve this dip in a colorful bowl at the center of a platter. This will catch everyone’s eye. - Creating a vibrant platter Surround the bowl with graham crackers or vanilla wafers. Scatter fresh lemon slices and extra raspberries around for color. - Suggested dippers Graham crackers and vanilla wafers make great dippers. You can also use fresh fruit for a fun twist! - Alternative sweeteners: You can use honey, agave, or maple syrup instead of powdered sugar. These options add unique flavors and can be healthier. - Non-dairy options: If you want a dairy-free dip, use vegan cream cheese and coconut yogurt. This keeps the creamy texture and flavor. - Different berry varieties: Feel free to swap raspberries with strawberries, blueberries, or blackberries. Each berry brings its own flavor, making it fun to mix things up. - Additional flavorings: Try adding a splash of almond extract or a hint of cinnamon for warmth. These flavors can elevate the dip and surprise your taste buds. - Tips on achieving fluffiness: Make sure your cream cheese is at room temperature. This helps it mix smoothly and become fluffy when blended. - Achieving the best texture: Fold in the raspberries gently to keep some whole. This adds bites of fruit that make every dip special. {{image_4}} You can make Lemon Raspberry Cheesecake Dip even more fun by adding flavors. - Adding chocolate: Mix in some cocoa powder or melted chocolate. This gives the dip a rich, sweet twist. Try dark chocolate for a bold taste or white chocolate for creaminess. - Mixing in other fruits: You can swap or add fruits. Try strawberries, blueberries, or peaches. Each fruit brings its own flavor, making the dip unique. - Infusing with herbs: For a fresh taste, add herbs like mint or basil. Just a little can change the flavor. It adds a fun surprise to your dip! You can also adjust this dip to fit different diets. - Gluten-free dippers: Use gluten-free graham crackers or rice cakes. They pair well and keep the dip safe for those avoiding gluten. - Vegan adaptations: Replace cream cheese with a vegan option made from cashews or tofu. Use maple syrup instead of powdered sugar for sweetness. - Low-sugar options: Try using a sugar substitute like stevia or monk fruit. These keep the dip sweet without the added sugar. To keep your Lemon Raspberry Cheesecake Dip fresh, store it in the fridge. Use an airtight container to prevent air from changing its texture. Make sure to cover it well. If you want to freeze it, put it in a freezer-safe container. Leave some space at the top for expansion as it freezes. This dip stays fresh for about 3 to 5 days in the fridge. Check for signs of spoilage. If it smells sour or has a strange color, throw it away. If you freeze it, it can last for about 2 months. However, the texture may change when thawed. Always taste a small amount before serving. How do I make this dip ahead of time? You can make this dip a day before serving. Just follow the steps and store it in the fridge. Cover it with plastic wrap to keep it fresh. Before serving, stir gently to make it smooth again. Can I use frozen raspberries? Yes, you can use frozen raspberries. Just thaw them and drain any excess juice. This helps keep the dip from getting watery. Fresh raspberries add a nice texture, but frozen ones work well too. What can I serve with Lemon Raspberry Cheesecake Dip? Serve this dip with graham crackers or vanilla wafers. You can also add fresh fruits like apple slices or strawberries. These add color and taste to your platter. My dip is too runny, what to do? If your dip is too runny, check if you added too much sour cream or lemon juice. You can add more cream cheese to thicken it. Mix in a little at a time until it reaches the right texture. How can I thicken the dip? To thicken the dip, add more cream cheese. You can also use a bit of powdered sugar. Mix well until the dip is thick and creamy. What’s the best way to store leftovers? Store leftovers in an airtight container in the fridge. This keeps it fresh for up to three days. Before serving again, stir the dip to bring back its smoothness. This blog post covered how to make a delicious Lemon Raspberry Cheesecake Dip. You learned the key ingredients, step-by-step instructions, and serving tips. We explored tips for flavor, ingredient swaps, and variations to try. You now have solid ways to store this dip and answers to common questions. Enjoy creating this treat! Your friends and family will love it. Try different flavors and serving ideas for fun. Happy dipping!

Lemon Raspberry Cheesecake Dip Delightful and Easy

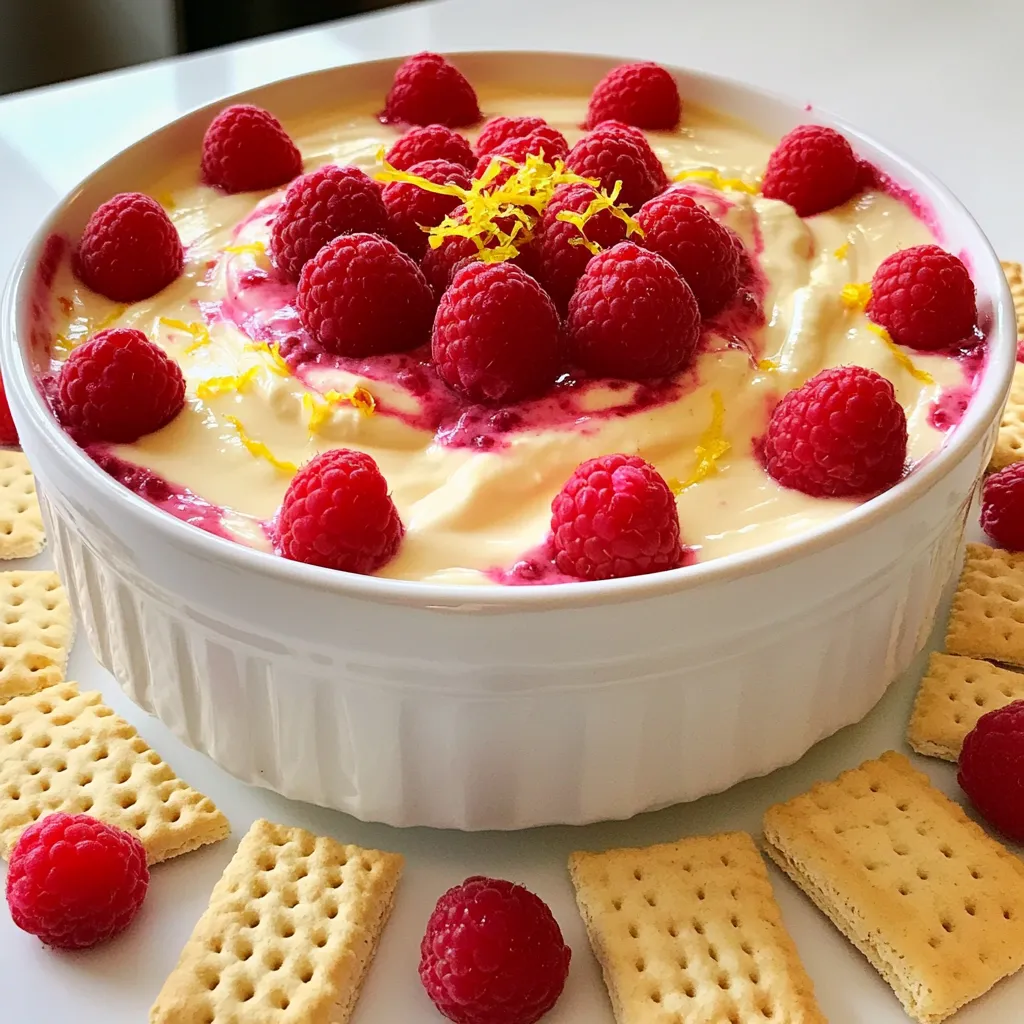
If you’re craving a sweet treat that’s both easy and delightful, you need to try this Lemon Raspberry Cheesecake Dip!

Older posts
Newer posts
← Previous Page1 … Page3 Page4 Page5 … Page83 Next →

dsad

© 2026 eataroundit • Built with GeneratePress

Our Policies

  • Copyright Policy
  • Cookie Policy
  • GDPR Policy
  • Privacy Policy
  • Disclaimer
  • Terms Of Use

More Information

  • Home
  • About
  • Contact
  • Appetizers
  • Dessert
  • Dinner
  • Drinks
©2026, eataroundit About Back To Top