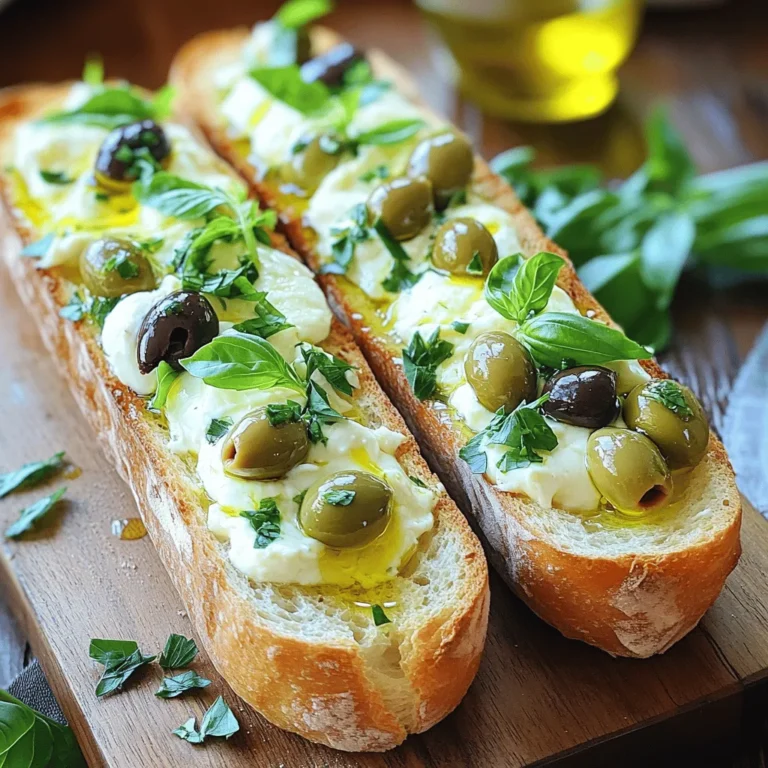
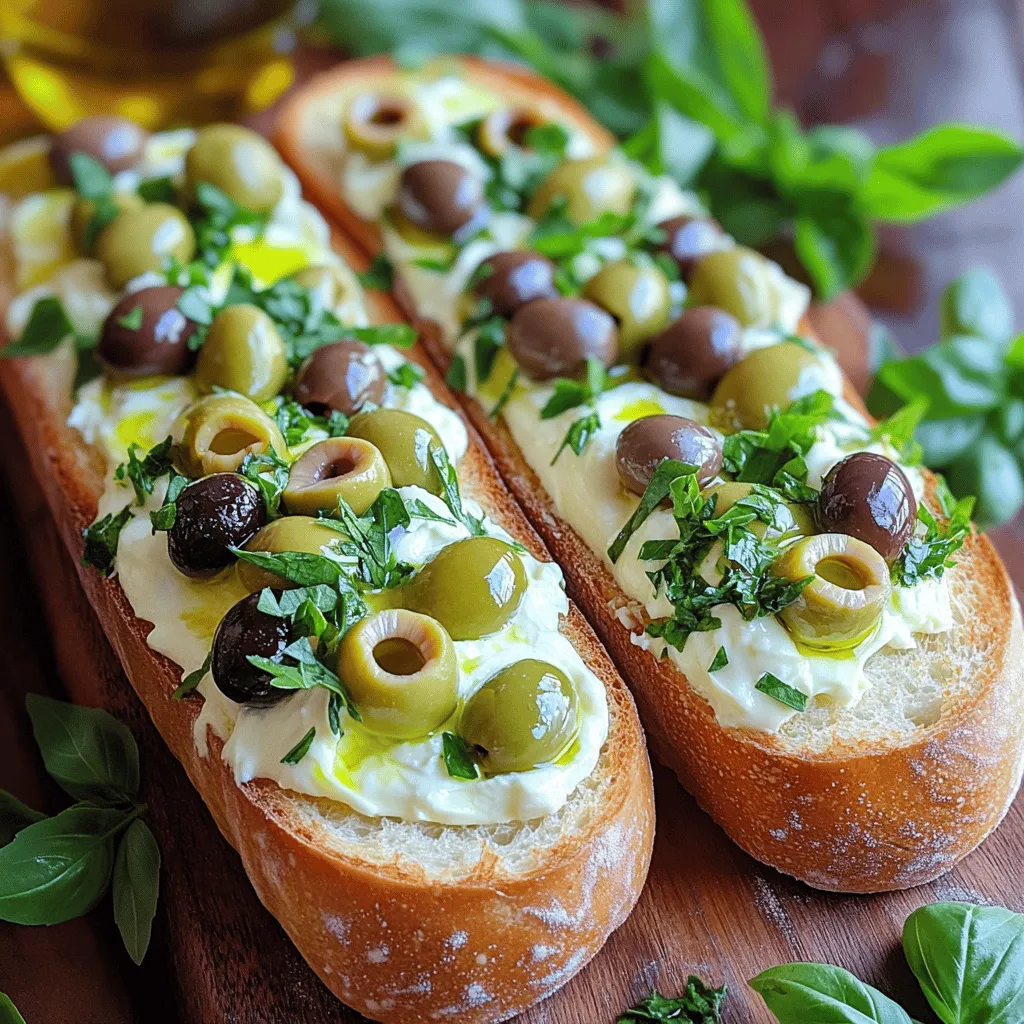
Looking for a standout appetizer that’s both tasty and simple? Look no further! My Olive Cheese Bread Appetizer combines rich flavors of olives and creamy cheeses to create a dish you can impress anyone with. In just a few easy steps, you’ll have a warm, cheesy delight perfect for any gathering. Let’s dive into the ingredients and get started on making this crowd-pleaser today!
Ingredients
Main Ingredients
– 1 large French baguette
– 1 cup pitted Kalamata olives, finely chopped
– 1 cup green olives, finely chopped
– 2 cups shredded mozzarella cheese
– 1 cup cream cheese, softened
Additional Flavor Enhancers
– 2 tablespoons fresh parsley, finely minced
– 2 tablespoons fresh basil, finely minced
– 1 tablespoon garlic powder
– 1 teaspoon onion powder
– ½ teaspoon red pepper flakes (optional)
– Salt and pepper to taste
– 2 tablespoons extra virgin olive oil
Gathering the right ingredients is key for this olive cheese bread. You need a fresh baguette as the base. The baguette should be crusty and soft inside. For olives, use both Kalamata and green olives. Their flavors mix well and provide a nice contrast.
The cheeses play a big role too. Mozzarella gives you that stretchy, gooey texture. Cream cheese adds smoothness and richness.
For a burst of freshness, use minced parsley and basil. Garlic and onion powder enhance the flavor. If you like some heat, add red pepper flakes. Don’t forget salt and pepper to taste.
Finally, drizzle some extra virgin olive oil. This adds richness and helps the bread crisp up. All these ingredients come together in perfect harmony.
Step-by-Step Instructions
Preparation Preparation
– Preheat the oven to 375°F (190°C).
– Slice the French baguette in half lengthwise.
Mixing the Filling
– Combine olives, cheeses, herbs, and spices in a bowl.
– Mix until well incorporated.
Assembling and Baking
– Spread the mixture evenly on the baguette halves.
– Drizzle with olive oil and bake for 15-20 minutes.
This simple process makes Olive Cheese Bread a fun dish to create. You will love how easy it is to prepare.Each step adds flavor and fun to your cooking experience. Enjoy the smell of melting cheese as it fills your kitchen!
Tips & Tricks
Perfect Slicing
– Use a serrated knife for clean cuts.
– Ensure even distribution of the filling.
To slice the bread well, a serrated knife works best. This type of knife cuts through the crust without squishing the soft inside. When you slice, be gentle and steady. After baking, each piece should still hold its shape. For the filling, spread it evenly to make sure every bite is tasty.
Enhancing Flavor
– Adjust red pepper flakes for spice levels.
– Experiment with different cheese varieties.
To control the heat, you can change the amount of red pepper flakes. If you want a little kick, add more. If not, skip them. You can also switch up the cheese. Try mixing mozzarella with cheddar or feta. Each type of cheese will bring a new flavor.
Presentation Suggestions
– Serve on a wooden board or decorative platter.
– Garnish with parsley and basil sprigs.
When it comes to serving, choose a wooden board or a pretty platter. This makes the bread look inviting. For a final touch, add sprigs of parsley or basil. These not only add color but also a fresh aroma. Your Olive Cheese Bread will look as good as it tastes!
Variations
Different Cheese Options
You can change the cheese to fit your taste. Swap mozzarella for cheddar for a sharper flavor. Cheddar melts well and gives a nice bite. Feta is another great option. It offers a salty kick and creamy texture. You can also add a layer of goat cheese. Goat cheese adds a tangy flavor that pairs well with olives.
Herb Alternates
Herbs can change the whole vibe of this dish. Use thyme for an earthy taste. Oregano gives a warm, strong flavor that works well with cheese. If you can’t find fresh herbs, use dried ones. They are easy to store and still give a good taste.
Additional Ingredients
Feel free to get creative with the mix-ins. Sun-dried tomatoes add a sweet and tangy flavor. Roasted garlic gives a rich, mellow taste that enhances the cheese. Diced bell peppers add a nice crunch and a hint of sweetness. Each of these additions makes the dish even more special.
Storage Info
Refrigeration Recommendations
Store any leftover Olive Cheese Bread in an airtight container. This helps keep it fresh. You can keep it refrigerated for up to 3 days.
Freezing Options
If you want to save it for later, wrap it tightly in plastic wrap. This keeps out air and moisture. It’s best used within 1 month for optimal flavor.
Reheating Instructions
To reheat your Olive Cheese Bread, I suggest using the oven. This gives the bread a crispy texture. If you prefer a softer option, you can microwave it. Just be careful not to overheat it.
FAQs
Can I make Olive Cheese Bread ahead of time?
Yes, you can prepare the filling and assemble it the night before. Just store it in the fridge. This makes it easy to bake right before your guests arrive.
How can I spice up this appetizer?
Consider adding jalapeños or other spiced olives. This adds a fun kick. You can also try mixing in some red pepper flakes for extra heat.
Is this recipe vegetarian-friendly?
Yes, all the ingredients are vegetarian. This makes it a great choice for those who avoid meat. The olives and cheese give it lots of flavor and richness.
What is the best way to serve Olive Cheese Bread?
Cut into small pieces for easy sharing at parties. This way, your guests can grab a piece without fuss. Pair it with drinks for a fun snack. Enjoy your Olive Cheese Bread!
This blog post covered how to make Olive Cheese Bread with simple ingredients and steps. We discussed the main components, flavor enhancers, and variations for extra taste. Store leftovers properly for the best flavor later. Remember, you can personalize this dish to fit your taste.
Try different cheeses or add herbs for fun twists. Use it as a crowd-pleaser at your next gathering. Enjoy your cooking adventure and share your results!

