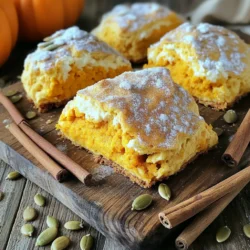
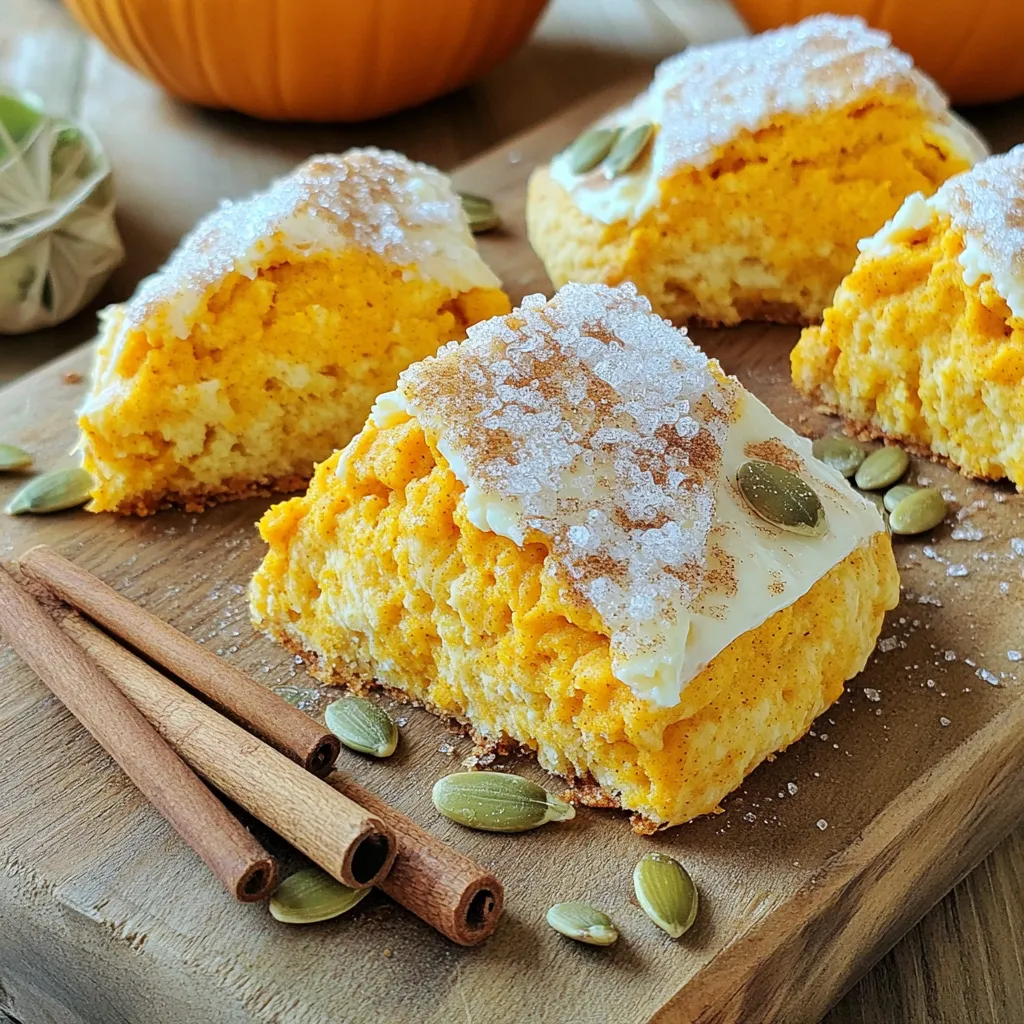
Get ready to indulge in the cozy flavors of fall with my Pumpkin Cream Cheese Scones Bakery Style Delight! These scones are soft, flavorful, and perfect for brunch or a snack. With simple ingredients like pumpkin puree and cream cheese, they come together quickly and taste just like your favorite bakery treats. Let’s dive into the recipe that will have everyone asking for seconds!
Ingredients
Main Ingredients
– 2 cups all-purpose flour
– 1/2 cup granulated sugar
– 1 tablespoon baking powder
– 1 teaspoon ground cinnamon
– 1/2 teaspoon ground nutmeg
Additional Ingredients
– 1/4 teaspoon ground ginger
– 1/2 teaspoon salt
– 1/2 cup unsalted butter, chilled and cubed
– 1/2 cup pumpkin puree
– 1/4 cup cream cheese, softened
Wet Ingredients and Toppings
– 1/4 cup heavy cream
– 1 large egg
– 1 teaspoon vanilla extract
– 1/2 cup chopped walnuts or pecans (optional)
– Egg wash: 1 egg beaten with 1 tablespoon milk
When making pumpkin cream cheese scones, each ingredient plays a key role. The flour helps create the base. Sugar adds sweetness, while baking powder gives the scones a lift. Spices like cinnamon and nutmeg bring warmth and flavor.
The butter, when cold, helps create a flakier texture. Pumpkin puree adds moisture and a subtle sweetness. Cream cheese contributes to a rich flavor, making every bite creamy.
For the wet ingredients, heavy cream adds richness and helps bind the dough. The egg improves texture and adds color. The vanilla extract enhances all the flavors. If you choose to add walnuts or pecans, they give a nice crunch.
Finally, the egg wash ensures a golden, shiny finish. Sprinkling raw sugar on top adds a sweet crunch. This combination of flavors and textures makes these scones a true delight.
Step-by-Step Instructions
Oven Preparation
– Preheat oven to 400°F (200°C).
– Line baking sheet with parchment paper.
Start by preheating your oven. This step is key for getting those perfect scones. Lining the baking sheet helps keep the scones from sticking.
Mixing Dry Ingredients
– Whisk together flour, sugar, baking powder, and spices.
In a large bowl, mix the flour, sugar, baking powder, cinnamon, nutmeg, and salt. Whisking helps to blend all the dry ingredients evenly. This step sets the base for your scones.
Incorporating Butter
– Add butter to dry mix and work until coarse crumbs form.
Cut the chilled butter into small cubes. Add these cubes to the dry mix. Use your fingers or a pastry cutter to work the butter into the flour. Stop when the mix looks like coarse crumbs, with some small butter pieces still showing. This gives your scones a flaky texture.
Preparing Wet Mixture
– Combine pumpkin puree, cream cheese, heavy cream, egg, and vanilla extract.
In a separate bowl, mix the pumpkin puree, cream cheese, heavy cream, egg, and vanilla extract. Stir until smooth. This creamy mix adds moisture and flavor to your scones.
Combining Mixtures
– Fold wet ingredients into dry, avoiding overmixing.
Slowly pour the wet mixture into the dry ingredients. Use a spatula or wooden spoon to fold them together gently. Be careful not to overmix; this keeps your scones tender and light. If you like, add chopped nuts for extra crunch.
Forming the Dough
– Knead and shape the dough into the desired form and cut.
Turn the dough out onto a floured surface. Knead it gently just a few times until it forms a ball. Then, press it into a rectangle about 1 inch thick. Cut it into triangles or squares based on your preference.
Baking the Scones
– Transfer to baking sheet, brush with egg wash, sprinkle with sugar.
– Bake for 15-20 minutes until golden.
Place your cut scones on the prepared baking sheet. Brush the tops with the egg wash, and sprinkle raw sugar on top. Bake in your preheated oven for about 15-20 minutes. Look for a golden brown color and a clean toothpick when testing for doneness.
Enjoy the warm, sweet aroma as they bake!
Tips & Tricks
Achieving Perfect Scones
To get perfect scones, use cold butter. Cold butter helps make the scones flaky. When the butter is cold, it creates little pockets of air as it melts. This gives the scones their light texture.
Be careful not to overmix the dough. Overmixing leads to tough scones. Mix just until the ingredients combine. A few lumps are fine. This keeps your scones tender and soft.
Egg Wash and Sugar Topping
Brushing your scones with an egg wash makes them shine. The wash adds a nice golden color. It also helps the sugar stick. For extra crunch, use raw sugar on top. This gives a sweet crunch with every bite.
Serving Suggestions
Serve your pumpkin cream cheese scones warm. They taste best fresh from the oven. You can enjoy them with butter or cream cheese.
Pair them with a hot drink like tea or coffee. They also go well with apple cider. The warm flavors blend nicely, making for a cozy treat.
Variations
Flavor Additions
You can add more fun to your scones with spices. Try adding a pinch of allspice or a splash of maple extract. These will brighten the flavor. You can also toss in chocolate chips or dried cranberries for a sweet twist. They pair well with pumpkin and cream cheese.
Dietary Adjustments
If you need a gluten-free option, use a gluten-free flour blend. It works well in most scone recipes. For dairy-free scones, swap cream cheese with a vegan cream cheese. Coconut cream can replace heavy cream, adding a nice flavor.
Scone Shapes and Sizes
Cutting scones into different shapes makes them fun. Use cookie cutters for stars, hearts, or even fun shapes like pumpkins. For a quick snack, try mini scones. They bake faster and are easy to share.
Storage Info
Storing Leftover Scones
Store your leftover scones in an airtight container. This keeps them fresh. If you leave them out, they may dry out. For best results, keep them at room temperature for up to two days. If you want to keep them longer, refrigeration can help but may change their texture.
Freezing Scones
You can freeze both uncooked and baked scones. For uncooked scones, shape them and place them on a baking sheet. Freeze them for about an hour, then transfer to a zip-top bag. For baked scones, let them cool completely before wrapping them tightly. They can last in the freezer for up to three months. When you’re ready to eat, thaw overnight in the fridge or at room temperature.
Reheating Tips
To reheat scones, use an oven for the best results. Preheat your oven to 350°F (175°C). Place the scones on a baking sheet for about 10-15 minutes. This keeps them warm and flaky. You can also microwave them for 10-15 seconds, but the oven is better for keeping their texture. Enjoy your scones fresh and warm!
FAQs
How do I know when my scones are done baking?
You can tell if your scones are done by checking a few signs. First, look for a golden-brown color on top. Use a toothpick to poke the center. If it comes out clean, your scones are ready. The sides should feel firm, not soft or doughy. Lastly, you will smell a warm, inviting scent that fills your kitchen.
Can I make these scones ahead of time?
Yes, you can prepare these scones ahead of time. Make the dough and shape it into triangles or squares. Wrap the cut scones in plastic wrap. You can store them in the fridge for up to 24 hours. When you are ready, bake them straight from the fridge. Just add a few extra minutes to the bake time.
What can I serve with pumpkin cream cheese scones?
Pumpkin cream cheese scones pair well with many treats. Serve them with a smear of butter or cream cheese. They also go great with honey or maple syrup. A warm drink like coffee, tea, or cider complements them perfectly. You can even add a sprinkle of cinnamon or nutmeg on top for extra flavor.
Can I use pumpkin spice instead of individual spices?
Absolutely! You can use pumpkin spice instead of the individual spices. Just replace the spices with about 2 teaspoons of pumpkin spice for a warm flavor. This makes it easy and quick. Pumpkin spice blends already contain cinnamon, nutmeg, and ginger. You get great taste with less measuring.
How do I fix dry scones?
If your scones turn out dry, there are ways to fix them. First, add a little butter or cream on top before serving. This adds moisture and flavor. You can also warm them in the oven for a few minutes with a damp paper towel over them. This helps soften them. Lastly, make sure to measure your ingredients correctly next time. Too much flour can lead to dryness.
This blog post covered all you need for perfect pumpkin cream cheese scones. We discussed ingredients, mixing methods, and baking steps. I shared tips to enhance your scone-making skills. Remember, cold butter creates flakiness, and avoid overmixing for a tender result. Try different flavors or shapes for fun! With proper storage, enjoy them fresh later. Now, get baking and savor the delicious outcome!