Skip to content
DisclaimerTerms Of UseGDPR PolicyCookie Policy

eataroundit

  • Home
  • Drinks
  • Appetizers
  • Dinner
  • Dessert
  • About
  • Contact
  • Privacy Policy
DisclaimerTerms Of UseGDPR PolicyCookie Policy

Hannah

To make healthy peanut butter oat bars, gather these simple ingredients: - 2 cups rolled oats - 1/2 cup natural peanut butter - 1/4 cup honey or maple syrup (for a vegan option, use maple syrup) - 1/2 cup mashed ripe bananas (about 1 large banana) - 1/4 cup chopped nuts (almonds or walnuts work great) - 1/4 cup dark chocolate chips (optional but tasty) - 1/2 teaspoon vanilla extract - 1/2 teaspoon ground cinnamon - A pinch of salt Each bar is a powerhouse of nutrients. On average, one bar provides: - Calories: 150 - Protein: 4g - Carbohydrates: 20g - Fiber: 3g - Sugars: 5g - Fat: 7g (mostly healthy fats from nuts and peanut butter) These bars give you a great balance of protein, fiber, and healthy fats. They keep you full and satisfied without the crash that comes from sugary snacks. If you have allergies, you can still enjoy these bars. Here are some easy swaps: - Nut Butter: Use sunflower seed butter or soy nut butter for nut-free bars. - Sweeteners: Replace honey with agave syrup for a vegan option. - Oats: Choose certified gluten-free oats if needed. - Nuts: Omit nuts or use seeds like pumpkin or sunflower seeds. These substitutions let everyone enjoy healthy peanut butter oat bars, no matter their dietary needs. For the full recipe, you can follow the steps shared above. Start by preheating your oven to 350°F (175°C). Grab an 8x8 inch baking dish and line it with parchment paper. Leave some paper hanging over the edges. This makes it easy to lift the bars out later. In a large bowl, combine 2 cups of rolled oats and 1/4 cup of chopped nuts. You can use almonds or walnuts, depending on your taste. Stir these together with a big spoon until they mix well. This blend is the base for your bar. Take a medium bowl and add 1/2 cup of natural peanut butter, 1/4 cup of honey or maple syrup, and 1/2 cup of mashed ripe bananas. You will need about 1 large banana. Then, add 1/2 teaspoon of vanilla extract, 1/2 teaspoon of ground cinnamon, and a pinch of salt. Whisk everything together until the mixture is smooth and creamy. Pour the wet mixture into the bowl with the oats and nuts. Mix them with a wooden spoon or spatula until every oat and nut gets coated. If you're using dark chocolate chips, fold them in gently. Next, transfer this combined mixture into your prepared baking dish. Press it down firmly with a spatula or your hands. This step helps the bars stick together. Put the baking dish into the oven and bake for 20-25 minutes. Watch for a golden edge, which means they are ready. Once done, take them out and let them cool in the pan for about 10 minutes. Use the parchment paper to lift the bars out. Let them cool completely on a wire rack. After they cool, slice them into 12 equal bars. Enjoy your tasty and healthy treat from the Full Recipe! To get the best texture, press the mixture firmly into your baking dish. This helps the bars hold together well. If they are too loose, they may crumble when you slice them. Bake until the edges are just golden. This gives a nice crispness while keeping the center chewy and soft. When it comes to peanut butter, choose a natural brand. Look for one with just peanuts and maybe a pinch of salt. Avoid brands with added sugar or oils. This keeps the bars healthier and more flavorful. The creaminess of the peanut butter affects the final texture, so pick one you love. You can easily change the flavor of your bars. Try adding spices like nutmeg or ginger for warmth. You can also use mix-ins like dried fruit or seeds for crunch and taste. Dark chocolate chips add a sweet touch, while chopped nuts bring a satisfying crunch. Get creative and find your favorite combo! {{image_4}} You can easily make these oat bars vegan. Simply swap honey for maple syrup. Use ripe bananas for moisture and sweetness. This keeps the bars delicious and plant-based. For a gluten-free version, ensure you use certified gluten-free oats. You can still enjoy the same great taste and texture. This way, you can share them with friends who need gluten-free options. You can add fun flavors to your oat bars. Consider mixing in dried fruits like cranberries or raisins. Nuts like almonds or walnuts add crunch and protein. Seeds such as chia or flax can boost nutrition too. Even a sprinkle of cinnamon or nutmeg can change the flavor. Get creative and find your favorite mix! To keep your healthy peanut butter oat bars fresh, store them in an airtight container. This will help maintain their taste and texture. You can place parchment paper between layers to prevent sticking. Store them at room temperature for up to a week. If you want them to last longer, consider freezing them. Freezing is an excellent way to keep your oat bars for a longer time. To freeze, start by cutting the bars into individual pieces. Wrap each piece tightly in plastic wrap or foil. Place the wrapped bars in a freezer-safe bag or container. They can last for up to three months in the freezer. When you want one, just take it out and let it thaw at room temperature. When you're ready to enjoy your oat bars again, you can eat them cold or warm them up. For warming, unwrap the bar and place it on a microwave-safe plate. Heat for about 10-15 seconds. This will bring back some softness. If you prefer, you can also enjoy them with toppings like yogurt or fresh fruit. These options add more flavor and nutrition, making your snack even better. Yes, you can use other sweeteners. Options like agave syrup or coconut sugar work well. Each sweetener will change the flavor a bit, so choose one that you like. Honey and maple syrup are also great choices in the Full Recipe. These bars can last up to a week when stored in an airtight container. If you want to keep them longer, freeze them. They can stay fresh for about three months in the freezer. Yes! You can use quinoa flakes or ground oats if you prefer. Just make sure the texture is similar to rolled oats. This keeps the bars chewy and tasty. These oat bars pair well with yogurt, fresh fruit, or a drizzle of honey. You can also enjoy them with a glass of milk or a smoothie. They make a great snack or quick breakfast option. Absolutely! You can replace peanut butter with sunflower seed butter. This keeps the bars nut-free but still delicious. The flavor will change, but they will still be tasty and nutritious. Healthy Peanut Butter Oat Bars are easy to make and fun to tweak. You’ve learned about the key ingredients, how to prep and bake, and storage tips. You can try vegan or gluten-free options based on your needs. Don’t forget to add your favorite flavors for a personal touch. With these bars, you have a tasty and healthy snack that keeps well. Enjoy them at home, school, or on the go!

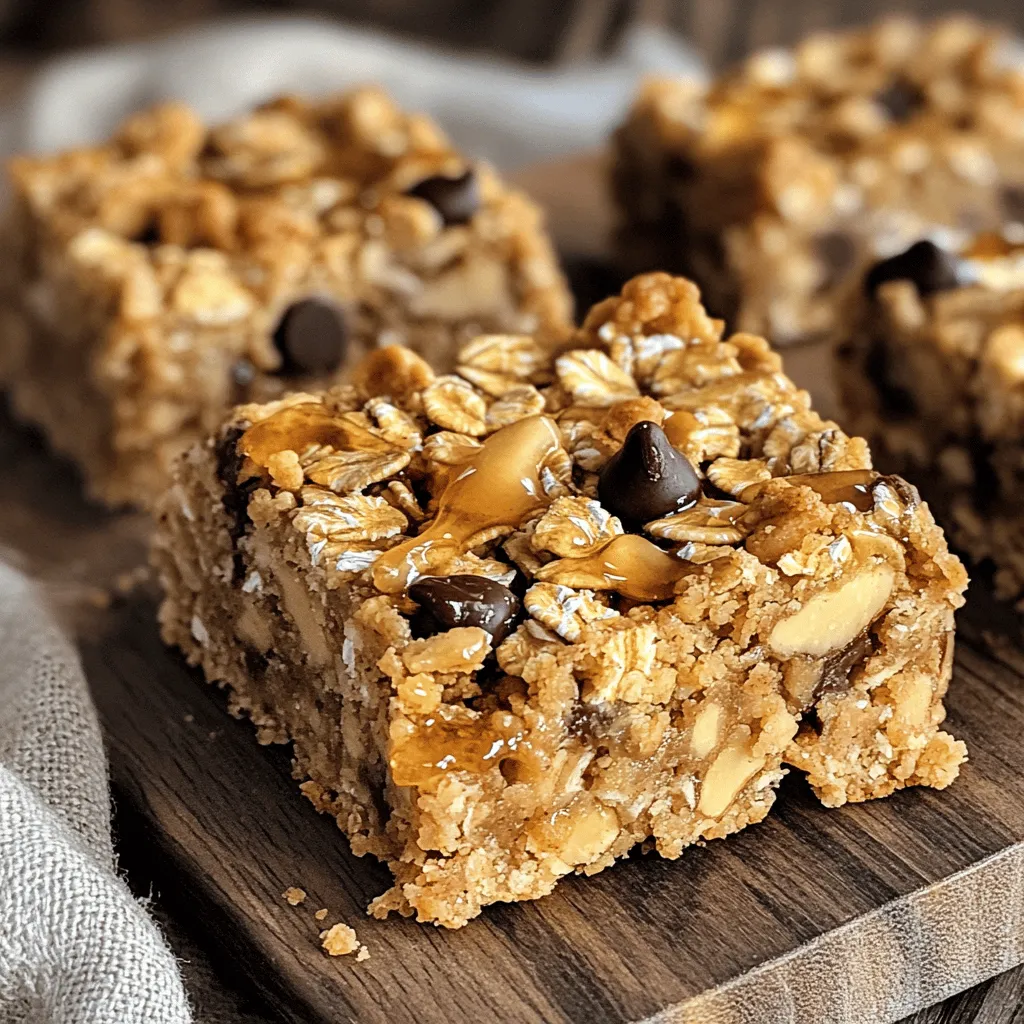
Healthy Peanut Butter Oat Bars Nutritious Snack Option

Looking for a nutritious snack that satisfies your cravings? Healthy peanut butter oat bars are an easy and delicious choice!

- 2 cups fresh corn kernels (or canned corn) - 1/2 cup all-purpose flour - 1/4 cup cornmeal - 1 large egg - 1/2 cup milk - 1 tablespoon baking powder - 1 teaspoon paprika - 1/2 teaspoon salt - 1/4 teaspoon black pepper - 1/4 cup green onions, finely chopped - 1/4 cup grated cheddar cheese (optional) - Oil for frying (vegetable or canola oil works best) When I make sweet corn fritters, I love using fresh corn. It adds a sweet crunch. If fresh corn isn't available, canned corn works too. Just make sure to drain it well. For the batter, I combine all-purpose flour and cornmeal. This mix gives the fritters a nice texture. I always add a large egg and milk to bind everything together. The egg helps with fluffiness, while the milk keeps it moist. To amp up the flavor, I add baking powder, paprika, salt, and black pepper. These spices create an exciting taste that keeps you coming back for more. Lastly, I love to fold in finely chopped green onions. They give the fritters a burst of color and flavor. If you want to make it extra special, add some grated cheddar cheese. It melts beautifully and adds a rich taste. Don't forget the oil for frying! Vegetable or canola oil works best. It ensures the fritters fry evenly and get that perfect golden color. For the full recipe, you can refer to the detailed instructions above. - In a large mixing bowl, combine 2 cups of fresh corn kernels, 1/2 cup of all-purpose flour, 1/4 cup of cornmeal, 1 tablespoon of baking powder, 1 teaspoon of paprika, 1/2 teaspoon of salt, and 1/4 teaspoon of black pepper. Mix these dry ingredients well. - In a separate bowl, whisk 1 large egg and 1/2 cup of milk until the mixture is light and frothy. - Pour the egg and milk mix into the bowl of dry ingredients. Stir gently until just combined. Be careful not to overmix. If you like, fold in 1/4 cup of finely chopped green onions and 1/4 cup of grated cheddar cheese. - Heat about 1/4 inch of oil in a large skillet over medium heat. Test if the oil is hot enough by dropping a small amount of batter into it. If it sizzles, you're ready! - Carefully drop spoonfuls of the batter into the skillet. Shape each spoonful into patties by flattening them slightly with the back of the spoon. - Fry the fritters for about 3-4 minutes on each side. You want them to be golden brown and crispy on the outside. - Once cooked, remove the fritters from the skillet using a slotted spoon. Place them on a plate lined with paper towels to drain any excess oil. - If you like, garnish the fritters with fresh herbs or serve them with a tasty dipping sauce. Enjoy your crispy and flavorful sweet corn fritters! For the full recipe, check out the detailed instructions above. To make your sweet corn fritters crispy, avoid overmixing the batter. Mix the wet and dry ingredients just until combined. This keeps the fritters light and fluffy. Also, make sure the oil is at the right temperature. If the oil is too cool, the fritters will absorb too much oil. A good test is to drop a small bit of batter into the oil. If it sizzles, you are ready to fry! You can boost the flavor of your fritters by adding spices and herbs. Try adding cumin for warmth or cilantro for freshness. Fresh ingredients make a big difference. Use fresh corn if possible, as it gives the fritters a sweet crunch. Fresh herbs also add bright notes that enhance the dish. You can prepare the fritter batter in advance. Just store it in the fridge for up to two hours before frying. This makes it easy for busy days. If you have leftovers, reheat them in a skillet over medium heat. This keeps them crispy and warms them through. Avoid using the microwave, as it makes them soggy. {{image_4}} You can easily make sweet corn fritters gluten-free. Use gluten-free flour instead of all-purpose flour. Some great options are almond flour or rice flour. These substitutes work well and keep the fritters crispy. Adjust the liquid in the recipe slightly if needed. Gluten-free flours can absorb more moisture. Just add a little extra milk if the batter seems too thick. If you want to make your fritters vegan, replace the egg with a flaxseed meal mixture. Mix one tablespoon of flaxseed meal with three tablespoons of water. Let it sit for about five minutes. For the milk, use almond milk or oat milk. You can also add vegan cheese for extra flavor. Look for brands that melt well and give that cheesy taste. Nutritional yeast is another great option to add a cheesy flavor without dairy. Sweet corn fritters are fun to customize! Try adding grated zucchini or diced bell peppers for extra veggies. These additions add color and nutrition. You can also explore spices to change up the flavor. A pinch of cumin or chili powder adds warmth. For an Asian twist, try adding a bit of ginger or sesame oil. The possibilities are endless, so feel free to experiment! To keep your fritters fresh, place them in a shallow container. Line the container with paper towels to soak up any moisture. Cover it tightly with a lid or plastic wrap. Store them in the fridge. This will help keep them crispy. Try to eat them within three days for the best taste. Freezing fritters is easy. First, let them cool completely on a wire rack. This prevents sogginess. Then, place the fritters in a single layer on a baking sheet. Freeze them for about one hour. Once frozen, transfer them to a freezer-safe bag. Squeeze out as much air as you can. To reheat, bake them in the oven at 350°F for about 15 to 20 minutes. This will make them crispy again. In the fridge, fritters last about three days. If you freeze them, they can last up to two months. Look for signs of spoilage. If they smell sour or have a strange texture, throw them away. Always trust your senses when checking food freshness. Sweet corn fritters last about 3 to 5 days in the fridge. To store them, place them in an airtight container. If you freeze them, they can last up to 3 months. Make sure to wrap them well in plastic wrap or aluminum foil before placing them in a freezer bag. This helps prevent freezer burn. Yes, you can make sweet corn fritters ahead of time. Prepare the batter and store it in the fridge for up to 24 hours. When you're ready to cook, just stir the batter and fry. If you have leftovers, reheat them in a skillet over medium heat. This keeps them crispy and warm. You can dip corn fritters in many tasty sauces. Some great options include: - Spicy aioli - Sweet chili sauce - Salsa - Sour cream or yogurt - Honey mustard These sauces add a nice kick and enhance the flavor of the fritters. Yes, you can use frozen corn for sweet corn fritters. Frozen corn is convenient and often sweeter. The downside is that it may have more water. Be sure to thaw and drain it well before using it in the batter. This avoids soggy fritters. To keep your fritters crispy, follow these tips: - Fry in hot oil, about 350°F (175°C). - Avoid overcrowding the pan; fry in batches. - Place cooked fritters on a wire rack instead of paper towels. This allows air to circulate and keeps them crispy longer. Sweet corn fritters are simple to make and so tasty. You learned the key ingredients, cooking steps, and storage tips. The options for variations, like gluten-free or vegan, add fun. Finally, enjoy these fritters with your favorite dips. Sharing them with friends and family will make mealtime special. Happy cooking, and enjoy every bite!

Sweet Corn Fritters Crispy and Flavorful Snack

Are you ready to bite into something delightful? Sweet corn fritters are the perfect crispy snack that everyone loves. With

To make this tasty garlic naan, you need a few key items. Here’s the list: - 2 cups all-purpose flour - 1 teaspoon baking powder - 1 teaspoon sugar - 1 teaspoon salt - 3/4 cup warm water (about 110°F) - 2 tablespoons plain yogurt (Greek yogurt works best) - 2 tablespoons olive oil (plus more for brushing) - 3 cloves garlic, finely minced - Fresh cilantro or parsley, finely chopped (for garnish) These ingredients blend to create a soft, warm naan that pairs well with many dishes. You can add some fun flavors to your naan. Here are some choices: - 1/2 teaspoon cumin powder for a warm spice - 1/4 teaspoon chili powder for a kick - A sprinkle of sesame seeds for crunch - A pinch of dried herbs like oregano or thyme These optional ingredients can give your naan a unique twist and make it even tastier. Having the right tools makes cooking easier and more fun. Here’s what I recommend: - Large mixing bowl - Wooden spoon or your hands for mixing - Rolling pin for shaping the naan - Non-stick skillet or frying pan for cooking - Damp cloth or plastic wrap to cover the dough Using these tools helps ensure your naan turns out perfectly every time. For the full recipe, check out my detailed instructions. Enjoy making this delicious garlic naan! Start by gathering your ingredients. You need: - 2 cups all-purpose flour - 1 teaspoon baking powder - 1 teaspoon sugar - 1 teaspoon salt - 3/4 cup warm water (around 110°F) - 2 tablespoons plain yogurt (Greek works best) - 2 tablespoons olive oil (plus extra for brushing) - 3 cloves garlic, finely minced In a large bowl, mix the flour, baking powder, sugar, and salt. Stir it well to blend everything. Next, make a well in the center of the dry mix. Pour in the warm water, yogurt, and olive oil. Use your hands or a wooden spoon to mix the ingredients. You want a soft dough. If it feels sticky, add more flour a little at a time. Once mixed, place the dough on a floured surface. Knead it for about 5 minutes until it feels smooth and elastic. Cover the dough with a damp cloth and let it rest for 15-20 minutes. This helps the gluten relax, making it easier to roll out. After resting, divide the dough into four equal pieces. Roll each piece into a ball. This makes sure they cook evenly. Heat a large skillet over medium-high heat. Do not add oil yet! On a floured surface, roll one dough ball into an oval shape. Aim for about 1/4 inch thick. An uneven shape gives that classic naan look! Place the rolled dough in the hot skillet. Cook for 1-2 minutes. You will see bubbles form on top. Carefully flip the naan over. Sprinkle the minced garlic on top. Cook for another 1-2 minutes, pressing down with a spatula. This helps it cook evenly until it is golden brown. Transfer the naan to a plate. Brush it with olive oil or melted butter for extra flavor. Repeat this process with the other dough balls. Adjust the heat if needed to avoid burning. To get the best naan, here are some tips: - Use warm water, not boiling. It helps the dough rise but keeps it soft. - Don’t rush the resting time. Letting the dough rest makes it easier to roll. - Keep the skillet hot. This helps create those lovely bubbles. - Press down the naan while cooking. This ensures even cooking and better texture. - Brush with oil or butter right after cooking. It adds a nice, rich flavor. These steps will help you create garlic naan that is soft, fluffy, and full of flavor. Enjoy making this quick garlic naan bread! For the full recipe, check the earlier sections. When making garlic naan, some common mistakes can ruin your bread. One mistake is adding too much water. If your dough is too sticky, it won’t roll out well. Start with less water and add more if needed. Another mistake is not allowing the dough to rest. Resting helps the gluten relax, making it easier to shape. Skipping this step can lead to tough naan. Lastly, don’t rush the cooking time. Each naan needs enough time to bubble and brown. A hot skillet is key! You can easily customize your garlic naan to fit your taste. Want more garlic? Add extra minced cloves to the dough. You can also mix in herbs like cilantro or parsley for added flavor. If you love cheese, sprinkle some shredded cheese on top before flipping it in the pan. For a spicy kick, try adding minced chili or red pepper flakes. Each of these choices makes your naan unique and delicious. To elevate the flavor of your garlic naan, here are a few secrets. Use fresh garlic for the best taste. You can also sauté the minced garlic in olive oil before adding it to the naan. This adds a rich, toasted flavor. Another trick is to brush the naan with melted butter after cooking. This adds a nice sheen and extra richness. Finally, garnishing with fresh herbs right before serving brightens every bite. For the full recipe, remember to check the details above. Enjoy your cooking! {{image_4}} You can change up the taste of garlic naan easily. For a cheesy twist, add shredded cheese to the dough before cooking. Mozzarella or cheddar will melt nicely. You can also sprinkle cheese on top right before serving. If you want a fresh herb flavor, mix chopped herbs into the dough. Cilantro, parsley, or thyme work well. They add a nice burst of flavor. You can also brush the naan with herb-infused oil after cooking to enhance the taste. For a spicy kick, add red pepper flakes or chopped jalapeños to the garlic. This gives the naan a nice heat. You can pair it with cooling yogurt dips to balance the spice. If you need a gluten-free option, use gluten-free flour. Look for blends that work well for baking. Combine it with xanthan gum to mimic the texture of regular naan. You can find many gluten-free flour mixes at stores. Ensure they have a balanced mix of starches and flours. This helps create a soft and chewy naan. Follow the same steps from the main recipe for cooking. Garlic naan goes great with many dishes. It’s perfect for scooping up curries or stews. Serve it alongside a bowl of creamy yogurt or raita for dipping. You can also use naan as a base for quick pizzas. Top it with sauce, cheese, and your favorite toppings, then bake until crispy. Try serving garlic naan with grilled meats or roasted vegetables. Its flavor complements many meals. Let your creativity flow when using this tasty bread! For the full recipe, refer to the earlier section. To keep your naan fresh, place it in a zip-top bag. Make sure the bag is sealed tightly. You can also wrap it in plastic wrap or aluminum foil. This helps to keep the naan soft and moist. Store the naan at room temperature if you plan to eat it within a day. If you need to store it longer, the fridge is a better option. The best way to reheat naan is in a skillet. Heat a non-stick skillet over medium heat. Place the naan in the skillet for about 30 seconds on each side. This brings back the soft texture and warmth. You can also use an oven. Preheat it to 350°F (175°C). Wrap the naan in foil and heat for about 5 minutes. This method keeps the naan soft. Freezing is a great option if you have extra naan. To freeze, let the naan cool completely. Then, stack them with parchment paper in between each one. Place the stack in a freezer bag. Make sure to remove as much air as possible. Naan can last in the freezer for up to three months. When you're ready to eat, just reheat it straight from the freezer using the skillet method. For a tasty meal, serve it alongside your favorite curry. For the full recipe, check out the earlier sections. Yes, you can make garlic naan without yogurt. Instead of yogurt, use an equal amount of warm water. This will keep your dough moist. You can also try adding a bit of vinegar to mimic the tangy flavor yogurt brings. This small change will help you create a soft naan. To make naan bread vegan, simply omit the yogurt. Use warm water and add a little lemon juice or vinegar for flavor. For the oil, use any plant-based oil like coconut or sunflower oil. This way, you still get a tasty naan without any animal products. Garlic naan pairs well with many dishes. You can serve it alongside your favorite curry, like chicken tikka masala or paneer butter masala. It also goes great with lentil soup or a spicy chickpea dish. Don’t forget to try it with a yogurt dip or hummus for a tasty snack. For the full recipe of garlic naan, check out the instructions above. In this post, we explored how to make quick garlic naan. We looked at essential and optional ingredients, tools needed, and step-by-step cooking instructions. I shared tips to avoid common mistakes and ways to customize your naan. Variations offered new flavors and catering options. Finally, we discussed storage and reheating methods to keep your naan fresh. Now you're ready to impress with your homemade garlic naan, full of flavor and warmth. Enjoy every bite!

Quick Garlic Naan Bread Tasty and Easy Recipe

Are you craving warm, soft naan bread packed with garlic goodness? This Quick Garlic Naan Bread recipe is perfect for

- 1 can (15 oz) chickpeas, thoroughly drained and rinsed - 2 cups cooked quinoa, fluffy and warm - 1 cup cherry tomatoes, vibrant and halved - 1 ripe avocado, elegantly sliced - 1 cup baby spinach or a mix of fresh greens Chickpeas are the star of this dish. They add protein and fiber. Quinoa serves as a great base. It’s light and full of nutrients. Fresh veggies add color and crunch. Cherry tomatoes bring sweetness, while avocado gives creaminess. Baby spinach offers a fresh bite. - 2 tablespoons extra virgin olive oil - 1 teaspoon smoked paprika - 1 teaspoon ground cumin - 1/2 teaspoon cayenne pepper (adjust to taste for heat preference) - Salt and freshly ground black pepper to taste The seasoning makes this bowl exciting. Olive oil helps blend the spices well. Smoked paprika adds a warm, smoky flavor. Cumin gives an earthy touch. Cayenne pepper adds heat, which you can adjust. Salt and pepper balance the flavors. - 1/4 cup tahini, creamy and rich - 1 tablespoon freshly squeezed lemon juice - Water to adjust tahini consistency, as needed The tahini dressing ties everything together. It’s creamy and rich. Lemon juice adds brightness and zest. You can use water to get the right consistency. This dressing makes each bite delightful. For the full recipe, check out the Full Recipe section. Enjoy making your Spicy Chickpea Buddha Bowl! - Preheat the oven to 400°F (200°C). - Combine chickpeas with seasoning in a bowl. Start by getting your oven nice and hot. This helps make the chickpeas crispy. Next, drain and rinse your chickpeas well. In a large bowl, add the chickpeas. Then, pour in the olive oil, smoked paprika, ground cumin, cayenne pepper, salt, and pepper. Stir until every chickpea is coated in the spice mix. This step adds a ton of flavor to your dish. - Roast chickpeas until golden brown and crispy. - Make tahini dressing by whisking ingredients together. Spread the seasoned chickpeas on a baking sheet. Roast them in the oven for about 20 to 25 minutes. Stir halfway through for even cooking. Keep an eye on them. You want them golden brown and crispy. While the chickpeas roast, make the tahini dressing. In a small bowl, whisk together tahini and lemon juice. Add a pinch of salt. If it’s too thick, add water a tablespoon at a time. This dressing should be smooth and easy to drizzle. - Layer quinoa as the base in serving bowls. - Arrange roasted chickpeas and fresh vegetables on top. To build your bowl, place warm quinoa at the bottom. It makes a great base. On top of the quinoa, add the roasted chickpeas. Next, arrange your fresh vegetables: halved cherry tomatoes, sliced avocado, and a handful of baby spinach. This will create a colorful and vibrant dish. Finally, drizzle the tahini dressing over everything. For extra flavor, sprinkle some salt, pepper, or chili flakes on top if you like a bit more heat. For the full recipe, check out the details above. To get crispy roasted chickpeas, watch the oven closely. Roast them for about 20 to 25 minutes. You want them to turn golden brown. Stir them halfway through for even cooking. If you like more heat, add more cayenne pepper. Adjust seasoning to fit your taste. You can add extra toppings for more flavor. Try nuts like almonds or seeds like sunflower. They add crunch and taste. Pair your bowl with sides like a fresh salad or warm pita bread. These sides can enhance your meal and make it even better. Make your Buddha bowl look great! Arrange the ingredients in a circle. This creates colorful sections that look nice. You can also garnish with sesame seeds or fresh herbs. Herbs like cilantro or parsley add a fresh touch. Serve with extra lemon wedges for a zesty burst. For the full recipe, check out the details above! {{image_4}} This dish is perfect for everyone. It’s vegan and naturally gluten-free. You can easily swap toppings for different needs. Try adding nuts or seeds for crunch. Sunflower seeds or almonds work well. They add protein and texture, making your bowl even better. Chickpeas are great, but you can use other legumes too. Black beans or lentils make good swaps. They also give a nice taste and texture. For the grain base, consider using brown rice or couscous. Both work well and change the flavor a bit. Want to spice things up? You can try different spice blends. For instance, curry powder or garam masala can add warmth. Fresh herbs like cilantro or parsley enhance the dish. They bring freshness and color. You can mix and match flavors to make it your own. For the full recipe, check out the details above! To store leftover Buddha bowl components, keep them in separate airtight containers. This helps keep each ingredient fresh. I recommend placing the quinoa and chickpeas in one container. Store the veggies, like cherry tomatoes and spinach, in another. Tahini dressing should also stay in its own container. This method preserves flavor and crunch. For the best taste, eat leftovers within three days. When you are ready to enjoy your Buddha bowl again, simply warm the quinoa and chickpeas in the microwave. Add the fresh veggies after reheating for the best texture. Freezing is a great option if you want to keep the chickpeas and quinoa longer. To freeze chickpeas, spread them on a baking sheet first. This prevents them from sticking together. Once they are frozen, place them in a freezer bag. For quinoa, let it cool completely before transferring it to a freezer bag. When you want to use them, thaw them in the fridge overnight. You can also microwave them on low power. This keeps them from getting mushy. In the fridge, expect the Buddha bowl ingredients to last about three to four days. After this time, they may lose flavor and texture. Check for signs of spoilage, such as mold or an off smell. If the chickpeas feel slimy or the veggies look wilted, it’s time to toss them. Always trust your senses to keep your meals safe and tasty. You can save money by using pantry staples. Start with dried chickpeas instead of canned. Soak them overnight and cook them. Use seasonal veggies from local markets for the best price and freshness. Frozen vegetables are also a great option. They last long and save you from waste. Quinoa can be swapped with rice or other grains, which may be cheaper. Yes! You can add plant-based protein to boost nutrition. Tofu is a great option. It soaks up flavors well and is easy to cook. You can also use tempeh for a nutty taste. Edamame is another great choice. It adds color and a fun texture. For a different twist, try adding lentils or beans. You can serve the Buddha bowl with a light salad. A simple cucumber and tomato salad pairs well. You can also serve it with a refreshing drink, like iced tea or lemonade. For a heartier option, try serving it with whole grain pita bread. This adds a nice texture and makes the meal more filling. This bowl is packed with health benefits. Chickpeas are high in protein and fiber, helping digestion. Quinoa offers complete protein and essential amino acids. The veggies provide vitamins and minerals. Avocado adds healthy fats, which are good for your heart. Each serving has about 400 calories. It keeps you full without the extra calories. You can easily change the tahini dressing to suit your taste. Add garlic for a stronger flavor. If you want a spicy kick, mix in some sriracha or chili paste. For a sweeter touch, add a bit of maple syrup or honey. You can also swap tahini for yogurt for a creamier dressing. Adjust the lemon juice for more or less tang. This blog post covers the tasty Spicy Chickpea Buddha Bowl. We explored key ingredients like chickpeas, quinoa, and fresh veggies. You learned how to roast chickpeas and prepare a flavorful tahini dressing. Tips for perfecting your bowl and tasty variations add fun to your meals. Incorporating these ideas will help you create a delicious dish. Enjoy making your own unique Buddha bowl that fits your taste and diet!

Spicy Chickpea Buddha Bowl Flavorful and Healthy Dish

Ready to spice up your meals? The Spicy Chickpea Buddha Bowl is your answer! Packed with protein, fresh veggies, and

To make this dish, you need a few key ingredients. Here’s what you’ll require: - 4 bone-in, skin-on chicken thighs - 1 cup assorted bell peppers (red, yellow, or green), sliced into strips - 1 medium onion, finely chopped - 3 cloves garlic, minced - 1 can (14 oz) diced tomatoes in their juices - 1 cup rich chicken broth - 1 teaspoon dried oregano - 1 teaspoon dried basil - 1 teaspoon red pepper flakes (optional, for added heat) - Salt and freshly cracked black pepper, to taste - 2 tablespoons extra virgin olive oil - Fresh parsley, chopped, for garnish Each ingredient adds its own flavor. The chicken gives the dish a hearty base. The bell peppers and onion bring sweetness and color. Garlic adds depth, while tomatoes create a rich sauce. You can easily customize this dish. Here are some optional ingredients to consider: - Mushrooms for an earthy touch - Olives for a briny flavor - Carrots for added sweetness - Zucchini for extra veggies - Fresh herbs like thyme or rosemary for a fresh twist Feel free to mix and match. Each addition can change the taste and make the dish your own. Having the right tools makes cooking easier. Here’s what I recommend: - Large skillet or Dutch oven - Wooden spoon for stirring - Sharp knife for chopping - Cutting board for prep - Measuring cups and spoons for accuracy Using these tools helps you cook with ease. You’ll enjoy the process and love the results. For the full recipe, check out the details above! Start by gathering all your ingredients. This makes cooking easy and fun. You will need: - 4 bone-in, skin-on chicken thighs - 1 cup assorted bell peppers (red, yellow, or green), sliced into strips - 1 medium onion, finely chopped - 3 cloves garlic, minced - 1 can (14 oz) diced tomatoes in their juices - 1 cup rich chicken broth - 1 teaspoon dried oregano - 1 teaspoon dried basil - 1 teaspoon red pepper flakes (optional, for added heat) - Salt and freshly cracked black pepper, to taste - 2 tablespoons extra virgin olive oil - Fresh parsley, chopped, for garnish Make sure to wash and slice the vegetables. This helps them cook evenly. Keep your chicken thighs ready, seasoned with salt and pepper. Heat the olive oil in a large skillet over medium-high heat. Wait until it shimmers. Carefully add the seasoned chicken thighs. Sear them for 5-7 minutes on each side. You want a golden-brown crust. Remove the chicken and set it aside. In the same skillet, lower the heat to medium. Add the chopped onion and bell peppers. Sauté for 4-5 minutes. The veggies should soften and smell great. Next, add the minced garlic and cook for 1 more minute. Stir it to avoid burning. Now, pour in the diced tomatoes and chicken broth. Add the oregano, basil, and red pepper flakes if you like heat. Mix everything well. Place the seared chicken back into the skillet. Let it simmer gently. Cover the skillet and reduce the heat to low. Cook for 30-35 minutes. The chicken should reach 165°F (75°C) and be tender. After cooking, taste the sauce. Adjust with salt and black pepper if needed. Serve your Chicken Cacciatore warm. Garnish with fresh parsley for a nice touch. I like to use deep bowls for serving. It shows off the vibrant sauce and vegetables. Pair it with crusty bread to soak up all that delicious sauce. For the full recipe, check the section above! To boost the flavor of your Chicken Cacciatore, use fresh herbs. Fresh basil and parsley add a bright taste. Try adding a splash of red wine for depth. It enhances the sauce and adds a rich taste. Also, let the sauce simmer longer to deepen the flavors. The longer it simmers, the better it gets. Avoid using low-quality chicken. Good chicken makes a big difference. Also, don’t skip the searing step. Searing adds color and flavor. Be careful not to rush the cooking process. Cooking too fast can lead to dry chicken. Finally, don’t forget to taste the sauce before serving. Adjust the seasoning for the best results. Always start with a hot skillet when searing chicken. This ensures a nice crust. Use bone-in, skin-on chicken for more flavor. If you want a bit of heat, add red pepper flakes to the sauce. Remember, you can always adjust spices to suit your taste. For a great presentation, serve the dish in rustic bowls. Add a sprinkle of fresh parsley on top. This makes your Chicken Cacciatore look as good as it tastes. For the full recipe, check the earlier section. {{image_4}} You can make a tasty vegetarian version of Chicken Cacciatore. Instead of chicken, use hearty vegetables. Some great choices are eggplant, mushrooms, or zucchini. These veggies soak up the sauce well. Replace the chicken broth with vegetable broth for a full flavor. You can still use the same spices and tomatoes. This will give you a rich, savory dish that everyone can enjoy. Chicken is great, but you can switch it up. Try using pork or turkey for a new twist. These meats work well with the same sauce. For seafood lovers, shrimp can be a fun option too. Just add the shrimp in the last few minutes of cooking. It will cook quickly and add a fresh taste. Don't forget to adjust cooking times based on the protein you choose. Want to kick up the heat? Add more red pepper flakes to your sauce. If you prefer a milder flavor, reduce the amount or leave it out. You can also try adding fresh chili peppers for a different flavor. For a sweet twist, consider adding a pinch of sugar to balance the heat. Experiment with spices to find the right level for you. For all these variations, you can refer to the Full Recipe for guidance. To keep your Chicken Cacciatore fresh, store it right. Use an airtight container. Let the dish cool down before sealing it. This helps avoid moisture buildup. Place the container in the fridge. It will stay good for about 3 to 4 days. If you want to keep it longer, consider freezing. Reheating Chicken Cacciatore is easy. You can use the stove or microwave. For the stove, place the dish in a skillet over low heat. Stir it often to warm it evenly. For the microwave, use a safe dish. Heat it in short bursts, stirring in between. Make sure it gets hot all the way through. You want it to reach an internal temperature of 165°F (75°C). Freezing Chicken Cacciatore is a great way to save it for later. First, let it cool completely. Then, transfer it to a freezer-safe container or bag. Make sure to squeeze out excess air. Label the container with the date. It can last for up to 3 months in the freezer. When ready to eat, thaw it in the fridge overnight. Reheat it as mentioned above for the best taste. Check out the Full Recipe for more tips on making this dish memorable! Chicken Cacciatore comes from Italy. The name means "hunter's chicken." It started as a dish for hunters. They used fresh ingredients from the land. Families would cook it in a big pot. This dish is simple but full of flavor. It has tomatoes, peppers, and herbs. Each cook adds their twist. The dish is popular in many homes today. Yes, you can make Chicken Cacciatore in a slow cooker! Just follow these steps: 1. Sear the chicken first for extra flavor. 2. Add all the ingredients to the slow cooker. 3. Cook on low for 6-8 hours or high for 3-4 hours. The chicken will be tender and soak up all the tasty sauce. This method saves time and makes cooking easy. Chicken Cacciatore tastes great with several side dishes: - Crusty bread for dipping in sauce - Pasta to soak up the sauce - Rice for a filling meal - A fresh salad to balance flavors These sides enhance the meal and make it more enjoyable. They add texture and freshness to the dish. You learned how to make Chicken Cacciatore easy and fun. We covered key ingredients, cooking steps, and expert tips. You now know how to customize this dish and store leftovers. Remember, cooking should be enjoyable. Experiment with flavors and variations. Don’t fear making mistakes; they’re part of learning. Enjoy every bite of your Chicken Cacciatore. It’s a dish worth sharing with family and friends. Keep trying new recipes that excite your taste buds. Happy cooking!

Easy Chicken Cacciatore Flavorful and Simple Dish

Looking for a quick, delicious meal? Easy Chicken Cacciatore is the answer! This simple dish packs bold flavors that everyone

To make a classic tuna noodle casserole, you need these key ingredients: - 12 oz egg noodles - 2 cans (5 oz each) tuna in water, well-drained and gently flaked - 1 can (10.5 oz) cream of mushroom soup - 1 cup frozen peas, thawed - 1 cup shredded sharp cheddar cheese - 1 cup milk, preferably whole - 1 small onion, finely diced - 1 teaspoon garlic powder - 1 teaspoon freshly ground black pepper - 1 teaspoon salt - 1 cup crushed potato chips or seasoned breadcrumbs for a crunchy topping - 2 tablespoons olive oil or melted butter for greasing You can make your casserole even better with some extras. Try adding: - Additional vegetables like bell peppers or carrots - Fresh herbs such as parsley or dill - Spices like paprika or cayenne for a kick If you have dietary needs, here are some swaps: - Use gluten-free noodles to keep it gluten-free - Try a dairy-free cream soup for a lactose-free option - Substitute almond milk for a lighter, dairy-free choice Feel free to explore these options to make the dish your own. For the full recipe, check out [Full Recipe]. First, preheat your oven to 350°F (175°C). This makes sure it's hot and ready. Next, boil some salted water in a large pot. Add the egg noodles and cook them until they are just right, or al dente. This usually takes about 7 to 9 minutes. Once done, drain the noodles well and set them aside. In a large mixing bowl, combine the flaked tuna, cream of mushroom soup, thawed peas, shredded cheddar cheese, milk, and diced onion. Add garlic powder, black pepper, and salt to this mix. Use a strong spoon to stir everything together. You want all the ingredients to blend well, creating a creamy and tasty mixture. Now, gently fold the cooked egg noodles into the tuna mix. Make sure each noodle gets coated, but be careful not to break them. Next, take a 9x13 inch baking dish and grease it with olive oil or melted butter. Pour the tuna noodle mixture into the dish and spread it out evenly. For a crunchy topping, sprinkle crushed potato chips or seasoned breadcrumbs all over the top. Place the dish in the oven and bake for about 25 to 30 minutes. Look for bubbling around the edges and a nice golden brown on top. When it's done, take it out and let it cool for a few minutes before serving. Feel free to check the Full Recipe for more details! To get a creamy texture in your tuna noodle casserole, use whole milk. This helps make the dish rich and smooth. Mix the cream of mushroom soup well with the milk. It should blend easy. If your casserole is too dry, add a little more milk before baking. This keeps the noodles soft and moist. Prep your ingredients ahead of time. Chop the onion and thaw the peas the night before. Use canned tuna to cut down on cooking time. You can also use pre-cooked egg noodles. This makes dinner quick on busy nights. Simply mix and bake, and you’re set! Serve the casserole straight from the dish for a cozy feel. To make it look nice, sprinkle fresh herbs on top. Chopped parsley or chives works well. Pair it with a crisp side salad for a fresh taste. This balances the richness of the casserole. For the full recipe, refer to the section above. {{image_4}} You can make this dish lighter by swapping out some ingredients. Use low-fat cream of mushroom soup instead of the regular kind. You can also choose whole wheat egg noodles for more fiber. Adding more veggies is a great way to boost nutrition. Try mixing in broccoli, bell peppers, or carrots. These will add color and taste. A veggie-packed version is not just healthy; it’s fun and vibrant! Take your casserole on a world tour by adding unique flavors. For a Mexican twist, mix in some salsa and black beans. Top it with jalapeños and a sprinkle of cilantro. If you prefer an Italian vibe, add Italian herbs and a bit of marinara sauce. You can even use Parmesan cheese instead of cheddar. These international twists will surprise your family and friends! Kids love fun shapes and colors. You can use fun pasta shapes instead of egg noodles. Another idea is to include their favorite veggies, like sweet corn or spinach. Adding cheese in the shape of stars or hearts will make them smile. This way, you create a meal that’s not only tasty but also playful and engaging! To keep your tuna noodle casserole fresh, store it properly. First, let the casserole cool down after baking. You can place it in an airtight container. If you want to store it in the baking dish, cover it tightly with plastic wrap or foil. If you want to freeze it, make sure to use a freezer-safe container. The casserole can last up to three months in the freezer. When it’s time to enjoy leftovers, reheat your casserole carefully. The best method is to use your oven. Preheat it to 350°F (175°C). Place the casserole in an oven-safe dish and cover it with foil. Heat for about 20 minutes. This method helps keep the texture and taste. You can also use a microwave for quicker reheating. Just place a single portion on a microwave-safe plate and heat for one to two minutes. Stir halfway to ensure even warming. Leftovers will last in the fridge for about three to four days. If you freeze the casserole, it will hold its quality for up to three months. After thawing, eat it within three days for the best taste. Always check for any off smells or changes in texture before eating. For the full recipe, refer to the earlier sections of this article. Yes, you can use fresh tuna. Just cook it first. Grill or sear the tuna until it's flaky. Then, chop it into bite-sized pieces. Fresh tuna adds a great taste. It also gives a nice texture to the casserole. Just remember, fresh tuna may need seasoning. Yes, you can prepare this casserole ahead. Assemble it, but do not bake it yet. Cover it tightly and store it in the fridge for up to 24 hours. When you are ready to eat, bake it as directed. You can also freeze it for longer storage. Just wrap it well and freeze before baking. When you want it, thaw overnight in the fridge and bake. This casserole pairs well with many sides. A fresh green salad adds crunch and color. You can also serve steamed veggies like broccoli or carrots. If you want something lighter, try a simple coleslaw. For a heartier meal, add garlic bread or dinner rolls. These sides balance the creamy casserole nicely. For more ideas, check out the Full Recipe. This blog post covers everything you need for a great tuna noodle casserole. We looked at key ingredients like egg noodles and cheese, plus options for add-ins. I shared tips to ensure a creamy dish and save time during busy nights. You can even explore healthy versions and fun variations for kids. Proper storage and reheating tips help you enjoy leftovers too. With these insights, you can make a delicious meal that fits your needs and tastes.

Classic Tuna Noodle Casserole Cozy Family Favorite

Tuna noodle casserole is a dish that brings comfort and warmth. This classic recipe is perfect for busy families or

- 2 cups all-purpose flour - 1/4 cup granulated sugar - 1 tablespoon baking powder - 1/2 teaspoon salt - 1/2 cup unsalted butter, cold and cubed - 1/2 cup blueberries (fresh or frozen) I use all-purpose flour for a light and fluffy texture. The sugar adds sweetness, while baking powder helps the scones rise. Salt balances the flavors. Cold, cubed unsalted butter is key for that flaky texture. Fresh or frozen blueberries bring juicy bursts of flavor. - Zest of 1 lemon - 1/2 cup heavy cream - 1 large egg - 1 teaspoon vanilla extract - 1 tablespoon lemon juice Lemon zest adds a bright, fresh taste. Heavy cream keeps the scones moist. The egg helps bind the dough. Vanilla extract adds depth, and lemon juice enhances the tartness. These zesty additions make your scones irresistible. - 1/4 cup powdered sugar - 1-2 tablespoons lemon juice The glaze is simple yet delicious. Powdered sugar creates sweetness, while lemon juice adds a tangy finish. Drizzle this on your warm scones for a lovely touch. For the full recipe, check out Zesty Blueberry Lemon Scones 🫐. - Preheat your oven to 400°F (200°C). - Line a baking sheet with parchment paper. This helps with easy cleanup and removal. - In a big bowl, mix 2 cups of all-purpose flour, 1/4 cup of granulated sugar, 1 tablespoon of baking powder, and 1/2 teaspoon of salt. - Make sure it’s combined well. This is your dry mix, which gives the scones their structure. - Add 1/2 cup of cold, cubed butter to the dry mix. - Use your fingers or a pastry cutter to blend the butter into the flour. Aim for crumbs that look like coarse sand, with some small pieces left for flakiness. - Carefully mix in 1/2 cup of blueberries and the zest of 1 lemon. Try not to squish the blueberries; they add juicy bursts of flavor. - Turn the dough onto a floured surface. Shape it into a circle, about 1 inch thick. - Use a sharp knife to cut the dough into wedges. You can also use a round cutter for classic shapes. - Place the scones on the lined baking sheet, leaving space between each. Bake them for 15-20 minutes, or until they turn golden brown. Enjoy the lovely smell as they bake! For the full recipe, check out the Zesty Blueberry Lemon Scones 🫐. To avoid overmixing the dough, mix just until combined. This keeps your scones soft. Overworking the dough can make them tough. Use a gentle hand when folding in ingredients. Cold butter is key for flakiness. When you cut in the cold butter, it creates air pockets. These pockets help the scones rise and stay light. Always keep your butter in the fridge until you’re ready to use it. Want more lemon flavor? Add extra lemon zest to your dough. You can also mix in a splash of lemon extract for a boost. If you love tartness, try a bit more lemon juice in the glaze. You can use different types of blueberries for variety. Fresh blueberries burst with juice, but frozen ones work well too. If you want something unique, try using wild blueberries. They add a deeper flavor and are often smaller. Serve your scones warm for the best taste. A dollop of whipped cream or a side of lemon curd makes them even better. Drizzle the glaze on top for a sweet finish. For garnishing, fresh fruit adds beauty. Arrange a few blueberries or slices of lemon on the plate. This not only looks nice but also enhances the fresh flavor of the scones. For the complete recipe, check out the Full Recipe for Zesty Blueberry Lemon Scones. {{image_4}} You can use different fruits in your scones. Raspberries add a sweet-tart flavor. Cranberries give a nice pop of color and a tangy bite. Both fruits pair well with lemon. Just make sure to adjust the sugar if you use tart berries. Want to make gluten-free blueberry lemon scones? Use gluten-free all-purpose flour instead of regular flour. This swap works well and keeps the scones fluffy. For vegan options, substitute unsalted butter with coconut oil or vegan butter. Use almond milk or oat milk instead of heavy cream. These swaps will make tasty vegan scones. To change the flavor, try adding white chocolate chips. They melt and add a creamy sweetness. You can also mix in chopped almonds for a nutty crunch. Both options create a unique twist on classic blueberry lemon scones. Experimenting with flavors can lead to delightful surprises. For more details and tips, check out the [Full Recipe]. To keep your blueberry lemon scones fresh, store them in an airtight container. This helps keep moisture out and prevents them from drying out. You can also wrap each scone in plastic wrap. If you stack them, place parchment paper between each scone. This prevents sticking and keeps them nice. You can freeze blueberry lemon scones for later use. First, let them cool completely. Then, place them in a single layer on a baking sheet. Freeze for about an hour. Once frozen, transfer them to a freezer bag. Remove as much air as possible to avoid freezer burn. For reheating, bake from frozen at 350°F (175°C) for 15-20 minutes. At room temperature, scones last about 2-3 days if stored properly. In the fridge, they can last up to a week. The cold air keeps them fresher longer. Keep an eye on them, as they tend to dry out. Enjoy your scones while they are still at their best! If you want the full recipe, check out Zesty Blueberry Lemon Scones 🫐. Yes, you can make these scones ahead. Prepare the dough and shape it. Wrap it tightly in plastic wrap. Store it in the fridge for up to 24 hours. When ready to bake, just slice and bake straight from the fridge. This keeps them fresh and tasty. Dense scones often come from a few common mistakes. First, overmixing the dough is a big one. Stop mixing as soon as the ingredients blend. Second, using warm butter can ruin the texture. Always use cold butter for best results. Lastly, check your baking powder is fresh. Old baking powder can lead to flat scones. Look for a golden brown color on the top. The edges should be firm, and the center should feel slightly soft but not wet. You can also check with a toothpick. If it comes out clean, your scones are ready! Serve scones warm for the best taste. Pair them with tea or coffee. You can add a dollop of whipped cream or lemon curd on top. A sprinkle of fresh fruit can make them pop on the plate. You can find the full recipe for Zesty Blueberry Lemon Scones 🫐 [here](#). In this post, we explored the tasty world of blueberry lemon scones. We covered the key ingredients and provided easy steps to make them. I shared tips for perfect texture and fun variations too. Remember, using cold butter and not overmixing makes a big difference. Try adding your favorite fruits or flavors to mix things up. With these ideas, you can bake the perfect scone every time. Enjoy making and sharing your delicious scones!

Blueberry Lemon Scones Flavorful and Simple Recipe

Are you ready to bake something special? You’ll love these Blueberry Lemon Scones! This flavorful and simple recipe combines juicy

Creating Raspberry Almond Crumb Bars starts with gathering the right ingredients. You will need: - 1 cup all-purpose flour - 1/2 cup almond flour - 1/2 cup rolled oats - 1/2 cup brown sugar, packed tightly - 1/4 teaspoon fine salt - 1/2 teaspoon baking powder - 1/2 cup unsalted butter, melted and slightly cooled - 1 teaspoon pure vanilla extract - 1 cup fresh raspberries (or thawed frozen raspberries) - 1 tablespoon cornstarch - 1 tablespoon honey (or pure maple syrup) - 1/4 cup sliced almonds These ingredients work together to create a sweet, crumbly treat. The all-purpose flour gives the bars structure. Almond flour adds a nutty flavor. Rolled oats bring a lovely texture. Brown sugar sweetens the bars and adds richness. Fine salt balances the sweetness, while baking powder helps them rise. The melted unsalted butter binds everything together and gives a rich taste. Pure vanilla extract adds warmth and aroma. Fresh raspberries offer a burst of tartness. Cornstarch thickens the raspberry filling, helping it hold together. Honey or maple syrup adds a touch of sweetness, while sliced almonds give a delightful crunch. This combination leads to a dessert that is both delicious and simple to make. For the full recipe, check out the instructions. 1. Preheating the Oven Start by preheating your oven to 350°F (175°C). This step is key for even baking. 2. Preparing the Baking Pan Line an 8x8 inch baking pan with parchment paper. Leave some paper hanging over the edges. This helps you lift out the bars later. 3. Mixing Dry Ingredients In a large bowl, whisk these dry ingredients together: - 1 cup all-purpose flour - 1/2 cup almond flour - 1/2 cup rolled oats - 1/2 cup brown sugar - 1/4 teaspoon fine salt - 1/2 teaspoon baking powder Mix well until everything is combined. This ensures an even flavor in your bars. 1. Making the Crust Pour in 1/2 cup melted unsalted butter and 1 teaspoon vanilla extract into the dry mix. Stir until it gets crumbly. If you can squeeze it together in your hand, it's ready. Set aside 1 cup of this crumb mix for later. 2. Preparing the Raspberry Filling In another bowl, gently toss together 1 cup of fresh raspberries, 1 tablespoon cornstarch, and 1 tablespoon honey (or maple syrup). This makes a sweet and thick filling. 3. Layering and Baking Press the crumb mixture into the bottom of your prepared pan. Bake it for 15 minutes. After that, spread the raspberry mix on top. Next, sprinkle the reserved crumb mixture over the filling. Top it with 1/4 cup sliced almonds for a nice crunch. Return the pan to the oven. Bake for another 25-30 minutes. You want the topping to turn golden and the raspberries to bubble. Once done, cool in the pan for 10 minutes. Use the parchment paper to lift out the bars onto a wire rack. Let them cool completely. When cooled, slice into squares and enjoy these delicious raspberry almond crumb bars. For the full recipe, refer back to the earlier section. Ensuring a Perfect Crust To make the crust just right, use cold butter. Cold butter makes the crust flaky. Mix the dry ingredients well before adding the butter. This helps everything blend better. Press the crust firmly into the pan. This gives it strength and keeps it from falling apart. Bake it until it’s just starting to turn golden. This shows it's ready for the filling. Achieving Optimal Raspberry Filling For the best raspberry filling, pick ripe, fresh berries. They burst with flavor and sweetness. If using frozen berries, thaw them first and drain excess liquid. Toss the raspberries gently with cornstarch and honey. This helps thicken the filling and adds sweetness. Spread the filling evenly over the crust. This ensures each bite has lots of yummy raspberry goodness. Serving Suggestions When serving, slice the bars into squares. This makes them easy to grab. You can serve them warm or at room temperature. For a more elegant touch, dust the bars with powdered sugar. It adds a pretty look and a hint of sweetness. Pair them with a scoop of vanilla ice cream for a special treat. Garnishing Ideas Garnish the bars with sliced almonds on top. This adds a nice crunch and flavor. You can also add a dollop of whipped cream on the side. Fresh mint leaves can add a pop of color. These simple touches make your dish look beautiful and inviting. For the full recipe, check out the section above. {{image_4}} Gluten-Free Option If you want a gluten-free version of these bars, swap all-purpose flour for a gluten-free blend. Look for one that contains xanthan gum. This will help the bars hold together well. Alternative Fruits You can change the raspberries to other fruits. Think about strawberries, blueberries, or peaches. Each fruit will give a different flavor and color. Just remember to adjust the sugar if the fruit is sweeter or tarter. Adding Spices Spices can add warmth and depth to your bars. Try a pinch of cinnamon or nutmeg in the crumb mix. You can also add some almond extract for a stronger almond flavor. Incorporating Chocolate If you love chocolate, mix in some chocolate chips. Dark chocolate pairs well with raspberries. You can add them to the filling or sprinkle them on top before baking. This will add a rich taste to your dessert. For the full experience, check out the Full Recipe. Storage Duration You can store your Raspberry Almond Crumb Bars for about five days. Keep them in an airtight container at room temperature. If you want them to last longer, consider freezing them. Best Practices for Preservation To keep your bars fresh, wrap them tightly in plastic wrap. Then, place them in a container. This method helps to lock in moisture and flavor. Avoid direct sunlight, as heat can make them soggy. How to Freeze To freeze the bars, first, let them cool completely. Slice them into squares, then wrap each piece in plastic wrap. Place the wrapped bars in a freezer bag. Remove as much air as possible to prevent freezer burn. They can stay frozen for up to three months. Reheating Instructions To reheat, take out the number of bars you want. Let them thaw in the fridge overnight. Then, warm them in the oven at 350°F (175°C) for about 10 minutes. This makes them taste fresh and delicious again. Enjoy your treat! For the full recipe, check out the recipe section. If you do not have almond flour, you can use all-purpose flour. You can also use ground oats or coconut flour. Keep in mind that these options may change the taste a bit. Almond flour adds a nutty flavor and soft texture. You can tell the bars are done when the top is golden brown. Also, look for bubbling around the edges. If you insert a toothpick, it should come out clean, except for some raspberry juice. Yes! Frozen raspberries work well in this recipe. Just make sure to thaw them first. Drain any excess liquid from the raspberries to avoid a soggy crust. The flavor will still be delicious! To cut even pieces, wait until the bars are fully cooled. Use a sharp knife for clean cuts. You can score the bars lightly with the knife first to guide your cuts. This will help you get nice, even squares. For cleaner edges, wipe the knife with a damp cloth between cuts. For the full recipe, check the instructions provided earlier. These raspberry bars are a tasty treat you can make at home. We covered essential ingredients like flour and fresh raspberries. You learned how to prepare and bake with clear step-by-step instructions. Tips helped ensure your bars turn out perfectly every time. Plus, you now have ideas for variations and storage. Enjoy experimenting with this recipe. It’s simple and fun. You'll love sharing your delicious bars with friends and family!

Raspberry Almond Crumb Bars Delicious and Simple Treat

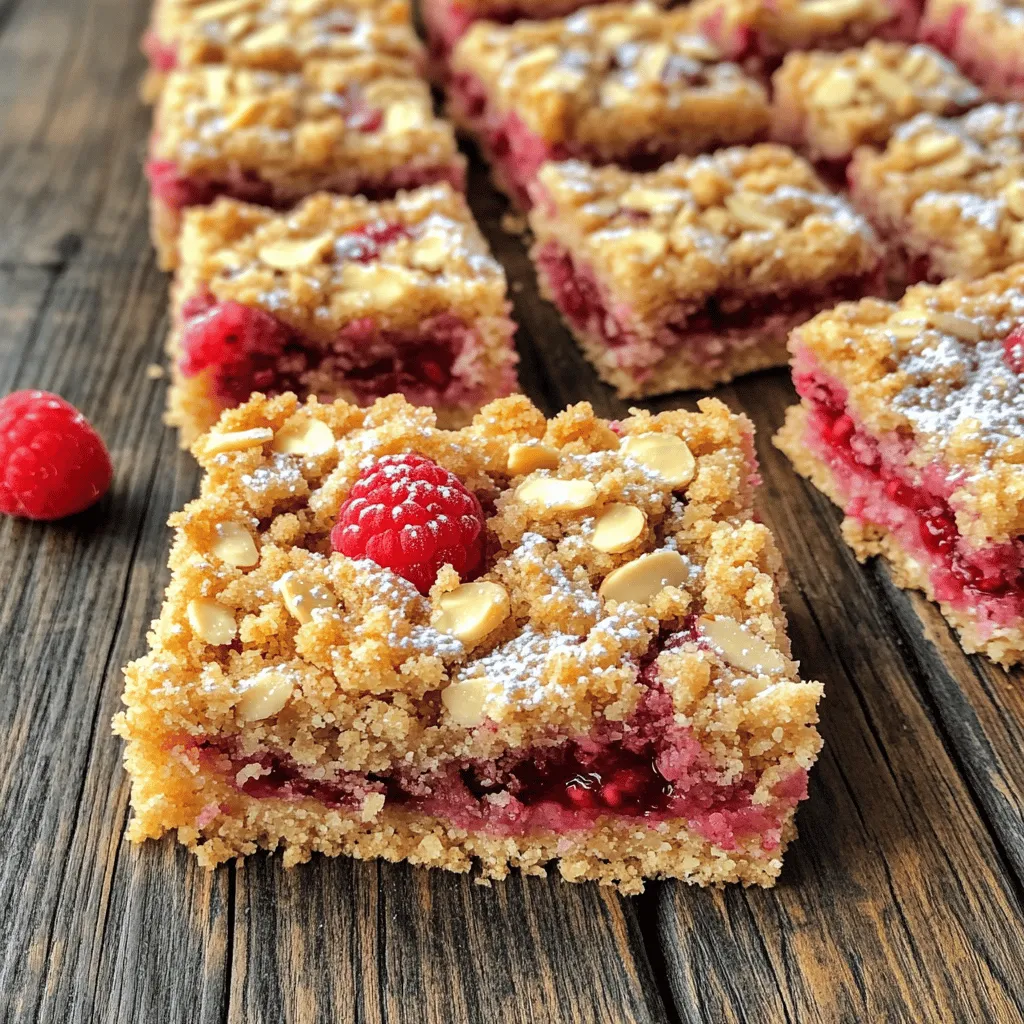
If you’re craving a sweet treat that’s easy to make, you’ve found it! Raspberry Almond Crumb Bars combine juicy raspberries

- 1 cup rolled oats - 1/2 cup peanut butter (creamy or crunchy) - 1/4 cup honey or maple syrup - 1/4 cup chocolate protein powder - 1/4 cup mini chocolate chips - 1/4 teaspoon salt - 1 teaspoon vanilla extract - 1/4 cup chopped nuts - Shredded coconut When I make chocolate peanut butter protein balls, I start with simple, wholesome ingredients. The rolled oats give a great base. They provide fiber and help bind everything together. Peanut butter adds creaminess and healthy fat, making the balls satisfying. Honey or maple syrup sweetens the mix. I love using honey for its rich taste. The chocolate protein powder boosts the nutrition and gives that delicious chocolate flavor. Mini chocolate chips are the best part. They add a sweet surprise in every bite. Don't forget the salt and vanilla extract! These two ingredients enhance all the flavors. For those who want a little extra, chopped nuts or shredded coconut can give a nice crunch. It’s fun to personalize the recipe to your taste! You can find the full recipe to guide you through making these tasty snacks. Start with a large mixing bowl. Add the rolled oats, chocolate protein powder, and salt. Mix these three dry ingredients well. You want to ensure an even distribution so every bite has the same flavor. Next, add the peanut butter and honey to the dry mix. Use a spatula or your hands to blend everything together. The mixture should feel sticky yet moldable. If it's too dry, add a little more peanut butter until it feels just right. Now comes the fun part! Gently fold in the mini chocolate chips and any optional ingredients you want, like chopped nuts or shredded coconut. Make sure these extras are mixed well for great texture. Then, scoop out a tablespoon of the mixture and roll it into a ball. You should get about 12-15 protein balls based on your size choice. Place the rolled protein balls onto a baking sheet lined with parchment paper. Chill them in the refrigerator for at least 30 minutes. This helps them firm up nicely. Enjoy these tasty snacks after they have set! For the full recipe, check out the complete guide. To get the best texture for your protein balls, the right mix is key. If your mixture feels too dry, add a bit more peanut butter. This makes it sticky but still easy to mold. You want the mixture to hold its shape when you roll it into balls. Want to kick up the flavor? Consider adding flavored protein powder, cinnamon, or a dash of sea salt. These little extras can make a big difference. Make sure to balance the sweetness from the honey or syrup with the rich taste of the peanut butter. This balance keeps each bite delightful. Involve your kids in the fun! Let them help mix the ingredients or roll the balls. They can even choose their favorite add-ins, like mini chocolate chips or nuts. For picky eaters, let them pick flavors they enjoy. This way, they will be excited to eat what they helped make! {{image_4}} You can easily change the flavor of your protein balls. Adding cocoa powder gives them more chocolate taste. Just mix in a tablespoon or two to the dry ingredients. You can also switch nut butters. Almond or cashew butter works great too. Each nut butter adds its own unique flavor. If you want a lower-sugar treat, try using a sugar-free sweetener. You can also make these vegan. Use maple syrup instead of honey. For protein powder, choose a plant-based option. This way, everyone can enjoy them! You can change the texture by adding different mix-ins. Try seeds like chia or flax for crunch. Dried fruits like cranberries or raisins can add sweetness. You can also make the balls smaller or larger. Use a cookie scoop for uniform sizes, or shape them into bars for an easy grab-and-go snack. To keep your chocolate peanut butter protein balls fresh, use an airtight container. This helps keep moisture out and flavor in. Place them in the fridge for the best results. They will stay tasty for up to a week. Make sure to seal your container well. This way, you can enjoy your snacks longer without losing quality. If you want to store your protein balls for a longer time, freezing is a great option. To freeze them, first, place the rolled balls on a baking sheet. Make sure they are not touching. Freeze them for about an hour. Once firm, transfer them to an airtight freezer bag. Seal it tightly, removing as much air as possible. When you're ready to enjoy them, take out the number you need. Let them thaw in the fridge for a few hours or on the counter for about 30 minutes. In the fridge, your protein balls will stay fresh for about a week. If you freeze them, they can last up to three months. Keep an eye out for signs of spoilage. If you notice any off smells, changes in color, or mold, it's best to toss them. Always trust your senses to ensure your snacks are safe to eat. For the full recipe and more details on making these delicious treats, check out the Full Recipe. Each chocolate peanut butter protein ball has about 100 calories. This number can change based on the exact ingredients you use. For example, if you add more chocolate chips or nuts, the calorie count will rise. To keep track, check the labels on your ingredients. Yes, you can make these protein balls nut-free. Instead of peanut butter, use sunflower seed butter or soy nut butter. Both options give a similar taste and texture. This way, you enjoy a tasty snack without nuts. To make these protein balls gluten-free, choose certified gluten-free rolled oats. Most oats may have gluten, so look for a gluten-free label. You can also check other ingredients like protein powder and chocolate chips for gluten. These protein balls are great as snacks or post-workout treats. You can serve them chilled from the fridge or at room temperature. They pair well with fruit or a glass of milk. For a special touch, roll them in shredded coconut or cocoa powder before serving. For the full recipe, check the recipe section. In this post, we explored how to make chocolate peanut butter protein balls. We covered key ingredients like oats, peanut butter, and chocolate protein powder. The steps included mixing, forming, and chilling the balls. We also discussed tips for texture and flavor, along with storage advice. These protein balls are easy to make and fun for everyone. You can tweak the recipe to suit your taste or dietary needs. Keep experimenting, and enjoy your delicious, healthy snacks!

Chocolate Peanut Butter Protein Balls Tasty Snack Idea

Looking for a tasty and healthy snack? Chocolate Peanut Butter Protein Balls are your answer! These bite-sized delights combine the

- 1 cup all-purpose flour - 1 teaspoon baking powder - 1/2 teaspoon baking soda - 1/4 teaspoon salt - 1/2 teaspoon ground cinnamon - 1/4 cup brown sugar, packed - 1/2 cup plain yogurt (Greek or regular) - 1/4 cup vegetable oil - 1 large egg, at room temperature - 1 teaspoon vanilla extract - 1 cup fresh peaches, peeled and diced - 1/4 cup chopped pecans (optional) You can use coconut yogurt instead of plain yogurt for a different flavor. If you need gluten-free muffins, try almond flour or a gluten-free blend. Both options work well in this recipe. Each muffin has about 150 calories. They are rich in vitamin C from the peaches and provide a good source of calcium from the yogurt. Enjoying these muffins gives you a tasty treat while adding some nutrients to your day. For the Full Recipe, follow the detailed steps to create these delightful muffins. Each bite will burst with flavor and make you smile! Start by preheating your oven to 350°F (175°C). This is key for even baking. Next, prepare your muffin tin. You can line it with paper liners or lightly grease it with cooking spray. This helps the muffins come out easily. In a medium bowl, combine the dry ingredients. This includes the all-purpose flour, baking powder, baking soda, salt, ground cinnamon, and brown sugar. Use a whisk to mix these well. There should be no lumps in your dry mix. In a separate large bowl, whisk together the wet ingredients. Use plain yogurt, vegetable oil, a large egg, and vanilla extract. Mix until smooth and creamy. This wet mix will give your muffins a nice texture. Now, it’s time to fill the muffin tin. Spoon the batter into each muffin cup. Fill them about two-thirds full. This allows the muffins to rise without overflowing. Gently fold in the diced peaches before you fill the cups. Make sure the pieces are spread evenly throughout the batter. This ensures every bite has that sweet peach flavor. Bake the muffins in your preheated oven for 18-20 minutes. To check if they are done, insert a toothpick into the center of a muffin. If it comes out clean, they are ready. If you see batter on the toothpick, give them a few more minutes. Once baked, let the muffins cool in the tin for about 5 minutes before transferring them to a wire rack. This cooling helps them set perfectly. For the full recipe, refer to the earlier section. Enjoy creating these peach yogurt muffins! To make your muffins light and fluffy, avoid overmixing. Mix the wet and dry ingredients until just combined. This helps keep the muffins airy. Overmixing can make them tough and chewy, not what you want. To achieve the ideal rise, fill your muffin cups about two-thirds full. This allows room for the muffins to expand as they bake. If you fill them too much, they may overflow. You can add spices or zest to boost flavor. A pinch of nutmeg or lemon zest can brighten the taste. Try adding these spices when you mix your dry ingredients. Incorporating nuts or seeds adds texture and taste. Chopped pecans or walnuts blend well with peaches. They give a nice crunch and pair well with the soft muffin base. Serve the muffins warm for the best experience. Lightly dusting them with powdered sugar makes them look fancy. You can also add a dollop of yogurt on the side. For a decorative touch, arrange extra peach slices on the plate. This not only adds color but also makes the dish look appetizing. Enjoy creating your beautiful and tasty Peach Yogurt Muffins! For the full recipe, refer to the earlier section. {{image_4}} You can change the flavor of these muffins easily. Try using different fruits like blueberries, strawberries, or raspberries. Each fruit adds its own unique taste. If you love chocolate, mix in some chocolate chips. You can also add shredded coconut for a tropical twist. These small changes can make your muffins exciting every time you bake. Want a vegan option? Replace the egg with a mashed banana or applesauce. Use a plant-based yogurt to keep things creamy. If you want to cut down on sugar, choose a sugar alternative like stevia or use less brown sugar. Both options keep your muffins tasty while fitting your diet. You can have fun with seasonal flavors. For fall, add pumpkin spice or chopped apples for a cozy vibe. In summer, mix in berries or even some citrus zest for a fresh taste. Each season brings new ingredients, making your muffins fit perfectly with the time of year. Try out the Full Recipe for a delightful treat! To keep your peach yogurt muffins fresh, store them at room temperature. Place them in an airtight container. This keeps them moist and tasty for up to three days. If your kitchen is warm, consider refrigerating them. Just wrap each muffin in plastic wrap to avoid drying out. This helps them stay soft for about a week. Want to save some muffins for later? Freezing is a great option! First, let the muffins cool completely. Place them in a single layer on a baking sheet. This prevents them from sticking together. After a few hours, put them in a freezer bag. Remove as much air as possible before sealing. These muffins can stay frozen for up to three months. When you’re ready to eat, simply take out how many you need. Thaw them in the fridge overnight. For a warm muffin, pop it in the microwave for about 15 seconds. Enjoy the soft and flavorful delight anytime you wish! For the full recipe, check out the recipe section above. To check if your muffins are ready, use a toothpick. Insert it into the center of a muffin. If it comes out clean, they are baked. If the toothpick has wet batter, bake for a few more minutes. Keep an eye on them after 18 minutes. Muffins should be lightly golden on top and spring back when touched. Yes, you can use canned peaches. They bring sweetness and moisture to your muffins. However, canned peaches can be softer and more watery. Drain them well before using. Fresh peaches will give a firmer texture and brighter flavor. Both options can work, so choose based on what you have. Serve these muffins warm for the best taste. They pair perfectly with a spread of butter or cream cheese. You can also add a dollop of yogurt on top. For a special touch, serve with sliced peaches and a sprinkle of cinnamon. This makes for a lovely breakfast or snack. If your muffins are dense, you may have overmixed the batter. Gently stir the wet and dry ingredients. Also, check the freshness of your baking powder and baking soda. Old leavening agents can lead to flat muffins. Lastly, ensure your oven is at the right temperature. An oven thermometer can help with this. In this post, we explored the key ingredients for delicious Peach Yogurt Muffins and provided simple steps to bake them. We talked about ingredient substitutions, nutritional facts, and how to enhance flavor while baking. Remember to store your muffins properly and feel free to try different variations. Baking should be fun and rewarding. Enjoy your peach muffins and share them with others. Happy baking!

Peach Yogurt Muffins Soft and Flavorful Delight

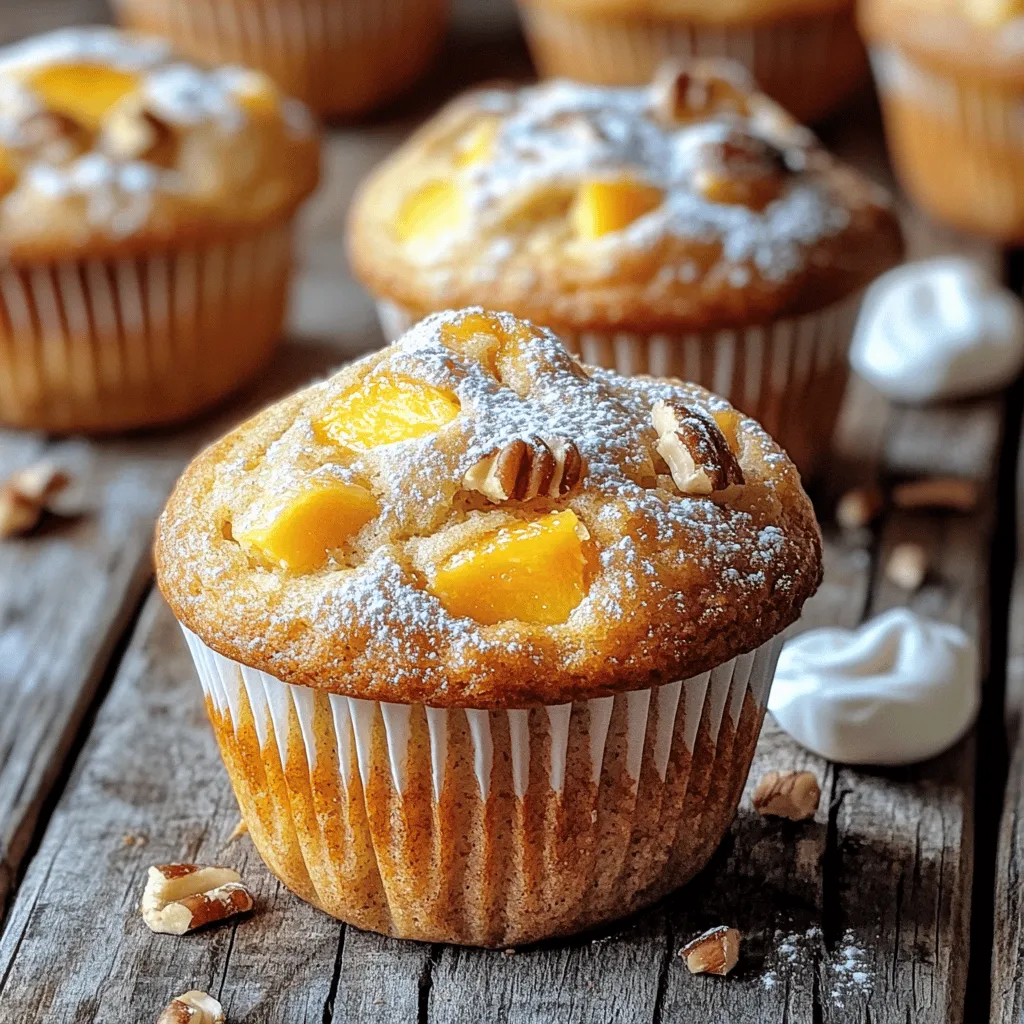
Craving a sweet snack that’s both soft and flavorful? Let me introduce you to Peach Yogurt Muffins! These tasty treats

Older posts
Newer posts
← Previous Page1 … Page14 Page15 Page16 … Page60 Next →

dsad

© 2025 eataroundit • Built with GeneratePress

Our Policies

  • Copyright Policy
  • Cookie Policy
  • GDPR Policy
  • Privacy Policy
  • Disclaimer
  • Terms Of Use

More Information

  • Home
  • About
  • Contact
  • Appetizers
  • Dessert
  • Dinner
  • Drinks
©2025, eataroundit About Back To Top