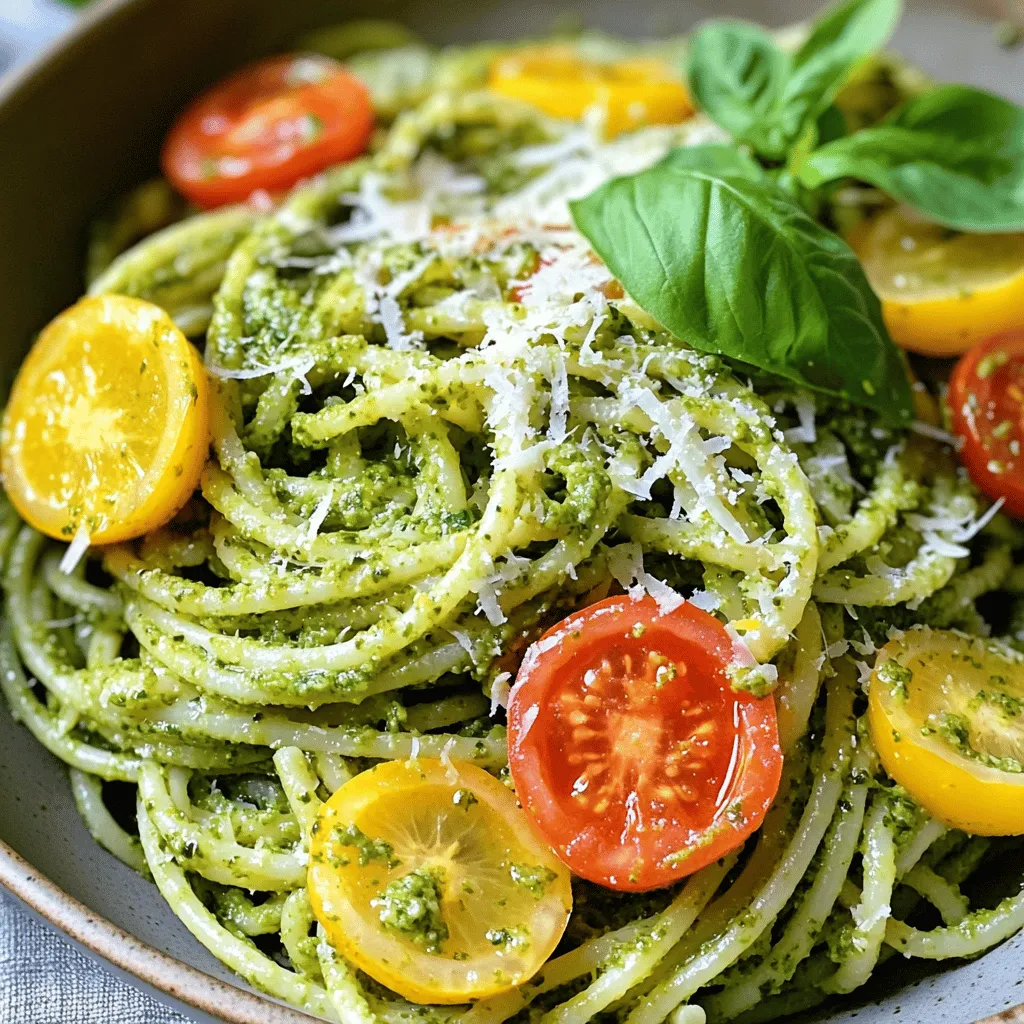
Lemon Basil Pesto Pasta Quick and Flavorful Meal
Savor the vibrant taste of Lemon Basil Pesto Pasta, a quick and easy meal that bursts with flavor! This dish
Savor the vibrant taste of Lemon Basil Pesto Pasta, a quick and easy meal that bursts with flavor! This dish
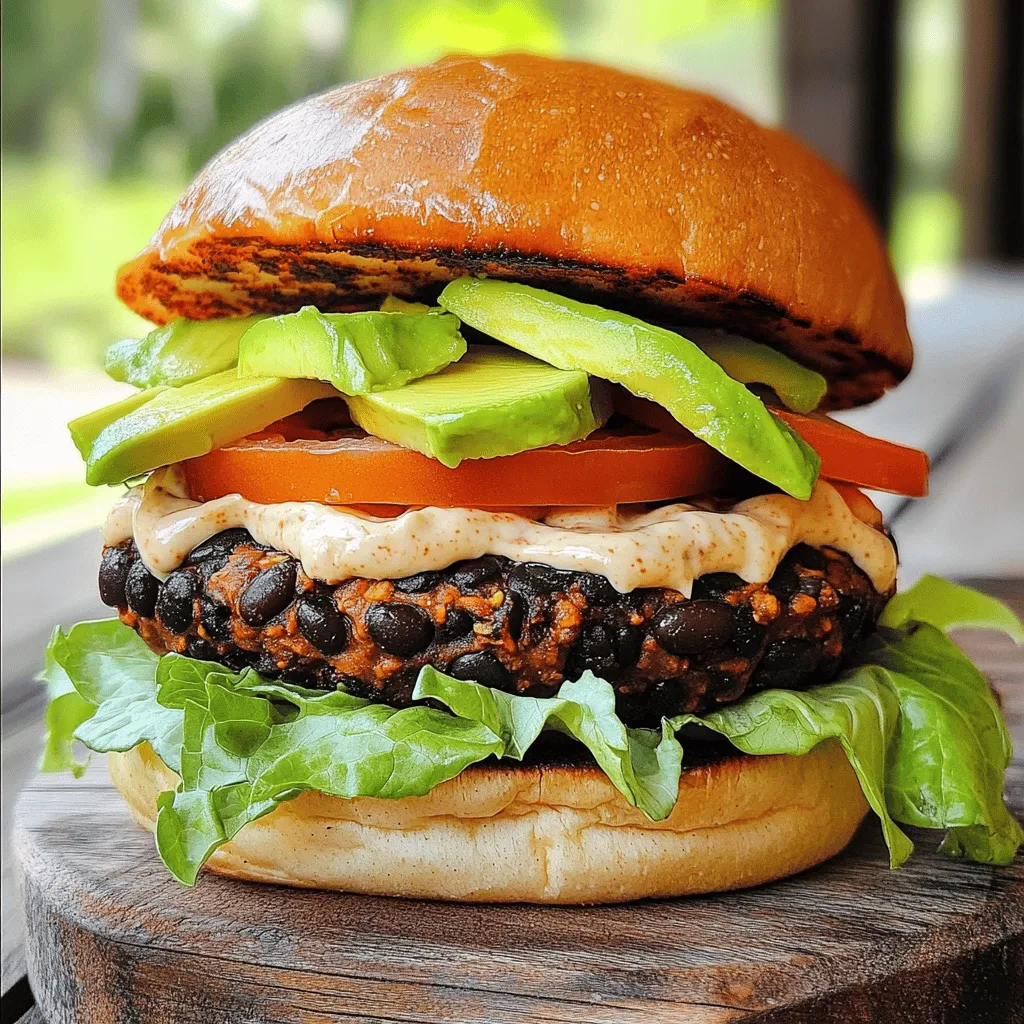
Are you ready to spice up your burger game? These Smoky Chipotle Black Bean Burgers pack a flavorful punch that
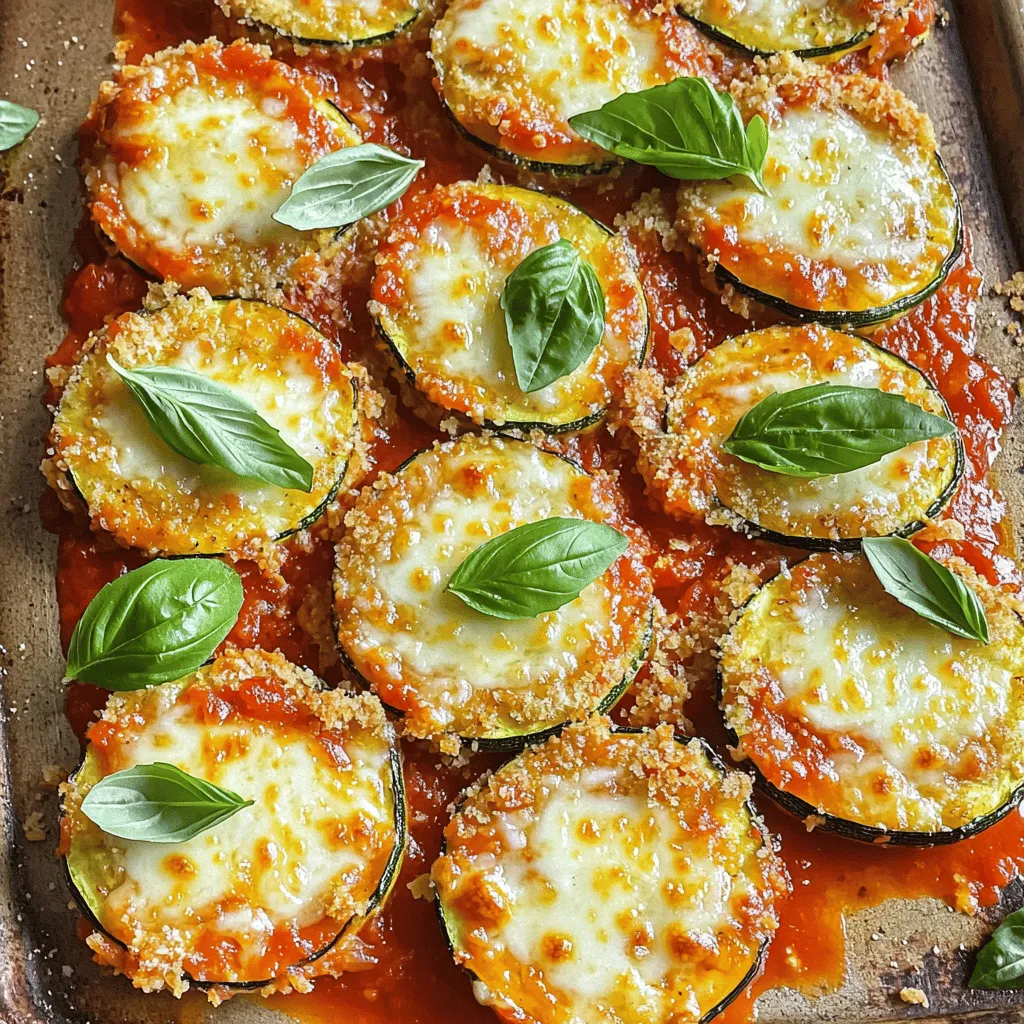
Craving a delicious dish that’s easy to make? Look no further than Baked Zucchini Parmesan! This tasty recipe packs a
![To make a tasty Thai Coconut Curry Soup, you need some key ingredients: - 1 tablespoon coconut oil - 1 medium onion, finely chopped - 4 cloves garlic, minced - 1 tablespoon fresh ginger, finely grated - 2 tablespoons red curry paste - 1 can (14 oz) coconut milk - 4 cups vegetable broth - 1 cup carrots, thinly sliced - 1 cup bell peppers, sliced (mix of red and yellow) - 1 cup sugar snap peas, trimmed - 1 tablespoon soy sauce (or tamari for gluten-free) - 1 tablespoon freshly squeezed lime juice - Salt and freshly ground black pepper to taste - Fresh cilantro leaves, for garnish - Lime wedges, for serving These ingredients create a rich and creamy soup packed with flavor. You can make your soup even better with these garnishes: - Chopped green onions - Sliced red chili for heat - Crushed peanuts for crunch - Extra lime juice for zing These options add more layers to your dish, making it even more special. If you have dietary needs, you can swap some ingredients: - Use olive oil instead of coconut oil for a different flavor. - Replace red curry paste with yellow curry paste for a milder taste. - Substitute vegetable broth with chicken broth for a non-vegetarian option. - Use tofu or chickpeas if you want a protein boost. These substitutions keep the soup delicious while meeting your needs. For the full recipe, refer to the recipe section above. Start by heating the coconut oil in a large pot over medium heat. Once it melts, add the finely chopped onion. Sauté the onion for about 3-4 minutes until it turns soft and clear. This step builds the foundation of flavor. Next, add the minced garlic and freshly grated ginger. Cook this mix for another 1-2 minutes. You’ll smell the wonderful aromas filling your kitchen. Now it’s time to add the red curry paste. Stir it into the pot, mixing well with the onions. Let it cook for about 2 minutes. This helps the spices release their flavors. After that, pour in the coconut milk and vegetable broth. Stir until everything blends into a creamy mixture. This is where the magic begins! Add the sliced carrots, bell peppers, and sugar snap peas to the pot. Increase the heat slightly and bring the soup to a gentle simmer. Once it starts bubbling, reduce the heat to low. Let the soup simmer for 10-15 minutes. You want the veggies to become tender but still vibrant. Stir in the soy sauce and fresh lime juice. Taste your soup and adjust salt and black pepper as needed. Let it rest for a few minutes before serving. Enjoy the warm, comforting flavors! For the complete recipe, check the [Full Recipe]. To make your Thai Coconut Curry Soup even better, use fresh herbs. Fresh cilantro brightens the dish. You can also add fresh basil for extra flavor. Lime juice adds a zesty kick that balances the creaminess of coconut milk. For heat, a pinch of red pepper flakes adds spice without overpowering the dish. Having the right tools helps you cook with ease. Use a large, heavy-bottom pot to heat your soup evenly. A sharp knife makes chopping vegetables simple and safe. A wooden spoon is perfect for stirring without scratching your pot. Measuring cups and spoons ensure you use the right amounts of each ingredient. A blender is handy if you want a smoother soup. Presentation makes a meal special. Serve your soup in bright, colorful bowls. Top it with extra cilantro leaves for a fresh look. Place lime wedges on the rim of the bowl for fun. You can also add a sprinkle of chopped peanuts for crunch. This not only looks great but gives your guests options to customize their meal. For the full recipe, check out the Tropical Thai Coconut Curry Soup section. {{image_4}} To make the Thai coconut curry soup vegetarian or vegan, swap the broth. Use vegetable broth instead of chicken broth. The coconut milk gives a creamy texture. You can add more veggies like zucchini or mushrooms. They absorb flavors well and add more nutrients. You can add protein to your soup for a more filling meal. Tofu is a great choice for vegans. Use firm tofu for the best texture. Just cube it and add it when you add the vegetables. For meat lovers, add chicken or shrimp. Cook the chicken until it's no longer pink. For shrimp, add them in the last few minutes. They cook fast and stay tender. Not everyone likes spicy food. If you want less spice, use less curry paste. Start with one tablespoon and taste as you go. You can also add coconut milk to cool it down. If you love heat, add more curry paste or fresh chili. Fresh herbs like Thai basil can also add a nice kick. Play with the spice level until it’s just right for you. For the full recipe, check out the Tropical Thai Coconut Curry Soup. After enjoying your Thai Coconut Curry Soup, store leftovers quickly. Let the soup cool down to room temperature first. Then, pour it into an airtight container. Make sure to seal it well. Label the container with the date. This helps you track how long it stays fresh. It’s best to eat leftovers within three days for optimal taste and safety. When you’re ready to enjoy your soup again, choose a gentle reheating method. You can use the stove or microwave. If using the stove, pour the soup into a pot. Heat it over medium-low heat. Stir often to prevent burning. If using a microwave, place the soup in a microwave-safe bowl. Cover it loosely to allow steam to escape. Heat in short bursts, stirring in between, until hot. This keeps the flavor rich and the texture smooth. If you want to save your soup for later, freezing works great. Use a freezer-safe container or a heavy-duty freezer bag. Leave some space at the top, as soup expands when it freezes. It’s best to consume frozen soup within three months for the best flavor. To defrost, move it to the fridge overnight. You can also use the microwave on the defrost setting. Then, reheat as mentioned above. Enjoy your delicious soup anytime! You can serve this soup with many tasty sides. Try jasmine rice for a soft touch. It soaks up the broth well. Naan bread is another great option. It’s perfect for dipping. You might also enjoy fresh spring rolls. They add a crunchy contrast. A light salad could brighten your meal too. Just add some lime juice for zing. To tone down the heat, use less curry paste. Start with one tablespoon instead of two. You can also add more coconut milk. This will make the soup creamier and milder. Another option is to add sugar. A teaspoon can help balance the spice. If it’s still too hot, serve it with rice. This will help cool down each bite. Yes, you can swap in many veggies. Zucchini, broccoli, or spinach work well. Just cut them into small pieces. Add them at the same time as the carrots. This keeps them crisp and colorful. You can also use frozen veggies if fresh ones are not on hand. Just be sure to thaw and drain them first. This will avoid extra water in the soup. You can find the full recipe for more tips. This blog post covered how to make delicious Thai Coconut Curry Soup. We explored essential ingredients, cooking instructions, and tips to enhance flavor. You can adjust spice levels and substitute for dietary needs. Don't forget the garnishes for a nice touch. Store leftovers to enjoy later and reheat to keep the flavors bright. Whether you prefer tofu, shrimp, or veggies, this soup is flexible. Hopefully, you feel ready to create your own tasty version! Enjoy cooking this comforting dish!](https://eataroundit.com/wp-content/uploads/2025/06/8c5fdd55-477c-4473-b646-55fdda6eaf62.webp)
Craving a warm, tasty meal? Let me introduce you to Thai Coconut Curry Soup. It’s a rich, creamy dish that
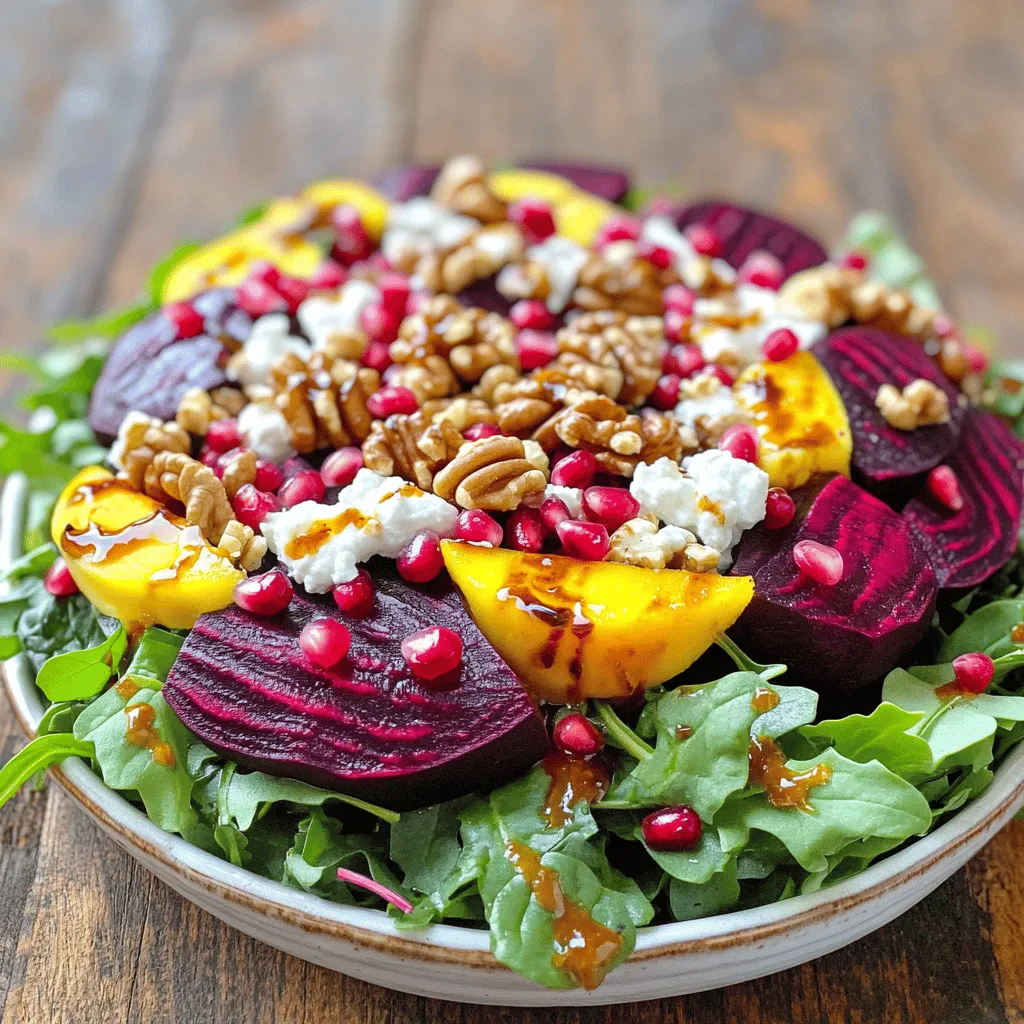
Looking for a fresh and vibrant dish to brighten up your meals? This Roasted Beet and Goat Cheese Salad is
![- 4 slices of artisan sourdough bread - 1 cup sharp cheddar cheese, grated - ½ cup mozzarella cheese, grated - 2 tablespoons unsalted butter, softened - 1 teaspoon garlic powder - 1 teaspoon fresh basil, chopped (or ½ teaspoon dried basil) - Salt and pepper to taste - 1 can (14 oz) diced tomatoes - 1 cup vegetable broth - ½ onion, diced - 1 clove garlic, minced - 1 teaspoon olive oil - 1 teaspoon sugar (optional, to balance acidity) - Fresh basil leaves for garnish When I prepare this meal, I focus on using fresh ingredients. The bread needs to be sturdy, like sourdough. It holds the melted cheese well. For the cheese, I love a mix of sharp cheddar and mozzarella. This blend gives a rich flavor and great stretch. For the soup, diced tomatoes offer a bright base. Using vegetable broth deepens the flavor. Don’t skip the onion and garlic; they add warmth and depth. If you like a sweeter soup, the sugar can help balance the acidity of the tomatoes. Fresh basil leaves make a lovely garnish and enhance the taste. You can find the detailed cooking steps in the Full Recipe. Enjoy every bite of this comforting meal! Sautéing Onion and Garlic Start by heating olive oil in a medium saucepan over medium heat. When the oil shimmers, add the diced onion and minced garlic. Sauté them for about five minutes. The onion should turn translucent and fragrant. Cooking and Blending the Soup Next, pour in the canned diced tomatoes and vegetable broth. If you like, add sugar to balance the acidity. Bring the mixture to a gentle simmer. Reduce the heat and let it cook for 15 to 20 minutes. This allows the flavors to develop. After that, use an immersion blender to puree the soup until smooth. If you do not have one, transfer the mixture to a countertop blender in batches. Seasoning and Keeping Warm Once blended, season the soup with salt, pepper, and fresh basil. Adjust to your taste. Keep the soup warm on low heat while you prepare the grilled cheese. Buttering the Bread Take your softened butter and spread a generous layer on one side of each slice of sourdough bread. This will help create a crispy crust. Layering the Cheese and Seasonings On the unbuttered side of two slices, start layering the grated sharp cheddar. Follow it with the mozzarella. Sprinkle garlic powder and fresh basil over the cheese to add flavor. Forming the Sandwiches Top the cheese layers with the remaining slices of bread, buttered side facing up. This forms two sandwiches that are ready for grilling. Preheating the Skillet Preheat a large skillet over medium heat until hot. This step is key for even cooking. Cooking Time and Techniques Carefully place the assembled sandwiches into the skillet. Grill them for about three to four minutes on each side. They should turn golden brown and the cheese should melt beautifully. Use a spatula to press down gently for even grilling. Achieving Perfect Melting Keep an eye on the sandwiches to avoid burning. When done, the cheese should ooze slightly. Transfer the sandwiches to a cutting board and slice them diagonally to make them look inviting. Enjoy your grilled cheese with that warm, creamy tomato soup for a classic, comforting meal. The full recipe can guide you through the whole process with ease. Choosing the Best Bread I love using artisan sourdough for grilled cheese. It has a nice crust and soft inside. Other good choices are whole grain or classic white bread. The bread should hold up to the cheese and butter. Cheese Melting Tips For the best melt, mix cheeses. I recommend sharp cheddar and mozzarella. Cheddar gives a strong flavor, while mozzarella adds stretch. Grate the cheese for easy melting. Layer it thick for a gooey bite. Adjusting Cooking Temperature Set your skillet to medium heat. If it’s too hot, the bread burns before the cheese melts. If it’s too low, the sandwich takes too long. Cook for about 3 to 4 minutes on each side. Keep an eye on it for a perfect golden crust. Adding Herbs and Spices Fresh herbs make a big difference. I love adding basil and a pinch of oregano. You can also try thyme or parsley. These spices brighten the soup’s flavor and add depth. Customizing Texture and Flavor You can make the soup smooth or chunky. If you like it smooth, use an immersion blender. For a chunkier soup, skip the blending step. Adding a splash of cream gives it a rich texture. Serving Temperature Tips Serve the soup warm, but not boiling. Heat it gently on low. A perfect serving temperature enhances the flavors. I like to garnish with fresh basil leaves for a pop of color. For a complete guide, check out the [Full Recipe]. {{image_4}} Adding Different Cheeses You can switch up the cheeses for more fun. Try gouda or pepper jack. Goat cheese adds a creamy touch. Fontina melts beautifully and offers a rich taste. Incorporating Vegetables or Meats Want to add more? Consider adding fresh spinach or sautéed mushrooms. You can also layer in cooked bacon or sliced turkey. These additions boost flavor and make the meal heartier. Changing Up the Bread Types Don’t stick to just sourdough. Try whole grain or rye for a twist. Even a soft brioche can make it special. Each type of bread gives a new flavor and texture. Creamy Tomato Soup Ideas For a creamy soup, add heavy cream or a splash of milk. This makes the soup rich and smooth. You can also blend in some cream cheese for extra creaminess. Spicy Tomato Soup Modifications Want a kick? Add red pepper flakes or a dash of hot sauce. You can also stir in fresh jalapeños for heat. This makes the classic soup exciting and bold. Alternate Accompaniments Instead of bread, serve your soup with crackers or a fresh salad. Grilled veggies on the side add color and taste. Try a classic Caesar salad for a crunchy pair. For the full recipe, check out the Gourmet Grilled Cheese Delight with Creamy Tomato Bliss. Grilled Cheese Storage Tips To keep your grilled cheese fresh, wrap it tightly in plastic wrap or foil. This helps keep moisture in and stops it from getting stale. Store it in the fridge for up to three days. If you want to keep it longer, freeze it. Just make sure to wrap it well. Thaw it in the fridge before reheating. Tomato Soup Storage Tips For tomato soup, let it cool completely before storing. Pour it into an airtight container. It can last in the fridge for about four days. If you want to store it longer, freeze it in portions. Use freezer bags or containers, and label them with the date. This way, you can enjoy your soup later! Best Methods for Grilled Cheese To reheat grilled cheese, the best way is in a skillet. Heat the skillet over medium-low heat. Place the sandwich in the skillet and cover it with a lid. This helps the cheese melt while the bread gets crispy. Cook for about 3-5 minutes on each side. Effective Ways to Reheat Soup For reheating tomato soup, use a saucepan. Pour the soup in and heat it over medium heat. Stir it often to avoid burning. If you prefer, you can also use a microwave. Just pour the soup into a microwave-safe bowl, cover it, and heat for about 1-2 minutes. Stir halfway through to ensure even heating. Enjoy your delicious grilled cheese with tomato soup! For the full recipe, check out the [Full Recipe]. To make the best grilled cheese, you need to avoid some common mistakes. - Mistake 1: Using low-quality bread. Choose a thick, crusty bread like artisan sourdough. - Mistake 2: Skipping the butter. Always butter the outside of the bread for a crisp crust. - Mistake 3: Cooking on high heat. Use medium heat for even melting of cheese. For essential cooking tips, remember: - Use a mix of cheeses for depth. Sharp cheddar and mozzarella work well together. - Press down lightly on the sandwich while grilling. This helps the cheese melt evenly. - Flip the sandwich carefully to avoid spilling cheese. Tomato soup pairs well with several side dishes. - Grilled Cheese: This classic is a must! - Crackers or Breadsticks: Great for dipping into the soup. - Cheese Platter: Add some cured meats and cheeses for an appealing spread. For salad pairings, consider: - Caesar Salad: The crisp greens balance the soup's creaminess. - Mixed Greens: Toss with a light vinaigrette for freshness. Yes, both grilled cheese and tomato soup can be frozen. - Freezing Recommendations: For grilled cheese, wrap each sandwich tightly in plastic wrap and then in foil. For soup, let it cool, then pour it into an airtight container. - Thawing and Reheating Guidelines: Thaw sandwiches in the fridge overnight. Reheat in a skillet. For soup, thaw in the fridge, then heat on the stove or in the microwave. To enhance flavor, consider these essential ingredients: - For Grilled Cheese: - Fresh herbs like basil or thyme add freshness. - A sprinkle of garlic powder boosts flavor. - For Tomato Soup: - Add a splash of cream for richness. - A teaspoon of sugar balances the acidity of tomatoes. Popular add-ins for both dishes include: - Grilled Cheese Add-ins: Sautéed mushrooms or spinach can add a twist. - Tomato Soup Add-ins: Roasted red peppers or a dash of hot sauce can spice things up. For the full recipe, check out the details above to create this comforting meal! In this post, I shared how to make the perfect grilled cheese and tomato soup. You learned about the key ingredients and step-by-step instructions to cook both dishes. I also provided tips to enhance flavors and storage advice for leftovers. These classics are easy to make and great for sharing. Enjoy making your own delicious versions at home. You can customize them to fit your taste. Simple and fun meals like these never go out of style.](https://eataroundit.com/wp-content/uploads/2025/06/8624663a-a546-4912-915f-999414a4d485.webp)
Who doesn’t love the classic combo of grilled cheese and tomato soup? This comforting meal brings warmth and joy to
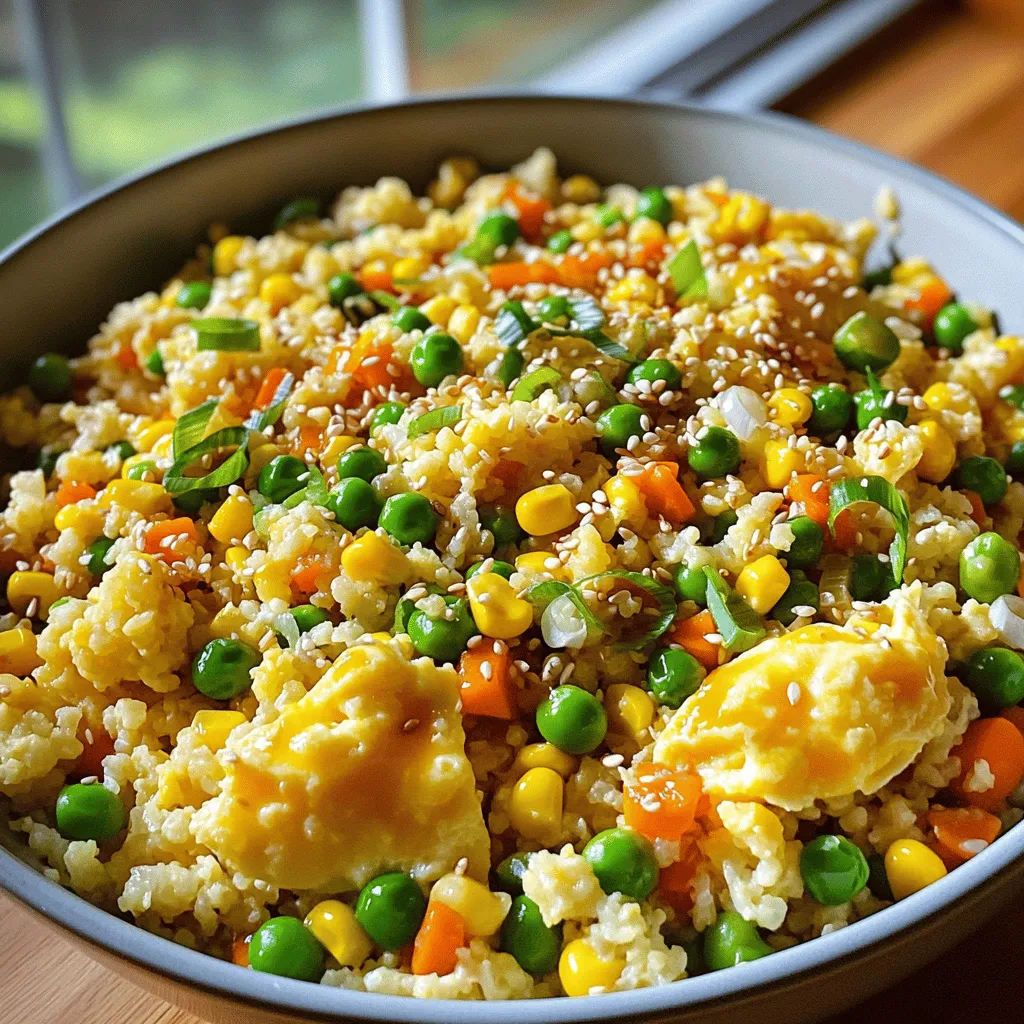
Looking for a quick, nutritious meal? Cauliflower Fried Rice is the answer! This simple dish packs flavor and health into
![- 2 cups cooked chicken, shredded - 4 large tortillas or wrap bread - 1 cup fresh romaine lettuce, chopped - 1/2 cup cherry tomatoes, halved - Salt and freshly cracked pepper, to taste - 1/4 cup Parmesan cheese, freshly grated - 1/2 cup Caesar dressing (homemade or your favorite store-bought brand) - 1/4 cup croutons, lightly crushed - Fresh basil leaves, for garnish In this recipe, you will use simple yet fresh ingredients. The cooked chicken is your main protein. You can use leftover chicken or rotisserie chicken. Shredding the chicken makes it easy to mix. You need large tortillas to wrap all the tasty fillings. The romaine lettuce gives your wraps a nice crunch. Cherry tomatoes add sweetness and color. Season with salt and pepper to let the flavors shine. For the dressing, you can choose homemade Caesar or a jarred version. The Parmesan cheese adds a salty, nutty flavor. Croutons give a delightful crunch in each bite. Adding fresh basil at the end makes the wraps look beautiful. Follow the [Full Recipe] for easy steps to make these wraps! Start by gathering your ingredients. In a large bowl, combine these items: - 2 cups cooked chicken, shredded - 1 cup fresh romaine lettuce, chopped - 1/2 cup cherry tomatoes, halved - 1/4 cup Parmesan cheese, freshly grated Mix them gently with a spoon. This helps the flavors blend well together. You want a nice, colorful salad. Now, it’s time for the dressing! Drizzle about 1/2 cup of Caesar dressing over your chicken salad mixture. Toss everything until each piece is coated. Taste the mix. If it needs more flavor, add salt and freshly cracked pepper. Grab your tortillas and lay one flat on a clean surface. Spoon a generous amount of the chicken Caesar salad mixture onto the center. Don’t forget to sprinkle 1/4 cup of crushed croutons on top for that perfect crunch. Fold the sides of the tortilla inward. Then, roll it tightly from the bottom to the top. Repeat this for the other tortillas. Once you have all your wraps ready, slice each one diagonally. This makes them look nice and easy to eat. For a pretty finish, add fresh basil leaves on top. These add both color and a delightful aroma. Now, you have a tasty and fresh Chicken Caesar Salad Wrap! For more details, check out the Full Recipe. When making Chicken Caesar Salad Wraps, start with fresh romaine lettuce. Look for crisp, vibrant leaves. Avoid any that are wilted or brown. For Caesar dressing, choose a high-quality brand or make your own. A good dressing adds a creamy texture and rich flavor. To roll your wraps tightly, lay the tortilla flat. Place your salad mix in the center. Fold in the sides first, then roll from the bottom. This keeps your filling secure and stops spills. Practice makes perfect, so don’t worry if you don’t get it right away. You can add more flavor with spices or herbs. A pinch of garlic powder can boost the taste. Fresh herbs like parsley or dill can add a nice touch. You could even sprinkle some crushed red pepper for a spicy kick. Experimenting with seasonings can make your wraps even better! {{image_4}} You can switch up the protein in your wraps. Try grilled shrimp or turkey for a new taste. Both options work well with the Caesar salad flavors. Shrimp adds a sweet, ocean taste, while turkey offers a hearty bite. Just cook your protein until it’s ready, then shred or slice it, and mix it into your salad. Want a plant-based twist? You can easily make a vegan version of Chicken Caesar Salad Wraps. Start by using chickpeas or grilled tofu instead of chicken. Both options provide great texture and protein. For the dressing, swap Caesar for a vegan ranch or tahini dressing. This keeps the creamy feel while staying meat-free. Add fresh veggies like cucumbers and avocados for extra crunch! Don’t feel stuck with Caesar dressing! You can try other dressings, too. Ranch dressing adds a tangy flavor that pairs well with the veggies. Italian dressing brings a zesty touch, making your wraps more vibrant. Experiment with these dressings to see what you like best. You might find a new favorite! For the full recipe, check out the Chicken Caesar Salad Wraps section. To keep your Chicken Caesar Salad Wraps fresh, store them in the fridge. Wrap each one in plastic wrap or foil. Place them in an airtight container. This helps to keep them from getting soggy. Consume leftovers within three days for the best taste. To reheat your wraps, do it gently. Unwrap them from the plastic or foil. Place them on a microwave-safe plate. Heat on low power for about 30 seconds. Check if they are warm enough. If not, heat in 10-second bursts. This method keeps the wrap from getting too soft. You can prep these wraps ahead of time. Cook the chicken in advance and shred it. Store it in the fridge until you are ready to use it. Chop the lettuce and tomatoes too, and keep them in separate containers. Assemble the wraps when you are ready to eat. This makes busy days much easier! You can find the Full Recipe for more details. Yes, leftover roast chicken works great in these wraps. It saves time and adds flavor. Shred the chicken and mix it with the other ingredients. This way, you reduce waste and create a quick meal. You can use any kind of cooked chicken you have on hand. Homemade Caesar dressing is simple and tasty. Here’s a quick recipe: - 1/2 cup mayonnaise - 2 tablespoons lemon juice - 1 teaspoon Dijon mustard - 1 garlic clove, minced - 1/4 cup Parmesan cheese, grated - Salt and pepper, to taste Mix all these ingredients in a bowl. Adjust the flavors as you prefer. This dressing is creamy and perfect for your wraps. These wraps pair well with many sides. Here are some ideas: - Fresh fruit salad - Sweet potato fries - A light soup, like tomato or minestrone - Sparkling water or lemonade These options add balance and make your meal more exciting. When stored properly, these wraps can last up to three days in the fridge. Wrap them tightly in plastic wrap or aluminum foil. This helps keep them fresh. Always check for any signs of spoilage before eating. Enjoy your meal safely! Chicken Caesar Salad Wraps are easy to make and taste great. We shared key ingredients, like chicken, romaine, and dressing. You learned how to combine, roll, and serve them. Tips on storage and flavor add more value to your meal prep. Overall, these wraps are flexible and fun for everyone. Try different proteins or dressings to fit your taste. Enjoy experimenting and savoring your delicious wraps!](https://eataroundit.com/wp-content/uploads/2025/06/fc51bd3b-ac87-4955-a0bc-3f49ceaba07f.webp)
Are you ready to enjoy a quick and tasty meal? Chicken Caesar Salad Wraps are your answer! Packed with shredded
![- 4 Italian sausages (choose mild or spicy based on your preference) - 1 red bell pepper, sliced into thin strips - 1 yellow bell pepper, sliced into thin strips - 1 green bell pepper, sliced into thin strips - 1 medium onion (preferably red or yellow), thinly sliced - 3 cloves garlic, finely minced - 2 tablespoons olive oil, divided - 1 tablespoon balsamic vinegar - Salt and pepper, to taste - Fresh basil leaves for garnish - Optional: Crusty bread or hoagie rolls for serving - You can swap Italian sausage for chicken or turkey sausage if you prefer. - For a vegetarian option, consider using plant-based sausage. - Try adding other vegetables like zucchini, mushrooms, or spinach for variety. - Each serving has about 400 calories, depending on the sausage type. - The dish offers around 20g of protein, 25g of fat, and 30g of carbs. - It can fit gluten-free diets if you use gluten-free bread or none at all. - Low-carb diets can enjoy this dish as a flavorful option without the bread. To cook the sausages, start by heating a large skillet over medium heat. Add 1 tablespoon of olive oil. When the oil is hot, carefully place the Italian sausages in the skillet. Cook them for about 6-7 minutes on each side. Look for a nice brown color. Use a meat thermometer to check the internal temperature. It should be at least 160°F (70°C) for safety. After cooking, remove the sausages from the skillet and let them rest. Slice them into bite-sized pieces. Next, it's time to sauté the vegetables. In the same skillet, add the second tablespoon of olive oil. Toss in the sliced onion, red bell pepper, yellow bell pepper, and green bell pepper. Cook these over medium heat for about 5-7 minutes. Stir them occasionally. You want them to be tender but still a bit crisp. This texture makes the dish more enjoyable. Add the minced garlic to the pan after the vegetables soften. Cook for one more minute. Make sure the garlic gets fragrant but does not burn. Now, let’s combine everything. Lower the heat to low and add the sliced sausage back into the skillet. Drizzle the balsamic vinegar over the mixture. Toss everything together well. This helps the flavors mix. Continue cooking for another 2-3 minutes. Taste your dish and adjust the seasoning with salt and pepper as needed. You want each bite to burst with flavor. Enjoy the full recipe details for even more cooking tips! To cook sausages evenly, start with a preheated skillet. This helps the sausages brown nicely. Cook them on medium heat for 6-7 minutes on each side. Use a meat thermometer to check for an internal temperature of 160°F (70°C). This ensures they are safe to eat. To keep vegetables from overcooking, cut them into similar sizes. Thin strips work best for bell peppers and onions. Sauté them on medium heat for about 5-7 minutes. Stir occasionally to check their doneness. The veggies should be tender but still crisp. For serving, you can use hoagie rolls. Spoon the sausage and pepper mix into the rolls for a tasty sandwich. If you prefer, serve it alongside crusty bread. This adds a nice crunch to each bite. Pair the dish with a fresh salad. A simple green salad with lemon vinaigrette works great. You can also serve it with roasted veggies or garlic bread for extra flavor. To boost the taste, consider adding spices. A pinch of dried oregano or thyme can elevate the dish. Fresh basil leaves also add a wonderful aroma when sprinkled on top. If you like heat, add crushed red pepper flakes. For a touch of sweetness, drizzle some honey or add sliced sweet peppers. These small changes can make a big difference in flavor. For the full recipe, check out the Italian Sausage & Rainbow Peppers Stir-Fry. {{image_4}} You can make Italian sausage and peppers in many ways. One option is to bake them in the oven. To do this, preheat your oven to 400°F (200°C). Place the sausages and peppers in a baking dish. Drizzle with olive oil and season with salt and pepper. Bake for about 25-30 minutes, turning halfway through. This method gives you juicy sausages with a nice roasted flavor. Grilling is another tasty option. Heat your grill to medium-high. Place the sausages on the grill and cook for about 6-7 minutes per side. You can grill the peppers in a basket or wrap them in foil. This method adds a smoky flavor that many people love. You can change the flavor by adding different spices or ingredients. For example, try adding some Italian herbs like oregano or thyme. You can also mix in some sun-dried tomatoes or olives for a Mediterranean twist. These additions can brighten your dish and make it unique. If you like heat, consider using hot peppers. You can add sliced jalapeños or crushed red pepper flakes. This will spice up your meal nicely. Just be careful not to add too much if you prefer milder flavors. Using seasonal vegetables can enhance your dish. In the summer, add zucchini or eggplant for more color and flavor. In the winter, consider using root vegetables like carrots or parsnips. They add sweetness and heartiness to your meal. Adjusting your recipe based on the season also helps. For warm weather, serve your sausage and peppers in a light way. You can use crusty bread or hoagie rolls for easy eating. In cooler months, serve it with a warm side like mashed potatoes or polenta for comfort. For the full recipe, check out [Full Recipe]. To keep your Italian sausage and peppers fresh, refrigerate leftovers right away. Place the food in an airtight container. Glass or BPA-free plastic containers work best. Seal them well to avoid air exposure, which can spoil the meal quickly. If you want to save some for later, freezing is a great option. First, let the dish cool down completely. Then, transfer it to a freezer-safe container. You can also use heavy-duty freezer bags. Remove as much air as possible before sealing. When you’re ready to eat, thaw the dish overnight in the fridge. Reheat it in a skillet over low heat or in the microwave. Make sure it reaches a safe temperature of 165°F (74°C). In the fridge, your sausage and peppers will last about 3 to 4 days. Always check for signs of spoilage before eating. Look for any off smells, changes in texture, or discoloration. If it looks or smells bad, it's best to throw it away. Always trust your senses when it comes to food safety. The best type of sausage depends on your taste. I recommend using Italian sausage. You can choose between mild or spicy. Mild sausage gives a rich flavor without too much heat. Spicy sausage adds a nice kick to your dish. Both types work well with the sweet peppers and onions. Yes, you can make this dish ahead. Cook the sausage and vegetables as usual. Let them cool, then store in an airtight container. You can keep it in the fridge for up to three days. When you're ready to eat, just reheat it in a pan. This saves time on busy days! I love serving this dish with crusty bread or hoagie rolls. They soak up the tasty juices. You can also pair it with a fresh salad or roasted veggies. A nice glass of red wine complements the meal well. If you prefer something lighter, try sparkling water with lemon. Yes, this recipe is perfect for meal prep. You can easily make a large batch. Cook the sausage and veggies and divide them into containers. It stores well in the fridge or freezer. Just remember to label them. When you want a quick meal, grab a container and reheat! This blog post covered how to make a delicious dish with Italian sausage and peppers. We explored key ingredients, their substitutes, and nutritional info. I shared step-by-step cooking instructions, tips for perfect results, and variations to try. Remember, this dish is versatile and easy to adapt. You can make it your own with different flavors and cooking methods. Enjoy creating your version of this savory meal, and don’t forget to share it with friends and family!](https://eataroundit.com/wp-content/uploads/2025/06/6e203fe1-d147-4c84-bee2-b699e41fadd4.webp)
Are you ready to spice up your dinner routine? Italian Sausage and Peppers is a crowd-pleaser that’s easy to make
![To make crispy baked falafel, you need a few key ingredients: - 1 cup dried chickpeas, soaked overnight - 1 small onion, roughly chopped - 2 cloves garlic, minced - 1/4 cup fresh parsley, finely chopped - 1/4 cup fresh cilantro, finely chopped - 1 teaspoon ground cumin - 1 teaspoon ground coriander - 1/2 teaspoon baking soda - 1 tablespoon freshly squeezed lemon juice - Salt and black pepper to taste - 2 tablespoons extra virgin olive oil These ingredients create a great flavor and texture. Soaking the chickpeas overnight helps soften them, making blending easier. Fresh herbs add brightness, while spices bring warmth to the dish. You can enhance your falafel with a few tasty toppings: - Tahini sauce for a rich, nutty flavor - Yogurt for a creamy and tangy touch - Whole wheat pita bread for a classic wrap - Crisp lettuce leaves for a fresh, gluten-free option These toppings add layers of flavor and texture, making each bite exciting. You can also serve falafel with fresh veggies, like tomatoes or cucumbers, to add crunch and color. When selecting ingredients, look for quality: - Choose dried chickpeas over canned for better texture. - Pick fresh herbs that are vibrant and aromatic. - Use high-quality olive oil for the best flavor. Fresh, high-quality ingredients make a big difference in your dish. They enhance the taste and make cooking more enjoyable. Always remember to wash your produce well to keep your meal safe and clean. For the full recipe, check out the detailed steps to create your crispy baked falafel! To start, you need dried chickpeas. Soak one cup overnight in water. This makes them soft and easy to blend. After soaking, drain and rinse the chickpeas well. Make sure they are dry before moving on. Moisture can make the falafel mushy. Next, grab your food processor. Add the drained chickpeas, one small chopped onion, and two minced garlic cloves. Toss in 1/4 cup of fresh parsley and 1/4 cup of fresh cilantro. Then, spice it up with one teaspoon of ground cumin and one teaspoon of ground coriander. Don’t forget 1/2 teaspoon baking soda and one tablespoon of lemon juice. Add a pinch of salt and black pepper to taste. Pulse until the mix is coarse but holds together. Do not over-process; you want some texture. Now, put the mixture in a bowl and cover it. Chill in the fridge for at least 30 minutes. This helps the falafel stay firm. When you’re ready, preheat your oven to 400°F (200°C). Form the mixture into small balls, about 1.5 inches wide. Place them on a lined baking sheet. Drizzle two tablespoons of olive oil over the balls. Toss gently to coat. Bake for 25-30 minutes, flipping halfway through. Once golden and crispy, serve them warm. You can enjoy them in pita bread or lettuce leaves. Drizzle with tahini sauce or yogurt for extra flavor. For the full recipe, check out the detailed steps. To get that amazing crunch, use dried chickpeas. Soaking them overnight helps. After blending, chill the mixture for at least 30 minutes. This step firms it up. When shaping, don’t make them too big. Smaller balls bake better and get crispier. Lastly, coat them well with olive oil before baking. This helps them brown beautifully. One common mistake is using canned chickpeas. They hold too much water and make the mix soggy. Another error is over-processing the mixture. It should be coarse, not smooth. Skipping the chilling step can lead to falafel that falls apart. Always remember to flip them halfway through baking for even cooking. You can spice up your falafel in many ways. Try adding a pinch of cayenne for heat. Swap cilantro for mint for a fresh twist. You can also mix in some roasted red pepper for a smoky flavor. Experimenting with different herbs can make each batch unique. Serve with tahini or yogurt to boost taste too! {{image_4}} You can easily spice up your falafel. Add a pinch of cayenne for heat. A dash of smoked paprika brings a nice depth. You could also use fresh herbs like dill or mint for a twist. A blend of spices makes for a unique flavor. Each spice changes the taste and keeps things fun. Making this falafel vegan is simple. The main recipe is already plant-based. Just ensure your toppings are dairy-free. For gluten-free options, use lettuce wraps instead of pita. This way, everyone can enjoy it. You can also swap chickpeas for other beans like black beans. This keeps the protein high and the taste delicious. Falafel is super versatile. You can serve it in wraps, bowls, or salads. Use whole wheat pita for a classic touch. For a lighter meal, try crisp lettuce leaves. Add fresh veggies like cucumbers, tomatoes, and onions. Drizzle with tahini sauce or yogurt for a creamy finish. You can even build a falafel bowl with grains like quinoa or rice. This makes for a filling meal that’s packed with flavor. For the full recipe, check out the details above! To store leftover falafel, let them cool first. Place them in an airtight container. They will stay fresh in the fridge for up to three days. If you want to keep them longer, consider freezing them. This keeps the flavor and texture intact. When reheating falafel, the oven is best. Preheat your oven to 350°F (175°C). Place the falafel on a baking sheet. Reheat for about 10-15 minutes. This method helps restore their crispy texture. You can also use an air fryer for a quick and crispy option. To freeze falafel, shape them before cooking. Place the raw falafel on a baking sheet. Freeze them for about an hour until firm. Then, transfer them to a freezer bag. They can last up to three months. When ready, bake them straight from the freezer. Just add a few extra minutes to the cooking time. Enjoy homemade falafel any time! For the full recipe, check out the [Full Recipe]. Many people wonder how to achieve the best flavor in falafel. The key is to use fresh herbs and spices. Another common question is about the texture. You want the mixture to be coarse but able to hold together. If your falafel falls apart, try adding a bit more flour. Some ask about soaking chickpeas. Always soak dried chickpeas overnight. This step hydrates them, making your falafel softer and easier to blend. To make baked falafel crispy, follow a few simple tips. First, make sure to drain the chickpeas well after soaking. Excess water can make them soggy. When shaping the falafel, keep them slightly smaller. This helps them crisp up faster. Drizzle olive oil over them before baking. The oil promotes a golden, crunchy exterior. Flip the falafel halfway through baking to ensure even crispness. Baking at a high temperature, like 400°F (200°C), also helps achieve that perfect crunch. Crispy baked falafel works well in many dishes. They are great in pita pockets, paired with fresh veggies and sauces. You can also serve them on a bed of salad greens. Adding tahini sauce or yogurt elevates the flavors. For a fun twist, try falafel in a grain bowl with quinoa or couscous. Another idea is to serve them as a snack with dipping sauces. The crunchy texture and bold flavors make falafel a versatile dish for any meal. In this blog post, we explored how to make crispy baked falafel from start to finish. We discussed key ingredients, step-by-step instructions, and tips for perfecting texture. You can also find fun variations and simple storage tips. Falafel is a healthy, tasty option for many meals, and it’s easy to make. With the right ingredients and techniques, you can enjoy a delicious dish at home. I hope these tips inspire you to create your own falafel!](https://eataroundit.com/wp-content/uploads/2025/06/0d5f2c74-7c14-4e19-87d5-275903f9b804.webp)
Are you ready to elevate your meal game with a crispy baked falafel recipe? This healthy option is perfect for
