Skip to content
DisclaimerTerms Of UseGDPR PolicyCookie Policy

eataroundit

  • Home
  • Drinks
  • Appetizers
  • Dinner
  • Dessert
  • About
  • Contact
  • Privacy Policy
DisclaimerTerms Of UseGDPR PolicyCookie Policy

Hannah

To make these vegan chocolate peanut butter cups, you need simple, wholesome ingredients. Here’s what you will need: - 1 cup dairy-free dark chocolate chips - 1/2 cup natural peanut butter - 2 tablespoons pure maple syrup - 1/4 cup coconut oil, melted - Pinch of flaky sea salt - Optional toppings: crushed nuts, extra sea salt flakes, or shredded coconut These ingredients work together to create a tasty treat. The dairy-free chocolate chips give a rich, chocolate flavor. Natural peanut butter adds creaminess and protein. Pure maple syrup offers just the right amount of sweetness. Melted coconut oil helps everything stick together and adds a nice texture. The pinch of sea salt enhances all the flavors. Feel free to get creative with the optional toppings. Crushed nuts add crunch, while shredded coconut brings a tropical twist. You can also sprinkle more sea salt for an exciting flavor contrast. Using quality ingredients makes a big difference. I recommend looking for organic or fair-trade options if you can. This choice not only supports sustainable farming but also elevates the taste of your treats. For the full recipe, check below and get ready to delight your taste buds! Start by lining a muffin tin with paper cupcake liners. This is key to easily removing the cups later. If you prefer, use silicone molds. They pop out the cups effortlessly, making cleanup a breeze. In a heat-safe bowl, combine 1 cup of dairy-free dark chocolate chips and 1/8 cup of melted coconut oil. Stir well. Microwave the mixture in 30-second bursts. After each burst, give it a good stir. This helps the chocolate melt evenly. Stop when the chocolate is smooth and melted. Now, create the chocolate base layer. Use a spoon to scoop about 1 tablespoon of the melted chocolate into the bottom of each cupcake liner. Spread it evenly. Place the muffin tin in the freezer for around 10 minutes. This sets the base layer. Next, make the peanut butter filling. In a mixing bowl, combine 1/2 cup of natural peanut butter, 2 tablespoons of pure maple syrup, and a pinch of flaky sea salt. Mix until smooth. Remove the muffin tin from the freezer. Spoon about 1 tablespoon of the peanut butter filling onto each chocolate layer. Spread it evenly with the back of the spoon. Now it’s time to add the top layer of chocolate. Pour the remaining melted chocolate over the peanut butter filling. Ensure each cup is fully covered. Tap the muffin tin on the counter to release air bubbles and smooth the top. Chill the muffin tin again. Return it to the freezer for 20 to 30 minutes. This step is vital for firm cups. If you want them to hold their shape, make sure they chill long enough. Check that both layers are firm before serving. - Best practices for melting chocolate: Always use a heat-safe bowl. Mix the chocolate chips with a bit of coconut oil for a smooth texture. Microwave in short bursts of 30 seconds. Stir well after each interval. This way, you avoid burning the chocolate. - Ensuring smooth peanut butter filling: Use natural peanut butter without added sugar or oils. Mix it well with maple syrup and a pinch of salt. This will give you a creamy and tasty filling. If it feels too thick, add a little more maple syrup to help it blend. - Suggestions for toppings and variations: Get creative with toppings! You can add crushed nuts for crunch, extra sea salt for contrast, or shredded coconut for a tropical twist. These touches make each cup unique and fun. - Balancing sweetness with sea salt: A small pinch of flaky sea salt can enhance the flavors. It balances the sweetness of the chocolate and peanut butter. Try experimenting with different amounts to find your perfect mix. {{image_4}} You can easily make these cups gluten-free. Use gluten-free chocolate chips. Check the label to ensure they are safe. You may also use gluten-free oats in place of any bread crumbs if you want a crunchy texture. Feel free to swap peanut butter with other nut butters. Almond butter adds a light, nutty taste. Cashew butter offers a creamy, mild flavor. Sunflower seed butter is a great option for nut-free diets. Each nut butter will change the cups' taste, so experiment to find your favorite. Not all chocolate is dairy-free. I recommend brands like Enjoy Life and Hu. You can find these at health stores or online. They offer a rich taste that pairs perfectly with peanut butter. Look for dark chocolate chips that have no added dairy for the best results. To keep your Vegan Chocolate Peanut Butter Cups fresh, you can store them in two main ways: the refrigerator or the freezer. - Refrigerator: If you plan to eat them within a week, simply place them in an airtight container. This keeps them cool and ready to enjoy. - Freezer: For longer storage, the freezer is your best friend. Store them in a freezer-safe container or a zip-top bag. This method can extend their life for up to three months. When choosing containers, opt for glass or BPA-free plastic. These materials help maintain flavor and texture. How long do these cups stay fresh? In the refrigerator, they can last about 5 to 7 days. In the freezer, they hold up for about three months. Look for these signs of spoilage: - Dry or chalky texture: This shows the chocolate has lost moisture. - Off smell: If they smell strange, it’s best to toss them. - Discoloration: Any unusual spots mean it’s time to say goodbye. By following these tips, you can enjoy your Vegan Chocolate Peanut Butter Cups at their best for longer. For the full recipe, check out the previous sections. To make vegan chocolate peanut butter cups, follow these easy steps: 1. Prepare the molds: Line a muffin tin with paper liners or use silicone molds. This helps with easy removal. 2. Melt the chocolate: In a bowl, mix dairy-free dark chocolate chips with half of the melted coconut oil. Heat in the microwave in 30-second bursts, stirring until smooth. 3. Create the base layer: Spoon 1 tablespoon of melted chocolate into each mold. Spread it evenly and freeze for about 10 minutes. 4. Make the filling: In a bowl, mix peanut butter, maple syrup, and a pinch of sea salt until smooth. 5. Add the filling: After the base layer sets, add 1 tablespoon of the peanut butter mixture on top. 6. Top with chocolate: Pour the remaining melted chocolate over the filling. Tap the tin to get rid of air bubbles. 7. Chill to set: Freeze for another 20-30 minutes until firm. 8. Serve: Remove from the liners and enjoy. You can add toppings like crushed nuts or sea salt for extra flavor. Yes, you can use almond butter instead of peanut butter. Almond butter gives a nutty taste and works well in this recipe. It’s a great option for those with peanut allergies. Just make sure to choose a natural almond butter without added sugars or oils. The texture remains creamy and delightful, and it pairs nicely with the chocolate. These vegan chocolate peanut butter cups offer several nutritional benefits: - Dark chocolate: Rich in antioxidants and may improve heart health. - Peanut butter: Packed with protein and healthy fats, it keeps you full longer. - Maple syrup: A natural sweetener that provides minerals like zinc and manganese. - Coconut oil: Contains medium-chain triglycerides, which may aid in weight loss and energy. These ingredients make the cups tasty and a better choice than many store-bought candies. You can find vegan chocolate peanut butter cups at many health food stores. Brands like Unreal and Hu Chocolate offer tasty options. Many local shops and cafes also sell homemade versions. Check online retailers too, as they often have a variety of brands. Making your own, using the Full Recipe, ensures you know exactly what's inside! You learned how to make delicious vegan chocolate peanut butter cups. We covered the ingredients, step-by-step instructions, and tips for perfecting your treats. You can customize flavors and even try different nut butters. Proper storage helps keep them fresh. In conclusion, making these cups is fun and easy. Enjoy creating tasty snacks that fit your diet. With this knowledge, you can impress friends and family with your homemade treats. Trust me, they will love them!

Vegan Chocolate Peanut Butter Cups Simple Delight

Indulging in a treat that’s both tasty and vegan sounds like a dream, right? In this post, I’ll show you

- 1 cup sushi rice - 1 ¼ cups water - 2 tablespoons rice vinegar - 1 tablespoon sugar - ½ teaspoon salt - 4 sheets nori (seaweed) - 1 small cucumber, cut into thin matchsticks (julienned) - 1 small carrot, cut into thin matchsticks (julienned) - 1 ripe avocado, sliced into even strips - ¼ red bell pepper, cut into thin matchsticks (julienned) - 2 tablespoons sesame seeds (toasted, if desired) - Soy sauce, for serving When choosing your ingredients, fresh is key. Sushi rice is sticky and perfect for rolling. The water helps cook the rice just right. Rice vinegar adds a nice tang, and sugar balances the flavor. Salt enhances all the tastes. Nori sheets give structure and flavor. Fresh veggies add crunch and color. I love using cucumber, carrot, avocado, and red bell pepper. They make each bite bright and tasty. You can add toasted sesame seeds for a nutty flavor. Soy sauce is great for dipping, too! Remember, the more fresh and colorful your ingredients, the better your sushi rolls will taste. For the full recipe, check out the complete guide to making Easy Veggie Sushi Rolls. Rinsing the Rice Start by rinsing your sushi rice under cold water. Use a fine-mesh strainer for this. Rinse until the water runs clear. This removes extra starch and helps the rice cook well. After rinsing, drain the rice completely. Cooking Method In a medium saucepan, combine the rinsed rice and 1 ¼ cups of water. Bring this mix to a boil over high heat. Once boiling, reduce the heat to low. Cover it with a lid and let it simmer for 18-20 minutes. The rice should absorb all the water and become soft. Combining Ingredients While your rice cooks, make the vinegar mixture. In a small bowl, mix 2 tablespoons of rice vinegar, 1 tablespoon of sugar, and ½ teaspoon of salt. You can heat this mix in the microwave for about 15-20 seconds. This helps the sugar dissolve easily. Cooling Process Once the sugar dissolves, let the vinegar mix cool down a bit. After the rice is done cooking, transfer it to a large bowl. Gently fold the vinegar mix into the rice using a spatula. Be careful to keep the rice fluffy. Now set the bowl aside to cool to room temperature. Assembling the Ingredients To roll your sushi, first prepare your workspace. Lay a sheet of nori, shiny side down, on a bamboo sushi mat or a flat surface. Dampen your hands with water to avoid sticky rice. Take a handful of rice and spread it evenly on the nori. Leave about an inch at the top edge. Next, arrange your fillings in the center of the rice. Use thin matchsticks of cucumber, carrot, avocado, and bell pepper for a nice crunch. For extra flavor, sprinkle some sesame seeds over the veggies. Rolling Technique Begin rolling the sushi away from you, using the bamboo mat for help. Start from the edge closest to you. Press gently but firmly to make a tight roll. When you reach the exposed edge of the nori, moisten it slightly with water. This helps seal the roll. Repeat this process with the other nori sheets and fillings. Once all rolls are made, slice them into bite-sized pieces. Use a sharp knife and wipe it with a damp cloth between cuts to keep the slices clean. Serve your rolls on a lovely platter with soy sauce on the side for dipping. For the full recipe, check out Easy Veggie Sushi Rolls. When making veggie sushi, fresh vegetables make a big difference. Use crisp, bright veggies for the best flavor. Here are some top choices: - Cucumber - Carrot - Avocado - Red bell pepper These veggies add color and taste. You can also try radishes or zucchini. Always check for freshness. In-season veggies taste best. Spring brings tender asparagus, while summer offers juicy tomatoes. Fall is great for colorful peppers. Winter gives us sweet butternut squash. Choose what's fresh to enhance your rolls. Rolling sushi can seem tricky, but you can master it. A bamboo mat helps a lot. It keeps your rolls tight and even. Here’s how to roll properly: 1. Place the nori on the bamboo mat, shiny side down. 2. Wet your hands to stop the rice from sticking. 3. Spread sushi rice evenly, leaving space at the top. For tight rolls, start rolling from the edge closest to you. Use gentle pressure to keep everything in place. Moisten the nori edge before sealing. This helps the roll stay tight and secure. Serving your sushi well makes it even more fun. You can place your rolls on a nice platter. Cut them into bite-sized pieces for easy eating. Here are some ideas to make it special: - Arrange with colorful garnishes, like sliced radishes or herbs. - Serve with soy sauce for dipping. You can also add pickled ginger or wasabi for extra flavor. These toppings enhance the overall experience. Enjoy your creation with friends or family. Sharing makes it even better! {{image_4}} For your veggie sushi rolls, feel free to mix and match ingredients. Here are some great ideas: - Other Vegetable Options: Try using bell peppers, zucchini, or sweet potato. These add color and crunch. - Adding Proteins: You can add tofu, tempeh, or edamame. This boosts protein and makes your rolls heartier. Sushi comes in many styles. Here are two popular ones: - California Rolls: These rolls often have imitation crab and avocado. They are sweet and creamy, perfect for beginners. - Temaki (Hand Rolls): These are cone-shaped and easy to hold. Just fill the nori with rice and veggies, then roll it up! You can easily adjust your sushi for different diets. Here are some tips: - Vegan Options: All the ingredients in your rolls can be vegan. Use plant-based fillings and sauces. - Gluten-Free Soy Sauce Choices: Regular soy sauce has gluten. Look for tamari or coconut aminos instead. These options taste great and keep it gluten-free. Feel free to explore these variations to make your sushi unique and delicious! For the full recipe, check out the Easy Veggie Sushi Rolls. Sushi is best fresh, but you can save leftovers. Wrap each roll in plastic wrap. This keeps the rolls moist and prevents them from drying out. Place them in an airtight container. Store the container in the fridge. - Best Practices for Refrigeration - Wrap rolls tightly in plastic wrap. - Use an airtight container to keep them fresh. - Keep sushi in the fridge, not at room temperature. - How Long Sushi Lasts Sushi lasts for about 24 hours in the fridge. After that, it may lose flavor and texture. Always check for any signs of spoilage before eating. You might wonder if you can reheat sushi. In general, sushi is best enjoyed cold. However, if you want to warm it, here are some tips. - Can You Reheat Sushi? Yes, but it is not always recommended. Reheating can change the texture of the fish and rice. - Recommended Methods If you decide to reheat, use a microwave. Place sushi on a plate. Cover it with a damp paper towel. Heat in short bursts of 10-15 seconds. Check after each burst to avoid overheating. Enjoy your veggie sushi rolls at room temperature for the best taste! To stop sushi rice from sticking, dampen your hands. Wet hands help keep the rice from clumping. You can also rinse the rice well before cooking. This helps remove excess starch. A little water goes a long way in making sushi fun to roll. Yes, you can prepare veggie sushi rolls ahead of time. Just keep them in the fridge. Wrap rolls in plastic wrap to keep them fresh. Use them within a day for the best taste. If you make them too early, the rice may harden. If you can't find nori, use lettuce leaves or rice paper. These options add a crisp taste. You can also use thin slices of cucumber as a wrap. Each choice provides a unique flavor and texture. Enjoy experimenting with different wraps! In this blog post, we explored the key ingredients and steps needed to make delicious veggie sushi. You learned how to prepare rice, mix the vinegar, and roll your sushi tightly. We shared tips on choosing fresh vegetables, variations of sushi styles, and how to store leftovers. Consider trying different fillings and styles to make your sushi unique. Enjoy the process, and soon you'll impress friends with your homemade sushi!

Easy Veggie Sushi Rolls Simple and Healthy Recipe

Ready to roll? In this easy-to-follow guide, you’ll learn how to create delicious veggie sushi rolls at home. Packed with

To make these tasty treats, you will need: - 1 cup rolled oats - 1/2 cup almond butter (or substitute with peanut butter) - 1/4 cup honey or maple syrup - 1/2 cup chocolate chips (use semi-sweet or dark according to preference) - 1/4 cup ground flaxseed - 1 teaspoon vanilla extract - A pinch of salt These ingredients come together to create a delicious energy ball that tastes like cookie dough. The oats give it a chewy texture, while the nut butter provides healthy fats. You can swap some ingredients or add extras for fun! Here are a few ideas: - Use sunflower seed butter instead of nut butter for nut-free balls. - Swap honey for agave syrup for a vegan option. - Add dried fruit like cranberries or raisins for sweetness. - Mix in seeds like chia or hemp for extra nutrition. Feel free to get creative! These treats fit many diets and tastes. You don’t need fancy tools to make these energy balls. Here’s what you should have: - A large mixing bowl - A smaller bowl for wet ingredients - A spatula or spoon for mixing - A baking sheet or plate - Parchment paper to line your baking sheet Having these items ready will make your cooking process smooth and easy. Start by gathering your dry ingredients. In a large bowl, mix 1 cup of rolled oats, 1/4 cup of ground flaxseed, and a pinch of salt. Stir well until everything is evenly blended. This step helps to ensure your energy balls taste great and have the best texture. Now, take another bowl for the wet ingredients. Combine 1/2 cup of almond butter (or peanut butter) with 1/4 cup of honey (or maple syrup). Use a spoon to mix until smooth and creamy. This is key for binding the energy balls together. You want it to be well combined. Next, pour your wet mixture into the dry ingredients. Add in 1 teaspoon of vanilla extract and 1/2 cup of chocolate chips. Stir everything together. You can use a spatula or your hands for this. The mixture should be sticky but easy to handle. Take small portions of the mixture and roll them into balls about 1 inch wide. You should get around 12 to 15 energy balls from this recipe. Place the balls on a parchment-lined sheet, leaving space between them. Chill for at least 30 minutes in the fridge. This step helps them firm up. After chilling, enjoy your tasty no-bake cookie dough energy balls! To get the best texture for your no-bake cookie dough energy balls, focus on the moisture level. If your mix feels too dry, add a splash of almond milk or more nut butter. If it feels too wet, add a bit more oats or flaxseed. The mixture should be sticky but hold together well when rolled into balls. One common mistake is not chilling the energy balls long enough. They need at least 30 minutes in the fridge to firm up. Another mistake is not measuring the ingredients correctly. Too much nut butter can make them too soft. Always use measuring cups for accuracy. Want to boost flavor? Add fun mix-ins! Try nuts, dried fruits, or seeds. You can also use different types of chocolate chips, like white or dark. For a spicy kick, add a dash of cinnamon or a few sprinkles of sea salt on top. These little changes can make your energy balls even more delicious. For the full recipe, check out the instructions above! {{image_4}} You can switch out almond butter for other nut butters. Peanut butter adds a classic taste. Cashew butter gives a creamy texture. Sunflower seed butter is great for nut allergies. Each option changes the flavor and texture. Adding flavors can make these energy balls more fun. A teaspoon of cinnamon gives warmth. You can use almond extract for a nutty twist. A splash of maple extract adds sweetness. Experiment with flavors that you love! You can boost nutrition by adding superfoods. Chia seeds add fiber and protein. Hemp seeds give healthy fats. You can also add a scoop of protein powder. These extras make your energy balls even more powerful! For the Full Recipe, check the main article. To keep your no-bake cookie dough energy balls fresh, store them in an airtight container. This helps keep moisture out and flavors in. I like to layer them with parchment paper for extra protection. You can keep them in the fridge for a week. If you want them to last longer, freezing is the way to go. Freezing is great for long-term storage. To freeze, arrange the energy balls on a baking sheet, making sure they do not touch. Freeze them for about 1 hour. Once they are firm, transfer them to a freezer bag or a container. They will keep well for up to 3 months. Just let them thaw in the fridge before enjoying them. These energy balls have a good shelf life. If stored properly, they last about a week in the fridge. Look out for changes in texture or smell. If the energy balls feel sticky or have an off odor, it’s best to toss them. Always trust your senses. Enjoy your no-bake cookie dough energy balls fresh and tasty! For the full recipe, check out the recipe link. Yes, you can make these energy balls vegan. Use maple syrup instead of honey. For the nut butter, almond or peanut butter works great. Both are vegan-friendly and add nice flavor. To reduce stickiness, add more rolled oats or ground flaxseed. You can also chill the mixture longer before rolling it into balls. This helps firm up the dough and makes it easier to handle. If you don’t want chocolate chips, try dried fruit, nuts, or seeds. You can use raisins, cranberries, or even coconut flakes. These swaps add different flavors and textures. Each energy ball contains about 100 calories. The exact number may vary based on your ingredients. For more precise counts, check your specific brand of nut butter and sweetener. Absolutely! Feel free to add spices like cinnamon or nutmeg. You can also mix in superfoods like chia seeds or protein powder for added benefits. The recipe is flexible and fun to experiment with! You can find the full recipe for No Bake Cookie Dough Energy Balls above in this article. It includes all the ingredients and steps to make these tasty treats! You now know the key parts of making no bake cookie dough energy balls. We covered the main and optional ingredients, essential tools, and easy steps to prepare them. Remember to avoid common mistakes and enhance your energy balls with your favorite mix-ins. You can store them well or freeze for later use. Feel free to customize your recipe with different flavors and nut butters. This snack is simple, fun, and tasty. Enjoy making your own energy balls that fit your taste!

No Bake Cookie Dough Energy Balls Easy and Tasty Treat

Looking for a quick, tasty snack that fuels your day? You’re in the right place! These No Bake Cookie Dough

- 1 medium-sized spaghetti squash - 1 cup marinara sauce (store-bought or homemade) - 1 cup cooked ground turkey or beef - 1 cup fresh spinach, finely chopped - 1 cup shredded mozzarella cheese - 1 teaspoon Italian seasoning blend - 1/2 teaspoon garlic powder - Salt and freshly cracked black pepper, to taste - Fresh basil leaves, for garnish - Olive oil, for drizzling Using high-quality ingredients makes this dish shine. Choose a fresh, firm spaghetti squash. Look for a squash that feels heavy for its size. This means it has good moisture. For the marinara sauce, homemade always wins. If you buy it, check for low sugar and no preservatives. Fresh spinach should be bright green and crisp. For the meat, lean ground turkey or beef adds richness and protein. Look for grass-fed options if possible. Mozzarella should be fresh and shredded just before use. This melts better and has a creamier texture. If you want a vegan option, replace the meat with lentils or mushrooms. For a dairy-free choice, use a vegan cheese substitute. You can swap marinara sauce for pesto for a different flavor. If you cannot find spaghetti squash, zucchini or butternut squash can work too. Just adjust cooking times as needed. To start, you need to preheat your oven to 400°F (200°C). This will get things ready for roasting the squash. Next, take your spaghetti squash and slice it in half lengthwise. Use a sharp knife and be careful. The squash can be tough to cut. After cutting, scoop out the seeds and strands with a spoon. This step makes room for the tasty filling. Drizzle the inside of each half with olive oil. Then, season with salt and freshly cracked black pepper to bring out the flavor. Now, place the squash halves cut side down on a lined baking sheet. Bake them in the preheated oven for 30 to 40 minutes. You’ll know they are ready when the flesh is fork-tender. When they cool for about 5 minutes, take a fork and scrape the flesh into spaghetti-like strands. This creates a light and fluffy texture. While the squash bakes, it’s time to prepare the filling. Heat a skillet over medium heat. Add your cooked ground turkey or beef to the skillet. Then, mix in the marinara sauce, chopped spinach, Italian seasoning, and garlic powder. Stir everything together and cook until heated through. This should take about 3 to 5 minutes. The spinach will wilt, adding nice color and flavor. Once the squash is ready, combine the spaghetti squash strands with the meat sauce mixture in a large bowl. Make sure everything is mixed well. Next, spoon the mixture back into the squash halves. Pack it tightly so each boat is full. Top each half with a generous sprinkle of shredded mozzarella cheese. Place the filled squash back in the oven and bake for another 15 to 20 minutes. You want the cheese to be melted, golden, and bubbly. Finally, garnish with fresh basil leaves for a lovely finish. Allow them to cool a few minutes before serving for the best flavor. Enjoy your delicious Baked Spaghetti Squash Boats! For the complete recipe, check out the Full Recipe. Cutting spaghetti squash can be tricky. Use a sharp knife and a steady surface. Start by placing the squash on a cutting board. Cut it in half lengthwise. If it feels hard, microwave it for a few minutes. This will soften it and make cutting easier. Always be careful with your fingers to avoid cuts. For a perfect bake, preheat your oven to 400°F (200°C). Place the squash cut side down on a baking sheet. Bake for 30 to 40 minutes. The best sign it’s ready is when a fork easily pierces the flesh. If it feels tough, give it more time. The goal is tender strands that pull away easily. To get that gooey melted cheese on top, use shredded mozzarella. Spread it generously over the stuffed squash. Bake it until golden and bubbly. This usually takes about 15 to 20 minutes in the oven. If you want a crispier top, switch to the broil setting for the last few minutes. Just keep an eye on it to prevent burning. For the complete journey of making these delightful Baked Spaghetti Squash Boats, you can refer to the Full Recipe. {{image_4}} You can easily make this dish vegetarian. Simply swap out the meat for more veggies. Try using mushrooms, bell peppers, or zucchini. These add great flavor and texture. You can also use lentils or chickpeas for a protein boost. A mix of roasted vegetables can make it colorful and tasty. Use the same marinara sauce to keep it delicious. If you want to change the protein, try chicken or plant-based meat. Ground chicken works well and has a mild flavor. For a vegan option, use tempeh or tofu. Just crumble or chop it into small pieces. You can also use beans like black beans or kidney beans. These choices keep the meal hearty and filling. To make your baked spaghetti squash even better, add herbs and spices. Fresh herbs like oregano or thyme can brighten the dish. You can also spice it up with a pinch of red pepper flakes for heat. A squeeze of lemon juice adds a nice zing. For a smoky taste, try smoked paprika. These little changes can make a big difference in flavor. For the full recipe, check out the detailed instructions above. Store your leftover baked spaghetti squash boats in an airtight container. Let the dish cool before sealing it. Place it in the fridge for up to three days. If you want to keep it longer, consider freezing it. To reheat, you can use the oven or the microwave. For the oven, preheat to 350°F (175°C). Place the boats in a baking dish and cover with foil. Heat for about 15-20 minutes or until hot. In the microwave, heat for 3-5 minutes. Check every minute to avoid overheating. If you want to freeze your spaghetti squash boats, make sure to let them cool completely. Wrap each boat in plastic wrap, then place them in a freezer-safe bag. They can last for up to three months. When ready to eat, thaw in the fridge overnight before reheating. Yes, you can try other squashes like butternut or acorn. These squashes have a different texture and taste but can work well. Remember, the cooking time may change. Always check for tenderness with a fork. The squash is done when it feels soft and fork-tender. You can test this by gently poking it with a fork. If the flesh easily pulls away in strands, it's ready. The cooking time is usually 30-40 minutes at 400°F (200°C). You can boost flavor by adding more spices like red pepper flakes for heat. Fresh herbs like parsley or thyme can add freshness. You might also try adding olives or sun-dried tomatoes for a tasty twist. For a richer flavor, consider a splash of balsamic vinegar. Some people like to add a bit of cream cheese for creaminess. Check out the Full Recipe for more ideas! In this blog post, we explored how to make delicious spaghetti squash. We looked at key ingredients and their quality, plus alternatives. I shared clear steps to prepare, bake, and fill your squash. We also discussed tips for perfect cooking and variations for added flavor. Lastly, I covered how to store leftovers and answered common questions. Spaghetti squash can be fun and tasty. With these ideas, you'll impress anyone who tries your dish!

Baked Spaghetti Squash Boats Tasty and Filling Meal

Are you ready to make a meal that’s both tasty and filling? Baked spaghetti squash boats are a delightful choice,

For the best ginger lemonade refresher, use fresh ingredients. Fresh lemon juice is key. You will need about 4 to 6 medium lemons to get 1 cup of juice. Fresh ginger gives a nice spice. Peel and slice half a cup of ginger thinly. The combination of these two will create a bright and zesty drink. Here are the exact measurements for the recipe: - 1 cup fresh lemon juice - 1/2 cup fresh ginger, sliced - 1 cup honey or agave syrup - 4 cups cold water - 1/2 teaspoon turmeric powder (optional) Feel free to adjust the honey or agave syrup to your liking. If you prefer a sweeter drink, add more sweetener. If you like it tangy, add more lemon juice. You can boost the health benefits of your drink. Adding turmeric powder gives an extra kick of flavor and health. Fresh mint leaves add a refreshing touch. Lemon slices make it look beautiful and add flavor. Use these add-ins to make your drink even more special. For the full recipe, check the details above. Start by gathering your ingredients. You need fresh ginger, cold water, and a saucepan. Slice the ginger thinly. This helps release its strong flavor. Place the sliced ginger and 2 cups of cold water in the saucepan. Heat it on medium until it boils. Once boiling, lower the heat and let it simmer for 10 minutes. This step creates a strong ginger infusion. After simmering, take the saucepan off the heat. Strain the ginger water into a large pitcher. Discard the solid ginger pieces. Now, you can mix the rest of your ingredients. Add 1 cup of fresh lemon juice to the pitcher. This gives your lemonade a bright and tangy taste. Next, pour in the honey or agave syrup. Stir well until it fully dissolves. If you want a health boost, add turmeric powder. Then, add the remaining 2 cups of cold water. Mix everything thoroughly. Taste your mixture. If it needs more sweetness, add a bit more honey or agave syrup. Your ginger lemonade is almost ready! Chill the pitcher in the fridge for at least 30 minutes. This ensures a cold drink on hot days. If you're in a hurry, you can serve it over ice right away. When serving, pour the lemonade into glasses. Garnish each glass with a slice of lemon and a sprig of fresh mint. This not only looks nice but also enhances the drink's aroma. Enjoy your refreshing summer drink! For the complete recipe, refer to the Full Recipe section. To make great ginger lemonade, focus on fresh ingredients. Start with ripe lemons for the best juice. The ginger should be firm and fragrant. Use a fine strainer to remove any solid bits from the infusion. This keeps your drink smooth and refreshing. Chill the lemonade well before serving. It should be cold and crisp, perfect for hot days. One common mistake is using bottled lemon juice. Fresh juice has a bright flavor. Another mistake is not letting the ginger steep long enough. Ten minutes gives the best taste. Also, avoid adding too much sweetener at once. Taste as you go to find your perfect balance. Lastly, don't skip the ice! It keeps your drink nice and cool. You can enhance your ginger lemonade in fun ways. Add fresh mint leaves for a cool twist. Basil can also bring a unique flavor. For a spicy kick, add a pinch of cayenne pepper. If you like fruit, try adding berries or slices of cucumber. These add color and taste. For the full recipe, check out the section above. {{image_4}} You can make your Ginger Lemonade Refresher even better by adding herbs and fruits. Fresh mint adds a cool taste that complements the ginger and lemon well. Simply muddle a few mint leaves at the bottom of your glass or pitcher. You can also try adding berries like strawberries or blueberries. They add a nice color and sweetness. Just mash them lightly before mixing them in. If you enjoy fizz, making your Ginger Lemonade sparkling is easy. Instead of regular water, swap in sparkling water or club soda. This adds a fun texture and makes the drink more festive. Pour it over ice for a refreshing summer treat. You’ll love the bubbly twist! Sweeteners are key to your Ginger Lemonade. While honey or agave syrup works well, you can try other options too. Maple syrup gives a unique flavor, while stevia is a low-calorie choice. You can also use simple syrup if you prefer a liquid sweetener. Just adjust the amount based on your taste. The goal is to find what you love best! For more variations and ideas, check out the Full Recipe. Store your ginger lemonade in a large pitcher or a sealed container. Keep it in the fridge to keep it cold and fresh. Always use a clean spoon when serving to avoid contamination. Your ginger lemonade will stay fresh for about 5 days in the fridge. After this time, it may lose flavor or become cloudy. If it starts to smell off or looks strange, it’s best to toss it out. Always check for these signs before drinking. If you have leftover ginger lemonade, you can use it in fun ways. Try using it as a base for cocktails or mocktails. You can also blend it into smoothies for a zesty kick. Adding a splash to salad dressings can also enhance flavors. Don’t let any deliciousness go to waste! For the complete recipe, check out the Full Recipe section. Ginger and lemon are great for your health. Ginger helps with digestion and reduces nausea. It can also ease sore throats and reduce inflammation. Lemon is high in vitamin C. It boosts your immune system and helps keep your skin healthy. Together, they make a refreshing drink that hydrates and energizes you. Yes, you can make this drink in advance. Just prepare it and store it in the fridge. It tastes even better after a few hours. The flavors blend together nicely. Make sure to serve it cold. This way, you can enjoy it whenever you want. To adjust the sweetness, add more honey or agave syrup. Start with a little, then taste it. You can always add more if needed. If it’s too sweet, add a splash of lemon juice. This balances the flavor. You can make it just right for your taste buds. Absolutely! The Ginger Lemonade Refresher is naturally non-alcoholic. It’s a perfect choice for all ages. You can also turn it into a mocktail by adding sparkling water. This gives it a fizzy touch. Everyone can enjoy this refreshing drink at summer parties. For the full recipe, check out the [Full Recipe]. This ginger lemonade refresher is a great summer drink. It is cool and tasty. Here are the ingredients you will need: - 1 cup fresh lemon juice (about 4-6 medium-sized lemons) - 1/2 cup fresh ginger, peeled and thinly sliced - 1 cup honey or agave syrup (adjust based on your sweetness preference) - 4 cups cold water - 1/2 teaspoon turmeric powder (optional, for added health benefits) - Lemon slices and fresh mint leaves for garnish Now, let’s dive into the instructions for making this drink. 1. Start by boiling the ginger slices in 2 cups of cold water. This helps to bring out the ginger flavor. 2. Once it boils, lower the heat. Let it simmer for about 10 minutes. 3. After simmering, take the saucepan off the heat. Strain the ginger water into a large pitcher. Discard the ginger slices. 4. Add the fresh lemon juice, honey or agave syrup, turmeric (if using), and the rest of the cold water to the pitcher. Stir well until the sweetener dissolves. 5. Taste the lemonade. If you want it sweeter, add more honey or agave syrup. 6. Chill it in the fridge for at least 30 minutes. If you're in a hurry, serve it over ice. 7. To serve, pour the ginger lemonade into glasses. Garnish with a lemon slice and fresh mint leaves. This recipe makes 4-6 servings and takes about 15 minutes to prep. Enjoy this refreshing drink on a hot day! In this article, we explored how to make the perfect ginger lemonade refresher. We discussed the best fresh ingredients for robust flavor, shared precise measurements, and included helpful add-ins for extra benefits. I provided step-by-step instructions, along with tips to avoid common mistakes. We also talked about fun variations and how to properly store your drink. Enjoy making this refreshing drink. With practice, you’ll craft the best ginger lemonade that everyone loves.

Ginger Lemonade Refresher Refreshing Summer Drink

Looking for a cool drink to beat the summer heat? Let me introduce you to the Ginger Lemonade Refresher! This

- 4 cups of water - 4 black tea bags (or substitute with green tea for a milder flavor) - 1/2 cup fresh mint leaves, plus extra for elegant garnishing - 1/2 cup freshly squeezed lemon juice - 1/2 cup honey or agave syrup (adjust to your sweetness preference) - Fresh lemon slices, for garnish - Ice cubes You can switch out black tea for green tea or herbal tea. Green tea gives a softer taste. Herbal teas like chamomile or hibiscus add a nice twist, too. For sweeteners, honey is a great choice, but agave syrup works well, too. You can use maple syrup or stevia if you prefer something different. If you want more herbal notes, try adding fresh basil or lemon verbena. Lemon is high in vitamin C, good for your immune system. It helps keep your skin clear and can aid digestion. Mint is great for your stomach and can freshen your breath. It has calming effects, too. Black and green teas are packed with antioxidants. They can boost your energy and help with focus. Together, these ingredients not only taste good but also support your health. To make lemon mint iced tea, start by boiling water. Use a medium saucepan and bring 4 cups of water to a rolling boil over medium-high heat. Once boiling, take the saucepan off the heat. Now, add 4 black tea bags or green tea bags if you prefer a lighter taste. Let the tea steep. For black tea, steep for 5 minutes. If you use green tea, steep for 3 minutes. This will give you the best flavor. After steeping, remove the tea bags. Next, add 1/2 cup of fresh mint leaves to the hot tea. Let those steep for another 10 minutes. This step infuses a refreshing mint flavor into your tea. Once done, strain the tea into a large pitcher. Use a fine mesh strainer to catch the mint leaves. This ensures a smooth drink. While the tea is still warm, stir in 1/2 cup of freshly squeezed lemon juice and 1/2 cup of honey or agave syrup. Mix well until the sweetener fully dissolves. Now, let the mixture cool to room temperature. After that, place it in the refrigerator to chill for about one hour. The steeping time is key for great flavor. For black tea, keep it at 5 minutes. For green tea, aim for 3 minutes. If you love herbal tea or want a caffeine-free option, consider chamomile or hibiscus. Each tea type has its own steeping time. Always check the package for specific instructions. When straining the tea, use a fine mesh strainer. This will catch any mint leaves and tea bits. Pour slowly to avoid spills. After straining, mix in the lemon juice and sweetener while the tea is warm. This helps the flavors blend better. For serving, fill each glass with ice cubes first. Then pour the chilled tea over the ice. This keeps your drink refreshing and cool. To make your lemon mint iced tea even better, consider adding other flavors. You can mix in slices of fresh fruit like strawberries, peaches, or oranges. These fruits add a nice twist to the classic taste. You might also try spices like ginger or a hint of cinnamon. Just a small amount can change the drink completely. Experiment with what you like best. When serving, make it look special. Use clear glasses so people can see the pretty colors. Add a slice of lemon on the rim of the glass. A sprig of fresh mint on top makes it look fresh and inviting. You can also add ice cubes with mint leaves or fruit inside. This adds a fun touch and keeps the drink cold. Serve your lemon mint iced tea nice and cold. After making it, chill it in the fridge for at least an hour. This helps the flavors blend well and makes the tea refreshing. When you serve it, fill the glasses with ice first, then pour the tea over the ice. This keeps it extra cold and refreshing on a hot day. Enjoy this great summer drink! For the complete recipe, check out the [Full Recipe]. {{image_4}} If you want to mix things up, try herbal teas like chamomile or hibiscus. Chamomile adds a soothing note, while hibiscus gives a fruity, tart flair. Both pair well with lemon and mint. You can steep them just like black or green tea. This way, you create a unique twist on the classic recipe. Adding fruit can make your Lemon Mint Iced Tea even better. Berries, peaches, or even slices of orange make great additions. You can mash up some berries or add peach slices to the pitcher. Let the fruit infuse for a few hours in the fridge. This adds natural sweetness and flavor without needing extra sugar. Not everyone likes the same level of sweetness. You can adjust the amount of honey or agave syrup based on your taste. Start with half a cup and add more if you like it sweeter. You could also try other sweeteners, like stevia or maple syrup. Experiment until you find your perfect balance for the best Lemon Mint Iced Tea. For a complete guide to making this delicious drink, check out the Full Recipe. To enjoy your Lemon Mint Iced Tea at its best, serve it chilled. When serving, fill a glass with ice cubes first. Pour the tea over the ice to keep it cold. Garnish with a lemon slice and fresh mint leaves for a nice look. This adds a touch of color and flavor. You can also prepare the tea in advance and store it until you are ready to serve. Your Lemon Mint Iced Tea stays fresh in the fridge for up to 3 days. Make sure to store it in a sealed pitcher or container. This keeps the flavors bright and fresh. If you notice any off smells or flavors, it’s best to toss it. You can freeze Lemon Mint Iced Tea for later. Pour the tea into ice cube trays and freeze. Once frozen, transfer the cubes to a bag. This helps you save space and make ice tea later. When you want some, just drop a few cubes into a glass. Allow them to melt and enjoy! This method keeps the tea's taste intact. To make Lemon Mint Iced Tea at home, follow these steps: 1. Boil water: Start by boiling 4 cups of water in a medium saucepan. 2. Steep tea: Once boiling, remove it from heat and add 4 tea bags. Let the tea steep for 5 minutes for black tea or 3 minutes for green tea. 3. Add mint: Remove the tea bags and add 1/2 cup of fresh mint leaves. Let them steep for 10 minutes. 4. Strain tea: Use a fine mesh strainer to strain the tea into a large pitcher. Discard the mint leaves. 5. Mix in lemon and sweetener: While the tea is warm, stir in 1/2 cup of freshly squeezed lemon juice and 1/2 cup of honey or agave syrup. Mix well. 6. Cool down: Allow the mixture to cool to room temperature, then chill in the fridge for about 1 hour. 7. Serve: Fill glasses with ice cubes and pour the chilled tea over the ice. Garnish with lemon slices and mint. This method makes a refreshing drink perfect for hot days. You can find the Full Recipe for more details. Yes, you can use various types of tea for Lemon Mint Iced Tea. Black tea gives a strong, bold flavor. Green tea offers a lighter, more delicate taste. Herbal teas, like chamomile or hibiscus, can add unique flavors. Each type will change the drink's essence. Experiment with different teas to find your favorite blend. Just remember to adjust steeping times based on the tea you choose. You have many options for sweetening Lemon Mint Iced Tea. Here are some popular choices: - Honey: A natural sweetener that adds a rich flavor. - Agave syrup: A plant-based sweetener that is less sugary than honey. - Sugar: Classic white or brown sugar works well too. - Stevia: A natural, no-calorie sweetener that is very sweet. - Maple syrup: This adds a unique touch of flavor. Choose the sweetener that fits your taste. Start with a little, then adjust to your liking. Lemon Mint Iced Tea is refreshing and easy to make. We covered the ingredients you need, like tea, mint, and lemon. I shared tips for brewing, mixing, and enhancing flavors. Different variations let you explore new tastes. Keep in mind how to store your tea for maximum freshness. Experiment with your own twists to find what you love. Enjoy your delicious, homemade Lemon Mint Iced Tea any time you want!

Lemon Mint Iced Tea Refreshing Summer Beverage Recipe

Looking for a cool drink to beat the summer heat? Lemon Mint Iced Tea is your answer! This bright, refreshing

To make a tasty chocolate coconut frappe, you need: - 1 cup brewed coffee - 1 cup coconut milk - 2 tablespoons unsweetened cocoa powder - 2 tablespoons sweetened shredded coconut - 2 tablespoons chocolate syrup - 1 tablespoon honey or maple syrup - 1 cup ice cubes These simple ingredients create a rich and creamy drink. The brewed coffee gives it depth. Coconut milk adds a smooth texture. Cocoa powder ramps up the chocolate flavor. Sweetened shredded coconut brings a delightful chew. Chocolate syrup sweetens and enhances the taste. Honey or maple syrup allows you to control how sweet it is. Finally, the ice cubes make it cold and refreshing. For an extra touch, consider these garnishes: - Whipped cream - Toasted coconut flakes - Chocolate shavings These add visual appeal and texture to your drink. Whipped cream makes it indulgent. Toasted coconut flakes give a crunchy contrast. Chocolate shavings offer a touch of elegance. If you want the full recipe, check out the detailed instructions to whip up this delightful drink! - Step 1: Brew and Cool Coffee Start by brewing your favorite coffee. Let it cool to room temperature. This step is key to keep your frappe smooth. - Step 2: Combine Ingredients in Blender In a blender, pour in the cooled coffee. Add one cup of coconut milk, two tablespoons of cocoa powder, and two tablespoons of shredded coconut. Don't forget the chocolate syrup and honey or maple syrup for sweetness! - Step 3: Blending Process Top the mixture with one cup of ice cubes. Secure the lid tightly. Blend on high speed until you get a smooth and frothy mix. This should take about 30 seconds. - Step 4: Adjusting Sweetness After blending, taste your frappe. If you want it sweeter, simply add more honey or maple syrup. Blend again for a few seconds to mix it in well. - Step 5: Drizzling Chocolate Syrup Take your serving glasses and drizzle chocolate syrup along the inner sides. This adds a fun and tasty touch. - Step 6: Pouring and Topping Carefully pour the blended frappe into each glass. Fill them just below the rim to avoid spills. - Step 7: Final Garnishes Top each glass with whipped cream. Then sprinkle toasted coconut flakes and chocolate shavings on top. This makes your frappe look extra special! Enjoy your Chocolate Coconut Frappe right away! You can find the full recipe to guide you through this delicious treat. Choosing the Right Coffee Start with a strong coffee. Brew it strong so it stands out in the drink. You can use any coffee you love. I find dark roasts work best. They add a rich flavor that pairs well with chocolate and coconut. Blender Techniques for Ideal Consistency Use a high-power blender for this recipe. Add your ingredients in the right order. This helps mix them well. Start with liquids, then add powders, and finally ice. Blend until it’s smooth and frothy. This will give your frappe a creamy texture. Adjusting Sweetness to Taste Taste your frappe before serving. If you want it sweeter, add more honey or maple syrup. Remember, you can always add more, but you can’t take it out. Balance the sweetness with the chocolate and coconut flavors. Creative Ways to Serve Serve your frappe in tall, clear glasses. This shows off the layers. Drizzle chocolate syrup on the inside of the glass. It looks fancy and tastes great. You can also add a colorful straw for fun. Adding Tropical Elements For a tropical feel, garnish with toasted coconut flakes. You can also add chocolate shavings on top of the whipped cream. A slice of fresh coconut on the side adds a nice touch. These small details make your frappe look amazing! For the full recipe, check out the Chocolate Coconut Frappe details above! {{image_4}} You can make this frappe fit your needs easily. - Vegan Option: Swapping Dairy If you want a vegan frappe, swap the coconut milk for almond milk or oat milk. Both options keep the drink creamy and tasty. You can also use coconut cream for extra richness. - Sugar-Free Variation: Sweetener Alternatives You can skip sugar by using sugar-free sweeteners. Try stevia or erythritol. They taste sweet without adding calories. Adjust the amount to your taste for the perfect balance. To make this frappe even more exciting, add some fun flavors. - Adding Flavor Extracts (e.g., vanilla or mint) Consider adding a splash of vanilla extract for a warm touch. Mint extract can give it a refreshing twist. Just a few drops can change the whole drink. - Mixing in Other Ingredients (e.g., banana or espresso) Want to make it fruity? Blend in half a banana for a creamy texture. If you love coffee, add a shot of espresso. This will boost the coffee flavor and energy level. These simple changes can make your Chocolate Coconut Frappe truly unique and delicious. Feel free to experiment! For the full recipe, check the earlier section. Storing Leftover Frappe If you have leftover frappe, store it in a sealed container. Make sure the container is airtight. This helps keep the flavor fresh. You can refrigerate it for up to two days. When you're ready to enjoy it again, give it a good shake or stir before drinking. The texture may change a bit, but it will still taste great. Reheating Tips for Coffee If you want to reheat your coffee, do it gently. Pour the coffee into a small pot. Heat it on low on the stove. Stir it often to avoid burning. You can also use a microwave. Heat it in short bursts, stirring in between. Enjoy your warm coffee as a base for a new frappe, or simply drink it hot! Prepping Ice Cubes and Cocoa Mixture To save time, prep your ice cubes ahead of time. Fill an ice tray with water and freeze. You can also mix your cocoa with a little coconut milk. Store this mixture in the fridge. It makes blending easier when you are ready to make your frappe. Making Ahead for Quick Assembly You can make the frappe quickly if you prepare in advance. Brew your coffee and cool it. Store it in the fridge. Keep your coconut milk and other ingredients ready. This way, when you want a refreshing drink, you can blend it up in no time. Enjoy your Chocolate Coconut Frappe anytime! Can I use a different milk alternative? Yes, you can use almond milk or oat milk. Each milk adds a unique flavor. Coconut milk gives a creamy taste, but other options work well too. How do I make this recipe non-caffeinated? You can swap brewed coffee for decaf coffee or use hot cocoa. Both options will still provide a rich and tasty drink. What are the health benefits of coconut milk? Coconut milk is rich in healthy fats. It may support heart health and aid in digestion. It's also a good source of vitamins and minerals. How long does the frappe last in the fridge? The frappe stays fresh for about one day. To keep it tasty, store it in an airtight container. Shake or stir before serving again. Can I freeze this frappe for later? Yes, you can freeze it! Pour the frappe into an ice cube tray. Later, blend the frozen cubes for a quick treat. This keeps it fresh for a longer time. For the full recipe, check the details above. Enjoy making this delightful treat! This article covered how to make a delicious Chocolate Coconut Frappe. We discussed essential ingredients, helpful steps, and tips for perfecting your drink. You learned creative ways to customize and serve your frappe. Whether you prefer a vegan version or different flavor boosts, options abound. Remember to store leftovers properly for later enjoyment. Enjoy making this tasty beverage whenever you need a treat!

Chocolate Coconut Frappe Delight in Every Sip

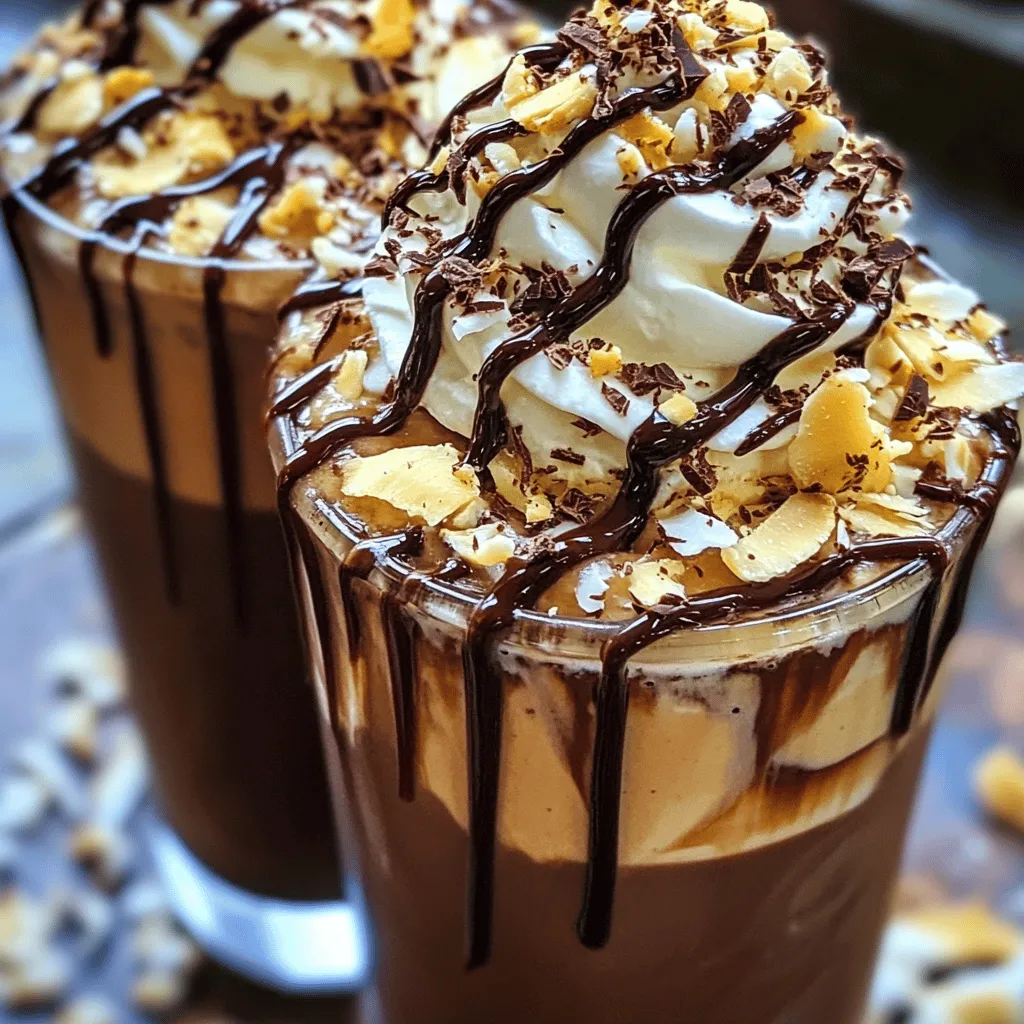
Are you ready to indulge in a drink that feels like a tropical vacation? The Chocolate Coconut Frappe is a

To make a Tropical Green Smoothie, gather these fresh ingredients: - 1 cup fresh baby spinach - 1 ripe banana, peeled - 1/2 ripe avocado, halved and pitted - 1/2 cup pineapple chunks, either fresh or frozen - 1/2 cup coconut water (or substitute with almond milk) - 1 tablespoon chia seeds - Juice of 1 fresh lime - 1 teaspoon honey or agave syrup (optional) These ingredients blend together to create a creamy and refreshing drink. Spinach adds nutrients without changing the flavor much. Bananas give a sweet taste and smooth texture. Avocados boost creaminess and healthy fats. Pineapple adds a tropical twist. Coconut water hydrates and keeps it light. Chia seeds pack fiber and omega-3s. Lime juice brings brightness, while honey adds sweetness if you wish. You will need some simple tools to create this smoothie: - A blender - A measuring cup - A tablespoon - A knife - A cutting board - A glass for serving Using a good blender is key to achieving a smooth texture. Make sure to measure your ingredients to keep the taste balanced. The knife and cutting board help you prepare the fruits easily. This Tropical Green Smoothie is packed with nutrients. Each serving has: - Calories: Approximately 200 - Protein: 3 grams - Carbs: 40 grams - Fiber: 7 grams - Sugars: 14 grams - Fat: 6 grams This drink is rich in vitamins and minerals. Spinach provides iron and calcium. Bananas and pineapple offer vitamin C and potassium. Avocado contributes healthy fats. Chia seeds add fiber and antioxidants. Enjoy this smoothie as a nutritious snack or a light meal. Start by washing the fresh baby spinach under cold water. This removes all dirt and grit. Next, peel the ripe banana. Make sure it is soft, as this gives sweetness. Then, cut the avocado in half and remove the pit. Use half of the avocado for creaminess. Now, grab your pineapple chunks. You can use fresh or frozen ones. They add a nice tropical flavor. Finally, squeeze the juice from the lime. This will bring a fresh zest to your smoothie. Now, we get to blend! Place the fresh spinach in the bottom of your blender. This helps create a smooth base. Next, add the banana, half avocado, and pineapple chunks on top. Pour in the coconut water or almond milk. This liquid helps the blending process. Then, sprinkle in the chia seeds. Finally, add the lime juice. If you want it sweeter, you can include honey or agave syrup. Blend everything on high for about 30 to 60 seconds. You want a smooth and creamy texture. If it seems too thick, add more coconut water or almond milk slowly until you reach the right thickness. Once your smoothie is blended, taste it. Adjust the sweetness or lime juice if needed. When satisfied with the flavor, pour the vibrant smoothie into your favorite glass. To make it look extra nice, sprinkle a few chia seeds on top. You can also add a slice of lime on the rim of the glass. A colorful straw adds a fun touch too. Enjoy this Tropical Green Smoothie as a refreshing drink! For the complete recipe, check out the Full Recipe section. To get the best texture for your Tropical Green Smoothie, start with fresh ingredients. Fresh spinach, ripe banana, and avocado create a creamy mix. If the smoothie is too thick, add more coconut water or almond milk slowly. Blend until smooth; this usually takes about 30-60 seconds. Use a high-speed blender for the best results. If you want to avoid lumps, layer spinach first for a better blend. To make your smoothie pop, choose ripe fruits. A ripe banana adds natural sweetness. Adding lime juice gives a zesty kick. Don't skip the chia seeds; they add a nice texture and boost nutrition. If you want a sweeter taste, add honey or agave syrup. Always taste before serving. Adjust sweetness or citrus to fit your liking. One common mistake is not washing your spinach well. Dirt can ruin the smoothie. Another mistake is overloading the blender. Too many ingredients can lead to a chunky mix. If you add frozen fruits, remember they will thicken the smoothie. Lastly, avoid skipping the lime juice; it balances the sweetness and adds brightness. For more tips, check out the Full Recipe for guidance on making the perfect Tropical Green Smoothie. {{image_4}} You can change the fruits in your Tropical Green Smoothie. Try using mango or papaya instead of pineapple. Both fruits add a sweet, tropical taste. You can also swap out the banana for a pear. This will keep your smoothie creamy and delicious. If you want to change the color, consider adding some berries. Blueberries or strawberries will add a fun twist. If you want to make your smoothie more filling, add protein. You can use protein powder for a quick boost. Another option is to add Greek yogurt. This will make your smoothie creamier and richer. For a plant-based option, try adding nut butter. Almond or peanut butter works well and adds a nice flavor. To keep your smoothie dairy-free, use almond milk or coconut water. These options blend well and keep the smoothie light. If you want a creamier texture, try using coconut yogurt. It adds a nice tropical taste without dairy. You can also use oat milk, which has a smooth texture and subtle flavor. For the complete recipe, refer to the Full Recipe section above. After making your Tropical Green Smoothie, store any leftovers in the fridge. Use an airtight container to keep it fresh. Try to consume the smoothie within 24 hours for the best taste. If you notice separation, just give it a gentle shake before drinking. If you want to save some for later, you can freeze the smoothie. Pour it into ice cube trays or freezer-safe bags. This way, you can blend the cubes into a fresh drink later. Smoothie cubes can last up to three months in the freezer. Just remember to defrost them in the fridge before blending. To keep your Tropical Green Smoothie fresh, always use ripe fruits. Fresh spinach must be bright green and crisp. Avoid any wilted leaves. If you make a big batch, try to store it in smaller portions. This helps keep each serving fresh and tasty. For extra freshness, add a little lime juice to the mix, as it can help preserve the flavors longer. You can make a tasty smoothie without bananas. Try using ripe avocado instead. It adds creaminess and healthy fats. You can also use mango for a sweet touch. Just replace the banana with one cup of your chosen fruit. Keep the other ingredients the same for the best results. Adding fruits boosts flavor and nutrition. Here are some great choices: - Mango - Papaya - Berries like strawberries or blueberries - Kiwi - Passionfruit These fruits pair well with spinach and coconut water. Feel free to mix and match for a unique taste. Yes, you can use frozen spinach! It saves time and is just as healthy. Frozen spinach is picked at peak ripeness, so it still has great nutrients. Just use about one cup of frozen spinach. No need to thaw it before blending. This keeps your smoothie chilled and refreshing. We covered the key steps to make a great tropical green smoothie. With fresh ingredients and the right tools, you can create a tasty drink. Remember the blending process for a smooth texture and the tips to avoid common mistakes. Explore variations to keep things fun and fresh. Proper storage helps your smoothie last longer. Enjoy crafting your unique version, and feel free to experiment with flavors and add-ins. Your tropical green smoothie adventure starts now!

Tropical Green Smoothie Refreshing and Nutritious Mix

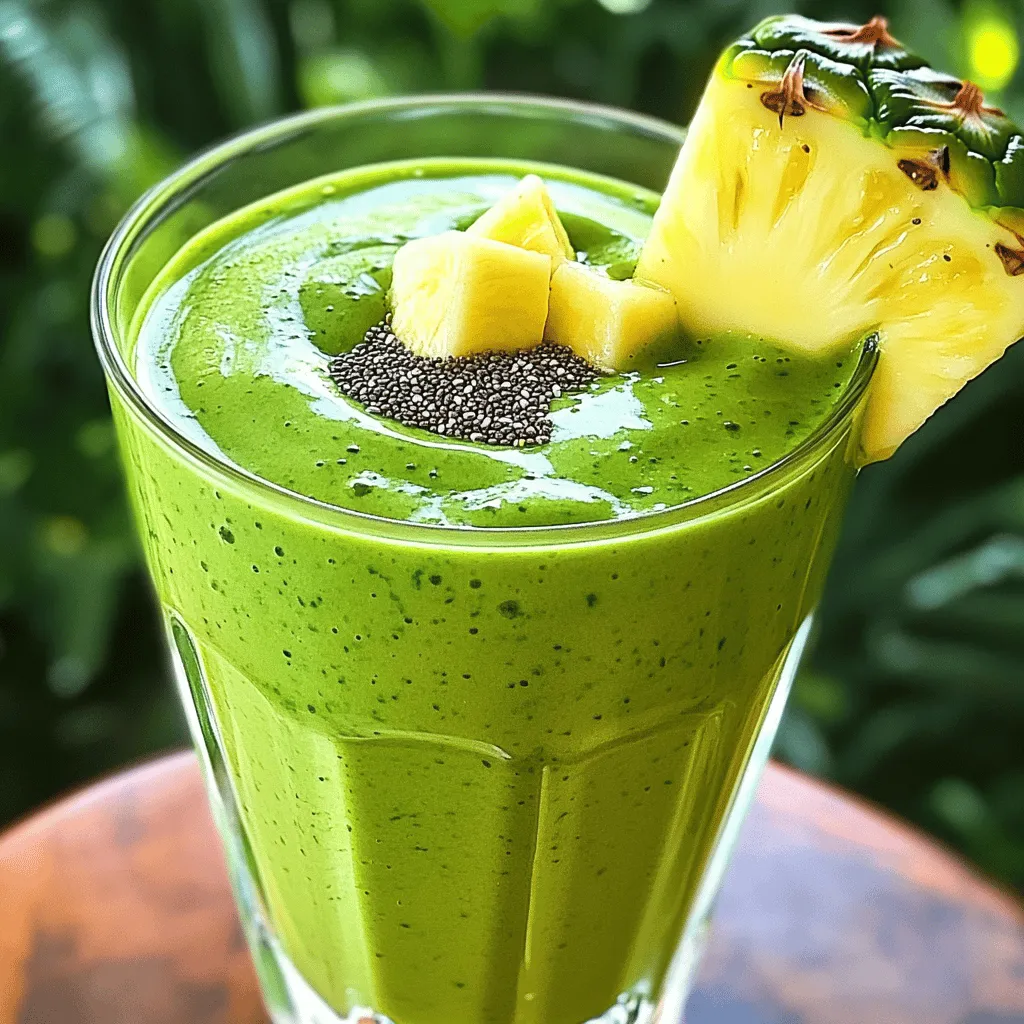
Are you ready to blend up a delicious Tropical Green Smoothie? This drink is packed with flavor and nutrition. You’ll

To make a delicious Banana Split Protein Shake, gather these main ingredients: - 1 perfectly ripe banana, peeled and diced - 1 scoop of creamy vanilla protein powder - 1 cup of unsweetened almond milk - 1 tablespoon of natural peanut butter - 1 tablespoon of rich chocolate syrup (or cacao for a healthier option) - 1 tablespoon of crushed nuts (walnuts or slivered almonds work great) These ingredients blend to create a shake that tastes like a treat but packs a punch of nutrition. The banana adds natural sweetness and creaminess. The protein powder gives you energy and helps build muscle. Almond milk keeps it light and dairy-free. Peanut butter adds flavor and healthy fats. Chocolate syrup makes it fun and tasty! To take your shake to the next level, consider these optional toppings and add-ins: - Whipped cream, for a luscious topping - Fresh cherries, for a charming garnish You can also add a handful of ice for a thicker texture. If you want, a sprinkle of cinnamon can enhance the flavor too. These extras make your shake look and taste even better. This shake is not just tasty; it's also healthy. Here’s a quick look at the nutrition you get from the main ingredients: - Calories: Around 300-350 calories - Protein: About 25 grams from the protein powder and peanut butter - Healthy Fats: From the peanut butter and nuts - Carbohydrates: From the banana, providing quick energy This Banana Split Protein Shake is a perfect blend of flavor and nutrition. For the full recipe, you can check out the detailed instructions to whip up this treat at home! To start, grab your ripe banana. Peel it and cut it into chunks. This will make blending easier. Next, gather your other ingredients: - 1 scoop of creamy vanilla protein powder - 1 cup of unsweetened almond milk - 1 tablespoon of natural peanut butter - 1 tablespoon of rich chocolate syrup - 1 tablespoon of crushed nuts - Whipped cream (optional) - Fresh cherries for garnish Now you have everything ready for your shake. Put all your ingredients into a high-speed blender. Start with the banana, then add the protein powder, almond milk, and peanut butter. Pour in the chocolate syrup next. Blend on high speed. Keep going until everything is smooth and creamy. If you want a thicker shake, add a handful of ice cubes. Blend again until it’s frosty. This step makes it extra yummy. Pour your shake into a tall glass. Fill it to your liking. For a fun touch, add whipped cream on top. Sprinkle some crushed nuts for a nice crunch. Finally, add a fresh cherry on top. This gives your shake that classic banana split look. Enjoy your Banana Split Protein Shake healthy and delicious treat! For the full recipe, check the earlier section. To get the best texture, start with a ripe banana. The riper the banana, the sweeter and creamier your shake will be. Blend well until smooth. If you want a thicker shake, add a handful of ice after blending the other ingredients. This gives it a frosty feel. Always blend on high speed for the best results. Fresh ingredients make a huge difference. Choose bananas that are yellow and slightly speckled. Use almond milk that is unsweetened for a clean flavor. If you want added crunch, choose fresh nuts. They should be whole and not stale. This will enhance both taste and nutrition. Always check the dates on your protein powder and nut butter to ensure freshness. One common mistake is not blending long enough. If you see chunks, blend more until smooth. Another mistake is using too much chocolate syrup. It can overpower the banana flavor. Stick to the recipe for balance. Lastly, avoid skipping the nuts or toppings. They add texture and flavor, making your shake feel special. Make sure to follow the Full Recipe for the best results. {{image_4}} If you want a dairy-free shake, use almond milk or coconut milk. These milks keep the shake creamy. You can also use oat milk for a thicker texture. Each option adds a unique flavor, enhancing your shake. To boost protein, try adding Greek yogurt to your shake. This makes it creamier and packs in more protein. You can also mix in some chia seeds or hemp seeds. They add extra nutrients without changing the taste much. Want to change the flavor? Swap the chocolate syrup for caramel sauce. This gives a sweet twist. You could also add a dash of cinnamon for warmth. For a fruity kick, toss in some berries. Each adjustment makes your shake exciting! For the complete recipe, check out the Full Recipe. If you have extra shake, pour it into a sealed container. Use a glass jar or a plastic bottle. The shake keeps well in the fridge for up to 24 hours. Before you drink it, give it a good shake to mix everything together again. You can also freeze the shake for later. Pour the shake into ice cube trays or freezer-safe bags. This way, you can blend them into a new shake later. Just remember to use them within two months for the best taste. You can warm the shake lightly, but I suggest not heating it too much. A microwave works fine, but don’t overheat it. Heat in short bursts and stir well. However, a cold shake is much tastier! If you do not have protein powder, don't worry! You can use Greek yogurt. It adds creaminess and protein. Silken tofu is another great option. It blends well and keeps your shake smooth. You can also try nut butter, like almond or cashew. It adds flavor and healthy fats. Yes, you can easily make this shake vegan! Swap the dairy milk for almond milk or oat milk. Use a plant-based protein powder, like pea or brown rice. Skip the whipped cream or use a vegan version. You can still enjoy a tasty shake without any animal products. You can store your shake in the fridge for up to 24 hours. Just remember to shake or stir it before drinking. It may separate a bit, but that's normal. For longer storage, freeze your shake in an airtight container. It can last up to a month in the freezer. Just blend it again when you’re ready to enjoy it! A Banana Split Protein Shake is easy to make and delicious. We covered key ingredients, blending tips, and how to store leftovers. You can also explore dairy-free options and flavor twists to fit your taste. Remember, using fresh ingredients makes a huge difference. Avoid common mistakes to get the best texture. Now you can enjoy a healthy treat without guilt!

Banana Split Protein Shake Healthy and Delicious Treat

Want a tasty way to fuel your day? The Banana Split Protein Shake is a fun twist on a classic

To make the Caramel Toffee Crunch Shake, you need some simple ingredients. Here’s what you’ll need: - 2 cups vanilla ice cream - 1 cup milk (whole or your preferred variety) - 1/4 cup caramel sauce (plus extra for drizzling) - 1/4 cup toffee bits - 1 tsp vanilla extract - Whipped cream, for topping - Pinch of sea salt (optional) Each ingredient plays a big role in making this shake creamy and sweet. The vanilla ice cream offers a rich base. The milk adds a nice smoothness. Caramel sauce gives it that sweet, gooey flavor we love. Toffee bits add a crunchy texture, making each sip a treat. The vanilla extract enhances the flavor, while whipped cream on top makes it look fancy. A pinch of sea salt can really boost all these flavors. It makes the sweetness pop! When you gather these ingredients, you set yourself up for a delightful shake experience. For the full recipe, check out the detailed steps ahead! To make a smooth shake, start with the right tools. Grab a good blender. Add the following ingredients: - 2 cups vanilla ice cream - 1 cup milk - 1/4 cup caramel sauce - 1/4 cup toffee bits - 1 tsp vanilla extract Blend on medium speed. Blend until everything is mixed well. You want a creamy texture, so keep blending until smooth. If you want a thicker shake, add more ice cream. For a thinner shake, pour in more milk. Adjust until it’s just right for you. To make your shake special, add a pinch of sea salt. This step brings out the flavors. Blend for a few seconds to mix the salt in. Now, let's talk about presentation. Drizzle caramel sauce inside your glasses before adding the shake. This adds a sweet touch and looks great. Pour the shake into the glasses. Fill them three-quarters full. This leaves room for whipped cream on top. Now for the fun part! Add a generous amount of whipped cream. Sprinkle toffee bits on top for a crunch. Finally, drizzle more caramel sauce over the whipped cream. This makes your shake look extra tasty. Enjoy every sip! For the full recipe, check the earlier section. To make your Caramel Toffee Crunch Shake even better, I have a few tips. - Using different types of milk: You can use whole, almond, or oat milk. Each gives a unique taste. Whole milk makes it rich and creamy. Almond milk adds a nutty flavor. Oat milk is great for a smooth finish. Experiment to find your favorite! - The role of sea salt in flavor enhancement: A pinch of sea salt can make a big difference. It balances the sweetness of the caramel. Just a little can bring out the flavors. Add it when blending for a well-rounded taste. - Tips for the perfect whipped cream topping: For fluffy whipped cream, chill your bowl and beaters first. Use heavy cream for the best results. Whip until soft peaks form. You can sweeten it with a bit of sugar or vanilla. Top your shake generously for a delicious finish. These tips will help you create a shake that is not just tasty but also a treat for the eyes. Enjoy every sip of your Caramel Toffee Crunch Shake! For the full recipe, check out the earlier section. {{image_4}} You can have fun with this shake by changing a few things. Here are some great ideas: - Alternative ice cream flavors: While vanilla is classic, you can try chocolate or coffee ice cream. Each flavor gives a new twist. You can even mix flavors for a layered taste! - Adding chocolate or nuts for different textures: Want a crunch? Toss in some chopped nuts or chocolate chips. They add a nice texture and flavor. You can use almonds, pecans, or even crushed cookies for extra fun. - Healthier versions: If you want to cut back on sugar, try using less caramel sauce. You can also swap in low-fat ice cream or milk. This way, you still enjoy the shake without feeling guilty. These simple tweaks make the Caramel Toffee Crunch Shake even more exciting. Check out the Full Recipe for the base shake, and then get creative! After you enjoy your Caramel Toffee Crunch Shake, you might have some left. Here’s how to keep it fresh. First, pour any leftover shake into an airtight container. This helps to keep air out and flavors in. Make sure to seal it tightly. Store it in the fridge for up to two days. If you want to store it longer, freezing is a great option. Pour the shake into a freezer-safe container. Leave some space at the top, as liquids expand when frozen. You can keep it in the freezer for up to a month. When you want to enjoy it again, take it out and let it sit in the fridge for a few hours. Or, you can microwave it for a few seconds, stirring often. If you have leftover shake, you can also use it in new ways. Try mixing it into pancakes or waffles for a sweet twist. You can use it to make ice cream floats or as a topping for desserts. Don’t waste a drop of that creamy goodness! Can I make this shake dairy-free? Yes, you can make this shake dairy-free. Use almond milk, coconut milk, or oat milk. Replace the ice cream with a dairy-free version. Many brands offer tasty options that will still give you that creamy texture. What is the best way to thicken my shake? To thicken your shake, add more ice cream. You can also freeze some of the milk to create ice cubes. Blend these frozen cubes with the other ingredients for a thicker shake. How can I make a Caramel Toffee Crunch Shake for a crowd? To make this shake for a crowd, simply multiply the ingredients. Use a larger blender or mix in batches. You can set up a shake bar with toppings like extra toffee bits, whipped cream, and caramel sauce for fun. Is this shake suitable for children? Yes, this shake is great for kids! It’s sweet and creamy, making it a fun treat. Just watch the sugar if you have younger ones. You can always adjust the amount of caramel sauce to make it a bit less sweet. For the full recipe, check out the complete guide to making the perfect Caramel Toffee Crunch Shake. You learned how to make a tasty Caramel Toffee Crunch Shake. We covered the key ingredients, steps, and helpful tips. You can customize it with different flavors or health options. Storing leftovers is simple, too. This shake is quick to make and fun to enjoy. Try it out and share your own twist! Simple variations let you make it your own, ensuring everyone can love this treat. Enjoy your shake journey and happy blending!

Caramel Toffee Crunch Shake Irresistible and Creamy

Are you ready to indulge in a sweet treat that feels like a hug in a glass? The Caramel Toffee

Older posts
Newer posts
← Previous Page1 … Page8 Page9 Page10 … Page59 Next →

dsad

© 2025 eataroundit • Built with GeneratePress

Our Policies

  • Copyright Policy
  • Cookie Policy
  • GDPR Policy
  • Privacy Policy
  • Disclaimer
  • Terms Of Use

More Information

  • Home
  • About
  • Contact
  • Appetizers
  • Dessert
  • Dinner
  • Drinks
©2025, eataroundit About Back To Top