Indulging in a rich dessert can be a game changer, and this Black Forest No-Bake Cheesecake is just that! This delightful recipe combines smooth cream cheese, fresh cherries, and a chocolate graham cracker crust to create a treat you’ll crave. You don’t need to turn on your oven or stress over complicated steps. Instead, let’s dive into how to whip up this easy, no-bake dessert that’s perfect for any occasion!
Ingredients
Complete List of Ingredients
To make a delightful Black Forest no-bake cheesecake, gather these ingredients:
– 1 ½ cups chocolate graham cracker crumbs
– ½ cup unsalted butter, melted
– 2 cups cream cheese, softened to room temperature
– 1 cup powdered sugar
– 1 teaspoon vanilla extract
– 1 ½ cups heavy whipping cream
– 1 cup cherry pie filling
– Dark chocolate shavings, for garnish
– Fresh cherries, for garnish
Ingredient Substitutions
You can switch some ingredients if needed:
– For the crust, try regular graham crackers or Oreo cookies.
– For a dairy-free option, use cashew or almond cream cheese.
– If you want less sugar, use a sugar substitute like stevia or monk fruit.
Importance of Fresh Ingredients
Using fresh ingredients makes a big difference in taste:
– High-quality cherries give a brighter flavor. Look for ripe, juicy ones.
– Fresh whipping cream beats pre-packaged options. It adds a rich, light texture.
Step-by-Step Instructions
Preparing the Crust
– Combining ingredients
Start by mixing 1 ½ cups of chocolate graham cracker crumbs with ½ cup of melted unsalted butter. This mixture should look like wet sand. Stir well until all the crumbs are coated.
– Pressing into the pan
Next, take this mixture and press it firmly into the bottom of a 9-inch springform pan. Use your hands or a flat measuring cup to create an even layer. Once done, chill it in the fridge for 15 minutes.
Making the Filling
– Mixing cream cheese
In a large bowl, beat 2 cups of softened cream cheese using an electric mixer. Mix until it’s smooth and creamy. This step is key for a fluffy filling.
– Adding powdered sugar
Gradually add 1 cup of powdered sugar and 1 teaspoon of vanilla extract. Keep mixing until everything is well combined and there are no lumps.
Whipping the Cream
– Technique for perfect whipped cream
In a separate bowl, pour 1 ½ cups of heavy whipping cream. Whip it with an electric mixer. Stop when stiff peaks form, which takes about 3-4 minutes.
– Incorporating whipped cream into the filling
Gently fold the whipped cream into the cream cheese mix with a spatula. Make sure no white streaks remain. This gives the cheesecake its light and airy texture.
Layering the Cheesecake
– Pouring and spreading the filling
Pour half of the filling onto the chilled crust. Use a spatula to spread it evenly.
– Adding cherry pie filling
Spoon half of the cherry pie filling over the cheesecake layer. Pour the rest of the filling on top, smoothing it out again. Finally, add the remaining cherry filling on top for a beautiful finish.
Chilling the Cheesecake
– Importance of chilling time
Cover the springform pan with plastic wrap. Chill it in the refrigerator for at least 4 hours, but overnight is best. This helps the cheesecake set properly.
– Tips for setting properly
Make sure your fridge is cold enough. A good chill is crucial for the perfect slice.
Serving Suggestions
– Releasing from the springform pan
After chilling, carefully release the sides of the springform pan. This will give you a lovely round cheesecake.
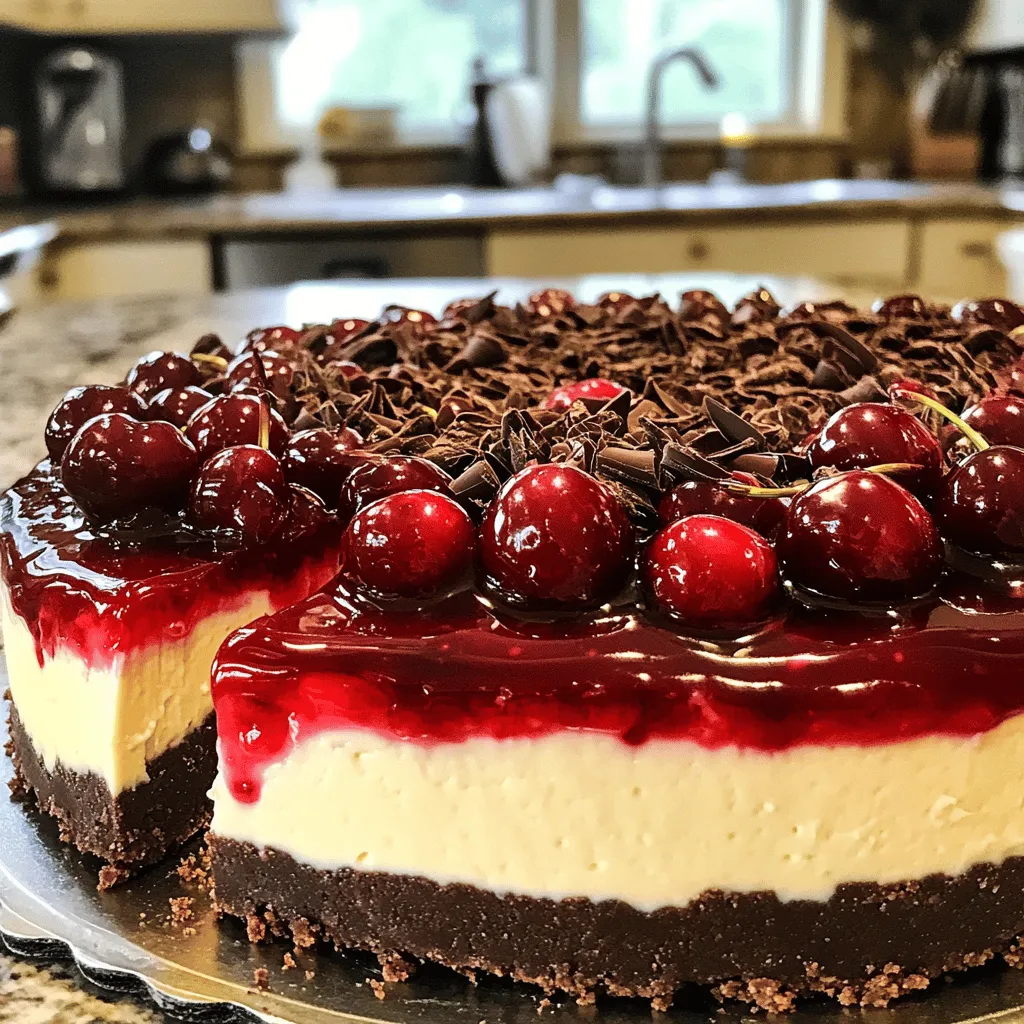
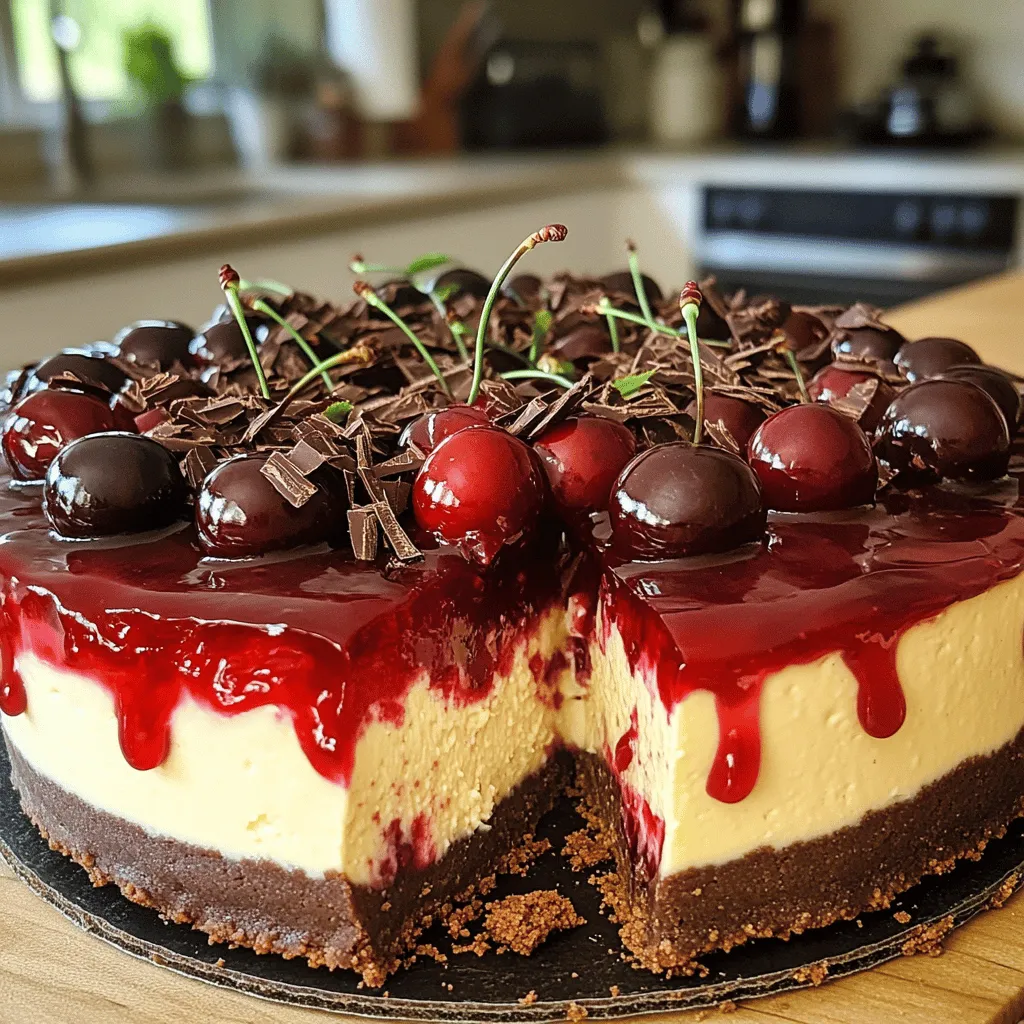
– Garnishing the cheesecake
Right before serving, add dark chocolate shavings and fresh cherries on top. This makes your dessert look even more tempting. Slice and enjoy this delightful dessert!
Tips & Tricks
Achieving the Perfect Texture
To get your cheesecake just right, start with room temperature cream cheese. Cold cream cheese can lead to lumps. Let it sit out for about 30 minutes before you mix. This step is key for a smooth filling.
When you whip the cream, aim for stiff peaks. This takes about 3-4 minutes with a mixer. Once you whip the cream, gently fold it into the cream cheese mixture. Use a spatula and take your time. This helps keep your cheesecake light and airy.
Flavor Enhancements
Want to jazz up the flavor? Try adding chocolate liqueur to your filling. This gives a rich taste that pairs perfectly with cherries. You can also switch up the toppings. Instead of cherry pie filling, use fresh raspberries or strawberries. This gives you a new twist on a classic dessert.
Presentation Ideas
For a stunning look, decorate with dark chocolate shavings. You can also add fresh cherries on top. This not only looks beautiful but also adds freshness. Serve the cheesecake on a nice cake stand to elevate your dessert. A sprinkle of chocolate shavings around the base adds flair and makes it even more appealing.Enjoy creating your own Black Forest No-Bake Cheesecake!
Variations
Different Flavor Profiles
You can change the flavor of this cheesecake if you want. Trying a raspberry no-bake cheesecake can be fun. Just swap the cherry pie filling for raspberry. Use fresh or frozen raspberries for a bright taste. You might even add a splash of raspberry puree to the cream cheese mix. This adds depth to the flavor.
Another twist is a mocha or espresso variant. Mix in a tablespoon of instant coffee or espresso powder with the cream cheese. This gives the cheesecake a delicious coffee kick. You can top it with cocoa powder or chocolate shavings for a lovely finish.
Dietary Modifications
Making this cheesecake fit different diets is easy. If you need a gluten-free option, use gluten-free chocolate graham cracker crumbs. Make sure all other ingredients are gluten-free too. You can still enjoy the same great taste without gluten.
For a vegan Black Forest cheesecake, use dairy-free cream cheese. Substitute the heavy cream with coconut cream for a rich texture. You can even sweeten it with maple syrup instead of powdered sugar. This way, you can keep the flavor while sticking to your diet.
Size Adjustments
You can make mini cheesecakes for a fun twist. Use small tart pans or muffin tins with liners. Just divide the crust and filling among these smaller pans. They are perfect for parties or gifts. Each mini cheesecake is easy to serve and eat.
If you are hosting a large gathering, simply scale up the recipe. Double or triple the ingredients and use a bigger pan. Just keep an eye on the chilling time. A larger cheesecake may need longer to set.
Storage Info
How to Store Leftovers
To keep your Black Forest no-bake cheesecake fresh, place it in the fridge. Use an airtight container or cover the cheesecake with plastic wrap. This keeps the moisture in and prevents it from drying out. If you use a springform pan, you can simply cover the top with plastic wrap. Make sure to avoid touching the filling to keep it clean.
Freezing Instructions
Yes, you can freeze this cheesecake for later enjoyment! First, let it chill in the fridge until set. Then, wrap it well in plastic wrap. You can also use aluminum foil for extra protection. When stored properly, it keeps well in the freezer for up to three months. To defrost, place it in the fridge overnight. This keeps the texture nice and creamy.
Recommended Duration for Best Taste
For the best flavor and texture, eat the cheesecake within five days of making it. After that, it may start to lose its freshness. Look for signs like a change in smell or texture. If it begins to smell off or the filling looks watery, it is best to discard it. Enjoy your cheesecake at peak freshness for the best taste!
FAQs
How long should I chill the cheesecake?
Chill the cheesecake for at least 4 hours. For the best results, overnight is better. This helps the cheesecake set well and develop its full flavor. The longer it chills, the firmer it gets.
Can I use regular graham crackers instead of chocolate?
Yes, you can use regular graham crackers. This change can reduce the rich chocolate flavor. The crust will be less sweet and more classic. If you like a less sweet dessert, this is a good option.
What’s the best way to slice a no-bake cheesecake?
To slice the cheesecake, use a sharp knife. Dip the knife in warm water before each cut. Wipe the knife after each slice. This keeps the slices clean and neat.
How can I make this cheesecake ahead of time?
You can make the cheesecake up to two days in advance. Just store it in the fridge, covered. This allows the flavors to blend well. It also saves you time on the day of serving. For best taste, eat it within three days.
This blog post lays out the key steps for making a delicious no-bake cheesecake. You learned about the must-have ingredients and helpful substitutes. Fresh ingredients add great taste. We discussed easy steps to prepare, layer, and chill your cheesecake. You also got tips for serving, variations, and storage.
In summary, this recipe offers flexibility and fun. Enjoy making it your own!


