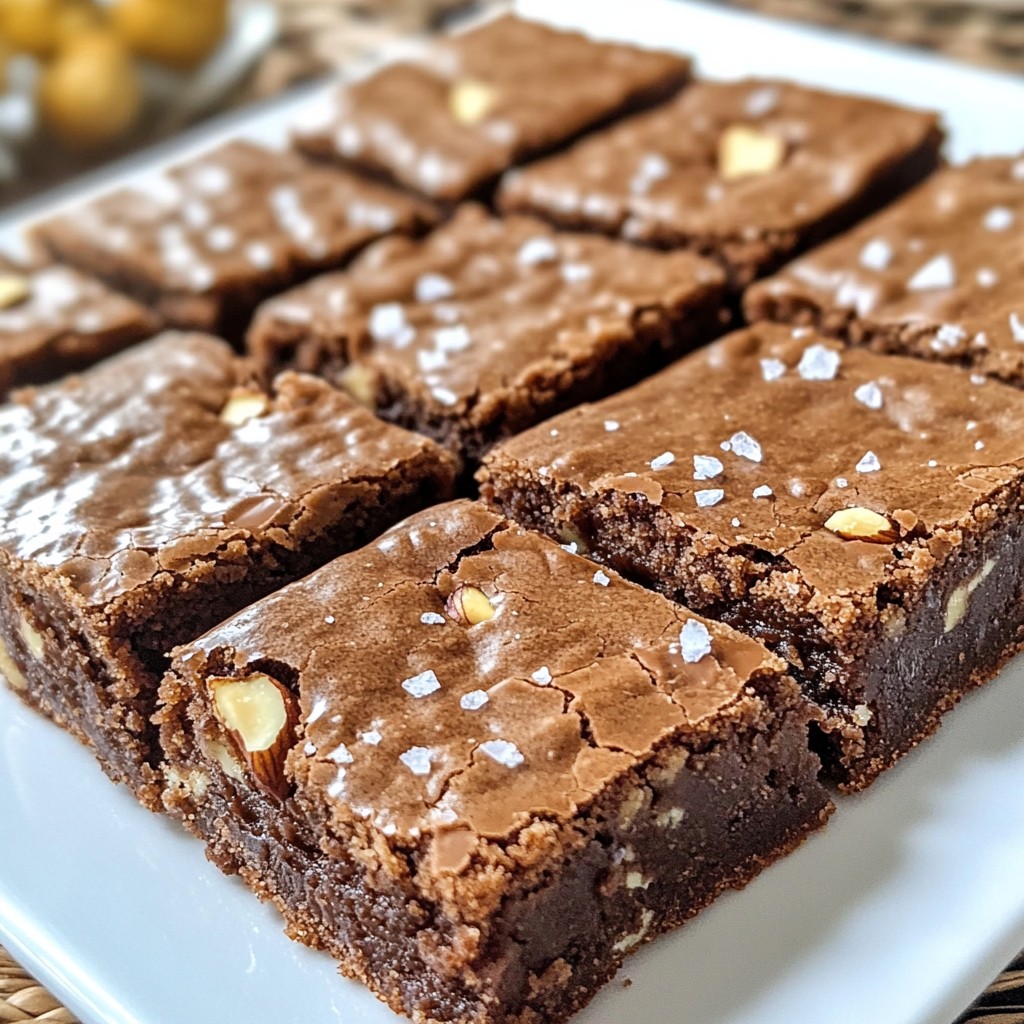
If you love dessert, then you’ll adore these Chocolate Hazelnut Cookie Bars! They are simple to make and full of rich, nutty flavor. Imagine biting into a warm, gooey treat that combines sweet chocolate and crunchy hazelnuts. Whether you're baking for a special occasion or just want a tasty snack, this easy recipe is here to satisfy. Let’s dive into the details and create something delicious together!
Why I Love This Recipe
- Decadent Flavor: The combination of rich chocolate and crunchy hazelnuts creates a heavenly flavor profile that is simply irresistible.
- Easy to Make: This recipe is straightforward, requiring minimal steps and ingredients, making it perfect for both novice and experienced bakers.
- Versatile Treat: These cookie bars can be served warm with ice cream or at room temperature, making them a delightful option for any occasion.
- Perfect for Sharing: With 16 bars in a single batch, these cookie bars are ideal for gatherings, parties, or simply sharing with friends and family.
Ingredients
Detailed Ingredient List
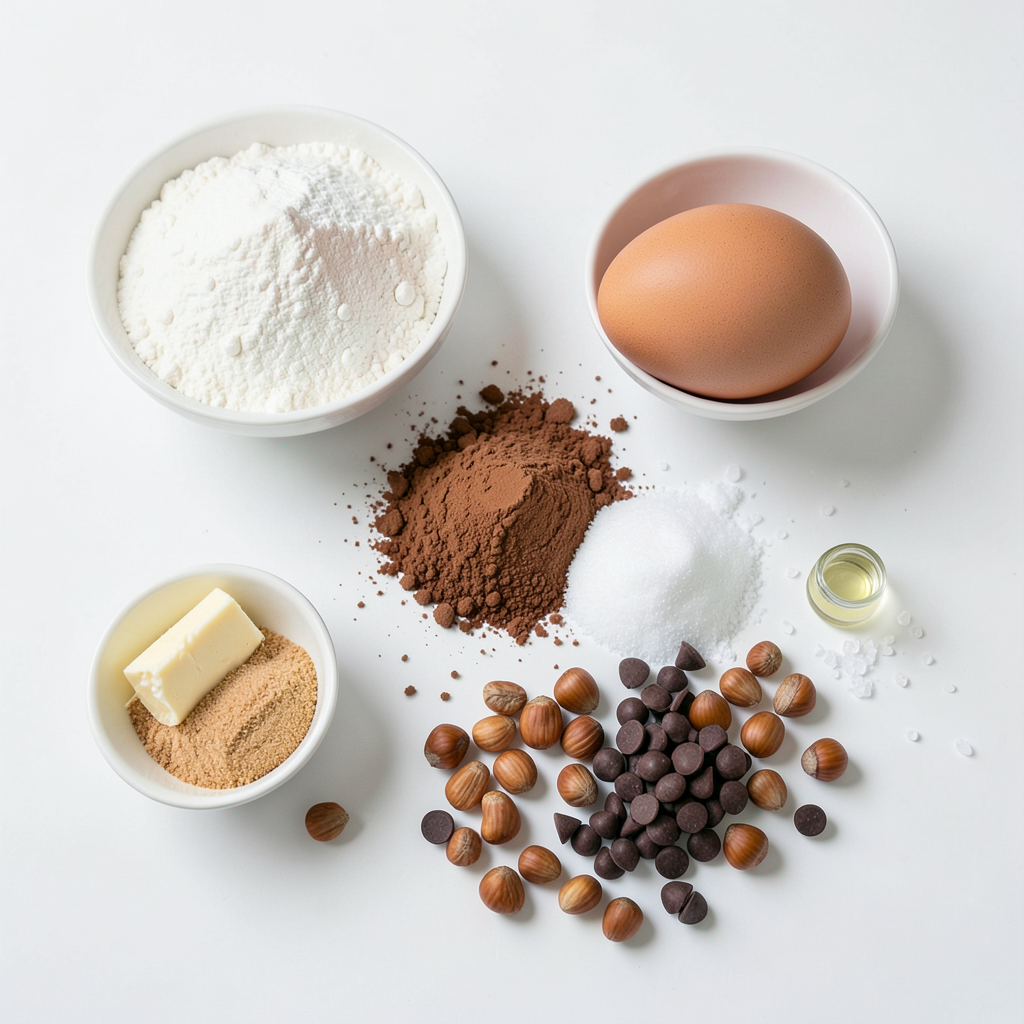
- 1 cup all-purpose flour
- 1/2 cup unsweetened cocoa powder
- 1/2 teaspoon baking soda
- 1/4 teaspoon salt
- 1/2 cup unsalted butter, softened
- 1 cup packed brown sugar
- 1/4 cup granulated sugar
- 1 large egg
- 1 teaspoon pure vanilla extract
- 1/2 cup hazelnuts, chopped
- 1 cup chocolate chips
- Flaky sea salt for topping
Recommended Quality Products
I always choose high-quality ingredients for the best flavor. For the cocoa powder, I prefer brands like Valrhona or Ghirardelli. They add a rich taste to the cookie bars. For the chocolate chips, go for dark or semi-sweet from Guittard or Nestlé. They melt beautifully and provide a lovely contrast to the hazelnuts. When it comes to hazelnuts, look for fresh, whole nuts. Toasting them enhances their nutty flavor.
Ingredient Substitutions
You can easily swap some ingredients if needed. If you want to cut back on sugar, use a sugar substitute like coconut sugar. For a dairy-free option, use vegan butter instead of unsalted butter. If you lack hazelnuts, pecans or walnuts work well, too. For those allergic to gluten, substitute all-purpose flour with a gluten-free blend. This way, everyone can enjoy these tasty cookie bars!
Step-by-Step Instructions
Prepping the Baking Pan
First, set your oven to 350°F (175°C). Grab an 8x8 inch baking pan. Line it with parchment paper. Make sure some paper hangs over the sides. This helps you lift the bars out easily later.
Mixing the Dry Ingredients
In a medium bowl, mix the dry ingredients. Combine 1 cup of all-purpose flour, 1/2 cup of cocoa powder, 1/2 teaspoon of baking soda, and 1/4 teaspoon of salt. Whisk them together well. Set this bowl aside for now.
Creaming Butter and Sugars
In a large bowl, use an electric mixer. Cream 1/2 cup of softened butter with 1 cup of brown sugar and 1/4 cup of granulated sugar. Mix until the texture is light and fluffy. This should take about 2-3 minutes.
Combining Wet and Dry Ingredients
Now, add 1 large egg and 1 teaspoon of vanilla extract to the butter-sugar mix. Beat until everything is smooth and blended. Next, slowly add the dry mixture into the wet mixture. Use a spatula to stir gently. Mix just until everything combines. Avoid overmixing to keep the bars light.
Adding Hazelnuts and Chocolate Chips
Gently fold in 1/2 cup of chopped hazelnuts and 1 cup of chocolate chips. Make sure they spread throughout the dough evenly. This gives each bite a nice crunch and chocolatey flavor.
Baking and Cooling Process
Pour the batter into the lined baking pan. Use a spatula to smooth the top. For extra flavor, sprinkle a small pinch of flaky sea salt on top. Bake in the oven for 25-30 minutes. Check with a toothpick; it should come out with a few moist crumbs. Let the bars cool in the pan for 15 minutes. Lift them out using the parchment paper. Cool completely on a wire rack before slicing into squares.
Tips & Tricks
Perfecting the Cookie Bar Texture
To get the best texture for your cookie bars, focus on mixing. Cream the butter and sugars until light and fluffy. This step adds air, making your bars soft. Don’t overmix when adding dry ingredients. Stir until just combined. This keeps the bars tender. Also, let your cookie bars cool before slicing. This helps them set and hold their shape.
Common Mistakes to Avoid
A few common mistakes can ruin your cookie bars. First, don’t skip the parchment paper. It helps with easy removal. Second, keep an eye on your baking time. Overbaking makes the bars dry. Use a toothpick to check for doneness. If it comes out with a few moist crumbs, they are ready. Lastly, remember to let the bars cool in the pan. This prevents them from breaking apart.
Enhancing Flavor with Toppings
Toppings can take your cookie bars to the next level. I love adding flaky sea salt on top before baking. It highlights the chocolate flavor and adds a nice crunch. You can also try drizzling melted chocolate on top after baking. For a fun twist, add caramel or chopped fruits. These small touches make your cookie bars even more special.
Pro Tips
- Chop Hazelnuts Finely: Ensure that the hazelnuts are chopped evenly to distribute their flavor throughout the bars while maintaining a nice texture.
- Use Room Temperature Ingredients: Make sure your butter and egg are at room temperature for a smoother batter and better incorporation of ingredients.
- Don’t Overmix: Mix the batter just until combined to prevent the cookie bars from becoming tough; overmixing can develop the gluten in the flour.
- Cool Before Cutting: Allow the bars to cool completely before slicing to ensure clean cuts and maintain their shape.
Variations
Nut-Free Version
You can enjoy these cookie bars without nuts. Replace hazelnuts with seeds like sunflower or pumpkin. These seeds add crunch and nutrients. They also keep the bars tasty and fun. You can even try adding extra chocolate chips for sweetness.
Flavor Infusions and Add-ins
Want to mix it up? Try adding flavors! You can stir in a teaspoon of espresso powder for a coffee kick. A touch of orange zest gives a fresh twist. Want more texture? Use crushed pretzels or toffee bits. These add a nice crunch and a sweet surprise.
Dietary Alternatives (Vegan, Gluten-free)
For a vegan option, swap butter for coconut oil. Use flax eggs instead of a large egg. Mix one tablespoon of ground flaxseed with three tablespoons of water and let it sit to thicken. For gluten-free cookie bars, use almond flour or a gluten-free flour blend. Ensure all ingredients are certified gluten-free for safety. Enjoy your treats without worry!
Storage Info
Storing Leftover Cookie Bars
Store your leftover cookie bars in an airtight container. This keeps them fresh for days. Place a piece of parchment paper between layers to avoid sticking. They last well at room temperature for up to five days. You can also refrigerate them for a week if you prefer them chilled.
Freezing Tips for Long-Term Storage
For long-term storage, freezing is a great option. Wrap each cookie bar in plastic wrap. Then, place the wrapped bars in a freezer bag. Label the bag with the date. You can freeze them for up to three months. When you're ready to eat, just thaw them in the fridge overnight.
Reheating Instructions
To enjoy your cookie bars warm, preheat your oven to 350°F (175°C). Place the bars on a baking sheet. Heat them for about 5-10 minutes. You can also microwave them for 15-20 seconds. This gives you that soft, gooey texture again. Enjoy them warm for the best taste!
FAQs
Can I use different types of chocolate?
Yes, you can use different types of chocolate. I like to use dark or semi-sweet chocolate chips. White chocolate also works well, though it changes the taste. You can mix and match to find your favorite combo. Just remember that each type will give a unique flavor to your cookie bars.
What can I use instead of hazelnuts?
If you want to swap hazelnuts, try almonds or walnuts. You can even use pecans for a sweeter touch. For nut-free options, sunflower seeds or pumpkin seeds work great. Just chop them to the same size as nuts for the best texture.
How do I know when the cookie bars are done?
You’ll know the cookie bars are done when a toothpick comes out with a few moist crumbs. The edges should look firm, and the center may still feel soft. If you bake them too long, they can become dry, so keep an eye on them!
Can I double the recipe?
Yes, you can double the recipe. Just use a larger baking pan, like a 9x13 inch one. Make sure to adjust the baking time. Check for doneness a few minutes earlier, as it may take longer to bake. Enjoy your extra cookie bars!
You now have a solid plan for your cookie bars. We covered key ingredients, step-by-step baking, tips for the best texture, and tasty variations. I shared helpful storage tips and answered common questions. Remember, each choice impacts your final treat. Experiment and enjoy the process! Baking is fun and can lead to yummy surprises. With these guidelines, you can create your own perfect cookie bars. Let your creativity shine in the kitchen. Happy baking!


