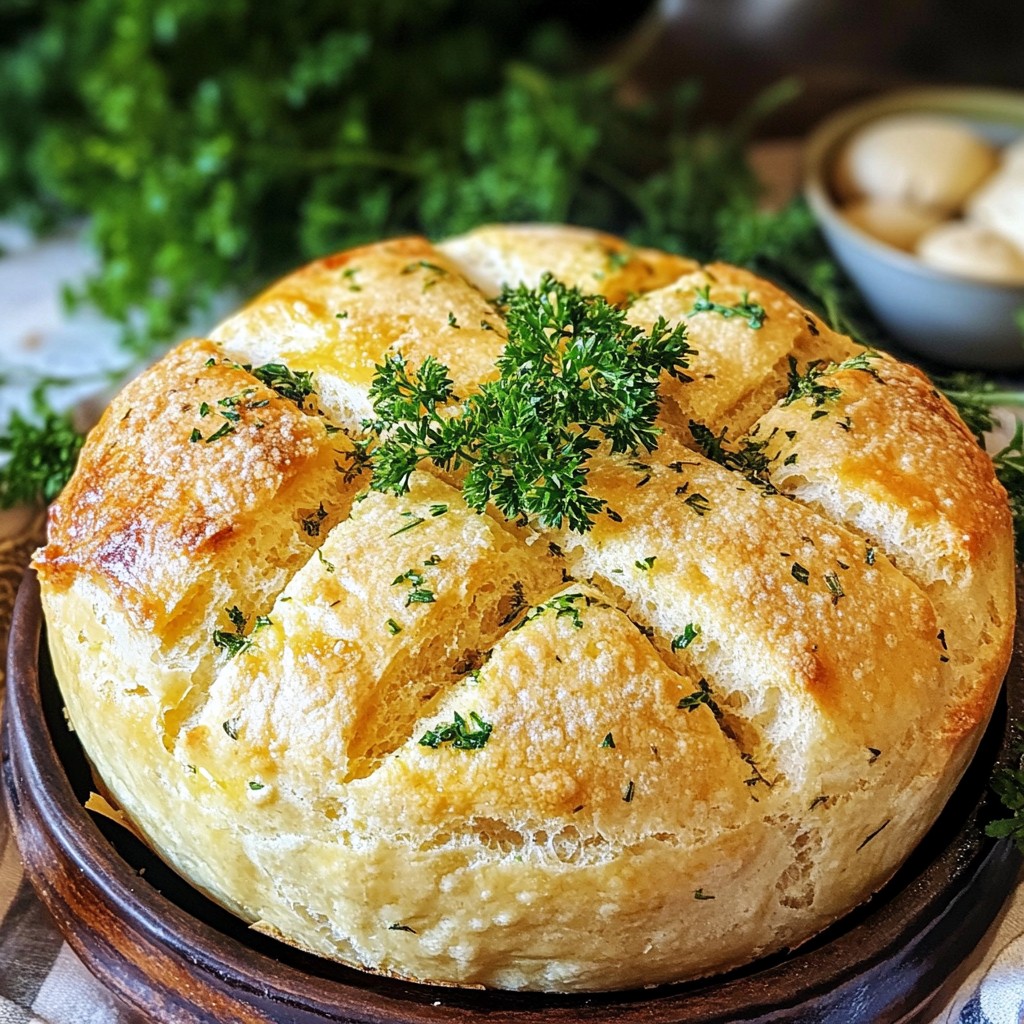
Are you ready to impress your family and friends with a homemade delight? This Herb Garlic Irish Soda Bread is simple, tasty, and perfect for any meal. In just a few easy steps, you’ll learn to mix fresh herbs and garlic into a classic recipe. Whether you enjoy it warm or toasted, the flavor will shine. Let’s dive into the ingredients and get baking together!
Why I Love This Recipe
- Easy to Make: This Irish soda bread comes together quickly, making it perfect for last-minute baking.
- Flavorful Herbs: The addition of oregano, thyme, and garlic gives the bread an aromatic and savory twist.
- Perfect for Any Meal: This bread pairs wonderfully with soups, salads, or simply with butter.
- Golden Crust: The olive oil brushing creates a beautiful crust that's irresistible to bite into.
Ingredients
Main Ingredients
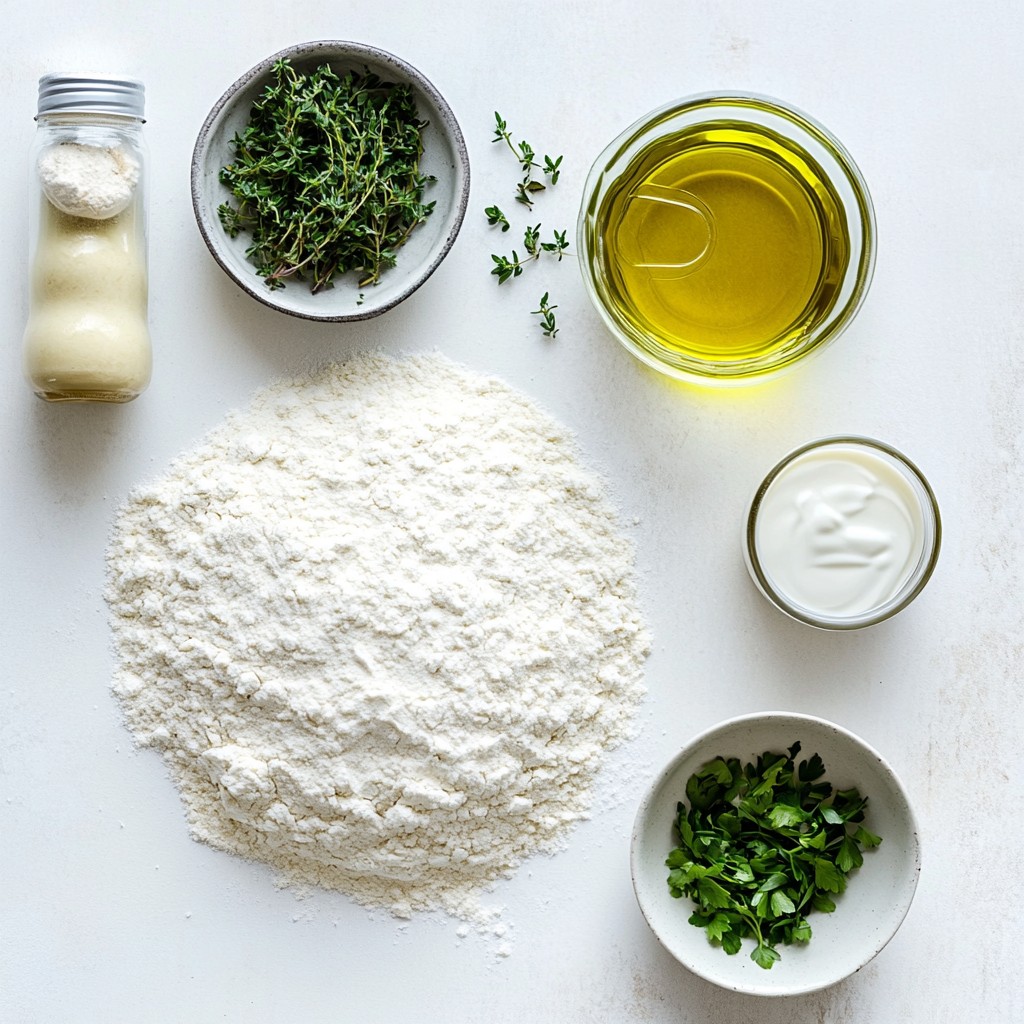
For Herb Garlic Irish Soda Bread, you'll need these main items:
- 4 cups all-purpose flour
- 1 teaspoon baking soda
- 1 teaspoon salt
- 1 ¾ cups buttermilk
- 2 tablespoons olive oil (plus extra for brushing)
These ingredients form the base of your bread. The flour gives structure. The baking soda and buttermilk help it rise. The olive oil adds moisture and flavor.
Herbs and Seasonings
Next, we add herbs and seasonings to boost flavor:
- 1 tablespoon dried oregano
- 1 tablespoon dried thyme
- 3 cloves garlic, minced
These herbs make the bread aromatic and tasty. Oregano and thyme add depth. Minced garlic gives a nice punch that pairs well with the bread.
Optional Additions
You can customize your bread with these optional items:
- Fresh parsley, chopped (for garnish)
Adding fresh parsley on top makes the bread look nice. It also adds a fresh taste when you serve it. You can also try other herbs like rosemary or chives for a twist.
With these ingredients, you can create a delicious loaf that will impress your family and friends. Enjoy the process of mixing and baking!
Step-by-Step Instructions
Preparing the Dough
Start by preheating your oven to 425°F (220°C). Line a baking sheet with parchment paper to stop sticking. In a large bowl, mix 4 cups of all-purpose flour, 1 teaspoon of baking soda, and 1 teaspoon of salt. Add 1 tablespoon of dried oregano, 1 tablespoon of dried thyme, and 3 cloves of minced garlic. Stir these dry ingredients well. Next, make a well in the middle of the mix. Pour in 1 ¾ cups of buttermilk and 2 tablespoons of olive oil.
Now, use your hands or a wooden spoon to mix until the dough forms a ball. The dough should feel soft but not sticky. If it sticks too much, add a little more flour until it feels just right.
Shaping the Loaf
Transfer your dough to a lightly floured surface. Knead it gently for about 1 minute. You want it to feel smooth and mixed, but don’t overdo it. Shape the dough into a round loaf. Make sure it looks nice and rounded. Place the loaf on your baking sheet. Use a sharp knife to score a deep cross on the top. This helps the bread expand evenly as it bakes.
Lightly brush the top with olive oil to get a golden crust.
Baking and Cooling
Bake your loaf in the preheated oven for 30 to 35 minutes. It should turn golden brown and sound hollow when tapped on the bottom. Once baked, take the bread out and let it cool on a wire rack for at least 10 minutes. This resting time helps improve the texture. Before serving, sprinkle some fresh chopped parsley on top for a pop of color. Enjoy your warm, homemade bread!
Tips & Tricks
Perfecting the Texture
To get the right texture, use the right flour. I prefer all-purpose flour for this bread. It gives a balanced texture. When mixing, avoid overworking the dough. Just knead it until it’s smooth. If it feels sticky, add a little more flour. Remember, a soft dough makes soft bread!
Achieving the Right Bake
Bake your bread at 425°F (220°C). Preheat the oven well for even cooking. A hot oven helps the bread rise quickly. After 30-35 minutes, check for doneness. Tap the bottom; it should sound hollow. This means your bread is ready to come out.
Serving Suggestions
Serve your Herb Garlic Irish Soda Bread warm. Slice it neatly and spread creamy butter on top. It pairs well with soups or salads. For a fun twist, top with cheese or herbs. Enjoy it fresh for the best taste!
Pro Tips
- Use Fresh Herbs: If possible, substitute dried herbs with fresh ones to elevate the flavor profile of your soda bread.
- Check Dough Consistency: The dough should be soft but not overly sticky. Adjust with flour as needed for the perfect texture.
- Proper Scoring: Score a deep cross on the loaf to help it rise evenly and create a beautiful crust.
- Cooling Time: Allow the bread to cool on a wire rack to maintain its texture; this prevents the bottom from becoming soggy.
Variations
Gluten-Free Options
If you want a gluten-free version of this bread, you can use a gluten-free flour blend. Many blends work well in baking. Look for one that contains xanthan gum, as this helps mimic the structure of gluten. Replace the all-purpose flour with an equal amount of gluten-free flour. Follow the same steps in the recipe. You may need to add a bit more buttermilk if the dough feels too dry.
Flavor Enhancements
You can boost the flavor of your bread by adding different herbs or spices. Try rosemary or basil for a fresh taste. For a kick, add red pepper flakes or black pepper. Cheese lovers can fold in shredded cheese, like cheddar or parmesan, into the dough. This adds a rich flavor and makes the bread extra tasty.
Seasonal Ingredients
Using seasonal ingredients can make your Irish soda bread even better. In spring, add fresh chives or green onions for a mild onion flavor. In fall, mix in grated carrots for a hint of sweetness. You can also fold in chopped apples or cranberries for a fruity twist. These changes make the bread more fun and exciting for any season.
Storage Info
Best Storage Practices
To keep your Herb Garlic Irish Soda Bread fresh, store it in a bread box or a paper bag. This helps keep the crust crisp. Avoid plastic bags, as they make the bread soggy. If you have leftovers, it is best to eat them within two days. For longer storage, consider the freezing option.
Reheating Instructions
When you want to enjoy your bread again, reheat it in the oven. Preheat your oven to 350°F (175°C). Wrap the bread in aluminum foil. Heat for about 10-15 minutes or until warm. This method helps restore some of the original crust's crunch. You can also slice pieces and toast them lightly for a quick snack.
Freezing Tips
If you need to store the bread longer, freezing is a great option. Let the bread cool completely first. Wrap it tightly in plastic wrap, then in aluminum foil. This double wrapping keeps the bread fresh and prevents freezer burn. You can freeze it for up to three months. To eat, thaw it overnight in the fridge, then reheat it in the oven.
FAQs
Can I use fresh herbs instead of dried?
Yes, you can use fresh herbs! Just chop them finely. Use three times more fresh herbs than dried. For example, if the recipe calls for one tablespoon of dried oregano, use three tablespoons of fresh. Fresh herbs add a bright flavor and a lovely texture. Just remember, they can change the dough's moisture. Adjust the buttermilk a bit if needed.
What can I serve with Herb Garlic Irish Soda Bread?
This bread pairs well with many dishes. Here are some ideas:
- Creamy butter
- Your favorite soup
- A fresh salad
- Cheese and charcuterie
- Olive oil for dipping
These options create a lovely meal. The bread also works great for sandwiches.
How do I know when the bread is done baking?
Check the color and sound of the bread. It should be golden brown on top. Tap the bottom of the loaf; it should sound hollow. This means it is fully baked. You can also use a toothpick to test the inside. If it comes out clean, your bread is ready!
In this blog post, we covered the key ingredients for making Herb Garlic Irish Soda Bread and provided clear steps for preparing, shaping, and baking it. I shared tips for texture and bake perfection, along with storage and reheating advice. You can even explore variations to suit your taste, such as gluten-free options. Remember, this bread is versatile and easy to make. Dive in, enjoy the process, and impress your friends and family with your homemade creation. Happy baking!