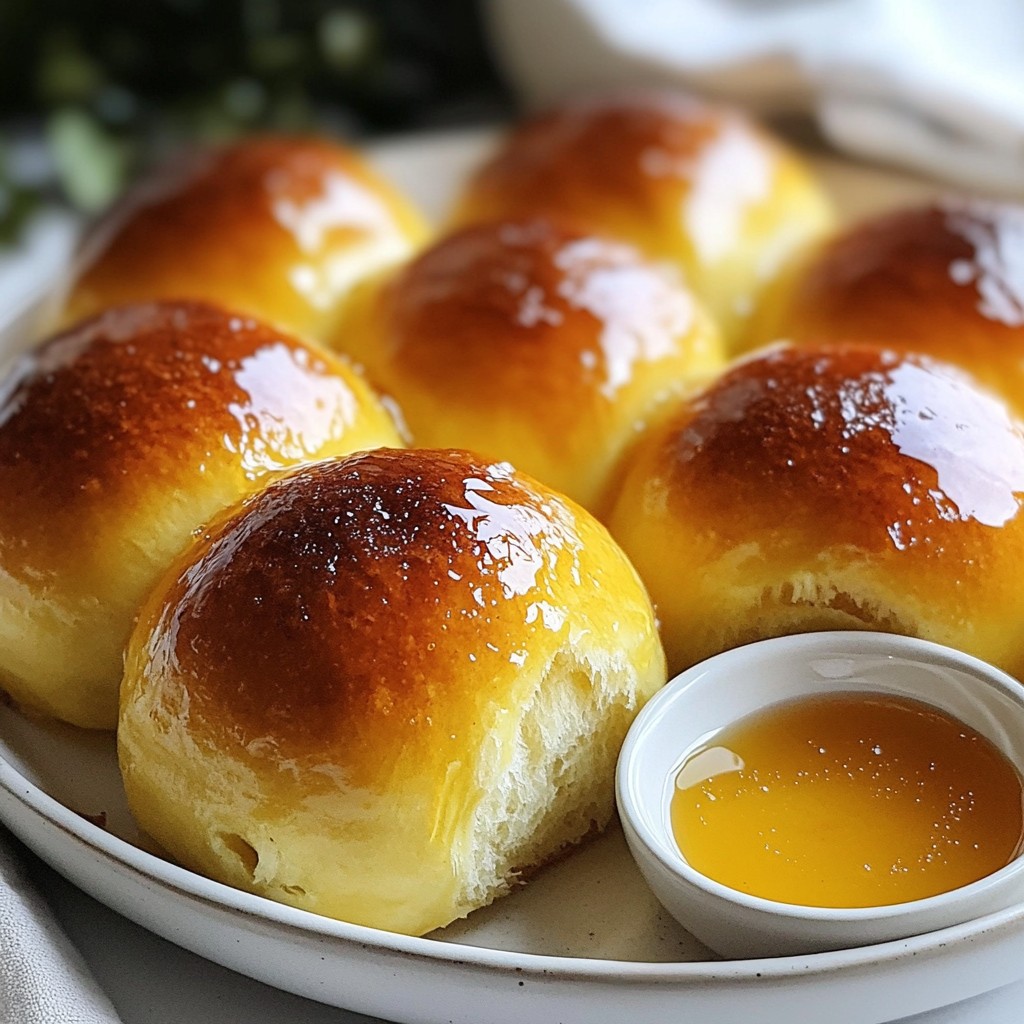
If you're craving something warm and sweet, you need this recipe for Honey Butter Dinner Rolls. These rolls are soft, fluffy, and perfect for any meal. I’ll guide you through each step, from making the yeast mixture to storing leftovers. Plus, I’ll share tips to ensure your rolls turn out perfect every time. Let’s dive into creating these delightful rolls that everyone will love!
Why I Love This Recipe
- Soft and Fluffy Texture: These dinner rolls are incredibly soft and fluffy, making them the perfect accompaniment to any meal.
- Sweet Honey Flavor: The addition of honey not only adds sweetness but also a lovely depth of flavor that enhances the rolls.
- Easy to Make: This recipe is straightforward and beginner-friendly, allowing anyone to bake delicious rolls at home.
- Versatile Serving Options: These rolls can be enjoyed warm with butter, served alongside soups, or used for sandwiches, making them highly versatile.
Ingredients
List of Ingredients
To make honey butter dinner rolls, you will need:
- 3 ½ cups all-purpose flour
- ¼ cup granulated sugar
- ½ teaspoon salt
- 1 packet (2 ¼ teaspoons) instant yeast
- ¾ cup warm milk (about 110°F)
- ¼ cup unsalted butter, melted and slightly cooled
- 2 large eggs, at room temperature
- ¼ cup honey, raw for better flavor
- Extra melted butter for brushing on top
These simple ingredients create warm, soft rolls that everyone will love.
Ingredient Substitutions
If you need to change some ingredients, here are a few ideas:
- All-purpose flour: You can use bread flour for a chewier roll.
- Granulated sugar: Honey can replace sugar for a sweeter roll.
- Unsalted butter: Use coconut oil for a dairy-free option.
- Warm milk: Almond milk or oat milk work well if you're dairy-free.
- Eggs: Flaxseed meal mixed with water can act as an egg substitute.
These options still give you great results.
Where to Find Quality Ingredients
To make the best honey butter dinner rolls, sourcing quality ingredients is vital:
- All-purpose flour: Look for brands that are unbleached and organic for more flavor.
- Honey: Buy local or raw honey for a richer taste. Farmers' markets are great places to find it.
- Butter: Opt for grass-fed butter for better flavor and nutrition.
- Milk: Choose whole or organic milk for creaminess.
Shopping at local markets or specialty stores often leads to the best finds.

Step-by-Step Instructions
Preparing the Yeast Mixture
To start, we need to wake up the yeast. Pour ¾ cup of warm milk into a large bowl. The milk should feel warm, like a cozy bath, around 110°F. Add ¼ cup of honey and whisk it gently. Make sure the honey dissolves well in the milk. Next, sprinkle 2 ¼ teaspoons of instant yeast over the mixture. Let it sit for about 5 minutes. You want to see bubbles and foam on top. This means the yeast is alive and ready to help our rolls rise.
Combining Dry Ingredients
While the yeast is working, let’s mix the dry stuff. In a separate bowl, combine 3 ½ cups of all-purpose flour, ¼ cup of granulated sugar, and ½ teaspoon of salt. Use a whisk to blend these ingredients well. This step is important because it helps the sugar and salt mix evenly in the dough. It also keeps the rolls from being too salty in one bite.
Kneading and Rising the Dough
Now that the yeast is bubbly, it’s time to combine everything. Pour the yeast mixture into the bowl of dry ingredients. Add ¼ cup of melted butter and 2 large eggs. Use a wooden spoon or spatula to stir everything together. You want a soft dough to form.
Next, transfer the dough onto a lightly floured surface. Knead it for about 6-8 minutes. Kneading helps develop the gluten, making the rolls soft and fluffy. The dough should feel smooth and elastic when you’re done.
After kneading, place the dough in a greased bowl. Cover it with a clean kitchen towel and let it rise in a warm place. Wait about 1 hour or until it has doubled in size. This is the best part; you can watch it grow! Once it’s risen, gently punch the dough down to release air.
Now, divide the dough into 12 equal pieces. Shape each piece into a ball. Place the balls in a greased baking dish, leaving space between them. Cover again and let them rise for another 30 minutes. They should look puffy and ready to bake.
Tips & Tricks
Ensuring Soft and Fluffy Rolls
To make soft and fluffy rolls, start with warm milk. Aim for around 110°F. This warmth helps activate the yeast. Use instant yeast as it works quickly and doesn't need proofing. Knead the dough well for about 6-8 minutes. This builds gluten, which gives the rolls a nice structure.
Let the dough rise in a warm area. Cover it with a towel to keep it cozy. After the first rise, it should double in size. When shaping the dough, handle it gently. Avoid pressing out all the air bubbles. This keeps the rolls light and airy.
Troubleshooting Common Issues
If your rolls are dense, check the yeast. Make sure it is fresh and active. If they don't rise well, the dough may be too cold. Try placing it in a warm spot.
For dry rolls, you might have added too much flour. Always measure flour correctly. Use the spoon and level method for accuracy. If rolls turn out too greasy, try less butter next time.
Best Practices for Rising the Dough
Rising dough works best in a draft-free spot. Place it in an oven turned off, or near a warm window. Avoid cold surfaces, as they slow down the rise.
Cover the bowl with a clean towel. This keeps moisture in and helps the dough rise well. After shaping the rolls, let them rise again. This second rise makes them even fluffier. Keep an eye on them; they should look puffy but not overflow.
Pro Tips
- Kneading Technique: Ensure that your dough is kneaded until it is smooth and elastic. This helps develop the gluten, giving your rolls the perfect texture.
- Temperature Matters: Make sure your milk is warm, around 110°F, to activate the yeast effectively. Too hot can kill the yeast, while too cold will slow down the process.
- Honey Quality: Opt for raw honey if possible. It not only enhances the flavor but also adds a touch of natural sweetness to your rolls.
- Storage Tips: If you have leftovers, store the rolls in an airtight container at room temperature. Reheat in the oven for a few minutes to regain their softness.
Variations
Adding Spices and Herbs
You can spice up your honey butter dinner rolls. Adding spices can bring warmth and depth. Try mixing in 1 teaspoon of garlic powder for a savory kick. For a cozy touch, add 1 teaspoon of dried rosemary or thyme. These herbs pair well with honey and butter. They enhance the flavor without overpowering the rolls. You can also use fresh herbs if you have them. Just chop them finely and mix them in.
Sweet Additions (e.g., cinnamon, nutmeg)
If you want a sweeter roll, add spices like cinnamon or nutmeg. Just 1 teaspoon of cinnamon can create a warm flavor. You can mix it right into the dry ingredients. Nutmeg works well too, but use less. A pinch will do. For a fun twist, consider adding chocolate chips or dried fruit. They will make your rolls even more delightful. These sweet variations are perfect for brunch or special occasions.
Gluten-Free Honey Butter Dinner Rolls Option
You can enjoy honey butter dinner rolls even if you avoid gluten. Use a good gluten-free flour blend. Look for one that has xanthan gum added. This helps mimic the texture of regular flour. Replace the all-purpose flour with 3 ½ cups of gluten-free blend. The rest of the recipe stays the same. You may need to adjust the liquid. Keep an eye on the dough's texture. It should be soft but not too sticky. With these changes, you’ll have delicious gluten-free rolls that everyone can enjoy!
Storage Info
How to Store Leftover Rolls
To keep your honey butter dinner rolls fresh, store them in an airtight container. You can also wrap them in plastic wrap. This helps to keep the rolls from drying out. If you have a large batch, place parchment paper between layers. This prevents them from sticking together. Properly stored, they can last for 2 to 3 days at room temperature.
Reheating Tips for Freshness
When it’s time to enjoy your leftover rolls, reheating is key. Preheat your oven to 350°F (175°C). Place the rolls on a baking sheet. Cover them with foil to keep them moist. Heat for about 10 to 15 minutes. This will help them regain their soft texture. If you prefer a quicker method, use the microwave. Heat them for about 10 seconds. Check the warmth, then add more time if needed.
Freezing Honey Butter Dinner Rolls
Freezing is a great option if you want to save rolls for later. First, let them cool completely. Place the rolls in a single layer on a baking sheet and freeze for about 1 hour. This helps them hold their shape. Then transfer them into a freezer bag or container. Remove as much air as possible. They can be frozen for up to 3 months. To thaw, simply place them in the fridge overnight or leave them at room temperature for a few hours. Reheat as needed for that fresh-from-the-oven taste!
FAQs
Can I make the dough ahead of time?
Yes, you can make the dough ahead of time. After kneading, let it rise as normal. Once it has doubled in size, punch it down and shape it. Then, cover the rolls and refrigerate them overnight. The next day, let them come to room temperature and rise for about 30 minutes before baking. This gives you fresh rolls with less work on the day you want to serve them.
How do I know when the rolls are done baking?
You can tell the rolls are done when they are golden brown. Tap the tops gently; if they sound hollow, they’re ready. The rolls should also feel light and airy to the touch. If you want to be sure, use a kitchen thermometer. The inside should reach about 190°F (88°C) for perfect doneness.
What can I serve with honey butter dinner rolls?
Honey butter dinner rolls pair well with many dishes. They are great with soups and stews. Serve them alongside roast chicken or beef for a nice touch. They also make a lovely snack with jam or more honey. You can even offer them with a side of whipped butter for spreading. Enjoy these rolls at any meal!
This blog covered how to make delicious honey butter dinner rolls from start to finish. You learned about key ingredients, how to prepare your dough, and tips for soft, fluffy rolls. Try different spice and sweet options to make your rolls unique. Storing and reheating your leftovers keeps them fresh for later. Making rolls ahead saves time when serving. With these easy steps, you can bake rolls everyone will love. Remember, practice makes perfect, so don’t hesitate to try again for the best results. Enjoy baking!