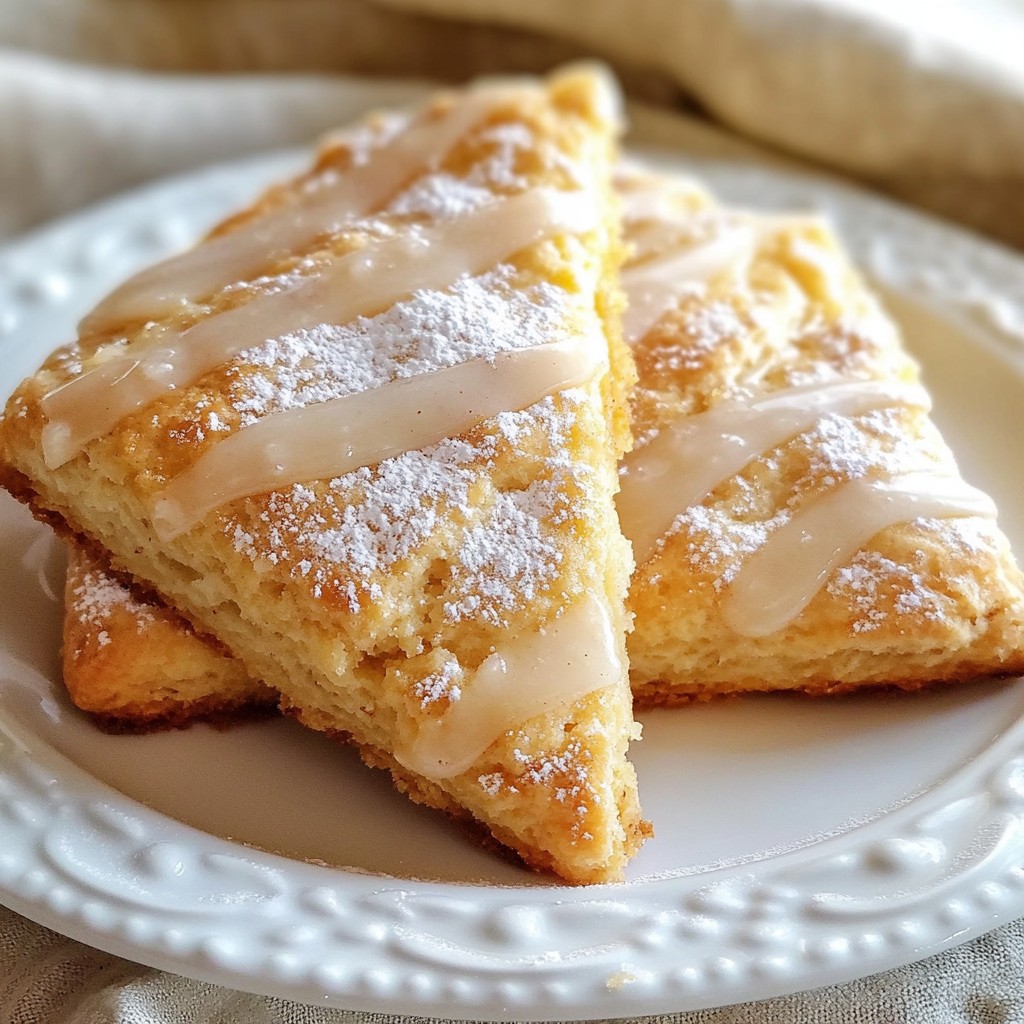
Wake up to the sweet aroma of freshly baked Maple Glazed Cinnamon Scones! These treats are the perfect combo of soft, flaky texture and a rich maple glaze that makes breakfast feel special. In this guide, I’ll walk you through simple steps and tips to create these delightful scones at home. Get ready to impress your family and friends with a breakfast they’ll rave about! Let's dive into the delicious details.
Why I Love This Recipe
- Deliciously Sweet and Spicy: The combination of maple syrup and cinnamon creates a warm, comforting flavor that’s perfect for any time of year.
- Easy to Make: This recipe is straightforward and quick, making it a perfect choice for both novice and experienced bakers.
- Perfect for Sharing: These scones are ideal for gatherings or brunches, allowing everyone to enjoy a delightful treat together.
- Versatile Glaze: The maple glaze adds a beautiful finish and can be adjusted to your sweetness preference, making it customizable for everyone.
Ingredients
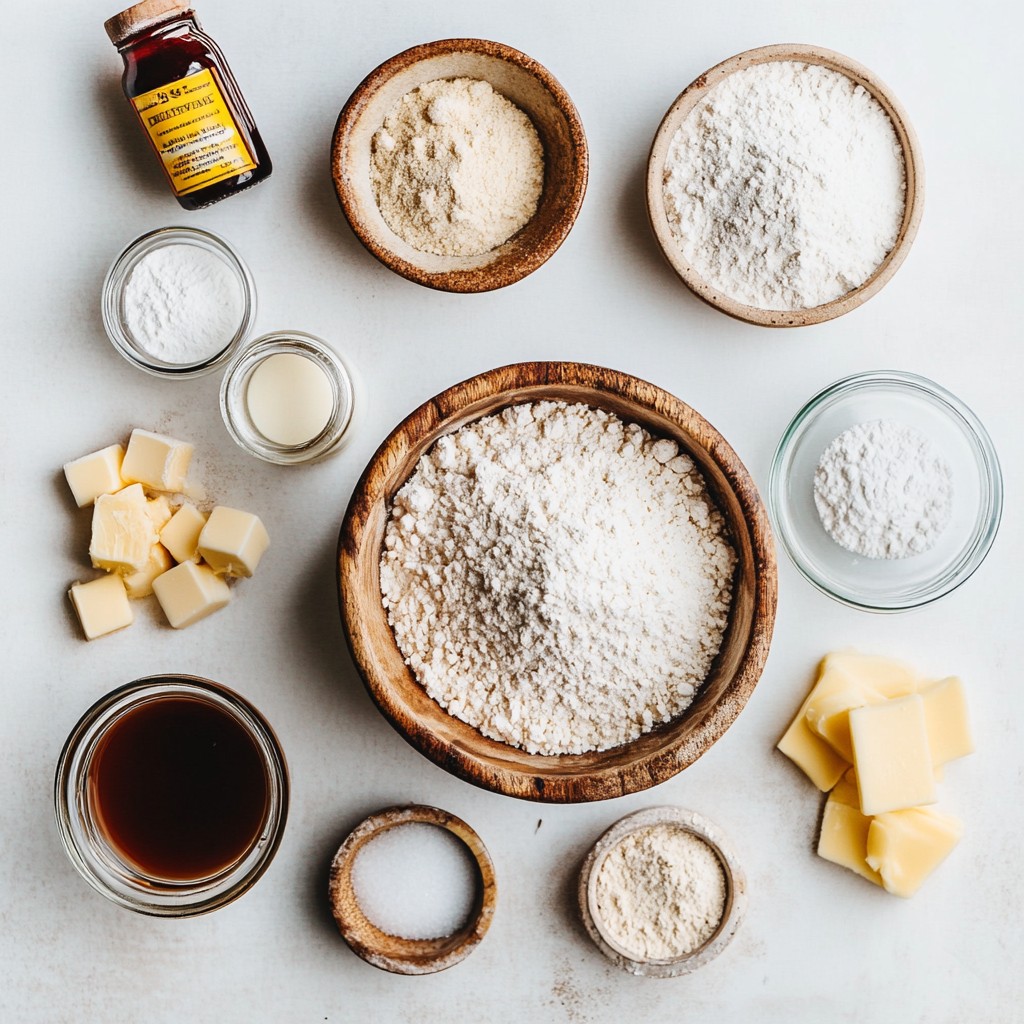
Dry Ingredients
- 2 cups all-purpose flour
- 1/2 cup granulated sugar
- 2 teaspoons baking powder
- 1/2 teaspoon baking soda
- 1 teaspoon ground cinnamon
- 1/4 teaspoon salt
For the dry mix, I use all-purpose flour as the base. It gives a nice texture. Granulated sugar adds sweetness, while baking powder and baking soda help the scones rise. Ground cinnamon brings warmth and flavor. A touch of salt balances the sweetness.
Wet Ingredients
- 1/2 cup unsalted butter, cold and cubed
- 3/4 cup buttermilk
- 1 teaspoon vanilla extract
- 1/2 cup maple syrup (for glazing)
- 1/4 cup powdered sugar (for glazing)
For the wet mix, I use cold butter to create flakiness. Buttermilk adds richness and moisture. A hint of vanilla enhances the flavor. The maple syrup and powdered sugar come together for a sweet glaze. This glaze is the finishing touch, making each bite special.
Step-by-Step Instructions
Preparing the Oven and Baking Sheet
First, preheat your oven to 400°F (200°C). This step warms the oven for a nice bake. Next, line a baking sheet with parchment paper. This helps prevent the scones from sticking.
Mixing Dry Ingredients
In a large bowl, whisk together dry ingredients. Combine 2 cups of all-purpose flour, 1/2 cup of granulated sugar, 2 teaspoons of baking powder, 1/2 teaspoon of baking soda, 1 teaspoon of ground cinnamon, and 1/4 teaspoon of salt. Mix until everything is well blended.
Incorporating the Butter
Now, add 1/2 cup of cold, cubed unsalted butter into the dry mix. Use your fingers or a pastry cutter to work the butter into the flour. Keep going until it looks like coarse crumbs. You want some small butter pieces left for flakiness.
Adding Wet Ingredients
In a separate bowl, combine 3/4 cup of buttermilk and 1 teaspoon of vanilla extract. Pour this mixture into the dry ingredients. Gently stir with a spatula until just combined. It’s okay if the dough looks a bit lumpy. Avoid overmixing to keep your scones light.
Shaping the Dough
Lightly flour your work surface and transfer the dough onto it. Pat the dough down into a circle, about 1 inch thick. Make sure the thickness is even. This helps the scones bake uniformly.
Cutting and Baking
Use a sharp knife or bench scraper to cut the dough into 8 equal wedges. Place these wedges onto the prepared baking sheet, leaving space between them. Bake for 15-20 minutes or until golden brown. A toothpick should come out clean from the center.
Preparing the Maple Glaze
While the scones bake, prepare the maple glaze. In a small bowl, mix together 1/2 cup of maple syrup and 1/4 cup of powdered sugar. Whisk until smooth and free of lumps.
Drizzling the Glaze
Once the scones are done, take them out of the oven. Let them cool for a few minutes. Then, drizzle the glaze over the warm scones. The glaze will soak in a bit, adding great flavor. Let it set for a few minutes before serving.
Tips & Tricks
Achieving Perfect Flakiness
To get the best flaky scones, keep your butter cold. Cold butter creates layers in the dough. When it melts during baking, it leaves tiny pockets that make the scones rise. Use a pastry cutter or your hands to mix the butter into the flour. You want some small chunks of butter left; this helps with flakiness.
Next, don’t overmix the dough. Gently stir the wet and dry ingredients until just combined. Some lumps are fine. Overmixing can make your scones tough. Remember, you want them light and airy.
Serving Suggestions
To serve your scones well, think about presentation. Place them on a rustic wooden board. This gives a warm and inviting look. Sprinkle a bit of extra cinnamon around for a nice touch.
Pair your scones with fresh apple slices for a crisp, sweet contrast. A small bowl of extra maple syrup for dipping adds a fun element. These simple pairings enhance the flavor of the scones and make for a delightful breakfast.
Common Mistakes to Avoid
One common mistake is overbaking your scones. Keep an eye on them while they bake. They should be golden brown when done. A toothpick should come out clean from the center.
Another mistake is not cutting the dough to the right thickness. Aim for about 1 inch thick when patting the dough. If the dough is too thick, the scones may not bake evenly. A uniform thickness ensures they cook through perfectly.
Pro Tips
- Use Cold Butter: Ensure your butter is very cold for flaky scones. You can even freeze it for about 15 minutes before using.
- Don’t Overmix: Mix the dough until just combined to keep your scones tender. Lumpy dough is perfectly fine!
- Uniform Size: Cutting the scones into equal wedges ensures they bake evenly. Use a sharp knife for clean cuts.
- Glaze While Warm: Drizzling the maple glaze on warm scones allows it to soak in, enhancing flavor and moisture.
Variations
Add-ins for Flavor
You can make your maple glazed cinnamon scones even better with fun add-ins.
- Nuts: Adding nuts like walnuts or pecans gives a nice crunch. Chop them up and mix them in with the dry ingredients. Just a half cup works well.
- Dried fruit: Dried fruits like cranberries or raisins add a sweet touch. Toss in about a half cup to the dough for a burst of flavor.
Glaze Alternatives
If you want to switch up the glaze, there are tasty options to try.
- Cream cheese glaze: A cream cheese glaze gives a rich and tangy flavor. Mix cream cheese with powdered sugar and a splash of milk until smooth.
- Chocolate drizzle: Drizzling melted chocolate over the scones adds a sweet twist. Simply melt some chocolate chips and drizzle them over the warm scones.
Different Flavor Profiles
You can also change the flavor of your scones to match your mood.
- Pumpkin spice version: For a fall flavor, add pumpkin spice to the dough. Just one teaspoon will do the trick.
- Lemon zest addition: To brighten the scones, toss in some lemon zest. The zest of one lemon adds a fresh and zesty kick.
These variations let you enjoy your maple glazed cinnamon scones in many delicious ways!
Storage Info
Storing Leftover Scones
To keep your scones fresh, store them in an airtight container. This will help lock in moisture and flavor. Placing parchment paper between layers prevents them from sticking together. Try to eat the scones within two days for the best taste.
Reheating Tips
When reheating scones, the oven provides the best results. Preheat your oven to 350°F (175°C) and warm the scones for about 5-10 minutes. This keeps them crispy and delicious. If you’re in a hurry, you can use the microwave. Heat them for 10-15 seconds, but be careful not to overdo it. Microwaved scones may become soft and chewy.
Freezing for Later Use
To freeze scones, let them cool completely first. Wrap each scone in plastic wrap, then place them in a freezer bag. This will help prevent freezer burn. When you’re ready to enjoy them, thaw overnight in the fridge. You can also warm them in the oven once thawed. This method keeps them tasty and fresh!
FAQs
How do I know when scones are done?
To check if your scones are done, look for a golden color on the edges. You can also insert a toothpick into the center. If it comes out clean, your scones are ready. Keep an eye on them as they bake. The total time is about 15-20 minutes, but ovens vary.
Can I make these scones ahead of time?
Yes, you can make these scones ahead of time! You can store the dough in the fridge for up to 24 hours. When ready, just shape and bake. For baked scones, let them cool completely. Store in an airtight container at room temperature for up to 3 days. To reheat, warm them in the oven at 350°F for about 5-10 minutes.
How do I make the glaze thicker?
If your glaze is too thin, add more powdered sugar. Start with a tablespoon at a time and mix well. This will help you reach the right thickness. If it’s too thick, add a splash of maple syrup or milk to thin it out.
What do I do if my dough is too sticky?
If your dough is sticky, dust it with a bit of extra flour. Use your hands to fold in the flour gently. Be careful not to overwork it. If it remains sticky, refrigerate for about 15 minutes. This helps firm it up.
Can I substitute ingredients?
Absolutely! If you don’t have buttermilk, you can use regular milk with a splash of vinegar or lemon juice. Let it sit for a few minutes to sour. For flour, you can try whole wheat flour. This gives a different flavor and texture. Just remember, it might change the final result slightly.
Making scones requires the right ingredients and steps. First, mix dry ingredients, then add butter. Combine wet ingredients and mix them gently with the dry mix. After shaping and cutting the dough, bake until golden. Finish with a sweet glaze for a tasty touch.
Remember, keep butter cold and avoid overmixing for great results. You can also get creative with flavors or toppings. Enjoy your scones fresh, and store leftovers properly. Each bite can bring joy, especially with a warm drink by your side.