Looking for a delicious breakfast idea? You’ll love these Maple Pecan Granola Parfaits! They’re easy to make, packed with tasty ingredients, and perfect for busy mornings. I’ll share step-by-step instructions, tips for the best crunch, and ways to customize them for your taste. Let’s dive in and create a breakfast that will keep you energized and satisfied all day long!
Ingredients
Key Ingredients List
To make Maple Pecan Granola Parfaits, you need a few key items:
– 1 cup rolled oats
– 1/2 cup pecans, roughly chopped
– 1/4 cup pure maple syrup
– 1/4 cup coconut oil, melted
– 1/2 teaspoon ground cinnamon
– 1/4 teaspoon sea salt
– 2 cups Greek yogurt (plain or vanilla)
– 1 cup mixed berries (strawberries, blueberries, raspberries)
These ingredients create a crunchy, sweet, and creamy delight.
Optional Ingredients for Extra Flavor
You can add even more flavor with these optional items:
– A drizzle of honey for serving
– Chia seeds for added texture and nutrition
– A sprinkle of nutmeg for warmth
These extras let you customize the parfait to your taste.
Substitutions for Dietary Preferences
If you have dietary needs, here are some easy swaps:
– Use gluten-free oats if you’re gluten-sensitive.
– Substitute maple syrup with agave nectar or honey if needed.
– Replace Greek yogurt with a dairy-free option like coconut yogurt.
These substitutions help everyone enjoy this tasty breakfast!
Step-by-Step Instructions
Prepping the Granola Mixture
First, gather your ingredients. You will need rolled oats, chopped pecans, maple syrup, melted coconut oil, ground cinnamon, and sea salt. In a large bowl, mix the oats, pecans, and syrup. Stir well so every piece gets coated. Add the melted coconut oil, cinnamon, and salt. Mix again until everything is well combined.
Baking the Granola to Perfection
Next, preheat your oven to 350°F (175°C). Spread the granola mixture evenly on a parchment-lined baking sheet. Baking takes about 15 to 20 minutes. Halfway through, stir the granola to help it brown evenly. It should look golden and smell amazing. Once done, take it out and let it cool completely.
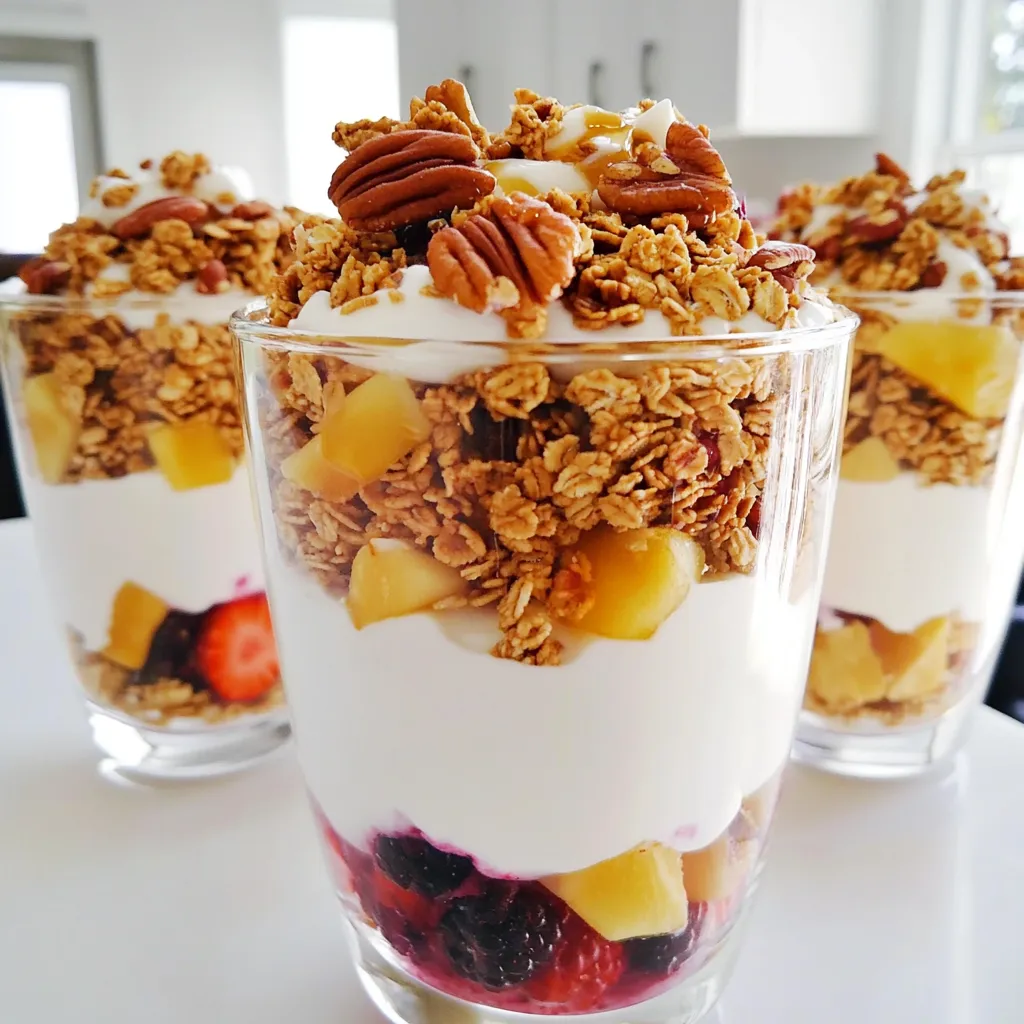
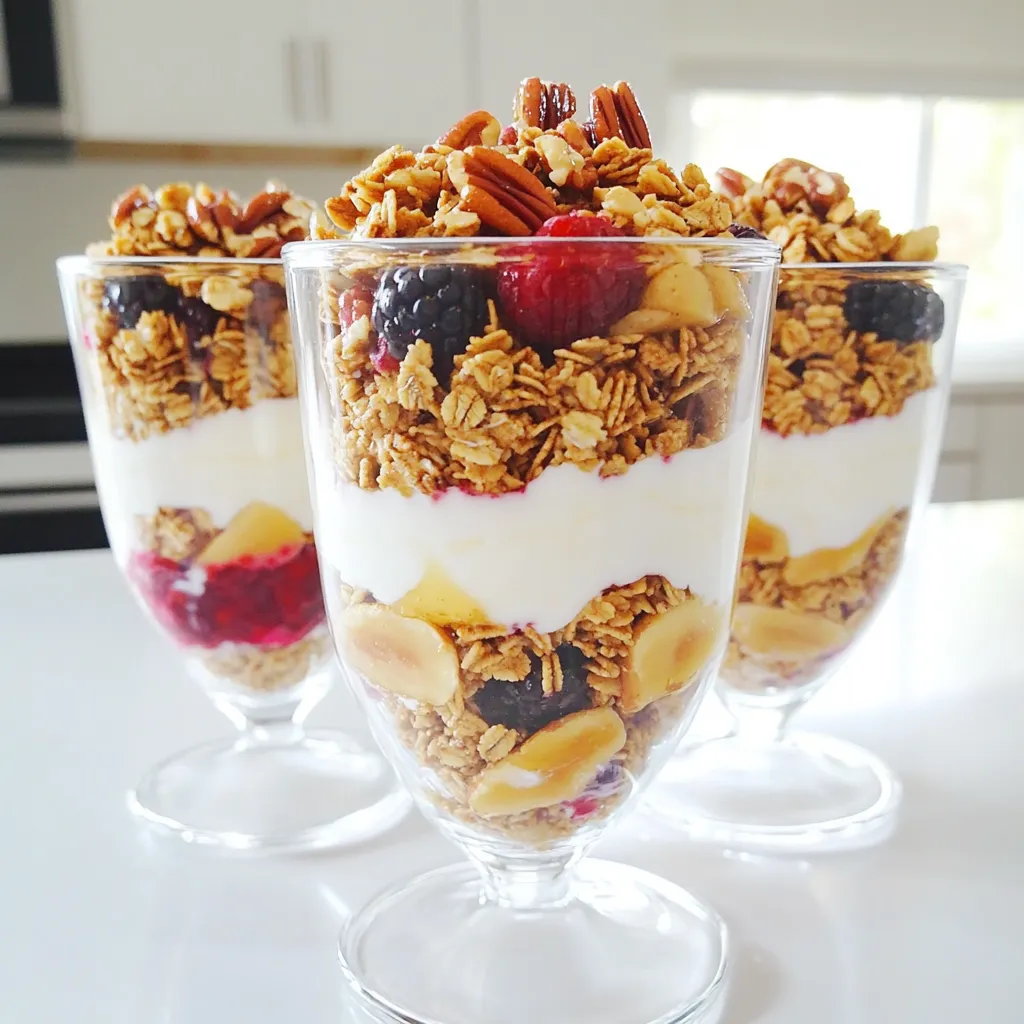
Assembling the Maple Pecan Granola Parfaits
Now comes the fun part. Grab clear glasses to show off those pretty layers. Start with a layer of Greek yogurt in each glass. Then, add a layer of your baked granola. Next, pile on some mixed berries. Repeat these layers until your glasses are full. For the final touch, top with more berries and a drizzle of honey if you like. This adds sweetness and makes it look fantastic!
Tips & Tricks
How to Achieve the Best Texture
For the best texture in your granola, use rolled oats. They provide a chewy base. Mix in chopped pecans for crunch. Make sure to stir the granola halfway while baking. This helps it brown evenly. Bake until golden brown, but watch it closely. Burnt granola can ruin your parfait. Allow it to cool completely, as it gets crispier when cool.
Presentation Ideas for Serving
Serve your parfaits in clear glass cups. This allows you to show off the pretty layers. Start with a spoonful of yogurt at the bottom. Then, add a layer of granola, followed by berries. Repeat until you fill the cup. Finish with a layer of berries on top. Add a drizzle of honey for extra sweetness. You can also sprinkle a few extra pecans on top for a nice touch.
Storing Leftover Granola
Store leftover granola in an airtight container. Keep it in a cool, dry place. It stays fresh for about two weeks. If it gets soft, you can re-crisp it in the oven. Just spread it out on a baking sheet and bake at 350°F (175°C) for 5-10 minutes. This way, you can enjoy your granola longer!
Variations
Different Nut Choices
You can switch up the nuts in this recipe. Try walnuts for a richer taste. Almonds add a nice crunch, too. Pecans are great, but don’t be shy to experiment. Use your favorite nuts or even seeds for a fun twist!
Seasonal Berry Options
Berries are the stars of this parfait. In summer, use fresh strawberries and blueberries. Fall brings a chance to add apples or pears. In winter, try frozen mixed berries for tasty results. Each season offers new flavors to explore.
Dairy-Free Alternatives
For a dairy-free option, use coconut yogurt instead of Greek yogurt. Almond milk yogurt works well, too. These swaps keep the parfait creamy and delicious. Enjoy a healthy breakfast that fits your diet!
Storage Info
How to Store Granola
To keep your granola fresh, store it in an airtight container. I like to use glass jars. This keeps moisture out and lets the granola stay crunchy. Place the container in a cool, dry place. Avoid direct sunlight to prevent the nuts from going bad.
Storing Assembled Parfaits
If you have leftover parfaits, cover them with plastic wrap or a lid. Store them in the fridge for up to one day. The granola will lose some crunch but still taste great. Layering the yogurt and berries helps keep them fresh longer.
Shelf Life Tips
Homemade granola can last for about two weeks when stored correctly. Check for any signs of spoilage, like a musty smell. If you see any, it’s best to toss it. For parfaits, eat them within a day for the best taste and texture.
FAQs
Can I make granola ahead of time?
Yes, you can make granola ahead of time. I like to prepare a big batch on the weekend. Store it in an airtight container for up to two weeks. This way, breakfast is quick and easy during busy mornings. Just grab and go!
What can I use instead of Greek yogurt?
If you prefer, you can use regular yogurt, dairy-free yogurt, or cottage cheese. Each option brings a unique taste. I enjoy using coconut yogurt for a tropical twist. Try what fits your diet or taste buds best!
How to customize flavors in parfaits?
Customizing flavors is fun! You can add different fruits like bananas or peaches. Try swapping pecans for almonds or walnuts. You can also mix in spices, like nutmeg or ginger, for a flavor kick. Don’t forget to play with sweeteners too, like agave or honey. The choices are endless!
In this blog post, we explored how to make delicious maple pecan granola and parfaits. We covered key ingredients, optional flavors, and tasty substitutions for diets. I shared step-by-step instructions for prep and baking. Tips helped you achieve the best texture and serving ideas. Variations allowed you to try different nuts and berries. Proper storage methods ensure freshness and great shelf life. Enjoy creating your own parfaits and have fun experimenting with flavors! You’ll love the results.


