
If you crave a sweet, tangy treat without turning on the oven, then you’re in for a treat! These No Bake Key Lime Pie Cups are fresh, creamy, and bursting with flavor. With simple ingredients like graham cracker crumbs, sweetened condensed milk, and fresh key lime juice, you can whip these up in no time. Join me as I guide you through the straightforward steps to create these delightful cups that everyone will love!
Ingredients
Essential Ingredients
– 1 cup graham cracker crumbs
– 4 tablespoons unsalted butter, melted
– 1 can (14 oz) sweetened condensed milk
– 1/2 cup sour cream
– 1/2 cup fresh key lime juice
The key to a great No Bake Key Lime Pie Cup lies in its ingredients. First, we need graham cracker crumbs for a tasty crust. The unsalted butter adds richness and helps bind the crumbs. Sweetened condensed milk brings sweetness and a creamy texture. Adding sour cream gives a nice tang to balance the sweetness. Finally, fresh key lime juice is a must for that zesty kick.
Optional Garnishes
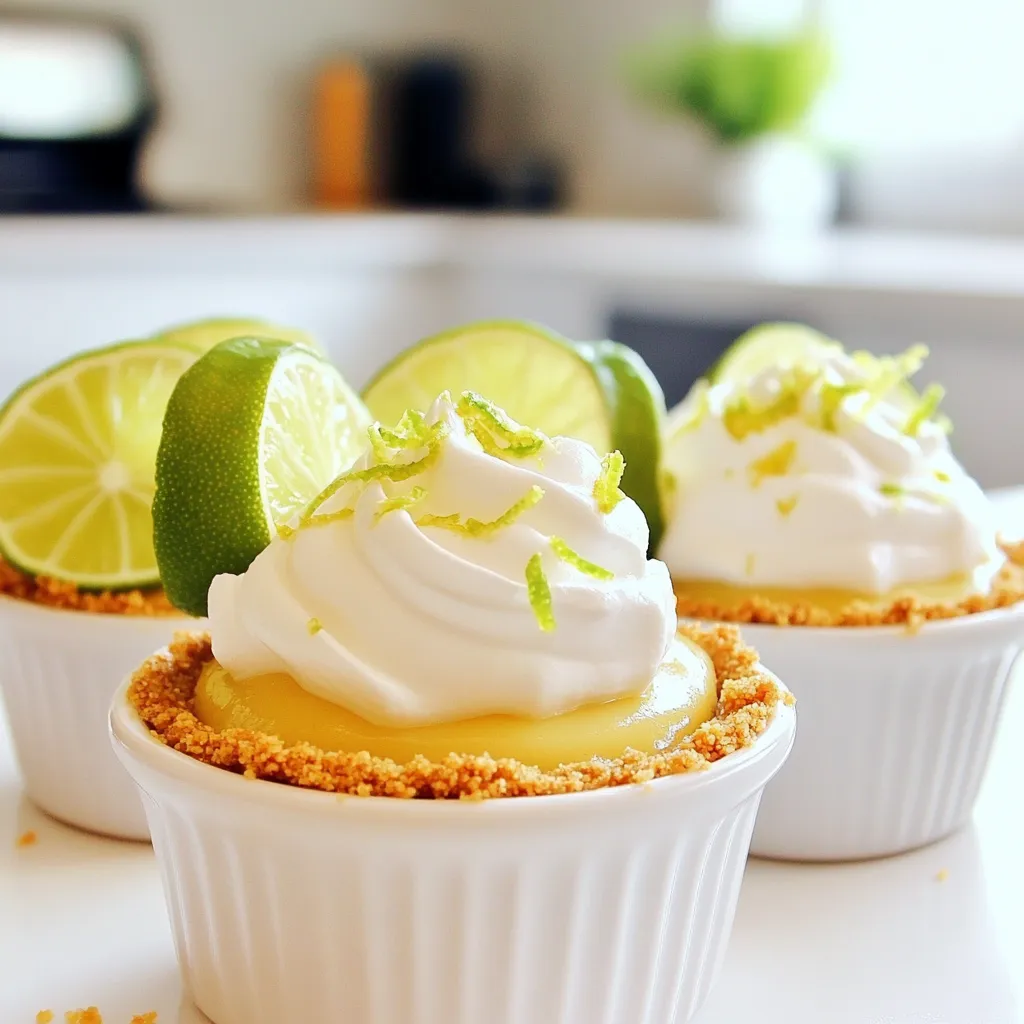
– Whipped cream
– Lime slices
– Extra key lime zest
Garnishing is where you can get creative! Whipped cream adds a fluffy topping. Lime slices bring freshness and color. Extra key lime zest enhances the flavor and looks beautiful on top. You can mix and match these garnishes to suit your taste.
Step-by-Step Instructions
Preparing the Crust
Start by mixing the graham cracker crumbs and melted butter. In a medium bowl, combine 1 cup of graham cracker crumbs with 4 tablespoons of unsalted butter. Stir until it looks like wet sand. This is the base for your cups.
Next, you will form the crust in each serving cup. Spoon about one heaping tablespoon of the crumb mixture into each cup. Use the back of a spoon or your fingers to press it down firmly. Aim for a nice, even layer at the bottom of 6 to 8 cups.
Making the Filling
Now it’s time to make the key lime filling. In a separate bowl, combine 1 can of sweetened condensed milk, 1/2 cup of sour cream, and 1/2 cup of fresh key lime juice. Add the zest of 2 key limes and 1 teaspoon of vanilla extract. Whisk everything together until it is smooth and well mixed. This filling will be creamy and tangy.
Assembling the Cups
Pour the filling over the crust in each cup. Carefully fill them right to the top. Make sure not to spill any on the sides.
Now, let’s chill the cups to set the filling. Cover each cup with plastic wrap and place them in the fridge for at least 4 hours. This helps the filling firm up nicely, making it easier to enjoy when you serve them.
Tips & Tricks
Achieving the Perfect Filling
Using fresh key lime juice makes a big difference. It gives your pie cups a bright, tangy taste. You can use regular limes if key limes are hard to find. The zest from the limes adds an extra burst of flavor.
Whisk the filling until it is smooth. Start slowly to mix the ingredients well. This step is key to avoiding lumps. A smooth filling creates a creamy texture. It makes each bite delightful.
Crust Tips
To get an even crust, press the mixture firmly. Use the back of a spoon or your fingers. Aim for a flat base in each cup. This helps keep the crust intact when you serve.
You can try different crusts too. Use crushed cookies instead of graham crackers. Oreos or vanilla wafers work well. Each choice gives your pie a unique twist.
Variations
Flavor Variations
You can easily change the flavor of your No Bake Key Lime Pie Cups. One fun option is to add coconut flavor. Simply mix in half a cup of shredded coconut into your filling. This gives a tropical twist that pairs well with the tangy lime.
Another idea is using different citrus juices. If you want a twist, try using orange or grapefruit juice. Each juice adds its own unique flavor. Just remember to adjust the sweetness based on the juice you choose.
Serving Variants
You can serve these treats in many ways. Individual cups are perfect for parties. They are easy to grab and eat. On the other hand, you can make one large pie. This option works well for family gatherings. Just pour the filling into a pie dish instead of cups.
When it comes to toppings, feel free to get creative. You can use alternative toppings for different occasions. For a holiday feel, add crushed candy canes or fresh berries. For a summer cookout, try fresh mint leaves or toasted coconut. Each topping adds a special touch to your dessert.
Storage Info
Storing Leftovers
To keep your No Bake Key Lime Pie Cups fresh, store them in the fridge. Use an airtight container to prevent any odors from affecting the taste. If you have leftover cups, they can last up to 3 days in the refrigerator. Just remember to cover them well to keep them creamy and delicious.
Freezing Options
Yes, you can freeze No Bake Key Lime Pie Cups! To do this, place them in a freezer-safe container. Wrap each cup tightly in plastic wrap before sealing. For the best taste and texture, eat them within a month. Thaw them overnight in the fridge before enjoying. This way, you can savor the fresh taste even after freezing.
FAQs
Can I use regular limes instead of key limes?
Yes, you can use regular limes. The flavor will be a bit different. Key limes are sweeter and more fragrant. If you use regular limes, the taste will be more tart. You might want to adjust the sugar in your recipe. Adding a little more sweetened condensed milk can help balance the flavor.
How long does it take for the cups to set?
The cups need at least 4 hours in the fridge. This chilling time helps the filling firm up. For best results, let them chill overnight. This makes the flavors blend well together, giving a tasty treat.
What can I substitute for sour cream?
You can use Greek yogurt as a substitute. It gives a similar tangy taste and creamy texture. If you want a dairy-free option, try coconut cream. It adds a nice flavor and works well.
This blog post covered the key ingredients and steps for making No Bake Key Lime Pie Cups. You learned about essential items like graham cracker crumbs and fresh key lime juice. We explored tips for perfecting the filling and crust, plus fun variations to try.
In the end, these cups are easy to make and delicious to eat. Enjoy crafting your treat and share it with friends! Your culinary adventure awaits, so dive in and create something special.


