No-Bake Lemon Icebox Pie Tasty and Effortless Delight

Looking for a quick and delicious dessert? This No-Bake Lemon Icebox Pie is your answer! I’ll guide you through a simple recipe that requires no baking but delivers big flavors. With just a few key ingredients, you can whip up a refreshing treat perfect for any occasion. Get ready to impress friends and family with this easy, zesty delight that will brighten up any table!

Ingredients

List of Ingredients for No-Bake Lemon Icebox Pie

– 1 ½ cups graham cracker crumbs

– ½ cup unsalted butter, melted

– 1 cup granulated sugar

– 1 can (14 ounces) sweetened condensed milk

– ½ cup freshly squeezed lemon juice (about 3-4 lemons)

– Zest of 2 lemons

– 1 teaspoon pure vanilla extract

– 1 cup heavy whipping cream

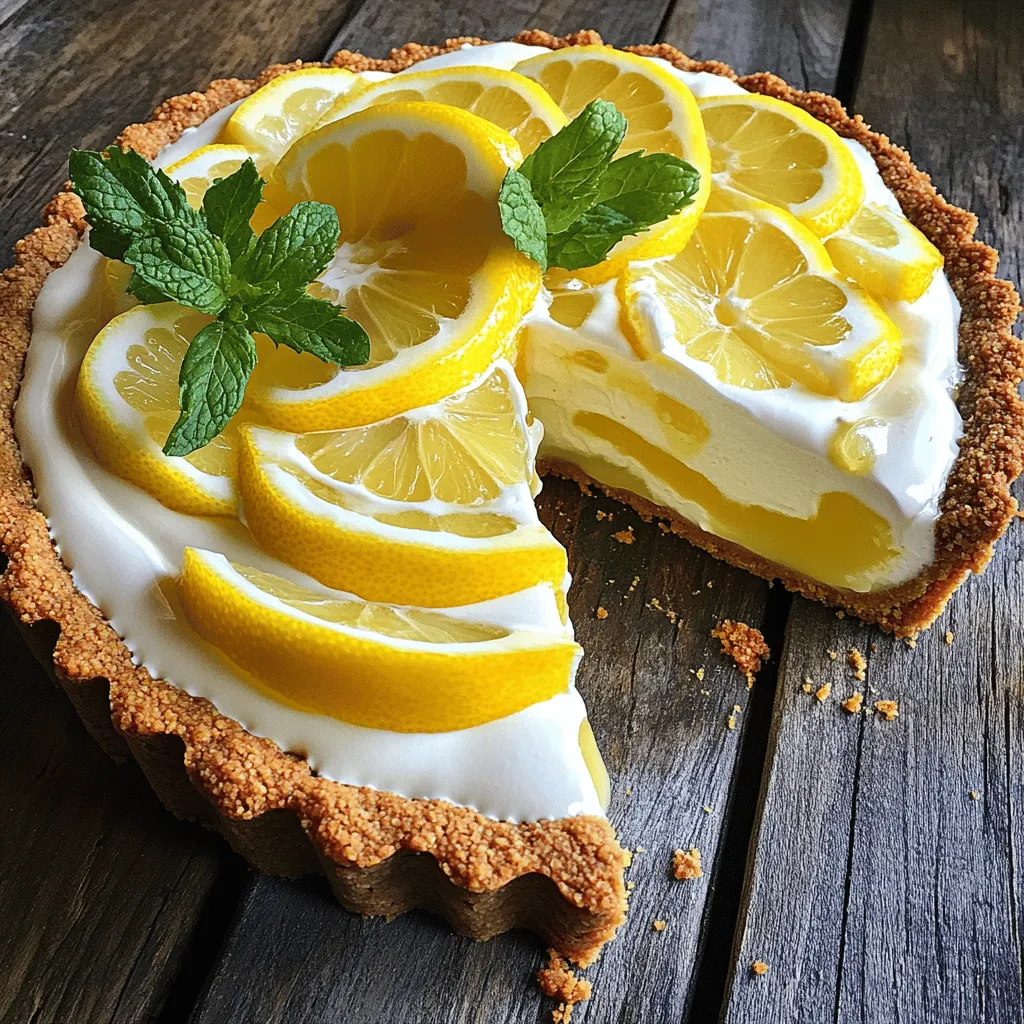
– Optional: Lemon slices and fresh mint leaves for garnish

Recommended Brands or Types of Ingredients

For the graham cracker crumbs, I like using Nabisco or Honey Maid. They give a great flavor. When choosing butter, opt for brands like Land O’Lakes or Kerrygold for rich taste. For sweetened condensed milk, Carnation is a solid choice. Fresh lemons are key; try to get organic ones for the best juice and zest. For whipped cream, Horizon Organic makes a nice option.

Possible Substitutions for Dietary Needs

If you want a gluten-free option, use gluten-free graham crackers. Coconut cream can replace heavy whipping cream for a dairy-free pie. For a lower sugar version, try using a sugar substitute like Stevia in the filling. If you are vegan, swap the condensed milk with coconut condensed milk and the heavy cream with a vegan whipping cream.

Step-by-Step Instructions

Preparing the Crust

To start, gather your ingredients. You need 1 ½ cups of graham cracker crumbs and ½ cup of melted unsalted butter. In a mixing bowl, combine the crumbs and butter. Stir until the mix looks like damp sand. Press this mixture into a 9-inch pie pan. Make sure to cover the bottom and sides well. This creates a sturdy crust. Now, place the crust in the fridge for 15 to 20 minutes. Chilling helps it firm up nicely.

Making the Lemon Filling

Next, you’ll make the lemon filling. In a large bowl, mix 14 ounces of sweetened condensed milk, 1 cup of granulated sugar, ½ cup of freshly squeezed lemon juice, the zest of 2 lemons, and 1 teaspoon of pure vanilla extract. Use a whisk to blend until smooth. Make sure there are no lumps. This step is key for a creamy filling. The combination of lemon juice and zest gives the filling a fresh taste.

Whipping the Cream and Combining

Now it’s time to whip the cream. In a clean bowl, pour 1 cup of heavy whipping cream. Use an electric mixer on medium-high speed. Beat the cream until stiff peaks form. This adds lightness to your filling. Once whipped, gently fold the cream into the lemon mixture. Use a spatula for this. Be careful and fold until you see no white streaks. This keeps the mixture airy and fluffy. Now, pour the lemon filling into your chilled crust and smooth the top with a spatula.

Tips & Tricks

How to Achieve the Perfect Whip for Cream

To get the best whipped cream, start with very cold heavy cream. Cold cream whips better and faster. Use a clean bowl and beaters. Beat the cream on medium-high speed. Keep an eye on it as you whip. Stop when you see stiff peaks form. This means the cream holds its shape well. Gently fold the whipped cream into your lemon mixture. This keeps it light and fluffy.

Ensuring a Smooth Filling without Lumps

For a smooth filling, mix the sweetened condensed milk and sugar first. Use a whisk to blend them well. Add the lemon juice and zest next. Make sure to mix until no lumps are left. If you see lumps, keep whisking until smooth. This step is key for a creamy filling that tastes great.

Best Practices for Chilling the Pie

Chill your pie in a clean fridge. Cover it with plastic wrap to keep it fresh. Let it chill for at least four hours. This helps the filling set and makes it easier to slice. For best results, chill it overnight if you can. The longer it chills, the better your pie will taste.

Variations

Alternative Crust Options

You can switch up the crust for your No-Bake Lemon Icebox Pie. Instead of graham crackers, try using crushed vanilla wafers or even Oreo cookies. Both options add a unique twist. You can also make a nut crust with ground almonds or pecans mixed with melted butter. This crust adds a rich flavor and a fun crunch.

Flavor Enhancements

Adding berries can elevate your pie. Fresh blueberries, raspberries, or strawberries work well. You can mix them into the lemon filling or layer them on top. For a tropical twist, consider adding coconut flakes. You might also try a hint of mint for a refreshing taste. These additions can make your pie even more delightful.

Dietary Variations

If you need a vegan version, replace the sweetened condensed milk with coconut cream and use maple syrup as a sweetener. For a gluten-free option, ensure you use gluten-free graham crackers or nuts for the crust. These changes keep the essence of the pie while catering to dietary needs. Enjoy experimenting!

Storage Info

How to Store Leftover Pie

To store leftover pie, cover it tightly with plastic wrap. Place the pie in the fridge. This keeps it fresh and helps maintain its creamy texture. You can also use a pie dish cover if you have one.

Recommended Timeframe for Consumption

Enjoy your pie within three to four days for the best taste. The lemon flavor shines brightest when fresh. After that, the crust may become a bit soft. If you store it correctly, it can last up to a week, but the texture may change.

Reheating or Refreshing Slices

No need to reheat this pie! It’s best served cold. If you want to refresh a slice, try adding a dollop of whipped cream on top. Fresh lemon slices or mint leaves also brighten the pie. Just be sure to enjoy it while it’s still fresh!

FAQs

Can I freeze No-Bake Lemon Icebox Pie?

Yes, you can freeze this pie. Wrap it tightly in plastic wrap. Place it in an airtight container to protect it from freezer burn. It will keep well for about two months. Thaw it in the fridge overnight before serving. This way, you can enjoy its refreshing taste anytime.

How do I prevent the crust from becoming soggy?

To keep your crust crisp, make sure the graham cracker crumbs are finely crushed. Mix them well with melted butter. After pressing the crust into the pan, chill it in the fridge for at least 15-20 minutes. This helps it set and hold its shape. Avoid adding too much filling too fast, as this can make the crust soggy.

What can I serve alongside this dessert?

Pair this pie with fresh fruit like strawberries or blueberries. A scoop of vanilla ice cream adds a rich touch. You can also serve it with whipped cream. Mint leaves and lemon slices make great garnishes too. These options enhance the pie’s bright flavors and make your dessert table more inviting.

This blog post covered everything you need for a perfect no-bake lemon icebox pie. We discussed the key ingredients, helpful tips, and how to achieve great texture. You learned about variations to suit different diets and how to store leftovers. Remember, this pie is versatile and easy to make! Experiment with flavors and crusts. Enjoy your dessert, and don’t hesitate to share it with friends. You can always create new twists on this classic recipe. Happy pie-making!

- 1 ½ cups graham cracker crumbs - ½ cup unsalted butter, melted - 1 cup granulated sugar - 1 can (14 ounces) sweetened condensed milk - ½ cup freshly squeezed lemon juice (about 3-4 lemons) - Zest of 2 lemons - 1 teaspoon pure vanilla extract - 1 cup heavy whipping cream - Optional: Lemon slices and fresh mint leaves for garnish For the graham cracker crumbs, I like using Nabisco or Honey Maid. They give a great flavor. When choosing butter, opt for brands like Land O'Lakes or Kerrygold for rich taste. For sweetened condensed milk, Carnation is a solid choice. Fresh lemons are key; try to get organic ones for the best juice and zest. For whipped cream, Horizon Organic makes a nice option. If you want a gluten-free option, use gluten-free graham crackers. Coconut cream can replace heavy whipping cream for a dairy-free pie. For a lower sugar version, try using a sugar substitute like Stevia in the filling. If you are vegan, swap the condensed milk with coconut condensed milk and the heavy cream with a vegan whipping cream. To start, gather your ingredients. You need 1 ½ cups of graham cracker crumbs and ½ cup of melted unsalted butter. In a mixing bowl, combine the crumbs and butter. Stir until the mix looks like damp sand. Press this mixture into a 9-inch pie pan. Make sure to cover the bottom and sides well. This creates a sturdy crust. Now, place the crust in the fridge for 15 to 20 minutes. Chilling helps it firm up nicely. Next, you’ll make the lemon filling. In a large bowl, mix 14 ounces of sweetened condensed milk, 1 cup of granulated sugar, ½ cup of freshly squeezed lemon juice, the zest of 2 lemons, and 1 teaspoon of pure vanilla extract. Use a whisk to blend until smooth. Make sure there are no lumps. This step is key for a creamy filling. The combination of lemon juice and zest gives the filling a fresh taste. Now it’s time to whip the cream. In a clean bowl, pour 1 cup of heavy whipping cream. Use an electric mixer on medium-high speed. Beat the cream until stiff peaks form. This adds lightness to your filling. Once whipped, gently fold the cream into the lemon mixture. Use a spatula for this. Be careful and fold until you see no white streaks. This keeps the mixture airy and fluffy. Now, pour the lemon filling into your chilled crust and smooth the top with a spatula. To get the best whipped cream, start with very cold heavy cream. Cold cream whips better and faster. Use a clean bowl and beaters. Beat the cream on medium-high speed. Keep an eye on it as you whip. Stop when you see stiff peaks form. This means the cream holds its shape well. Gently fold the whipped cream into your lemon mixture. This keeps it light and fluffy. For a smooth filling, mix the sweetened condensed milk and sugar first. Use a whisk to blend them well. Add the lemon juice and zest next. Make sure to mix until no lumps are left. If you see lumps, keep whisking until smooth. This step is key for a creamy filling that tastes great. Chill your pie in a clean fridge. Cover it with plastic wrap to keep it fresh. Let it chill for at least four hours. This helps the filling set and makes it easier to slice. For best results, chill it overnight if you can. The longer it chills, the better your pie will taste. {{image_4}} You can switch up the crust for your No-Bake Lemon Icebox Pie. Instead of graham crackers, try using crushed vanilla wafers or even Oreo cookies. Both options add a unique twist. You can also make a nut crust with ground almonds or pecans mixed with melted butter. This crust adds a rich flavor and a fun crunch. Adding berries can elevate your pie. Fresh blueberries, raspberries, or strawberries work well. You can mix them into the lemon filling or layer them on top. For a tropical twist, consider adding coconut flakes. You might also try a hint of mint for a refreshing taste. These additions can make your pie even more delightful. If you need a vegan version, replace the sweetened condensed milk with coconut cream and use maple syrup as a sweetener. For a gluten-free option, ensure you use gluten-free graham crackers or nuts for the crust. These changes keep the essence of the pie while catering to dietary needs. Enjoy experimenting! To store leftover pie, cover it tightly with plastic wrap. Place the pie in the fridge. This keeps it fresh and helps maintain its creamy texture. You can also use a pie dish cover if you have one. Enjoy your pie within three to four days for the best taste. The lemon flavor shines brightest when fresh. After that, the crust may become a bit soft. If you store it correctly, it can last up to a week, but the texture may change. No need to reheat this pie! It’s best served cold. If you want to refresh a slice, try adding a dollop of whipped cream on top. Fresh lemon slices or mint leaves also brighten the pie. Just be sure to enjoy it while it’s still fresh! Yes, you can freeze this pie. Wrap it tightly in plastic wrap. Place it in an airtight container to protect it from freezer burn. It will keep well for about two months. Thaw it in the fridge overnight before serving. This way, you can enjoy its refreshing taste anytime. To keep your crust crisp, make sure the graham cracker crumbs are finely crushed. Mix them well with melted butter. After pressing the crust into the pan, chill it in the fridge for at least 15-20 minutes. This helps it set and hold its shape. Avoid adding too much filling too fast, as this can make the crust soggy. Pair this pie with fresh fruit like strawberries or blueberries. A scoop of vanilla ice cream adds a rich touch. You can also serve it with whipped cream. Mint leaves and lemon slices make great garnishes too. These options enhance the pie's bright flavors and make your dessert table more inviting. This blog post covered everything you need for a perfect no-bake lemon icebox pie. We discussed the key ingredients, helpful tips, and how to achieve great texture. You learned about variations to suit different diets and how to store leftovers. Remember, this pie is versatile and easy to make! Experiment with flavors and crusts. Enjoy your dessert, and don’t hesitate to share it with friends. You can always create new twists on this classic recipe. Happy pie-making!

No-Bake Lemon Icebox Pie

Indulge in the refreshing taste of this Zesty No-Bake Lemon Icebox Pie that's perfect for any occasion! With a creamy lemon filling and a buttery graham cracker crust, this dessert is a breeze to make and requires no baking. You'll be amazed at how easy it is to whip up this delightful treat using just a few ingredients. Ready to impress your friends and family? Click through to explore the recipe and bring this zesty goodness to your table!

Ingredients
  

1 ½ cups graham cracker crumbs

½ cup unsalted butter, melted

1 cup granulated sugar

1 can (14 ounces) sweetened condensed milk

½ cup freshly squeezed lemon juice (about 3-4 lemons)

Zest of 2 lemons

1 teaspoon pure vanilla extract

1 cup heavy whipping cream

Optional: Lemon slices and fresh mint leaves for garnish

Instructions
 

Prepare the Crust: In a medium-sized mixing bowl, combine the graham cracker crumbs with the melted unsalted butter. Stir well until the mixture is evenly moistened and resembles damp sand. Carefully press this mixture into the bottom and up the sides of a 9-inch pie pan to form a crust. Place the pie crust in the refrigerator for about 15-20 minutes to firm up.

    Make the Filling: In a large mixing bowl, add the sweetened condensed milk, granulated sugar, freshly squeezed lemon juice, lemon zest, and pure vanilla extract. Use a whisk to blend everything together until the mixture is smooth and thoroughly combined, ensuring no lumps remain.

      Whip the Cream: In a separate clean mixing bowl, use an electric mixer to beat the heavy cream on medium-high speed. Continue to whip until stiff peaks form. This will give your filling a light and airy texture. Once whipped, gently fold the whipped cream into the lemon mixture using a clean spatula. Be careful to fold gently until there are no visible white streaks, ensuring the mixture remains airy.

        Fill the Crust: Once combined, pour the luscious lemon filling into the prepared graham cracker crust. Use a spatula to smooth the surface evenly for a polished look.

          Chill: Cover the pie with plastic wrap, making sure it is sealed well. Place the pie in the refrigerator and let it chill for at least 4 hours, or until it is firm enough to hold its shape when sliced.

            Serve: After the chilling period, remove the pie from the refrigerator. Slice it into wedges and garnish each piece with fresh lemon slices and mint leaves for an extra pop of color and flavor, if desired.

              Prep Time: 20 minutes | Total Time: 4 hours 20 minutes | Servings: 8

                Leave a Comment

                Recipe Rating