If you love refreshing desserts, you’re in for a treat! These No-Bake Mini Lemon Cheesecakes are the perfect cool delight for warm days. With creamy filling and a buttery crust, they’re simple to make and even easier to enjoy. Plus, you can dress them up with fresh berries or mint for a burst of color. Let’s dive into this zesty recipe that will have your taste buds dancing!
Ingredients
Main Ingredients for Cheesecake Filling
– 8 oz cream cheese, softened
– 1/2 cup powdered sugar
– 1/2 cup heavy whipping cream
– 1/4 cup freshly squeezed lemon juice
– Zest of 1 medium lemon
Ingredients for Crust
– 1 cup graham cracker crumbs
– 1/4 cup unsalted butter, melted
– 2 tablespoons granulated sugar
Optional Garnishes
– Fresh berries (strawberries, blueberries, or raspberries)
– Extra lemon zest
– Mint leaves for presentation
To make the filling, start with cream cheese. It needs to be soft, so let it sit out for a bit. The powdered sugar adds sweetness. The heavy whipping cream gives it a nice, rich texture. Fresh lemon juice and zest provide the bright flavor that makes these cheesecakes pop.
For the crust, graham cracker crumbs are key. You mix them with melted butter and sugar. This mixture will form a crunchy base. Press it down well to hold the filling.
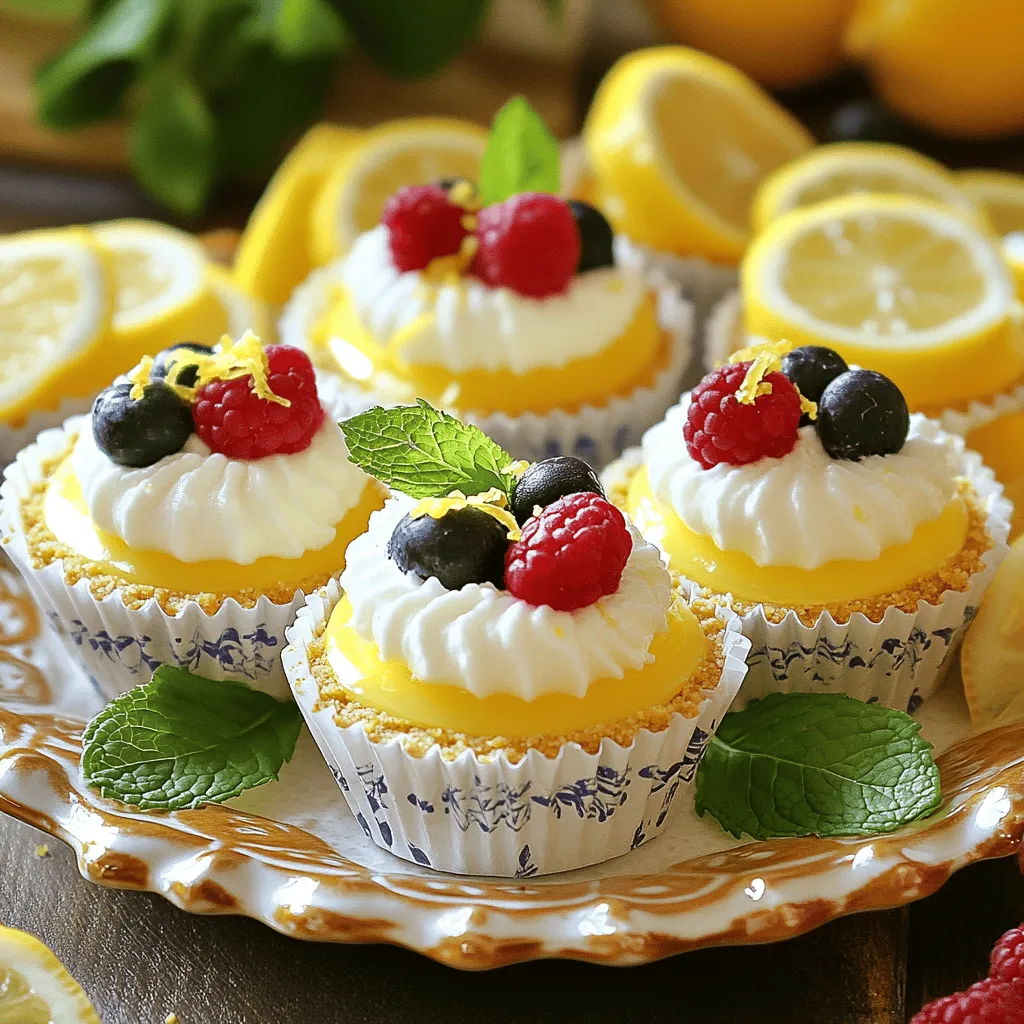
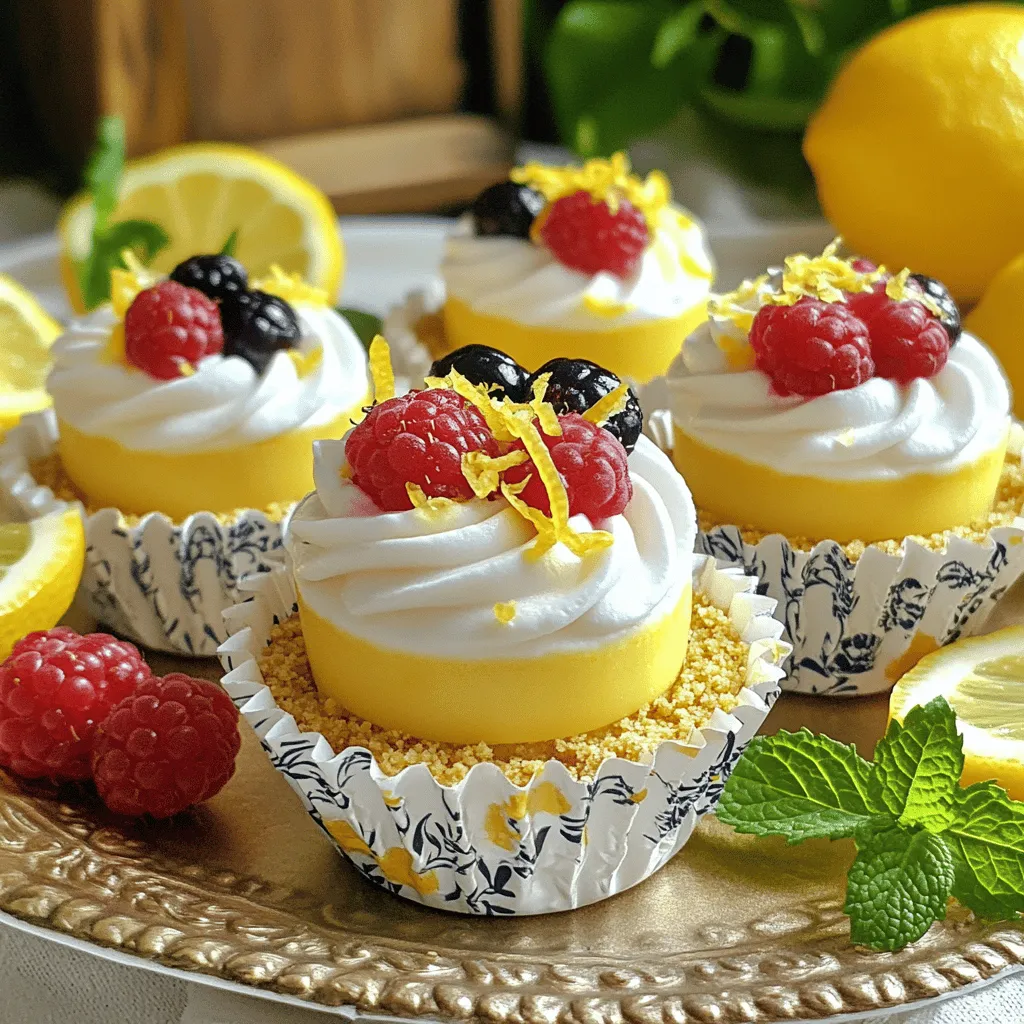
You can also add fun garnishes. Fresh berries add color and taste. A little extra lemon zest brightens the look. Mint leaves make it look fancy and fresh.
This recipe is simple but delicious.It’s perfect for a hot day or any time you want a cool treat.
Step-by-Step Instructions
Prepare the Crust
– In a medium bowl, mix graham cracker crumbs, melted butter, and granulated sugar.
– Stir until the mixture looks like wet sand.
– Take a small amount of the crust mix and press it firmly into mini cheesecake cups or a muffin tin. Make sure it is even and compact.
Make the Cheesecake Filling
– In a large bowl, beat softened cream cheese until it is smooth.
– Gradually add sifted powdered sugar and mix until there are no lumps.
– Pour in heavy whipping cream, lemon juice, lemon zest, and vanilla extract.
– Beat this mixture until it is light and fluffy, about two minutes.
Fill and Chill
– Carefully fill each crust-lined cup with the cheesecake filling. Fill them about three-quarters full.
– Gently tap the tray on the counter to remove air bubbles.
– Cover the mini cheesecakes and refrigerate for at least four hours until set.
Tips & Tricks
Achieving the Perfect Consistency
To get the best texture for your cheesecake, first, make sure the cream cheese is at room temperature. Cold cream cheese can make mixing hard and lead to lumps. Beat the filling until it is light and fluffy. This will create a smooth and creamy cheesecake that melts in your mouth.
Storage Recommendations
Store any leftovers in an airtight container. This keeps them fresh and tasty. I recommend chilling the cheesecakes for at least four hours before serving. This helps them set properly and enhances the flavor.
Presentation Ideas
Garnish your mini cheesecakes with fresh berries. Strawberries, blueberries, or raspberries add color and taste. You can also sprinkle extra lemon zest on top for a bright touch. For a fun display, arrange them on a decorative platter with thin lemon slices and mint leaves. This makes your treat look as good as it tastes.
Variations
Flavor Enhancements
You can switch up the flavor of your mini cheesecakes easily. Try using lime, orange, or even grapefruit juice. Each fruit adds a unique twist. You can also blend in pureed fruits like strawberries or mangoes. This gives your cheesecake an exciting color and flavor.
Alternative Crust Options
Not everyone can have regular crust. For a gluten-free option, use almond flour or gluten-free cookie crumbs. They taste great and hold well. You can also try using chocolate cookies or vanilla wafers for a different flavor. Each cookie choice can change how your cheesecake tastes.
Dairy-Free Alternatives
You can make these cheesecakes dairy-free if you wish. Use vegan cream cheese made from nuts or soy. For the whipped cream, try coconut cream instead of heavy cream. You can blend these options to create a tasty vegan dessert. It’s a great way to enjoy cheesecake without using dairy.
Serving Suggestions
Ideal Pairings
What drinks go well with lemon cheesecakes? I suggest refreshing drinks like iced tea or lemonade. They balance the tartness of the cheesecake. You can also try sparkling water with lemon slices for a fizzy touch.
What about other desserts? Mini lemon cheesecakes pair well with light desserts. Consider serving them with fruit sorbets or panna cotta. They both add a creamy and fruity taste that complements the lemon flavor.
Occasion Ideas
When should you serve these mini cheesecakes? They are perfect for summer gatherings and parties. Their cool and bright flavor makes them a hit for family events. You can also serve them at picnics or barbecues.
Want to get creative? Try serving them in jars for a fun twist. You can also layer them with fresh fruit in clear cups. This makes a beautiful display and makes it easy for guests to grab one.
Portion Control Tips
How should you serve these mini cheesecakes? I recommend serving one per person. This keeps the portions small and controlled.
For a nice plate presentation, try using a decorative platter. Arrange the cheesecakes in a circle. Add thin lemon slices and mint leaves around them. This adds color and makes the dish more appealing.
FAQs
How long do No-Bake Mini Lemon Cheesecakes last in the fridge?
No-Bake Mini Lemon Cheesecakes last about 4 to 5 days in the fridge. Store them in an airtight container to keep them fresh. The longer they sit, the softer the crust may get. For the best taste and texture, enjoy them within the first few days.
Can I use bottled lemon juice instead of fresh?
Yes, you can use bottled lemon juice. It is convenient and saves time. However, fresh lemon juice has a brighter taste. Bottled juice may have preservatives that dull the flavor. For the best result, I recommend using fresh lemon juice whenever possible.
What can I do if my filling is too runny?
If your filling is too runny, try adding more cream cheese. Make sure it is softened and at room temperature. You can also beat the mixture longer to help it thicken. If it still seems too loose, chill it longer in the fridge. This will help it firm up before serving.
Is it possible to freeze these cheesecakes?
Yes, you can freeze these cheesecakes. To freeze, wrap each cheesecake tightly in plastic wrap. Place them in a freezer-safe container. When you’re ready to eat, thaw them in the fridge overnight. This keeps the texture nice and creamy.
Can I make this recipe gluten-free?
Absolutely! To make this recipe gluten-free, use gluten-free graham cracker crumbs. You can also use crushed nuts like almonds or pecans for the crust. Another option is to use gluten-free cookies, like Oreo or ginger snaps, for a unique twist.
In this post, we explored how to make mini lemon cheesecakes. We covered the main ingredients for the filling and crust, step-by-step instructions, and helpful tips. You can enhance flavors and make swaps for dietary needs too.
These cheesecake bites are great for gatherings or family fun. Follow these steps to wow your guests with a tasty treat that’ll impress! Enjoy cooking and share your delicious results!


