No-Bake Strawberry Cheesecake Cups Simple Dessert Delight

WANT TO SAVE THIS RECIPE?

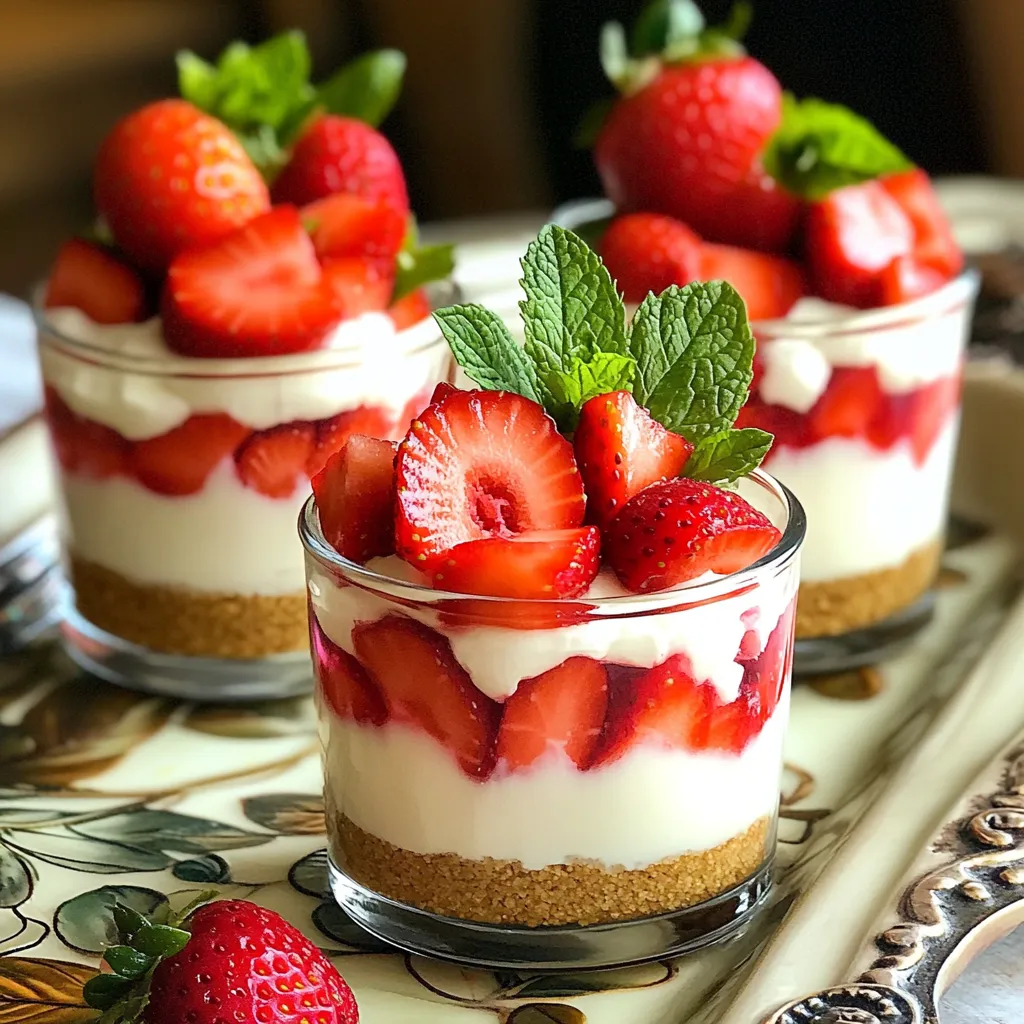
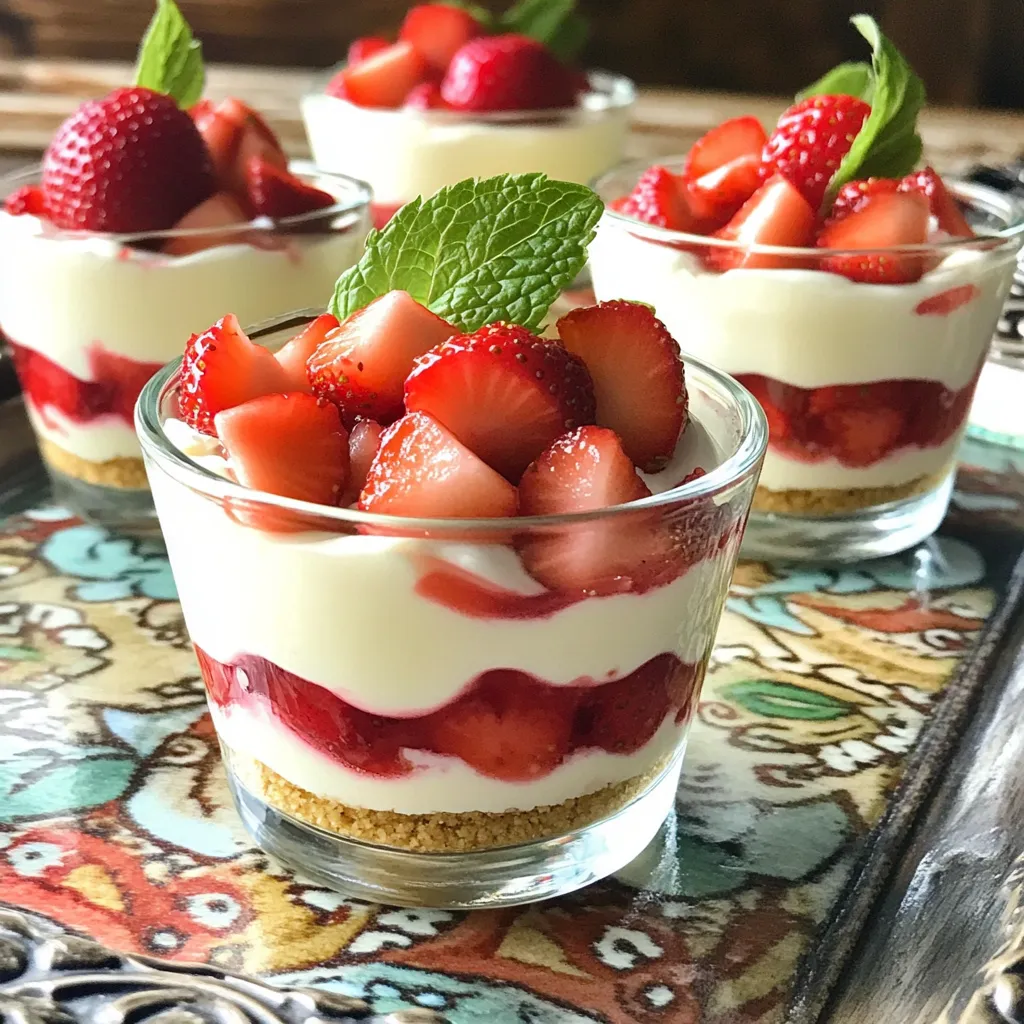
Looking for an easy dessert that impresses? You’ll love my No-Bake Strawberry Cheesecake Cups! With just a few simple ingredients, you can create a delightful treat that’s perfect for any occasion. Imagine a creamy, sweet cheesecake layered with fresh strawberries, all without turning on the oven. Let’s dive into this simple recipe and make your dessert dreams come true!

Ingredients

Main Ingredients

– 1 cup crushed graham crackers

– 4 tablespoons unsalted butter, melted

– 1 (8 oz) package cream cheese, softened

– 1/2 cup powdered sugar

– 1 teaspoon vanilla extract

– 1 cup whipped cream

– 1 cup fresh strawberries, diced

– Additional whole strawberries for garnish

– Fresh mint leaves for garnish (optional)

In this simple dessert, we start with the crust. You need crushed graham crackers and melted butter. This mix gives us a tasty base.

Next, the filling is key. We use cream cheese, powdered sugar, and vanilla. These blend into a smooth and sweet mix.

Whipped cream adds lightness. It makes the filling fluffy and airy.

Fresh strawberries give a pop of color and flavor. Diced strawberries mix right into the layers. You can also add whole strawberries for a nice touch.

Mint leaves make a pretty garnish, too. They add a fresh look and taste.

Together, these ingredients create a delightful treat. Each cup is a balance of creamy, sweet, and fruity flavors. You’ll love how easy it is to make and enjoy!

Step-by-Step Instructions

Preparing the Crust

– In a small bowl, combine 1 cup of crushed graham crackers and 4 tablespoons of melted butter.

– Stir until the mixture looks like wet sand.

– Take about 2 tablespoons of this mixture and spoon it into each cup.

– Press down gently to form an even crust layer at the bottom.

Making the Cheesecake Filling

– In a medium bowl, beat 1 (8 oz) package of softened cream cheese until it is smooth.

– Gradually mix in 1/2 cup of powdered sugar and 1 teaspoon of vanilla extract.

– Keep mixing until there are no lumps, and the mixture is creamy.

– Carefully fold in 1 cup of whipped cream using a spatula.

– Be gentle to keep the mixture light and fluffy.

Assembling the Cheesecake Cups

– Use a spoon to layer the cream cheese mixture over the crust in each cup.

– Fill each cup halfway with the cream cheese mixture.

– Evenly distribute 1 cup of diced strawberries on top of the cream cheese layer.

– Spoon the remaining cream cheese mixture over the strawberries, filling the cups nearly to the brim.

– Finish with a layer of diced strawberries and garnish each cup with a whole strawberry and a mint leaf if you like.

– Cover the cups with plastic wrap and refrigerate for at least 2 hours.

Tips & Tricks

Tips for a Perfect Cheesecake Texture

To get the best texture, start with softened cream cheese. This step is key. Cold cream cheese can make your filling lumpy. Let it sit at room temperature for about 30 minutes before mixing.

When you mix the whipped cream, be gentle. Use a spatula to fold it into the cream cheese. This helps keep the mixture light and airy. If you stir too hard, it can lose that fluffy feel.

Presentation Tips

For a stunning look, serve your cheesecake cups on a decorative tray. This small touch makes a big difference. You can impress your guests with simple, elegant serving.

To add some texture, sprinkle crushed graham crackers on top. This extra layer gives a nice crunch. Plus, it adds to the visual appeal of the dessert. With these tips, your no-bake strawberry cheesecake cups will shine!

Variations

Fruit Alternatives

You can change the fruit in your cheesecake cups. Try using blueberries or raspberries instead of strawberries. Both fruits add a sweet and tart flavor. You can also use seasonal fruits. In summer, peaches or cherries can shine in this dessert. In fall, consider apples or pears for a cozy twist. Each fruit brings its own taste and joy to your cups.

Dietary Adjustments

You can make this recipe fit your diet. If you need gluten-free options, use gluten-free graham crackers. They work just as well for the crust. If you are dairy-free, look for cream cheese made from nuts or soy. These swaps keep the creamy texture while fitting your needs. Enjoy your dessert without worry!

Storage Info

Proper Refrigeration

To store leftovers, cover each cup tightly with plastic wrap. This keeps them fresh and prevents any odors from the fridge. I recommend eating them within three days. This keeps the flavors bright and the texture creamy. If you wait too long, they may lose their charm.

Freezing Tips

Yes, you can freeze no-bake strawberry cheesecake cups! To do this, wrap each cup with plastic wrap and then place them in a freezer-safe bag. They will stay good for up to a month. When you are ready to enjoy them, take the cups out and place them in the fridge overnight. This allows them to thaw slowly. After thawing, serve them cold for a refreshing treat!

FAQs

How long do no-bake cheesecake cups last in the fridge?

No-bake cheesecake cups stay fresh for about 3 to 5 days in the fridge. To keep them tasty, make sure to cover each cup with plastic wrap. This prevents drying and keeps flavors intact. If you plan to enjoy them later, it’s best to store them in an airtight container.

Can I use store-bought whipped cream instead of homemade?

Yes, you can use store-bought whipped cream. It saves time and still gives that light, fluffy texture. Just make sure it is fresh and unsweetened for the best taste. If you prefer, you can still whip heavy cream at home. This way, you control the sweetness and flavor.

What can I use instead of graham crackers for the crust?

If you want an alternative to graham crackers, try using crushed cookies like Oreos or digestive biscuits. You can also use crushed nuts mixed with melted butter for a gluten-free option. Each choice adds a unique flavor and texture to your cheesecake cups.

You learned how to make delicious no-bake strawberry cheesecake cups. We discussed the key ingredients, easy steps to prepare, and tips for the best texture. You can also explore fun variations and storage options for leftovers. This dessert is simple and can fit any occasion. Enjoy making this treat for friends or family. Your perfect cheesecake cups are just a few steps away!

- 1 cup crushed graham crackers - 4 tablespoons unsalted butter, melted - 1 (8 oz) package cream cheese, softened - 1/2 cup powdered sugar - 1 teaspoon vanilla extract - 1 cup whipped cream - 1 cup fresh strawberries, diced - Additional whole strawberries for garnish - Fresh mint leaves for garnish (optional) In this simple dessert, we start with the crust. You need crushed graham crackers and melted butter. This mix gives us a tasty base. Next, the filling is key. We use cream cheese, powdered sugar, and vanilla. These blend into a smooth and sweet mix. Whipped cream adds lightness. It makes the filling fluffy and airy. Fresh strawberries give a pop of color and flavor. Diced strawberries mix right into the layers. You can also add whole strawberries for a nice touch. Mint leaves make a pretty garnish, too. They add a fresh look and taste. Together, these ingredients create a delightful treat. Each cup is a balance of creamy, sweet, and fruity flavors. You’ll love how easy it is to make and enjoy! - In a small bowl, combine 1 cup of crushed graham crackers and 4 tablespoons of melted butter. - Stir until the mixture looks like wet sand. - Take about 2 tablespoons of this mixture and spoon it into each cup. - Press down gently to form an even crust layer at the bottom. - In a medium bowl, beat 1 (8 oz) package of softened cream cheese until it is smooth. - Gradually mix in 1/2 cup of powdered sugar and 1 teaspoon of vanilla extract. - Keep mixing until there are no lumps, and the mixture is creamy. - Carefully fold in 1 cup of whipped cream using a spatula. - Be gentle to keep the mixture light and fluffy. - Use a spoon to layer the cream cheese mixture over the crust in each cup. - Fill each cup halfway with the cream cheese mixture. - Evenly distribute 1 cup of diced strawberries on top of the cream cheese layer. - Spoon the remaining cream cheese mixture over the strawberries, filling the cups nearly to the brim. - Finish with a layer of diced strawberries and garnish each cup with a whole strawberry and a mint leaf if you like. - Cover the cups with plastic wrap and refrigerate for at least 2 hours. To get the best texture, start with softened cream cheese. This step is key. Cold cream cheese can make your filling lumpy. Let it sit at room temperature for about 30 minutes before mixing. When you mix the whipped cream, be gentle. Use a spatula to fold it into the cream cheese. This helps keep the mixture light and airy. If you stir too hard, it can lose that fluffy feel. For a stunning look, serve your cheesecake cups on a decorative tray. This small touch makes a big difference. You can impress your guests with simple, elegant serving. To add some texture, sprinkle crushed graham crackers on top. This extra layer gives a nice crunch. Plus, it adds to the visual appeal of the dessert. With these tips, your no-bake strawberry cheesecake cups will shine! {{image_4}} You can change the fruit in your cheesecake cups. Try using blueberries or raspberries instead of strawberries. Both fruits add a sweet and tart flavor. You can also use seasonal fruits. In summer, peaches or cherries can shine in this dessert. In fall, consider apples or pears for a cozy twist. Each fruit brings its own taste and joy to your cups. You can make this recipe fit your diet. If you need gluten-free options, use gluten-free graham crackers. They work just as well for the crust. If you are dairy-free, look for cream cheese made from nuts or soy. These swaps keep the creamy texture while fitting your needs. Enjoy your dessert without worry! To store leftovers, cover each cup tightly with plastic wrap. This keeps them fresh and prevents any odors from the fridge. I recommend eating them within three days. This keeps the flavors bright and the texture creamy. If you wait too long, they may lose their charm. Yes, you can freeze no-bake strawberry cheesecake cups! To do this, wrap each cup with plastic wrap and then place them in a freezer-safe bag. They will stay good for up to a month. When you are ready to enjoy them, take the cups out and place them in the fridge overnight. This allows them to thaw slowly. After thawing, serve them cold for a refreshing treat! No-bake cheesecake cups stay fresh for about 3 to 5 days in the fridge. To keep them tasty, make sure to cover each cup with plastic wrap. This prevents drying and keeps flavors intact. If you plan to enjoy them later, it’s best to store them in an airtight container. Yes, you can use store-bought whipped cream. It saves time and still gives that light, fluffy texture. Just make sure it is fresh and unsweetened for the best taste. If you prefer, you can still whip heavy cream at home. This way, you control the sweetness and flavor. If you want an alternative to graham crackers, try using crushed cookies like Oreos or digestive biscuits. You can also use crushed nuts mixed with melted butter for a gluten-free option. Each choice adds a unique flavor and texture to your cheesecake cups. You learned how to make delicious no-bake strawberry cheesecake cups. We discussed the key ingredients, easy steps to prepare, and tips for the best texture. You can also explore fun variations and storage options for leftovers. This dessert is simple and can fit any occasion. Enjoy making this treat for friends or family. Your perfect cheesecake cups are just a few steps away!

No-Bake Strawberry Cheesecake Cups

Indulge in the perfect summer dessert with these No-Bake Strawberry Cheesecake Cups! Made with fresh strawberries, creamy cheesecake, and a buttery graham cracker crust, this easy recipe is ideal for gatherings or a sweet treat at home. In just 20 minutes, you can create delightful individual servings that will impress everyone. Ready to satisfy your sweet tooth? Click through to discover the full recipe and make your own delicious cheesecake cups today!

Ingredients
  

1 cup crushed graham crackers

4 tablespoons unsalted butter, melted

1 (8 oz) package cream cheese, softened to room temperature

1/2 cup powdered sugar

1 teaspoon vanilla extract

1 cup whipped cream (either store-bought or homemade)

1 cup fresh strawberries, diced into small pieces

Additional whole strawberries for garnish

Fresh mint leaves for garnish (optional)

Instructions
 

In a small mixing bowl, combine the crushed graham crackers with the melted butter. Stir until well mixed; the consistency should resemble wet sand.

    Take about 2 tablespoons of this graham cracker mixture and spoon it into the bottom of each cup or small glass. Gently press down to create an even crust layer.

      In a medium mixing bowl, use an electric mixer to beat the softened cream cheese until it is completely smooth and creamy.

        Gradually add in the powdered sugar and vanilla extract, continuing to mix until everything is well blended and there are no lumps.

          Carefully fold the whipped cream into the cream cheese mixture using a spatula, being gentle to maintain the airy texture. Stop once the mixture appears light and fluffy.

            Using a spoon, layer the cream cheese mixture over the graham cracker crust in each cup, filling them about halfway full.

              Evenly distribute the diced strawberries on top of the cream cheese layer in each cup, creating a colorful fruity layer.

                Spoon the remaining cream cheese mixture on top of the strawberries, filling the cups almost to the brim.

                  Finish with a final layer of diced strawberries on top, and garnish each cup with a whole strawberry and a fresh mint leaf if desired.

                    Cover each cup with plastic wrap and refrigerate for at least 2 hours to allow the flavors to meld together and the cheesecake to firm up.

                      Prep Time: 20 minutes | Total Time: 2 hours 20 minutes | Servings: 6

                        - Presentation Tips: Serve the cheesecake cups on a decorative tray for an elegant touch. For added visual appeal and texture, consider sprinkling some crushed graham crackers over the top before serving.

                          WANT TO SAVE THIS RECIPE?

                          Leave a Comment

                          Recipe Rating