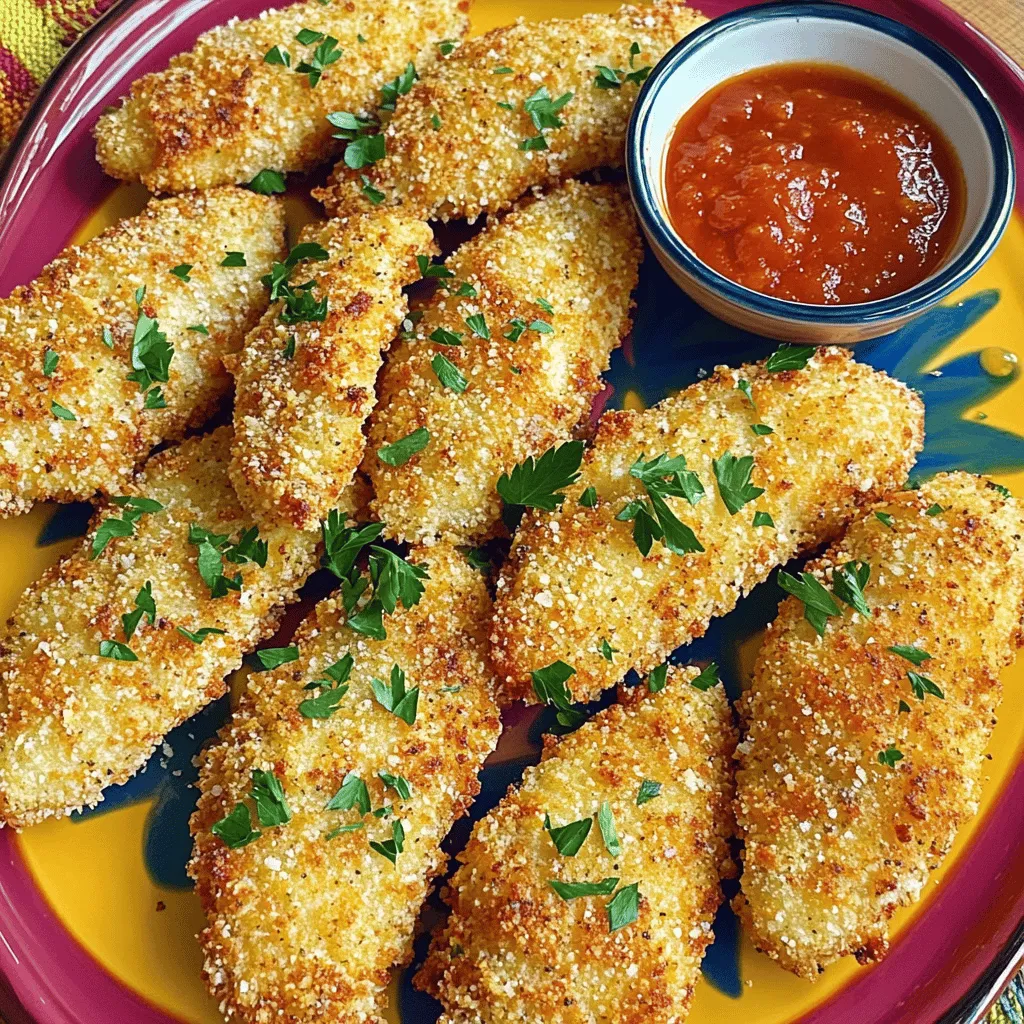
Craving a crunchy snack that’s both tasty and easy? You need to try my Oven-Baked Crispy Parmesan Chicken Tenders! They are simple to make and perfect for lunch or dinner. With a light, crispy coating and rich parmesan flavor, these tenders will soon become a family favorite. Let’s dive into the details and get you cooking these delicious bites!
Ingredients
List of Ingredients
To make the Oven-Baked Crispy Parmesan Chicken Tenders, gather the following ingredients:
– 1 pound chicken tenderloins
– 1 cup panko breadcrumbs
– ½ cup freshly grated Parmesan cheese
– 1 teaspoon garlic powder
– 1 teaspoon onion powder
– ½ teaspoon smoked paprika
– ½ teaspoon dried oregano
– Salt and freshly ground black pepper to taste
– 2 large eggs
– 1 tablespoon Dijon mustard
– Cooking spray or a drizzle of olive oil for greasing
Nutritional Information
These chicken tenders are not only tasty but also provide good nutrition. Each serving offers a balance of protein and healthy fats. Here’s a quick breakdown per serving:
– Calories: 350
– Protein: 30g
– Carbohydrates: 20g
– Fat: 15g
– Fiber: 1g
This makes them a filling choice for lunch or dinner.
Cooking Spray Alternatives
If you don’t have cooking spray, you can use olive oil. Here are a few options:
– Use a small drizzle of olive oil to coat the baking sheet.
– Brush the baking sheet with melted butter for extra flavor.
– Use coconut oil for a different taste.
These alternatives work well to keep the chicken tenders from sticking.
Step-by-Step Instructions
Preparing the Oven and Baking Sheet
First, set your oven to 400°F (200°C). This high heat helps the chicken turn crispy. While the oven heats, grab a baking sheet. Line it with parchment paper to keep the chicken from sticking. Lightly spray the sheet with cooking spray or drizzle a bit of olive oil over it. This step is key for a nice crust.
Mixing Dry and Wet Ingredients
In a medium bowl, combine the dry ingredients. Add 1 cup of panko breadcrumbs, ½ cup of grated Parmesan cheese, and the spices: 1 teaspoon each of garlic powder and onion powder, ½ teaspoon each of smoked paprika and dried oregano, plus salt and pepper to taste. Mix these well so the flavors blend. In a smaller bowl, whisk together 2 large eggs and 1 tablespoon of Dijon mustard. This mixture will help the breadcrumbs stick to the chicken.
Coating Chicken Tenders
Take each chicken tenderloin and dip it into the egg mix. Let any extra egg drip back into the bowl. Then, coat the tender in the breadcrumb mix. Press the crumbs onto the chicken gently. This helps them stick better. Once coated, place the tenders on your prepared baking sheet. After coating all the tenders, lightly spray or drizzle a bit of olive oil on top. This helps them turn golden brown while baking. Bake the chicken tenders for 15-20 minutes. Flip them halfway through for even crispiness. After baking, let them rest for a few minutes. This helps keep the chicken juicy before you serve.
Tips & Tricks
Achieving Maximum Crispiness
To get your chicken tenders super crispy, use panko breadcrumbs. They are light and airier than regular breadcrumbs. This gives a perfect crunch. Make sure to coat the tenders well. Press the breadcrumbs firmly onto the chicken. This helps them stick. A light spray of cooking oil before baking adds to the crunch. Flip the tenders halfway through baking. This ensures even crispiness all around.
Adjusting Spices for Flavor Enhancements
You can change the flavor by adjusting the spices. If you like heat, add cayenne pepper or chili powder. For a fresh taste, try adding lemon zest. Mix in some fresh herbs like thyme or basil for extra flavor. Tasting your breadcrumb mix is key. Make sure it has the right blend for your palate. Don’t forget to season your chicken with salt and pepper too. This builds a solid flavor base.
Serving Suggestions
Serve your chicken tenders on a colorful platter. Add a bowl of marinara or ranch for dipping. Fresh parsley can brighten the dish. For a fun twist, try them in a sandwich with lettuce and tomato. You can also pair them with a side salad or steamed veggies. They make a great meal for kids and adults alike.

Variations
Substituting Chicken Breast or Thighs
You can switch out chicken tenderloins for chicken breasts or thighs. Chicken breasts are leaner, while thighs are juicier. If you use breasts, cut them into strips. This helps them cook evenly. For thighs, trim off excess fat before cutting. Both options will still work great with the crispy coating. Adjust baking time if the pieces are thicker.
Using Different Cheeses
While Parmesan shines in this recipe, feel free to mix it up. You can try mozzarella for a gooey texture. Cheddar adds a sharp flavor that many love. Feta cheese gives a salty kick. Just remember, if you use softer cheeses, they might not crisp as well. Choose hard cheeses for the best crunch.
Gluten-Free Alternatives
For a gluten-free version, swap panko breadcrumbs with gluten-free options. Many brands offer gluten-free panko that tastes great. You can also use crushed cornflakes or almond flour as a coating. Both provide crunch and flavor. Just check the labels to ensure they are truly gluten-free. Enjoy your crispy chicken tenders without worry!
Storage Info
How to Properly Store Leftovers
Store any leftover chicken tenders in an airtight container. This keeps them fresh and tasty. Let them cool down first before sealing. You can store them in the fridge for about three days. If you want to keep them longer, consider freezing.
Reheating Techniques for Crispiness
To reheat and keep your chicken tenders crispy, use an oven or air fryer. Preheat your oven to 375°F (190°C) for about 10 minutes. Place the chicken tenders on a baking sheet. Heat for about 10-15 minutes. This will help them regain their crunch. If using an air fryer, set it to 375°F and cook for about 5-7 minutes.
Freezing Chicken Tenders
You can freeze these chicken tenders if you want to save some for later. Cool them completely before freezing. Place them in a single layer on a baking sheet and freeze for about 1 hour. Once they are solid, transfer them to a freezer bag. They can last for up to three months in the freezer. When ready to eat, bake them straight from frozen. Just add a few extra minutes to the cooking time.
FAQs
How long do oven-baked chicken tenders last?
Oven-baked chicken tenders stay tasty for about 3 to 4 days. Store them in an airtight container in the fridge. This keeps them fresh. If you notice any changes in smell or color, it’s best to toss them.
Can I pre-make these chicken tenders?
Yes, you can pre-make these chicken tenders! Coat the chicken and place them on a baking sheet. Cover the sheet with plastic wrap and store it in the fridge. You can bake them later. Just remember to add a few extra minutes to the baking time if they are cold.
What can I serve with crispy parmesan chicken tenders?
Crispy parmesan chicken tenders pair well with many sides. Here are some ideas:
– Fresh salad with a light vinaigrette
– Crispy fries or sweet potato fries
– Creamy mashed potatoes
– Roasted vegetables like broccoli or carrots
– Dipping sauces such as marinara or ranch
These options make your meal more fun and delicious. You can mix and match to suit your taste. Enjoy the versatility of this dish!
In this post, I shared how to make oven-baked chicken tenders. We covered the key ingredients, step-by-step instructions, and tips to ensure crispiness. You learned about variations, storage options, and answered common questions.
Remember, these chicken tenders are easy to customize and perfect for any meal. Keep experimenting with flavors and enjoy your tasty dishes!