Skip to content
DisclaimerTerms Of UseGDPR PolicyCookie Policy

eataroundit

  • Home
  • Drinks
  • Appetizers
  • Dinner
  • Dessert
  • About
  • Contact
  • Privacy Policy
DisclaimerTerms Of UseGDPR PolicyCookie Policy

NO-ING-IMG

To make Cheesy Spinach Artichoke Flatbread, you'll need the following items: - 1 pre-made flatbread or naan - 1 cup fresh spinach, roughly chopped - 1 cup canned artichoke hearts, drained and coarsely chopped - 1 cup cream cheese, softened to room temperature - 1/2 cup sour cream - 1 cup shredded mozzarella cheese - 1/2 cup grated Parmesan cheese, divided - 1 garlic clove, finely minced - 1 teaspoon fresh lemon juice - Salt and freshly ground black pepper, to taste - Olive oil, for brushing You can add some extra flavor with these optional ingredients: - Red pepper flakes, for a spicy kick This recipe serves four people. Each person can enjoy a couple of slices. If you plan for a crowd, just double the recipe. This flatbread makes a great snack or appetizer! Start by preheating your oven to 400°F (200°C). This step is key for a great bake. A hot oven helps the flatbread get crispy and the cheese melt just right. Grab a large bowl. Add the softened cream cheese and sour cream. Beat them together until they are smooth and creamy. This will be the base of your flatbread. Next, stir in the minced garlic and fresh lemon juice. Don’t forget to add salt and pepper to taste. Mix well to season it properly. Now, gently fold in the chopped spinach and artichoke hearts. Add the shredded mozzarella cheese and half of the grated Parmesan cheese. Mix until all the ingredients are combined perfectly. Take your pre-made flatbread or naan and place it on a lined baking sheet. This will help with easy cleanup later. Use a spatula or the back of a spoon. Spread the creamy spinach-artichoke mixture evenly over the flatbread. Leave about a half-inch border around the edges. Sprinkle the remaining grated Parmesan cheese on top. This will give a nice golden finish when baked. Now, lightly drizzle olive oil over the flatbread. If you want some heat, add red pepper flakes to taste. Finally, slide the baking sheet into the preheated oven. Bake for 15-20 minutes. You will know it’s done when the edges are crispy and the cheese is bubbly. After baking, let it cool for a couple of minutes. Then slice it into pieces before serving. Enjoy your delicious cheesy spinach artichoke flatbread! Start with soft cream cheese. This makes mixing easy. Beat it well with sour cream until it’s smooth. Add minced garlic and fresh lemon juice. This gives a nice flavor. Season with salt and black pepper. Taste as you go. You want a mix that is rich and creamy. Fold in the chopped spinach and artichokes gently. Add mozzarella and half of the Parmesan. This ensures even flavor throughout. Preheat your oven to 400°F (200°C). This is key for a crispy crust. Use parchment paper on your baking sheet. It keeps the flatbread from sticking. Spread the creamy mixture evenly on the flatbread. Leave a half-inch border around the edges. This allows the edges to get nice and crispy. Sprinkle the remaining Parmesan on top for a golden finish. Bake for 15-20 minutes. Watch for bubbling cheese and golden edges. A beautiful presentation makes a difference. Serve slices on a rustic wooden board. This adds warmth to your dish. Garnish with fresh parsley for color. A small dollop of sour cream on the side looks nice too. It invites people to dig in. Enjoy the compliments on your tasty flatbread! {{image_4}} You can make this flatbread gluten-free. Use gluten-free flatbread or naan instead of regular. Many stores sell gluten-free options. Check labels for safety. This allows everyone to enjoy this tasty dish. For a heartier meal, add protein. Cooked chicken, shrimp, or even bacon work well. Dice the protein into small pieces. Fold it into the creamy mixture before spreading it on the flatbread. This adds flavor and makes the flatbread more filling. Mix up the cheese for fun flavors. Try adding gouda or cheddar for a twist. You can also use cream cheese with herbs for extra taste. Experiment with your favorite cheeses. Each choice gives a new spin on this classic dish. You can store leftover cheesy spinach artichoke flatbread in the fridge. Make sure to wrap it tightly in plastic wrap or foil. This keeps it fresh and prevents it from drying out. It will last for about 3 days. If you want to keep it longer, consider freezing it. To freeze your flatbread, first let it cool completely. Then, wrap it in plastic wrap. After that, place it in a freezer-safe bag. Be sure to squeeze out as much air as possible. This prevents freezer burn. Your flatbread can stay in the freezer for about 2 months. When ready to eat, thaw it in the fridge overnight. Reheat your flatbread in the oven for the best taste. Preheat the oven to 350°F (175°C). Place the flatbread on a baking sheet. Heat it for about 10-15 minutes. This keeps the edges crispy and the cheese melty. If you're in a hurry, you can use the microwave, but the texture won't be as good. Just heat it for 1-2 minutes until warm. To make Cheesy Spinach Artichoke Flatbread from scratch, follow these steps: 1. Preheat your oven to 400°F (200°C). 2. In a bowl, mix 1 cup of cream cheese and 1/2 cup of sour cream until smooth. 3. Add 1 minced garlic clove and 1 teaspoon of fresh lemon juice. Season with salt and pepper. 4. Fold in 1 cup of chopped spinach, 1 cup of artichoke hearts, 1 cup of mozzarella cheese, and 1/4 cup of Parmesan cheese. 5. Spread your mixture on a flatbread, leaving a border. 6. Top with the remaining Parmesan cheese. 7. Drizzle olive oil on top and add red pepper flakes if you like spice. 8. Bake for 15-20 minutes until golden and bubbly. This method gives you a creamy, cheesy flatbread that is hard to resist! Yes, you can use frozen spinach. Just make sure to thaw it first. Squeeze out all the water to avoid a soggy flatbread. Frozen spinach is a great time-saver and still delivers good flavor. Just remember to chop it finely after thawing for the best texture. You can serve this flatbread with a fresh salad. A simple green salad or a Caesar salad works well. You can also pair it with a side of marinara sauce for dipping. For drinks, a crisp white wine or sparkling water complements this dish nicely. Enjoy your meal with friends and family! This blog post covered how to make Cheesy Spinach Artichoke Flatbread. We listed required and optional ingredients and portion sizes. Then, I shared step-by-step instructions, from preheating the oven to assembling your flatbread. Tips on perfecting the mixture and achieving the perfect bake help you succeed. Variations allow you to customize, while proper storage tips ensure freshness. Explore your creativity with this dish. Enjoy your delicious flatbread and share it with friends!

Cheesy Spinach Artichoke Flatbread Easy and Delicious

If you love cheesy goodness, you must try this Cheesy Spinach Artichoke Flatbread. It’s easy to make and tastes amazing!

- 2 ¾ cups shredded unsweetened coconut - 2/3 cup sweetened condensed milk - 1 teaspoon vanilla extract - 2 large egg whites - 1/4 teaspoon salt - 1 cup dark chocolate chips - 1 tablespoon coconut oil When I make chocolate dipped coconut macaroons, I start with shredded coconut. Using unsweetened coconut gives the best flavor. Sweetened condensed milk keeps them moist and sweet. A touch of vanilla extract adds warmth. The egg whites help bind the mixture together. Lastly, salt enhances the sweetness and flavor. - Toppings and garnishes - Flavor variations (e.g., almond extract or orange zest) You can add fun touches to your macaroons. Consider toppings like chopped nuts or a sprinkle of sea salt. For flavor, try almond extract or a hint of orange zest. These extras make your treats unique and special. 1. Preheat your oven to 325°F (160°C). Line a baking sheet with parchment paper. This makes it easy to remove the macaroons later. 2. In a large bowl, mix 2 ¾ cups of shredded coconut with 2/3 cup of sweetened condensed milk. Stir until the coconut is well coated and sticky. 1. Add 1 teaspoon of vanilla extract, 2 large egg whites, and 1/4 teaspoon of salt to the bowl. Mix well until everything is combined. 2. Use a tablespoon or a cookie scoop to form small mounds. Each mound should be about 1 to 2 inches wide. Place them on the baking sheet with 2 inches between each mound. 1. Bake the macaroons for 20-25 minutes. They are done when the tops turn golden brown. 2. Once baked, let them cool on the baking sheet for about 10 minutes. Then, move them to a wire rack to cool completely. 1. While the macaroons cool, melt 1 cup of dark chocolate chips with 1 tablespoon of coconut oil. Use a microwave-safe bowl. Heat in 30-second intervals and stir until smooth. 2. Dip the bottom of each macaroon in the melted chocolate. Allow any excess chocolate to drip off. Place the chocolate-dipped macaroons back on the wire rack. 3. For extra flair, drizzle more melted chocolate over each macaroon. Let the chocolate set at room temperature or refrigerate until hard. To get those lovely golden brown tops, keep an eye on your macaroons while they bake. Bake them at 325°F for 20-25 minutes. You want them to look golden, not burnt. Check them a few minutes before the time is up. If you find they are browning too quickly, you can cover them with foil. To prevent macaroons from sticking, use parchment paper on your baking sheet. This makes removal easy. You can also lightly grease the parchment for added safety. Be sure to space each mound about 2 inches apart for even baking. For melting chocolate, use a microwave-safe bowl. Add the dark chocolate chips and coconut oil. Heat them in 30-second bursts. Stir in between each burst until smooth. This helps avoid scorching the chocolate. If your chocolate is too thick, add a little more coconut oil. If it’s too thin, let it cool a bit before dipping. You want a nice coating that sticks but isn’t too runny. To make your macaroons look great, arrange them on a nice plate. A sprinkle of extra shredded coconut or cocoa powder adds flair. You can also drizzle some melted chocolate over the top for a fancy touch. Pair these macaroons with a cup of coffee or tea. The rich chocolate and sweet coconut go well with both. Enjoy this delightful treat with friends or on your own! {{image_4}} You can use different types of chocolate for dipping your macaroons. Milk chocolate offers a creamy, sweet taste. It pairs well with the coconut flavor. Dark chocolate gives a rich, bold taste, balancing the sweetness of the macaroons. If you prefer something sweeter, white chocolate is a great choice. It adds a smooth, sweet touch and makes the treats look beautiful. Adding mix-ins can take your macaroons to the next level. Chopped nuts add crunch and depth. Almonds or cashews work well with coconut. Dried fruits like cherries or apricots can add a sweet and chewy element. You can also infuse flavors using different extracts. Almond or coconut extract can give your macaroons a unique twist. Just a few drops can change the whole flavor. If you want a vegan option, you can replace sweetened condensed milk. Use coconut cream or a dairy-free condensed milk. For binding, egg whites can be swapped with flaxseed meal or chia seeds mixed with water. This gives a similar texture and holds the macaroons together. Check the ratios to ensure the right consistency. To keep your macaroons fresh, store them in an airtight container. This helps keep them moist. Place the container in a cool, dry space, away from sunlight. At room temperature, these treats can last about 4 to 5 days. If you want to store macaroons longer, consider the fridge. Place them in a sealed container to avoid moisture. They can last up to two weeks in the fridge. For freezing, wrap each macaroon in plastic wrap. Then place them in a freezer bag. They can stay good for up to three months. Thaw them in the fridge overnight before enjoying. To prevent the chocolate from melting, store the macaroons away from heat. If you see white streaks on the chocolate, that’s called blooming. It happens when chocolate changes temperature. Pack them with parchment paper between layers to avoid sticking. This keeps the chocolate coating perfect for serving. Macaroons trace back to Italy. They first appeared in a monastery in the 8th century. These sweet treats made their way to France through the nuns. They became a popular dessert there. Today, we know macaroons as chewy coconut delights. Yes, you can! To replace egg whites, use aquafaba. This is the liquid from canned chickpeas. Use three tablespoons of aquafaba for each egg white. It creates a similar texture. Your macaroons will still taste great! This recipe is already gluten-free. Shredded coconut is naturally gluten-free. Just ensure your coconut is not processed with gluten products. Check labels to be safe. Enjoy your tasty treat without worry! Dry macaroons can happen for a few reasons. First, you might have added too much coconut. Measure carefully! Second, ensure you mix well. This helps bind the ingredients. Finally, check your baking time. Overbaking can lead to dryness. You can use sweetened coconut. This will make your macaroons sweeter. Adjust the amount of sweetened condensed milk if desired. Taste as you go to find your perfect balance. Enjoy experimenting with flavors! In this blog post, we explored how to make chocolate dipped coconut macaroons. We covered the main and optional ingredients, step-by-step instructions, useful tips, and ideas for variations. The key to success lies in the right mix of coconut, chocolate, and a few simple steps. Try new flavors or storage tips to keep them fresh. Remember, this treat is adaptable and fun to make. Enjoy your baking journey and the delicious rewards that follow!

Chocolate Dipped Coconut Macaroons Easy Delightful Treat

If you’re craving a sweet treat that’s both easy to make and delicious, you’re in the right place! Chocolate Dipped

- 1 cup orzo pasta - 1 cup cherry tomatoes, halved - 1 medium cucumber, diced - 1 cup Kalamata olives, pitted and sliced - 1/2 medium red onion, finely chopped - 1/2 cup feta cheese, crumbled - 1/4 cup fresh parsley, finely chopped - 1/4 cup fresh mint, finely chopped - 3 tablespoons extra virgin olive oil - 2 tablespoons fresh lemon juice - Salt and freshly ground black pepper, to taste Orzo pasta is the star of this dish. It adds a nice texture. The cherry tomatoes bring sweetness and color. Cucumber adds a cool crunch. Kalamata olives give a salty depth. Red onion adds a sharp bite. Feta cheese brings creaminess and tang. Fresh herbs like parsley and mint give a bright flavor. Each ingredient plays a role in making this salad fresh and tasty. When making Greek Orzo Salad, always choose fresh produce. Look for ripe cherry tomatoes. They should be bright red and firm. Pick cucumbers that feel crisp and have smooth skin. For herbs, select vibrant parsley and mint. The fresher your ingredients, the better your salad will taste. Fresh ingredients not only enhance flavor but also boost nutrition. Start by boiling water in a large pot. Add salt to the water for flavor. When the water boils, add 1 cup of orzo pasta. Cook the orzo according to the package instructions. It usually takes about 8-10 minutes. You want it to be al dente, not too soft. Once cooked, drain the orzo in a colander. Rinse it under cold water to stop the cooking. This helps cool the pasta quickly. While the orzo cools, prepare the salad mix. Grab a large mixing bowl and add the fresh ingredients. Start with 1 cup of halved cherry tomatoes. Next, add 1 medium diced cucumber. Toss in 1 cup of sliced Kalamata olives. Then, add 1/2 medium finely chopped red onion. Finally, crumble in 1/2 cup of feta cheese. Don't forget to add 1/4 cup each of finely chopped fresh parsley and mint. These herbs add great flavor and freshness. In a small bowl, whisk together the dressing. Combine 3 tablespoons of extra virgin olive oil with 2 tablespoons of fresh lemon juice. Add a pinch of salt and freshly ground black pepper. Whisk it well until the mix is smooth. Once the orzo is cool, add it to the bowl with the salad mix. Drizzle the dressing over everything. Then, sprinkle in the chopped parsley and mint. Toss gently to combine all ingredients. Make sure everything is well mixed and coated in dressing. Taste the salad to see if it needs more flavor. You can add more salt, pepper, or lemon juice if needed. Adjust it until it tastes just right for you. To cook orzo just right, start with a large pot of water. Add a good amount of salt. This helps flavor the pasta. Bring the water to a rolling boil before adding the orzo. Cook it according to the package instructions, usually around 8-10 minutes. You want it al dente, which means it should still have a bit of a bite. Once done, drain the orzo in a colander. Rinse it under cold water. This stops the cooking and cools it down. Fresh herbs can really boost your Greek Orzo Salad. I like to use parsley and mint. They add a bright taste that pairs well with the feta. When chopping herbs, make sure to use a sharp knife. This helps keep the herbs fresh and flavorful. Add them right before serving to keep their color and taste vibrant. If you want to try other herbs, basil or dill also work well. To make your salad look great, serve it in a large, shallow bowl. This gives it a beautiful display. Add a few extra crumbles of feta on top for a pop of white. You can also add some fresh herb leaves as a garnish. A light drizzle of olive oil on top makes it shine. This not only looks nice but also adds extra flavor. A colorful salad is more inviting and makes your meal even more enjoyable. {{image_4}} You can add protein to Greek Orzo Salad to make it heartier. Grilled chicken works well. Simply cube cooked chicken and mix it in. For a plant-based option, try chickpeas. They add texture and protein. Just rinse and drain canned chickpeas before adding them to the salad. Both choices boost flavor and nutrition. While feta cheese is classic, you can try other cheeses. Goat cheese adds a creamy touch. If you prefer a sharper taste, use aged cheddar. Mozzarella is another great choice, offering a mild flavor. Experiment to find your favorite cheese that pairs well with the salad's fresh ingredients. This salad is versatile, allowing you to swap in seasonal veggies. In summer, use bell peppers or zucchini for crunch. In fall, add roasted butternut squash for warmth. Try blanching asparagus in spring for a fresh twist. These changes keep the salad exciting and highlight the best of each season's produce. To store your Greek orzo salad, place it in an airtight container. This keeps the salad fresh. Make sure to cool the salad before sealing it. This helps prevent moisture build-up. You can also separate the dressing and salad for better storage. This way, the salad stays crisp. When prepping this salad, consider making a big batch. It keeps well and is perfect for lunches. Store it in smaller containers for easy grab-and-go meals. You can also prepare the ingredients ahead of time. Just chop the veggies and herbs. Keep them in the fridge until you're ready to mix everything. In the fridge, Greek orzo salad lasts for about 3 to 5 days. However, it tastes best within the first 2 days. The flavors meld together, making each bite delightful. After 5 days, the veggies may lose their crunch. If you notice any off smells or slimy textures, it’s time to toss it. Yes, you can prepare Greek Orzo Salad ahead of time. This makes it great for meal prep or gatherings. Just cook the orzo and mix all the ingredients together. Store it in an airtight container in the fridge. The flavors will blend nicely overnight. However, it's best to add the herbs and dressing right before serving. This keeps the salad fresh and bright. If you need a feta substitute, try crumbled goat cheese or ricotta. These options give a creamy texture and a nice flavor. You can also use dairy-free cheese if you're vegan or lactose intolerant. Just remember, each cheese will change the taste a little. So choose one that fits your needs and taste. No, Greek Orzo Salad is not gluten-free. Orzo is made from wheat, so it contains gluten. If you want a gluten-free version, use gluten-free pasta instead. There are many options available now, like rice or corn pasta. These alternatives work well and keep the dish tasty and fun. This blog post covers all you need for a tasty Greek Orzo Salad. We went through key ingredients, freshness of produce, and cooking tips. You learned how to whip up the salad, dressing, and serve it well. Don't forget variations like adding protein or seasonal veggies for more flavor. Lastly, we reviewed how to store leftovers. Enjoy making this dish! It’s simple, tasty, and perfect for meal prep or sharing with friends.

Greek Orzo Salad With Feta Flavorful and Fresh Dish

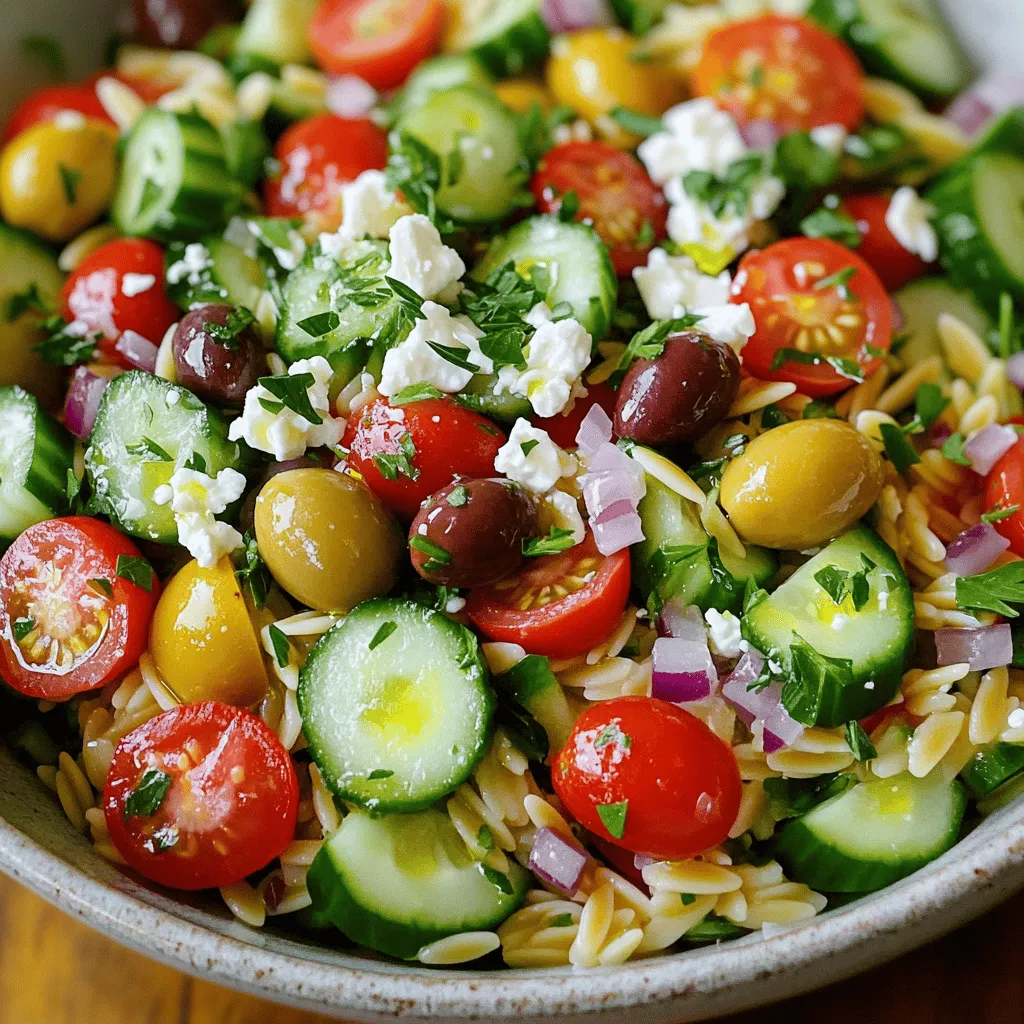
Looking for a tasty and fresh dish? Your quest ends here! Greek Orzo Salad with Feta is not just a

- 2 cups fresh strawberries, hulled and sliced - 1 cup heavy whipping cream - 8 oz cream cheese, softened to room temperature - 1/2 cup powdered sugar - 1 teaspoon pure vanilla extract - 1 cup graham cracker crumbs - 1/4 cup unsalted butter, melted - A pinch of sea salt This recipe has a fun mix of flavors. You will enjoy the sweet taste of strawberries with the creamy cheesecake. Each ingredient plays an important role. Fresh strawberries give a juicy, sweet flavor. Use ripe strawberries for the best taste. The heavy whipping cream adds fluffiness to the cake. It makes the cheesecake layer light and airy. Cream cheese is key for that rich cheesecake taste. Make sure it’s soft for easy mixing. Powdered sugar brings sweetness to the cream cheese. It blends well without any lumps. Pure vanilla extract adds depth and warmth. I suggest using real vanilla for the best flavor. The graham cracker crumbs form a crunchy crust. They add texture and a nice contrast to the creaminess. Unsalted butter helps bind the crust together. It gives it a rich flavor without being too salty. A pinch of sea salt enhances the sweetness of the whole cake. By using these ingredients, you create a delightful dessert that everyone will love. To start, grab a medium mixing bowl. Combine the graham cracker crumbs, melted butter, and a pinch of salt. Mix it well until it feels like damp sand. Next, take an 8x8-inch dish and press this mixture firmly into the bottom. This will be your crust. Now, move to a large mixing bowl. Use an electric mixer to beat the softened cream cheese until it is smooth. Slowly add the powdered sugar and vanilla extract. Keep mixing until everything is creamy and lump-free. In another bowl, pour in the heavy whipping cream. Use an electric mixer to whip it until stiff peaks form. This means it will hold its shape when you lift the beaters. Gently fold the whipped cream into the cream cheese mixture. Be careful not to deflate the whipped cream. Take your prepared crust and evenly distribute the sliced strawberries over it. Next, spoon half of the cheesecake mixture on top of the strawberries. Use a spatula to smooth it out evenly. Now, add a second layer of sliced strawberries on top of the cheesecake mixture. Then spread the remaining cheesecake mixture over these strawberries. Smooth it out gently so that the strawberries are fully covered. Cover the dish with plastic wrap or a lid. Place it in the refrigerator for at least 4 hours. If you want the best results, let it chill overnight. This helps it set perfectly. Using cold cream and a cold bowl is key for great whipped cream. Cold ingredients whip up better, giving you a light and fluffy texture. I always chill my bowl and beaters for about 15 minutes before starting. This small step makes a big difference. When you whip the cream, watch for stiff peaks. This means the cream holds its shape well. Once you reach that point, gently fold the whipped cream into the cream cheese mixture. Be careful not to mix too hard. The goal is to keep that light fluffiness. Garnishing your cake with extra strawberries adds color and freshness. You can slice some berries and arrange them on top. A whole strawberry on each slice looks fancy and fun! Pair your slices with fresh mint leaves for a nice touch. The mint adds a burst of flavor that fits well with the creamy cheesecake. Enjoy your dessert with a cup of tea or coffee for a perfect treat! {{image_4}} You can switch up the strawberries. Try blueberries or raspberries instead. Both fruits offer sweet and tangy flavors. Blueberries add a burst of juiciness. Raspberries give a lovely tartness. You can layer them just like strawberries. This keeps the cake fresh and fun. If you need gluten-free options, use crushed gluten-free cookies. They give a nice crunch and hold up well. You can also use chocolate cookies for a richer taste. This twist on the crust adds a fun chocolate flavor. Experiment with different cookies to find your favorite. Want to boost the taste? Add lemon zest to the cream cheese mix. This gives a bright, zesty flavor that pairs well with the fruit. You can also drizzle chocolate on top. Melt some chocolate and let it cool slightly. Drizzle it over the cake for a special touch. Both ideas make your dessert even more delicious! To keep your Strawberry Cheesecake Icebox Cake fresh, use these methods: - Refrigerate: Cover the cake with plastic wrap or a lid. This keeps it fresh in the fridge. - Freeze: If you want to store it longer, cut slices and wrap each piece in plastic wrap. Place the wrapped pieces in a freezer-safe bag. This helps prevent freezer burn. When stored properly in the fridge, this cake stays fresh for about 3 to 5 days. If you freeze it, you can enjoy it for up to 2 months. Just remember, the taste and texture are best within the first month. If you've frozen your cake, defrost it safely: - In the fridge: Move the cake to the fridge a few hours before you want to eat it. This keeps it cold and tasty. - Room temperature: You can also let it sit out for about 30 minutes. This helps bring back its creamy texture. Avoid using a microwave, as it can make the cake soggy. Yes, you can make this cake ahead of time. I often prepare it a day before. This lets the flavors blend well. It also saves time for busy days. When you make it ahead, just store it in the fridge, covered. Yes, chilling is very important. It helps the cake set properly. The cream cheese mixture firms up when cold. This gives the cake a nice texture. If you skip chilling, the cake may be too soft. I recommend chilling it for at least four hours. For the best results, chill it overnight. You can use low-fat cream cheese, but it may change the taste. The cake might be less creamy and rich. Full-fat cream cheese gives a better flavor and texture. If you want to use low-fat, try adding a bit of heavy cream for richness. This recipe brings together fresh strawberries, creamy goodness, and a tasty crust. You can easily prepare it step by step, allowing layers of flavor to blend. Remember to chill your cake for the best texture and taste. Don’t hesitate to try other fruits or crusts to make it your own. With these tips, you can create a dessert everyone will love. Enjoy making this delightful treat and impress your friends and family!

Strawberry Cheesecake Icebox Cake Delightful Recipe

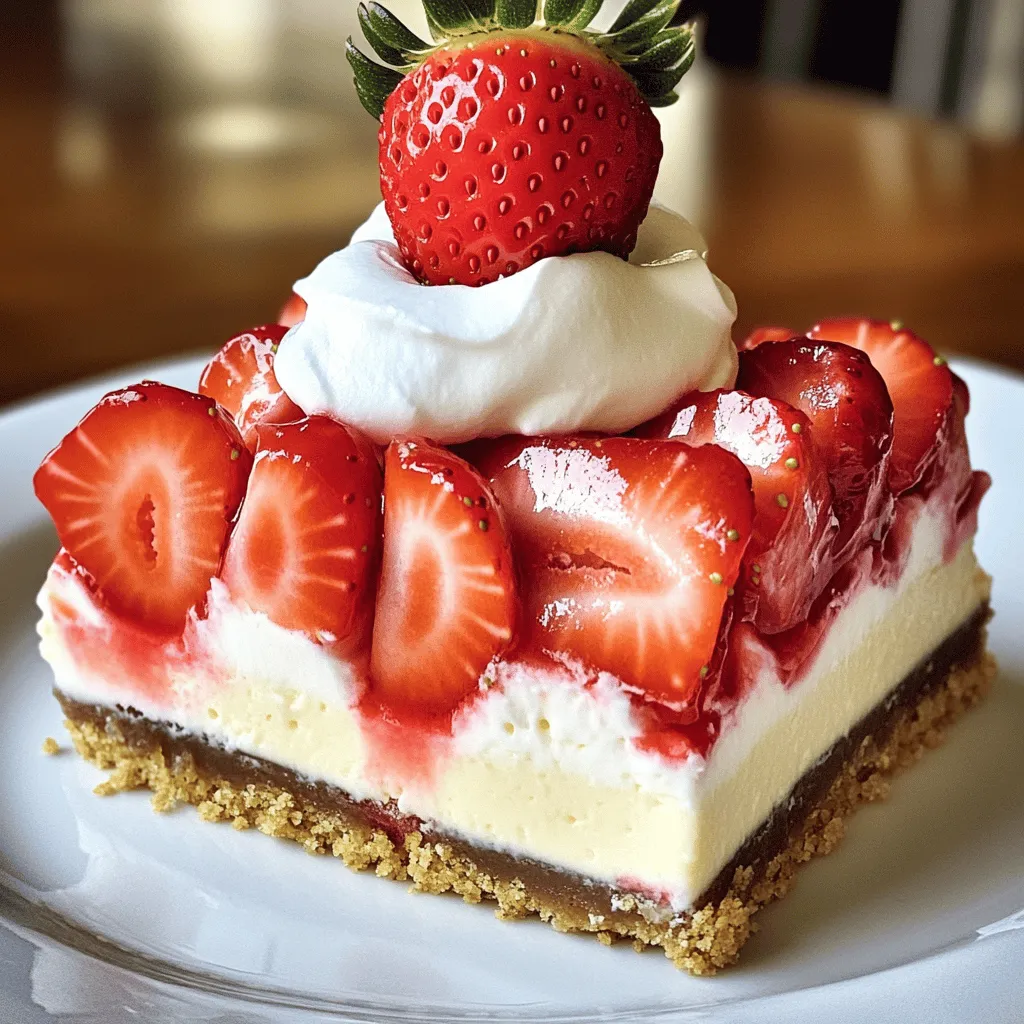
Are you ready for a dessert that’s as easy as it is delicious? This Strawberry Cheesecake Icebox Cake will wow

To make honey garlic butter roasted carrots, you will need the following ingredients: - 1 lb (450 g) baby carrots (or regular carrots, peeled and cut into 1-inch pieces) - 3 tablespoons unsalted butter - 2 tablespoons honey - 4 cloves garlic, minced finely - 1 teaspoon fresh thyme leaves (or ½ teaspoon dried thyme) - Salt and freshly ground black pepper to taste - Fresh parsley, chopped for garnish (optional but recommended) You will find these tools helpful for your cooking: - Oven - Baking sheet - Parchment paper - Small saucepan - Mixing bowl - Stirring spoon - Knife and cutting board If you need to make changes, here are some options: - Instead of baby carrots, use regular carrots. Just peel and cut them. - You can swap unsalted butter with olive oil for a dairy-free option. - Maple syrup can replace honey for a different sweet taste. - If you don't have fresh thyme, use dried thyme or omit it. These ingredients and tools will help you create a dish that is simple, tasty, and full of flavor. Enjoy the process! Start by prepping your oven. Preheat it to 400°F (200°C). This helps the carrots roast well. Next, gather your ingredients. You will need baby carrots, unsalted butter, honey, garlic, thyme, salt, and pepper. If you don’t have baby carrots, use regular ones. Just peel and cut them into 1-inch pieces. Now, melt the butter in a small saucepan over medium heat. Watch it closely as it starts to bubble. Once melted, add the minced garlic and honey. Stir this mix well. Let it cook for about one minute, stirring often. This keeps the garlic from burning. After a minute, take the pan off the heat. Add fresh thyme, salt, and pepper. Mix everything together to spread the flavors evenly. In a large mixing bowl, place your coated carrots. Pour the honey garlic butter over them. Toss the carrots until they are fully covered. This step ensures that every bite is flavorful. Next, prepare a baking sheet by lining it with parchment paper. This makes for easy cleanup later. Spread the carrots out in a single layer. This allows them to roast evenly. Now, place the baking sheet in your hot oven. Roast the carrots for 25-30 minutes. Halfway through, take them out and gently toss them. This helps them caramelize and cook evenly. You want them tender and golden brown. Once the time is up, remove the baking sheet from the oven. Let the carrots cool for a few minutes. This helps them hold their shape. For a fresh touch, chop some parsley. Sprinkle it on top of the carrots just before serving. This adds color and flavor. Enjoy your tasty honey garlic butter roasted carrots! To roast carrots well, start with fresh ones. Baby carrots are great, but you can use regular ones. Just peel and cut them into 1-inch pieces. Uniform size helps them cook evenly. Preheat your oven to 400°F (200°C). This heat is key for a good roast. Line your baking sheet with parchment paper. It makes cleanup easier and helps the carrots roast better. Caramelization gives carrots a sweet, rich flavor. To get this, coat the carrots in honey garlic butter well. Spread them in a single layer on the sheet. If they crowd each other, they won't brown well. Toss them halfway through roasting. This helps them brown evenly. Look for a golden color and a tender texture. The outside should be slightly crispy, while the inside stays soft. You can change the flavor of your carrots easily. Add spices like chili flakes for heat or lemon zest for brightness. Consider using maple syrup instead of honey for a different sweetness. Fresh herbs like rosemary or dill can also work well. If you want a nutty flavor, sprinkle some toasted nuts on top before serving. Each twist can make your dish unique and tasty! {{image_4}} You can change the carrots for other veggies. Try parsnips for a sweet twist. Brussels sprouts add a nice crunch. Sweet potatoes bring a hearty flavor. Broccoli or cauliflower can work too. Just cut them to a similar size for even cooking. You can make these carrots spicy. Add a pinch of red pepper flakes for heat. Want a sweeter taste? Use maple syrup instead of honey. You can also add citrus zest for brightness. Try lemon or orange to lift the flavors. Making this dish vegan is easy. Swap butter for coconut oil or vegan butter. Use agave syrup instead of honey for sweetness. This keeps it plant-based and still tasty. For a gluten-free version, this recipe is already safe. Enjoy it without any changes if you need gluten-free meals. To keep your leftover honey garlic butter roasted carrots fresh, let them cool first. Once they are cool, place them in an airtight container. Make sure to store them in the fridge. They stay good for about 3 to 5 days. If you want to keep them longer, freezing is a great option. When you're ready to enjoy the carrots again, you can reheat them easily. The oven works best. Preheat your oven to 350°F (175°C). Spread the carrots on a baking sheet and warm them for about 10-15 minutes. This keeps them tasty and maintains their texture. You can also use a microwave. Just warm them in short bursts of 30 seconds until they are hot. If you want to freeze your leftover carrots, place them in a freezer-safe bag or container. They can last up to 3 months in the freezer. When you're ready to eat them, thaw them in the fridge overnight. Then, reheat them as mentioned above. This way, you can enjoy this delicious dish even later! You can serve these carrots as a side dish with many meals. They pair well with roasted chicken, grilled steak, or baked fish. You can also enjoy them with quinoa or rice for a tasty vegetarian meal. Adding them to a holiday feast makes a colorful, sweet addition. Roast the carrots for 25-30 minutes at 400°F (200°C). Halfway through, toss them gently. This helps them cook evenly. You want them tender but not mushy. Check for doneness by piercing a carrot with a fork. If it goes in easily, they are ready! Yes, you can prepare these carrots in advance. You can mix the honey garlic butter and coat the carrots a few hours ahead. Just store them in the fridge. When you are ready to roast, take them out and let them sit at room temperature for about 15 minutes before cooking. This helps them roast evenly. Roasting carrots is simple and delicious. I’ve shared the best ingredients, tools, and methods to make it easy. You can try different flavors and even use other veggies. Storing leftovers is simple, too. Remember, you can always adjust to fit your diet. Cooking can be fun and tasty with these tips. Enjoy your time in the kitchen and the great meals you create!

Honey Garlic Butter Roasted Carrots Simple and Tasty

Are you ready to transform simple carrots into a flavorful dish? My Honey Garlic Butter Roasted Carrots bring sweet and

To make this delicious dish, you will need the following main ingredients: - 1 pound large shrimp, peeled and deveined - 1 cup all-purpose flour - 2 large eggs, beaten - 1 cup unsweetened shredded coconut - 1 cup panko breadcrumbs - 1 teaspoon garlic powder - 1 teaspoon paprika - 1/2 teaspoon salt - 1/2 teaspoon freshly ground black pepper - Coconut oil spray, for greasing - Lime wedges, for serving These ingredients create a crispy and flavorful coating for the shrimp. The combination of coconut and panko gives a nice crunch. You can enhance your coconut shrimp with these optional ingredients: - A dash of cayenne pepper for heat - Fresh herbs like cilantro for garnish - A touch of lemon zest for brightness - Sweet chili sauce for dipping These extras can elevate the flavor and presentation. Each adds a unique twist that can impress your guests. When picking shrimp, look for these tips: - Choose shrimp that smell clean and ocean-like. - Check for a firm texture; it should not feel mushy. - Look for a shiny and translucent appearance. - Avoid shrimp with black spots or a dull color. Fresh shrimp can make a big difference in taste. Take your time to select the best shrimp for your dish. Start by rinsing your shrimp under cold water. This step cleans them well. Use paper towels to dry each shrimp. Dry shrimp help the coating stick better. Set up three bowls for breading. In the first bowl, add 1 cup of all-purpose flour. In the second bowl, place 2 beaten eggs. In the third bowl, mix 1 cup of unsweetened shredded coconut, 1 cup of panko breadcrumbs, 1 teaspoon of garlic powder, 1 teaspoon of paprika, 1/2 teaspoon of salt, and 1/2 teaspoon of black pepper. Combine these ingredients well. Preheat your air fryer to 380°F (193°C) for about 5 minutes. While it heats, organize your breaded shrimp on a plate. Lightly spray the air fryer basket with coconut oil spray to keep the shrimp from sticking. Arrange shrimp in a single layer, making sure not to crowd them. This helps them cook evenly. Air fry for 8-10 minutes, flipping them halfway through. Watch them carefully; they should turn golden brown and crispy. Once done, let them rest for one minute before serving. For a fresh twist, add lime wedges for squeezing over the shrimp. To achieve that perfect crispiness, start with dry shrimp. Wet shrimp won't hold the coating well. Pat each shrimp with a paper towel before breading. This extra step makes a big difference. Also, use panko breadcrumbs. They are light and airy, giving your shrimp a crunchier texture. Mix in unsweetened shredded coconut. This adds flavor and enhances the crispiness. Coating fall-off can ruin your dish. To prevent this, dredge each shrimp properly. First, coat it in flour, then dip it in the beaten eggs. Finally, roll it in the coconut-panko mix. Press the coating down gently. This helps it stick better. Avoid overcrowding the air fryer basket. Space each shrimp out to ensure even cooking. This keeps the coating intact and crispy. Not all air fryers cook the same. Some models may need longer or shorter times. Generally, cook your shrimp for 8-10 minutes at 380°F (193°C). Flip them halfway through. This promotes even browning. Keep an eye on your shrimp. Look for a golden brown color. If your air fryer runs hot, check them a minute early. Adjust as needed for the best results. {{image_4}} To add some heat to your shrimp, use spices. Mix in cayenne pepper or chili powder with the coconut-panko mixture. Start with a small amount and taste as you go. You can also use hot sauce in the egg wash for an extra kick. This spicy twist will make your shrimp even more exciting! For a gluten-free version, swap all-purpose flour for almond flour or gluten-free flour. Use gluten-free panko breadcrumbs instead of regular ones. Be sure to check labels to confirm they are gluten-free. This way, everyone can enjoy your tasty shrimp without worry. Dipping sauce brings out the best in coconut shrimp. Instead of sweet chili sauce, try a mango salsa or a spicy aioli. You can mix mayonnaise with sriracha for a creamy sauce. For a tangy touch, whip up a lime yogurt dip. These sauces will surely impress your guests and enhance the shrimp flavors! To store leftover coconut shrimp, let them cool first. Place them in an airtight container. Make sure the container is sealed tightly to keep moisture out. You can store them in the fridge for up to three days. Avoid stacking the shrimp on top of each other to prevent sogginess. When you are ready to enjoy your leftover shrimp, use the air fryer for the best taste. Preheat the air fryer to 350°F (175°C). Place the shrimp in a single layer in the basket. Heat them for about 5 minutes or until crispy. This method helps to keep the shrimp crunchy, just like when they were first cooked. If you want to freeze coconut shrimp, prepare them first as usual. After breading, lay them out on a baking sheet. Freeze them for about 1-2 hours until firm. Then, transfer the shrimp to a freezer bag. Label the bag with the date. You can freeze them for up to three months. When ready to cook, you can air fry them straight from the freezer. Just add a few minutes to the cooking time to ensure they are cooked through. Yes, you can use frozen shrimp. Just remember to thaw them first. Place the shrimp in cold water for about 15-20 minutes. After thawing, rinse and pat them dry. This step helps the coating stick better. If you skip this step, the shrimp may not turn out as crispy. Air Fryer Coconut Shrimp pairs well with many sides. Here are a few ideas: - Rice: Coconut rice adds more flavor. - Salad: A fresh green salad balances the dish. - Dipping sauces: Sweet chili sauce or lime aioli works great. - Vegetables: Roasted or steamed veggies add color. Feel free to mix and match. Your shrimp will be the star of the meal. To check if shrimp are cooked, look for a few signs: - Color: They should be opaque and pink. - Shape: Cooked shrimp curl into a C shape. - Time: Cooking takes about 8-10 minutes in the air fryer. If you are unsure, use a food thermometer. Shrimp should reach an internal temperature of 120°F (49°C). Enjoy your perfectly cooked shrimp! In this post, we covered how to make Air Fryer Coconut Shrimp. We discussed main and optional ingredients, tips for fresh shrimp, and step-by-step cooking instructions. You learned tricks for perfect crispiness, storage methods, and fun variations to try. Air frying shrimp is quick and easy. You can adjust flavors to suit your taste. Whether you want spicy or gluten-free options, the sky’s the limit. Enjoy your delicious coconut shrimp anytime by storing or freezing leftovers!

Air Fryer Coconut Shrimp Crispy and Flavorful Treat

If you’re craving a crispy, flavorful treat, you’ve found the right recipe! My Air Fryer Coconut Shrimp combines sweet coconut

To make Gingerbread Latte Cookies, you need these ingredients: - 2 1/4 cups all-purpose flour - 1 teaspoon baking soda - 1 teaspoon ground ginger - 1 teaspoon ground cinnamon - 1/2 teaspoon ground nutmeg - 1/2 teaspoon ground cloves - 1/2 teaspoon salt - 3/4 cup unsalted butter, softened - 1 cup packed brown sugar - 1/4 cup granulated sugar - 1 large egg - 2 teaspoons pure vanilla extract - 1/4 cup strong brewed coffee, cooled - 1/4 cup unsulfured molasses - Optional: 1 cup white chocolate chips for drizzle You can make some swaps if you need. For the flour, try whole wheat flour for a nutty flavor. If you don’t have brown sugar, you can mix white sugar with a bit of molasses. Use coconut oil instead of butter for a dairy-free option. If you don't drink coffee, substitute it with milk or a coffee substitute. You can also skip the white chocolate drizzle if you prefer a less sweet treat. Select fresh spices for the best flavor. Check the butter to ensure it's unsalted and soft. Fresh molasses adds richness, so avoid old bottles. For coffee, use a strong brew you enjoy drinking. Lastly, always choose pure vanilla extract over imitation for a more natural taste. These small choices make a big impact on your cookies! Before you start, gather all your ingredients and tools. This will make your baking easier. You need flour, spices, sugars, butter, and coffee. Make sure your butter is soft for easy mixing. Preheat your oven to 350°F (175°C) and line your baking sheets with parchment paper. This helps your cookies bake evenly and not stick. 1. Mix Dry Ingredients: In a medium bowl, stir together the flour, baking soda, ginger, cinnamon, nutmeg, cloves, and salt. This mix gives the cookies their warm gingerbread flavor. 2. Cream Butter and Sugars: In a large bowl, use an electric mixer to beat the softened butter, brown sugar, and granulated sugar. Mix until it becomes light and fluffy, about 2-3 minutes. 3. Add Wet Ingredients: Next, add the egg, vanilla, coffee, and molasses. Mix until everything is smooth and well combined. 4. Combine Mixtures: Gradually add the dry mix into the wet mix. Stir just until you see no flour. Avoid overmixing to keep your cookies soft. 5. Shape the Cookies: Use a cookie scoop or tablespoon to drop rounded dough balls on the baking sheets. Space them about 2 inches apart. 6. Bake: Place the sheets in the oven and bake for 10-12 minutes. The edges should be set, and the centers should stay soft. 7. Cool Down: After baking, let the cookies cool on the sheets for 5 minutes. Then, move them to a wire rack to cool completely. 8. Optional Drizzle: If you want, melt white chocolate in the microwave. Drizzle it over the cooled cookies for a sweet finish. Baking at 350°F (175°C) is key for soft cookies. Check them at the 10-minute mark. If the edges are firm, they are ready. Remember, the centers should still be soft; they will firm up as they cool. Enjoy the warm, spicy aroma that fills your kitchen! To bake the best gingerbread latte cookies, follow these simple tips: - Use room temperature butter: This helps create a light and fluffy dough. - Measure flour correctly: Spoon flour into your measuring cup and level it off. Avoid packing it down. - Don’t overmix: Mix until just combined to keep cookies soft and chewy. Here are some common mistakes I see often: - Skipping the parchment paper: This can lead to cookies sticking and uneven baking. - Baking too long: Check your cookies at the lower end of the baking time. They should look set but soft in the middle. - Not cooling properly: Let cookies cool on the baking sheet for a few minutes first. This helps them firm up. Want to take your cookies to the next level? Try these ideas: - Add espresso powder: A teaspoon can boost the coffee flavor. - Mix in spices: A pinch of cardamom or allspice adds warmth and depth. - Use flavored extracts: Almond or hazelnut extracts can add a nice twist. These tips will help you create the perfect gingerbread latte cookies. Enjoy your baking! {{image_4}} You can switch up the spices to create new flavors. Try adding more cinnamon for warmth or increase the ginger for a kick. You can also mix in a teaspoon of pumpkin spice for a fall twist. Adding a splash of almond extract will give a nutty touch. If you love chocolate, fold in some cocoa powder to the dough for a chocolatey gingerbread cookie. To make these cookies gluten-free, use a gluten-free flour blend instead of all-purpose flour. You can also replace the egg with a flaxseed meal. Just mix one tablespoon of flaxseed with three tablespoons of water and let it sit until it thickens. For a vegan option, swap the butter for coconut oil or vegan butter. Use a plant-based milk instead of brewed coffee for the coffee flavor. You can get creative with toppings. Instead of white chocolate drizzle, use dark chocolate for a richer taste. Chopped nuts like pecans or walnuts add crunch. For a fruity twist, consider adding dried cranberries or raisins. You can even sprinkle some coarse sea salt on top for a sweet-salty contrast. These small changes can make your gingerbread latte cookies unique and exciting! After baking, let your cookies cool completely. This helps keep them soft. Store your cookies in an airtight container. You can use a cookie jar or a plastic bag. Keep them at room temperature for the best taste. If you want them to stay soft, add a slice of bread to the container. The bread adds moisture, which keeps your cookies fresh. You can freeze both cookie dough and baked cookies. To freeze the dough, scoop it into balls and place them on a baking sheet. Freeze them for about an hour, then transfer them to a plastic bag. This way, you can bake fresh cookies whenever you want. For baked cookies, let them cool, then wrap them tightly in plastic wrap. Place them in a freezer-safe bag. They will stay fresh for up to three months. Stored at room temperature, these cookies last about a week. If you freeze them, they can last up to three months. Always check for any signs of spoilage before eating. If they smell off or look dry, it’s best to toss them. Enjoy your gingerbread latte cookies fresh or from the freezer for a cozy treat anytime! Yes, you can make gingerbread latte cookies in advance. This makes holiday baking easier. You can prepare the dough and keep it in the fridge. Chill the dough for up to three days. This helps the flavors meld and deepens the taste. When you are ready, just scoop and bake. To make the cookie dough ahead of time, follow the recipe steps until mixing the dry and wet ingredients. After mixing, wrap the dough in plastic wrap. Store it in the fridge for up to three days. For longer storage, freeze the wrapped dough. It can last up to three months in the freezer. Thaw it in the fridge before baking. To keep cookies fresh, store them in an airtight container. Layer parchment paper between the cookies to avoid sticking. Keep the container at room temperature for up to a week. If you want to store them longer, freeze the cookies. Wrap them well in plastic wrap and place them in a freezer bag. This way, you can enjoy these treats anytime! This post covered how to make gingerbread latte cookies from start to finish. We discussed the best ingredients and their swaps. We walked through each baking step, with tips for perfect cookies. Variations for different diets and flavor twists were explored. Finally, I shared tips for storage and freshness. Baking cookies is fun and rewarding. Follow these steps, and you’ll enjoy tasty treats!

Gingerbread Latte Cookies Scrumptious Holiday Treat

Get ready to jingle your taste buds with my Gingerbread Latte Cookies! This scrumptious holiday treat blends warm spice with

- 1 cup cream cheese, softened to room temperature - 1 cup canned pumpkin puree (not pie filling) - ½ cup powdered sugar (adjust to taste) - 1 teaspoon pure vanilla extract - 1 teaspoon pumpkin pie spice - ½ teaspoon ground cinnamon - ¼ cup heavy cream, chilled The main ingredients in this dip create the perfect blend of flavors. Cream cheese gives it a smooth base. Canned pumpkin puree adds that warm, fall taste. Powdered sugar sweetens the dip just right. Vanilla extract brings a lovely aroma. Pumpkin pie spice and ground cinnamon add cozy spice notes. Heavy cream makes the dip light and fluffy once whipped. - Graham crackers - Crisp apple slices - Salty pretzels For dippers, I love using graham crackers for their sweetness. Crisp apple slices give a nice crunch and freshness. Salty pretzels add a fun contrast to the sweet dip. You can mix and match for a fun platter. Each dipper enhances the flavor of the cheesecake dip. Enjoying different textures makes it even more fun! Start by taking a large bowl. Add 1 cup of softened cream cheese and 1 cup of canned pumpkin puree. Use a hand mixer to blend them on medium speed. Mix until it’s smooth and creamy. You don’t want any lumps. Next, add ½ cup of powdered sugar, 1 teaspoon of pure vanilla extract, 1 teaspoon of pumpkin pie spice, and ½ teaspoon of ground cinnamon. Mix on low speed until all ingredients blend well. This creates a rich and flavorful base for your dip. In a separate bowl, pour in ¼ cup of chilled heavy cream. Use a mixer to whip it until stiff peaks form. This means the cream holds its shape when you lift the beaters. The whipped cream adds a light texture to your dip. Now, gently fold the whipped cream into the pumpkin mixture using a spatula. Be careful here; you want to keep the whipped cream fluffy. This will make your dip light and airy. Taste your dip. If you want it sweeter, add more powdered sugar. For extra spice, add a pinch of pumpkin pie spice. Once mixed, transfer the dip into a decorative serving bowl. Cover it with plastic wrap and chill in the refrigerator for at least 30 minutes. This step is key. Chilling helps the flavors meld together and makes the dip firmer. When you are ready to serve, arrange an enticing platter with your choice of dippers. Graham crackers work great for sweetness. Crisp apple slices add a fresh crunch. Salty pretzels give a nice contrast. For an added touch, you can garnish the dip with a sprinkle of ground cinnamon or a drizzle of honey. This will make your dip not only tasty but also visually appealing. To get the best texture, start with softened cream cheese. This helps it mix smoothly with the pumpkin. Cold cream cheese can create lumps, which you want to avoid. Mix both cream cheese and pumpkin well until creamy. When whipping the heavy cream, use a clean bowl and beaters. Whip until stiff peaks form. This means the cream holds its shape. Be careful when folding it into the pumpkin mix. Use a spatula and fold gently. This keeps the dip light and fluffy. Adjusting sweetness and spice is easy. Start with ½ cup of powdered sugar, then taste. If you like it sweeter, add more sugar. If you want a stronger spice flavor, add a pinch of pumpkin pie spice. Remember, you can always add but not take away. Presentation makes your dip even more inviting. Sprinkle ground cinnamon on top for color. You can also drizzle honey for extra sweetness. Use bright plates or bowls to make the dip stand out. Arrange your dippers around the dip for an eye-catching display. {{image_4}} You can change the flavor of your dip easily. Want a twist? Try adding chocolate or caramel. Mix in some chocolate syrup or melted caramel for a sweet surprise. These flavors pair well with pumpkin. You can also make a dairy-free version. Use dairy-free cream cheese and coconut cream instead of heavy cream. This change keeps the dip creamy and tasty without dairy. Fall brings more than just pumpkin. You can add other spices to change things up. Try nutmeg or allspice for a warm taste. A hint of ginger can also brighten the flavor. These spices add depth and make the dip even cozier for chilly days. Dippers can change the fun of your dip. Instead of graham crackers, use animal crackers for a playful touch. Fresh pear slices add a sweet crunch. For a savory option, try cheese crisps or tortilla chips. Even pretzel bites work great. Each dipper adds its own flavor to the dip, making every bite new and exciting. To keep your pumpkin spice cheesecake dip fresh, store it in an airtight container. This helps prevent it from absorbing other flavors in your fridge. Make sure to cover the dip with plastic wrap first for extra protection. Refrigerate it right after serving. This way, it stays fresh and tasty for later. Yes, you can freeze pumpkin spice cheesecake dip. However, the texture may change when thawed. To freeze, put the dip in a freezer-safe container. Leave some space at the top, as it may expand. When you're ready to eat, thaw it in the fridge overnight. Stir well before serving to help restore its creamy texture. In the fridge, your pumpkin spice cheesecake dip lasts about 3 to 5 days. Always check for signs of spoilage, like a change in smell or texture. If it looks or smells off, it’s best to toss it. Keeping it stored well helps maintain its sweet and spicy flavor. Pumpkin spice cheesecake dip is a smooth, creamy dessert. It blends pumpkin puree, cream cheese, and warm spices. The dip tastes sweet and rich, perfect for fall. You can enjoy it with various dippers. Yes, you can prepare this dip ahead of time. Make it and store it in the fridge for up to two days. Just cover it tightly with plastic wrap. This allows the flavors to blend nicely. You can serve it cold or let it sit at room temperature. Yes, this recipe is nut-free as written. Ensure your dippers are also nut-free. You can use graham crackers, apple slices, or pretzels. Always check labels to avoid hidden nuts. You can use homemade pumpkin puree, but it may vary in texture. Canned pumpkin is smoother and more consistent. Homemade may have a chunkier texture which alters the dip's creaminess. Both options taste great, so choose what you prefer. Serve the dip in a pretty bowl. Lay out your dippers on a colorful platter. Offer a mix of sweet and salty options. You can also garnish with cinnamon or honey for flair. This makes your treat more inviting for guests. You learned how to make a tasty Pumpkin Spice Cheesecake Dip. We covered key ingredients like cream cheese and canned pumpkin. I showed you how to mix, whip, and chill for the best flavor. You now know tips for perfect texture and ways to customize, too. With options for various dippers, storage info, and fun variations, this dip will impress at your next event. Enjoy creating it as much as you will enjoy sharing it!

Pumpkin Spice Cheesecake Dip Simple and Delicious Treat

Get ready for a fall favorite! This Pumpkin Spice Cheesecake Dip is simple and downright delicious. You’ll love how cream

- 2 salmon fillets (approximately 6 oz each) - 1 cup jasmine rice - 1/4 cup teriyaki sauce (store-bought or homemade) - 1 cup broccoli florets - 1/2 red bell pepper, thinly sliced - 1 medium carrot, julienned - 2 green onions, finely chopped - 1 tablespoon sesame seeds (optional for garnish) - Salt and pepper, to taste When I prepare my teriyaki salmon rice bowls, I love how simple the ingredients are. The salmon fillets are rich and flaky, adding depth to the dish. I always choose jasmine rice because it cooks up fluffy and has a slight sweetness. Teriyaki sauce gives it that perfect umami kick. For veggies, I prefer a mix of broccoli, red bell pepper, and carrots. They add color and crunch to my bowl. I chop the broccoli into small florets, slice the bell pepper thin, and julienne the carrot for easy cooking. Finally, I garnish with green onions and sesame seeds. These little touches make the dish pop and enhance the flavor. Salt and pepper are key for seasoning. They help balance everything and bring out the best in all the ingredients. To start, rinse the jasmine rice. Hold it under cold water in a fine mesh strainer. Keep rinsing until the water runs clear. This step removes excess starch. Next, put the rinsed rice in a medium saucepan. Add 2 cups of water and a pinch of salt. Heat the saucepan over medium-high heat until it boils. When it boils, lower the heat to low and cover it with a lid. Let it simmer for about 15 minutes. The rice should absorb all the water and become tender. After that, turn off the heat but keep it covered for another 5 minutes. Finally, fluff the rice gently with a fork. While the rice cooks, it’s time to prepare the salmon. Season both sides of the salmon fillets with salt and pepper. This step adds flavor to the fish. In a large skillet, heat 1 tablespoon of sesame oil over medium heat. Wait until the oil shimmers. Carefully place the salmon fillets skin-side down in the hot skillet. Cook for about 4-5 minutes. You want the skin to become crispy and the salmon to cook halfway through. Now, it’s time to glaze the salmon. Gently flip the fillets using a spatula. Pour 1/4 cup of teriyaki sauce over the salmon. Make sure they are well coated. Continue cooking for another 3-4 minutes. Baste the salmon with the sauce every minute. This step makes the salmon glossy and flavorful. Once the salmon is done, take it out of the skillet and put it on a plate. In the same skillet, add the broccoli florets, julienned carrots, and sliced red bell pepper. Sauté these vegetables for about 3-5 minutes. Stir frequently until they are tender but still crisp. - Checking doneness: To know if your salmon is done, look for a light pink center. Use a fork to check. If it flakes easily, it’s ready. - Ensuring skin crispiness: Start cooking skin-side down. This helps the skin get crispy. Don’t flip it too soon. Wait until it’s golden brown. - Water ratios for jasmine rice: Use a 1:2 ratio for jasmine rice. One cup of rice needs two cups of water. This gives you fluffy rice. - Avoiding sticky rice: Rinse the rice well before cooking. This removes excess starch. It helps keep the rice from becoming gummy. - When to add vegetables: Add the vegetables after you glaze the salmon. This way, they stay crisp and colorful. - Maintaining crisp texture: Stir-fry the veggies over high heat. This keeps them tender but crunchy. Cook for just a few minutes to preserve their bite. {{image_4}} Alternative to salmon You can swap salmon with other fish. Try tuna, trout, or even chicken. These options still give a tasty meal. Other vegetable options Feel free to mix in your favorite veggies. Snap peas, zucchini, or bell peppers add color and crunch. Use what you have on hand for a fun twist. Homemade teriyaki recipe Making your own teriyaki sauce is easy! Combine soy sauce, brown sugar, garlic, and ginger. Simmer until thick. This homemade version packs a fresh flavor. Other flavor profiles to try Want to change it up? Use soy sauce with honey for sweetness. You can also try a spicy chili sauce for heat. The choice is yours! Additional sides Serve your teriyaki salmon rice bowl with a side of edamame or cucumber salad. These sides add freshness and balance the meal. Pairing with sauces or dressings Drizzle extra teriyaki sauce over the top for more flavor. You can also try a sesame dressing for a nutty touch. Don't be afraid to mix flavors! - Store leftovers in a sealed container. - Use glass or BPA-free plastic to keep food fresh. - You can freeze cooked salmon and rice separately. - For best taste, wrap salmon tightly in foil. - Thaw in the fridge overnight before reheating. - Reheat in the oven or microwave until hot. - In the fridge, teriyaki salmon lasts about 2-3 days. - Look for a change in color or smell to check for spoilage. Teriyaki salmon cooks in about 10-15 minutes. Cooking time can change based on the thickness of the fillets. For thinner fillets, check for doneness at around 8 minutes. For thicker ones, it may take up to 15 minutes. Always make sure the salmon is opaque and flakes easily with a fork to ensure it is fully cooked. Yes, making teriyaki sauce at home is easy. Here’s a simple method: - Ingredients: - 1/4 cup soy sauce - 2 tablespoons honey or brown sugar - 1 tablespoon rice vinegar (or apple cider vinegar) - 1 teaspoon garlic, minced - 1 teaspoon ginger, minced - Instructions: 1. In a small saucepan, mix all ingredients. 2. Heat over medium until simmering. 3. Stir until the sugar dissolves and let it thicken for 1-2 minutes. This homemade sauce adds a fresh touch to your teriyaki salmon bowls. Jasmine rice is the best choice for teriyaki salmon bowls. It has a fragrant aroma and a soft texture. Other options are sushi rice, which is sticky and holds together well, or brown rice, which offers a nutty flavor and extra fiber. Choose what you like best to enjoy your dish fully. This blog post covered how to make a tasty teriyaki salmon bowl. We looked at the main ingredients, like salmon, rice, and fresh veggies. I shared step-by-step instructions to cook everything perfectly. You now know tips for great salmon, rice, and veggies. To wrap it up, you can enjoy this dish your way. Don't hesitate to try new ingredients or sauces. Whether you stick to the recipe or get creative, I hope you have fun cooking!

Teriyaki Salmon Rice Bowls Tasty and Simple Recipe

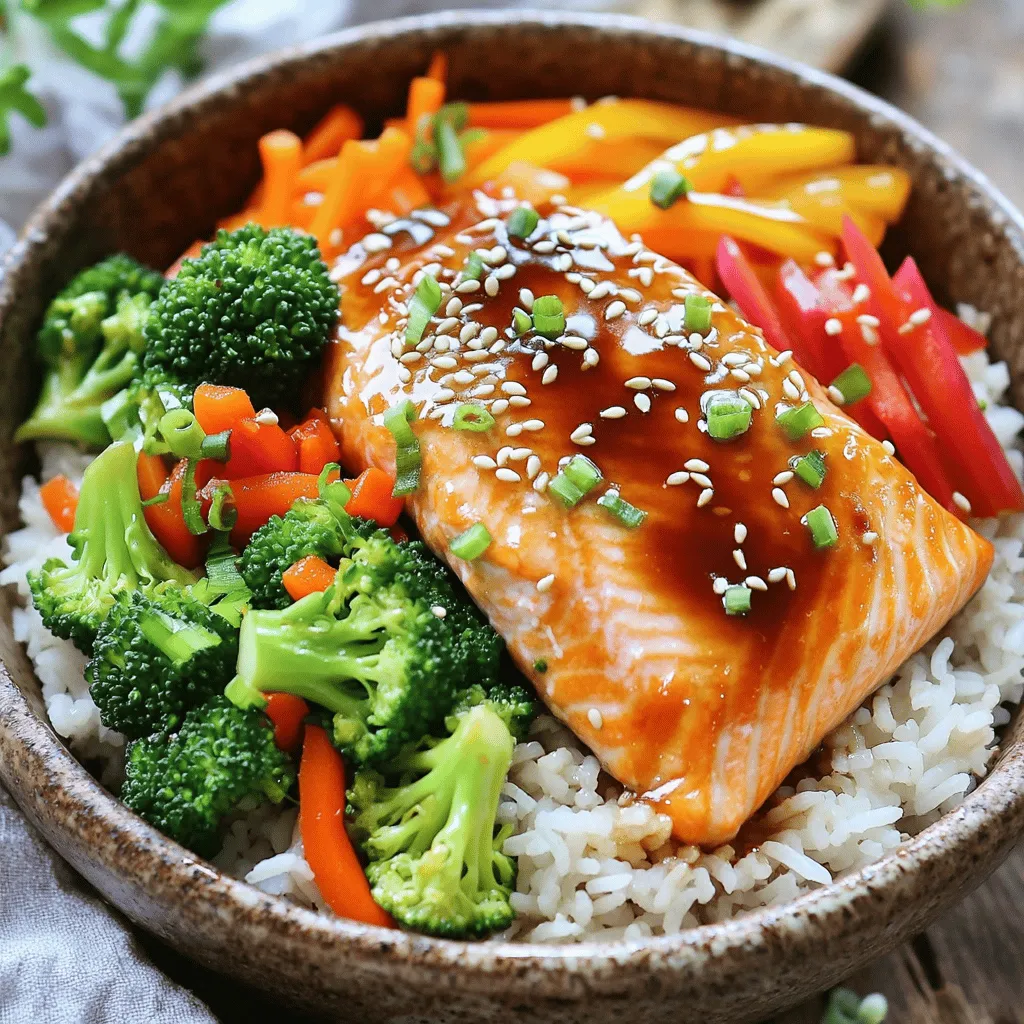
Are you ready to create a delicious meal with minimal effort? These Teriyaki Salmon Rice Bowls are quick, tasty, and

To make lemon poppy seed pancakes, gather these items: - 1 cup all-purpose flour - 1 tablespoon poppy seeds - 1 tablespoon baking powder - 1/4 teaspoon salt - 1 tablespoon granulated sugar - 1 cup milk, at room temperature - 1 large egg, lightly beaten - 2 tablespoons unsalted butter, melted and slightly cooled - Zest of 1 lemon, finely grated - 2 tablespoons freshly squeezed lemon juice - Pure maple syrup, for drizzling If you want to change the number of servings, here’s a quick guide: - For 2 servings, use 1/2 cup flour, 1/2 cup milk, and 1 egg. - For 6 servings, use 1 1/2 cups flour, 1 1/2 cups milk, and 2 eggs. Adjust the other ingredients accordingly. You can modify this recipe for different diets: - For gluten-free, swap all-purpose flour with a gluten-free blend. - For dairy-free, use almond milk or oat milk instead of regular milk. - For vegan pancakes, replace the egg with 1/4 cup of applesauce. Try these options to suit your needs! To start, gather all your ingredients. This makes cooking easier. In a medium bowl, sift 1 cup of all-purpose flour, 1 tablespoon of poppy seeds, 1 tablespoon of baking powder, 1/4 teaspoon of salt, and 1 tablespoon of sugar. Whisk these dry ingredients well. This helps mix them evenly. Next, in another bowl, combine 1 cup of room temperature milk, 1 large lightly beaten egg, 2 tablespoons of melted butter, the zest of 1 lemon, and 2 tablespoons of lemon juice. Whisk this mixture until it’s smooth. Now, pour the wet mix into the dry mix. Stir gently with a spatula until just combined. It’s okay to have small lumps; they help keep your pancakes fluffy. Preheat a non-stick skillet over medium heat. Lightly grease the surface with cooking spray or a bit of butter. This keeps pancakes from sticking. Pour 1/4 cup of batter onto the skillet for each pancake. Cook until bubbles form on top, which takes about 2-3 minutes. Flip the pancake with a spatula and cook for another 2 minutes, or until it turns golden brown. Once cooked, place your pancakes on a warm plate. You can keep them in a low oven to stay warm while you finish cooking the rest. For fluffy pancakes, do not overmix the batter. Small lumps are fine and help with texture. Use room temperature milk and eggs; this helps the batter mix better. Make sure your skillet is hot before adding the batter. This gives the pancakes a nice rise. Lastly, serve your pancakes warm and drizzle with pure maple syrup. A sprinkle of extra lemon zest on top adds flavor and a beautiful touch. Enjoy each fluffy bite! When making lemon poppy seed pancakes, avoid overmixing the batter. Lumps are fine. If the batter is too smooth, your pancakes may turn out dense. Another mistake is cooking on too high heat. Medium heat works best for even cooking. Lastly, don’t skip letting your pan heat up. A hot pan ensures a nice golden crust. Use a non-stick skillet or griddle for the best results. A flat spatula helps flip the pancakes easily. A whisk works great for mixing your wet and dry ingredients. If you have a ladle, it helps pour the batter evenly. Keep a warm plate ready to hold your cooked pancakes until serving. Serve pancakes warm and stack them high for a great look. Drizzle pure maple syrup generously over the top. For a pop of color, add a sprinkle of lemon zest. Fresh berries can also brighten up the plate. You can even serve them with a dollop of whipped cream for extra flair. {{image_4}} You can make your lemon poppy seed pancakes even better. Try adding blueberries or raspberries to the batter. Just fold them in gently. You can also mix in chocolate chips for a sweet twist. The chocolate pairs well with the lemon flavor! For gluten-free pancakes, use a gluten-free flour blend. Look for one that has a mix of flours. This will help keep the pancakes fluffy. To make these pancakes vegan, swap the egg for a flax egg. Mix one tablespoon of flaxseed meal with three tablespoons of water. Let it sit for five minutes until it thickens. Change your pancakes with the seasons! In spring, add fresh strawberries or a hint of mint. For summer, try a splash of coconut milk in the batter. In autumn, mix in pumpkin puree and some warm spices like cinnamon. During winter, use a bit of peppermint extract for a festive flavor. Each season brings a new taste to enjoy! After enjoying your lemon poppy seed pancakes, you might have some left. To store them, let the pancakes cool first. Then, stack them with a piece of parchment paper in between each pancake. Place the stack in an airtight container. This helps keep them fresh. You can store them in the fridge for up to three days. Be sure to seal the container well. When you're ready to eat your leftover pancakes, reheating is key. You can use a microwave for a quick option. Place a pancake on a microwave-safe plate. Heat it for about 20-30 seconds. If you want a crispier texture, use a skillet. Heat the skillet over medium heat. Place the pancake in the skillet for about one minute on each side. This method brings back the fluffy texture. Freezing pancakes is a great way to save time. To freeze them, make sure they are completely cool. Stack them with parchment paper in between. Then, place the stack in a freezer-safe bag. Remove as much air as possible before sealing. You can freeze pancakes for up to two months. When you're ready, just reheat them straight from the freezer! If you don't have poppy seeds, you can use chia seeds or sesame seeds. Both options add crunch. You can also skip the seeds for a smooth pancake. The flavor will still shine through. Yes, you can make the batter ahead. Just mix the wet and dry ingredients separately. Keep them in the fridge for up to a day. When ready to cook, mix them together. This will save you time in the morning! You can tell pancakes are done when they are golden brown. Look for bubbles forming on top before you flip them. Cook them for about 2-3 minutes on each side. If they spring back when you touch them, they are ready to eat! This blog post covered everything you need for perfect pancakes. We explored ingredients, measurements, and helpful substitutions for diets. I shared step-by-step cooking methods, tips for fluffiness, and common mistakes to avoid. You now have ideas for flavor upgrades and how to store leftovers. In the end, pancakes can be simple or fancy. You can easily make them your own. Enjoy cooking and sharing these treats with loved ones!

Lemon Poppy Seed Pancakes Delight in Every Bite

Wake up your taste buds with my Lemon Poppy Seed Pancakes! These fluffy, bright pancakes bring a burst of citrus

Older posts
Newer posts
← Previous Page1 … Page17 Page18 Page19 … Page83 Next →

dsad

© 2026 eataroundit • Built with GeneratePress

Our Policies

  • Copyright Policy
  • Cookie Policy
  • GDPR Policy
  • Privacy Policy
  • Disclaimer
  • Terms Of Use

More Information

  • Home
  • About
  • Contact
  • Appetizers
  • Dessert
  • Dinner
  • Drinks
©2026, eataroundit About Back To Top