Skip to content
DisclaimerTerms Of UseGDPR PolicyCookie Policy

eataroundit

  • Home
  • Drinks
  • Appetizers
  • Dinner
  • Dessert
  • About
  • Contact
  • Privacy Policy
DisclaimerTerms Of UseGDPR PolicyCookie Policy

NO-ING-IMG

To make high-protein mocha overnight oats, you need the following ingredients: - 1 cup rolled oats - 2 cups unsweetened almond milk - 1 scoop chocolate or mocha protein powder - 2 tablespoons unsweetened cocoa powder - 1 tablespoon chia seeds - 1 tablespoon maple syrup - 1 teaspoon instant coffee granules - 1/2 teaspoon pure vanilla extract - A pinch of fine salt - Optional toppings: sliced bananas, crushed walnuts, ground cinnamon These ingredients are simple yet powerful. The rolled oats provide fiber and energy. Almond milk keeps it light and creamy. The protein powder boosts your protein intake, which is great for muscle repair. Cocoa powder adds rich chocolate flavor. Chia seeds thicken the mix and add healthy fats. Maple syrup sweetens it naturally, while coffee granules give that mocha kick. Vanilla and salt enhance all the flavors. Feel free to get creative with the toppings! Sliced bananas add sweetness. Crushed walnuts give a nice crunch. A sprinkle of ground cinnamon can elevate the taste. Enjoy this nourishing breakfast that keeps you full and satisfied! 1. Mixing the ingredients In a mixing bowl, start by adding: - 1 cup rolled oats - 2 cups unsweetened almond milk - 1 scoop chocolate or mocha protein powder - 2 tablespoons unsweetened cocoa powder - 1 tablespoon chia seeds - 1 tablespoon maple syrup - 1 teaspoon instant coffee granules - 1/2 teaspoon pure vanilla extract - A pinch of fine salt Use a whisk to blend everything well. Make sure the protein powder and cocoa mix in fully. This step is key for a smooth texture. 2. Dividing into jars Once mixed, evenly divide the mixture into two jars or lidded containers. This ensures you have equal servings for each breakfast. 3. Refrigeration Secure the lids on the jars. Place them in the refrigerator overnight, or for at least 4 hours. This allows the oats to soak up the liquid and become creamy. - Ideal storage conditions Store your jars in the fridge. Keeping them cool helps maintain freshness and texture. - Best practices for freshness Always use airtight containers. This keeps out air and other smells from the fridge. Consume within 3-4 days for the best taste. - How to serve your oats When ready to eat, take the jar out and stir it well. If it looks too thick, add a splash of almond milk for a creamier consistency. - Combining with additional toppings Top your oats with optional sliced bananas, crushed walnuts, or a sprinkle of ground cinnamon. These add extra flavor and texture. Enjoy your tasty breakfast! You can easily change the sweetness with maple syrup. Start with one tablespoon and taste. If you want it sweeter, add more. For milk, you can use any type you like. Almond milk is great, but oat milk or soy milk works too. Just stick to unsweetened to keep the flavor balanced. Mixing well is key. Use a whisk or spoon to blend everything. Make sure the protein powder and cocoa are not clumpy. Before serving, check the consistency. If it looks thick, add a splash of milk. Stir well to blend it all again. You can store multiple servings in jars. Just divide the oats into containers. Seal them well and keep them in the fridge. For time-saving, prep these oats on a Sunday night. You’ll have breakfast ready for the week! {{image_4}} You can easily change the flavor of your mocha overnight oats. Here are some fun ideas: - Adding different fruits: Try adding sliced strawberries, blueberries, or apples. Fruits bring freshness and sweetness. You can mix them in or add them as a topping. - Using flavored protein powders: If you want a twist, use vanilla or caramel protein powder. It changes the taste and adds more fun to your breakfast. Making these oats fit your diet is simple. Here’s how: - Making it vegan-friendly: Just swap almond milk for any plant-based milk. Use maple syrup instead of honey to keep it vegan. - Gluten-free options: Use certified gluten-free oats. This ensures you avoid any gluten while still enjoying your tasty dish. Sweeteners can change your oatmeal’s taste. Here’s what you can try: - Comparing natural sweeteners: Besides maple syrup, you can use honey or agave. Each gives a different flavor and sweetness level. - Using sugar-free options: If you want to skip sugar, use stevia or monk fruit sweetener. They keep your oats sweet without extra calories. Overnight oats are best stored in the fridge. They can last up to five days. Check for signs of spoilage before eating. If you see mold or smell something off, throw them away. Fresh oats should smell like cocoa and coffee. You can freeze overnight oats for later. Use freezer-safe jars to avoid spills. Leave some space at the top, as they will expand. When ready to eat, transfer to the fridge overnight to defrost. You can also microwave them for a quick meal. Use airtight containers for storing your oats. Glass or plastic works well. Keep your fridge organized by labeling jars with dates. This helps you eat fresh meals and avoid waste. Store toppings separately to maintain crunchiness. You can store overnight oats in the fridge for up to five days. After that, they may lose texture and flavor. Keep them in airtight containers to stay fresh. Always check for any signs of spoilage before eating. Yes, you can use water instead of milk. However, using water will make your oats less creamy. If you want a richer taste, stick with milk or plant-based milk like almond milk. You can use Greek yogurt or cottage cheese as a substitute for protein powder. Both add creaminess and protein. You could also use nut butter for a different flavor and texture. It is not safe to eat overnight oats after a week. They can spoil and may not taste good. Stick to the five-day rule for best quality and safety. Always trust your senses when deciding to eat food. You now have a complete guide for making delicious overnight oats. We covered ingredients, preparation steps, and how to store them. I shared tips for customizing flavors and achieving the best texture. Remember to keep your storage conditions right for maximum freshness. Try different fruits or sweeteners to find what you love. With these details, you can make tasty meals ahead of time and enjoy healthy breakfasts. Get started, and make the most of your mornings!

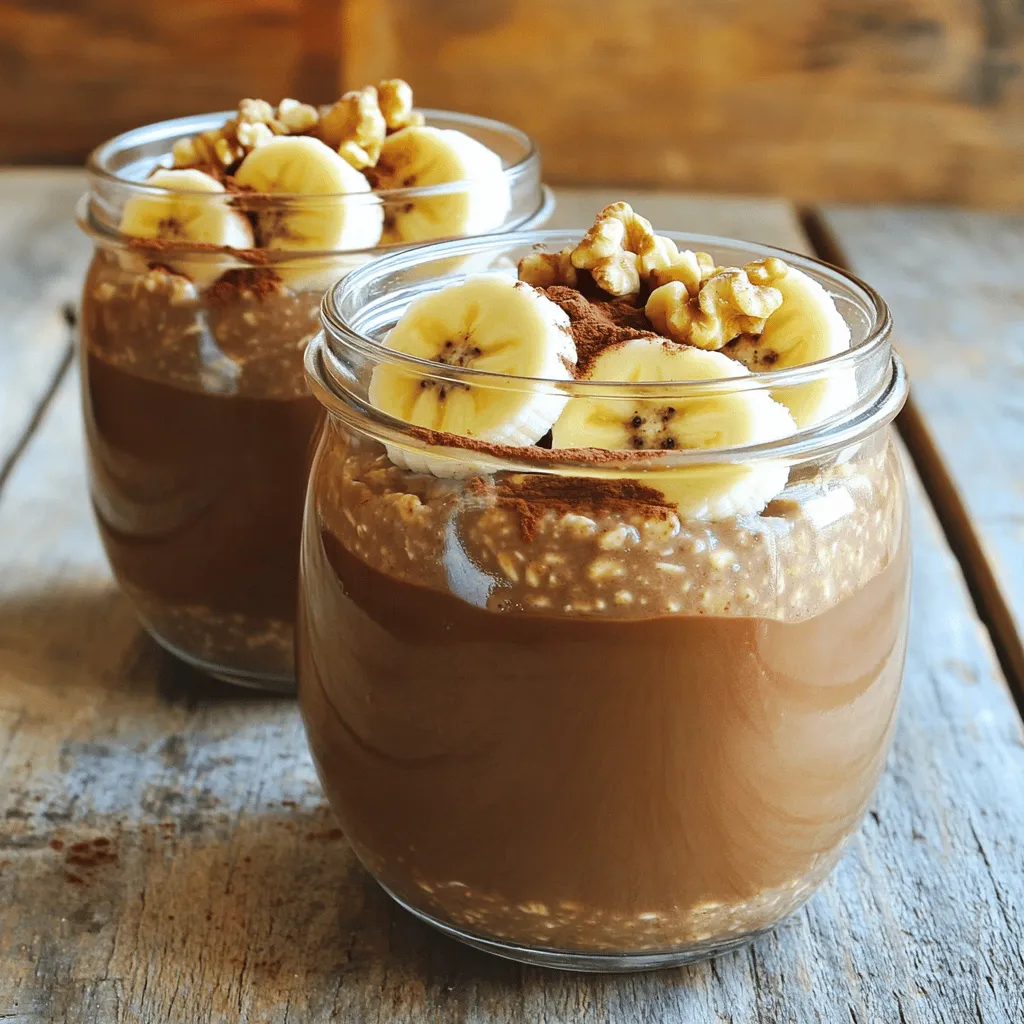
High-Protein Mocha Overnight Oats Quick and Easy Recipe

Looking for a quick and easy breakfast that fuels your day? My High-Protein Mocha Overnight Oats are just what you

- 1 lb chicken or turkey sausages, cut into ½-inch rounds - 2 cups Brussels sprouts, halved lengthwise - 2 cups baby potatoes, halved or quartered for even cooking - 1 red bell pepper, diced into bite-sized pieces - 1 red onion, cut into wedges - 3 tablespoons extra virgin olive oil - 2 tablespoons pure maple syrup - 2 tablespoons Dijon mustard - 1 teaspoon garlic powder - 1 teaspoon dried thyme (or 1 tablespoon fresh thyme, minced) - Salt and freshly cracked black pepper to taste In this dish, I love using chicken or turkey sausages. They add great flavor and cook nicely with the veggies. The Brussels sprouts bring a nice crunch, while baby potatoes offer a creamy texture. Red bell pepper and red onion add sweetness and color to the mix. For the perfect glaze, I combine extra virgin olive oil, pure maple syrup, and Dijon mustard. This mix creates a nice balance of sweet and tangy. Garlic powder and dried thyme add depth. Use salt and pepper to boost the flavors. Make sure to have fresh, quality ingredients. They make a big difference in taste and nutrition. Proper seasoning elevates this meal from simple to spectacular. Enjoy this delicious mix of flavors on a busy weeknight! - Preheat oven to 425°F (220°C). - Line a baking sheet with parchment paper. First, set your oven to 425°F. This high heat helps the food roast nicely. Next, grab a large baking sheet. You want to line it with parchment paper. This makes clean-up easy and keeps the food from sticking. - Combine sausages and vegetables in a bowl. - Prepare the maple-Dijon dressing. In a big bowl, toss in the chicken or turkey sausages. Add the halved Brussels sprouts, baby potatoes, red bell pepper, and onion. Make sure to cut the veggies into similar sizes. This helps them cook evenly. Now, prepare the maple-Dijon dressing. In a smaller bowl, mix together olive oil, maple syrup, Dijon mustard, garlic powder, thyme, salt, and pepper. Whisk until it’s smooth and well mixed. - Drizzle the dressing over the mixture. - Spread out on the baking sheet. Drizzle the dressing over the sausage and veggies. Use tongs or a spoon to toss everything together. Make sure each piece is well coated. Then, spread the mixture out on the prepared baking sheet. Keep some space between pieces for even roasting. - Roast for 25-30 minutes. - Stir halfway through cooking for even browning. Place the baking sheet in the oven. Roast for 25 to 30 minutes. Halfway through, stir the mixture. This helps to brown everything nicely. You’ll know it’s done when the sausages are cooked through, and the veggies are tender and golden-brown. Enjoy the delightful smells wafting from your oven! To cook your dish just right, cut your veggies to similar sizes. This helps them cook evenly. If some pieces are tiny and others large, you may end up with mushy or hard bits. Aim for uniform cuts. Make sure to use enough space on the baking sheet. When you crowd the pan, the veggies steam instead of roast. Give them room to breathe. This way, you’ll get crispy edges that add flavor. To take your dish to the next level, add fresh herbs or spices. Thyme works well here, but rosemary or parsley can shine too. Just chop them finely and toss them in with the other ingredients. For garnishes, I recommend fresh thyme sprigs or chopped parsley. They add color and a burst of freshness. Serve the dish right from the pan for a rustic look. Your guests will love it! {{image_4}} You can use a variety of sausages for this dish. Chicken or turkey sausages work great. They are lean and flavorful. Pork sausages add richness and depth. If you prefer beef, go for it! For a plant-based option, try vegetarian sausages. They provide texture and taste without meat. Each type of sausage brings its own flavor. Pick what you love best! Feel free to switch up the veggies based on the season. Carrots, zucchini, or squash can add color and taste. Broccoli or cauliflower are also great choices. Just remember to cut them into similar sizes. This helps them cook evenly. Cooking times may vary. For softer veggies like zucchini, reduce the time to about 20 minutes. For firmer ones like carrots, increase to 30-35 minutes. Always check if they are tender. This ensures a perfect meal every time! To keep your Maple Dijon Sausage & Veggies fresh, store them in airtight containers. Make sure the dish cools to room temperature first. Place the sausage and veggies in one container or separate them if you prefer. Label the containers with the date. This ensures you know when to eat them. To preserve texture when reheating, I recommend using the oven. Preheat your oven to 350°F (175°C). Place the leftovers on a baking sheet. Heat for about 15-20 minutes until warmed through. You can also use a microwave, but the oven keeps the crispness of the veggies. Enjoy your meal again with great flavor! Yes, you can. If you want to swap Dijon mustard, try using yellow mustard or spicy brown mustard. Both add flavor but in different ways. Yellow mustard is milder, while spicy brown gives a nice kick. You can also use whole grain mustard for added texture and depth. Feel free to experiment! To add heat, consider using red pepper flakes or cayenne pepper. A little goes a long way, so start with a pinch. You can also include fresh chili peppers, like jalapeños or serranos. Just chop them up and mix them in with the sausages and veggies. Adjust the spice to your taste for the perfect kick! Yes, you can prepare this dish ahead. Chop the veggies and sausages a day before. Store them in an airtight container in the fridge. Mix the maple-Dijon dressing ahead of time too. Keep it separate until you’re ready to cook. This makes cooking quick and easy, especially on busy days! This dish combines juicy sausages and fresh veggies, creating a tasty meal. We covered key ingredients, easy steps, and helpful tips. You learned about storage options and exciting variations. I hope these ideas spark your creativity in the kitchen. Enjoy making this dish your own, and remember to share your flavorful twists!

Sheet-Pan Maple Dijon Sausage & Veggies Delight

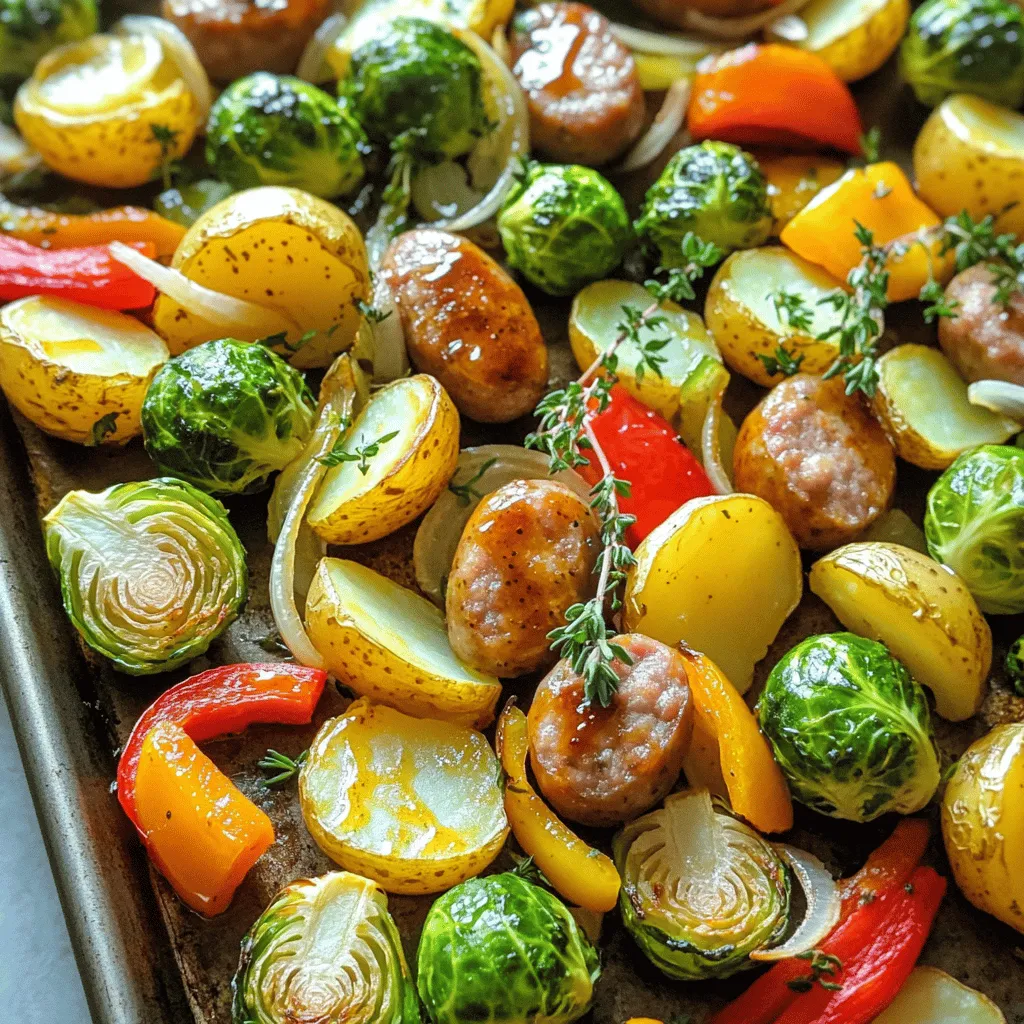
Looking for a simple, tasty meal that will delight your taste buds? Try my Sheet-Pan Maple Dijon Sausage & Veggies

- 1 package (15.25 oz) Oreo cookies - 8 oz cream cheese, softened at room temperature - 1 teaspoon peppermint extract The heart of your truffles lies in the main ingredients. The Oreo cookies give a rich, chocolate flavor. Cream cheese adds creaminess and helps bind the truffles. A touch of peppermint extract brings that festive flair. - 1 cup white chocolate chips - 2 tablespoons coconut oil - Crushed peppermint candies for garnish The coating is just as important. White chocolate chips create a sweet, smooth layer. Adding coconut oil helps your chocolate melt evenly. Crushed peppermint candies on top give a crunch and add a pop of color. - Additional flavorings - Alternative chocolates Feel free to get creative! You can add other flavorings like vanilla or almond. If you prefer dark chocolate or milk chocolate, switch up the coating. These small changes can make your truffles unique and exciting. To start, gather your ingredients. First, crush the Oreo cookies. Use a food processor for this. Pulse them until they turn into fine crumbs, like sand. If you don’t have a food processor, you can place the cookies in a zip-top bag and crush them with a rolling pin. Next, transfer the cookie crumbs to a large mixing bowl. Add the softened cream cheese to the bowl. Stir with a spatula or use your hands to mix it well. You want a smooth, dough-like texture. This part is fun! Now, add one teaspoon of peppermint extract. Mix it in until it’s evenly spread through the dough. The peppermint gives a nice holiday flavor that pairs perfectly with the Oreos. Once your mixture is ready, it’s time to form the truffles. Use a tablespoon to scoop out the dough. Roll it into smooth balls with your hands. Each ball should be about one inch wide. Place the balls on a parchment-lined baking sheet. After shaping the truffles, you need to chill them. Put the baking sheet in the freezer for about 30 minutes. This helps them firm up, making them easier to handle later. While the truffles chill, melt the white chocolate and coconut oil. You can do this in a microwave-safe bowl. Heat in 30-second bursts, stirring each time until smooth. If you prefer, you can use a double boiler on the stove. Just remember to stir until melted and creamy. After the truffles have chilled, take them out of the freezer. Dip each truffle into the melted white chocolate. Use a fork to lift it out. Let any extra chocolate drip off before placing it back on the baking sheet. While the chocolate is still wet, sprinkle crushed peppermint candies on top. This adds a festive crunch and extra holiday cheer. Finally, return the truffles to the freezer for 10 to 15 minutes. This helps the chocolate set completely, making your truffles ready to enjoy! To know when your dough is ready, look for a smooth, even texture. The mixture should stick together without being too wet. If it crumbles, add a bit more cream cheese. When rolling your truffles, keep your hands slightly damp. This helps shape smooth balls and prevents sticking. Aim for uniform sizes for a neat look. You can melt the chocolate using two methods: the microwave or a double boiler. For the microwave, heat in 30-second bursts. Stir after each interval until smooth. For a double boiler, simmer water in a pot and place a bowl on top. Stir until melted. To avoid chocolate seizing, ensure no water touches your chocolate. Even a drop can ruin its smoothness. Keep everything dry for the best results. For a creative display, arrange truffles on a pretty platter. Use festive colors to match your theme. You can also place them in small gift boxes. Tie with ribbon for a lovely touch. This makes them perfect for sharing at parties or as gifts. {{image_4}} You can change the flavor of your truffles. For chocolate Oreo truffles, swap regular Oreos for chocolate ones. They add a rich taste. You can also turn these into mint chocolate variations. Just add more peppermint extract. This gives a stronger mint flavor. You can mix and match flavors to fit your taste. If you need gluten-free options, use gluten-free Oreo cookies. They work just as well and keep the same yummy taste. For vegan adaptations, use a dairy-free cream cheese. You can also switch the white chocolate for dairy-free chocolate chips. These changes make the truffles accessible for everyone. Make your truffles more festive with holiday-themed garnishes. Use red and green sprinkles for a fun touch. You can also experiment with different extracts or spices. Try almond extract or cinnamon for new flavors. These small changes can make your truffles stand out. To keep your No-Bake Peppermint Oreo Truffles fresh, store them in the refrigerator. Place them in an airtight container. This will help keep them moist and tasty. You can stack them in layers, but use parchment paper to separate each layer. This way, they won't stick together. If you want to enjoy them later, freezing is a great option. To freeze, first, chill the truffles until firm. Then, place them in a single layer on a baking sheet. Freeze them for about an hour. After they are solid, transfer them to a freezer-safe container. Be sure to separate layers with parchment paper. They can last up to three months in the freezer. These truffles can last in the fridge for about a week. Keep an eye on them. If they start to smell off or change texture, it’s time to toss them. Signs of spoilage include a change in color or a slimy texture. Always trust your senses. If something seems wrong, don’t eat it! Yes, you can use different cookies. Try chocolate sandwich cookies or vanilla cookies. You can even use gluten-free cookies if needed. These swaps add fun flavors. Just keep the same amount of crumbs. The key is to have a cookie that crushes easily. Use your favorite cookies to make these truffles unique. You can make these truffles ahead of time. Prepare them up to a week in advance. After rolling them, store the truffles in an airtight container. Keep the container in the fridge if you eat them soon. For longer storage, freeze them. Just let them thaw in the fridge before serving. This way, you can enjoy them fresh at any time! If you want a dairy-free option, use vegan cream cheese. You can also try nut butters. Peanut butter or almond butter works great. These options change the flavor but keep the texture. You can even use silken tofu for a lighter filling. Just blend it well with the cookie crumbs. We covered how to make delicious Oreo truffles with fun flavors and easy steps. You learned about the key ingredients, methods for mixing and rolling, and tips for perfect results. Consider variations like chocolate or mint to customize your truffles. Storing them correctly helps keep them fresh. Enjoy impressing friends and family with these tasty treats. Try these recipes today to celebrate any occasion!

No-Bake Peppermint Oreo Truffles Easy Holiday Treat

Get ready to impress your friends and family with my No-Bake Peppermint Oreo Truffles! These festive treats combine crispy Oreo

To make this creamy dish, you will need: - 12 oz (340g) pasta of your choice (fusilli or penne recommended) - 2 cups fresh spinach, roughly chopped - 1 cup ricotta cheese - 1 cup vegetable broth - 1/2 cup heavy cream - 1 cup cherry tomatoes, halved - 2 cloves garlic, minced - 1 tablespoon olive oil - 1/2 teaspoon red pepper flakes (optional for a spicy kick) - Salt and pepper to taste - Grated Parmesan cheese for serving - Fresh basil leaves for garnish You will need a large pot for cooking. It’s best to have a wooden spoon for stirring. A measuring cup and spoons will help with accurate measurements. A cutting board and knife will make chopping the spinach and tomatoes easy. Lastly, a serving bowl or plate will help present your dish nicely. When picking ingredients, fresh is best. Look for bright green spinach. The leaves should be crisp and not wilted. Choose ripe cherry tomatoes that feel firm. For ricotta, check for creaminess and avoid any that look dry. Use high-quality vegetable broth for a rich flavor. If you want a touch of spice, pick fresh red pepper flakes. Always taste your ingredients before cooking to ensure they are fresh and flavorful. Start by heating olive oil in a large pot over medium heat. Add minced garlic and sauté for about one minute. You want it fragrant, but be careful not to burn it. Next, toss in halved cherry tomatoes. Sauté them for three to four minutes. This step helps them soften and release their juices. Now, pour in vegetable broth and raise the heat to bring it to a gentle boil. Once boiling, add 12 oz of pasta. Make sure the pasta is well coated in the broth. Lower the heat to a simmer, cover the pot, and cook for about 10 to 12 minutes. Stir occasionally to stop the pasta from sticking. Check the pasta for an al dente texture before moving on. When the pasta is cooked, lower the heat to its lowest setting. Gently fold in one cup of ricotta cheese, one cup of heavy cream, and two cups of chopped spinach. If you like a bit of heat, add red pepper flakes. Stir everything until the cheese melts and the spinach wilts. Season with salt and pepper to taste. Let the pasta sit for a few minutes to thicken before serving. To keep pasta from getting mushy, follow these steps: - Use a timer to track cooking time. - Taste the pasta a minute before the package time ends. - Stir the pasta often to prevent sticking. - Keep the heat at medium to maintain a steady boil. Cooking pasta perfectly is key to a great dish. Aim for al dente, which means it should be firm but not hard. A few simple seasonings can make a big difference: - Use fresh garlic for a strong flavor. - Add salt to the water when cooking pasta. - Consider red pepper flakes for a spicy kick. - Use fresh herbs like basil to brighten the dish. Don't be afraid to taste as you go. Adjust the seasonings to match your liking. A touch of lemon juice can also add freshness. To serve this dish beautifully, try these tips: - Use deep bowls to hold the creamy pasta. - Top with freshly grated Parmesan cheese. - Add a sprinkle of fresh basil for color. - Drizzle olive oil for a glossy finish. A great presentation makes the meal even more enjoyable. Take your time to make it look nice, and your guests will appreciate it! {{image_4}} You can boost your pasta dish by adding protein. Cooked chicken adds a hearty touch. Grilled shrimp provides a nice seafood flavor. For a plant-based option, try cubed tofu. Add these proteins during the last few minutes of cooking. This way, they heat through without overcooking. You can also marinate the chicken or shrimp for extra flavor before adding them to the pot. If you want to mix up the greens, kale or Swiss chard work great. Both offer a rich, earthy taste. Chop them up and add them just like you would spinach. They will wilt down nicely and add more texture to your dish. Using different greens also boosts the nutrient profile. Each option brings its own unique flavor and color. You can easily adapt this recipe for gluten-free or vegan diets. For gluten-free pasta, choose a type made from rice or corn. This ensures a similar texture while keeping it gluten-free. To make it vegan, swap ricotta for a plant-based alternative. There are many great options on the market. You can use cashew cream for the heavy cream. These changes keep the dish creamy and delicious while meeting dietary needs. To store your leftover One-Pot Creamy Spinach Ricotta Pasta, let it cool first. Use an airtight container. It keeps well in the fridge for up to three days. Make sure to seal it tightly to keep the flavors fresh. If you notice any excess liquid, stir it back in before storing to maintain creaminess. When you are ready to enjoy your pasta again, reheat it gently. You can use a skillet or microwave. If using a skillet, add a splash of vegetable broth or cream. This prevents it from drying out. Heat on low to keep the sauce smooth. If using a microwave, cover it to trap steam, stirring halfway through. For longer storage, you can freeze this pasta dish. Portion it into freezer-safe containers. Label them with the date. The pasta stays good for up to two months. When you're ready to eat, thaw it in the fridge overnight. Reheat it as mentioned above for a creamy, delicious meal. Yes, you can use any pasta you like. Fusilli and penne work great. Spaghetti or farfalle are also good choices. Just make sure to adjust the cooking time as needed. Thinner pasta cooks faster, while thicker types may need more time. If you don't have ricotta, try cottage cheese or cream cheese. Both will give you a creamy texture. For a dairy-free option, use tofu blended with a bit of lemon juice. This will mimic the ricotta taste and texture. To make this in a pressure cooker, start by sautéing garlic and tomatoes using the sauté function. Then, add the vegetable broth and pasta. Cook at high pressure for about 3-5 minutes. Release the pressure, then stir in the ricotta, cream, and spinach until blended. Yes, you can prepare this recipe ahead of time. Just cook the pasta and mix in the sauce. Store it in the fridge for up to two days. When you’re ready to eat, reheat it gently on the stove, adding a splash of broth to loosen it up. This one-pot creamy spinach ricotta pasta is simple yet tasty. We covered the best ingredients and tips for cooking. Remember to avoid overcooking the pasta for the best texture. You can add proteins or try other greens for variety. Store leftovers properly and reheating will keep it fresh. Feel free to experiment with this dish. Enjoy creating a meal that fits your taste. Cooking should be fun and rewarding!

One-Pot Creamy Spinach Ricotta Pasta Delight

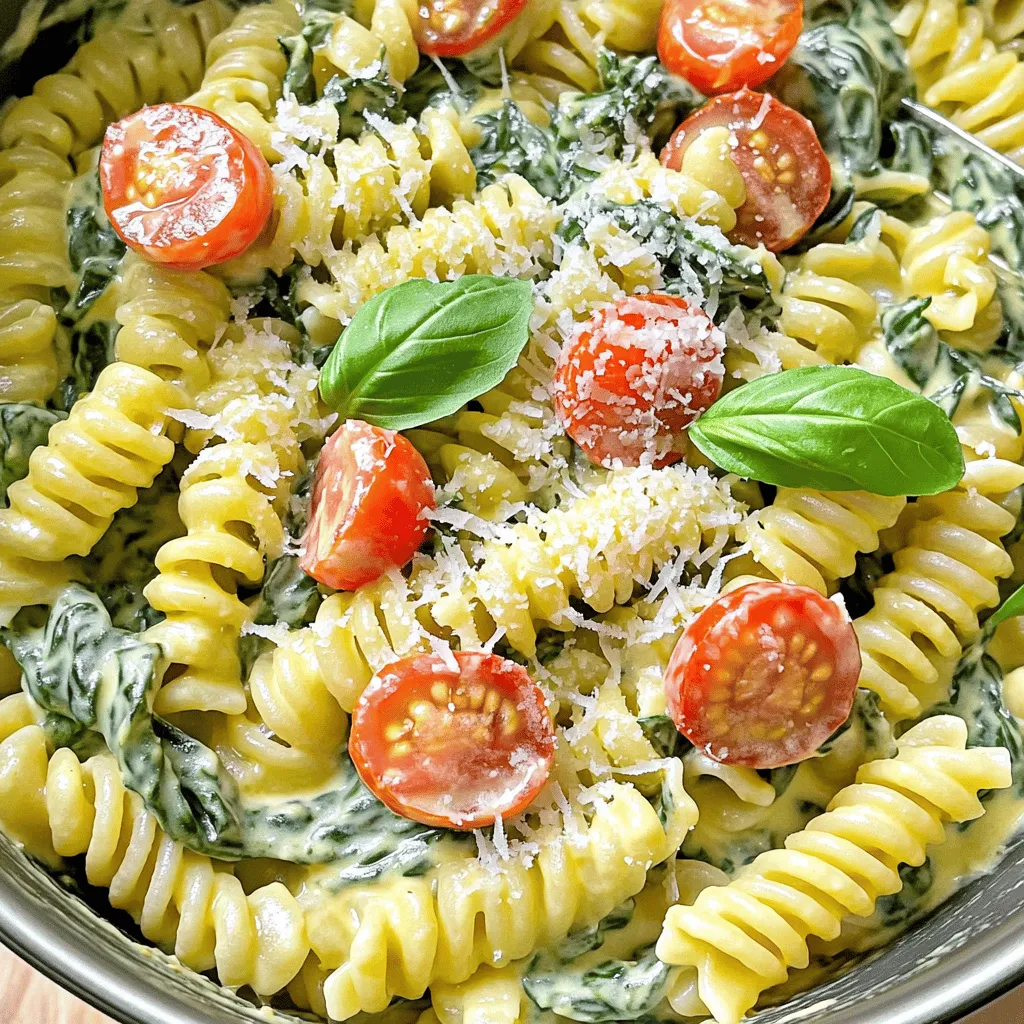
If you’re craving a simple yet delicious meal, you’ll love this One-Pot Creamy Spinach Ricotta Pasta. This dish makes cooking

For this tasty dish, you will need: - 1 pound fresh broccoli florets - 3 tablespoons extra virgin olive oil - 4 cloves fresh garlic, finely minced Using fresh broccoli is key. Look for bright green florets. They should feel firm and crisp. Fresh garlic adds a nice punch to the flavor. These seasonings give the broccoli its special taste: - 1/2 cup freshly grated Parmesan cheese - 1 teaspoon garlic powder - Salt and freshly ground black pepper to taste Parmesan cheese brings a savory touch. Garlic powder enhances the garlic flavor. Use salt and pepper to make everything pop. Want to spice things up? Consider adding: - 1/2 teaspoon red pepper flakes (for a spicy kick) - Zest of 1 lemon Red pepper flakes add heat. The lemon zest brightens the dish and balances the rich flavors. Feel free to mix and match these add-ins! First, wash the fresh broccoli florets under cold water. This step cleans any dirt or residues. Next, dry the florets with a clean kitchen towel or paper towels. This helps the broccoli crisp up in the air fryer. Moisture can make it soggy, so drying is key. In a large mixing bowl, add the dried broccoli florets. Pour in three tablespoons of extra virgin olive oil. Then, add four cloves of finely minced garlic and one teaspoon of garlic powder. If you like a spicy kick, sprinkle in half a teaspoon of red pepper flakes. Add salt and freshly ground black pepper to taste. Toss everything gently but well. Make sure each floret is coated with oil and spices. Preheat your air fryer to 400°F (200°C). This helps the broccoli cook evenly and become crispy. Once ready, place the seasoned broccoli florets in the air fryer basket in a single layer. Do not overcrowd; cook in batches if needed. Cook for eight to ten minutes. Shake the basket halfway through. This ensures even cooking. After cooking, remove the broccoli and return it to the mixing bowl. While it's hot, sprinkle half a cup of freshly grated Parmesan cheese over the florets. Toss gently until the cheese slightly melts. Finally, add the zest of one lemon for a bright flavor. Toss again before serving. Enjoy this delicious, crisp dish! To get the best crispiness, dry the broccoli well. Water makes the florets steam instead of crisp. Use a clean towel to pat them dry thoroughly. Next, toss them in olive oil and seasonings. This helps the broccoli crisp in the air fryer. Spread them out in a single layer in the basket. Overcrowding can lead to uneven cooking. Set your air fryer to 400°F (200°C). This high heat cooks the broccoli fast and helps it crisp up nicely. Cook for 8 to 10 minutes, but check for doneness. Shake the basket halfway through cooking. This ensures all sides get that perfect golden-brown color. If you prefer extra crispy edges, add an extra minute or two as needed. Start by rinsing the broccoli under cold water. This removes dirt and any chemicals. Cut into florets as needed. Make sure to pat them dry with a towel. This step is very important! Proper cleaning helps keep your broccoli fresh and tasty. Store any leftover broccoli in a plastic bag or container in the fridge for up to three days. {{image_4}} You can add protein to your Air Fryer Garlic Parmesan Broccoli. Chicken or tofu work well. For chicken, use bite-sized pieces. Toss them with olive oil, garlic, and seasonings. Cook the chicken first for about 10 minutes. Then, add the broccoli for the last 8 minutes. This way, both cook perfectly. For tofu, press it first to remove extra moisture. Cut it into cubes, then mix with the same seasonings. Cook it for 10 to 12 minutes alongside the broccoli. This adds a hearty touch to your dish. If you want a vegan option, skip the Parmesan cheese. Instead, use nutritional yeast. It gives a cheesy flavor without dairy. Mix about 1/2 cup of nutritional yeast into the broccoli after cooking. You can also try vegan cheese shreds. Add them in the last minute of cooking. They will melt and provide a nice texture. This keeps your dish creamy and flavorful without animal products. To spice things up, add more heat with spices. Start with the red pepper flakes. Increase the amount to 1 teaspoon for extra kick. You can also add cayenne pepper or chili powder. Mix these spices into your seasoning blend. This makes the broccoli bold and exciting. If you love garlic, add more minced garlic too. A little extra zest will make the dish pop. Enjoy your spicy broccoli as a side or snack. To keep your Air Fryer Garlic Parmesan Broccoli fresh, store it in an airtight container. Allow the broccoli to cool to room temperature before sealing it. This step keeps moisture out and helps maintain the crispiness. You can store it in the fridge for up to three days. When you're ready to eat your leftovers, I recommend reheating them in the air fryer. Preheat the air fryer to 350°F (175°C). Place the broccoli in the basket and heat for about 3 to 5 minutes. This method revives the crisp texture while warming the broccoli evenly. You can also use a microwave but keep in mind it may make the broccoli a bit soggy. If you want to freeze your Air Fryer Garlic Parmesan Broccoli, first let it cool completely. Then, place the cooled broccoli in a freezer-safe bag. Squeeze out as much air as possible before sealing it. You can freeze it for up to three months. To thaw, move the bag to the fridge overnight. Reheat it in the air fryer for the best texture, following the reheating tips above. Yes, you can use an oven instead. Preheat your oven to 425°F (220°C). Spread the seasoned broccoli on a baking sheet. Roast for about 15-20 minutes. Make sure to stir halfway through for even cooking. The broccoli will not be as crispy, but it will still taste great. This dish pairs well with many meals. Here are a few ideas: - Grilled chicken or fish - Pasta dishes - Quinoa or rice bowls - A fresh salad - As a snack on its own These options bring out the flavors and make a balanced plate, adding protein or carbs. To make more servings, simply scale the ingredients. For two pounds of broccoli, use: - 6 tablespoons olive oil - 8 cloves of garlic - 1 cup Parmesan cheese - Adjust seasonings to taste. Cook in batches if needed. Overcrowding can lead to uneven cooking. This post covered how to make Air Fryer Garlic Parmesan Broccoli. You learned about fresh ingredients, essential seasonings, and fun add-ins. We walked through prepping the broccoli, mixing the seasonings, and cooking in the air fryer. I shared tips for crispiness, the best settings, and cleaning practices. You saw variations like adding proteins or going vegan. Plus, we discussed storing and reheating leftovers. Now, it’s time to enjoy this simple, tasty recipe! Cook with your favorite flavors and share it with others.

Air Fryer Garlic Parmesan Broccoli Crisp and Flavorful

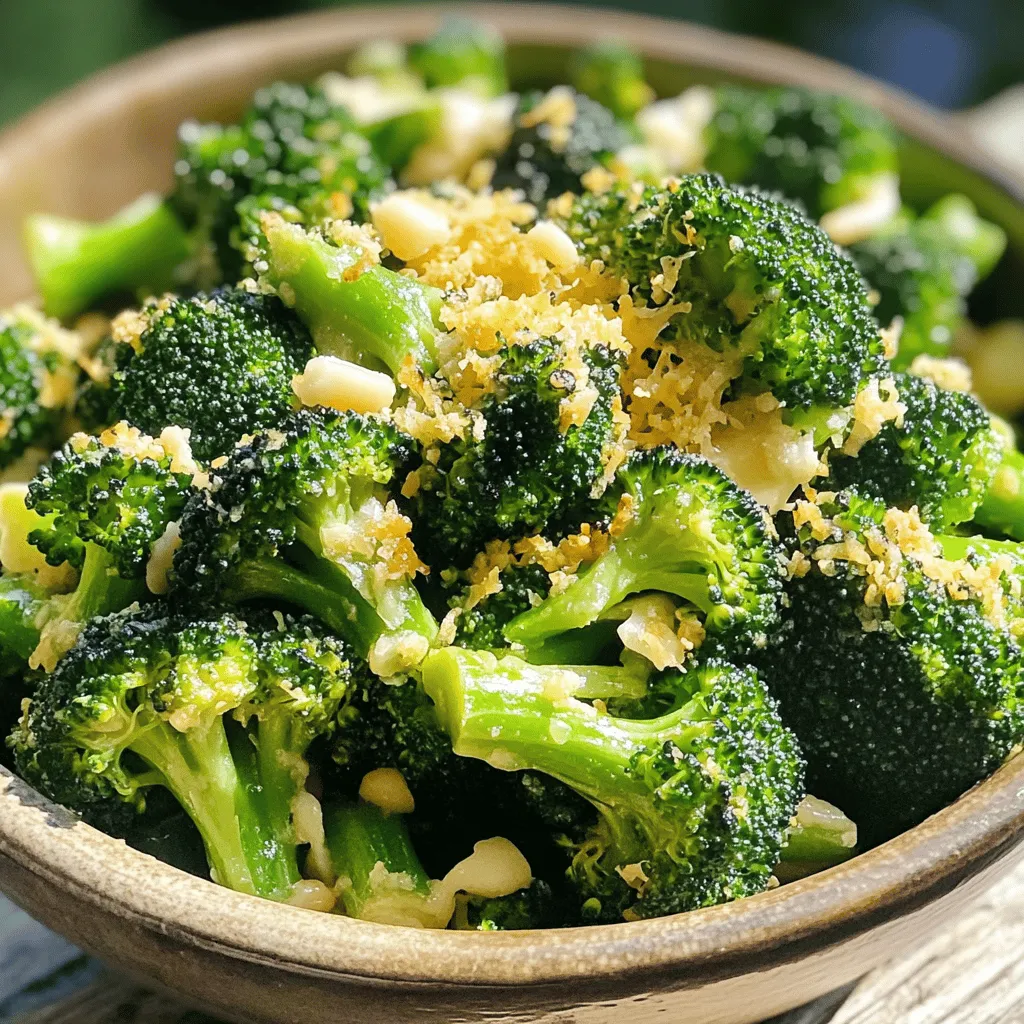
Are you ready to take your vegetable game to the next level? My Air Fryer Garlic Parmesan Broccoli is the

To create this tasty Pumpkin Spice Cheesecake Smoothie, you'll need the following items: - 1 cup pumpkin puree (you can use canned or fresh) - 1 frozen banana (this adds creaminess) - 1/2 cup Greek yogurt (plain or vanilla works well) - 1/2 cup almond milk (or any milk you prefer) - 2 tablespoons maple syrup (adjust to your taste) - 1 teaspoon pumpkin pie spice (a mix of warm spices) - 1/2 teaspoon vanilla extract (for extra flavor) - 1 tablespoon cream cheese (softened for a smooth texture) - Optional: whipped cream and crushed graham crackers (for fun toppings) These ingredients combine to make a rich and creamy smoothie. The pumpkin puree gives it a warm, fall flavor. The frozen banana helps make it thick and smooth. Greek yogurt adds protein and creaminess. Almond milk keeps it light, while maple syrup sweetens it just right. Pumpkin pie spice brings in that cozy, spiced taste. Vanilla extract adds depth, and cream cheese makes it feel like cheesecake. Feel free to experiment with the optional toppings. Whipped cream and crushed graham crackers can make this smoothie feel even more like dessert! To start, gather your ingredients. You need pumpkin puree, a frozen banana, Greek yogurt, almond milk, maple syrup, pumpkin pie spice, vanilla extract, and cream cheese. This smoothie is quick to make. It takes only about 10 minutes from start to finish. First, add all the ingredients into your blender. Put in the pumpkin puree, frozen banana, Greek yogurt, almond milk, maple syrup, pumpkin pie spice, vanilla extract, and cream cheese. Blend on high speed. You want the mix to be smooth and creamy. Make sure there are no lumps left. This step is key for a perfect texture. After blending, taste your smoothie. If you want it sweeter, add more maple syrup. Blend again for a few seconds to mix it well. If you like it thicker, toss in a few ice cubes. Blend until it’s creamy and smooth again. This way, you can make it just how you like! This smoothie is great for breakfast or a snack. Serve it in tall, clear glasses to show off its rich color. Add whipped cream on top for extra fun. A sprinkle of crushed graham crackers makes it look fancy. You can even add a cinnamon stick for a cute touch. Enjoy this smoothie with a friend or save some for later! To get the best texture, start with softer ingredients. Add the pumpkin puree and frozen banana first. Then, layer the Greek yogurt and almond milk on top. This helps everything blend smoothly. Use high speed to mix until it's creamy and lump-free. If your blender struggles, stop and stir the mix with a spoon. Then, blend again. If you want more spice, add a dash of nutmeg or cinnamon. You can also play with the sweetness. If you like it sweeter, mix in more maple syrup. For a richer taste, add an extra tablespoon of cream cheese. Don't forget to taste as you go. This way, you can adjust it to your liking! {{image_4}} You can switch out some ingredients if needed. Use pumpkin pie filling instead of pumpkin puree for a sweeter taste. Swap Greek yogurt for regular yogurt or even silken tofu for a dairy-free option. If you don’t have almond milk, any milk type works, like oat or soy milk. For a creamier drink, try using mascarpone cheese instead of cream cheese. Milk choices can change the flavor and texture. Almond milk adds a nutty taste, while coconut milk gives a tropical vibe. If you prefer a thicker smoothie, use full-fat coconut milk. Rice milk is a lighter choice if you like a milder flavor. Each option brings its own twist, so feel free to experiment! You can add fun flavors for the seasons. In winter, stir in a pinch of peppermint extract for a minty touch. In spring, try adding a handful of fresh spinach for extra nutrients and a green hue. During summer, blend in fresh strawberries for a fruity twist. Each season offers a new chance to enjoy this smoothie in different ways! Store any leftover smoothie in an airtight container. Keep it in the fridge for up to two days. If you notice it thickening, just stir in a splash of milk before enjoying. You can freeze leftover smoothie for later. Pour it into ice cube trays or freezer-safe bags. When you want a quick treat, simply blend the frozen cubes with a bit of milk. This way, you’ll have a refreshing drink ready in no time. To enjoy the smoothie warm, gently heat it in a saucepan over low heat. Stir it often to avoid burning. You want it warm, not hot. Check the taste and add more spices if needed. This will keep the flavors vibrant and tasty. You can use any plant-based yogurt. Options like coconut or almond yogurt work well. They provide creaminess and flavor. Silken tofu is another great choice, giving a smooth texture. To make this smoothie vegan, replace Greek yogurt with a plant-based yogurt. Use maple syrup as a sweetener. Almond milk is already vegan, so you’re set there. You can also skip the cream cheese or use a vegan cream cheese substitute. Yes, you can prep the smoothie in advance. Blend it and store it in the fridge. It keeps well for about 24 hours. Just give it a good shake or stir before serving. For longer storage, consider freezing it. This blog covered a great smoothie recipe with pumpkin and banana. You learned about top ingredients, easy steps for blending, and ways to adjust sweetness. I shared tips for serving and improving flavor, plus variations to keep it interesting. Remember, you can store leftovers and freeze the smoothie for later. This recipe suits different diets too. Experiment and enjoy each sip. Smoothies like this make healthy eating fun and simple.

Pumpkin Spice Cheesecake Smoothie Creamy and Rich Delight

If you love creamy drinks that are also rich and flavorful, you’re in for a treat! The Pumpkin Spice Cheesecake

To make Mediterranean hummus veggie wraps, you will need: - 4 large whole wheat tortillas - 1 cup hummus - 1 cucumber, thinly sliced - 1 red bell pepper, sliced - 1 medium carrot, julienned - 1 cup baby spinach - 1/2 cup cherry tomatoes, halved - 1/4 cup Kalamata olives, sliced - 1/4 cup feta cheese (optional) - 2 tablespoons fresh lemon juice - Salt and black pepper to taste These ingredients work together to create a colorful and tasty wrap. You can add some extra flavors to make your wraps even better: - Fresh parsley or dill for garnish - Avocado slices for creaminess - Roasted red peppers for sweetness - Red onion for a bit of bite These add-ons can give you a fun twist on the basic recipe. You can switch up your hummus to change the taste: - Roasted garlic hummus for a bold flavor - Spicy red pepper hummus for some heat - Lemon dill hummus for a fresh twist - Beet hummus for a vibrant color These variations make it easy to customize your wraps to your liking. To start, lay your whole wheat tortillas flat. Use a clean surface or a large cutting board. This gives you space to create your tasty wraps. Next, take your hummus and spread a nice layer over each tortilla. Make sure to leave a small edge around the sides. This edge helps hold everything inside when you roll the wraps. Now, let’s make the veggie mix. In a bowl, add the sliced cucumber, red bell pepper strips, julienned carrot, baby spinach, halved cherry tomatoes, and sliced Kalamata olives. This mix adds color and crunch. Squeeze in fresh lemon juice for a zesty touch. Season with salt and black pepper to taste. Toss everything gently to coat the veggies evenly. This mixture will pack your wraps with flavor and nutrients. Next, it’s time to fill the tortillas. Spread the veggie mixture evenly over the hummus on each tortilla. If you want to add feta cheese, sprinkle it over the veggies. Now, start rolling a tortilla from one end, tucking in the sides as you go. This keeps the filling secure. Once rolled, use a sharp knife to cut each wrap in half diagonally. This makes them easier to eat and looks great on a plate. Serve your wraps right away for the best taste, or wrap them up for a tasty lunch later. Making your hummus at home is easy and fun. Start with one can of chickpeas. Drain and rinse them well. In a blender, add the chickpeas, two tablespoons of tahini, and the juice of one lemon. Blend until smooth. If it’s too thick, add a bit of water. Season with salt and pepper to taste. You can also add garlic for extra flavor. This simple recipe gives you fresh, creamy hummus that pairs perfectly with your wraps. To keep your wraps fresh, pack them carefully. Always use fresh tortillas. Roll them tightly to hold in the filling. If you make the wraps ahead of time, wrap them in foil or parchment paper. This keeps them from drying out. Store them in the fridge if you’re not eating them right away. For the best taste, enjoy them within two days. Presentation makes a big difference! Cut your wraps in half to show off the colorful filling. Place them on a bright platter. You can garnish with fresh parsley or dill. Add a small bowl of extra hummus or a yogurt dip on the side. This invites your guests to dive right in! {{image_4}} To make these wraps vegan, skip the feta cheese. Use hummus as your base. It adds creaminess and flavor. You can also add avocado for a rich texture. Try using a vegan herb spread for added zest. If you need gluten-free options, use rice paper or lettuce leaves. They provide a fresh taste and crunch. You can also find gluten-free tortillas at many stores. Make sure to check the label for safety. Feel free to get creative with your veggies. Add roasted red peppers for sweetness. Shredded zucchini adds moisture and nutrients. Try using arugula if you want a peppery kick. Sliced radishes can give a nice crunch. Experiment with whatever you like! Store your leftover Mediterranean hummus veggie wraps in an airtight container. This keeps them fresh and tasty. Place a piece of parchment paper between layers to prevent sticking. They stay good in the fridge for 2 to 3 days. If you notice any sogginess, eat them sooner. You can freeze these wraps for longer storage. Wrap each one tightly in plastic wrap and then place them in a freezer bag. This method helps avoid freezer burn. They will keep for up to 3 months in the freezer. When ready to eat, thaw them in the fridge overnight. To reheat your wraps, you have a few options. You can use a microwave for a quick fix. Remove any cold toppings like feta before heating. Heat for about 30 seconds to 1 minute, checking to avoid overheating. Alternatively, warm them in a skillet over medium heat for a few minutes on each side. This method keeps the tortilla crispy. Enjoy your wraps warm! Mediterranean Hummus Veggie Wraps last about three days in the fridge. Make sure to store them in an airtight container. This will keep the wraps fresh and tasty. If you notice any change in smell or texture, it’s best to toss them. Yes, you can make these wraps ahead of time. Prepare them up to one day before you plan to eat. Wrap them tightly in foil or parchment paper. This helps keep them fresh. Just remember to add the veggies close to serving time for the best crunch. If you want a substitute for feta cheese, try using goat cheese or vegan cheese. Both options add a nice creaminess. You can also skip the cheese entirely for a lighter wrap. This way, you keep all the flavors while making it dairy-free. This post covered how to make tasty Mediterranean hummus veggie wraps. We explored essential ingredients and fun options to add flavor. I shared step-by-step instructions for prepping, assembling, and serving your wraps. You learned tips for making homemade hummus and storing leftovers. Finally, I addressed common questions about variations and substitutions. Enjoy creating your wraps and experimenting with flavors. They are perfect for any meal or snack!

Mediterranean Hummus Veggie Wraps Tasty and Healthy Dish

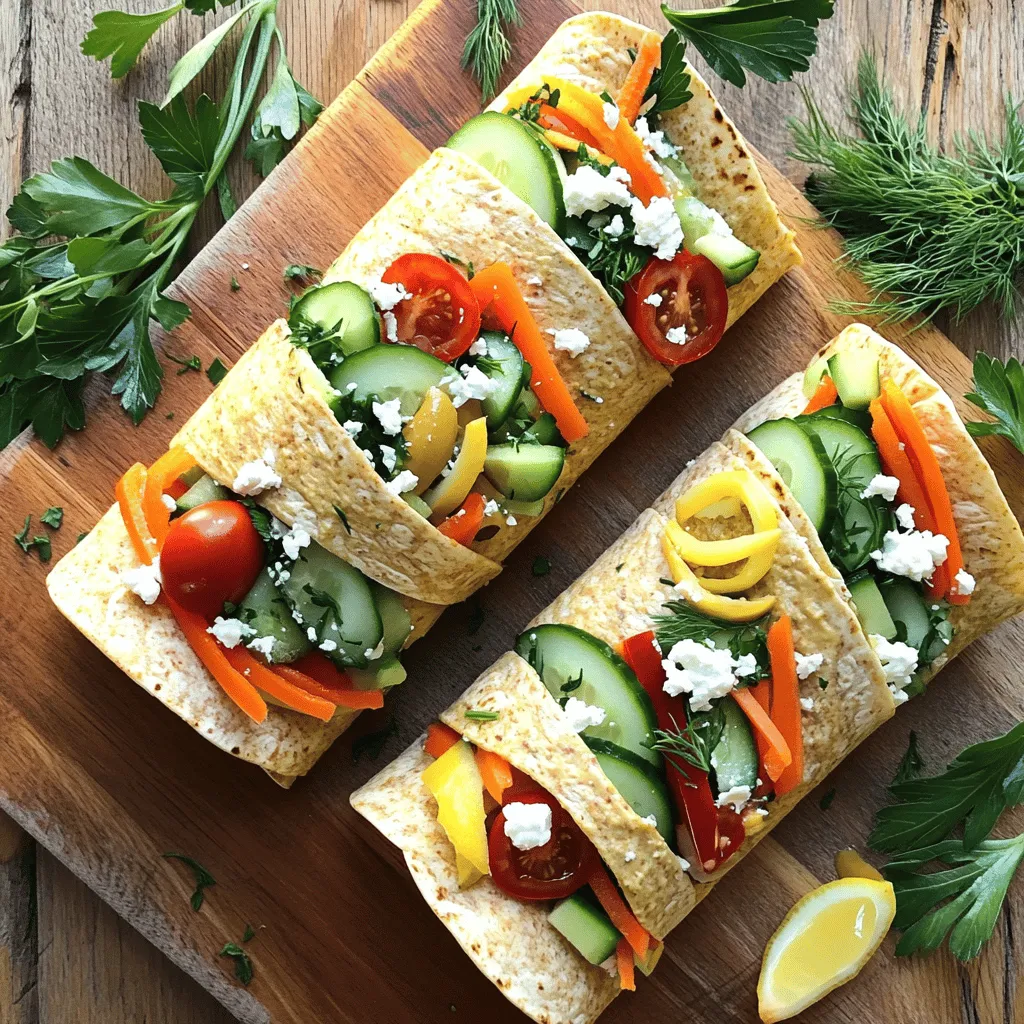
Looking for a fresh and healthy meal that bursts with flavor? Try my Mediterranean Hummus Veggie Wraps! You’ll love how

You need 2 cups of fresh strawberries for this jam. Make sure they are ripe and sweet. Hull them and chop them into small pieces. Fresh strawberries give the best flavor and color to your jam. Use 1/4 cup of pure maple syrup. This sweetener adds a rich taste. You can adjust this amount based on how sweet you want your jam. If you like it sweeter, feel free to add more. You will need 2 tablespoons of chia seeds. These tiny seeds help thicken the jam. They absorb liquid and create a nice texture. Plus, they add a boost of fiber and nutrients. Add 1 teaspoon of pure vanilla extract. This ingredient gives the jam a warm, sweet flavor. It blends well with the strawberries and enhances the taste. Just a pinch of sea salt is needed. This tiny amount helps balance the sweetness. It brings out the natural flavors of the strawberries and maple syrup. Start by washing your strawberries. Remove the green tops and chop them into small pieces. This will help them cook faster and release their juices. In a medium saucepan, add the chopped strawberries. Pour in 1/4 cup of pure maple syrup and a pinch of sea salt. Turn the heat to medium and stir gently. Cook for about 5-7 minutes. You will see the strawberries soften and break apart. Once the strawberries are soft, grab a fork or potato masher. Mash the strawberries to your liking. If you prefer a smooth jam, mash them well. If you like some chunks, mash a little less. Now it's time to mix in the chia seeds. Add 2 tablespoons of chia seeds along with 1 teaspoon of pure vanilla extract. Stir well to make sure the chia seeds are spread evenly in the mixture. Remove the saucepan from the heat. Let the mixture sit for about 10-15 minutes. During this time, the chia seeds will soak up the liquid. This will help your jam thicken nicely. After resting, taste your jam. If you want it sweeter, add more maple syrup. Stir well to combine any extra sweetness. Carefully pour the jam into a clean jar or airtight container. Let it cool completely before sealing the jar. For best results, refrigerate the jam for at least one hour. This chilling time helps it thicken more and enhances the flavor. When picking strawberries, look for bright red ones with a strong scent. They should feel firm but not too hard. Avoid berries with white or green spots. These spots mean they are not ripe. Fresh strawberries give the best flavor for your jam. If you can, buy local or organic strawberries. They taste better and are often fresher. The recipe calls for maple syrup for sweetness. You can add more or less syrup to fit your taste. Try starting with 1/4 cup, then taste the mixture. If you want it sweeter, add a little more syrup. Remember, the sweetness can change as the jam cools. Always taste before you finish! To get the right jam thickness, let it rest. Chia seeds absorb liquid and help thicken the jam. After cooking, let it sit for 10-15 minutes. If you want it thicker, you can add more chia seeds. If it’s too thick, stir in a bit of water or extra strawberries. Keep adjusting until it’s just right for you! {{image_4}} You can mix in other fruits to make this jam unique. Blueberries, raspberries, or peaches work well. Just keep the same amount of fruit. If you want a berry blend, try equal parts strawberries and blueberries. This adds different flavors and colors to your jam. Adding spices can change the flavor profile of your jam. A sprinkle of cinnamon brings warmth. You can also try ginger or nutmeg for a zesty kick. Just add a small amount while cooking the strawberries. Taste it as you go to find the perfect balance. If you want a sugar-free jam, you can use stevia or monk fruit sweetener. These options can replace maple syrup. You may need to adjust the amount based on the sweetness you prefer. Using ripe fruit can also help keep the jam sweet without added sugars. To keep your jam fresh, store it in a clean jar. Glass jars work best. Make sure to seal it tightly. This helps keep out air and moisture. You can also use an airtight container. If your jam is warm, allow it to cool before sealing. This prevents condensation inside the jar. If you leave your jam out at room temperature, it lasts for one day. After that, you should refrigerate it. Keeping it out can cause spoilage. Always check for any signs of mold or off smells before using. If you see or smell anything unusual, it is best to throw it away. In the fridge, your jam can last up to two weeks. Store it in the back of the fridge for the best results. The back is usually cooler than the front. When you open the jar, use clean utensils each time. This prevents bacteria from getting in. If you want to keep it longer, you can freeze it. Just pour it into a freezer-safe container, leaving some space at the top for expansion. Yes, you can use frozen strawberries! Just thaw them first. The flavor will still be great. The jam may be a bit thinner, so be ready to adjust the chia seeds. The jam lasts about one week in the fridge. Store it in a clean jar. Make sure it’s sealed well to keep it fresh. Chia seed jam is super versatile! You can spread it on toast or pancakes. It’s also great on yogurt or oatmeal. Try it in smoothies or as a topping for desserts! Yes, this jam is both gluten-free and vegan! It uses only plant-based ingredients. You can enjoy it without any worries about dietary restrictions. To make a larger batch, simply multiply the ingredients. Keep the same ratio for strawberries and chia seeds. Adjust the cooking time slightly if needed. Just make sure to use a bigger pot! You can create delicious strawberry vanilla chia seed jam using fresh ingredients like berries and maple syrup. We covered steps to prep, cook, and store your jam. I shared tips on choosing berries and achieving the right consistency. You even learned tasty variations. This jam is easy, fun, and fits many diets. Enjoy experimenting with flavors and sharing your results. This jam can brighten any meal or snack. Enjoy the process and the sweet reward!

Strawberry Vanilla Chia Seed Jam Easy and Tasty Recipe

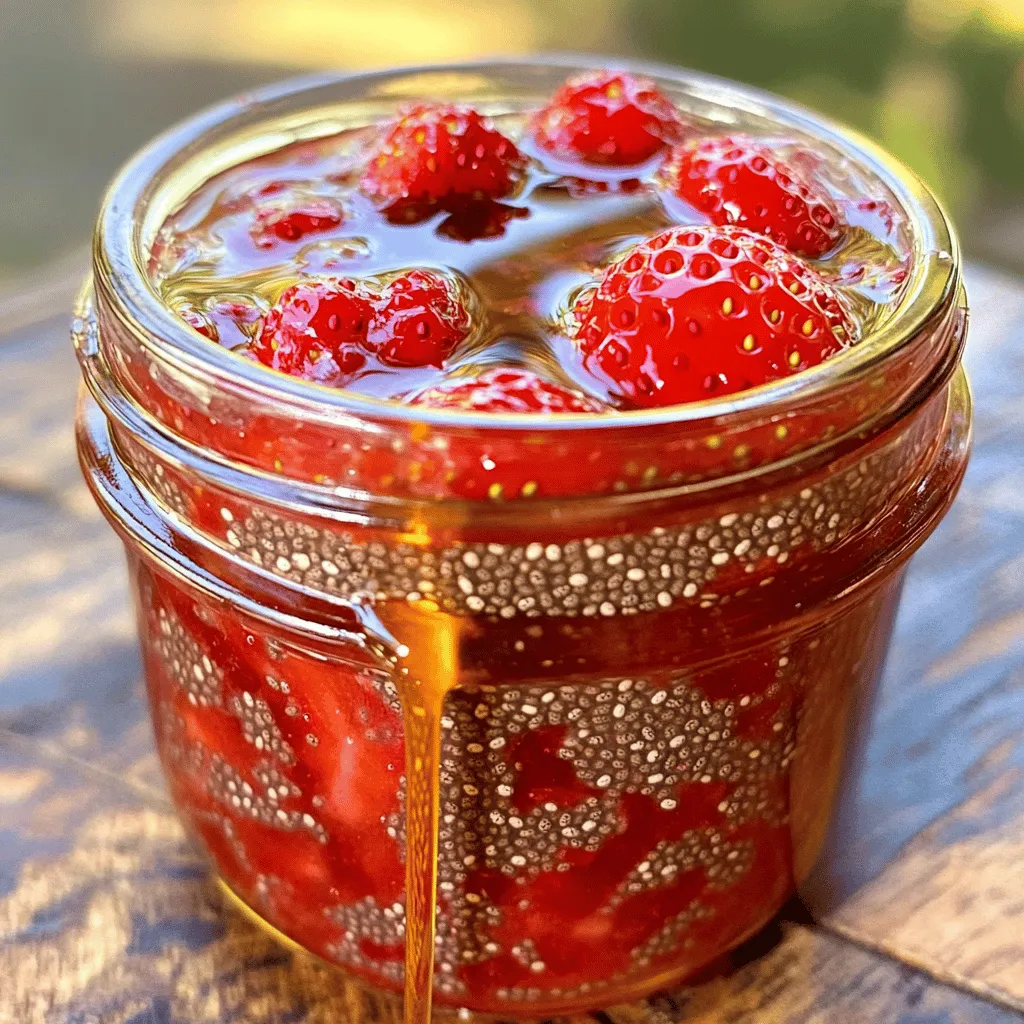
Are you ready to whip up a delicious treat? This Strawberry Vanilla Chia Seed Jam recipe is not just easy;

- 1 block firm tofu - 1/4 cup honey - 2 tablespoons Sriracha sauce - 2 cups cooked jasmine rice - 1 cup broccoli florets - 1 cup mixed bell peppers - 2 tablespoons cornstarch - 2 tablespoons vegetable oil - 1 teaspoon sesame oil The heart of this dish lies in its simple, yet bold ingredients. Firm tofu gives a nice texture and absorbs flavors well. Honey adds sweetness that balances the heat from Sriracha sauce. You can adjust the amount of Sriracha according to your taste. I often start with two tablespoons, but feel free to add more if you enjoy spice! Next, we need jasmine rice for a fluffy base. This rice pairs well with the sweet and spicy glaze. The broccoli florets and mixed bell peppers add color and crunch. They also provide essential nutrients, making this bowl not just tasty but healthy too. For cooking, cornstarch is crucial. It coats the tofu and creates a crispy coating when fried. The blend of vegetable oil and sesame oil enhances the dish's flavor. The vegetable oil helps fry the tofu while sesame oil gives that nutty touch. Gather these ingredients, and you’re ready to make a delicious meal that is satisfying and fun to eat! - Start with a block of firm tofu. - Drain and press it to remove extra water. - Cut the tofu into 1-inch cubes. - Place the cubes in a bowl and coat them with 2 tablespoons of cornstarch. - This coating helps create a crispy texture when cooked. - Heat a large skillet over medium heat. - Add 2 tablespoons of vegetable oil and 1 teaspoon of sesame oil. - Once the oil is hot, carefully add the tofu cubes in a single layer. - Cook each side for about 3-4 minutes. - Look for a golden brown color and crisp texture. - Remove the tofu from the skillet and set it aside. - In a small bowl, mix together 1/4 cup of honey and 2 tablespoons of Sriracha sauce. - Add 1 tablespoon of soy sauce and 1 tablespoon of rice vinegar to the mix. - Whisk until you have a smooth glaze. - Taste it and adjust the spice level to fit your liking. - In the same skillet, add 1 cup of broccoli florets and 1 cup of sliced bell peppers. - Stir-fry for about 4-5 minutes until they are tender but still crisp. - Next, add 1/2 cup of shredded carrots. - Stir for another minute to warm them up. - Carefully add the crispy tofu back into the skillet. - Pour the honey-Sriracha sauce over the tofu and vegetables. - Gently toss everything together to coat evenly. - Cook for an additional 2-3 minutes to meld the flavors. - Evenly distribute 2 cups of cooked jasmine rice among serving bowls. - Top each bowl with the tofu and vegetable mixture. - Finally, garnish with chopped green onions and sesame seeds. - Serve hot and enjoy the sweet and spicy flavors! To get that perfect crispy tofu, start by properly drying it. After draining, press the tofu to remove excess moisture. This step makes a big difference. Next, cut the tofu into 1-inch cubes and coat them in cornstarch. Cornstarch gives a nice crunch when cooked. When cooking, avoid overcrowding the skillet. If you add too much tofu at once, it will steam instead of fry. Fry in batches if needed. This way, your tofu will be golden brown and crispy on all sides. Do you prefer less heat? You can easily adjust the spice level in this dish. Start with less Sriracha in the sauce. You can even replace some of the Sriracha with honey for a sweeter taste. Adding other flavors can also help. Try mixing in a bit of lime juice or adding sweet chili sauce. These can balance the heat while still keeping the dish tasty. To make your dish even more flavorful, consider adding garlic or ginger. These ingredients bring a warm, aromatic touch to the sauce. You can add minced garlic when you mix the sauce or toss in fresh ginger when you stir-fry the veggies. If you want to switch things up, use alternative sauces. For example, teriyaki sauce can add a different twist. You can also try hoisin sauce for a sweet and savory flavor. Play around with flavors to find what you enjoy best! {{image_4}} For a tasty twist, think about meat alternatives. You can use tempeh or seitan in place of tofu. These options add protein and texture. If you want a vegan dish, use maple syrup instead of honey. This swap keeps that sweet flavor while staying plant-based. You can also try agave nectar as a sweetener. You can add more veggies to your bowl for extra color and taste. Spinach, snap peas, or zucchini work well. Try seasonal vegetables like asparagus in spring or butternut squash in fall. Each season brings different flavors and nutrients, so mix it up! Pair your Honey Sriracha Glazed Tofu Bowls with a fresh salad. A simple cucumber salad or a crunchy slaw adds a nice touch. For extra flavor, drizzle with a tangy dressing like sesame ginger. You can also serve it with a side of steamed edamame for a protein boost. To keep your Honey Sriracha Glazed Tofu Bowls fresh, store leftovers in an airtight container. Place the tofu and veggies in the fridge within two hours of cooking. This helps avoid bacteria growth. The dish stays good for about three days. After that, the tofu may lose its crispness and flavor. To reheat, use a skillet for the best results. Heat over medium until warm. This keeps the tofu crispy. You can also microwave, but be careful. Microwaving may make the tofu soft. For rice, add a splash of water and cover it. Heat for one to two minutes, stirring halfway. This helps the rice stay fluffy. For easy meal assembly, prep ingredients ahead of time. Cut the tofu and veggies and store them separately. You can even mix the sauce early. When you’re ready to cook, it will take less time. Just stir-fry the veggies and tofu, then add the sauce. This way, you get a quick, tasty meal any night! I recommend using firm or extra-firm tofu for this dish. Firm tofu holds its shape well during cooking. It absorbs the honey Sriracha sauce nicely, giving you great flavor. Extra-firm tofu is even denser and offers a crispier texture when cooked. Both options will work, but if you prefer more bite, stick with extra-firm tofu. Yes, you can easily make this dish gluten-free. Simply swap regular soy sauce for a gluten-free version, such as tamari. This change keeps the flavor while ensuring it fits a gluten-free diet. Check labels carefully, as some brands add extra ingredients that may contain gluten. If you want more heat, here are some tips: - Increase the amount of Sriracha in the sauce. - Add red pepper flakes when cooking the tofu. - Toss in some sliced fresh chilies with the vegetables. Each option boosts the spice level, helping you find the right balance for your taste. This dish pairs well with many sides. Consider serving it with: - Steamed edamame for a protein boost. - A fresh cucumber salad for cool crunch. - Roasted sweet potatoes for sweetness. These sides complement the sweet and spicy flavors of the tofu bowls perfectly. This blog post covered how to make tasty Honey Sriracha Glazed Tofu Bowls. We discussed key ingredients like firm tofu, honey, and Sriracha sauce. I shared step-by-step instructions for preparing, cooking, and assembling the dish. You learned tips to keep tofu crispy and ideas for adding extra flavors. Finally, I offered storage advice and answered common questions. With these guidelines, you can create a delicious meal that everyone will enjoy. Happy cooking!

Honey Sriracha Glazed Tofu Bowls Simple and Tasty Meal

Looking for a quick and tasty meal that packs a punch? Try my Honey Sriracha Glazed Tofu Bowls! They’re loaded

To make this creamy butternut squash sage risotto, gather the following ingredients: - 1 medium butternut squash, peeled and cubed - 1 cup Arborio rice - 4 cups vegetable broth - 1 small onion, finely chopped - 2 cloves garlic, minced - 2 tablespoons olive oil - 1 tablespoon butter - 1/2 cup grated Parmesan cheese - 1/4 cup heavy cream - 1 tablespoon fresh sage, chopped (plus additional for garnish) - Salt and pepper to taste Choose fresh, firm butternut squash for the best flavor. Look for a squash with a smooth skin and no soft spots. When selecting onions, pick ones that feel heavy for their size. They should be dry and firm. For garlic, choose bulbs that are plump and free from sprouting. Fresh sage should be vibrant and green, with no wilting or browning. You can enhance the risotto by adding a few extra ingredients. Consider using: - A splash of white wine for depth - Crushed red pepper flakes for heat - A handful of spinach or kale for extra greens - Chopped nuts like walnuts or pecans for crunch These options can take your creamy butternut squash sage risotto to the next level! Start by heating 4 cups of vegetable broth in a medium saucepan. Use low heat to keep the broth warm. This makes it easier for the rice to cook. A warm broth helps the risotto stay creamy and smooth. In a large skillet, add 1 tablespoon of olive oil over medium heat. Once hot, add 1 medium butternut squash, peeled and cubed. Sauté the squash for about 8 to 10 minutes. You want it tender and slightly caramelized. Once done, remove it from the skillet and set it aside. In the same skillet, add another tablespoon of olive oil and 1 tablespoon of butter. Let the butter melt, then add 1 small onion, finely chopped. Cook until it turns translucent, around 3 to 4 minutes. Next, add 2 cloves of minced garlic and cook for 1 more minute until it smells great. Now, pour in 1 cup of Arborio rice. Stir it well, and toast the rice for 2 to 3 minutes. You want the edges to look slightly translucent. This step brings out a nutty flavor. Then, start ladling in the warm vegetable broth, one ladle at a time. Stir often and let the rice absorb the broth before adding more. Continue this for 15 to 20 minutes until the risotto is creamy and the rice is al dente. Once the rice is cooked, stir in the sautéed butternut squash, 1/4 cup of heavy cream, 1 tablespoon of chopped fresh sage, and 1/2 cup of grated Parmesan cheese. Mix everything until it’s creamy. Don’t forget to season with salt and pepper to taste. Remove the skillet from heat and let it sit for a minute. Serve warm, garnished with fresh sage and extra Parmesan for a beautiful finish. To make creamy risotto, start with the right rice. Arborio rice is perfect because it has high starch. This starch makes the risotto creamy. Always heat your broth in a separate pot. Keeping it warm helps the rice cook well. Stirring often is key. This helps the rice release more starch. - Use fresh ingredients: Fresh butternut squash and herbs add flavor. - Cook slowly: Take your time. This dish needs at least 20 minutes of gentle cooking. One mistake is adding all the broth at once. This can make the rice soggy. Instead, add one ladle at a time. Let the rice absorb the broth before adding more. Another common error is not stirring enough. If you don’t stir, the rice might stick to the pan. Always keep an eye on it. Lastly, don’t skip the seasoning. Taste as you cook. Add salt and pepper to enhance the flavors. To get the right texture, focus on timing. Cook the rice until it's al dente, or firm to the bite. This usually takes about 15 to 20 minutes. When you add the heavy cream and cheese, mix well. This will give your risotto that creamy feel. If it seems too thick, add a splash of warm broth. This will help loosen it up. Always aim for a smooth, rich consistency that flows easily on the plate. {{image_4}} You can easily make a vegan version of butternut squash sage risotto. Replace the butter with more olive oil. Skip the Parmesan cheese and use nutritional yeast instead. It adds a cheesy flavor without dairy. For creaminess, swap heavy cream with coconut cream or a plant-based cream. This way, you keep the dish rich and tasty while making it vegan-friendly. If you want to add protein, chicken and sausage work great. For chicken, you can sauté bite-sized pieces in the skillet before cooking the onions. Make sure they're cooked through. For sausage, slice it and cook it with the onion and garlic. This adds a savory depth to the risotto. Both options make the dish more filling and enjoyable, perfect for a hearty meal. You can switch up the vegetables based on the season. In spring, try adding peas or asparagus for a fresh taste. In summer, zucchini or bell peppers brighten up the dish. In fall, mushrooms add an earthy flavor that pairs well with the squash. Each season gives you a new way to enjoy this creamy risotto. Feel free to experiment and discover what you love! To store leftover risotto, first let it cool to room temperature. Then, place it in an airtight container. Make sure to seal it well to prevent moisture loss. Store the container in the fridge. The risotto will stay fresh for up to three days. If you want to keep it longer, consider freezing it. When reheating risotto, add a splash of broth or water to keep it creamy. Use a skillet over medium heat for even warmth. Stir the risotto often while reheating. This helps to prevent it from sticking to the pan. You can also use the microwave, but be cautious. Heat it in short bursts, stirring in between. This way, you avoid overcooking it. Freezing risotto is a great option for meal prep. However, keep in mind that the texture changes after freezing. To freeze, place it in a freezer-safe container. Leave some space at the top for expansion. It can stay in the freezer for up to three months. When you are ready to eat, thaw it in the fridge overnight before reheating. Arborio rice is a special type of short-grain rice. It is starchy and creamy when cooked. This rice absorbs liquid well, which makes risotto rich and smooth. The starch from Arborio rice gives risotto its famous creamy texture. You cannot use regular rice for this dish, as it won’t create the same result. Yes, you can use butternut squash puree. It saves time and makes cooking easier. However, fresh squash adds texture and flavor. If you choose puree, skip the sauté step. Just stir it in after adding the broth. Adjust the liquid amounts to keep the risotto creamy. Risotto usually takes about 20 minutes to cook. You want to stir it often. This helps the rice absorb the broth and become creamy. Always taste it to check if the rice is al dente or soft enough for your liking. You can prepare risotto ahead of time, but it is best fresh. If you make it early, it may become thick. To reheat, add a little broth or water. Stir it over low heat until warm. This will help restore its creamy texture. This blog post explored how to make creamy butternut squash sage risotto. You learned about selecting fresh ingredients, preparing broth, and step-by-step cooking instructions. We discussed tips for perfecting your risotto, including variations for special diets. Remember, making risotto takes patience and practice, but the rewards are great. Whether you choose classic or creative twists, this dish will impress. Enjoy your cooking adventure!

Creamy Butternut Squash Sage Risotto Delightful Dish

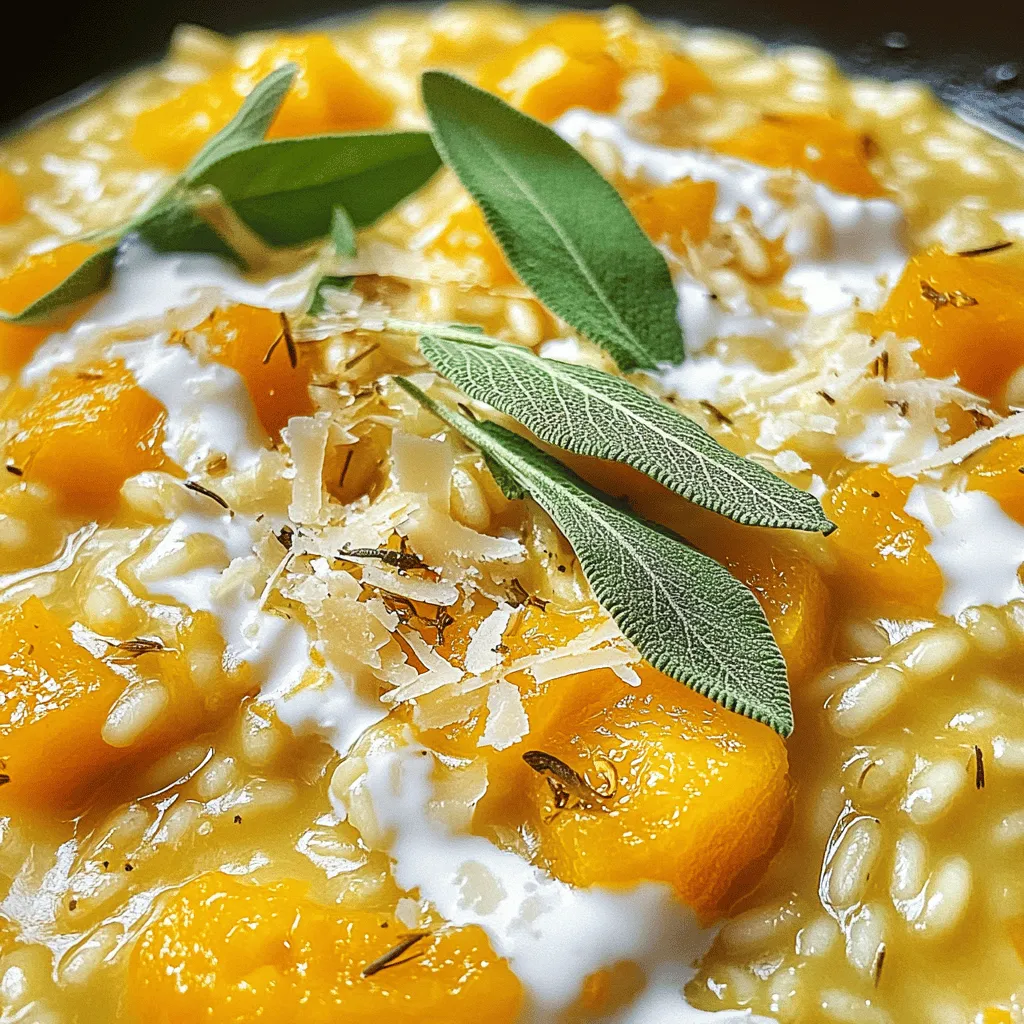
If you’re craving a warm, comforting dish, you’ve found it! This Creamy Butternut Squash Sage Risotto is rich and smooth,

Older posts
Newer posts
← Previous Page1 … Page29 Page30 Page31 … Page83 Next →

dsad

© 2026 eataroundit • Built with GeneratePress

Our Policies

  • Copyright Policy
  • Cookie Policy
  • GDPR Policy
  • Privacy Policy
  • Disclaimer
  • Terms Of Use

More Information

  • Home
  • About
  • Contact
  • Appetizers
  • Dessert
  • Dinner
  • Drinks
©2026, eataroundit About Back To Top