Skip to content
DisclaimerTerms Of UseGDPR PolicyCookie Policy

eataroundit

  • Home
  • Drinks
  • Appetizers
  • Dinner
  • Dessert
  • About
  • Contact
  • Privacy Policy
DisclaimerTerms Of UseGDPR PolicyCookie Policy

Hannah

- 2 large sweet potatoes, peeled and diced into bite-sized cubes - 2 tablespoons extra virgin olive oil - 1 teaspoon smoked paprika - 1 teaspoon ground cumin - Sea salt and freshly cracked black pepper to taste - 1 red bell pepper, diced into small pieces - 1/2 medium red onion, finely chopped - 1 cup cooked quinoa, cooled - 1/4 cup crumbled feta cheese (optional for a creamy touch) - 1/4 cup fresh parsley, finely chopped - Juice of 1 fresh lemon - 1 tablespoon honey or maple syrup (omit honey for a vegan salad) You can change up this salad to fit your taste. Here are some ideas: - Swap quinoa for farro or barley for a different grain. - Add beans like black beans or chickpeas for extra protein. - Toss in some diced avocado for creaminess. - Use different cheeses like goat cheese or blue cheese. This salad is not just tasty; it is also good for you. Here’s a quick look: - Sweet potatoes are high in fiber and vitamins A and C. - Quinoa adds protein and is gluten-free. - Olive oil provides healthy fats. - Feta cheese adds calcium and flavor. - Overall, this dish is balanced with carbs, protein, and fats. For the full recipe, check out the details above! To start, preheat your oven to 425°F (220°C). This high heat helps to caramelize the sweet potatoes. In a large bowl, take two large sweet potatoes. Peel and dice them into bite-sized cubes. Add two tablespoons of extra virgin olive oil. Sprinkle in one teaspoon of smoked paprika and one teaspoon of ground cumin. Finish with sea salt and freshly cracked black pepper to taste. Toss everything together well. The goal is to coat the sweet potatoes evenly. Line a large baking sheet with parchment paper. Spread the seasoned sweet potatoes in a single layer. Give them some space to roast evenly. Roast for 25 to 30 minutes. Stir or flip them halfway through to ensure even browning. While the sweet potatoes roast, prepare the salad base. In another large bowl, combine one cup of cooked quinoa that has cooled. Then, add one diced red bell pepper and half a finely chopped medium red onion. Add a quarter cup of fresh parsley, finely chopped. Mix these ingredients well. The colors should look vibrant and inviting. This base adds texture and flavor. Once the sweet potatoes are roasted, take them out and let them cool for about five minutes. Next, add the warm sweet potatoes to the quinoa mixture. Stir gently to combine without mashing the sweet potatoes. In a small bowl, whisk the juice of one fresh lemon with one tablespoon of honey or maple syrup. Drizzle this dressing over the salad. Toss gently to coat everything evenly. If you want a creamy touch, sprinkle a quarter cup of crumbled feta cheese on top just before serving. For a beautiful presentation, serve in a large, shallow bowl. This lets the vibrant colors shine through. Roasting sweet potatoes is simple and rewarding. Start by cutting them into even cubes. This helps them cook evenly. Aim for about one-inch pieces. Next, toss them in olive oil and spices. The oil helps them get crispy. Use smoked paprika for a nice smoky flavor. Roast at 425°F (220°C) for 25-30 minutes. Stir them halfway to get all sides browned. If they look golden and soft, they are ready. A great dressing can elevate your salad. For this dish, whisk together fresh lemon juice and honey or maple syrup. This adds a sweet and tangy flavor. Adjust to your taste. If you want a creamier dressing, add some crumbled feta cheese. This will make your salad rich and delicious. Drizzle the dressing over the salad right before serving. Toss gently to mix everything without breaking the sweet potatoes. A beautiful presentation makes your dish more inviting. Serve the salad in a large, shallow bowl. This allows the bright colors to shine. Layer the warm sweet potatoes on top of the quinoa mixture. Finish with a sprinkle of fresh parsley. This adds a pop of green and freshness. You can also add a few extra feta crumbles on top for a nice touch. Enjoy the colors and flavors! For the full recipe, check out Roasted Sweet Potato Quinoa Salad 🥗. {{image_4}} You can easily boost your salad's protein. Add grilled chicken for a hearty option. Simply slice cooked chicken breasts and mix them in. Chickpeas are great too. They add a nutty taste and creamy texture. Use canned chickpeas for ease or cook dry ones if you prefer. For vegetarians, feta cheese adds creaminess. Try a vegan cheese if you want a dairy-free option. You can also add avocado for a creamy touch. It pairs well with sweet potatoes and gives healthy fats. Change up the veggies based on the season. In fall, add roasted Brussels sprouts or butternut squash. In summer, try fresh corn or diced cucumbers. Each season brings new flavors. You can even use fresh herbs like mint or basil. They brighten the salad and add extra zest. These variations make the roasted sweet potato salad adaptable. You can enjoy it all year round. For the full recipe, check out the details above. To keep your roasted sweet potato salad fresh, store it in an airtight container. Place the container in the fridge. This helps prevent the flavors from mixing too much. If you have feta cheese, add that right before serving. It keeps the cheese creamy. If you want to warm up the sweet potatoes, use the oven. Preheat it to 350°F (175°C). Place the sweet potatoes on a baking sheet and cover with foil. Heat for about 10-15 minutes. This helps keep them soft and tasty. You can also use a microwave. Just heat in short bursts, stirring in between. Cooked sweet potatoes last about 3-5 days in the fridge. Quinoa also stays good for about 5 days. If you store the salad without dressing, it can last longer. Just keep an eye on the veggies. Once they start to wilt, it's time to toss them. Roasted sweet potatoes last about 3 to 5 days in the fridge. Make sure to store them in an airtight container. This keeps them fresh and tasty for longer. When you want to eat them, just reheat in the oven or microwave. They still taste great! Yes, you can use other grains. Brown rice and farro work well. They both add a nice texture and flavor. You can also try couscous or barley for a change. Each grain brings its own taste, making your salad special. Toppings can make your salad shine. Here are some great ideas: - Avocado slices for creaminess - Chopped nuts for crunch - Dried cranberries for sweetness - Green onions for a fresh bite - Pumpkin seeds for added nutrients These toppings add flavor and fun! Absolutely! This salad is perfect for meal prep. You can make it ahead of time and store it in the fridge. Just keep the dressing separate until you’re ready to eat. This way, your salad stays fresh and crunchy. Enjoy it for lunch or a quick dinner! For the full recipe, check out the Roasted Sweet Potato Quinoa Salad. This blog post covers how to make a tasty roasted sweet potato salad. We outlined the key ingredients, offered step-by-step instructions, and shared helpful tips. You can customize the dish by adding proteins or seasonal ingredients, making it versatile. Storing leftovers is easy, and reheating sweet potatoes is simple too. Enjoy a healthy dish that’s quick and flavorful. With these tips and recipes, you can make a delicious meal anytime. Go ahead and make this salad your own. You’ll love every bite!

Roasted Sweet Potato Salad Bold and Flavorful Dish

Get ready to spice up your meal with a Roasted Sweet Potato Salad that’s bold and flavorful! This dish not

To make garlic herb chicken thighs, gather these simple ingredients: - 4 bone-in, skin-on chicken thighs - 4 cloves of garlic, finely minced - 2 tablespoons fresh rosemary, finely chopped - 2 tablespoons fresh thyme, finely chopped - 1 tablespoon olive oil - 1 teaspoon lemon zest (from about half a lemon) - Salt and freshly ground black pepper to taste - 1 cup low-sodium chicken broth - Fresh parsley, chopped, for garnish When measuring ingredients, precision matters. Here are some tips: - Use dry measuring cups for solid ingredients like herbs. - Use liquid measuring cups for liquids like olive oil and chicken broth. - For garlic, mince it finely to enhance its flavor. - Fresh herbs are best chopped finely to release their oils. - Use a microplane for lemon zest to avoid bitter pith. If you lack some ingredients, don't worry! Here are swap ideas: - Use boneless chicken thighs if you prefer less fat. - Substitute garlic powder for fresh garlic in a pinch. - Try dried rosemary or thyme if fresh isn’t available. - Use vegetable broth instead of chicken broth for a vegetarian twist. - Swap lemon zest with a splash of vinegar for brightness. These ingredients and tips will set you up for a delicious meal. You can find the full recipe for garlic herb chicken thighs in the recipe section. To start, preheat your oven to 400°F (200°C). This step is vital for a great roast. Next, take your chicken thighs and pat them dry with paper towels. This helps the skin get crispy. Season both sides well with salt and freshly ground black pepper. Make sure every inch gets covered. Now, grab a large, oven-safe skillet and heat 1 tablespoon of olive oil over medium-high heat. Wait until the oil shimmers. Place the chicken thighs skin side down in the hot oil. Sear them for about 5 minutes. You want that skin to turn a deep golden brown. Flip the thighs and sear the other side for another 3 minutes. Don’t rush this step; a good sear makes all the difference! After searing, take the chicken out and set it aside. In the same skillet, lower the heat to medium. Add 4 cloves of minced garlic and sauté for about 30 seconds. The garlic should smell fragrant, but be careful not to let it brown. Next, stir in 2 tablespoons of chopped rosemary, 2 tablespoons of thyme, and 1 teaspoon of lemon zest. Cook for another minute until the herbs smell amazing. Then, pour in 1 cup of low-sodium chicken broth. Use a wooden spoon to scrape up the browned bits from the skillet. These bits add great flavor! Place the seared chicken thighs back into the skillet, skin side up. Transfer the skillet to your preheated oven. Bake for 25-30 minutes or until the chicken reaches an internal temperature of 165°F (75°C). When done, take the skillet out and let the chicken rest for 5-10 minutes. This resting time keeps the juices inside the chicken. Finally, sprinkle some chopped parsley over the top for a fresh touch. Enjoy your flavorful Garlic Herb Chicken Thighs! For the complete guide, refer to the Full Recipe. To make your garlic herb chicken thighs shine, start with a great marinade. Mix garlic, rosemary, thyme, olive oil, lemon zest, salt, and pepper in a bowl. The acid in lemon zest brightens the flavors. Let the chicken marinate for at least 30 minutes. If you have more time, marinate it overnight. This gives the herbs time to infuse into the meat. For crispy skin, pat the chicken thighs dry before cooking. This step is key. Heat your skillet until it is hot. Sear the thighs skin-side down for about five minutes. This step creates a nice golden crust. After flipping, cook for three more minutes. This helps keep the meat juicy. Baking the chicken in broth adds moisture while it cooks. For side dishes, think simple and fresh. Roasted vegetables work well. Try carrots, broccoli, or green beans. A side salad with mixed greens adds crunch. You can also serve garlic mashed potatoes. They soak up the flavorful broth. For a light touch, serve with rice or quinoa. Each of these pairs well with the garlic herb chicken thighs. For the full recipe, check out the section above. {{image_4}} You can change the flavor of garlic herb chicken thighs by using different herbs. Instead of rosemary and thyme, try using oregano and basil for a Mediterranean touch. You can also mix in parsley or tarragon for a fresh twist. This way, you can create a dish that suits your taste. You can cook chicken thighs in various ways. The skillet method gives a nice crispy skin. First, sear the chicken in a hot pan. Then, add your garlic herb mixture and finish it in the oven. For the grill, marinate the chicken first. Then, cook it on medium heat until it reaches a safe temperature. Each method brings a unique flavor and texture. You can add some fun by changing the flavors. For a spicy kick, mix in red pepper flakes or a dash of hot sauce with your garlic. If you prefer sweet, add honey or maple syrup to the marinade. For a citrusy taste, include more lemon juice or zest. These options will make your garlic herb chicken thighs even more exciting. For the full recipe, check out the complete instructions above. To store leftover Garlic Herb Chicken Thighs, wait until they cool down. Place the chicken in an airtight container. Make sure to cover it well. You can keep it in the fridge for up to 3 days. If you want to keep it longer, freezing is a good option. For freezing, wrap each chicken thigh tightly in plastic wrap. Then, place them in a freezer-safe bag. Remove as much air as possible to prevent freezer burn. You can store them in the freezer for up to 3 months. Label the bag with the date. When you are ready to cook, thaw the chicken in the fridge overnight. To reheat your chicken thighs, preheat your oven to 350°F (175°C). Place the chicken in an oven-safe dish. Add a splash of chicken broth to keep it moist. Cover the dish with foil to avoid drying out. Heat for about 20 minutes or until the chicken reaches 165°F (75°C). You can also reheat it in the microwave. Just cover it and heat it in short bursts, checking often. Enjoy your tasty meal again with ease! For the full recipe, check out the [Full Recipe]. The best way to check chicken doneness is with a meat thermometer. You should insert the thermometer into the thickest part of the thigh, avoiding the bone. The chicken is safe to eat when it reaches 165°F (75°C). Checking the doneness this way ensures juicy and safe chicken. You can also cut into the chicken; the juices should run clear, not pink. Yes, you can use boneless chicken thighs for this recipe. Boneless thighs will cook faster, so adjust the cooking time. Sear them for about 4 minutes on each side. Then, bake them for 20 minutes instead of 25-30 minutes. They will still be tasty and absorb those lovely garlic herb flavors. For maximum flavor, marinate the chicken thighs for at least 30 minutes. If you can, let them sit for 2 hours. You can also marinate them overnight for deeper flavor. Just remember to keep them in the fridge while marinating. This step is key to infusing the chicken with those delicious garlic and herb notes. You can find the full recipe in the sections above. You learned how to make delicious garlic herb chicken thighs. We covered the ingredients, prep steps, and cooking methods. I also shared tips for perfect texture and seasoning. Don't forget the storage tips for leftovers and variations to try. Cooking can be fun and tasty with simple ideas. Enjoy your meals and don’t hesitate to mix things up! You have the tools to make this dish your own.

Garlic Herb Chicken Thighs Flavorful Easy Dinner Recipe

If you’re looking for an easy dinner that bursts with flavor, you’re in the right place! Garlic Herb Chicken Thighs

When making a Sweet Potato Chickpea Buddha Bowl, fresh ingredients matter. Here’s what you need: - 2 medium sweet potatoes, peeled and diced into 1-inch cubes - 1 can (15 oz) chickpeas, thoroughly rinsed and drained - 1 cup cooked quinoa (white, red, or a blend for color) - 2 cups baby spinach, washed and dried - 1 ripe avocado, sliced into wedges - 2 tablespoons extra virgin olive oil - 1 teaspoon smoked paprika for a smoky flavor - 1 teaspoon ground cumin to add depth - Sea salt and freshly cracked black pepper to taste - 1 tablespoon tahini, for creaminess - Juice of 1 lemon, freshly squeezed - Sesame seeds for garnish, toasted if desired Each ingredient adds flavor and nutrition. Sweet potatoes bring sweetness and fiber. Chickpeas add protein and creaminess. Quinoa offers a nutty taste and is filling. Baby spinach gives color and vitamins. Avocado rounds it out with healthy fats. The spices enhance the dish, making it vibrant and tasty. For detailed cooking steps, check out the Full Recipe. Each bite will be a delight! First, preheat your oven to 400°F (200°C). This step ensures even cooking for your sweet potatoes and chickpeas. Next, prepare the sweet potatoes by peeling and dicing them into 1-inch cubes. Drain and rinse the chickpeas. On a large baking sheet, combine the diced sweet potatoes and chickpeas. Drizzle with olive oil, then sprinkle with smoked paprika, cumin, salt, and pepper. Toss everything well so each piece is coated. Arrange them in a single layer. Place the baking sheet in the preheated oven. Roast for 25-30 minutes. Stir halfway through the cooking time. This helps achieve even browning. Your sweet potatoes should turn tender and slightly crispy on the edges when done. For the dressing, gather these ingredients: - 1 tablespoon tahini - Juice of 1 lemon - A pinch of sea salt - 2 tablespoons water In a small bowl, whisk together the tahini, lemon juice, salt, and water. Mix until it is smooth and creamy. If needed, add more water, a teaspoon at a time, until you reach the desired consistency. This dressing adds creaminess and flavor to your bowl. Follow these steps, and you'll create a flavorful Sweet Potato Chickpea Buddha Bowl. For the complete recipe, check out the Full Recipe. To achieve crispy edges on sweet potatoes, cut them into uniform 1-inch cubes. This size cooks evenly and gets crispy. Use a high oven temperature, like 400°F (200°C). Toss the cubes with olive oil, smoked paprika, and cumin. Spread them out on your baking sheet. Give them space to breathe, so they roast instead of steam. Stir halfway through roasting to ensure they brown nicely. Even roasting is key for tasty vegetables. If they crowd the pan, they won't cook well. Use one large baking sheet instead of two small ones. This helps them roast evenly and get that golden-brown color we all love. When it comes to presentation, deep bowls work best. They showcase the beautiful layers of your Buddha bowl. Start with a base of quinoa. This adds color and texture. Next, layer the roasted sweet potatoes and chickpeas. Top it off with baby spinach for a fresh crunch. Slice the avocado into wedges and arrange it beautifully on top. Drizzle the tahini dressing generously over everything. For an extra touch, sprinkle sesame seeds on top. This adds flavor and a nice crunch. You can serve it two ways. Either gently toss all the ingredients together for a mixed bowl or keep the layers for a vibrant look. Both ways will taste amazing! Sweet potatoes are packed with vitamins and fiber. They help with digestion and keep you full. Chickpeas add protein and healthy fats. Together, they make a perfect pair for a healthy meal. Quinoa is a complete protein, which means it has all nine essential amino acids. It's also gluten-free, making it a great choice for many diets. Spinach is rich in iron and vitamins. Adding it boosts the nutrition of your Buddha bowl. With all these ingredients, you get a bowl full of health benefits. It's not just tasty; it's good for you too! For more details, check out the Full Recipe. {{image_4}} You can swap out sweet potatoes for other root veggies like carrots or beets. They add sweetness and color. For a crunch, try using roasted cauliflower or Brussels sprouts. When it comes to grains, quinoa is great, but you can also try brown rice, farro, or even barley. Each grain brings a unique taste to your bowl, so mix it up! While tahini dressing is delicious, you can also use hummus for creaminess. A yogurt dressing adds a nice tang. For a spicy kick, try sriracha or a spicy peanut sauce. Don’t forget about spices! Try adding curry powder or chili flakes. These changes can really amp up the flavor of your bowl. To make your Buddha bowl gluten-free, choose grains like quinoa or brown rice. They are tasty and safe for gluten-free diets. For vegan options, the current recipe is already plant-based. Just ensure your tahini is free of any animal products. This bowl is perfect for everyone! For the full recipe, check the details above. To store your Sweet Potato Chickpea Buddha Bowl, let it cool first. Use airtight containers to keep it fresh. You can store it in the fridge for up to three days. This keeps the flavors intact while preventing spoilage. If you want to keep it longer, consider freezing some components. However, avoid freezing the avocado, as it may change texture. When reheating, use a microwave or an oven. For microwave use, place the bowl in for one to two minutes. Stir halfway to ensure even heating. If using an oven, preheat it to 350°F (175°C) and heat the bowl for about 10-15 minutes. This method helps keep the sweet potatoes crispy and the spinach fresh. You can prepare elements of the Buddha bowl in advance. Roast the sweet potatoes and chickpeas a few days prior. Store them in separate containers. Wash and dry the spinach, and keep it in a paper towel-lined bag for freshness. Slice the avocado just before serving to keep it green. This way, you can enjoy a quick, healthy meal any day of the week! For the full recipe, check out the Sweet Potato Chickpea Buddha Bowl. To make this bowl, start by preheating your oven to 400°F (200°C). 1. Prepare the sweet potatoes and chickpeas: Peel and dice 2 medium sweet potatoes into 1-inch cubes. Rinse and drain 1 can of chickpeas thoroughly. 2. Combine and season: On a large baking sheet, mix the sweet potatoes and chickpeas. Drizzle with 2 tablespoons of olive oil. Add 1 teaspoon of smoked paprika, 1 teaspoon of ground cumin, and sea salt and black pepper to taste. Toss everything until well-coated. 3. Roast: Spread the mixture in a single layer and roast for 25-30 minutes. Stir halfway to ensure even browning. The sweet potatoes should be tender and slightly crispy. 4. Make the tahini dressing: In a small bowl, whisk together 1 tablespoon of tahini, the juice of 1 lemon, a pinch of salt, and 2 tablespoons of water. Adjust with more water for the right consistency. 5. Assemble the bowl: In a large serving bowl, layer 1 cup of cooked quinoa, then add the roasted sweet potatoes and chickpeas. Top with 2 cups of washed baby spinach and arrange sliced avocado. 6. Dress and serve: Drizzle the tahini dressing over the bowl and sprinkle sesame seeds on top. You can mix the ingredients or leave them layered for presentation. You can find the full recipe above for detailed instructions and tips. Yes! You can change this recipe to fit your taste. Here are some ideas: - Vegetable swaps: Use roasted broccoli, cauliflower, or bell peppers instead of sweet potatoes. - Grain options: Swap quinoa for brown rice, farro, or even couscous. - Protein boosts: Add grilled chicken, tofu, or a boiled egg for extra protein. - Spice it up: Try adding chili flakes or cayenne for heat, or mix in fresh herbs like cilantro or parsley. This dish is both healthy and satisfying. Here’s a quick look at the nutrition per serving: - Calories: About 450 - Protein: 15 grams (thanks to chickpeas and quinoa) - Fiber: 10 grams (from sweet potatoes and spinach) - Healthy fats: 15 grams (from avocado and olive oil) This bowl is rich in vitamins A and C, iron, and potassium. It provides a balanced meal with wholesome ingredients. In this post, we explored how to create a Sweet Potato Chickpea Buddha Bowl. You learned about the key ingredients and how to prepare each one. We discussed cooking techniques to ensure crispy edges and delicious textures. You now have tips for presentation and substitutions to fit your taste. This dish is not only tasty but also packed with nutrients. Enjoy making it, and don't hesitate to mix things up! You can create your own bowl while bringing health and flavor to your table.

Sweet Potato Chickpea Buddha Bowl Healthy and Flavorful

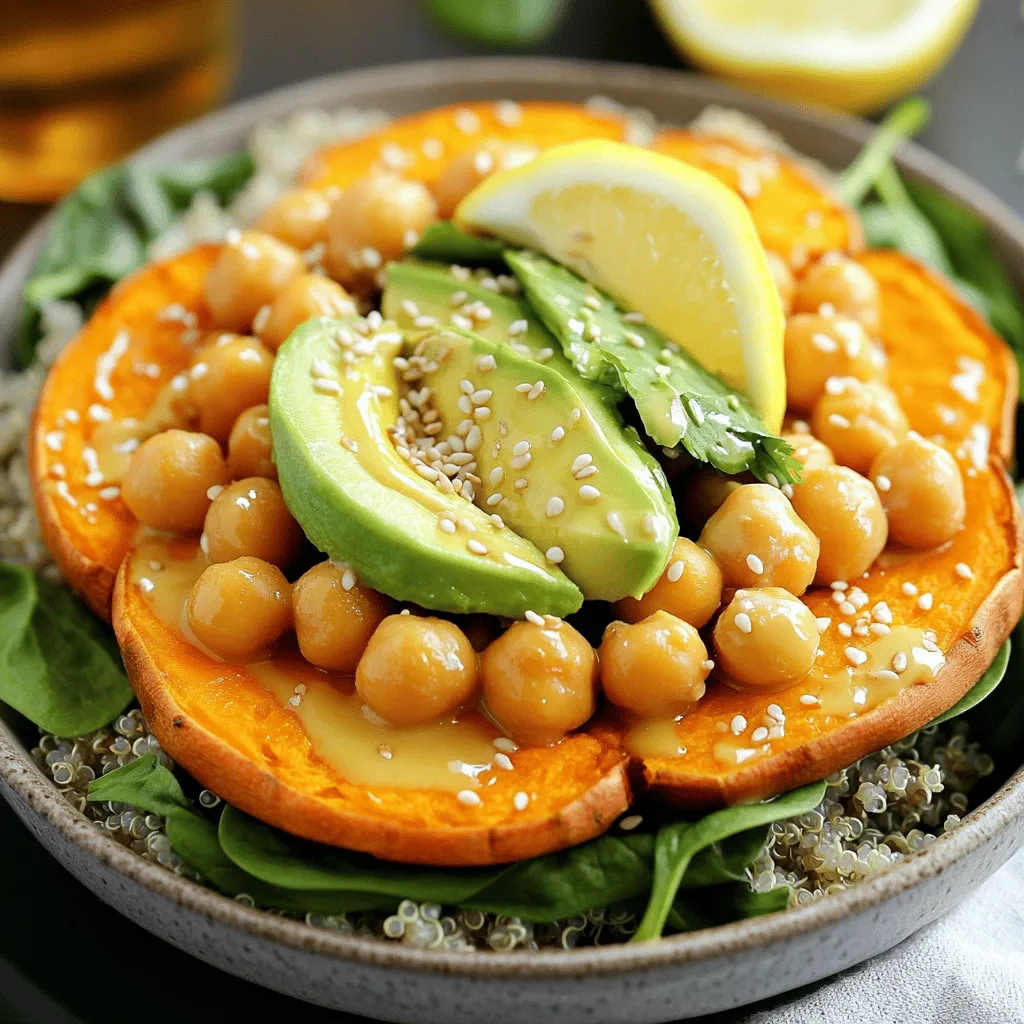
Looking for a healthy meal that’s packed with flavor? Here’s a Sweet Potato Chickpea Buddha Bowl that delivers both! This

To make crispy Brussel sprout chips, you need just a few key items: - 1 lb Brussels sprouts - 2 tablespoons olive oil - 1 teaspoon garlic powder - 1 teaspoon smoked paprika - 1/2 teaspoon sea salt - 1/4 teaspoon black pepper - 1/4 teaspoon cayenne pepper (optional) - 1 tablespoon nutritional yeast These ingredients create a tasty and crunchy snack. The Brussels sprouts are the main star. Olive oil helps them crisp up, while spices add flavor. You can customize your chips with extra seasonings. Here are some ideas: - Parmesan cheese for a nutty taste - Lemon zest for brightness - Chili powder for extra heat - Herbs like thyme or rosemary for earthiness Feel free to experiment with flavors. This is your chance to make them unique. Brussels sprouts are a superfood. They are low in calories and high in vitamins. Here are some benefits: - Rich in fiber for easy digestion - High in vitamins C and K - Contains antioxidants that help fight disease By making crispy Brussel sprout chips, you enjoy a tasty snack that is also good for you. Plus, they are simple to make. Check out the Full Recipe for details! To make perfect crispy Brussels sprout chips, start with fresh sprouts. Wash them well under cold water. This step removes any dirt or grit. After washing, dry them gently using a clean towel. Next, trim the hard ends off and remove any yellow leaves. This keeps your chips tasty and fresh. Now, slice each Brussels sprout in half lengthwise. Cutting them this way helps them crisp up nicely in the oven. Preheat your oven to 375°F (190°C). A hot oven helps create that crunchy texture we all love. After slicing the sprouts, place them in a large bowl. Add olive oil, garlic powder, smoked paprika, sea salt, black pepper, and optional cayenne pepper. Toss to coat them evenly. Next, line a baking sheet with parchment paper. This makes cleanup easy. Lay the seasoned Brussels sprouts cut side down in a single layer. Bake them for 20-25 minutes. Remember to flip them halfway through. This ensures even cooking and crispy edges. Once your chips are golden and crispy, take them out of the oven. While they are still hot, sprinkle nutritional yeast on top. This gives a cheesy flavor without dairy. For added fun, try different spices or herbs. You can also add a squeeze of lemon juice for a fresh burst. Serve your crispy Brussels sprout chips in a vibrant bowl. They make a delightful snack or a crunchy side. Enjoy your tasty creation! For the full recipe, check out the full recipe section. Seasoning is key for tasty Brussels sprout chips. Use fresh herbs and spices to make them pop. I love using garlic powder and smoked paprika for depth. Don't forget to coat all the sprouts evenly. This helps every chip burst with flavor. You can also adjust seasonings to fit your taste. Add more cayenne for heat or nutritional yeast for a cheesy flavor. To get your chips crispy, start with dry Brussels sprouts. Wash them well and pat them dry. The oil needs to coat each sprout to help with crispiness. Bake them cut side down to maximize air flow. This allows them to crisp up evenly. Flip them halfway during baking for perfect texture. One common mistake is overcrowding the baking sheet. Give the sprouts space to breathe. If they are too close, they will steam instead of crisp. Another mistake is not preheating the oven. A hot oven ensures the chips bake evenly. Lastly, skip the salt until after baking. Salt draws out moisture, which can lead to soggy chips. For the full recipe, check out the Crispy Brussels Sprout Chips recipe. {{image_4}} You can mix up the flavors of your Brussels sprout chips easily. Try adding different spices for a unique taste. Here are some fun ideas: - Lemon Zest: Add a bright touch with fresh lemon zest. - Curry Powder: Give your chips an exotic twist with curry powder. - Cheese Powder: Sprinkle cheese powder for a cheesy kick. - Herbs: Use dried herbs like thyme or rosemary for a fresh aroma. - Sesame Oil: Swap olive oil for sesame oil for a nutty flavor. Each variation can bring new life to this simple snack. Crispy Brussels sprout chips are great on their own, but pairing them boosts the fun. Here are some ideas: - Dips: Serve with hummus or a spicy yogurt dip. - Salads: Toss them into salads for a crunchy topping. - Cheese Platter: Add them to a cheese platter for extra texture. - Burgers: Use them as a side with burgers or sandwiches. - Movie Night: Enjoy them as a healthy snack during movie night. These options make your chips more versatile and exciting. If you don’t have certain ingredients, don’t worry! You can use these substitutions: - Olive Oil: Swap with avocado oil or melted coconut oil. - Garlic Powder: Use fresh minced garlic if you prefer. - Sea Salt: Regular table salt works well if you don’t have sea salt. - Nutritional Yeast: Try grated Parmesan cheese for a different flavor. - Cayenne Pepper: Omit it if you want a milder taste. These substitutions keep your crispy Brussels sprout chips tasty and fun! For the complete guide, check the Full Recipe. To keep your leftover chips fresh, place them in an airtight container. This helps prevent moisture from making them soggy. Store them at room temperature, away from direct sunlight. They should stay crispy for about 2 days. If you put them in the fridge, they may lose their crunch. When you want to enjoy your leftover chips again, reheating is key. Preheat your oven to 350°F (175°C). Spread the chips on a baking sheet in a single layer. Bake for about 5-10 minutes until they are hot and crispy again. This method helps restore their crunch and flavor. Avoid the microwave, as it can make them chewy. If you want to save your chips for longer, freezing is a great option. First, let the chips cool completely. Then, place them in a freezer-safe bag or container. Remove as much air as possible to avoid freezer burn. They can last up to 3 months in the freezer. When you're ready to eat them, simply reheat from frozen using the oven method. This way, you’ll enjoy crispy chips even after a long time! To make the best crispy Brussel sprout chips, start by preheating your oven to 375°F. Clean and dry the sprouts well. Trim the ends and slice each sprout in half. Toss them with olive oil and seasonings. Spread them in a single layer on a baking sheet. Bake for 20-25 minutes, flipping halfway. Keep an eye on them to avoid burning. For an extra flavor boost, sprinkle on nutritional yeast right after baking. Using frozen Brussels sprouts is possible, but fresh ones work best. Frozen sprouts contain more moisture. This moisture can make it hard to get them crispy. If you use frozen, thaw and dry them well before baking. Always remember to slice them in half for even cooking. Brussel sprouts are not only tasty; they are also very healthy. They are low in calories and high in fiber. They contain vitamins C and K, which help your body. These sprouts also have antioxidants that support your immune system. Eating them can improve digestion and lower blood sugar levels too. Crispy Brussel sprout chips are best enjoyed fresh. However, if you have leftovers, store them in an airtight container. They can last for about 2-3 days. To keep them crispy, avoid sealing them while they are still warm. You can reheat them in the oven for a few minutes to regain their crunch. For the full recipe, check out the Crispy Brussels Sprout Chips section. Crispy Brussels sprout chips are delicious and easy to make. You learned about the main ingredients, steps, and tips for perfect chips. We explored tasty variations and how to store your leftovers. These chips offer great health benefits, making them a smart snack. Now you can enjoy a tasty treat that's fun to make and healthy. Happy cooking!

Crispy Brussel Sprout Chips Simple and Flavorful Snack

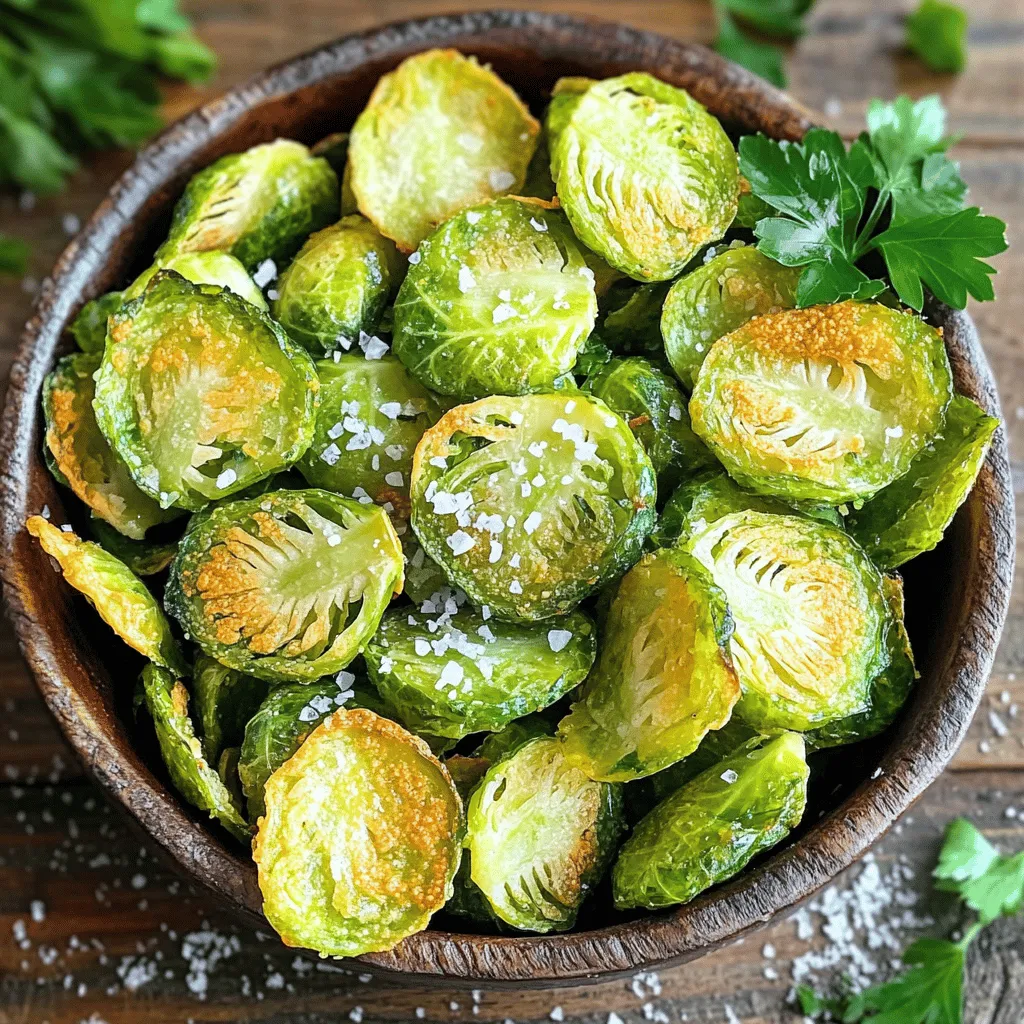
If you crave a snack that’s both tasty and healthy, you’ll love crispy Brussel sprout chips. They are simple to

To start, we need two large eggplants. Slice them into 1/2-inch rounds. Sprinkle one teaspoon of salt over the slices. This step helps pull out moisture and bitterness. Let the slices sit in a colander for about 30 minutes. Afterward, rinse them under cold water. Pat them dry with paper towels before cooking. For the breading, gather these items: - 1 cup all-purpose flour - 3 large eggs, beaten - 2 cups Italian-style breadcrumbs Set up three shallow dishes. Place the flour in one, beaten eggs in another, and breadcrumbs in the last. This setup makes breading easy and fun. For the sauce and cheese, you will need: - 2 cups marinara sauce (you can use homemade or jarred) - 3 cups fresh mozzarella cheese, sliced - 1 cup grated Parmesan cheese - 1 teaspoon dried oregano - Fresh basil leaves for garnish - Olive oil for frying These ingredients make the dish rich and creamy. The combination of marinara sauce and cheese gives eggplant Parmesan its classic taste. Each layer adds flavor and texture that you will love. Start by slicing two large eggplants into 1/2-inch rounds. Sprinkle 1 teaspoon of salt over these slices. Set the slices in a colander to rest for about 30 minutes. This step pulls out excess moisture and helps cut bitterness. After 30 minutes, rinse the slices under cold water. Then, dry them with paper towels until they are moisture-free. Next, set up your breading station. Use three shallow dishes. Fill the first dish with 1 cup of all-purpose flour. In the second dish, beat three large eggs. The last dish should hold 2 cups of Italian-style breadcrumbs. Now, take each eggplant slice. First, coat it in flour, shaking off the extra. Then, dip it in the egg mixture, letting excess drip off. Finally, press the slice into the breadcrumbs to coat it well. Heat a generous amount of olive oil in a large skillet over medium heat. Fry the breaded eggplant slices in batches. Cook each side for about 3-4 minutes until they turn golden brown. After frying, place the slices on a plate lined with paper towels. This step helps absorb any leftover oil. Preheat your oven to 375°F (190°C). In a baking dish, spread a thin layer of marinara sauce on the bottom. This keeps the eggplant from sticking. Place half of the fried eggplant slices over the sauce. Add half of the marinara sauce next. Then, layer half of the mozzarella cheese and half of the grated Parmesan cheese. Repeat this layering until you use all the ingredients. Sprinkle the remaining dried oregano on top. Add any leftover mozzarella and Parmesan cheese. Place the dish in the preheated oven. Bake for about 30-35 minutes. You want the cheese to bubble and turn a lovely golden brown. For the full details on the ingredients and preparation, refer to the [Full Recipe]. When picking eggplants, look for smooth skin. Choose ones that feel heavy for their size. The best eggplants are firm and shiny. Avoid any with soft spots or wrinkles. Small to medium eggplants often taste better, as they are less bitter. Purple varieties are most common, but white or green ones also work well. To lighten up this dish, try baking instead of frying. Brush the eggplant slices with olive oil and place them on a baking sheet. Bake at 400°F (200°C) for about 20 minutes, flipping halfway. You can also use whole wheat breadcrumbs for added fiber. Consider swapping out some cheese for a lower-fat option, which can still taste great. Frying can be tricky, but it's key for great flavor. Use enough oil to cover the bottom of your skillet. Heat the oil until it shimmers, then add the eggplant slices. Don't overcrowd the pan; this helps keep the oil hot. Fry until each side is golden brown, about 3-4 minutes. Let the fried slices rest on paper towels to soak up extra oil. Eggplant Parmesan is rich and satisfying. Pair it with a side salad for freshness. Garlic bread or crusty Italian bread complements it well. A light red wine, like Chianti, enhances the meal. For a twist, serve it with a side of pasta tossed in marinara sauce. You can find the Full Recipe for more details. {{image_4}} To make a gluten-free version, swap the all-purpose flour and breadcrumbs. Use gluten-free flour and gluten-free breadcrumbs instead. This keeps the dish tasty and safe for gluten-free diets. You can find these options at most grocery stores. For a vegan twist, skip the eggs and mozzarella. Use a plant-based egg substitute, like flaxseed meal mixed with water. Replace the mozzarella with vegan cheese that melts well. Use nutritional yeast for that cheesy flavor. This version is a hit with vegans and non-vegans alike. Want some heat? Add crushed red pepper flakes to the marinara sauce. You can also sprinkle pepper flakes between the layers of cheese. For an extra kick, use pepper jack cheese instead of mozzarella. This spicy version will wake up your taste buds! You can find the full recipe at the start of the article. Feel free to mix and match these variations to suit your taste! After you make Eggplant Parmesan, let it cool before storing. Place it in an airtight container. You can keep it in the fridge for up to three days. The flavors will deepen as it sits, making the dish even tastier. You can freeze Eggplant Parmesan for later use. First, let it cool completely. Then, wrap it tightly in plastic wrap or foil. Store it in a freezer-safe container. It will stay good for about three months. To enjoy, thaw it overnight in the fridge before reheating. Reheat Eggplant Parmesan in your oven for the best results. Preheat the oven to 350°F (175°C). Place the dish in the oven and heat for about 20 minutes. If it looks dry, add a splash of marinara sauce to keep it moist. You can also use a microwave, but the oven keeps the crust crispy. Enjoy your savory and satisfying dish again! Yes, you can prepare Eggplant Parmesan ahead of time. You can layer the dish and then cover it with plastic wrap. Store it in the fridge for up to 24 hours. When you're ready, just bake it. This makes it easy for busy days or special events. To slice eggplant, use a sharp knife. Cut the eggplant into even rounds. Aim for 1/2-inch thick slices. This size helps them cook evenly. If you prefer, you can also slice them lengthwise. Just keep the thickness the same. To reduce bitterness, sprinkle salt on the sliced eggplant. Let it sit for about 30 minutes. The salt draws out moisture and bitterness. After that, rinse the slices well and dry them. This step improves the taste and texture. Absolutely! You can switch cheeses based on your taste. Try using provolone or fontina for a different flavor. You can also mix in some goat cheese for added creaminess. Just remember to use the same amount as the recipe states. Eggplant Parmesan, or Melanzane alla Parmigiana, comes from Southern Italy. It is a classic dish that highlights fresh ingredients. The dish has roots in the Campania region, where eggplants grow well. Over time, it has spread and gained popularity worldwide. Eggplant Parmesan can be a healthy dish. Eggplants are low in calories and high in fiber. However, frying can add calories and fat. To make it healthier, you can bake the eggplants instead of frying them. This keeps the flavors while reducing calories. This blog covered how to make a tasty Eggplant Parmesan. I shared tips on choosing eggplants, salting them, and making a healthier version. You learned the step-by-step process for preparing, breading, and baking. I also offered variations, like vegan and gluten-free options. In the end, Eggplant Parmesan is versatile and satisfying. Whether you stick to a classic recipe or try new twists, enjoy experimenting in your kitchen!

Eggplant Parmesan Savory and Satisfying Dish

Eggplant Parmesan is a dish that brings comfort and satisfaction to every table. I’ll share easy steps to make this

- 4 large bell peppers - 1 cup quinoa - 2 cups vegetable broth - 1 can black beans - 1 cup corn kernels - 1 cup diced tomatoes - 1 small red onion - 2 cloves garlic - 1 teaspoon ground cumin - 1 teaspoon smoked paprika - 1 tablespoon olive oil - Salt and black pepper to taste - Fresh cilantro - Slices of avocado - Baking dish - Medium saucepan - Large skillet For this tasty dish, you need a few key ingredients. Start with four large bell peppers. These will be your edible bowls. I like to use red, yellow, or green ones for color. You'll also need one cup of quinoa, a great source of protein. Quinoa cooks in vegetable broth for extra flavor. A can of black beans adds texture and protein. Corn kernels give sweetness and crunch. You should also grab diced tomatoes, a small red onion, and garlic. These add depth to the filling. Ground cumin and smoked paprika bring warmth and flavor. A little olive oil helps cook the onions and garlic. Don’t forget salt and black pepper for seasoning. If you want to elevate your dish, I suggest garnishing with fresh cilantro and slices of avocado. They add a nice touch and richness. For cooking, use a baking dish to hold the peppers upright. A medium saucepan will be needed to cook the quinoa. Finally, a large skillet is perfect for sautéing the onions and garlic. These tools will help you create a flavorful and filling meal. For the full recipe, check out the detailed instructions. Start by setting your oven to 375°F (190°C). This heat helps cook the peppers evenly. Next, take your bell peppers and carefully cut off the tops. Make sure to remove the seeds and white membranes inside. This step prevents bitterness. Once done, lightly brush the outside of each pepper with olive oil. This adds flavor and helps them brown nicely in the oven. Place the peppers upright in a baking dish. This keeps them stable while they bake. To cook the quinoa, first rinse it well under cold water. Rinsing removes the bitter coating called saponin. In a medium saucepan, mix the rinsed quinoa with 2 cups of vegetable broth. This broth gives the quinoa a rich flavor. Bring this mixture to a boil over medium-high heat. Once boiling, reduce the heat to low, cover, and let it simmer for 15-20 minutes. The quinoa is done when it absorbs all the liquid and looks fluffy. While the quinoa cooks, heat a tablespoon of olive oil in a large skillet over medium heat. Add in the diced red onion and sauté for about 3-4 minutes. You want the onions to become translucent. Then, add minced garlic, ground cumin, and smoked paprika. Cook this for one more minute. This step makes the kitchen smell amazing. Next, mix in the black beans, corn, diced tomatoes, and cooked quinoa. Stir everything well and season with salt and black pepper to taste. Let it cook for another 5 minutes until warmed through. Now it’s time to fill the peppers! Generously spoon the quinoa mixture into each pepper. Pack it in slightly so they are full and hearty. After filling, cover the baking dish with aluminum foil. This keeps the moisture in while baking. Place the covered dish in your preheated oven. Bake the stuffed peppers for 25 minutes. After that, carefully remove the foil. Let them bake for an additional 10 minutes. This step helps the tops get a nice color and texture. Once they are done, let them cool a bit before serving. You can garnish with fresh cilantro and avocado slices for extra flavor. For the full recipe, refer to the earlier sections. Enjoy your flavorful and filling vegan stuffed peppers! To make your vegan stuffed peppers burst with flavor, choose the right spices and herbs. Ground cumin adds warmth, while smoked paprika gives it a hint of smokiness. You can also try: - Oregano - Chili powder - Fresh basil Adding more vegetables enhances the taste and texture. Consider these options: - Diced zucchini - Chopped spinach - Shredded carrots Mixing in these vegetables not only improves flavor but also boosts nutrition. Evenly cooked quinoa is key for a great texture. Rinse the quinoa well before cooking. This removes bitterness and helps achieve a fluffy result. Use vegetable broth for added flavor. For the bell peppers, adjust their firmness based on your preference. If you like them soft, bake longer. If you want a bit of crunch, reduce the baking time. Remember, the goal is a balance of flavors and textures. Enjoy experimenting with different combinations! For the full recipe, check out the [Full Recipe]. {{image_4}} You can swap black beans for lentils or chickpeas. Lentils offer a soft texture and a mild flavor. They cook quickly, making them a great choice. Chickpeas add a nice bite and a nutty taste. If you're looking for grains, consider using brown rice or farro. Both options give a chewy texture that pairs well with peppers. To change the flavor, try adding different spices. Cumin and chili powder can bring warmth. For Italian-style, consider adding oregano and basil. For Mediterranean flair, use dill or za'atar. You can also mix in olives or sun-dried tomatoes for extra zest. Each change can create a whole new dish. If you need gluten-free options, use quinoa or rice as the base. Both are safe for gluten-free diets. For nut-free substitutions, skip any nuts in toppings. You can replace avocado with a rich tahini sauce. This keeps your dish creamy without any nuts. Enjoy these variations to suit your taste and needs! To keep your vegan stuffed peppers fresh, store leftovers in the fridge. Place them in an airtight container to prevent drying out. This way, you can enjoy them for up to 4 days. When you're ready to eat, reheat in the microwave or oven. For the microwave, heat on high for about 2-3 minutes. If using the oven, preheat to 350°F (175°C) and cover with foil to keep them moist. Bake for about 10-15 minutes until warm. If you want to save your stuffed peppers for longer, freezing is a great option. Let them cool completely before wrapping each pepper in plastic wrap. Then, place them in a freezer-safe bag or container. They can last up to 3 months in the freezer. To thaw, move them from the freezer to the fridge a day before you plan to eat them. This gradual thawing keeps them moist. When ready to reheat, follow the same steps as above for the oven or microwave. Enjoy your flavorsome meal anytime! For the full recipe, check the link. To kick up the heat, you can add jalapeños to your filling. Just chop them finely and mix them in with the other ingredients. If you like, you can also drizzle your stuffed peppers with hot sauce before serving. This adds a nice kick without changing the main flavors. Yes, you can make these peppers in advance. Prepare the filling and stuff the peppers a day before. Store them in the fridge until you are ready to bake. Just remember to cover them well to keep them fresh. When you are ready, bake them straight from the fridge. You may need to add a few extra minutes to the cooking time. These stuffed peppers pair well with a salad or some roasted veggies. You could serve them with a simple green salad drizzled with lemon vinaigrette. For something warm, try roasting zucchini or carrots. Both options add color and flavor to your meal. You can find more ideas in the Full Recipe. Vegan stuffed peppers are simple and tasty. We covered key ingredients, cooking steps, and tips for flavor. You can mix and match proteins, spices, and vegetables to fit your taste. Don't forget storage tips to keep leftovers fresh. Experiment with these ideas to make the dish your own. I'm excited for you to enjoy this healthy meal, and I hope you find joy in making it!

Vegan Stuffed Peppers Flavorful and Filling Meal

Looking for a hearty meal that’s both tasty and easy to make? Vegan stuffed peppers are your answer! Packed with

To make a Loaded Breakfast Skillet, you will need: - 4 medium-sized potatoes, diced into 1-inch cubes - 1 tablespoon olive oil - 1 red bell pepper, diced - 1 green bell pepper, diced - 1 small onion, finely chopped - 4 large eggs - 1 cup cherry tomatoes, halved - 1 cup fresh spinach, chopped - 1 teaspoon garlic powder - 1 teaspoon smoked paprika - Salt and black pepper to taste - ½ cup shredded cheese (cheddar, Monterey Jack, or your preference) - Fresh herbs for garnish (chives or parsley, finely chopped) These ingredients come together for a tasty breakfast that fills you up. You can easily swap some ingredients based on what you like or have on hand. Here are some ideas: - Instead of potatoes, use sweet potatoes for a sweeter taste. - You can use any bell pepper color, like yellow or orange. - If you don't have spinach, try kale or arugula. - For cheese, feta or goat cheese can add a nice tang. - If you're out of garlic powder, fresh garlic works well too. These swaps keep the dish fresh while still being tasty. Adding some toppings can make your Loaded Breakfast Skillet even better. Here are some fun options: - Avocado slices add creaminess. - Hot sauce gives it a nice kick. - Salsa adds a fresh flavor. - Sour cream or Greek yogurt can cool it down. - Fresh herbs like cilantro or basil can brighten the dish. Feel free to get creative with your toppings for a flavorful morning treat! Start by heating the olive oil in a large skillet over medium heat. Once it is hot, add the diced potatoes. Season them well with salt and black pepper. Cook the potatoes for about 10-12 minutes. Stir them often until they turn golden brown and fork-tender. Now, it’s time to add some color and flavor. Toss in the chopped onion, red bell pepper, and green bell pepper. Sauté these vegetables for about 5 minutes. This will help them soften and release their tasty flavors. Watch them closely, so they do not burn. Next, sprinkle garlic powder and smoked paprika over the mix. Stir everything together well. Let the spices cook for about 1 minute. You want to let the aromas fill your kitchen. Add the halved cherry tomatoes and chopped spinach to the skillet. Cook this for another 2-3 minutes. Stir gently until the spinach wilts and the tomatoes soften. Now, use a spoon to make four small wells in the mixture. Crack one egg into each well. Cover the skillet with a lid. Let the eggs cook for about 5-7 minutes. Adjust the time if you like runny yolks or firmer eggs. Once the eggs are cooked to your liking, sprinkle the shredded cheese evenly on top. Cover the skillet again and let the cheese melt for about 1 more minute. Remove the skillet from the heat and garnish with fresh herbs. Your loaded breakfast skillet is now ready to enjoy! For a full recipe, check out the complete steps in the earlier section. To get the best eggs, start with fresh ones. Crack each egg into a small bowl before adding it to the skillet. This helps avoid any shell pieces. Make small wells in the veggie mix for each egg. Cover the skillet with a lid and watch closely. Cook for about 5-7 minutes. For runny yolks, check earlier. For firmer yolks, let them cook a bit longer. This simple method gives you control over your egg's doneness. Use a large skillet to cook evenly. A thick-bottomed skillet helps distribute heat well. Start with medium heat; too high can burn your food. Stir the potatoes often to prevent sticking. When you add the veggies, keep stirring to mix flavors. If you find uneven cooking, adjust the heat slightly. Always make sure all ingredients are in a single layer for even cooking. Spices add depth to your dish. Garlic powder and smoked paprika are great choices. They give a warm, smoky flavor that pairs well with eggs. Don’t be afraid to experiment with spices. Try adding cumin or chili powder for a kick. Fresh herbs like chives or parsley brighten the dish. Season with salt and black pepper to taste. This adds a nice balance to the flavors. For a full taste experience, check the Full Recipe for more spice ideas. {{image_4}} You can easily add meat to your Loaded Breakfast Skillet. Bacon and sausage bring a tasty crunch and savory flavor. Start with bacon. Cook it until crispy, then chop it and mix it in at the end. For sausage, brown the links or patties in the skillet before adding the eggs. Both options will take your dish to the next level. Just remember to adjust cooking times for the meat. If you prefer a veggie-packed dish, you can load up on more vegetables. Try adding mushrooms, zucchini, or even kale. These options add texture and color. Simply chop them finely and add them to the skillet with the bell peppers. Cooking them well makes them tender and enhances flavors. You can also try different herbs, like basil or oregano, for added freshness. Cheese is a key ingredient in this recipe. It adds creaminess and rich taste. While cheddar and Monterey Jack are great choices, you can use any cheese you love. Feta or goat cheese can add a tangy twist. For a spicy kick, try pepper jack. Just sprinkle your favorite cheese on top before serving. The melted cheese will create a delicious layer that everyone will enjoy. For the complete recipe, check out the Full Recipe. To keep your Loaded Breakfast Skillet fresh, store it in an airtight container. This helps prevent moisture loss and keeps flavors intact. Allow the skillet to cool before sealing. You can keep it in the fridge for up to three days. When you're ready to enjoy leftovers, reheat in a skillet over medium heat. Add a splash of water to create steam, which helps keep the eggs moist. Stir occasionally for even heating. You can also microwave it in a bowl, covered with a damp paper towel. Heat for 1-2 minutes, checking to ensure it’s warm throughout. If you want to store your Loaded Breakfast Skillet longer, freezing is a great option. Portion it into freezer-safe containers. Make sure to leave room for expansion. You can freeze it for up to three months. When you’re ready to eat, thaw in the fridge overnight. Reheat in the skillet or microwave, just like with fresh leftovers. Enjoy your delicious breakfast anytime! Yes, you can prepare parts of the Loaded Breakfast Skillet ahead. You can cook the potatoes and veggies in advance. Store them in the fridge for up to three days. When you’re ready, just heat them in a skillet. Then, add the eggs and cheese to finish cooking. This saves you time on busy mornings. You can use many veggies in this dish. Here are some great options: - Zucchini, diced - Mushrooms, sliced - Broccoli florets - Asparagus, chopped - Corn, fresh or frozen Feel free to mix and match your favorites. Each veggie adds a unique flavor and texture. Customizing this recipe is easy. Here are a few ideas: - For a vegan option, swap eggs for tofu or chickpea flour. - If you’re gluten-free, check labels on your ingredients. Most items are gluten-free. - For low-carb diets, use cauliflower rice instead of potatoes. These swaps let everyone enjoy this tasty dish while sticking to their diets. To learn more about the complete recipe, check the Full Recipe section. This article covered how to make a Loaded Breakfast Skillet. We discussed main ingredients and tasty swaps. You learned to prep potatoes and cook veggies. We explored egg cooking tips for perfect results and added flavor with spices. You can even add meat or more veggies for different tastes. In closing, this dish is easy to customize and store well. Enjoy your cooking!

Loaded Breakfast Skillet Flavorful Morning Treat

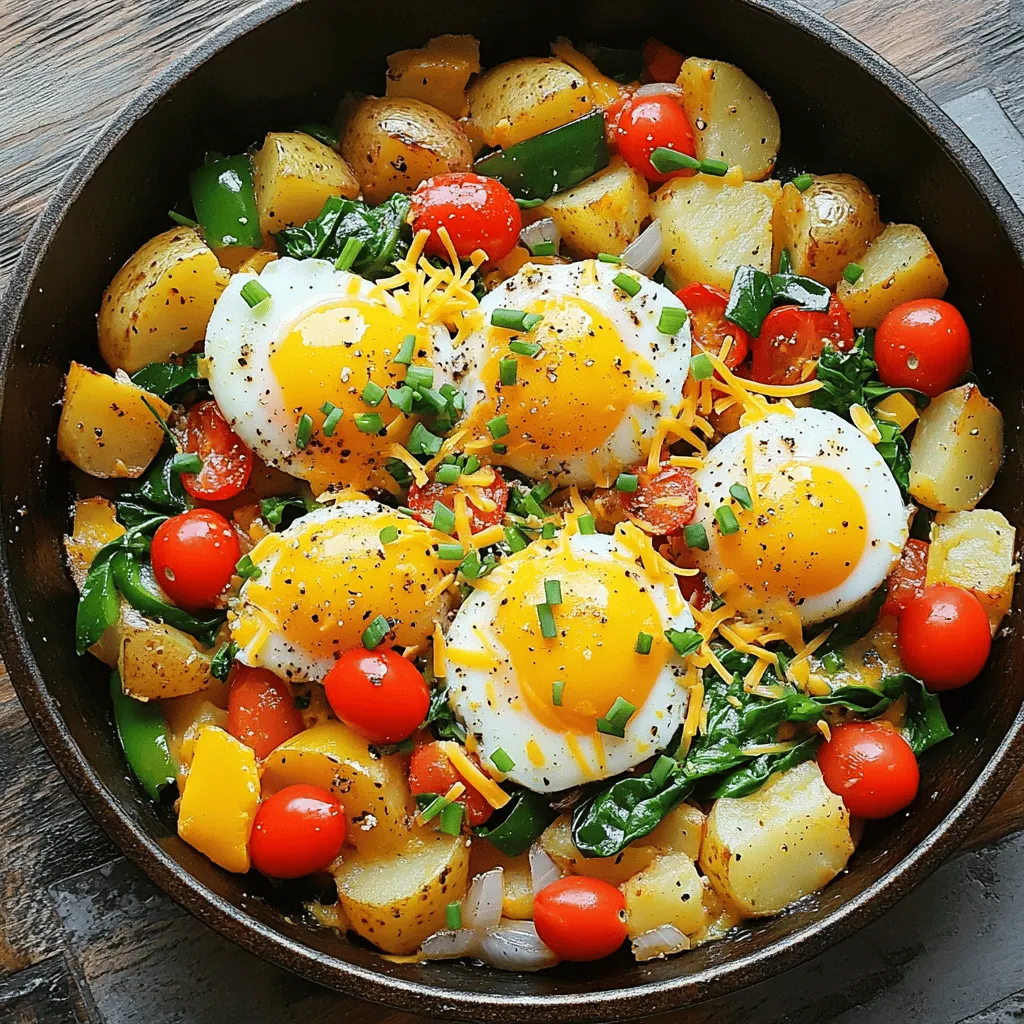
Start your day off right with a Loaded Breakfast Skillet! This dish is packed with flavor and nutrition. You can

- 4 salmon fillets (approximately 6 oz each) - 1 cup teriyaki sauce (store-bought or homemade) - 1 pound asparagus, trimmed and cleaned - 1 tablespoon fresh ginger, finely grated - 2 cloves garlic, minced - 1 tablespoon honey - 2 tablespoons olive oil - Salt and pepper, to taste - Sesame seeds, for garnish - Sliced green onions, for garnish Gather these ingredients before you start cooking. The salmon fillets will absorb the teriyaki sauce well. Fresh ginger and garlic enhance the flavor. Honey adds a touch of sweetness. The asparagus provides a crisp contrast. The olive oil helps the asparagus roast nicely. Salt and pepper bring out the flavors. Sesame seeds and green onions add a nice finish. This simple list makes a meal that impresses! For the full recipe, check out the details above and enjoy creating a flavorful delight. - In a bowl, mix teriyaki sauce, ginger, garlic, and honey. - Whisk until blended. - Set aside 1/4 cup for basting later. This marinade gives the salmon a deep flavor. The ginger and garlic add a nice kick. Make sure to coat the salmon well. The longer it marinates, the better it tastes. - Preheat your oven to 425°F (220°C). - Line a baking sheet with parchment paper for easy cleanup. - In a bowl, place the trimmed asparagus. - Drizzle with olive oil and season with salt and pepper. - Toss until coated. The parchment paper helps prevent sticking. The olive oil gives the asparagus a nice shine and flavor. Make sure to spread the asparagus in a single layer. This helps it cook evenly. - Remove the salmon from the marinade. - Place the salmon skin-side down on the baking sheet. - Spread the seasoned asparagus on one side of the sheet. - Bake for 12–15 minutes. - Baste the salmon with the reserved marinade halfway through. Check the salmon at 12 minutes. It should flake easily with a fork when done. The asparagus will be tender yet crisp. This method keeps both the salmon and asparagus moist and flavorful. For the full recipe, check out the details above. Enjoy your teriyaki salmon with asparagus! To get the best flavor from your salmon, marinate it well. I suggest marinating for at least 30 minutes. If you have more time, let it soak for up to 1 hour. This helps the fish absorb all those yummy flavors. Keep your salmon moist by basting it with the reserved marinade halfway through baking. This keeps the fish juicy and flavorful. When it comes to asparagus, seasoning is key. I like to use olive oil, salt, and pepper. Toss the asparagus well so that each piece is coated. This ensures even cooking and great taste. You can also grill or steam the asparagus if you want a different flavor. Grilling adds a smoky touch, while steaming keeps it crunchy and bright. For sides, rice or quinoa pairs nicely with teriyaki salmon. A fresh salad with sesame dressing also works well. To plate, place a salmon fillet on a bed of asparagus. Sprinkle with sesame seeds and garnish with sliced green onions. This makes your dish look appealing and adds a bit of crunch. For the full recipe, check out the details above. {{image_4}} You can switch up the protein in this dish. If you prefer chicken, use boneless thighs or breasts. For a vegetarian option, tofu works great. Just make sure to press the tofu to remove excess moisture before marinating. If you need a gluten-free option, look for tamari instead of traditional soy sauce for your teriyaki sauce. Many brands offer gluten-free teriyaki sauces. Always check the label to be sure. To boost the flavor, add spices or herbs. A pinch of red pepper flakes adds a nice kick. Fresh herbs like cilantro or basil can brighten the dish. You could also try a sprinkle of Chinese five-spice for a unique twist. Feel free to switch up the veggies too. Broccoli, bell peppers, or snap peas can add color and crunch. These vegetables roast well and pair nicely with the salmon. You have options for cooking. Baking gives even heat and a nice finish. The stovetop is great for a quick sear. Just heat oil in a skillet and cook for about 5 minutes on each side. Grilling adds smoky flavor. Preheat your grill and place the salmon and asparagus on it. Cook for about 6-8 minutes, turning halfway through. Cooking times may vary. Always watch for doneness. The salmon should flake easily when it’s done. For more details, check the Full Recipe. To keep your teriyaki salmon and asparagus fresh, store leftovers in the fridge. Place the salmon and asparagus in an airtight container. This helps keep the flavors intact and prevents odors from mixing. Make sure to eat leftovers within three days for the best taste. If you want to save some for later, freezing is a great option. Wrap the salmon and asparagus tightly in plastic wrap or aluminum foil. Then, place them in a freezer-safe bag. Label with the date. They can last up to three months in the freezer. Reheating salmon can be tricky. You want to keep it moist and tasty. The best method is to use the oven. Preheat it to 300°F (150°C). Place the salmon in a baking dish and cover it with foil. Heat for about 10-15 minutes. This helps retain moisture. If you prefer the microwave, use a lower power setting. Heat for short bursts of 30 seconds. Check often to make sure it does not dry out. Teriyaki salmon and asparagus can stay fresh in the fridge for about three days. If stored properly, they can last up to three months in the freezer. Always look for signs of spoilage. If the salmon has a sour smell or the asparagus is slimy, it's time to toss them. Eating spoiled food can make you sick, so always check before enjoying your leftovers. You can find the full recipe for this delicious dish in the earlier section. You can serve teriyaki salmon with many tasty sides. Here are some ideas: - Steamed rice: White or brown rice pairs well with the sauce. - Quinoa: This grain adds a nutty flavor and is healthy. - Salads: A fresh green salad with a light dressing can balance the meal. - Roasted vegetables: Carrots or bell peppers add color and crunch. - Noodles: Udon or soba noodles work nicely with the teriyaki flavor. These sides add variety and make your meal fun and colorful. Yes, you can! Here are some sauces that work well: - Soy sauce: This is a simple swap for a salty flavor. - Hoisin sauce: It adds sweetness and depth, similar to teriyaki. - Miso glaze: This brings a rich, umami taste to the dish. - BBQ sauce: It gives a smoky flavor that can be delightful. Each of these will change the taste but still make the dish delicious. Teriyaki salmon is quite healthy! Here’s why: - High in omega-3s: Salmon is rich in good fats that support heart health. - Low in calories: A typical serving has about 350 calories. - Packed with nutrients: Salmon provides protein, vitamins, and minerals. - Asparagus benefits: This veggie adds fiber and vitamins A and C. Balancing this dish with healthy sides can make it even better for you. You can tell salmon is cooked when: - Flaking easily: Use a fork to see if it breaks apart easily. - Color change: It should change from bright pink to a lighter color. - Temperature check: The inside should reach 145°F (63°C) for safety. Keep these signs in mind to make sure your salmon is just right. In this blog post, we explored a simple recipe for teriyaki salmon and asparagus. We covered key ingredients, step-by-step instructions, and helpful tips for cooking. You can easily change flavors or methods, making this a versatile dish. Remember, proper storage keeps leftovers tasty. Whether you're cooking for yourself or a crowd, this dish impresses. Enjoy it with your favorite sides, and share your creations with friends!

Teriyaki Salmon with Asparagus Flavorful Delight Recipe

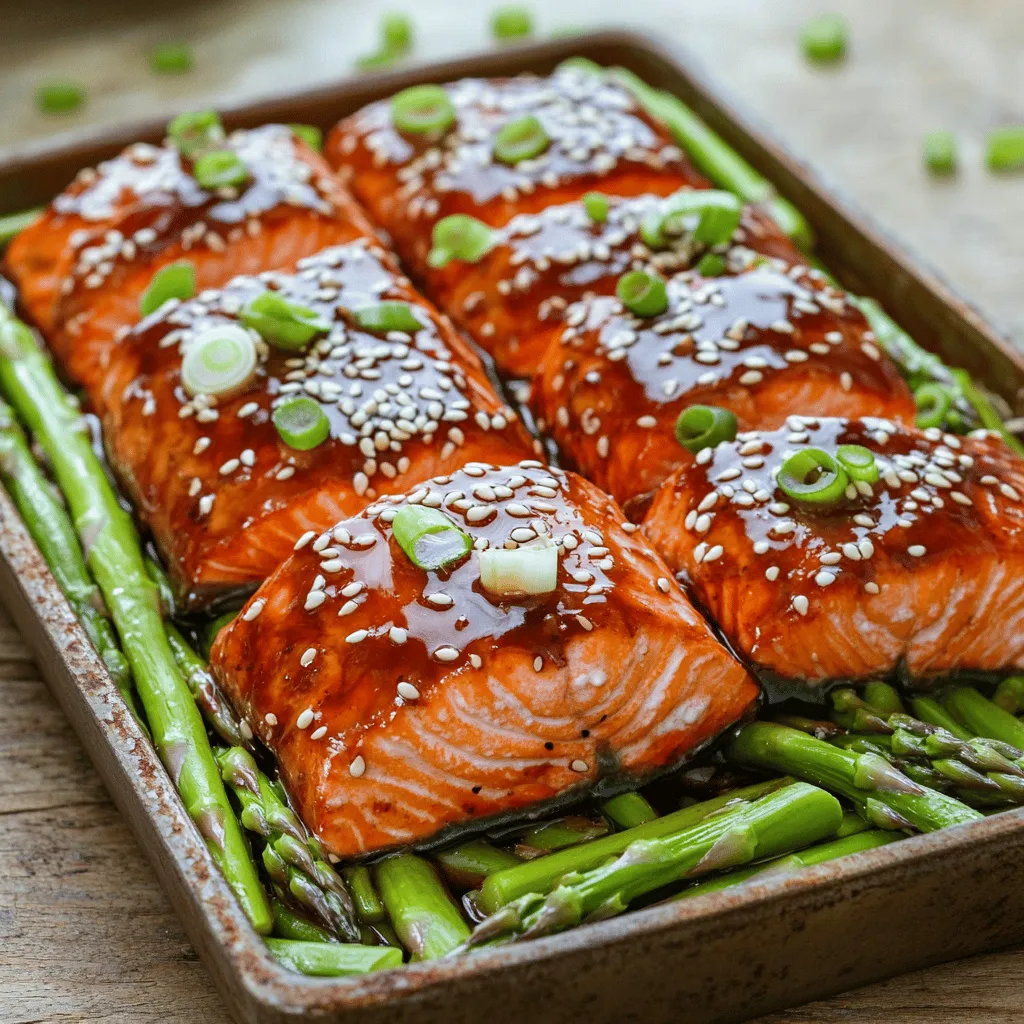
Are you ready to impress your family with a simple yet stunning dish? Teriyaki Salmon with Asparagus is not just

- 2 medium sweet potatoes, peeled and cubed - 1 can (15 oz) black beans, rinsed and drained - 1 cup corn kernels (fresh or frozen) - 1 small onion, finely diced - 2 cloves garlic, minced - 1 teaspoon ground cumin - 1 teaspoon chili powder - Salt and black pepper to taste - 8 small corn tortillas - 1 cup enchilada sauce (store-bought or homemade) - 1 cup shredded cheese (cheddar or Mexican blend) - Fresh cilantro leaves, chopped, for garnish - Lime wedges, for serving These enchiladas pack a punch of nutrients. Sweet potatoes provide fiber and vitamins, while black beans add protein. Each serving contains roughly: - Calories: 350 - Protein: 15g - Carbohydrates: 50g - Fiber: 10g - Fats: 12g This dish is filling and balanced, making it a great meal choice. You can easily adjust this recipe to fit your taste. Here are some options: - Sweet Potatoes: Use butternut squash or regular potatoes if preferred. - Black Beans: Substitute with pinto beans or lentils for different flavors. - Corn: Try using diced bell peppers or zucchini. - Cheese: Use dairy-free cheese or omit cheese for a vegan version. - Tortillas: Flour tortillas work too, but corn keeps it gluten-free. Feel free to mix and match based on what you have at home! First, gather all your ingredients. You will need sweet potatoes, black beans, corn, onion, garlic, spices, tortillas, enchilada sauce, and cheese. Make sure your oven is preheated to 375°F (190°C). This gets the kitchen ready for some tasty cooking! 1. Cook the Sweet Potatoes: Start by boiling water in a medium pot. Add the cubed sweet potatoes and cook them for about 10 to 12 minutes. You want them soft enough to pierce with a fork. After cooking, drain them and set them aside. 2. Sauté the Aromatics: In a large skillet, add a splash of olive oil over medium heat. Once hot, toss in the diced onion. Sauté it for about 5 minutes until it becomes translucent. Now, add the minced garlic, cumin, and chili powder. Stir for another minute to wake up those spices. 3. Mix the Filling: Add the cooked sweet potatoes, rinsed black beans, and corn into the skillet. Stir everything well and heat until warm. Season the mix with salt and black pepper to taste. 4. Form the Enchiladas: Spread a thin layer of enchilada sauce on the bottom of your baking dish. Take a corn tortilla and add about 1/3 cup of the filling down the center. Roll it up tightly and place it seam-side down in the dish. Keep doing this for all the tortillas, fitting them snugly. 5. Add Sauce and Cheese: Pour the rest of the enchilada sauce over the rolled tortillas. Then sprinkle the shredded cheese on top. This will melt beautifully while baking. 6. Bake: Cover the dish with aluminum foil and place it in your preheated oven. Bake for 20 minutes. After that, remove the foil and bake for another 10 minutes. The cheese should be bubbly and golden brown. 7. Serve and Garnish: Let the enchiladas cool for a few minutes before serving. Top with fresh cilantro and serve with lime wedges for an extra zing. This recipe makes a delightful meal for any occasion, and you can find the full recipe above! Enjoy your cooking! To make the filling shine, use fresh ingredients. Start with sweet potatoes. Cook them until soft but not mushy. This keeps the texture nice. Mix in black beans and corn for balance. I like to add spices like cumin and chili powder for flavor. Taste as you mix. Adjust salt and pepper to your liking. A little lime juice can add a nice kick too! Choose the right cheese for extra creaminess. I recommend cheddar or a Mexican blend. They melt well and add great flavor. For the sauce, you can use store-bought enchilada sauce. You can also make your own for a fresh touch. A spicy sauce can boost the dish if you like heat. Pour it generously over the enchiladas before baking. Avoid overcooking the sweet potatoes; they should be tender but not falling apart. Don’t skip the seasoning; it makes a big difference. Ensure your tortillas are pliable. Warm them slightly before filling to prevent tearing. Also, don’t overcrowd the baking dish. Leave some space for the cheese to melt evenly. Follow these tips, and your enchiladas will be a hit! Check out the Full Recipe for detailed steps. {{image_4}} To make these enchiladas vegan, simply skip the cheese. You can use a vegan cheese substitute or add more veggies for flavor. Try adding avocado or cashew cream for a rich taste. You can also replace the enchilada sauce with a homemade version that uses vegetable broth. This keeps the dish light and tasty. For gluten-free enchiladas, choose corn tortillas. Most corn tortillas are naturally gluten-free, making them perfect for this recipe. Always check the label to ensure they are safe. You can also use gluten-free flour tortillas if you prefer a different texture. You can customize your filling with extra ingredients. Consider adding: - Spinach or kale for added greens - Bell peppers for a crunchy texture - Zucchini for moisture - Black olives for a salty kick These additions can enhance the flavor and nutrition of your dish. Mix and match to find your perfect blend. After enjoying your sweet potato and black bean enchiladas, store leftovers in an airtight container. Make sure the dish is cool before sealing. These enchiladas stay fresh in the fridge for up to four days. If you want to keep them longer, freezing is a great option. To freeze your enchiladas, first let them cool completely. Then, wrap each enchilada tightly in plastic wrap. Place the wrapped enchiladas in a freezer-safe bag or container. You can freeze them for up to three months. Label the bag with the date, so you remember when you made them. When you’re ready to enjoy your frozen enchiladas, remove them from the freezer. Let them thaw in the fridge overnight. For reheating, preheat your oven to 350°F (175°C). Place the enchiladas in a baking dish and cover with foil. Bake for about 20 minutes until warmed through. If you prefer a crisper top, remove the foil for the last 5 minutes. Enjoy the flavors just like they were freshly made! For the complete recipe, check out the Full Recipe. You can pair these enchiladas with several tasty sides. I often serve them with: - Mexican rice - Refried beans - Fresh avocado slices - A light salad with lime dressing - Chips and salsa These sides add flavor and fun to your meal. You can also add a dollop of sour cream or Greek yogurt for creaminess. To heat things up, try these simple tricks: - Add diced jalapeños to the filling for a fresh kick. - Sprinkle red pepper flakes into the enchilada sauce. - Use spicy cheese like pepper jack. - Mix in a bit of hot sauce when cooking the filling. Adjust the spice to fit your taste. It’s fun to play with heat! Yes, you can make these enchiladas ahead of time. Here’s how: - Prepare the filling and roll the enchiladas. - Place them in a baking dish and cover them tightly with plastic wrap. - Store in the fridge for up to 24 hours. When ready to bake, just add the sauce and cheese, then pop them in the oven. This saves time on busy nights. For the full recipe, check the link above! You learned about making Sweet Potato and Black Bean Enchiladas today. We covered all the key parts: ingredients, cooking steps, tips, variations, and storage. Use substitute options if needed, and know the common mistakes to avoid. With these points in mind, you can create a tasty dish. Cook with confidence, and don’t be afraid to try new flavors. Enjoy your delicious enchiladas, and share them with your friends. You’ll impress everyone with your cooking skills!

Savory Sweet Potato and Black Bean Enchiladas Recipe

Looking to spice up your dinner routine? My Savory Sweet Potato and Black Bean Enchiladas combine flavors that dance on

To make Maple Mustard Roasted Brussels Sprouts, you need: - 1 lb Brussels sprouts, thoroughly washed, trimmed, and halved - 3 tablespoons extra virgin olive oil - 2 tablespoons pure maple syrup - 1 tablespoon Dijon mustard - 1 tablespoon whole grain mustard - 2 cloves garlic, finely minced - Salt and freshly ground black pepper, to taste - ¼ cup freshly grated Parmesan cheese (optional) - Chopped fresh parsley, for garnish Each ingredient plays a key role in the dish. The Brussels sprouts give a nice texture and taste. The olive oil helps them roast well. Maple syrup adds sweetness. Dijon and whole grain mustard bring a sharp flavor. Garlic adds depth, while salt and pepper enhance all the tastes. Parmesan cheese is optional but adds richness. Fresh parsley brightens the dish. You can make some swaps if you need to. If you don't have Brussels sprouts, broccoli or green beans work too. Use any cooking oil if you lack olive oil. Honey can replace maple syrup for sweetness. If you want less tang, skip the mustards or use a milder one. For a dairy-free version, leave out the Parmesan or use a plant-based cheese. Start by washing 1 pound of Brussels sprouts. Trim the ends and cut them in half. This helps them cook evenly. Next, grab a large mixing bowl. Add 3 tablespoons of extra virgin olive oil, 2 tablespoons of pure maple syrup, 1 tablespoon of Dijon mustard, and 1 tablespoon of whole grain mustard. Then, add 2 cloves of finely minced garlic. Sprinkle in salt and freshly ground black pepper to taste. Whisk this mixture until it blends well. This will be your tasty coating. Now, preheat your oven to 400°F (200°C). Once ready, add the halved Brussels sprouts to the bowl. Toss them in the maple mustard mixture until they are well coated. Line a baking sheet with parchment paper. Spread the Brussels sprouts out in a single layer. This helps them roast evenly. Place the baking sheet in the oven and roast for 20-25 minutes. Halfway through, give them a gentle toss. This ensures they caramelize nicely. If you want, add ¼ cup of freshly grated Parmesan cheese during the last 5 minutes of roasting. It melts beautifully and adds flavor. Once they look golden brown and tender, take them out of the oven. Transfer the Brussels sprouts to a serving dish. For a pop of color, sprinkle freshly chopped parsley on top. You can also drizzle a little extra maple syrup over them for added sweetness. Serve them warm as a side dish or a main event. They pair well with roasted meats or a hearty grain salad. For more detailed steps, check the Full Recipe. To get the best Brussels sprouts, start with fresh ones. Look for bright green sprouts that feel firm. Wash them well and trim off any brown edges. Cut them in half to help them cook evenly. The oven should be hot, at 400°F (200°C). Spread the sprouts in a single layer on a baking sheet. This helps them roast, not steam. Toss them halfway through to get all sides nice and crispy. You can boost the flavor of Brussels sprouts by adding garlic and fresh herbs. Fresh thyme or rosemary works well. You can also use different mustards for a unique taste. Whole grain mustard adds texture and depth, while Dijon gives a nice tang. A sprinkle of Parmesan cheese adds a rich, creamy flavor. Drizzling a bit of extra maple syrup before serving can enhance the sweetness too. One common mistake is overcrowding the baking sheet. If the sprouts are too close, they steam instead of roast. Make sure they are spread out. Another mistake is not preheating the oven. A hot oven is key for crispy edges. Lastly, don’t skip the tossing step during roasting. This ensures even cooking and caramelization. Follow these tips for the best Maple Mustard Roasted Brussels Sprouts. You can find the Full Recipe in the earlier section. {{image_4}} You can mix in other vegetables with your Brussels sprouts. Carrots add sweetness and color. Sweet potatoes bring a creamy texture. Red onions offer a nice crunch. Just cut them into similar sizes for even cooking. Toss them in the same maple mustard mix, and roast together. You’ll create a tasty medley of flavors. The mustards in this dish make it special. Dijon mustard gives a sharp bite. Whole grain mustard adds texture and a bit of tang. You can switch it up! Try yellow mustard for a milder taste. Or go for spicy brown mustard for an extra kick. Each choice brings a unique twist to the dish. Want a vegan version? Skip the Parmesan cheese. It’s just as good without it. You can also replace the honey with maple syrup. Make sure to check labels on your mustard to ensure they are dairy-free. This way, everyone can enjoy this dish without worry. Once you finish your meal, let the Brussels sprouts cool. Place them in an airtight container. They stay fresh in the fridge for up to three days. When you want to enjoy them again, just take them out. The maple mustard flavor remains tasty even after a day or two. You can freeze the Brussels sprouts if you have leftovers. Spread them on a baking sheet in a single layer. Freeze for about two hours until they are solid. Then, transfer them to a freezer-safe bag. They can last up to three months in the freezer. Just remember to label the bag with the date. To reheat, you have a few options. The oven works best for keeping them crispy. Preheat your oven to 350°F (175°C). Spread the sprouts on a baking sheet and heat for about 10-15 minutes. You can also use the microwave. Heat them in short bursts of 30 seconds. Mix them in between to ensure even heating. If you want, add a drizzle of maple syrup before serving. It brings back that sweet flavor. For more details, check the Full Recipe. Brussels sprouts are done when they are golden brown and tender. You can poke them with a fork. If they feel soft, they are ready. The outside should have a nice crisp. This means they caramelized well in the oven. Yes, you can make this recipe ahead of time. You can prepare the Brussels sprouts and coat them with the maple mustard mix. Then, store them in the fridge for up to 24 hours. When you are ready, just roast them as instructed. This saves time on busy days. These Brussels sprouts pair well with many dishes. You can serve them with roasted chicken or baked fish. They also work great with quinoa or rice. For a vegetarian option, try them with a hearty lentil dish. The flavors blend well together. You can find the full recipe for Maple Mustard Roasted Brussels Sprouts in the recipe section above. Enjoy cooking! This article covered everything you need for tasty Brussels sprouts. We explored the best ingredients, their measurements, and smart substitutes. I shared step-by-step instructions for preparation, roasting, and serving. You also learned tips for perfection, flavor, and avoiding mistakes. I offered variations to add twist and ideas for storage. Finally, we answered common questions to boost your cooking skills. Enjoy making these sprouts your way and sharing them with friends and family!

Maple Mustard Roasted Brussels Sprouts Delicious Dish

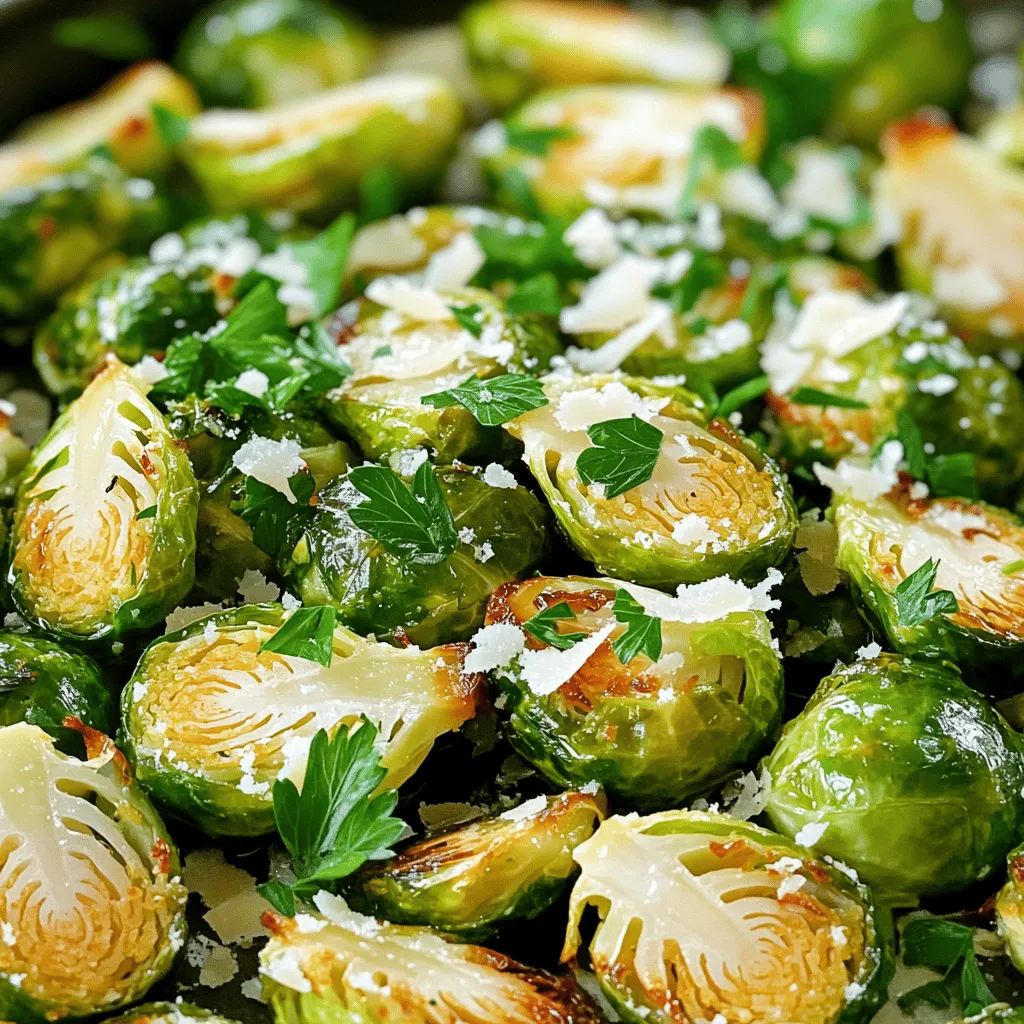
If you want to make Brussels sprouts delicious, try my Maple Mustard Roasted Brussels Sprouts! This dish combines sweet maple

Older posts
Newer posts
← Previous Page1 … Page23 Page24 Page25 … Page61 Next →

dsad

© 2025 eataroundit • Built with GeneratePress

Our Policies

  • Copyright Policy
  • Cookie Policy
  • GDPR Policy
  • Privacy Policy
  • Disclaimer
  • Terms Of Use

More Information

  • Home
  • About
  • Contact
  • Appetizers
  • Dessert
  • Dinner
  • Drinks
©2025, eataroundit About Back To Top