Skip to content
DisclaimerTerms Of UseGDPR PolicyCookie Policy

eataroundit

  • Home
  • Drinks
  • Appetizers
  • Dinner
  • Dessert
  • About
  • Contact
  • Privacy Policy
DisclaimerTerms Of UseGDPR PolicyCookie Policy

Hannah

- 1 pre-made pie crust - 2 cups fresh spinach, chopped - 1 cup mushrooms, sliced - 1 small onion, finely chopped - 3 large eggs - 1 cup heavy cream - 1 cup shredded cheese - 1 teaspoon garlic powder - 1/2 teaspoon grated nutmeg - Salt and pepper to taste - 1 tablespoon olive oil You can swap cheese for a dairy-free option. Try nutritional yeast for flavor. For vegetables, use kale or broccoli if you don't have spinach. Zucchini also works well in this dish. Use a 9-inch pie dish for baking. A non-stick pan is best for sautéing. You will need a whisk for mixing and a cutting board for chopping. A sharp knife will make prep easier. - Preheat the oven to 375°F (190°C). - Sauté onions until translucent. First, you need to get your oven hot. This helps cook the quiche evenly. While the oven heats, grab a skillet. Add a tablespoon of olive oil over medium heat. Chop your onion finely and add it to the skillet. Cook it until it turns clear, about 3-5 minutes. - Sauté mushrooms and spinach. - Combine the egg mixture with sautéed vegetables. Now, let's add the mushrooms. Slice them up and toss them in with the onions. Cook them until golden brown, which should take about 5-7 minutes. Next, chop the spinach and add it to the skillet. Stir it until it wilts, around 2-3 minutes. After that, let the mixture cool a bit. In a large bowl, crack three eggs and pour in a cup of heavy cream. Whisk them together until smooth. Add one teaspoon of garlic powder, half a teaspoon of grated nutmeg, and some salt and pepper. Mix until combined. Now fold in your sautéed vegetables and one cup of shredded cheese. This mix will bring all the flavors together. - Pour filling into the pie crust. - Bake until set and golden. Grab your pre-made pie crust and pour the filling right into it. Make sure it spreads out evenly. Place the quiche in your preheated oven. Bake it for 35-40 minutes. You'll know it's done when the center is set and the top is golden. Once it's ready, let it cool for about 10 minutes before slicing. Enjoy this simple yet delightful quiche recipe! For the full recipe, check out the details above. To make your quiche great, focus on cooking times and temperatures. Bake your quiche at 375°F (190°C) for 35-40 minutes. You want it firm in the center. A golden crust adds a nice touch. To achieve this, brush the crust with a bit of beaten egg before baking. This will give it a lovely color and shine. Pair your quiche with a fresh salad. A mixed green salad works well. The crunch of the greens balances the soft quiche. For presentation, slice the quiche into wedges. Serve each wedge on a colorful plate. You can garnish with a sprinkle of herbs or extra cheese for flair. Adding a few sautéed mushrooms on top makes it even better. If you have leftovers, store them in airtight containers. Your quiche will stay fresh in the fridge for up to 3 days. To reheat, place slices in the oven at 350°F (175°C) for about 10-15 minutes. This method keeps the crust crispy. You can also microwave them, but watch for sogginess. Always check that it's heated through before serving. For the full recipe, check the recipe card above. {{image_4}} You can easily change the flavor of your quiche. Adding herbs like dill or thyme can elevate the taste. Fresh herbs enhance the aroma and add a bright note. Try mixing in different cheeses, too. Feta or goat cheese bring a tangy flavor. Cheddar offers a rich, creamy taste. Experiment with your favorites to find what you love. If you need a gluten-free option, use a gluten-free pie crust. There are many good choices at the store. You can also make this quiche vegetarian by leaving out any meat. For a vegan alternative, replace eggs with silken tofu or chickpea flour. Use plant-based cream for a creamy texture without dairy. Seasonal vegetables can make this quiche even better. In spring, add asparagus or peas for a fresh crunch. In the fall, consider roasted squash or sweet potatoes. Adjust the flavors based on what’s in season. This keeps your quiche exciting and full of flavor year-round. For the full recipe, check out the detailed instructions above. How long does the quiche last in the fridge? Your spinach and mushroom quiche lasts about 3 to 4 days in the fridge. Make sure to store it in an airtight container to keep it fresh. Best storage containers to use Use a glass or plastic container with a tight lid. This helps prevent moisture loss and keeps flavors intact. Can you freeze cooked quiche? Yes, you can freeze cooked quiche! Freezing is a great way to save leftovers. Just wrap it tightly in plastic wrap. Tips for thawing and reheating Thaw your quiche in the fridge overnight. To reheat, place it in a 350°F (175°C) oven for about 20 minutes. This keeps the crust crisp. How to identify if your quiche has gone bad Look for any changes in smell or color. If it smells sour or has mold, it’s time to toss it. Best practices to ensure freshness Always cool the quiche completely before storing. This helps prevent condensation and keeps it fresh longer. How long does it take to cook a spinach and mushroom quiche? It takes about 55 minutes to cook. This includes 15 minutes of prep time and 40 minutes of baking. You want to bake it until the center is set and slightly golden. Can I use frozen spinach instead of fresh? Yes, you can use frozen spinach. Just remember to thaw and drain it well. This will prevent excess water in your quiche. What can I serve with spinach and mushroom quiche? This quiche pairs well with a mixed green salad. You can also serve it with fresh fruit or a light soup. How to reduce calories in the quiche? To cut calories, use a lighter cream or milk. You can also reduce the cheese or use a low-fat version. Can I make the quiche ahead of time? Yes, you can prepare it a day ahead. Just bake it and refrigerate. Warm it up before serving. What is the secret to a fluffy quiche? The secret is to whisk the eggs and cream well. This adds air and helps it rise. Can I use a different crust for the quiche? Absolutely! You can use a whole wheat crust, a puff pastry, or even a crustless version. Each will give a unique taste. For the full recipe, check out the detailed steps above. This blog post covered how to make a tasty spinach and mushroom quiche. We discussed the key ingredients, preparation steps, and cooking tips. You learned about ingredient substitutions, variations, and storage options. In conclusion, making quiche is simple and fun. You can easily customize it to fit your taste. Enjoy your cooking and share this delicious dish with friends and family. Your quiche journey is just beginning!

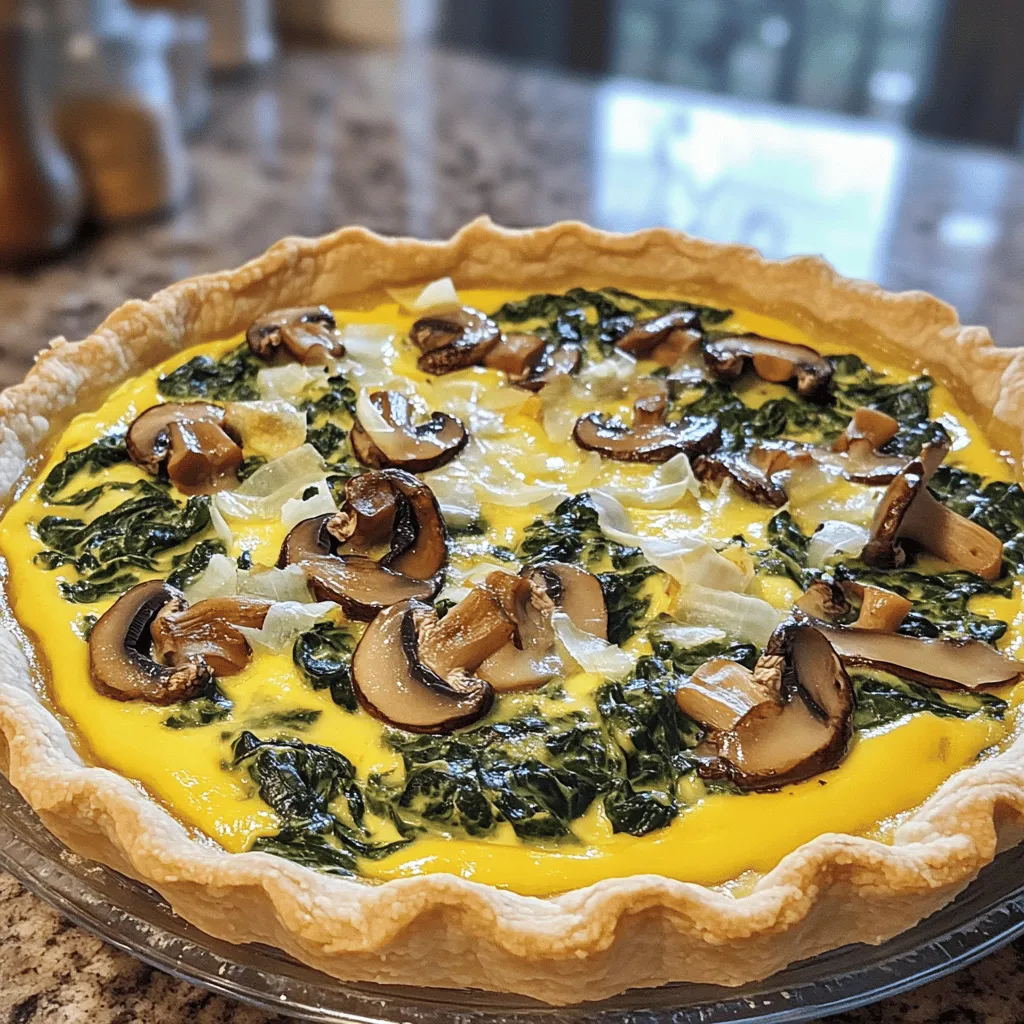
Spinach and Mushroom Quiche Simple Delightful Recipe

Are you ready to impress your family or friends with a tasty dish? This Spinach and Mushroom Quiche offers a

- 1 lb (450g) carrots: Peeled and chopped into 1-inch pieces for easy cooking. - 1 medium onion: Finely chopped to add sweetness and depth to the soup. - 2 cloves garlic: Minced to create a rich, aromatic base. - 1 tablespoon fresh ginger: Grated for a warm, spicy kick. - 1 teaspoon ground cumin: Adds earthy warmth and depth of flavor. - 1 teaspoon ground coriander: Brings a light, citrusy taste. - 1/2 teaspoon ground cinnamon: Introduces a warm, sweet note. - 1/4 teaspoon cayenne pepper: Adjust based on your heat preference for a spicy touch. - 4 cups vegetable broth: Homemade or store-bought for a rich, savory base. - 1 can (14 oz) full-fat coconut milk: Adds creaminess and richness. - 2 tablespoons extra virgin olive oil: For sautéing and a hint of flavor. - Salt and black pepper: To taste, enhancing all the flavors. - Fresh cilantro or parsley: For garnish, adding a fresh finish. - Lemon wedges: For serving, providing a zesty contrast. When sourcing these ingredients, choose fresh and organic options whenever possible. Fresh carrots should feel firm and vibrant in color. Look for onions and garlic that are dry and free from blemishes. High-quality spices can make a big difference in flavor, so consider buying from a reputable spice shop. For the coconut milk, choose full-fat for the best creaminess. Enjoy this soup with hearty bread for a complete meal. You can find the Full Recipe for more details. To make Moroccan spiced carrot soup, start by preparing your ingredients. You need 1 pound of carrots, 1 onion, garlic, and ginger. First, heat 2 tablespoons of olive oil in a large pot over medium heat. When the oil glistens, add the chopped onion. Cook for about 5 minutes until the onion becomes soft and clear. Next, add 2 minced garlic cloves and 1 tablespoon of grated ginger. Stir for 1 minute until it smells great. Then, add the spices: 1 teaspoon of cumin, 1 teaspoon of coriander, 1/2 teaspoon of cinnamon, and 1/4 teaspoon of cayenne pepper. Mix these spices with the onion for 1 more minute. Now, it’s time to add the chopped carrots. Stir them in until they are well-coated with the spices. Pour in 4 cups of vegetable broth, then bring the soup to a boil. Once boiling, turn down the heat, cover the pot, and let it simmer for 20-25 minutes. The carrots should be fork-tender when done. After the carrots soften, it’s blending time! If you have an immersion blender, use it right in the pot. Blend until the soup is smooth. If you don’t have one, carefully pour the soup into a countertop blender in batches. Blend each batch until smooth and return it to the pot. Once blended, add 1 can of full-fat coconut milk. Mix well to combine. Season your soup with salt and black pepper to taste. If you want it warm, heat it gently on low. Avoid boiling after adding the coconut milk. Now your soup is ready! You can serve it hot with a sprinkle of fresh cilantro or parsley. A squeeze of lemon adds a nice touch. Enjoy your flavorful Moroccan spiced carrot soup! For more details, refer to the Full Recipe. To enhance the flavor of your Moroccan spiced carrot soup, use fresh spices. Fresh spices give a brighter taste. Toast them in oil for a minute. This brings out their rich flavors. Avoid overcooking the carrots. They should be tender but not mushy. Keep an eye on the cooking time. Blend the soup until it is smooth. If you leave chunks, the texture will not be nice. Pair your soup with warm, crusty bread. The bread is perfect for dipping. You can also serve it with a fresh salad. This adds crunch and freshness to your meal. For a beautiful presentation, swirl some coconut milk on top. Add a sprig of cilantro in the center. This makes each bowl look inviting. Serve with lemon wedges on the side. A squeeze of lemon adds a bright, zesty flavor to each bite. You can find the full recipe linked above. Enjoy creating your delicious soup! {{image_4}} You can easily make this soup your own! Try using sweet potatoes or butternut squash instead of carrots. They add a nice sweetness. If you want to spice things up, add a pinch of smoked paprika or turmeric. For dietary needs, this soup is naturally vegan and gluten-free. If you want to add protein, toss in some cooked lentils or chickpeas. They blend well and boost nutrition without changing the flavor. There are many fun ways to serve this soup! You can serve it as a starter in small bowls. It also pairs well with crusty bread for dipping. For a twist, try serving it cold on hot days. Just chill it in the fridge before serving. Seasonal variations can add excitement. In fall, sprinkle roasted pumpkin seeds on top. In spring, add fresh herbs like mint or basil. These changes keep the soup fresh and exciting every season! For the full recipe, check out the Moroccan Spiced Carrot Soup 🥕 section. To keep your Moroccan spiced carrot soup fresh, follow these steps: - Cool the soup: Let it cool to room temperature before storing. - Refrigerate: Place the soup in an airtight container. It stays good in the fridge for about 3 to 4 days. - Freeze: For long-term storage, pour the soup into freezer-safe containers. It can last for up to 3 months in the freezer. Always label your containers with the date. This helps you keep track of how long the soup has been stored. When it's time to enjoy your soup again, here are some tips: - Stovetop method: Pour the soup into a pot. Heat over medium-low heat. Stir often to avoid sticking. This method keeps the texture nice and creamy. - Microwave method: If you use a microwave, transfer the soup to a microwave-safe bowl. Heat on medium power in short bursts. Stir between heating to ensure even warmth. Avoid boiling the soup after adding coconut milk. This helps keep the rich flavor intact. Enjoy your warm, comforting soup! Moroccan spiced carrot soup stays fresh for about 5 days in the fridge. Make sure to store it in an airtight container. This helps keep the flavors intact. If you see any signs of spoilage, like off smells or mold, discard it. Always trust your senses when it comes to food safety. Yes, you can make this soup ahead of time. In fact, it tastes even better after resting. Making it in advance allows the flavors to meld and deepen. After cooling, store it in the fridge. To reheat, gently warm it on the stove. Avoid boiling after adding coconut milk to keep it creamy. This soup is packed with health benefits. Carrots are rich in beta-carotene, which is good for your eyes. The spices like ginger and cumin have anti-inflammatory properties. Coconut milk provides healthy fats that support heart health. Plus, the soup is low in calories, making it a great choice for a light meal. Enjoy this nourishing dish while reaping its many benefits. For the full recipe, check out the link. This blog post provides you with a complete guide for making Moroccan Spiced Carrot Soup. We covered the ingredients, cooking steps, blending techniques, and final touches for the best flavor. You learned about tips for serving and storing leftovers, along with variations to suit your taste. Remember, the key to great soup is fresh ingredients and care in preparation. Enjoy making this dish, and feel free to get creative with flavors and textures. Delicious meals bring joy, so have fun in the kitchen!

Moroccan Spiced Carrot Soup Flavorful and Satisfying

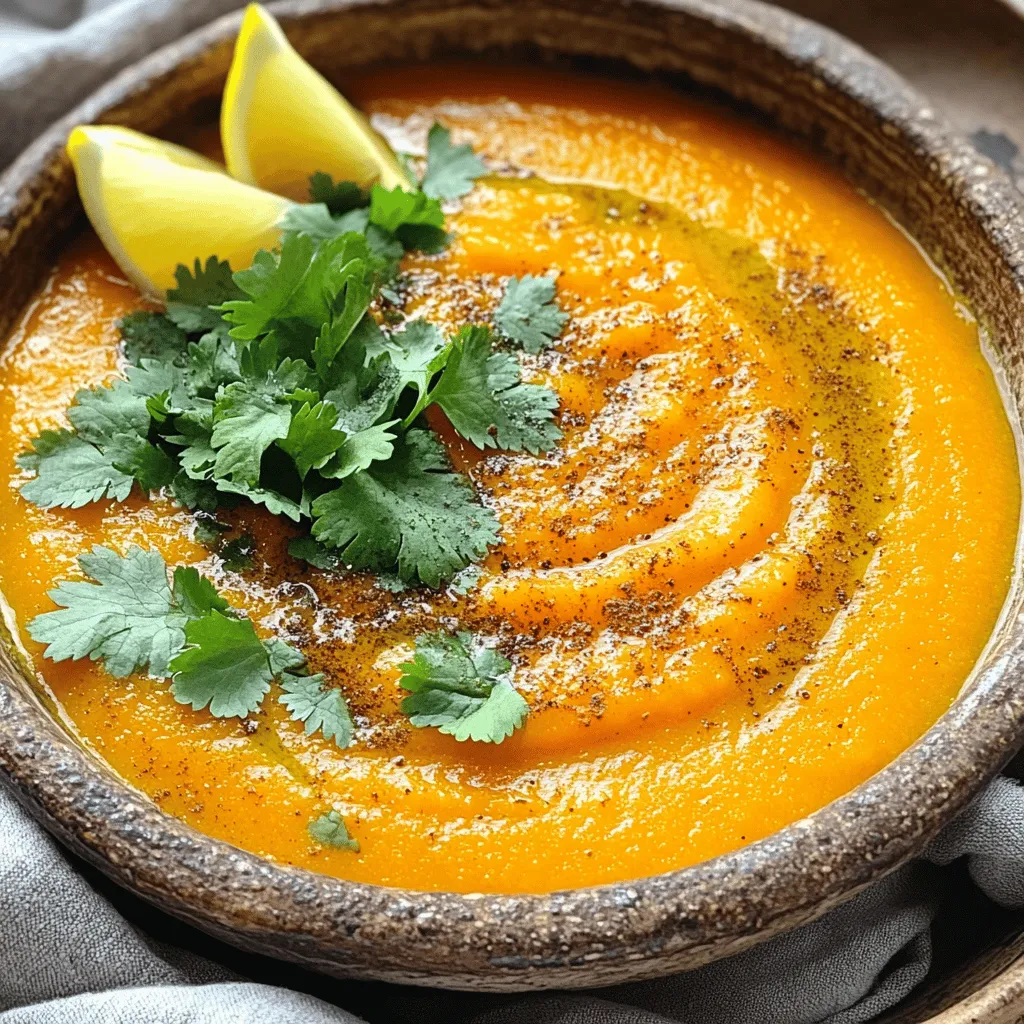
Discover the warm, vibrant flavors of Moroccan Spiced Carrot Soup! In this post, you’ll learn to create a cozy dish

- 1 lb (450g) boneless, skinless chicken thighs, sliced into bite-sized pieces - 2 tablespoons honey - 3 tablespoons soy sauce - 3 cloves garlic, finely minced - 1 tablespoon fresh ginger, grated - 1 bell pepper (choose red or yellow for sweetness), sliced into strips - 1 cup broccoli florets (fresh or frozen) - 1 medium carrot, julienned (cut into thin strips) - 1 tablespoon vegetable oil (for frying) - Salt and freshly ground pepper to taste In this recipe, I use chicken thighs. They are juicy and flavorful. The honey adds a nice sweetness. Soy sauce brings umami, while garlic and ginger give depth. Fresh vegetables like bell pepper, broccoli, and carrot bring color and crunch. - 2 green onions, chopped (for garnish) - Sesame seeds (for garnish) I love to add green onions on top. They add a fresh taste and a nice pop of color. Sesame seeds give a nice crunch and a nutty flavor. You can put these on right before serving to make your dish look more appealing. For the full recipe, check out the [Full Recipe]. Start by mixing key ingredients in a small bowl. You will need: - 2 tablespoons honey - 3 tablespoons soy sauce - 3 cloves garlic, finely minced - 1 tablespoon fresh ginger, grated Whisk these ingredients together until fully blended. Set the sauce aside for later use. Next, heat 1 tablespoon of vegetable oil in a large skillet or wok over medium-high heat. Once the oil shimmers, add 1 pound of sliced chicken thighs. Spread the chicken in a single layer for even cooking. Season it lightly with salt and pepper. Sauté the chicken for about 5 to 7 minutes. Stir frequently to ensure it cooks evenly. Check that the chicken reaches an internal temperature of 165°F. Once cooked, remove the chicken from the skillet and place it on a plate. In the same skillet, add your fresh vegetables. You will need: - 1 bell pepper, sliced into strips - 1 cup broccoli florets - 1 medium carrot, julienned Stir-fry the vegetables for 3 to 4 minutes. You want them tender-crisp and vibrant in color. This quick cooking helps lock in their nutrients and flavor. Now, return the cooked chicken to the skillet with the vegetables. Pour the honey garlic sauce over everything. Toss the mixture to ensure all ingredients are coated. Allow it to cook for an additional 2 to 3 minutes. This helps the sauce thicken and glaze the chicken and veggies. For a special touch, garnish with chopped green onions and sesame seeds. Serve hot over steamed rice or noodles for a complete meal. For the full recipe, refer to the ingredients and cooking steps above. To pick the right chicken, choose boneless thighs. They stay juicy and tender. Look for bright pink meat with no dark spots. Fresh chicken should feel firm but not hard. To keep chicken juicy, avoid overcooking. Sauté it until it turns golden brown, about 5-7 minutes. Use a meat thermometer to check if it reaches 165°F. Letting it rest for a few minutes before cutting helps too. You can add more spices for a flavor boost. Try red pepper flakes for heat or a splash of lime juice for brightness. Fresh herbs, like cilantro, add freshness as well. For sauce consistency, ensure you whisk the honey and soy well. If it’s too thin, let it cook longer until it thickens. This creates a tasty glaze that clings to the chicken and veggies. Serve this dish with jasmine rice or rice noodles. Both are great at soaking up the sauce. Adding a side of steamed green beans or a simple salad complements the meal well. For plating, use a colorful bowl. Arrange the stir-fry neatly and sprinkle sesame seeds on top. This adds texture and makes your meal look inviting. For the full recipe, check out the additional details provided. {{image_4}} You can switch chicken for tofu or shrimp. Tofu is a great choice for a plant-based meal. It absorbs flavors well and adds protein. For shrimp, cook it for about 3-4 minutes. Shrimp cooks faster than chicken, so watch it closely. Both options keep the dish tasty and fun. Using seasonal vegetables can add freshness to your stir-fry. Try snap peas, zucchini, or even asparagus. Mix colors for a more appealing plate. Bright veggies like red bell peppers and orange carrots make your meal pop. The more colors, the better the nutrition! If you need a gluten-free option, use gluten-free soy sauce. This change keeps the flavor while making it safe to eat. You can also replace honey with maple syrup or agave nectar for a sweet touch. These swaps make the dish fit your needs without losing taste. For the full recipe, check out the Honey Garlic Chicken Stir-Fry. You can store leftover Honey Garlic Chicken Stir-Fry in an airtight container. Make sure it cools down first. This way, it stays fresh and tasty. You can keep it in the fridge for up to three days. Always check for any off smells or changes before eating. If you want to freeze your stir-fry, follow these easy steps: - Allow the dish to cool completely. - Transfer it to a freezer-safe container. - Seal it tightly to prevent freezer burn. You can freeze it for up to three months. To thaw, place the container in the fridge overnight. When ready to eat, reheat it on the stove or in the microwave. Stir it well to ensure even heating. Enjoy your quick and healthy meal again! You can find the full recipe [here](#). Making Honey Garlic Chicken Stir-Fry takes about 20 minutes. You need around 10 minutes to prep the ingredients. The cooking time is about 10 minutes. This quick meal is great for busy nights. Yes, you can make this recipe in advance. Cook the chicken and vegetables, then store them in the fridge. Keep the sauce separate in a jar. When you’re ready to eat, just heat everything up together. This way, your meal stays fresh and tasty. You can serve Honey Garlic Chicken Stir-Fry with rice or noodles. Jasmine rice works well, but you can try brown rice for added fiber. Rice noodles add a nice touch too. Add a side salad for extra crunch. This recipe is not spicy. It has a sweet and savory flavor. If you want some heat, add red pepper flakes or sriracha. Start with a little, then taste and adjust to your liking. In this blog post, we covered making a tasty Honey Garlic Chicken Stir-Fry. You learned about the main ingredients, with chicken thighs, fresh veggies, and a sweet sauce. I detailed step-by-step instructions, tips for perfect chicken, and options for variations. You can even store leftovers easily. Now, enjoy experimenting with your dish. Mix in your favorite veggies or proteins to make it your own. Cooking can be fun and rewarding. Keep trying new things and savor every bite!

Honey Garlic Chicken Stir-Fry Healthy and Fast Meal

Looking for a quick, healthy meal that bursts with flavor? You’ll love my Honey Garlic Chicken Stir-Fry! This dish pairs

- 1 cup jasmine rice - 1 cup coconut milk - 1/2 cup water - 1 tablespoon granulated sugar - 1/4 teaspoon fine salt - 1 ripe mango, peeled and diced into cubes - 2 tablespoons toasted coconut flakes - Fresh mint leaves for garnish (optional) - For a dairy-free option, use almond milk or oat milk. - Add a pinch of cinnamon for warmth or lime zest for brightness. - Try adding chopped nuts for a crunchy contrast. When making coconut rice with mango, these ingredients make all the difference. The jasmine rice gives a lovely aroma and texture. Coconut milk adds richness and creaminess. Using fresh mango elevates the dish with sweetness. You can personalize this dish with optional ingredients based on your taste and dietary needs. For example, if you need a dairy-free option, almond milk works well. Adding some cinnamon or lime zest can enhance the flavors even more. This way, you can make the dish truly your own. For the full recipe, check out the detailed steps. - Rinse jasmine rice under cold water. - Combine rice with coconut milk and water. First, I rinse the jasmine rice under cold water. This step helps remove extra starch. Rinsing keeps the rice light and fluffy. I continue rinsing until the water runs clear. Next, I take a medium saucepan and mix the rinsed rice with coconut milk and water. I also add sugar and salt for flavor. A gentle stir with a wooden spoon helps mix everything well. - Bring coconut milk mixture to a boil. - Reduce heat and cover to simmer for 15 minutes. Then, I place the saucepan over medium heat. I wait for the coconut milk mixture to come to a gentle boil. It is important to stir occasionally to stop sticking. Once it boils, I reduce the heat to low. I cover the saucepan with a tight lid. This keeps the steam inside. I let it simmer for about 15 minutes. During this time, I avoid lifting the lid to let the rice cook properly. - Fluff the rice after resting. - Assemble the dish with mango and toppings. After the cooking time, I remove the saucepan from heat. I let it sit for about 10 minutes, still covered. This resting time helps the rice get even fluffier. Once done, I use a fork to fluff the rice gently. I separate the grains without mashing them. To serve, I scoop the coconut rice onto plates. I top each serving with fresh diced mango for sweetness. Lastly, I sprinkle toasted coconut flakes on top. If I want, I can add fresh mint leaves for a colorful touch. For the full recipe, check it out [here](#). To make the best coconut rice, keep the lid on during cooking. Lifting the lid lets steam escape, which affects the rice. After cooking, let the rice rest for ten minutes. This step helps it become fluffy and light. For a lovely presentation, serve the rice in colorful bowls. Place a generous amount of diced mango on top. You can also sprinkle toasted coconut flakes for extra crunch. Pair this dish with a refreshing drink like iced tea or coconut water for a tropical feel. One common mistake is undercooking the rice. If the rice is too hard, it won't taste good. Always check that the rice is tender before serving. Use high-quality jasmine rice and fresh mango for the best flavor. Rinse the rice well to remove excess starch. This step prevents the rice from becoming sticky. {{image_4}} You can use different rice types for coconut rice. Brown rice adds a nutty flavor and a chewy texture. Sushi rice gives a creamy finish that pairs well with mango. Each rice type changes the taste and feel of the dish. You can also mix rice types for a unique twist. Adding more fruits can elevate your coconut rice. Pineapple brings a sweet and tangy taste. Bananas add creaminess and sweetness. You can also toss in nuts like cashews or almonds for crunch. These add-ins make your dish lively and fun. Get creative with what you have. Coconut rice can be sweet or savory. For a savory version, add spices like garlic and ginger. This gives it a warming flavor. You can balance sweetness by adding lime juice. A hint of citrus makes the dish bright and fresh. Experiment with flavors to find your perfect mix. Try the Full Recipe for a classic take on this dish. To keep your coconut rice fresh, place it in an airtight container. This will help keep it moist. Store it in the fridge for up to four days. If you notice any signs of spoilage, it is best to throw it away. When reheating coconut rice, add a splash of water. This will help restore its soft texture. You can use a microwave or a stovetop. If using the microwave, cover the rice to keep the moisture in. For stovetop reheating, warm it on low heat while stirring often. You can also mix leftover rice into a stir-fry or use it in a salad for a fun twist. To freeze coconut rice, let it cool completely. Then, portion it into freezer-safe bags. Remove as much air as possible before sealing. You can store it for up to three months. To thaw, leave it in the fridge overnight. When ready to use, reheat it as mentioned earlier for the best texture. You can use different kinds of milk. For a dairy option, try whole milk or cream. If you want a non-dairy choice, almond milk or soy milk works well. Use unsweetened versions for better flavor. You can also mix water with coconut extract for a coconut taste. Yes, you can prep coconut rice ahead. Cook the rice, let it cool, and store it in a sealed container. Keep it in the fridge for up to three days. When ready, reheat the rice on the stove or microwave. Add a splash of water for moisture. Serve it with fresh mango just before eating. Look for mangoes that are slightly soft when you press them. A ripe mango should have a sweet smell near the stem. Check the skin color; it can be green, yellow, or red. Avoid mangoes with dark spots or wrinkles. A good mango gives the best flavor in your dish. In this blog post, we explored the key ingredients for making delicious coconut rice. You learned about essential and optional ingredients, along with easy step-by-step instructions. We discussed tips for perfect texture and ways to serve it beautifully. Additionally, we covered variations, storage tips, and answered your burning questions. Coconut rice is versatile and fun to make. With the right ingredients and techniques, you can impress anyone with this dish! Enjoy your cooking and get creative with flavors.

Coconut Rice with Mango Simple and Tasty Delight

Welcome to a tropical treat you can whip up at home: Coconut Rice with Mango! This simple dish combines fluffy

To make this creamy spinach artichoke dip, you'll need these ingredients: - 2 cups fresh spinach, finely chopped - 1 cup canned artichoke hearts, thoroughly drained and coarsely chopped - 1 cup cream cheese, softened to room temperature - 1/2 cup sour cream - 1/2 cup mayonnaise - 1 cup shredded mozzarella cheese - 1/2 cup grated Parmesan cheese - 1 teaspoon garlic powder - 1/2 teaspoon onion powder - Salt and freshly cracked black pepper, to taste - Fresh parsley, finely chopped, for garnish (optional) Each ingredient plays a big role in the taste and texture of the dip. The fresh spinach adds a bright green color and a slight earthiness. Canned artichoke hearts provide a tender bite and a unique flavor. Cream cheese forms the base, giving the dip its creamy texture. Sour cream and mayonnaise add tang and richness. Mozzarella cheese melts beautifully, while Parmesan adds a salty, nutty taste. Garlic and onion powders boost the flavor without overpowering the dish. When picking fresh spinach, look for bright green leaves that feel crisp. Avoid any leaves that appear wilted or yellow. For artichokes, choose firm ones with tight leaves. If you buy canned artichokes, pick a brand with minimal additives. Always drain them well before using. This helps keep the dip from getting watery. Making spinach artichoke dip is simple. You will need about 10 minutes to prep and 25 minutes to bake. Gather all your ingredients before you start. It helps to stay organized. 1. Preheat the Oven: Set your oven to 375°F (190°C). This step is key for even cooking. 2. Mix the Base: In a large bowl, combine 1 cup of softened cream cheese, 1/2 cup of sour cream, and 1/2 cup of mayonnaise. Blend these with a hand mixer until smooth. If you do not have a mixer, a spatula works just fine. 3. Incorporate Veggies and Cheese: Gently fold in 2 cups of finely chopped fresh spinach and 1 cup of coarsely chopped canned artichoke hearts. Then, add 1 cup of shredded mozzarella and 1/2 cup of grated Parmesan cheese. Make sure everything is mixed well. 4. Season the Mixture: Add 1 teaspoon of garlic powder, 1/2 teaspoon of onion powder, salt, and pepper to taste. Stir until the spices blend into the mix. 5. Prepare for Baking: Transfer your mixture into a greased baking dish. Spread it evenly with a spatula. 6. Bake: Place the dish in your preheated oven. Bake for 20-25 minutes until the dip bubbles and the top is golden brown. 7. Cool Slightly: Carefully take the dish out of the oven. Let it cool for about 5 minutes. This step makes serving easier. 8. Garnish and Serve: If you want, sprinkle chopped parsley on top. This adds color and flavor. Serve the dip warm with tortilla chips, pita bread, or fresh veggies. - Prep Time: 10 minutes - Cooking Time: 20-25 minutes - Total Time: 35 minutes - Servings: 6-8 Following these steps will help you create a creamy spinach artichoke dip that everyone will love. For the full recipe, check out the detailed instructions above. When making spinach artichoke dip, avoid these common mistakes: - Using frozen spinach: Fresh spinach gives the best flavor. Frozen can make the dip watery. - Not draining artichokes: Make sure to drain those canned artichokes well. Extra liquid ruins the texture. - Skipping seasoning: Don’t forget salt and pepper. They boost the dip's flavor. - Overbaking: Keep an eye on the oven. You want golden tops, not burnt edges. To get that perfect creamy texture, follow these tips: - Soften the cream cheese: Let it sit at room temperature before mixing. Cold cream cheese doesn’t blend well. - Mix well: Blend the base thoroughly until smooth. This helps avoid lumps. - Use full-fat ingredients: Cream cheese, sour cream, and mayonnaise should be full-fat. Low-fat options can change the texture. - Add cheese gradually: Fold in cheeses slowly. This keeps the dip creamy and prevents clumping. Here are some handy tools to help you make the best dip: - Mixing bowl: A large bowl is key for combining all ingredients easily. - Hand mixer or spatula: A hand mixer works best for blending the cream cheese. A spatula is great for folding in veggies and cheese. - Baking dish: Use a shallow, greased dish to help the dip cook evenly. - Oven mitts: Always use mitts when handling hot dishes. Safety first! For the full recipe, check out the Creamy Spinach Artichoke Delight Dip. It’s a hit at every gathering! {{image_4}} To make a vegan version, swap out dairy for plant-based options. Use vegan cream cheese and mayonnaise. You can also add coconut yogurt for creaminess. Nutritional yeast gives a cheesy flavor. This dip stays rich and creamy without any animal products. For a gluten-free dip, ensure your mayonnaise and other ingredients are certified gluten-free. Serve it with gluten-free chips or veggie sticks. This way, everyone can enjoy the dip without worry. Experimenting with flavors makes the dip even more exciting. Add some heat with red pepper flakes or diced jalapeños. A squeeze of lemon juice can brighten the taste. Try mixing in sun-dried tomatoes or olives for a twist. These options can make the dip unique and fun! Remember to check the Full Recipe for detailed steps and tips to create your own creamy masterpiece. To store leftover dip, let it cool first. Place it in an airtight container. You can keep it in the fridge for up to three days. Make sure to cover it well. This keeps the dip fresh and tasty. You can freeze spinach artichoke dip for later use. Portion it into small containers or freezer bags. Be sure to label them with the date. It will last in the freezer for about three months. When ready to eat, thaw it in the fridge overnight. This way, it stays safe and tasty. To reheat your dip, use an oven or microwave. If using an oven, preheat it to 350°F (175°C). Place the dip in a baking dish and cover it with foil. Bake for 15-20 minutes until hot. If using a microwave, heat it in short bursts, stirring in between. This helps avoid hot spots. Enjoy your creamy spinach artichoke delight dip warm for the best flavor! You can make this dip ahead of time. Prepare it up to the baking step. Store it in the fridge for up to two days. When you’re ready, bake it as directed. This saves time and makes serving easy. Yes, you can make this dip in a slow cooker. Combine all the ingredients in the cooker. Cook on low for about two hours, stirring occasionally. This method keeps the dip warm for longer. It's perfect for parties! You can serve this dip with many tasty options. Here are some ideas: - Tortilla chips - Pita bread - Veggie sticks (like carrots and celery) - Crackers - Bread slices These sides add fun and flavor to your dip experience. Want to dive deeper into the recipe? Check out the Full Recipe for more details! This blog post covered the essential steps to make a delicious spinach artichoke dip. We discussed key ingredients like fresh spinach and artichokes, along with tips for choosing the best ones. I shared easy instructions and cooking techniques to ensure you get a creamy texture. With variations for vegan and gluten-free needs, there’s something for everyone. Remember, proper storage and reheating can keep your dip tasting fresh. Dive into this tasty dip and impress your friends at your next gathering! Enjoy making it your own.

Spinach Artichoke Dip Creamy and Tasty Delight

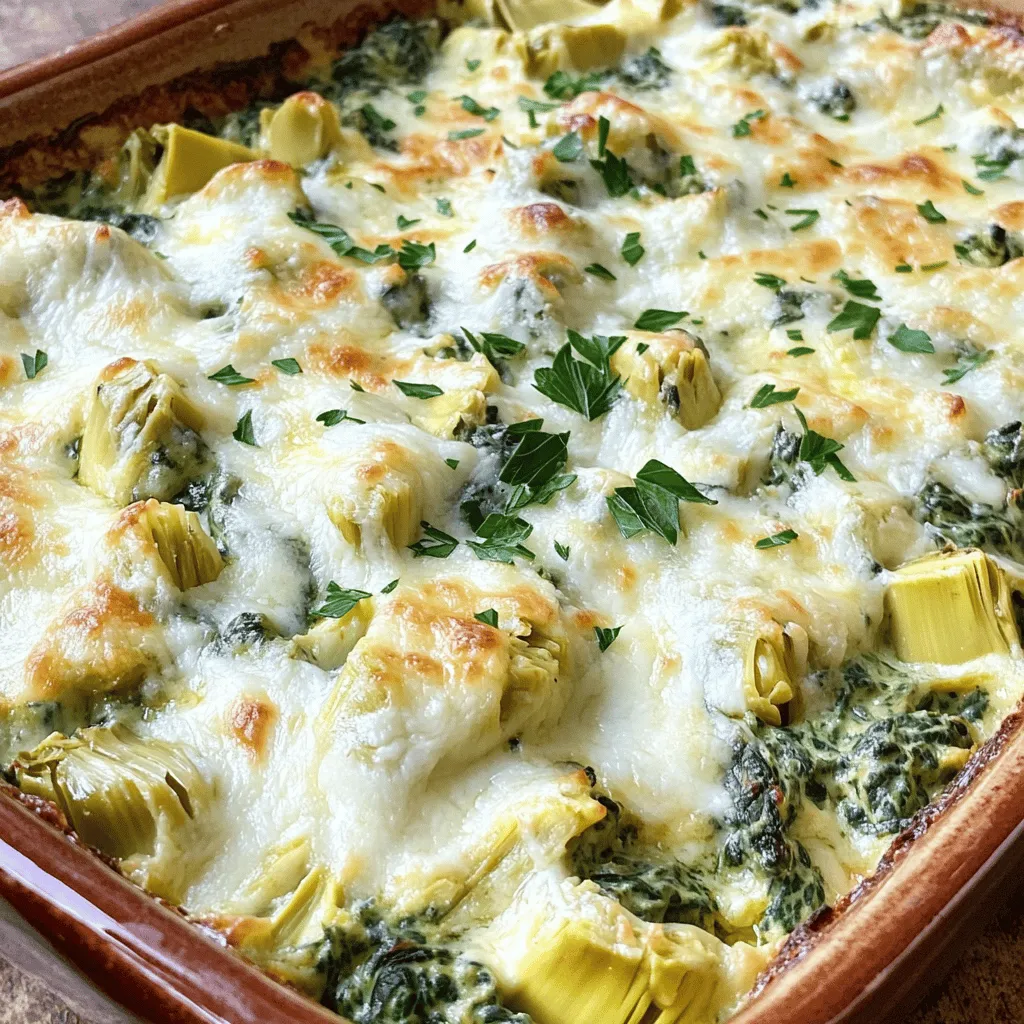
If you crave a dip that’s both creamy and full of flavor, you need to try my Spinach Artichoke Dip!

- 4 medium zucchinis, spiralized into noodles - 1 cup cherry tomatoes, halved - 1 cup fresh basil leaves - 1/4 cup pine nuts - 1/4 cup Parmesan cheese, grated (or use nutritional yeast for a vegan alternative) - 2 cloves garlic, minced - 1/4 cup olive oil, plus extra for sautéing - Salt and pepper, to taste - 1 tablespoon fresh lemon juice Zucchini is the star here. It’s low in carbs and full of nutrients. Spiralizing zucchini gives it a fun noodle shape. Cherry tomatoes add sweetness and color. Their juicy bite pairs well with the creamy pesto. Pesto is the heart of this dish. You blend fresh basil, pine nuts, garlic, lemon juice, and olive oil. The result? A rich, green sauce that bursts with flavor. You can use Parmesan cheese for a savory touch. Nutritional yeast works, too, for a vegan twist. - Crushed Red Pepper Flakes - Nutritional Yeast If you want heat, add crushed red pepper flakes. They give the dish a spicy kick. Nutritional yeast can enhance the flavor and is great for vegans. With these extras, you can customize your meal to fit your taste. For the full recipe, check out the details on how to bring this dish together! To make fresh pesto, gather your ingredients. You need basil leaves, pine nuts, Parmesan cheese, garlic, lemon juice, and salt. Place these in a food processor. Pulse until finely chopped. This process brings out the flavor. Next, add olive oil while the food processor runs. Slowly drizzle in the oil. This makes your pesto creamy. You may need to scrape down the sides a few times. After blending, taste your pesto. Adjust with more salt and pepper if needed. Now, let’s sauté the cherry tomatoes. Grab a large skillet and add a drizzle of olive oil. Heat it over medium heat. Add the halved cherry tomatoes and a pinch of salt. Sauté them for about 3-4 minutes. You want them to soften and release their juices. This step adds a sweet flavor to your dish. It’s time to cook the zucchini noodles. Carefully add them to the skillet with the tomatoes. Gently toss everything together. Cook for another 2-3 minutes. You want the noodles to be tender but still firm. Achieving the right texture is key for a great bite. Once cooked, remove the skillet from heat. Stir in the vibrant pesto until every noodle is coated. This last step marries all the flavors. For the complete recipe, refer to the [Full Recipe]. When choosing zucchini, look for ones that are firm and smooth. Avoid any that have soft spots or blemishes. Size matters too; aim for medium-sized zucchinis. They have a better taste and texture than larger ones. Freshness is key. The skin should be shiny and vibrant in color. You can swap out some ingredients in your pesto. Try walnuts or almonds instead of pine nuts. For a dairy-free option, use nutritional yeast instead of Parmesan cheese. To enhance flavor, add a squeeze of lemon juice or zest. A pinch of salt brightens the taste too. Zucchini noodles pair well with grilled chicken or shrimp for added protein. You can also serve them with whole grain pasta for a fun mix. For a lovely presentation, add a sprinkle of fresh basil on top. This makes the dish look vibrant and inviting. If you want some heat, add crushed red pepper flakes. For the full recipe, check out the Zesty Zucchini Noodles with Pesto & Cherry Tomatoes. {{image_4}} To make this dish vegan, we need to swap the cheese. Instead of Parmesan, use nutritional yeast. This gives a cheesy flavor without dairy. You can also try cashew cheese for a creamier texture. Blending soaked cashews with a bit of lemon juice and garlic makes a great choice. It adds richness and taste to your zucchini noodles. Want to add protein? Chicken and tofu both work well here. For chicken, grill or sauté it first. Then slice it and mix it in with the zucchini noodles. If you prefer tofu, choose firm tofu. Press it to remove extra water, then cube it. Sauté the cubes until golden. Toss them with the noodles and sauce for a hearty meal. You can change this dish based on the season. In summer, add bell peppers and corn for sweetness. In fall, try adding roasted butternut squash or kale. During winter, spinach and broccoli can add color and nutrients. Mix and match seasonal veggies to keep your dish fresh and exciting. This way, you enjoy different flavors all year round. For the full recipe, check out Zesty Zucchini Noodles with Pesto & Cherry Tomatoes. After you enjoy your zucchini noodles with pesto and cherry tomatoes, store any leftovers in an airtight container. Keep them in the fridge. They will stay fresh for about 3 days. To keep the texture nice, try to store the noodles and sauce separately. This way, they won't get too soggy. When it's time to enjoy your leftovers, reheat them gently. The best method is to use a skillet. Heat the skillet over medium heat. Add a splash of olive oil, then toss in your noodles and tomatoes. Stir for about 2-3 minutes until warm. Avoid high heat to keep the noodles from becoming mushy. Freezing zucchini noodles is a great way to save extra servings. To freeze them, first blanch the noodles. Boil water and cook the noodles for just 1-2 minutes. Then, quickly place them in ice water to stop cooking. Drain and pat dry. Place them in freezer bags, remove as much air as possible, and seal. They can last up to 2 months in the freezer. Zucchini noodles last about 3 to 5 days in the fridge. Store them in an airtight container. They may lose some texture over time. If they start to feel slimy or smell off, it's best to toss them. Freshness is key for taste and texture. Yes, you can use store-bought pesto. It saves time and can be very tasty. Check the ingredients for quality. Some store-bought options are too salty or oily. Making your own allows for better flavor control and freshness. Zucchini noodles pair well with many dishes. Here are some great options: - Grilled chicken or shrimp for protein. - A side salad for crunch. - Garlic bread for a classic touch. - Roasted vegetables for added color and flavor. These dishes enhance your meal and make it more filling. This post covered key ingredients and steps to make delicious zucchini noodles. We explored how to prepare homemade pesto, sautée cherry tomatoes, and cook zucchini for the best texture. I shared tips for selecting fresh zucchini and enhancing your pesto. You can even adapt this dish with protein or seasonal veggies. Remember to store leftovers properly and reheating them right for the best taste. Enjoy these tasty noodles any time, knowing you’ve made a healthy choice.

Zucchini Noodles with Pesto and Cherry Tomatoes Delight

Looking for a fresh, quick meal idea? Zucchini noodles with pesto and cherry tomatoes offer a delightful solution. They are

- 4 salmon fillets (approximately 6 ounces each) - 1 cup quinoa, thoroughly rinsed - 2 cups low-sodium vegetable or chicken broth - 1 cup broccoli florets - 1 bell pepper, thinly sliced (choose red or yellow for color) - 1 medium carrot, julienned - 3 tablespoons teriyaki sauce (can be store-bought or homemade) - 1 tablespoon sesame oil - 1 tablespoon olive oil I love using fresh ingredients for my teriyaki salmon bowls. The salmon fillets are the star. They bring rich flavor and healthy fats. Quinoa serves as a great base. It is full of protein and fills you up. The broth adds depth to the quinoa. It makes each bite tasty. For vegetables, I pick bright colors. Broccoli gives a nice crunch. Bell peppers add sweetness and color. Carrots bring a touch of earthiness. These veggies are not only healthy but also make the dish look pretty. Seasoning is key to flavor. Teriyaki sauce gives the salmon a sweet and savory taste. I also use sesame oil for a nutty touch. Olive oil helps the salmon roast nicely. With this mix, every bite is a delight. Try this recipe [Full Recipe] to create your own teriyaki salmon bowls. You’ll find it easy and fun! - In a medium saucepan, combine 1 cup of rinsed quinoa and 2 cups of broth. - Bring this mix to a boil over high heat, watching closely. - Once boiling, reduce the heat to low. Cover and let it simmer for 15 minutes. - After the time is up, remove it from heat. Fluff the quinoa gently with a fork. - Preheat your oven to 400°F (200°C). - On a lined baking sheet, place 4 salmon fillets skin-side down. - Drizzle olive oil over the salmon and season with salt and pepper. - Generously brush each fillet with teriyaki sauce, ensuring it’s well-coated. - Heat 1 tablespoon of sesame oil in a skillet over medium heat. - Add 1 cup of broccoli florets, 1 sliced bell pepper, and 1 julienned carrot. - Sauté the vegetables for 5 to 7 minutes, stirring often, until they look vibrant and tender. These steps are key for your teriyaki salmon bowls. Each part creates a delicious meal you can enjoy. For the complete recipe, visit the Full Recipe section. To get the best salmon, you want it to flake easily. After baking, gently poke with a fork. If it breaks apart without effort, it’s ready. If not, give it a couple more minutes in the oven. Also, watch your oven temperature. Too hot can dry it out. Keep it at 400°F (200°C) for the best results. After cooking, fluff your quinoa with a fork. This keeps the grains light and separate. If you stir with a spoon, it can turn mushy. To prevent this, let it sit for a few minutes after cooking. The steam will help separate the grains. Timing is key for crisp vegetables. Sauté for about 5 to 7 minutes. Stir often but don’t overcook. You want them bright and tender. To add flavor, toss in a bit of garlic or ginger. This gives a great taste without losing nutrients. Keep it fresh and vibrant! {{image_4}} You can change the protein in this dish. Tofu is a great option if you want vegetarian. It absorbs flavors well and gives a nice texture. Just press it to remove extra moisture before cooking. For a twist, try chicken or shrimp. Both cook quickly and pair well with teriyaki sauce. Not a fan of quinoa? Use brown rice instead. It has a nutty flavor and adds nice texture. Cauliflower rice is another option. It’s low-carb and works well in bowls. Just sauté it lightly to keep it crisp. While teriyaki sauce shines in this dish, you can make your own. Combine soy sauce, honey, and ginger for a homemade version. If you want something different, use peanut sauce or a tangy soy sauce mix. Each sauce brings its own flair to the meal. For the full recipe, check out Teriyaki Salmon Bowls with Quinoa. To keep your Teriyaki Salmon Bowls fresh, store leftovers in the fridge. Place the salmon and quinoa in an airtight container. Add some vegetables on the side. This helps keep them crisp. You can refrigerate them for up to three days. For longer storage, freeze your leftovers. Wrap the salmon and quinoa tightly in plastic wrap. Then, place them in a freezer-safe bag. This way, they can last for up to three months. When it’s time to enjoy your leftovers, you have a few options. The best method is to reheat in the oven. Preheat the oven to 350°F (175°C). Place the salmon and quinoa in an oven-safe dish. Cover with foil to keep moisture in. Heat for about 15 minutes. If you're in a hurry, you can also use a microwave. Heat in short bursts of 30 seconds. Stir and check often to avoid overcooking. Leftover Teriyaki Salmon Bowls can last three days in the fridge. If you freeze them, they will stay good for up to three months. Always check for signs of spoilage. Look for a change in color or an off smell. If anything seems off, it’s best to toss it. Enjoy your meal, but safety comes first! You can tell salmon is cooked by looking for a few signs. The color should change from bright pink to a pale pink or opaque. It should flake easily when you poke it with a fork. The internal temperature should reach 145°F (63°C) for safe eating. This ensures it is not raw but still moist and tender. Yes! You can easily swap quinoa for other grains. Brown rice works well; it adds a nutty flavor. You can also use farro or barley for a different texture. Each grain brings its own taste and nutrition, so feel free to explore what you like best. You can add many kinds of vegetables to your teriyaki salmon bowls. Seasonal veggies like asparagus or zucchini can brighten the dish. Personal favorites like snap peas or bok choy also work great. Just remember to cut them into bite-sized pieces for easy eating. You can mix and match based on what you enjoy! This blog post covered a healthy salmon dish with quinoa and colorful vegetables. You learned how to cook quinoa and roast salmon with the right seasonings. We shared tips for perfect results and various options for proteins, grains, and sauces. By following these steps, you can create a tasty meal that suits your taste. Keep experimenting with your ingredients and enjoy the process of cooking. Delicious meals can boost your health and happiness.

Teriyaki Salmon Bowls with Quinoa Packed Meal

Dive into the world of flavor with my Teriyaki Salmon Bowls packed with quinoa! This dish blends flaky salmon, wholesome

Here’s what you need for creamy spinach and ricotta stuffed shells: - 24 jumbo pasta shells - 2 cups fresh spinach, finely chopped - 1 cup ricotta cheese - 1 cup shredded mozzarella cheese - 1/2 cup grated Parmesan cheese - 1 teaspoon garlic powder - 1 teaspoon onion powder - 1/2 teaspoon grated nutmeg - Salt and freshly cracked pepper to taste - 2 cups marinara sauce - 2 tablespoons extra-virgin olive oil - Fresh basil leaves for garnish These ingredients work together to create a dish that is rich and comforting. The jumbo shells hold the creamy filling well, making each bite a delight. Fresh spinach adds a pop of color and nutrition. Ricotta gives a soft, creamy texture, while mozzarella and Parmesan add a cheesy bite. Garlic powder and onion powder enhance the flavor without any fuss. Nutmeg adds warmth, making this dish feel extra special. You can find the full recipe with step-by-step instructions in the section above. Enjoy making this tasty treat! - Preheat the oven to 375°F (190°C). - Cook the pasta shells until al dente. Start by preheating your oven. This helps the dish cook evenly later. Next, boil some salted water in a large pot. Add the jumbo pasta shells and cook them according to the package. You want them to be firm but not too soft. Once they are done, drain them and set them aside to cool. - Sauté the spinach in olive oil. - Mix ricotta cheese with sautéed spinach and seasonings. In a medium skillet, pour in some extra-virgin olive oil. Heat it over medium heat. Add the finely chopped spinach. Cook it for about 2 to 3 minutes until it wilts. Then, take it off the heat and let it cool. In a large bowl, mix the ricotta cheese with the sautéed spinach. Add half the shredded mozzarella, half the grated Parmesan, garlic powder, onion powder, and nutmeg. Season with salt and pepper to taste. Stir everything together until it looks creamy and well mixed. - Stuff the pasta shells with the filling. - Add marinara sauce on top and sprinkle cheese. Take each cooked pasta shell and carefully fill it with the spinach and ricotta mix. Pack them snugly in a greased 9x13-inch baking dish. Once all shells are filled, pour marinara sauce evenly over them. Then, sprinkle the rest of the mozzarella and Parmesan on top. This adds a nice cheesy crust when baked. - Cover and bake for 20 minutes, then uncover and bake for an additional 10 minutes. Cover the baking dish with aluminum foil. This keeps the cheese from burning. Bake for 20 minutes. After that, remove the foil and bake for another 10 minutes. You want the cheese to be bubbly and golden. When you take it out, let it cool for a few minutes. This makes serving easier. For the full recipe, you can refer back here. To cook pasta shells well, start with plenty of salted water. Use a large pot to keep the shells from sticking. Cook them until they are al dente, meaning they should have a slight bite. After cooking, drain them gently and let them cool. This helps prevent them from tearing. When stuffing the shells, use a spoon to fill each one. Avoid overstuffing to keep the shells from breaking. A heaping tablespoon of filling per shell works nicely. Arrange them snugly in the baking dish to help hold their shape. You can boost the taste of your stuffed shells with spices. Try adding crushed red pepper for heat or dried oregano for a classic touch. Fresh herbs like basil or parsley also work well. If you want to switch up the sauce, consider using a white sauce or a pesto. These alternatives can add a new twist to your dish. Pair your stuffed shells with a simple side salad. A green salad with vinaigrette cuts through the creaminess. Garlic bread also makes a great side, perfect for mopping up sauce. For presentation, serve the shells in a large dish. Sprinkle extra cheese on top for a gourmet look. A few fresh basil leaves can add a nice pop of color and flavor. For the full recipe, check out the Creamy Spinach and Ricotta Stuffed Shells details! {{image_4}} You can make creamy spinach and ricotta stuffed shells even more delicious. Try adding or substituting other veggies. For example, mushrooms, zucchini, or artichokes work well. They add color and extra flavor. You can also switch up the cheese in the filling. Use goat cheese for a tangy twist or add feta for a salty kick. Mixing different cheeses keeps the dish exciting. If you need gluten-free options, there are many brands of pasta shells available. Look for brands like Tinkyada or Banza. They make tasty gluten-free pasta. Keep in mind that gluten-free shells may cook differently. Check the package for cooking times. You might need to adjust your cooking times to keep them from getting mushy. If you love meat, consider adding ground meat to the filling. Ground beef, turkey, or sausage all work great. They add richness and protein to your dish. When using meat, cook it first. Brown it in a pan before mixing it with the cheese and spinach. This step ensures all flavors blend well. You’ll get a hearty meal that everyone will enjoy. For the full recipe of creamy spinach and ricotta stuffed shells, check out the details above. To keep your creamy spinach and ricotta stuffed shells fresh, store them in an airtight container. This helps to prevent them from drying out. Place the container in the fridge. They will stay fresh for about three days. If you want to enjoy them later, freezing is a great option. You can freeze stuffed shells either baked or unbaked. For unbaked shells, fill them as you normally would and place them in a freezer-safe dish. Cover with plastic wrap and then foil to keep out air. For baked shells, let them cool completely before freezing. Wrap the dish tightly. They can stay in the freezer for up to three months. When you are ready to enjoy frozen shells, thaw them in the fridge overnight. Reheat them in the oven at 350°F (175°C) for about 25-30 minutes if baked. If they are unbaked, cook them directly from frozen. Just add about 10 extra minutes to the baking time. Yes, you can prepare these stuffed shells ahead. Start by cooking the pasta shells and making the filling. Once everything is ready, stuff the shells and place them in a baking dish. Cover the dish with plastic wrap and store it in the fridge. This way, you can bake them later. Just remember to add a few extra minutes to the baking time if they are cold from the fridge. To make this dish healthier, consider these tips: - Use low-fat ricotta cheese instead of regular. - Swap out some of the mozzarella for a lighter cheese. - Add more vegetables, like zucchini or mushrooms, to the filling. - Use whole wheat pasta shells for more fiber. These changes help cut down on fat and calories while still keeping the dish tasty. If you can't have ricotta, try these options: - Cottage cheese for a similar texture. - Silken tofu blended until smooth for a vegan option. - Cream cheese mixed with yogurt can also work. These substitutes offer different flavors and textures, but they still create a great dish. Watch for these signs while baking: - The cheese should be melted and bubbly. - The tops of the shells will be golden brown. - The sauce should be hot and simmering. If you see these signs, your stuffed shells are ready to enjoy! This recipe shows how to make creamy spinach and ricotta stuffed shells. You start with fresh ingredients and simple steps for a tasty dish. I shared tips to make perfect stuffed shells and variations for vegetarians or meat lovers. Whether you store leftovers or freeze them, this meal stays fresh. Remember, cooking should be fun and creative. Enjoy making this dish your own!

Creamy Spinach and Ricotta Stuffed Shells Delight

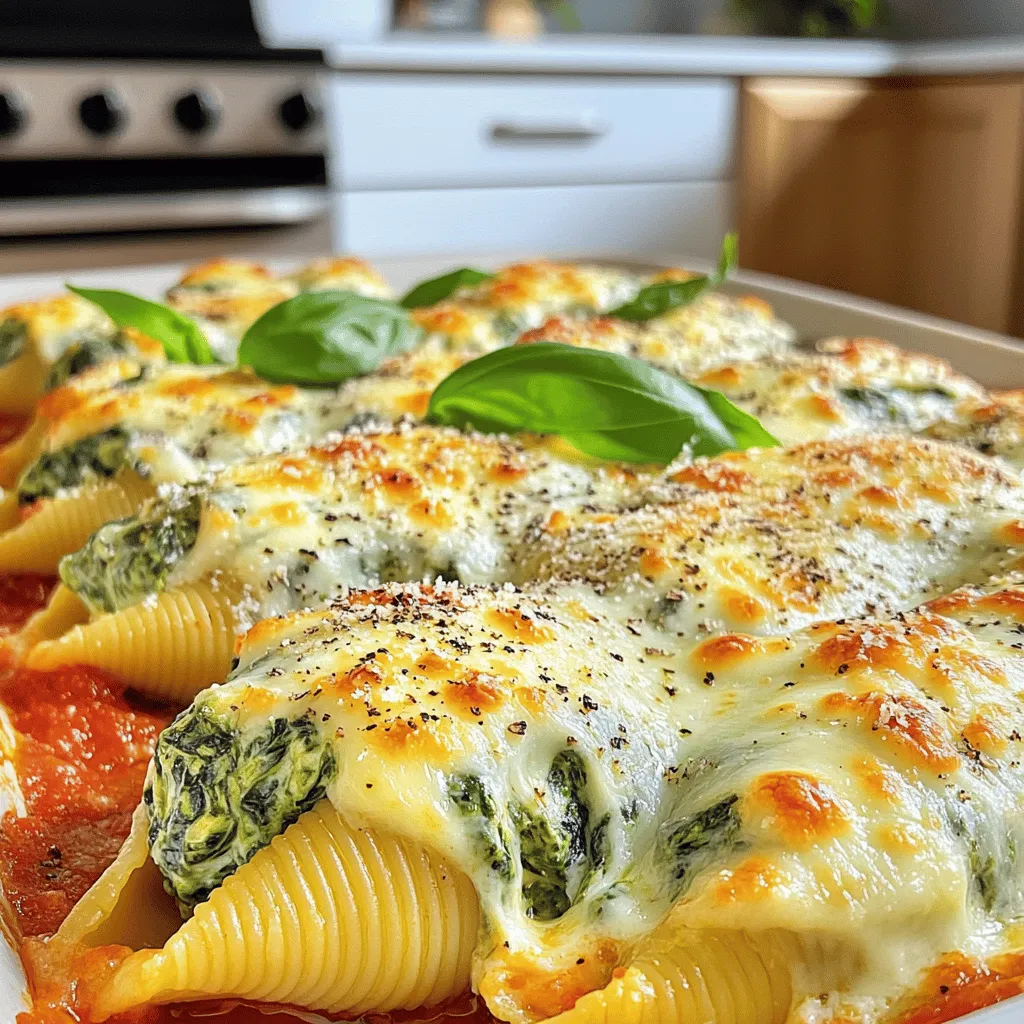
Are you ready to dive into a dish that’s both creamy and comforting? My Creamy Spinach and Ricotta Stuffed Shells

To create a delicious Moroccan Lamb Tagine with Apricots, gather these fresh and flavorful ingredients: - 1.5 lbs lamb shoulder, cut into 1-inch cubes - 1 large onion, finely chopped - 3 cloves garlic, minced - 2 tsp ground cumin - 2 tsp ground cinnamon - 1 tsp ground ginger - 1 tsp turmeric - 1 tsp cayenne pepper (adjust to taste) - 1 cup chicken or vegetable broth - 1 cup dried apricots, chopped - 1 can (14 oz) chickpeas, drained and rinsed - 1/4 cup honey - 1/2 cup slivered almonds, toasted - Salt and pepper, to taste - 2 tablespoons extra virgin olive oil - Fresh cilantro or parsley, finely chopped, for garnish Each ingredient plays a key role in building layers of flavor. The lamb shoulder gives a rich base. The spices add warmth and depth. Dried apricots bring a sweet contrast to the savory lamb. The chickpeas add texture and protein. Honey balances the flavors with a hint of sweetness. Slivered almonds provide a nice crunch. For the best results, use fresh spices and high-quality lamb. This will enhance the overall taste. You can find the full recipe for more detailed steps. 1. Start by heating 2 tablespoons of extra virgin olive oil in a large tagine or pot over medium heat. 2. Add 1 large finely chopped onion and sauté it for about 5 minutes until it turns translucent. Stir to avoid sticking. 3. Next, add 3 cloves of minced garlic to the pot. Sauté for one more minute until fragrant. 4. In a separate bowl, combine 1.5 lbs of cubed lamb shoulder with spices: 2 teaspoons each of ground cumin and ground cinnamon, 1 teaspoon each of ground ginger, turmeric, and cayenne pepper. Mix in salt and pepper to taste. 5. Add the seasoned lamb to the pot. Brown the meat on all sides for about 5-7 minutes. This step builds flavor. 6. Pour in 1 cup of chicken or vegetable broth. Stir in 1 cup of chopped dried apricots and 1/4 cup of honey. Bring to a gentle simmer. 1. Cover your tagine or pot with a lid. Lower the heat and let it cook for 1.5 to 2 hours. 2. Stir occasionally to ensure even cooking. The lamb should be fork-tender when done. 3. During the last 10 minutes, fold in 1 can of drained and rinsed chickpeas. 4. Taste the dish and adjust seasoning with more salt and pepper if needed. 5. When ready, sprinkle 1/2 cup of toasted slivered almonds on top for crunch. 1. Serve the tagine directly in the pot for a rustic look. 2. Pair it with fluffy couscous or warm flatbreads. These soak up the rich sauce well. 3. For an extra flourish, add more toasted almonds and a sprinkle of fresh herbs like cilantro or parsley on top. For the full recipe, visit the link above. To enhance your Moroccan lamb tagine, focus on seasoning. You can adjust the spices to suit your taste. If you like it spicy, add more cayenne pepper. For a sweeter dish, increase the honey. This recipe uses classic spices like cumin and cinnamon for authentic flavor. For fork-tender lamb, slow cooking is key. Cook the lamb on low heat for 1.5 to 2 hours. This allows the meat to break down and absorb all the spices. Stir occasionally to keep it from sticking. If you have time, letting it rest before serving can help too. Using the right cookware makes a difference. A tagine is best for this dish, as it helps retain moisture and flavor. If you don’t have one, a heavy-bottomed pot works well too. Just ensure it has a tight lid to trap steam. Garnishing your dish adds visual appeal. I recommend using toasted slivered almonds for crunch and fresh cilantro or parsley for color. These small touches elevate the dish. Serve the tagine right in the pot for a rustic look. Pair it with fluffy couscous or warm flatbreads. They are great for soaking up the sauce. For the full recipe, check out the complete details. Enjoy cooking! {{image_4}} You can swap lamb for other meats. Beef or chicken works well. For a vegetarian option, try chickpeas or lentils. Both options give a hearty feel. Dried apricots add sweetness, but you can use other fruits. Raisins or dried figs can enhance the dish. For a nutty crunch, try walnuts or pistachios. These changes keep the flavors exciting. You can cook this tagine in many ways. A slow cooker is great for easy, hands-off cooking. Just set it and forget it! If you use a traditional tagine, the flavors deepen beautifully over time. For a faster meal, use an Instant Pot. It cuts the cooking time in half. This method keeps the meat tender and juicy, too. Adding vegetables boosts nutrition and flavor. Carrots, bell peppers, or zucchini work well. They add color and texture to your dish. Feel free to experiment with spices. Cumin and cinnamon are classic, but you might try coriander or smoked paprika. They can add new layers of taste. A little fresh mint or lemon zest can brighten up the dish, too. For the full recipe, check out the Moroccan Lamb Tagine with Apricots. To keep your Moroccan lamb tagine fresh, place leftovers in an airtight container. It’s best to chill the tagine in the fridge within two hours. This helps prevent bacteria growth. Label your container with the date. This way, you will know how long it’s been stored. Ideally, use it within three to four days. Glass containers work well for storage. They seal tightly and help keep the flavors intact. If you use plastic, ensure it is BPA-free. Avoid metal containers, as they can react with the sauce and alter the taste. When reheating, do it slowly on the stove. This method helps maintain moisture and flavor. You can also use the microwave, but cover the dish with a microwave-safe lid. Heat in intervals of 30 seconds, stirring between each. To keep the lamb tender, avoid high heat. If needed, add a splash of broth or water. This will prevent it from drying out. Taste and adjust the seasoning after reheating. You may need a pinch of salt or a dash of pepper to refresh the flavors. To freeze Moroccan lamb tagine, first let it cool completely. Portion it into freezer-safe bags or containers. Remove as much air as possible to avoid freezer burn. Label each bag with the date for easy tracking. It’s best used within three months for optimal flavor. For thawing, place the frozen tagine in the fridge overnight. If short on time, you can use the microwave's defrost setting. Rewarm it on the stove, stirring gently. Add a little broth if it seems too thick. Enjoy your delightful meal just as fresh as the first time! What can I substitute for lamb in this recipe? If you want a different meat, try beef or chicken. Both meats soak up the flavors well. You can also use eggplant for a vegetarian option. It adds a nice texture and taste. How do I know if the lamb is tender enough? You can check if the lamb is fork-tender. It should pull apart easily with a fork. If it feels tough, let it cook a bit longer. This ensures all the flavors have melded well. Can I make this dish ahead of time? Yes, you can! Making it a day ahead enhances the flavors. Just store it in the fridge. Reheat it gently before serving to enjoy its full taste. How long should I cook the tagine for optimal flavor? Cook the tagine for 1.5 to 2 hours. This slow cooking allows the flavors to blend. It also makes the lamb tender and juicy, which is key for this dish. What sides go well with Moroccan Lamb Tagine? Serve it with fluffy couscous or warm flatbreads. These sides soak up the rich sauce nicely. You can also add a fresh salad for a bright contrast. What is the history of lamb tagine in Moroccan cuisine? Lamb tagine has roots in Berber culture. It reflects the mix of spices and local ingredients. Traditionally, families gather around the pot to enjoy this communal dish. Are there traditional serving customs associated with this dish? Yes, tagine is often served directly from the pot. Diners eat with their hands or use bread. This style encourages sharing and enhances the meal's warmth and connection. In this article, we explored how to make a great Moroccan Lamb Tagine. We covered the key ingredients, step-by-step instructions, useful tips, and potential variations. You can adjust the recipe to your taste, whether using a slow cooker or making it the traditional way. Remember, cooking is about experimenting and having fun. Use this guide to impress friends or family with your delicious dish. Enjoy every bite, and don't be afraid to try new things!

Moroccan Lamb Tagine with Apricots Flavorful Delight

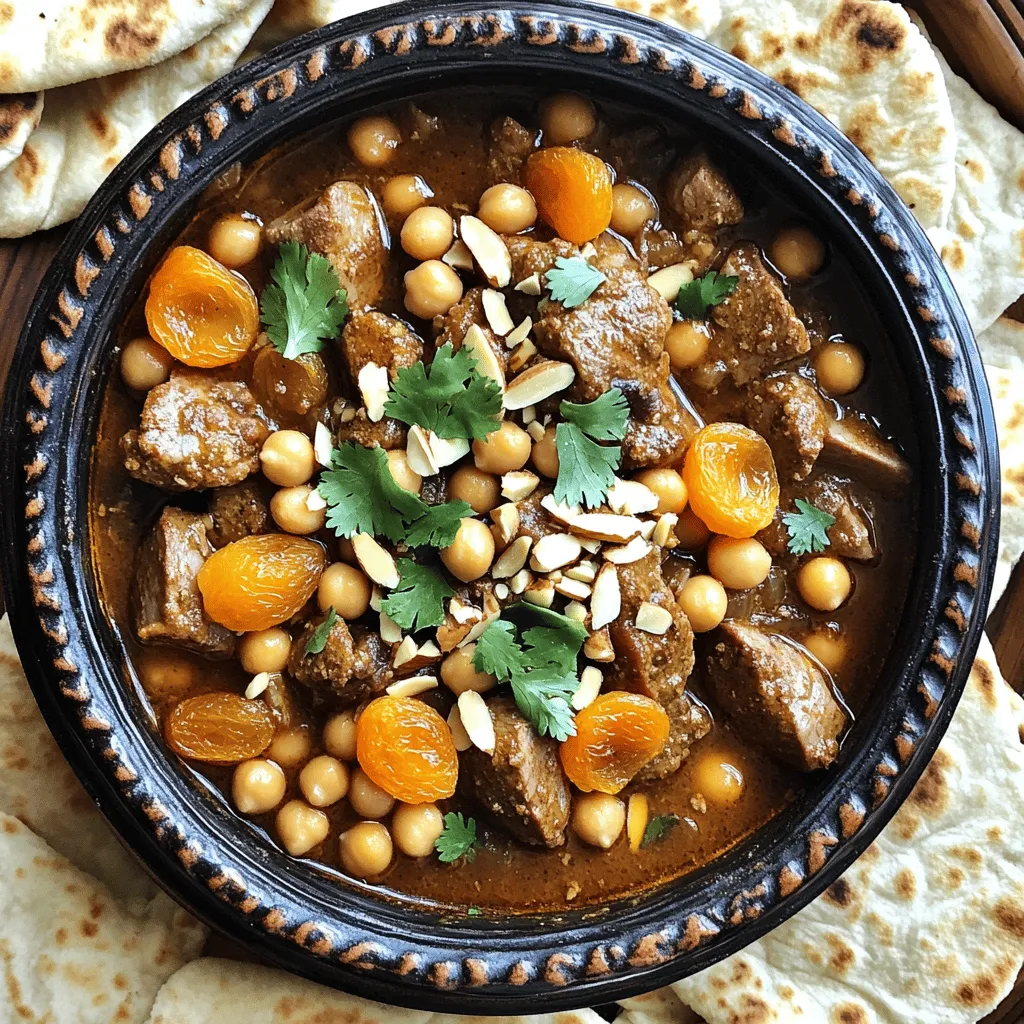
Craving a dish that excites your taste buds? Look no further! Moroccan Lamb Tagine with Apricots combines tender lamb, sweet

- 4 bone-in, skin-on chicken thighs - 1/4 cup honey - 1/4 cup Dijon mustard - 2 tablespoons apple cider vinegar - 2 garlic cloves, minced - 1 teaspoon paprika - 1/2 teaspoon salt - 1/4 teaspoon black pepper - 1 tablespoon olive oil - Fresh parsley, chopped for garnish The chicken thighs are the star here. They stay juicy and tender, especially with the skin on. The honey and mustard glaze brings a sweet and tangy punch. You need the Dijon mustard for flavor depth and apple cider vinegar for a bit of acidity. - Additional herbs and spices - Side dish suggestions Feel free to add herbs like thyme or rosemary for extra flavor. You can also spice things up with cayenne or chili powder. As for sides, roasted vegetables or a fresh salad pair great with this dish. They balance the sweetness of the glaze nicely. You can find the Full Recipe for Honey Mustard Glazed Chicken Thighs at the beginning of this article! First, preheat your oven to 400°F (200°C). This heat helps cook the chicken evenly. Next, grab a baking dish and lightly grease it with olive oil or cooking spray. This step ensures the chicken won’t stick. In a small mixing bowl, whisk together the following ingredients: - 1/4 cup honey - 1/4 cup Dijon mustard - 2 tablespoons apple cider vinegar - 2 minced garlic cloves - 1 teaspoon paprika - 1/2 teaspoon salt - 1/4 teaspoon black pepper Mix until everything is combined well. This glaze adds a sweet and tangy flavor to the chicken. Take your chicken thighs and pat them dry with paper towels. Dry skin gives you that crispy finish. Place the thighs in a large bowl. Drizzle 1 tablespoon of olive oil over them and mix well. This helps the glaze stick. Pour half of your honey mustard glaze over the chicken. Make sure to coat each thigh well on both sides. Put the thighs skin-side up in the greased baking dish, making sure they have space to cook evenly. Bake in the preheated oven for 30 minutes. This starts to crisp the skin. After 30 minutes, take the dish out and brush the remaining glaze over each thigh. Put it back in the oven for another 15-20 minutes. The chicken is done when it reaches 165°F (74°C) inside, and the skin is golden brown. Once cooked, let the chicken rest for 5 minutes before serving. This keeps the meat juicy. For a nice touch, sprinkle chopped fresh parsley on top for color and flavor. Enjoy your delicious honey mustard glazed chicken thighs! To get crispy skin on your chicken thighs, start by drying them well. Use paper towels to pat them dry thoroughly. This simple step helps remove excess moisture. Less moisture means a crispier skin when you bake. After cooking, let the chicken rest for about five minutes. This resting time is key. It allows the juices to settle back into the meat. When you cut into it, you’ll enjoy juicy, tender chicken. You can prepare the honey mustard glaze in advance. Mix the honey, mustard, vinegar, garlic, paprika, salt, and pepper ahead of time. Store it in the fridge for up to two days. This saves time on cooking day. Just pull it out when you're ready to cook the chicken. For the full recipe, refer to the main section. {{image_4}} You can make honey mustard glazed chicken thighs even more tasty. Try adding spices or herbs. For a kick, add cayenne pepper or a pinch of chili powder. If you prefer herbs, rosemary or thyme work great. These will change the flavor and make it unique. You can mix and match to find your favorite taste. If you want to switch it up, consider grilling or air frying. Grilling gives a smoky flavor and nice grill marks. Just preheat your grill and cook the thighs for about 25 minutes, turning them halfway. If you prefer air frying, set it to 375°F (190°C) and cook for 20-25 minutes. Both methods keep the chicken juicy and delicious. You can use different cuts of chicken for this recipe. Bone-in chicken breasts or drumsticks also work well. If you want a lighter option, try skinless thighs. For sweeteners, maple syrup or agave nectar can replace honey. These swaps keep the dish enjoyable while changing the taste a bit. Store any leftover honey mustard glazed chicken thighs in an airtight container. They will stay fresh in the fridge for up to three days. To keep the flavors intact, avoid leaving them uncovered. If you have extra glaze, store it separately to use later. You can freeze the chicken thighs for up to three months. First, let them cool completely. Then, wrap each thigh tightly in plastic wrap. Place them in a freezer-safe bag or container, removing as much air as possible. To thaw, put them in the fridge overnight before reheating. When reheating, keep the chicken juicy. Preheat your oven to 350°F (175°C). Place the chicken thighs in a baking dish and cover with foil. Heat for about 20-25 minutes, or until warmed through. This method prevents drying out and keeps the skin nice. For extra crispiness, uncover for the last 5 minutes. Enjoy your delicious meal again! To check if chicken thighs are cooked, use a meat thermometer. Insert it into the thickest part of the thigh. The safe internal temperature is 165°F (74°C). This ensures the chicken is safe to eat. If you don’t have a thermometer, check if the juices run clear. If the juices are pink, the chicken needs more time. You can serve honey mustard glazed chicken thighs with several tasty sides. Here are some great options: - Roasted seasonal vegetables - Fresh green salad - Garlic mashed potatoes - Quinoa or rice pilaf - Steamed broccoli or green beans These sides enhance the meal and add flavor. Yes, you can use boneless chicken thighs. They cook faster than bone-in thighs. Reduce the baking time to about 20-25 minutes. Always check the internal temperature. It should still reach 165°F (74°C). Boneless thighs will also soak up the honey mustard glaze well! Now you know how to make delicious honey mustard glazed chicken thighs. You learned about the main and optional ingredients, as well as step-by-step instructions. I shared tips to make the chicken crispy, moist, and easy to prepare ahead of time. Different cooking methods and ingredient swaps give you options to try new flavors. Store leftovers correctly for later. Enjoy your meal or share it with friends. You can become an expert cook in no time with these simple steps.

Honey Mustard Glazed Chicken Thighs Simple Recipe

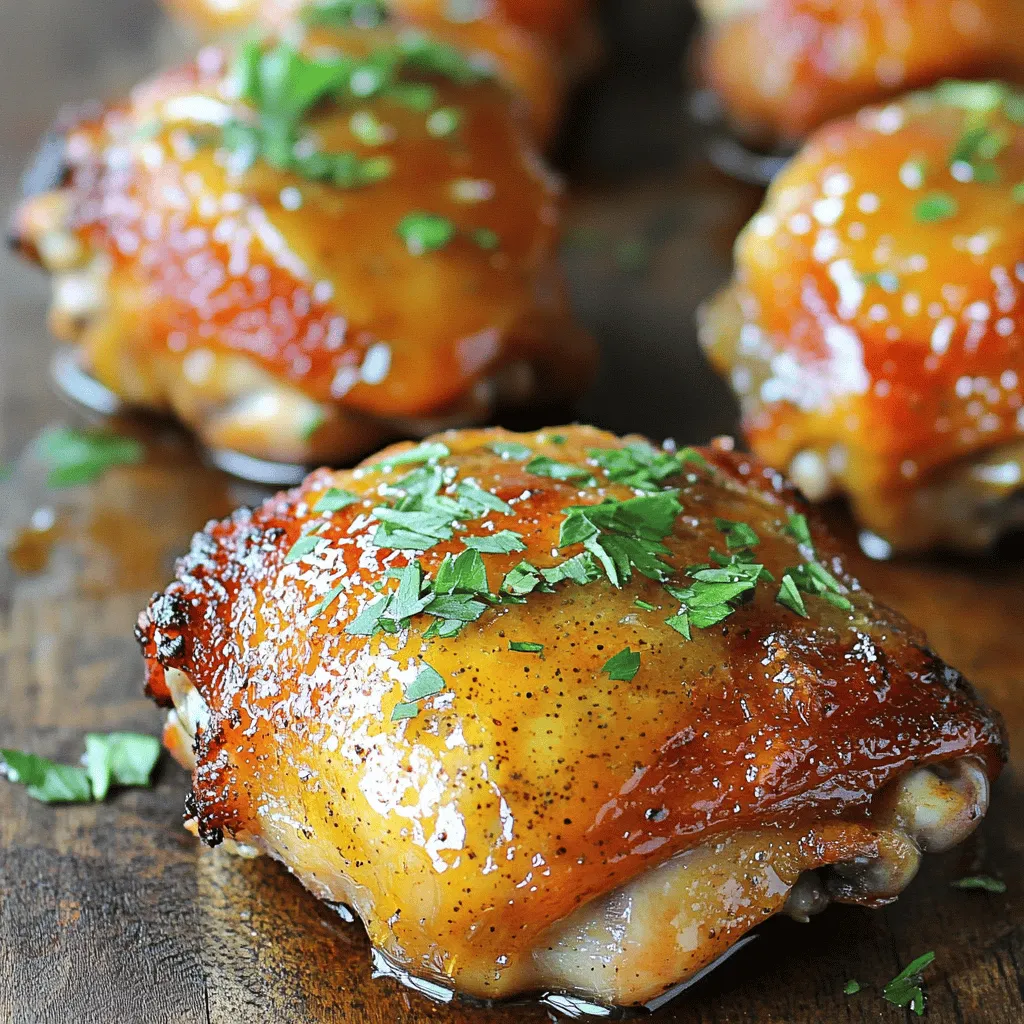
Welcome to my simple recipe for Honey Mustard Glazed Chicken Thighs! If you love flavor-packed meals that are easy to

Older posts
Newer posts
← Previous Page1 … Page25 Page26 Page27 … Page61 Next →

dsad

© 2025 eataroundit • Built with GeneratePress

Our Policies

  • Copyright Policy
  • Cookie Policy
  • GDPR Policy
  • Privacy Policy
  • Disclaimer
  • Terms Of Use

More Information

  • Home
  • About
  • Contact
  • Appetizers
  • Dessert
  • Dinner
  • Drinks
©2025, eataroundit About Back To Top