Skip to content
DisclaimerTerms Of UseGDPR PolicyCookie Policy

eataroundit

  • Home
  • Drinks
  • Appetizers
  • Dinner
  • Dessert
  • About
  • Contact
  • Privacy Policy
DisclaimerTerms Of UseGDPR PolicyCookie Policy

NO-ING-IMG

- 4 salmon fillets (can be skin-on or skinless) - 1/4 cup pure maple syrup - 2 tablespoons soy sauce (or tamari for gluten-free) - 2 cloves garlic, minced - 1 tablespoon Dijon mustard - 1 teaspoon ground ginger - Salt and black pepper, to taste - 2 tablespoons extra virgin olive oil - Lemon juice for brightness - Fresh herbs like thyme or dill for added aroma - Red pepper flakes for heat - Chopped green onions for color - Sesame seeds for crunch - Fresh cilantro for a burst of freshness Start by making the marinade. In a small bowl, mix together: - 1/4 cup pure maple syrup - 2 tablespoons soy sauce - 2 cloves garlic, minced - 1 tablespoon Dijon mustard - 1 teaspoon ground ginger - Salt and black pepper to taste Whisk these ingredients until smooth. This blend gives the salmon its sweet and savory flavor. Next, place the salmon fillets in a shallow dish or a resealable bag. Pour half the marinade over the fillets. Make sure they are well-coated. Cover the dish or seal the bag. Let the salmon marinate at room temperature for 15 to 30 minutes. This step helps the flavors soak into the fish. While the salmon marinates, preheat your oven to 400°F (200°C). Heat 2 tablespoons of extra virgin olive oil in a large oven-safe skillet over medium-high heat. Once the oil is hot, add the marinated salmon fillets, skin-side down. Sear them for about 2 to 3 minutes. You want the skin to be crispy and golden brown. After searing, gently flip the fillets using a spatula. Brush the tops with the remaining marinade. This adds extra flavor. Transfer the skillet to the preheated oven. Bake the salmon for 8 to 10 minutes. It should be cooked through and flake easily with a fork. The ideal internal temperature is 145°F (63°C). Once you take the salmon out of the oven, let it rest in the skillet for 2 to 3 minutes. This resting time keeps the fish juicy and tender. When ready to serve, place the salmon on a wooden platter or on individual plates. Garnish with chopped green onions and sesame seeds. This adds color and a nice crunch. For a complete meal, serve with steamed broccoli or fluffy quinoa. Marinating your salmon is key to great flavor. Use a glass or plastic dish for marinating. Avoid metal, as it can react with the marinade. Make sure to coat the salmon well. Let the salmon sit in the marinade for 15-30 minutes. This time allows the flavors to soak in. You can even marinate overnight for deeper flavor. If you have time, try adding herbs like dill or parsley. To get crispy skin, start with a dry fillet. Pat the skin with a paper towel to remove moisture. Heat the olive oil in a hot skillet before adding the salmon. Place the fillets skin-side down. Don’t move them for the first few minutes. This helps the skin crisp up nicely. Cook until the skin is golden brown, about 2-3 minutes. Flip gently and brush with more marinade for flavor. Cooking salmon perfectly is all about timing. Aim for an internal temperature of 145°F (63°C). Use a meat thermometer to check the temperature. Bake the salmon for 8-10 minutes after searing. It should flake easily with a fork when done. Let the salmon rest for a few minutes after cooking. This keeps it juicy and tender. Trust me, these tips will help you serve the best maple glazed salmon! {{image_4}} You may want to change some ingredients to suit allergies or tastes. If you need a gluten-free option, swap soy sauce for tamari. If you dislike garlic, simply leave it out. You can also replace Dijon mustard with yellow mustard if that’s what you have. For a sweeter flavor, try adding a bit of brown sugar to the glaze. To change the taste, consider adding other spices. You might use a pinch of cayenne pepper for heat. A splash of orange juice can add a nice citrus kick. If you love herbs, try fresh thyme or rosemary in the marinade. These changes make the dish unique and exciting every time you cook it. Pairing your maple glazed salmon with sides can elevate your meal. Steamed broccoli or asparagus adds color and crunch. Quinoa or rice makes a hearty base and soaks up the glaze well. For a light touch, serve with a fresh salad. A simple mix of greens, cucumber, and a lemon vinaigrette works great. Don’t forget to garnish the salmon with green onions and sesame seeds for a lovely finish! Store leftover maple glazed salmon in an airtight container. Place it in the fridge. It will stay fresh for up to three days. Make sure the salmon cools down before sealing it. This helps keep the flavor intact. If you want to keep the salmon longer, freezing is a great option. Wrap each fillet in plastic wrap. Then, place them in a freezer-safe bag. Remove as much air as you can. Frozen maple glazed salmon can last for about three months. When ready to eat, thaw it in the fridge overnight. To reheat your salmon, preheat your oven to 350°F (175°C). Place the salmon on a baking sheet. Cover it with foil to keep it moist. Heat for about 10-15 minutes, or until warmed through. You can also use a microwave. Heat it on low power for short bursts. Check often to avoid overcooking. Enjoy your delicious salmon without losing its taste! You can serve maple glazed salmon with many sides. Here are some great options: - Steamed broccoli - Fluffy quinoa - Roasted sweet potatoes - Garlic mashed potatoes - Light salad with mixed greens These sides add color and flavor. They also balance the rich taste of the salmon. Yes, you can use frozen salmon fillets. Just remember to thaw them first. The best way to thaw is in the fridge overnight. If you are short on time, place the sealed salmon in cold water for 30 minutes. After thawing, marinate the salmon as usual. This dish will still taste great! Leftover salmon lasts up to three days in the fridge. To store it properly, place it in an airtight container. If you want to keep it longer, freeze it. It can last up to three months in the freezer. Just remember to wrap it well to prevent freezer burn. Reheat gently in the oven or microwave when ready to eat. This post covered how to create delicious maple glazed salmon. We explored the main and optional ingredients, provided step-by-step cooking instructions, and shared helpful tips to enhance your dish. We also talked about variations for different tastes and how to store your leftovers properly. When cooked right, salmon offers great flavor and health benefits. Enjoy experimenting with this recipe and make it your own. I hope you feel confident cooking this tasty dish!

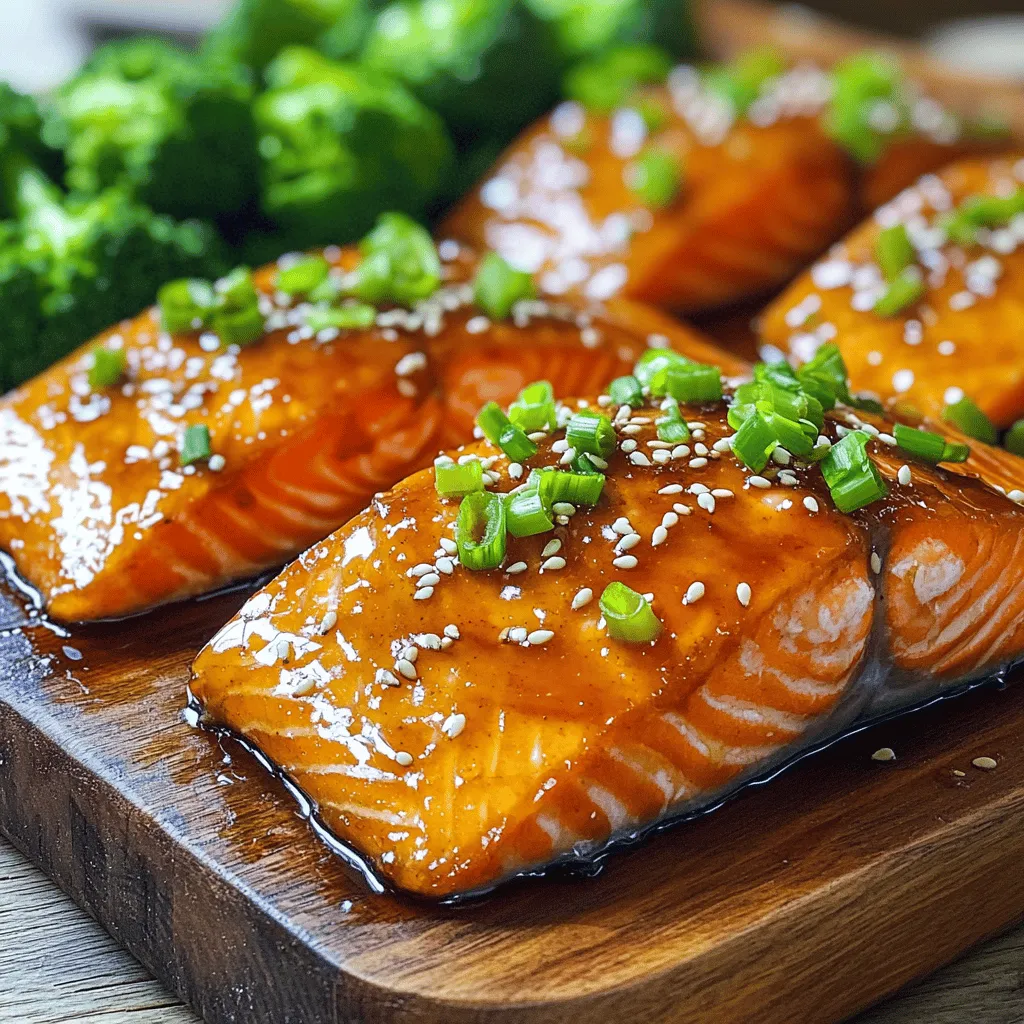
Maple Glazed Salmon Fillets Delightful Dinner Recipe

Looking to impress at dinner with a simple yet tasty dish? Maple Glazed Salmon Fillets are your answer! This delightful

- 1 block firm tofu, pressed and cubed - 1/4 cup teriyaki sauce, divided - 2 cups cooked quinoa (tri-color for visual appeal) - 1 cup fresh broccoli florets - 1 cup julienned carrots - 1 cup snap peas To make a great Teriyaki Tofu Buddha Bowl, start with firm tofu. It holds its shape well. Press the tofu to remove excess water. This step helps the tofu absorb flavors better. Next, we need teriyaki sauce. It adds sweetness and depth to the dish. Cooked quinoa is a must for a hearty base. I suggest using tri-color quinoa for a pop of color. Fresh broccoli, julienned carrots, and snap peas give crunch and nutrition. These veggies are vibrant and tasty. - 2 green onions, finely sliced - 1 tablespoon sesame seeds (toasted for flavor) Garnishing elevates the bowl's look and taste. Green onions add a mild onion flavor. Toasted sesame seeds give a nice crunch and nutty taste. You can also mix in other toppings if you like. - 1 tablespoon sesame oil - 1 tablespoon extra virgin olive oil - Salt and pepper, to taste Sesame oil and olive oil are key for sautéing the vegetables. They bring out the flavors and keep the dish healthy. Don’t forget to season with salt and pepper. Adjust these to your taste. This balance of ingredients makes the bowls healthy and satisfying. Each bite will be flavorful and fun! Preheating the Oven Start by preheating your oven to 400°F (200°C). This temperature makes the tofu crispy and golden. Coating the Tofu Take your block of firm tofu and press it to remove excess water. Once dry, cut it into cubes. Place the cubes in a bowl and add 2 tablespoons of teriyaki sauce. Mix gently to coat all sides. Spread the tofu in a single layer on a parchment-lined baking sheet. Bake for 25-30 minutes, flipping halfway through. You want it crispy on the outside. Temperature Guidelines Use a large non-stick skillet for cooking. Heat it on medium heat. Add 1 tablespoon of sesame oil and 1 tablespoon of olive oil. Cooking Process Once the oil is hot, toss in 1 cup of fresh broccoli florets, 1 cup of julienned carrots, and 1 cup of snap peas. Sauté the veggies for about 5-7 minutes. Stir occasionally to keep them bright and tender. Add salt and pepper to taste. Serving Size Preparation For each serving, start with a base of 2 cups of cooked quinoa. This grain provides a nutty flavor and fills you up. Layering Ingredients On top of the quinoa, layer the sautéed vegetables. Next, add a hearty portion of the roasted teriyaki tofu. This makes a colorful and filling meal. Sauce Drizzle Drizzle the remaining teriyaki sauce over the assembled bowls. This adds extra flavor and ties the dish together. Adding Green Onions and Sesame Seeds Finally, sprinkle with 2 finely sliced green onions and 1 tablespoon of toasted sesame seeds. This adds crunch and a pop of color to your dish. Enjoy your Teriyaki Tofu Buddha Bowls warm! - Baking Techniques: For best results, use firm tofu. Press it well to remove excess water. This helps the tofu absorb flavors and achieve a crispy texture. Coat the cubes in teriyaki sauce and spread them evenly on a baking sheet. Bake at 400°F for a golden-brown finish. - Flipping Tips: Flip the tofu halfway through baking. This ensures even cooking and crispiness on all sides. Use a spatula to gently turn each piece without breaking them. - Timing for Optimal Crispness: Add vegetables to the pan when the oil is hot. Sauté them for about 5-7 minutes. Stir occasionally to cook evenly. Watch the colors; vibrant veggies mean they are cooked just right. You want them tender but still crunchy. - Serving Suggestions: Start with a base of quinoa in each bowl. Layer your sautéed vegetables on top, then add the crispy tofu. This creates a beautiful and colorful dish. - Bowl Composition: For an eye-catching presentation, sprinkle sliced green onions and toasted sesame seeds on top. You can also drizzle extra teriyaki sauce for added flavor. Consider adding sliced avocado or crushed peanuts for extra texture and taste. {{image_4}} You can switch up the protein in your Buddha bowls. Try different types of tofu, like smoked or marinated. These options add unique flavors and textures. You can also use tempeh, which has a nutty taste. Another great choice is chickpeas. They pack protein and pair well with the teriyaki sauce. Feel free to mix in different vegetables based on the season. In spring, use fresh asparagus or peas. In autumn, add roasted sweet potatoes or brussels sprouts. These seasonal choices not only taste great but also add color to your bowl. Mix and match to create a vibrant meal. You can make teriyaki sauce at home or buy it from the store. Homemade sauce can be simple. Just combine soy sauce, honey, garlic, and ginger. This way, you control the flavors and sweetness. If you want more depth, try adding a splash of lime or a pinch of chili flakes. These small changes can make a big impact on your dish. To store leftovers, let the Teriyaki Tofu Buddha Bowls cool to room temperature. Divide them into airtight containers. Keep them in the fridge for up to four days. Label the containers with the date. This way, you know when to enjoy them again. You can freeze cooked bowls but not uncooked ones. For freezing, separate the tofu and veggies from the quinoa. Place each in freezer-safe bags. They can last up to three months in the freezer. When ready to eat, thaw them in the fridge overnight. To reheat, use the oven or microwave. If using the oven, set it to 350°F (175°C). Heat for about 15 minutes. This keeps the tofu crispy. If using a microwave, heat it in short bursts. Stir between intervals to keep the texture nice. Yes, you can make Teriyaki Tofu Buddha Bowls vegan. All the ingredients in this dish are plant-based. The tofu serves as the protein source. You only need to check the teriyaki sauce. Some brands may add honey or other animal products. Look for sauces labeled vegan to keep it plant-based. If you need a substitute for quinoa, try brown rice or couscous. Both work well as a base. You can also use farro or barley for a nutty flavor. Each grain adds its unique texture and taste. Just make sure to cook them according to package directions. Buddha bowls can last about three to five days in the fridge. Store them in an airtight container. Keep the sauce separate if you want to avoid soggy veggies. When ready to eat, just reheat and add the sauce back on top. This blog post covered how to create delicious Teriyaki Tofu Buddha Bowls. We explored the main ingredients like tofu, teriyaki sauce, quinoa, and veggies. I shared step-by-step instructions, tips for perfecting your dish, and variations to spark creativity. Proper storage tips ensure your leftovers stay tasty. Enjoy making this bowl full of flavors. You can mix ingredients and customize it to your taste. Your kitchen adventure awaits!

Teriyaki Tofu Buddha Bowls Healthy and Satisfying Meal

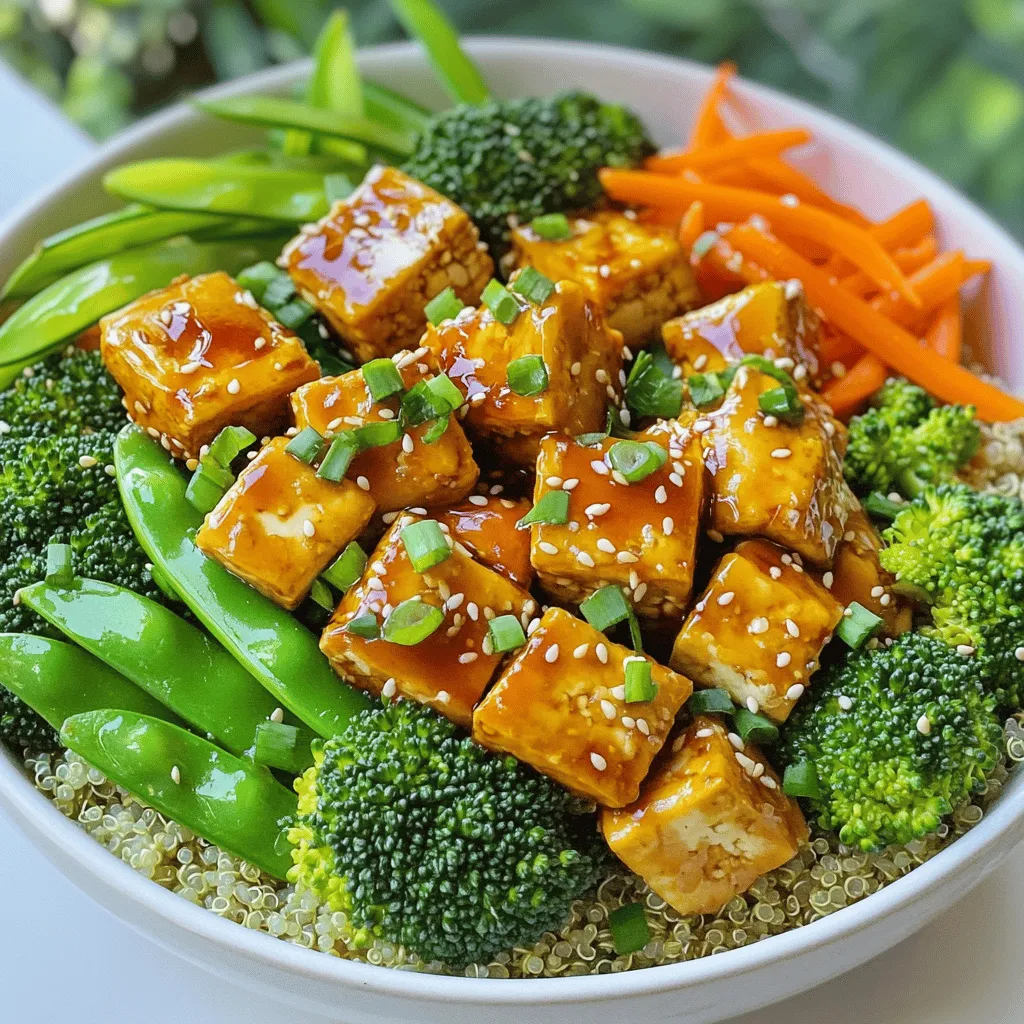
Looking for a healthy and satisfying meal? These Teriyaki Tofu Buddha Bowls might be just what you need! Packed with

- Whole wheat tortillas - Ripe avocado - Fresh spinach leaves - Strawberries - Feta cheese - Balsamic glaze - Salt and pepper - Optional sweetener (honey or agave syrup) To make Avocado Strawberry Spinach Wraps, you need simple, fresh ingredients. First, grab two large whole wheat tortillas for a hearty base. Next, choose a ripe avocado. It should feel soft when you press it gently. You will also need one cup of fresh spinach leaves. Wash and dry them well for the best flavor. Strawberries are a must! Use one cup, hulled and sliced, to add sweetness. Crumbled feta cheese brings a nice tangy taste; you will want about ¼ cup. For flavor, we will drizzle 2 tablespoons of balsamic glaze on top. Don't forget the salt and pepper to taste! If you enjoy sweetness, add an optional tablespoon of honey or agave syrup to the avocado. This mix of flavors and textures makes the wraps delicious and healthy. To start, you need to prepare the filling. Grab a ripe avocado and place it in a small bowl. Use a fork to mash it until it's smooth and creamy. This is the base of your wrap. Next, season the avocado with salt and pepper to taste. If you want a touch of sweetness, mix in one tablespoon of honey or agave syrup. This adds a nice balance to the flavors. Now, it’s time to assemble your wraps. Take two large whole wheat tortillas and lay them flat on your counter. With a spatula or the back of a spoon, spread a good amount of the mashed avocado in the center of each tortilla. Leave about an inch of space around the edges. Next, layer fresh spinach leaves over the avocado. Make sure the spinach covers it well. Then, add the sliced strawberries on top of the spinach. Their sweetness will pair perfectly with the other ingredients. For added flavor, sprinkle crumbled feta cheese over the strawberries. The tanginess of the cheese really enhances the taste. Finally, drizzle balsamic glaze across the top. This glaze brings a rich sweetness and acidity that ties everything together. Now for the fun part—rolling the wraps! Start by folding in both sides of the tortilla towards the center. This helps keep the filling inside. Then, roll the tortilla tightly from the bottom up. Make sure it’s secure. For a nice presentation, slice each wrap in half diagonally before serving. Arrange the wraps on a vibrant plate. You can also garnish with extra sliced strawberries and a drizzle of balsamic glaze on the side. This makes your dish look even more appealing and fresh. You can easily change these wraps to fit your taste. Adding protein is a great way to make them heartier. - Chicken: Grilled chicken adds a nice flavor and protein boost. - Tofu: Marinated tofu makes a great plant-based option. Feel free to experiment with different cheese types. Here are some tasty ideas: - Goat cheese: This adds a creamy texture and rich taste. - Mozzarella: It melts well and brings a mild flavor. To make your wraps even tastier, consider adding spices or herbs. Here are some options to try: - Basil: Fresh basil leaves add a sweet and fragrant touch. - Mint: This herb brings a refreshing flavor that pairs well with strawberries. Balancing flavors is key. You can use sauces to add depth. Here are some suggestions: - Honey mustard: This adds sweetness and tang. - Sriracha: A little heat can balance the sweetness of the strawberries. These tips will help you create wraps that burst with flavor and personality! {{image_4}} You can switch up the veggies and fruits in this recipe. Using kale or arugula can add a different taste and texture. These greens provide more nutrients and a nice crunch. If you want to try new fruits, blueberries or mango work great too. Blueberries add a sweet burst, while mango gives a tropical twist. Both choices keep the wraps fresh and exciting. Need a gluten-free option? Look for gluten-free tortillas in stores. They taste just as good and keep the wrap intact. For a vegan version, you can skip the feta cheese. Try using crumbled tofu or a nut cheese instead. These options add creaminess without dairy. You can still enjoy the flavor and texture of the wraps while sticking to your diet. To keep your avocado strawberry spinach wraps fresh, wrap them tightly in plastic wrap or foil. This helps prevent air from getting to them. Place the wrapped wraps in an airtight container. Store them in the fridge. They will stay good for about 2 days. After that, the freshness starts to fade. Always check for any signs of spoilage before eating. You can freeze assembled wraps, but it is best to do so without the fresh ingredients. The avocado and strawberries can become mushy. To freeze, wrap each assembled but unfilled wrap in plastic. Place the wrapped wraps in a freezer-safe bag or container. They will last for about a month in the freezer. When you’re ready to eat, thaw the wraps in the fridge overnight. For reheating, you can use a skillet or microwave. If using a skillet, heat on low until warm. Enjoy your delicious wraps without losing their fresh flavors! Avocado strawberry spinach wraps are a fresh and tasty meal. They combine creamy avocado, sweet strawberries, and crisp spinach. Whole wheat tortillas hold all these flavors together. The sprinkle of feta cheese adds a nice tang. A drizzle of balsamic glaze gives it a sweet and sour boost. This dish is colorful and packed with nutrients. You'll love how easy it is to make! Yes, you can make these wraps ahead of time. To keep them fresh, wrap each one tightly in plastic wrap. Store them in the fridge for up to two days. Just prepare the filling, and assemble the wraps when you’re ready to eat. If you want to add some crunch, wait to add the strawberries until just before serving. This way, they stay fresh and juicy. These wraps are very healthy! They are full of vitamins, minerals, and healthy fats. The ripe avocado provides good fats that help your heart. Spinach is rich in iron and fiber, which is great for digestion. Strawberries are full of antioxidants and vitamin C. Whole wheat tortillas offer more fiber than regular ones. You can enjoy these wraps guilt-free, knowing they support a balanced diet. These avocado strawberry spinach wraps are fresh, colorful, and easy to make. We covered the simple steps to prepare the filling, assemble the wraps, and serve them beautifully. You can customize them with your favorite proteins and cheeses, or swap in different fruits and veggies. Don’t forget, they store well in the fridge and can freeze, too. I hope you feel inspired to try these wraps and make them your own. Enjoy a tasty meal that’s both healthy and fun!

Avocado Strawberry Spinach Wraps Fresh and Healthy Meal

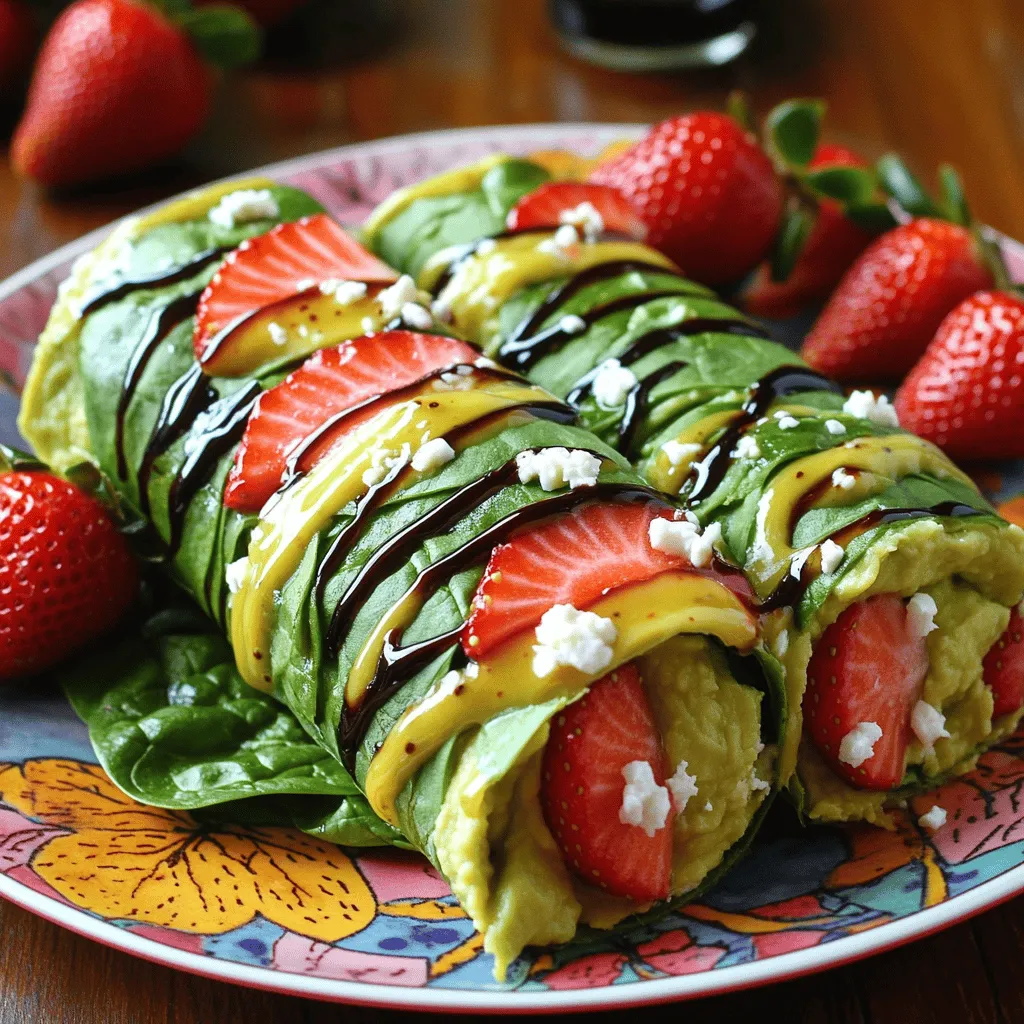
Looking for a quick and tasty meal? Try my Avocado Strawberry Spinach Wraps! These wraps pack fresh flavors into each

- 6 medium apples: Use Granny Smith or Honeycrisp for the best flavor. They add a nice tartness and hold up well during baking. - Fresh lemon juice: One tablespoon helps keep the apples from browning. It also adds brightness to the dish. - Sweeteners: I use 1/2 cup of brown sugar. It gives a rich flavor and helps caramelize the apples. - Spices: One teaspoon of ground cinnamon and 1/4 teaspoon of nutmeg bring warmth and depth to the filling. They make the whole house smell amazing while baking. - Oat topping essentials: One cup of rolled oats and 1/2 cup of all-purpose flour create a crunchy topping. The oats give texture, while the flour helps bind it. - Butter: I prefer unsalted butter, 1/2 cup, melted and slightly cooled. It adds richness and helps the topping crisp up nicely. - Optional ingredients: Chopped nuts, like walnuts or pecans, add extra crunch. Use 1/2 cup if you like a more textured topping. This simple list of ingredients makes it easy to whip up a warm and comforting dessert! Choosing the right apple is key for your crisp. I love using Granny Smith or Honeycrisp apples. They have the right mix of sweet and tart, which makes the dish pop. To prepare the apples, start by peeling them. Use a good peeler for easy work. Next, core each apple to remove the seeds. A simple apple corer can help here. Finally, slice the apples into thin pieces. Aim for about 1/4-inch thickness. This helps them cook evenly and stay tender. Now, let’s mix the filling. Take your sliced apples and place them in a large bowl. Add 1 tablespoon of fresh lemon juice. This keeps the apples from browning and adds a nice zing. Next, sprinkle in 1/2 cup of brown sugar, 1 teaspoon of ground cinnamon, and 1/4 teaspoon of ground nutmeg. Toss everything well. Make sure every apple slice is coated. This mix adds sweetness and warmth to your crisp. Once mixed, pour the apple filling into a greased 9x13-inch baking dish. Spread it out evenly for the best bake. The crumble topping is what makes this dessert special. In a separate bowl, combine 1 cup of rolled oats, 1/2 cup of all-purpose flour, and 1/4 teaspoon of salt. Melt 1/2 cup of unsalted butter and let it cool slightly. Pour the melted butter into the dry ingredients. Mix everything until it forms a crumbly texture. If you like, you can add 1/2 cup of chopped nuts for extra crunch. This topping should be crumbly but hold together when pressed. Preheat your oven to 350°F (175°C). Make sure it’s nice and hot before you bake. Spread the crumble topping over the apple filling. Use a spatula to cover the apples evenly. Then, place the dish in the oven and bake it for 30-35 minutes. You’ll know it’s done when the topping is golden brown, and the apples start bubbling around the edges. Let it cool for about 10 minutes before serving. This helps the juices settle, making it easier to serve. Enjoy your warm bowl of cinnamon apple crisp! Choosing the right apples is key. I love using Granny Smith or Honeycrisp. Both add great flavor and texture. Look for apples that are firm and fresh. When it comes to spices, fresh ground cinnamon makes a big difference in taste. Use one teaspoon for a warm, cozy flavor. Adding a pinch of nutmeg enhances this dessert with a subtle depth. For the topping, the texture is vital. Combine oats, flour, and melted butter until it looks crumbly. If it feels too wet, add a bit more flour. If too dry, mix in a splash of melted butter. Add chopped nuts for extra crunch if desired. This dessert shines when served warm. A scoop of vanilla ice cream on top is perfect. The cold ice cream melts slightly, creating a creamy sauce. You can also drizzle some cream over the warm crisp for added richness. For a fun twist, serve the crisp in small individual bowls. Top each bowl with a sprinkle of cinnamon and a fresh mint leaf. This adds color and makes it look special. Feel free to get creative with spices. Try adding a bit of ginger or allspice for a different flavor. You can also mix in fruits like berries or pears for an extra fruity touch. If you need a gluten-free version, swap the all-purpose flour for almond flour or gluten-free blend. To make it vegan, replace the butter with coconut oil or vegan butter. Adjusting the recipe makes it suitable for everyone! {{image_4}} You can change up your apple crisp by adding berries or peaches. This fruity twist brightens the dish. I love using fresh raspberries or blueberries. They add a nice tart flavor. Peaches give a sweet and juicy touch. Mix them in with the apples for a fun blend. You can also swap out sugar for alternative sweeteners. Maple syrup or honey can work well. They add a different flavor and sweetness. Just adjust the amount to suit your taste. This change can make your dessert feel special and unique. If you want a lower sugar version, you can cut back on brown sugar. You can use sugar substitutes like stevia or erythritol. These options keep the sweetness without the extra calories. For those with nut allergies, there are nut-free options. You can leave out the chopped walnuts or pecans. You can replace them with seeds like pumpkin or sunflower seeds. They still add crunch and texture. In the fall, you can spice things up with cloves or allspice. These spices add warmth and depth to the crisp. They make the dish even more comforting and perfect for chilly days. In summer, try using different fruits. Cherries or plums can create a fresh version. They bring bright flavors that are great when it’s hot outside. Each season offers a chance to try something new with your apple crisp. To keep your cinnamon apple crisp fresh, use an airtight container. Glass or plastic containers work well. Make sure the dish is completely cool before sealing it. This helps prevent moisture build-up. Store it in the fridge for the best results. Cinnamon apple crisp lasts about 3 to 5 days in the fridge. If you want to keep it longer, you can freeze it. In the freezer, it can last up to 3 months. Check for signs of spoilage like off smells or mold. If you see these signs, it’s best to throw it away. To reheat your cinnamon apple crisp, use the oven for the best texture. Preheat the oven to 350°F (175°C). Place the crisp in an oven-safe dish. Cover it with foil to keep it moist. Heat for about 15 to 20 minutes. You can also use a microwave, but it may make the topping soft. For a quick refresh, add a scoop of ice cream or cream before serving. This adds a nice touch and makes it feel new again! For a great Cinnamon Apple Crisp, I suggest using tart apples like Granny Smith. They hold their shape well during baking. Sweet apples like Honeycrisp also work nicely. They add a natural sweetness that contrasts well with the spices. Mixing both types gives a balanced flavor. Choose apples that are firm and fresh for the best results. You can use pre-made apple filling if you’re short on time. Store-bought filling can save you prep work. However, it may lack the fresh taste of homemade. Homemade filling allows you to control the sugar and spice levels. You also get to enjoy the fun of preparing the dish from scratch. It's all about what you prefer! Yes, you can make Cinnamon Apple Crisp ahead of time! Prepare the dish and store it in the fridge before baking. When you’re ready, just pop it in the oven. If you bake it first, let it cool completely. Then cover it tightly and store it in the fridge for up to three days. Reheat in the oven to maintain that crispy topping. To make Cinnamon Apple Crisp vegan, swap out the butter. Use coconut oil or a vegan butter substitute. For the topping, ensure your oats are certified vegan. You can also use maple syrup instead of brown sugar for sweetness. This keeps the flavor rich while making it dairy-free! Cinnamon Apple Crisp combines sweet apples, spices, and a buttery topping for a cozy treat. You learned how to prepare ingredients, create the filling, and assemble the crisp. Remember to choose the right apples and spices for the best flavor. Consider experimenting with fun variations and serving it warm with ice cream. With simple storage tips, you can enjoy leftovers later. Explore this delicious dessert that fits many tastes and diets. Enjoy making your very own Cinnamon Apple Crisp!

Cinnamon Apple Crisp Warm and Comforting Dessert Delight

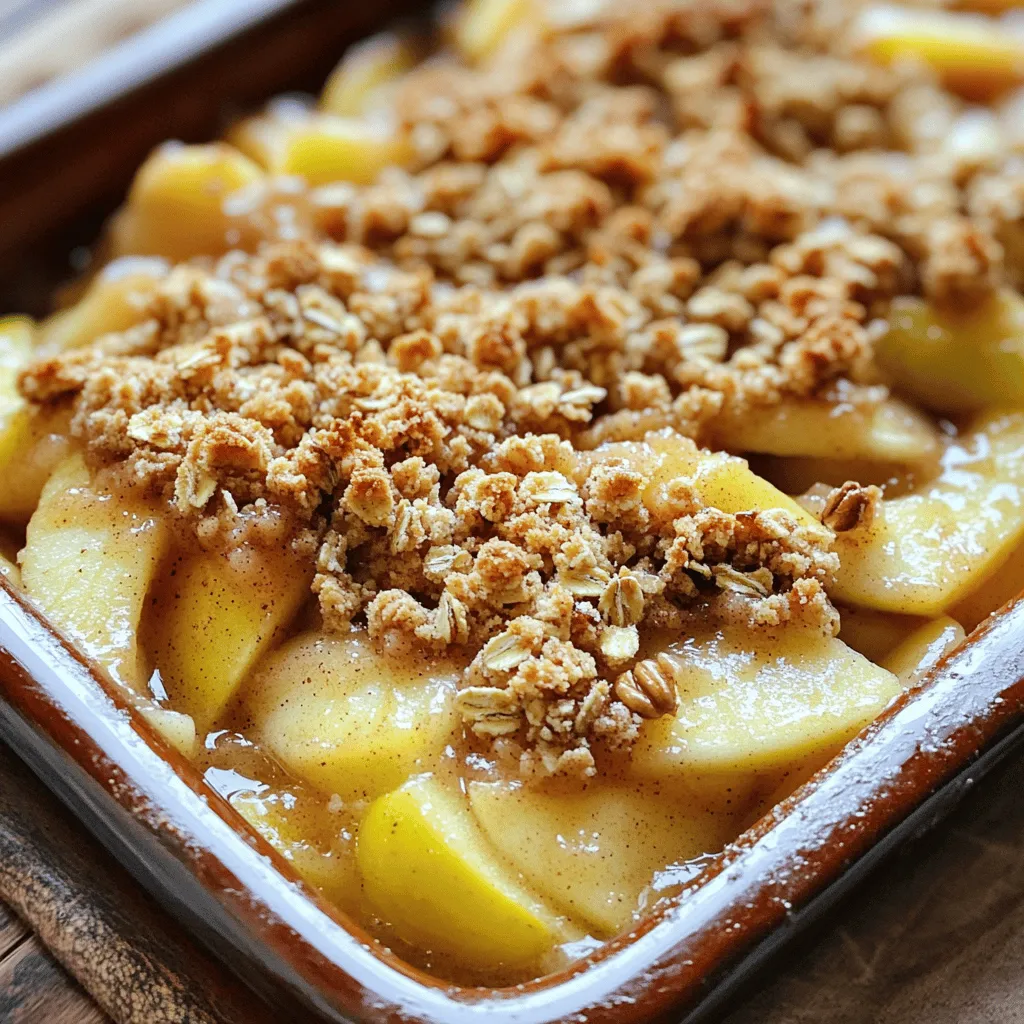
Are you ready for a dessert that wraps you in warmth and comfort? My Cinnamon Apple Crisp is the perfect

- Medium head of cauliflower - Shredded sharp cheddar cheese - Grated parmesan cheese - Large egg - Breadcrumbs (gluten-free option) - Green onions - Garlic powder - Onion powder - Seasoning: Salt and pepper - Greasing option: Cooking spray or olive oil These ingredients work together to create tasty cheesy cauliflower tots. The cauliflower adds a nice texture while keeping the dish healthy. The combination of sharp cheddar and parmesan gives a rich, cheesy flavor that you will love. The egg binds everything together, and the breadcrumbs add that perfect crunch. For the toppings, I love using fresh green onions. They add a nice freshness and color. Garlic and onion powder give a subtle flavor boost. Don’t forget to season with salt and pepper; it makes a big difference! If you prefer, you can use gluten-free breadcrumbs. They work just as well and keep the dish accessible for everyone. Use cooking spray or olive oil to grease the baking sheet. This step helps the tots crisp up nicely. Now that you have your ingredients ready, let's move on to the next steps to make these cheesy cauliflower tots! - Preheat to 400°F (200°C). - Line the baking sheet with parchment paper. - Boil cauliflower florets until tender. - Drain and cool the cauliflower. To start, you will want to boil the cauliflower florets. This step is important because soft cauliflower mixes better. Cook them for about 5 to 7 minutes until tender. You can check this by piercing them with a fork. After boiling, drain the florets and let them cool for a bit. - Squeeze out moisture from cauliflower. - Combine all ingredients and mix thoroughly. Once the cauliflower cools, wrap it in a clean towel. Squeeze out as much moisture as you can. This part is key for crispy tots. Next, in a large bowl, mix the drained cauliflower with the cheeses, egg, breadcrumbs, green onions, garlic powder, onion powder, and salt and pepper. Stir well to blend everything evenly. - Shape the mixture into tots. - Place on baking sheet and bake. Now comes the fun part! Take small portions of the mixture and shape them into tots. Aim for a size similar to walnuts. Place them on the prepared baking sheet, giving them space. This helps them cook evenly. - Flip tots halfway for even cooking. - Cool before serving. Bake the tots in your preheated oven for about 20 to 25 minutes. Flip them halfway through to get that golden-brown crust on both sides. Once they are ready, take them out and let them cool for a few minutes. Enjoy your crispy cheesy cauliflower tots! To get the best crispy tots, you must drain extra moisture from the cauliflower. After boiling, let the cauliflower cool. Then, wrap it in a clean towel and squeeze out as much water as you can. This step is key! If you skip it, your tots may be soggy. For baking, I recommend using parchment paper on your baking sheet. This helps the tots cook evenly and stay crispy. You can easily boost the flavor of your tots. Add spices like paprika or cayenne for a little kick. Fresh herbs, like parsley or cilantro, can also make a big difference. If you want to switch up the cheese, try mozzarella or pepper jack. These options add a new twist to the classic recipe. For serving, place your cheesy cauliflower tots in a small basket or on a colorful plate. Pair them with dips like marinara sauce or creamy ranch for extra flavor. To make them look even better, sprinkle some chopped green onions on top. This adds a nice pop of color and freshness! {{image_4}} You can change the cheese for different flavors. Try using mozzarella for a gooey texture. Pepper jack adds a nice spicy kick. If you want a dairy-free option, use vegan cheese. Many brands offer great substitutes that melt well. You can make these tots even better by adding more veggies. Zucchini or carrots mix well with cauliflower. They add color and nutrients. If you want extra protein, add cooked bacon or chicken. Chopped ham also works nicely. If you need a gluten-free version, use gluten-free breadcrumbs. They work just as well in this recipe. For a low-carb option, skip the breadcrumbs altogether. You can replace them with almond flour or crushed pork rinds. These choices keep the texture nice and crispy. To keep your cheesy cauliflower tots fresh, store them in an airtight container. Place them in the fridge after they cool down. They stay good for about 3 to 4 days. If you want to keep them longer, you can freeze them. For freezing, lay the tots on a baking sheet. Make sure they don’t touch each other to avoid sticking. Freeze them for about an hour, then transfer them to a freezer-safe bag. This way, they won’t clump together. When you're ready to eat, reheat them in the oven at 400°F (200°C) for about 15-20 minutes. This step helps keep them crispy and delicious. Yes, you can use frozen cauliflower. It is a great time-saver. Frozen cauliflower is usually blanched before freezing. This helps keep its color and nutrients. Just make sure to thaw it first. Drain any extra water well. This step keeps your tots crispy. Fresh cauliflower is also good. It has a firmer texture. This gives the tots a nice bite. To add heat, mix in some crushed red pepper flakes. Start with a pinch and taste as you go. You can also add cayenne pepper or hot sauce. These spices boost the flavor without overpowering the cheese. If you like a stronger kick, try jalapeños. Finely chop them and mix in with the other ingredients. Several sauces work great with cheesy cauliflower tots. Marinara sauce is a classic choice. Its tangy flavor complements the cheese well. Ranch dressing adds a creamy touch. You can also try a spicy aioli. This adds a little zest. For a twist, use a yogurt dip with herbs. Each sauce brings a different flavor that enhances your tots. Making these tots vegan is easy. Replace the egg with a flaxseed meal mix. Just mix one tablespoon of flaxseed meal with three tablespoons of water. Let it sit for a few minutes until it thickens. For cheese, use a vegan cheese alternative. You can also try nutritional yeast for a cheesy flavor. This keeps your tots delicious and plant-based. The blog post shares a simple way to make tasty cauliflower tots. We covered the ingredients needed, step-by-step cooking instructions, and tips for the best results. There are ideas for variations and storage options, too. These tots are fun to make and can suit many diets. Try out the recipe and make it your own. I hope you enjoy every crispy bite of your homemade cauliflower tots!

Cheesy Cauliflower Tots Crispy and Simple Recipe

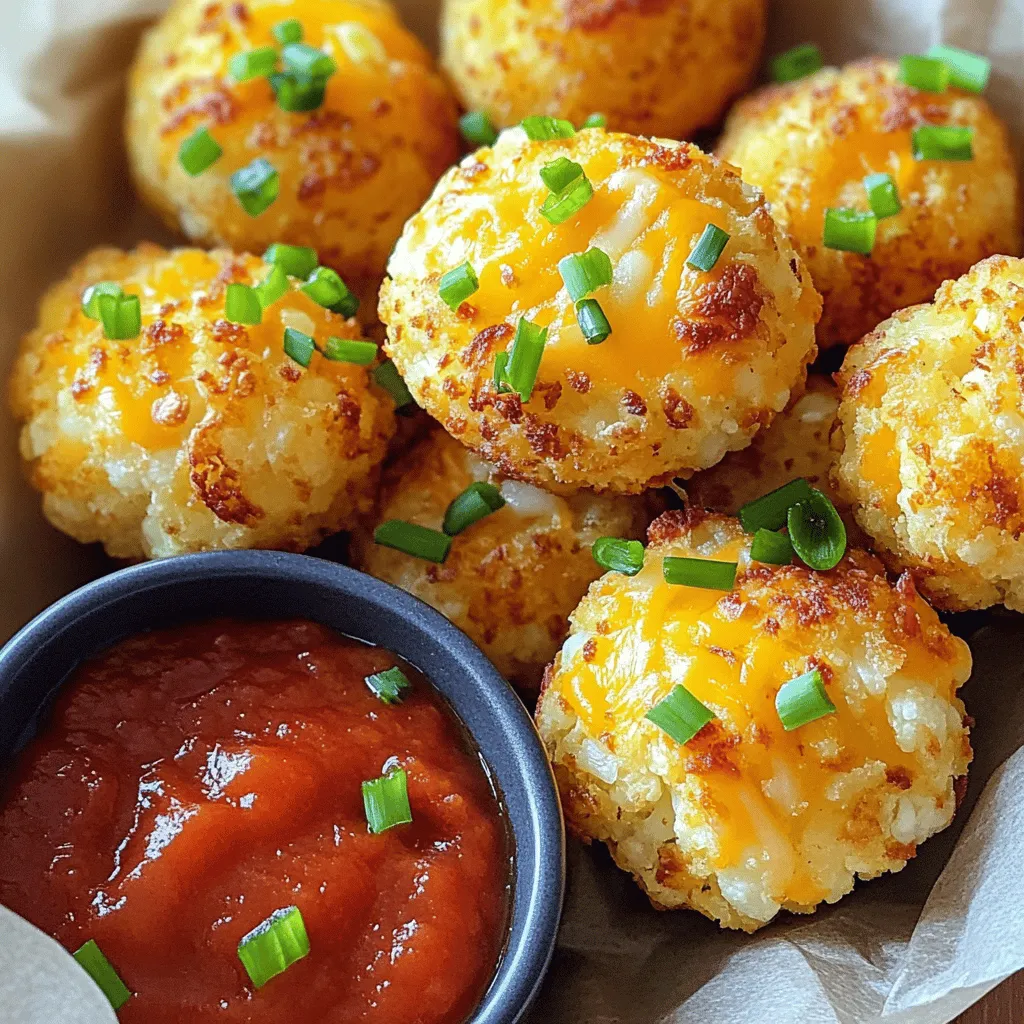
Looking for a tasty snack that’s both easy to make and healthy? These Cheesy Cauliflower Tots are your answer! Packed

- 1 lb large shrimp, peeled and deveined - 2 tablespoons extra-virgin olive oil - 1 tablespoon chili powder - 1 teaspoon smoked paprika - 1 teaspoon garlic powder - 1 teaspoon ground cumin - Juice of 2 limes (about ¼ cup) - Zest of 1 lime - Salt and freshly ground black pepper to taste - Fresh cilantro, finely chopped (for garnish) - Lime wedges (for serving) These ingredients create a bright, zesty flavor. The shrimp provide a nice base. The marinade adds spice and depth to each bite. - Alternatives for shrimp: You can use scallops or chicken. Both work well with the marinade. - Oil and seasoning replacements: Use avocado oil instead of olive oil. For spice, try cayenne or taco seasoning. Substitutions can change the dish, but they still keep it fresh and tasty. - US to metric conversions: - 1 lb shrimp = 454 grams - 2 tablespoons oil = 30 ml - 1 tablespoon chili powder = 15 grams - Tips for scaling the recipe: To make more, just double or triple the ingredients. Keep the same ratios for flavor. Using the right measurements helps keep the dish balanced. Adjusting makes it easy to serve any number of guests. To start, you need to mix the marinade. In a big bowl, combine: - 2 tablespoons extra-virgin olive oil - 1 tablespoon chili powder - 1 teaspoon smoked paprika - 1 teaspoon garlic powder - 1 teaspoon ground cumin - Juice of 2 limes (about ¼ cup) - Zest of 1 lime - Salt and freshly ground black pepper Whisk these ingredients together until they blend well. This step is key for flavor. Marinate the shrimp for at least 30 minutes. If you have time, let them sit for up to 2 hours. This longer marinating time helps the shrimp soak up the spices. Now it’s time to grill. Preheat your grill to medium-high heat. This is vital. A hot grill gives you the best sear and flavor. If you use wooden skewers, soak them in water for 30 minutes. This stops them from burning. When you skewer the shrimp, place them close but not too tight. This allows even cooking. Cook the shrimp for about 2-3 minutes on each side. You’ll know they’re done when they turn bright pink and opaque. This shows they are perfectly grilled. To keep the shrimp tender, watch the time closely. Overcooking can make them tough. Once off the grill, let them rest for a minute. This helps keep the moisture in. To get the best flavor, let your shrimp marinate. A good rule is to marinate for 30 minutes. For more flavor, try to marinate for 2 hours. The longer you let them soak, the tastier they become. Use medium-high heat for grilling shrimp. This helps cook them evenly. If you use high heat, they may cook too fast and burn. I like to soak wooden skewers in water for 30 minutes before grilling. This keeps them from burning on the grill. Arrange your grilled shrimp on a nice platter. Sprinkle some fresh cilantro on top for color. Serve lime wedges on the side for that extra zing. Complement this dish with rice or a fresh salad to make it a complete meal. {{image_4}} To spice up your shrimp, try adding jalapeños or hot sauce. This extra kick can make each bite exciting. You can also use chipotle powder for smoky heat. For a milder option, switch lime for lemon or orange juice. Each citrus gives a unique twist to the flavor. If grilling is not an option, you can bake the shrimp. Preheat your oven to 400°F (200°C). Spread the shrimp on a baking sheet and bake for about 8-10 minutes. They will cook quickly, so keep an eye on them. You can also cook them on the stovetop in a skillet. Heat oil over medium-high heat and cook the shrimp for about 2-3 minutes per side. Serve the shrimp with rice or quinoa for a filling meal. Both grains soak up the flavors well. A fresh salad with greens, avocado, and a lime vinaigrette makes a great side too. This adds color and crunch to your plate. After grilling, let the shrimp cool. Place them in an airtight container. This helps keep them fresh. You can store the shrimp in the fridge for up to 3 days. If you want to keep them longer, consider freezing. To freeze, place the shrimp in a freezer-safe bag. Remove as much air as possible. They can last in the freezer for up to 3 months. To reheat grilled shrimp, use a skillet on low heat. Add a splash of olive oil. This method helps keep the shrimp juicy. You can also use the microwave for quick reheating. Place them on a plate and cover with a damp paper towel. Heat in short bursts of 30 seconds. Be careful not to overheat or they will get tough. You can prepare the shrimp ahead of time. Marinate them up to 2 hours before grilling. If you want to prep further in advance, marinate and freeze them. They can marinate in the freezer for up to a month. Just remember to thaw them in the fridge before grilling. This way, you can enjoy tasty shrimp anytime! You should marinate the shrimp for at least 30 minutes. For the best flavor, let them soak for up to 2 hours. This allows the shrimp to absorb all the tasty spices and lime juice. Yes, you can use frozen shrimp. Just make sure to thaw them first. To thaw, place the shrimp in the fridge overnight or run cold water over them for about 10-15 minutes. Pat them dry before marinating. Chili lime grilled shrimp pairs well with several sides. Try serving it with: - Cilantro lime rice - Fresh green salad - Grilled corn on the cob - Avocado slices For drinks, consider a cold margarita or a refreshing iced tea. Large shrimp work best for grilling. Look for shrimp that are labeled as U-15 or 16-20 per pound. These sizes are easy to handle and cook evenly. Fresh shrimp is great, but frozen shrimp is also fine if you thaw them properly. This blog post covered everything you need for grilled shrimp. We reviewed key ingredients, including shrimp, marinades, and garnishes. You learned about substitutions, conversions, and measurements to make cooking easier. The step-by-step instructions help you prepare, grill, and serve delicious shrimp. Don't forget our tips for marinating and grilling, plus side dish suggestions to enhance your meal. Finally, remember how to store leftovers and reheat them. Use this guide to create tasty dishes and impress your family. Happy grilling!

Chili Lime Grilled Shrimp Flavorful and Easy Recipe

Fire up your grill and get ready for a burst of flavor with my Chili Lime Grilled Shrimp! This simple

- 1 medium head of cauliflower, cut into bite-sized florets - 1 cup cornstarch - 2 tablespoons olive oil - 3 tablespoons soy sauce (or tamari for a gluten-free option) - 3 tablespoons maple syrup - 1 tablespoon rice vinegar - 2 teaspoons sesame oil - 2 cloves garlic, finely minced - 1 teaspoon fresh ginger, finely minced - 1 tablespoon sesame seeds, toasted - 3 green onions, finely chopped for garnish - Salt and pepper to taste Each ingredient plays a role in building flavor and texture. The cauliflower provides a great base. Cornstarch helps create that crispy texture. Olive oil adds richness, while soy sauce and maple syrup give depth and sweetness. Garlic and ginger bring warmth and spice, while sesame oil adds that nutty finish. - Chili flakes for heat - Other vegetables like bell peppers or broccoli - Fresh herbs like cilantro or parsley Adding chili flakes can spice things up. Mixing in other vegetables boosts nutrition and flavor. Fresh herbs can brighten the dish and add freshness. Feel free to experiment for your taste! This dish serves four and is packed with nutrients. Cauliflower is low in calories but high in fiber. It provides vitamins C and K. The olive oil offers healthy fats, while the sauce brings a sweet and savory balance. Overall, it’s a nutritious option for a plant-based meal. Start by preheating your oven to 425°F (220°C). This high heat helps the cauliflower get crispy. While the oven warms, line a baking sheet with parchment paper. This step stops the cauliflower from sticking and makes cleanup easy. Grab a large bowl and add your bite-sized cauliflower florets. Pour in 2 tablespoons of olive oil. Toss the florets gently so every piece gets coated. This oil will add flavor and help the cornstarch stick later. Next, sprinkle 1 cup of cornstarch over the oiled cauliflower. Toss again to coat every floret. This is key for that crunchy texture we all love. Spread the coated florets onto the prepared baking sheet. Make sure they sit in a single layer. This space lets them roast evenly. Place the sheet in the oven and roast for 25-30 minutes. Halfway through, turn the florets. This helps them brown and crisp on all sides. While the cauliflower roasts, it’s time for the sticky sauce. In a small saucepan, mix together 3 tablespoons of soy sauce, 3 tablespoons of maple syrup, 1 tablespoon of rice vinegar, and 2 teaspoons of sesame oil. Add 2 minced garlic cloves and 1 teaspoon of fresh ginger. Heat the mixture on medium. Stir a bit and let it simmer for about 5 minutes. You want it to thicken slightly. When the cauliflower is done roasting, take it out of the oven and move it to a large bowl. Immediately pour the warm sticky sauce over the cauliflower. Toss gently to coat each floret. Then, return the glazed cauliflower to the baking sheet. Roast for another 5-10 minutes. This step lets the sauce caramelize, giving it that sticky goodness. Once it’s beautifully caramelized, take it out and sprinkle with toasted sesame seeds and chopped green onions. This adds a nice crunch and fresh flavor to the dish. Enjoy! To get the crispiest cauliflower, start with dry florets. After washing, pat them dry with a towel. This helps the cornstarch stick better. When you coat them with olive oil, make sure each piece is covered. The cornstarch layer is key. It forms a crunchy shell while roasting. Spread the florets evenly on the baking sheet. Avoid crowding them; this prevents steaming. Roast until golden brown, turning halfway for even cooking. Balancing flavors in your sticky sauce is essential. Start with soy sauce for saltiness. Add maple syrup for sweetness; it complements the salty notes. Rice vinegar brings in acidity, brightening the dish. Don’t forget sesame oil; it adds depth and richness. When mixing, taste as you go. If it's too salty, add a bit more maple syrup. If it's too sweet, a splash of vinegar can help. Adjusting these flavors makes the dish more enjoyable. For the best experience, serve sticky sesame cauliflower hot. A deep dish showcases its beauty. Garnish with toasted sesame seeds and green onions for added crunch. Pair it with steamed rice or fluffy quinoa for a filling meal. You can also add a fresh salad on the side. This adds a nice contrast to the sticky texture. For an extra kick, serve with a spicy dipping sauce. Enjoy this dish as a tasty main or a flavorful side! {{image_4}} You can change the taste of your sticky sesame cauliflower easily. For a spicy kick, add red pepper flakes or sriracha to the sauce. This brings heat that balances well with the sweetness. If you are a garlic fan, increase the minced garlic to four cloves. The extra garlic gives a bold flavor that enhances the dish. You can also add a splash of chili oil for a fragrant, spicy touch. If you want a gluten-free version, use tamari instead of soy sauce. It tastes great and keeps the dish safe for those with gluten issues. For nut-free needs, check that your sesame oil is pure. Some brands may add nut oils. You can use sunflower oil in place of sesame oil for a similar taste without nuts. Sticky sesame cauliflower pairs well with many sides. Serve it with steamed rice or fluffy quinoa for a filling meal. You can also enjoy it with a fresh salad for a light touch. For dips, try a simple soy sauce mix or a creamy avocado dip. Both add extra flavor and fun to your meal. To keep your sticky sesame cauliflower fresh, first let it cool. Place the cauliflower in an airtight container. Store it in the fridge for up to 3 days. Make sure to keep the sauce separate if possible. This helps the cauliflower stay crispy. For the best taste, reheat your cauliflower in the oven. Preheat the oven to 350°F (175°C). Spread the cauliflower on a baking sheet. Heat for about 10-15 minutes. This method helps it regain its crunch. You can also use a microwave, but it may lose some texture. Heat on high for 1-2 minutes, checking often. You can freeze sticky sesame cauliflower for later use. Let it cool completely before freezing. Place it in a freezer-safe bag or container. Make sure to remove as much air as possible. It can stay in the freezer for up to 2 months. When ready to eat, thaw in the fridge overnight and reheat in the oven. Yes, you can use frozen cauliflower. Just thaw it before cooking. Frozen cauliflower may have more water, so be careful not to make it soggy. Pat it dry with a towel after thawing. This way, it will crisp up nicely in the oven. You can use agave syrup or honey. Both options work well. If you need a vegan choice, stick with agave syrup. Remember, the taste may change slightly, but it will still be sweet and tasty. To add more heat, mix in crushed red pepper flakes or sriracha. You can also add a dash of chili oil to the sauce. Start with a little and taste as you go. This way, you can find the right heat level for your liking. Yes, this recipe is great for meal prep! You can cook a big batch and store it in the fridge. Just keep it in an airtight container. It will last for about three to four days. Reheat it in the oven or microwave before eating. Sticky sesame cauliflower is a fun dish to make and enjoy. We covered key ingredients and how to customize your meal. I shared clear steps for roasting and preparing the sauce. You learned tips for extra crispness and flavor balance. Plus, we looked at tasty variations and helpful storage info. Try these ideas in your kitchen. You’ll impress your family and friends with this dish. Enjoy your cooking adventure!

Sticky Sesame Cauliflower Flavorful Plant-Based Dish

Looking to impress your taste buds with a delicious and healthy dish? Sticky Sesame Cauliflower is your answer! This flavorful

- 1 lb ground chicken - 1/4 cup breadcrumbs - 1/4 cup grated Parmesan cheese The main ingredients are simple yet flavorful. Ground chicken provides a lean base. Breadcrumbs add texture, while Parmesan cheese brings a nice savory depth. These three form the heart of the meatballs. - 2 cloves garlic, finely minced - 1/4 cup fresh parsley, finely chopped - 1 tablespoon fresh thyme leaves, chopped Garlic is key to flavor in these meatballs. It gives a warm, rich taste. Fresh parsley adds a pop of color and freshness. Thyme enhances the overall herb profile, making every bite fragrant and delicious. - 1 teaspoon dried oregano - 1/2 teaspoon red pepper flakes (optional for added heat) - 2 tablespoons olive oil, for frying Dried oregano creates an earthy note. Red pepper flakes bring heat, but you can skip them if you prefer mild. Olive oil is perfect for frying, creating a golden crust while keeping the meatballs juicy inside. - In a large mixing bowl, add: - 1 lb ground chicken - 1/4 cup breadcrumbs - 1/4 cup grated Parmesan cheese - 2 cloves garlic, finely minced - 1/4 cup fresh parsley, finely chopped - 1 tablespoon fresh thyme leaves, chopped - 1 teaspoon dried oregano - 1 large egg, lightly beaten - 1/4 teaspoon salt - 1/4 teaspoon freshly ground black pepper - 1/2 teaspoon red pepper flakes (optional) Mix these ingredients gently using your hands. This step is key. You want all the flavors to blend. But be careful not to overmix. Overmixing can make your meatballs tough. Keep it light and gentle to keep them tender. - Preheat your skillet over medium heat. - Add 2 tablespoons of olive oil and let it heat for a minute. While the skillet warms up, take a small portion of your chicken mix. Roll it in your palms to form meatballs. Aim for about 1 inch wide. This size helps them cook evenly. Once the oil shimmers, place the meatballs in the skillet. Make sure they have space. If they are too close, they won’t brown well. You can cook them in batches if needed. Cook the meatballs for about 5-7 minutes. Turn them gently as they cook. You want them to be golden brown on all sides. Check that the inside reaches 165°F for safe eating. When done, carefully remove the meatballs from the skillet. Place them on a paper towel-lined plate. This helps soak up any extra oil. Serve the meatballs warm. They pair well with marinara sauce for dipping. You can also drizzle it over pasta for a tasty meal. Enjoy the mix of flavors and the ease of this recipe! To get the best meatballs, avoid overmixing. When you blend the chicken with the other ingredients, do it gently. Overmixing makes meatballs tough. They should stay soft and tender. When rolling, aim for about one inch in size. Use your palms to shape them. A smooth surface helps them cook evenly. Try not to press too hard. Cook in batches for even browning. If you crowd the skillet, meatballs can steam instead of brown. Brown each side for about 5-7 minutes. Watch the internal temperature. Use a meat thermometer for safety. Chicken should reach 165°F to be safe to eat. Serve the meatballs warm on a bright plate. Drizzle with marinara sauce for color and flavor. Add fresh parsley on top for a pop of green. This makes your dish look great and taste better. {{image_4}} You can switch the meat for turkey. Turkey meatballs are lean and tasty. They cook well with the same spices and herbs. If you want a richer flavor, use a beef or pork blend. Mixing meats adds depth to the taste. Changing herbs can change the whole dish. Try adding basil or rosemary for a fresh twist. These herbs bring a bright flavor that pairs well with chicken. You can also add cheese. Feta adds a tangy taste, while mozzarella makes it creamy. These simple swaps can create a new favorite dish. Want to mix things up? Use pesto sauce instead of marinara. Pesto gives a nutty and herb-rich flavor. You can also try yogurt or tahini dipping sauces. These options add creaminess and extra taste to the meatballs. To keep your garlic herb chicken meatballs fresh, store leftovers in an airtight container. This helps prevent moisture loss and keeps them tasty. In the fridge, these meatballs last for about 3 to 4 days. Be sure to let them cool down before sealing the container. You can freeze both cooked and uncooked meatballs. For cooked meatballs, let them cool completely. Then, place them in a single layer on a baking sheet. Freeze them for about 1 hour, then transfer to a freezer bag. This keeps them from sticking together. For uncooked meatballs, shape and freeze them in the same way. They will keep well for about 3 months. To thaw, place them in the fridge overnight or use the microwave for quick defrosting. When you are ready to eat, reheating is simple. For the oven, preheat to 350°F. Place meatballs on a baking sheet and heat for about 15-20 minutes. If using the microwave, place them on a microwave-safe plate. Heat in short bursts of 30 seconds, checking often. This keeps them moist and warm. Garlic herb chicken meatballs can last in the fridge for about 3 to 4 days. To keep them fresh, store them in an airtight container. This helps prevent moisture loss and keeps them tasty. If you notice any off smell or change in color, it’s best to throw them away. Yes, you can make these meatballs ahead of time! You can prepare the mixture and form the meatballs. Then, store them in the fridge for up to 24 hours before cooking. This makes dinner quick on a busy night. If you want to freeze them, place the uncooked meatballs on a baking sheet. Freeze until firm, then transfer to a bag. They will last up to 3 months in the freezer. When ready, cook them straight from the freezer, just add a few extra minutes to the cooking time. These meatballs pair well with many tasty sides. You can serve them with marinara sauce for dipping. They also go great on a bed of spaghetti. For a lighter option, try them on a salad with fresh greens. Roasted vegetables or garlic bread are also excellent choices. You can even serve them with some rice or quinoa for a healthy twist. This article covered how to make tasty garlic herb chicken meatballs. We discussed key ingredients like ground chicken and Parmesan cheese. You learned step-by-step instructions for mixing and cooking. We shared tips for the perfect texture and cooking methods. I also provided ideas for variations, storage, and answers to common questions. You can enjoy these meatballs in many ways. Don’t hesitate to try different flavors or sauces. Happy cooking!

Garlic Herb Chicken Meatballs Flavorful and Easy Recipe

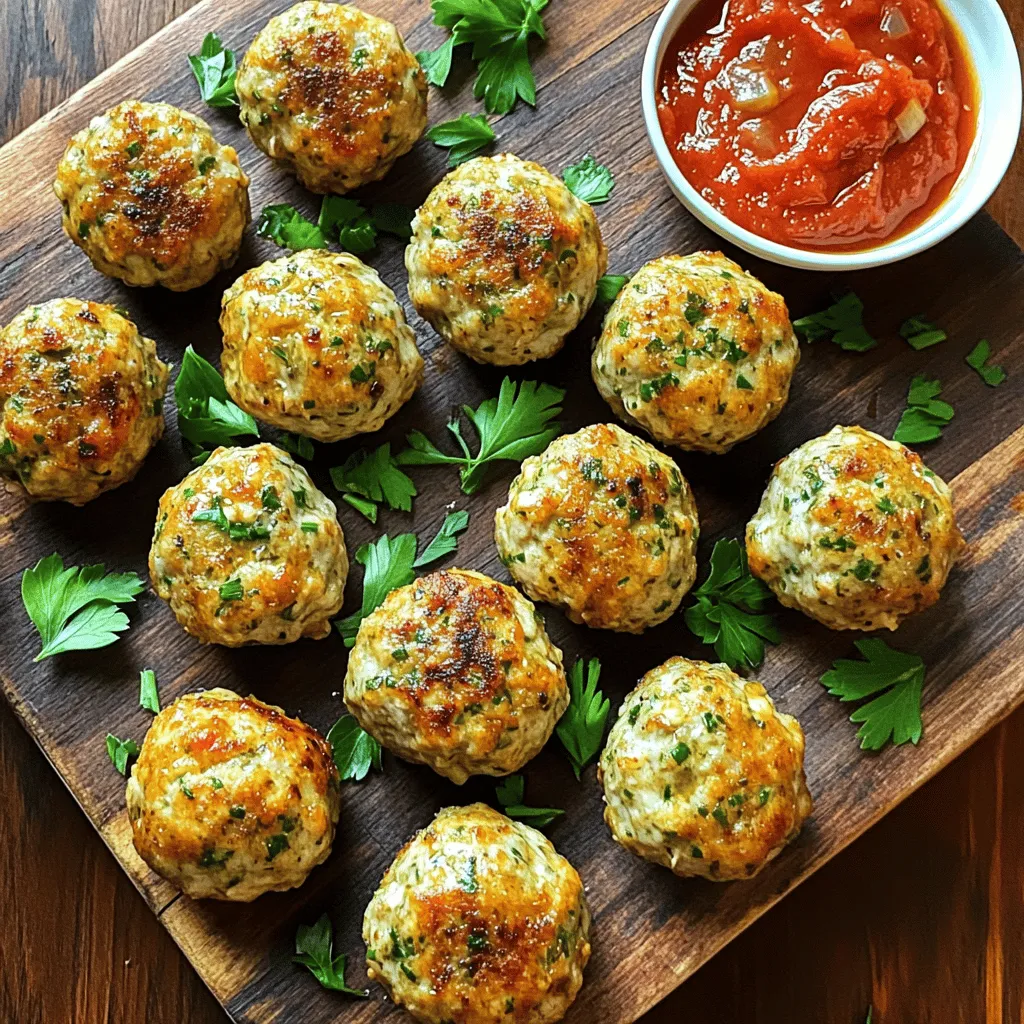
If you’re craving a meal that’s both tasty and easy to make, try my Garlic Herb Chicken Meatballs! This recipe

- 1 cup rolled oats - 1/2 cup almond butter - 1/4 cup honey or maple syrup - 1/2 cup dried cranberries, roughly chopped - 1/2 cup sliced almonds - 1/4 cup chia seeds - 1/2 teaspoon pure vanilla extract - A pinch of salt What are the health benefits of oats? Oats are great for your heart. They help lower cholesterol. They also keep you full for longer. This helps control your weight. Oats provide fiber, which aids digestion. Plus, they give you energy for the day. What are the advantages of almond butter? Almond butter is rich in healthy fats. It has protein that builds muscles. This nut butter also offers vitamins and minerals. It's good for your skin and boosts your brain power. Using almond butter keeps your snacks tasty and nutritious. What is the nutritional value of dried cranberries? Dried cranberries are sweet and tangy. They are full of antioxidants, which protect your body. They also have vitamins like C and E. These fruits support your immune system. Plus, they add a burst of flavor to your energy bars. 1. Preheat your oven to 350°F (175°C). 2. Line an 8-inch square baking pan with parchment paper. Leave some paper hanging over the sides. This helps you lift the bars out later. 3. In a large bowl, mix together the rolled oats, chia seeds, sliced almonds, and chopped dried cranberries. Stir until everything is well combined. 1. In another bowl, add the almond butter, honey (or maple syrup), vanilla extract, and a pinch of salt. 2. Mix these ingredients until they are smooth and creamy. This makes it easier to blend with the dry mix. 1. Pour the almond butter mixture over the dry ingredients. Stir well until everything is coated and forms a sticky mix. 2. Transfer the mixture to the prepared baking pan. Press down firmly with your hands or a spatula. Aim for an even layer. 3. Bake in the oven for 15 to 20 minutes. You want the edges to turn golden brown. 4. After baking, let the pan cool for about 10 minutes. 5. Lift the mixture out using the parchment paper. Place it on a cutting board. Cut into bars of your desired size. 6. Let the bars cool completely at room temperature. Store them in an airtight container to keep them fresh. These steps will help you create tasty and healthy cranberry almond energy bars. Enjoy the process of making something good for you! - Store energy bars in an airtight container. - Keep them in the fridge for longer freshness. - You can also freeze them to enjoy later. - To maintain taste, avoid heat and moisture. - Mix dry and wet ingredients well for even flavor. - Press the mixture firmly into the pan to avoid crumbling. - You can add more honey if you like sweeter bars. - Feel free to swap almond butter with your favorite nut butter. - Wrap each bar in parchment paper for a nice look. - Use twine or stickers to seal them neatly. - This makes them great for gifts or snacks on the go. - Place them in a cute box for a charming presentation. {{image_4}} You can change the nut butter based on your taste. Here are some options: - Peanut butter - Cashew butter - Sunflower seed butter You can also swap out honey or maple syrup for other sweeteners: - Agave syrup - Coconut nectar - Brown rice syrup Add extra flavors to your energy bars to make them unique. Consider: - Dark chocolate chips for sweetness - Cinnamon or nutmeg for spice - Coconut flakes for a tropical twist Making these bars vegan is easy! Just use maple syrup and a vegan nut butter. To make them gluten-free, use certified gluten-free oats. This way, everyone can enjoy these tasty treats! Cranberry almond energy bars stay fresh for about one week at room temperature. Store them in an airtight container to keep them moist. If you want them to last longer, refrigerate them. In the fridge, they can last up to three weeks. To freeze these energy bars, wrap each one tightly in plastic wrap. Place the wrapped bars in a freezer-safe bag or container. They can last up to three months in the freezer. When you are ready to eat one, take it out and let it thaw in the fridge overnight. You might have leftover almond butter or chia seeds after making these bars. Use almond butter on toast or in smoothies for a creamy boost. Chia seeds are great in yogurt or oatmeal. You can even add them to salads for a nice crunch. This way, you waste nothing from your recipe! You can use fresh cranberries, but they change the texture. Fresh cranberries add moisture. This can make the bars more soggy. Dried cranberries are better for a chewy texture. They also add sweetness without extra sugar. If you use fresh, consider adding more oats to balance. You can tell the bars are ready when the edges turn golden brown. Check the center too; it should feel firm. If you poke it, it should spring back. Bake for 15 to 20 minutes. Keep an eye on them to avoid burning. Yes, you can make these bars without added sugar. Use ripe bananas for natural sweetness. Applesauce is another great option. Both will keep the bars moist. You may need to adjust the amount of oats. Taste as you mix to get your desired sweetness. To cut the energy bars, let them cool slightly first. Use a sharp knife for clean edges. If they stick, run the knife under warm water. Cutting them while still warm helps them hold shape. Make sure to cut them into even sizes for easy snacking. You learned how to make tasty energy bars with simple, healthy ingredients. Each part, from mixing to baking, is easy to follow. Remember, these bars are not just quick snacks; they are good for you too. You can change flavors and ingredients based on your needs. Store them right and enjoy them fresh for weeks. I hope this guide inspires you to create your own yummy energy bars!

Cranberry Almond Energy Bars Healthy Nutritious Snack

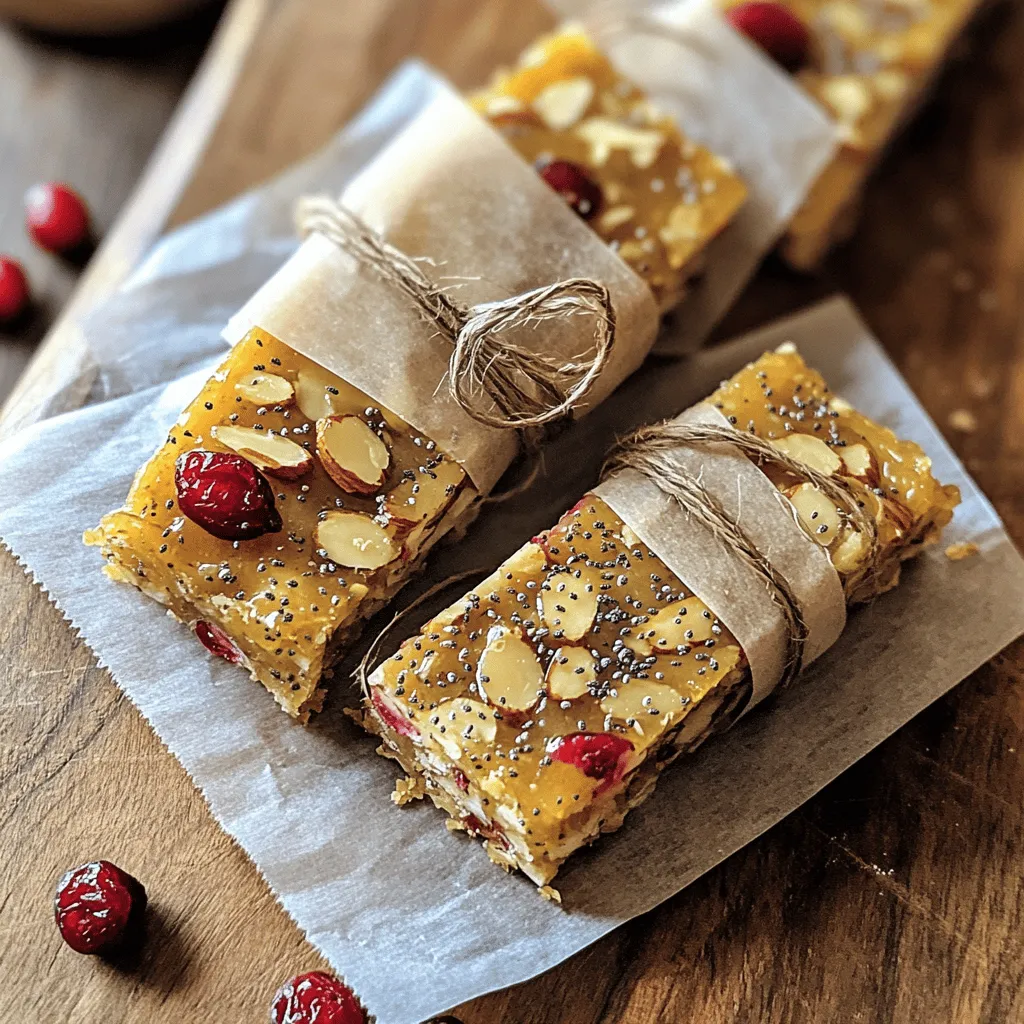
Looking for a tasty and healthy snack? If so, these Cranberry Almond Energy Bars are perfect for you! Packed with

- 1 cup dark chocolate chips - 1/2 cup unsalted butter (1 stick) - 3/4 cup granulated sugar - 2 large eggs, at room temperature - 1 teaspoon vanilla extract - 1/3 cup all-purpose flour - 1/4 cup unsweetened cocoa powder - 1 tablespoon espresso powder - 1/4 teaspoon salt - Optional: powdered sugar for dusting Dark chocolate chips give these bites a rich flavor. I love using high-quality dark chocolate, as it enhances the taste. Unsalted butter adds creaminess and depth to the batter. Granulated sugar helps sweeten and creates a lovely texture. Eggs are key here. They bind the batter and provide moisture. Using room temperature eggs ensures they mix in well. Vanilla extract adds warmth and rounds out the flavors in the brownies. For the dry mix, I use all-purpose flour and unsweetened cocoa powder. These create a sturdy base and add that chocolatey goodness. Espresso powder boosts the chocolate flavor. It gives a nice kick without being too strong. A pinch of salt balances the sweetness and enhances all the flavors. If you want an extra touch, consider powdered sugar for dusting. It adds a nice visual appeal and a hint of sweetness. Each ingredient plays a role in making these espresso brownie bites delicious and memorable. 1. Preheat your oven to 350°F (175°C). This helps the brownie bites bake evenly. 2. Prepare a mini muffin pan by lining it with paper liners. You can also grease it with non-stick spray. This step stops the brownie bites from sticking. 3. Melt the chocolate and butter together. In a microwave-safe bowl, combine 1 cup of dark chocolate chips with 1/2 cup of unsalted butter. Heat them in the microwave. Use 30-second intervals and stir well each time. Keep doing this until the mix is smooth and melted. 4. Mix in sugar and eggs. Add 3/4 cup of granulated sugar to your melted mix. Stir it until it blends well. Then, add 2 large eggs one at a time, mixing well after each. Finally, stir in 1 teaspoon of vanilla extract for flavor. 1. Sift and mix the dry ingredients. In another bowl, combine 1/3 cup of all-purpose flour, 1/4 cup of unsweetened cocoa powder, 1 tablespoon of espresso powder, and 1/4 teaspoon of salt. Sifting helps to break up any lumps and makes mixing easier. 2. Fold the dry mix into the wet mix. Gently combine the dry and wet ingredients. Mix just until you see no flour bits. Be careful not to overmix; this keeps your brownie bites chewy. 1. Fill the muffin pan. Use a spoon or a small cookie scoop to fill each muffin cavity about 3/4 full. This amount lets them rise perfectly. 2. Bake in the oven. Place the filled pan in your preheated oven. Bake for 10 to 12 minutes. The edges should look firm, while the centers stay soft and fudgy. 3. Cool the brownie bites. Once baked, take them out of the oven. Let them cool in the pan for 3 to 5 minutes. Then, move them to a wire rack to cool completely. This cooling step helps them set up nicely. 4. Optional dusting. If you want a sweet touch, sprinkle powdered sugar on the cooled brownie bites right before serving. This adds a nice look and extra sweetness. To get chewy brownie bites, avoid overmixing the batter. Mix just until you see no dry flour. Overmixing makes brownies tough. Using room temperature eggs is key. Cold eggs can make the batter clumpy. They mix better when warm. Just take them out of the fridge for about 30 minutes before using. Balancing chocolate and espresso is crucial. Too much espresso can overpower the chocolate. Use one tablespoon of espresso powder for the right kick. For a fancy touch, dust the finished brownie bites with powdered sugar. It adds sweetness and a nice look. You can also serve them with whipped cream or a shot of espresso for a rich dessert experience. {{image_4}} You can change the chocolate in these bites to make them your own. - Adding nuts or chocolate chunks: Mix in walnuts, pecans, or chocolate chunks for a tasty crunch. Nuts add a nice texture, while extra chocolate boosts the flavor. Just fold in about half a cup of your favorite nuts or chunks before baking. - Using different types of chocolate: For a sweeter treat, try milk chocolate instead of dark chocolate. This will give your brownie bites a creamier taste. You can even blend dark and milk chocolate for a nice balance. Get creative with flavors to make these bites unique. - Adding flavored extracts: A splash of almond or hazelnut extract can elevate your bites. Just add a teaspoon to the mix. This will add a lovely aroma and depth to the brownies. - Incorporating spices: Spice things up by adding a pinch of cinnamon or chili powder. Cinnamon gives warmth and comfort, while chili powder adds a surprising kick. Start with just a quarter teaspoon and adjust to your taste. These variations keep your espresso brownie bites exciting. Feel free to mix and match to find your favorite flavor combinations! Store your espresso brownie bites in an airtight container. Keep them at room temperature for the best taste. A cool, dry spot works well. If you live in a warm area, consider using the fridge. This keeps them fresh longer but may alter the texture. If you choose the fridge, let them sit out for a bit before serving. This will soften them up again. These brownie bites stay fresh for about 3 to 5 days at room temperature. If stored in the fridge, they can last up to a week. You can also freeze them for about a month. Just wrap each bite tightly in plastic wrap. Store them in a freezer-safe bag or container. When you're ready to enjoy, let them thaw at room temperature. Can I use a different type of coffee instead of espresso powder? Yes, you can use instant coffee granules. Just make sure to match the amount. Espresso powder gives a stronger coffee flavor, so adjust to your taste. How do I know when the brownie bites are done baking? Check for firm edges and slightly soft centers. They should not jiggle when you shake the pan. A toothpick inserted should come out with a few moist crumbs. Can I make these brownie bites gluten-free? Absolutely! Substitute all-purpose flour with a gluten-free blend. Make sure the blend includes xanthan gum for the best texture. What can I serve with espresso brownie bites? Serve them with a shot of espresso or a scoop of vanilla ice cream. Whipped cream or a sprinkle of berries adds a nice touch. Can I freeze espresso brownie bites for later? Yes, you can freeze them! Place them in an airtight container. They stay fresh for up to three months. Just thaw before serving for the best taste. In this article, we explored how to make delicious brownie bites using simple ingredients. We covered the steps from preheating the oven to cooling your treats. I shared tips for perfect texture and flavor, along with variations like adding nuts or spices. Remember to store your brownie bites properly for the best taste. With these insights, you'll bake great brownie bites every time. Enjoy your baking journey!

Espresso Brownie Bites Rich and Easy Dessert Recipe

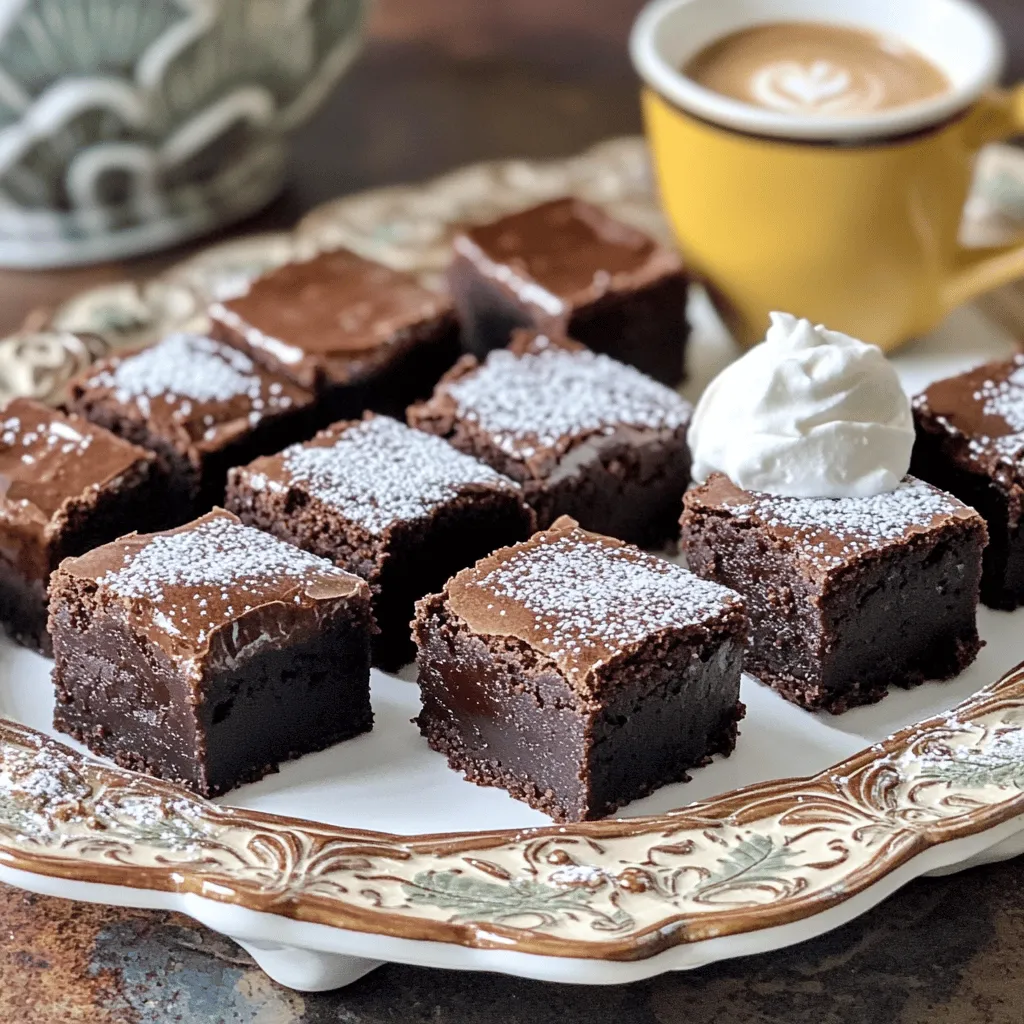
Craving a sweet treat that packs a punch? Espresso Brownie Bites are your answer! These rich, chocolatey delights blend the

Older posts
Newer posts
← Previous Page1 … Page31 Page32 Page33 … Page83 Next →

dsad

© 2026 eataroundit • Built with GeneratePress

Our Policies

  • Copyright Policy
  • Cookie Policy
  • GDPR Policy
  • Privacy Policy
  • Disclaimer
  • Terms Of Use

More Information

  • Home
  • About
  • Contact
  • Appetizers
  • Dessert
  • Dinner
  • Drinks
©2026, eataroundit About Back To Top