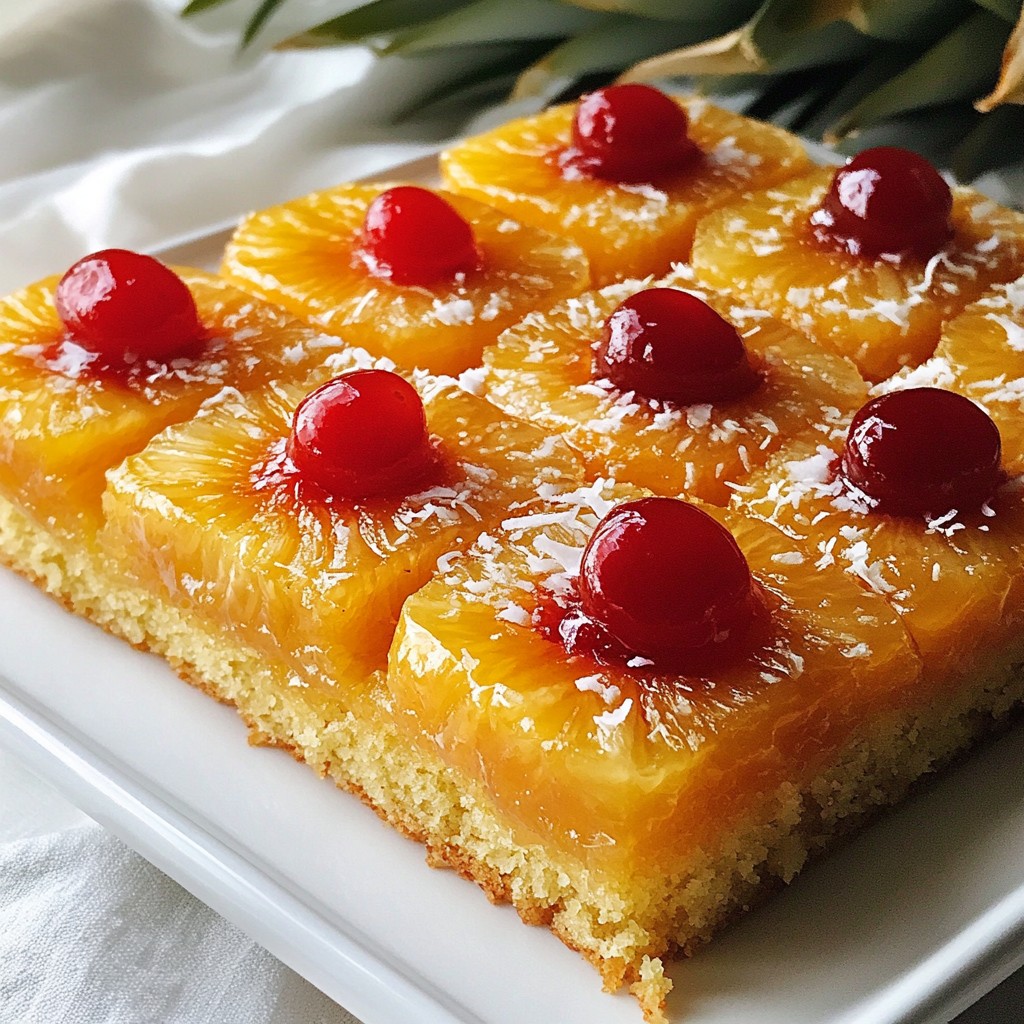
Welcome to a tropical treat you won't forget! My Pineapple Coconut Upside-Down Cake Delight is a perfect mix of sweet fruit and fluffy cake. In this post, I'll share simple steps to create this delicious dessert. You’ll also find helpful tips and fun variations to try. Whether you want to impress guests or enjoy a slice at home, this cake brings joy to any occasion. Ready to bake? Let’s get started!
Why I Love This Recipe
- Delicious Tropical Flavor: This cake is infused with the sweet and tangy flavors of pineapple and coconut, creating a tropical paradise in every bite.
- Eye-Catching Presentation: The caramelized pineapple and maraschino cherries on top make this cake not only delicious but also visually stunning, perfect for any occasion.
- Easy to Make: With simple ingredients and straightforward steps, this recipe is perfect for bakers of all skill levels, ensuring a successful outcome every time.
- Versatile Dessert: This cake can be enjoyed on its own, or with a scoop of ice cream or a dollop of whipped cream, making it a versatile treat for any dessert lover.
Ingredients
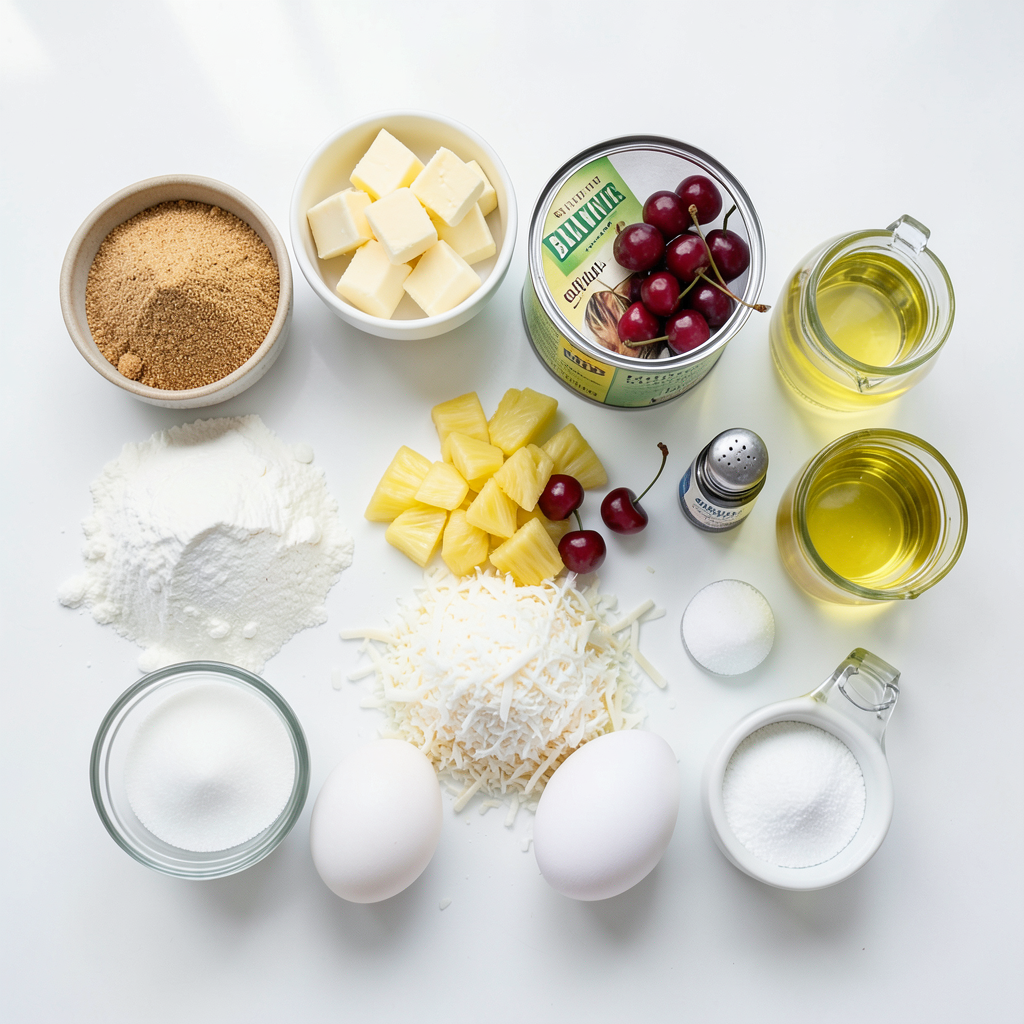
List of Ingredients
- 1 cup packed brown sugar
- 1/4 cup unsalted butter
- 1 can (20 oz) sliced pineapple in juice, drained
- Maraschino cherries (enough for each pineapple slice)
- 1 1/2 cups all-purpose flour
- 1 cup granulated sugar
- 1/2 cup unsweetened coconut milk
- 1/2 cup unsweetened shredded coconut
- 1/2 cup vegetable oil
- 3 large eggs
- 1 teaspoon baking powder
- 1/2 teaspoon baking soda
- 1 teaspoon pure vanilla extract
- 1/4 teaspoon salt
Measurements and Substitutions
Each ingredient plays a key role in creating this cake’s rich flavor. You can switch the brown sugar with coconut sugar for a lighter taste. Instead of all-purpose flour, use gluten-free flour for a gluten-free version. You can use margarine in place of butter for a dairy-free option. If you need a vegan cake, replace the eggs with 1/4 cup applesauce for each egg.
Dietary Considerations (gluten-free, dairy-free options)
This cake can fit many diets. Use gluten-free flour for those avoiding gluten. Unsweetened coconut milk is a great dairy-free choice. For a vegan twist, use applesauce as mentioned before. Always check labels when buying ingredients to ensure they meet your needs. Enjoy this cake while being mindful of your diet!
Step-by-Step Instructions
Preparation Steps
1. Preheat your oven to 350°F (175°C). This helps cook the cake evenly.
2. Melt 1/4 cup of unsalted butter in a small saucepan over medium heat.
3. Stir in 1 cup of packed brown sugar until smooth. Remove from heat.
4. Pour this mixture into a 9-inch round cake pan. Spread it evenly.
5. Drain one can of sliced pineapple (20 oz). Arrange the slices over the brown sugar.
6. Place a maraschino cherry in the center of each pineapple slice.
Baking Process
1. In a large bowl, mix 1 1/2 cups of all-purpose flour, 1 cup of granulated sugar, 1 teaspoon of baking powder, 1/2 teaspoon of baking soda, and 1/4 teaspoon of salt.
2. In another bowl, whisk together 1/2 cup of unsweetened coconut milk, 1/2 cup of vegetable oil, 3 large eggs, and 1 teaspoon of pure vanilla extract.
3. Slowly add the wet mix to the dry mix. Stir gently until combined.
4. Fold in 1/2 cup of unsweetened shredded coconut. Mix it well but don’t overwork it.
5. Pour the batter over the pineapple and cherries in the pan. Cover them completely.
6. Place the pan in the oven. Bake for 40-45 minutes. Check with a toothpick for doneness.
Inverting the Cake
1. Once baked, take the cake out of the oven. Let it cool in the pan for about 10 minutes.
2. After cooling slightly, place a serving plate on top of the cake pan.
3. Carefully flip the plate and pan together. The cake should slide out easily.
4. Let the cake cool completely on the plate. This keeps it moist and tasty.
Tips & Tricks
Ensuring Even Baking
To ensure even baking, always preheat your oven. This step helps create a consistent heat. Use the middle rack for the best results. Avoid opening the oven door too soon. This can cause the cake to sink.
How to Achieve a Perfectly Fluffy Texture
For a fluffy texture, don't over-mix your batter. Mix until just combined. This keeps air in the batter. Use room-temperature eggs; they blend better. Folding in the shredded coconut gently also helps. This keeps the batter light and airy.
Presentation Tips
Presentation makes your cake shine. Use a cake stand for height. Garnish with shredded coconut on top. Add a dollop of whipped coconut cream to the side. Arrange extra pineapple rings around the base for color. These tips make your cake a true showstopper.
Pro Tips
- Use Fresh Pineapple: For an even more vibrant flavor, consider using fresh pineapple instead of canned. Just slice it into rings and proceed with the recipe as directed.
- Let the Cake Cool Properly: Allow the cake to cool in the pan for 10 minutes before inverting. This helps the caramelized layer set and makes for a cleaner release.
- Customize the Toppings: Feel free to add other fruits such as mango or kiwi for a colorful presentation. They’ll complement the tropical flavors beautifully.
- Check for Doneness: Use a toothpick to check for doneness. If it comes out clean from the center, your cake is ready. If there’s batter on the toothpick, give it a few more minutes.
Variations
Alternative Fruits and Toppings
You can switch up the fruits for fun tastes. Try peaches or mangoes for a twist. Use fresh fruits for extra flavor. You can also add nuts, like pecans or walnuts. They add crunch and taste.
Vegan and Healthier Versions
To make this cake vegan, swap the eggs with flax eggs. Use 1 tablespoon of flaxseed meal mixed with 2.5 tablespoons of water for each egg. Replace the butter with coconut oil to keep it rich. For a healthier cake, use whole wheat flour instead of all-purpose flour. You can also cut down the sugar by using maple syrup.
Mini Pineapple Coconut Upside-Down Cakes
Mini cakes are fun and cute! Use a muffin tin to make smaller versions. Place pineapple slices and cherries at the bottom of each cup. Pour in the batter, filling each cup about two-thirds full. Bake for about 25-30 minutes. These mini cakes are perfect for parties or snacks.
Storage Info
Best Practices for Storing Leftovers
Store leftover pineapple coconut upside-down cake in an airtight container. Keep it in the fridge for up to five days. Make sure it’s cool before you seal it. This helps keep the cake moist and fresh. If you want to keep it longer, consider freezing it instead.
Freezing Instructions
To freeze the cake, first, let it cool completely. Wrap it tightly in plastic wrap. Then, wrap it again in aluminum foil. Label the package with the date. You can freeze the cake for up to three months. When you are ready to enjoy it, thaw it in the fridge overnight.
Reheating Tips
To reheat the cake, you can use the oven or microwave. For the oven, preheat it to 350°F (175°C). Place the cake on a baking sheet and heat it for about 10-15 minutes. For the microwave, slice a piece and heat it for about 30 seconds. Check that it’s warm throughout. Enjoy your cake warm for a delightful treat!
FAQs
Can I use fresh pineapples instead of canned?
Yes, you can use fresh pineapples. Fresh pineapple adds a bright flavor. To prepare, peel and slice the pineapple into rings. Make sure to remove the core. Use about 1 medium pineapple for this recipe. Fresh fruit gives a firmer, juicier bite to the cake.
How to prevent the cake from sticking to the pan?
To keep your cake from sticking, use non-stick cooking spray. Coat the pan well before adding the brown sugar mix. You can also line the bottom with parchment paper. This extra step ensures a smooth release when you invert the cake.
What other flavor variations can I try?
You can play with flavors easily! Try adding crushed walnuts for a nutty crunch. A splash of rum in the batter can enhance the tropical taste. You might also swap coconut milk for almond milk for a different twist.
This blog post covered key ingredients, step-by-step instructions, and helpful tips for making your cake. You learned about making it gluten-free or dairy-free, plus how to bake it perfectly. We explored fun variations and storage methods to keep your cake fresh. Lastly, I answered common questions to make your baking easier. Embrace these tips, and enjoy creating delicious cakes that wow everyone!