Looking for a light and creamy treat that won’t spike your sugar levels? You've found it! This Silky Sugar-Free Vanilla Coconut Cream is a simple delight, perfect for any occasion. With just a few easy steps, I’ll guide you through transforming chilled coconut milk into a fluffy dessert that tastes as good as it looks. Ready to impress your taste buds? Let’s dive into this sweet, guilt-free recipe!
Why I Love This Recipe
- Deliciously Creamy: This coconut cream is incredibly silky and rich, making it a perfect base for desserts or a stand-alone treat.
- Sugar-Free Delight: Using erythritol means you can enjoy this dessert without the guilt of added sugars, making it suitable for various dietary preferences.
- Simple Ingredients: With just a handful of easy-to-find ingredients, this recipe is straightforward and quick to whip up.
- Versatile & Customizable: You can easily modify this recipe by adding different flavors or toppings, allowing for endless variations!
Ingredients
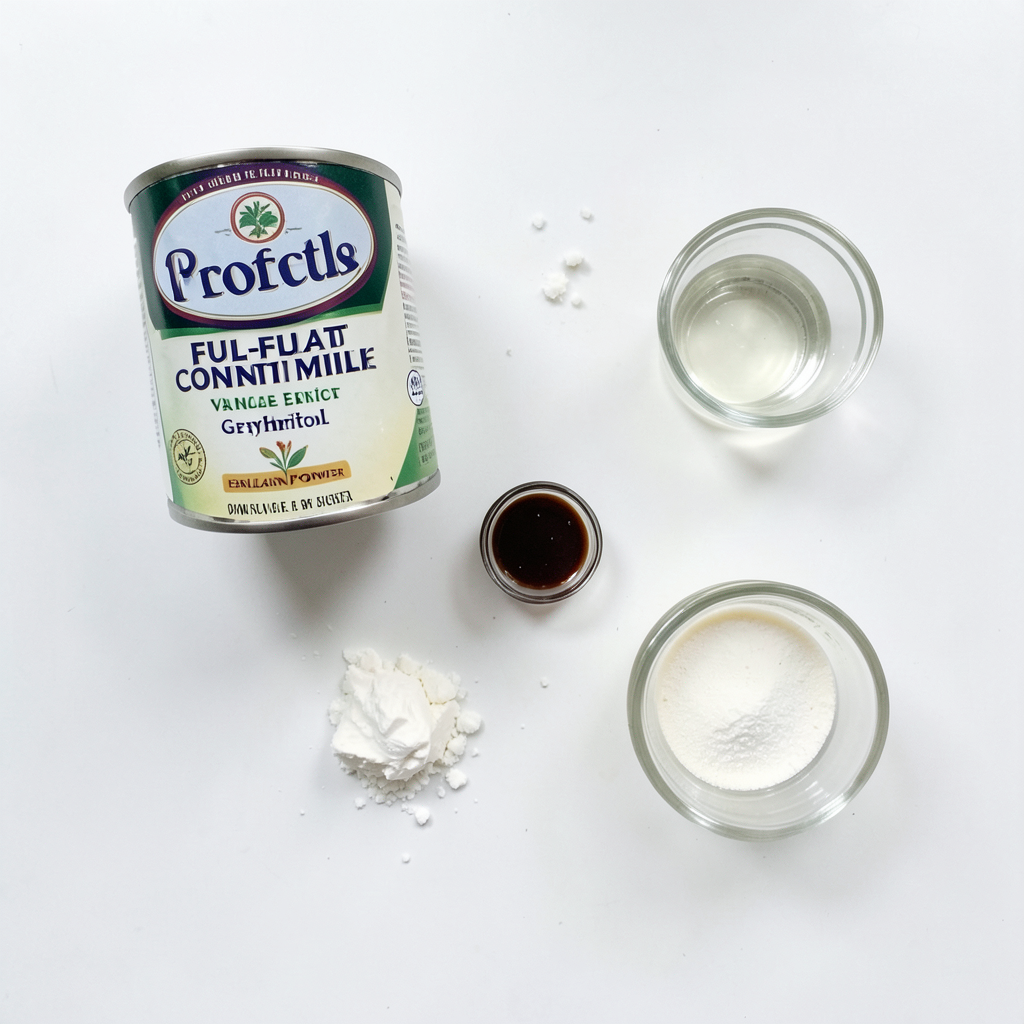
To create the Silky Sugar-Free Vanilla Coconut Cream, you will need the following simple ingredients:
- 1 can (400ml) full-fat coconut milk, well-chilled
- 1 tablespoon pure vanilla extract
- 2 tablespoons erythritol or your favorite sugar-free sweetener
- 1 teaspoon gelatin powder (optional for added thickness)
- 1 tablespoon warm water (to dissolve the gelatin)
- A pinch of fine sea salt
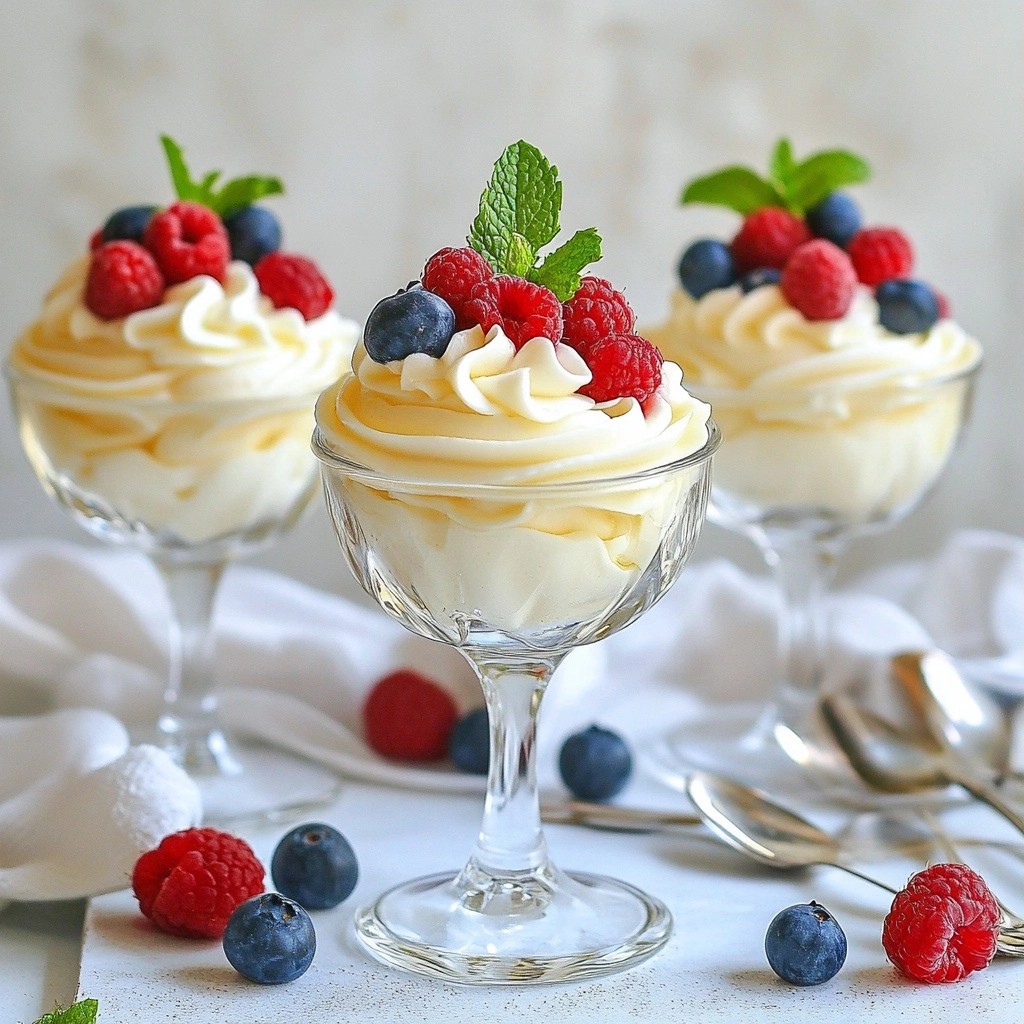
- Fresh mixed berries and mint leaves, for garnish (optional)
Each ingredient plays a key role in building rich flavors and creamy texture. The full-fat coconut milk gives a smooth base. Vanilla extract adds a lovely aroma and taste. Erythritol sweetens without sugar. Gelatin helps thicken if you choose to use it. The warm water is just for dissolving the gelatin. A pinch of salt balances the sweetness.
You can also add fresh berries and mint leaves on top for color and taste. This dessert is simple and delightful. Enjoy making this creamy treat!
Step-by-Step Instructions
Chilling the Coconut Milk
Chill the coconut milk in the fridge overnight. This step is key because it helps separate the thick cream from the water. When cold, the cream rises to the top, making it easy to scoop out later.
Separating the Cream
Open the can carefully. Use a spoon to scoop out only the thick cream on top. Leave the liquid at the bottom for smoothies or soups. This technique keeps your cream pure and thick.
Whipping the Coconut Cream
In a mixing bowl, add the coconut cream. Use an electric mixer on medium speed. Whip the cream for about 3-5 minutes until it’s fluffy and smooth. Make sure to stop and scrape down the sides for even mixing.
Optional Gelatin Preparation
If you want a thicker texture, use gelatin. In a small bowl, mix one tablespoon of warm water with one teaspoon of gelatin powder. Stir until it dissolves. Let it cool for a minute before adding it to the cream.
Incorporating Sweetener and Vanilla
Now, add the vanilla extract and erythritol to the whipped cream. If you're using gelatin, pour it in slowly while mixing. This ensures the sweetener and flavors blend well throughout the cream.
Final Touches
To enhance flavors, add a pinch of fine sea salt. This small step boosts sweetness. Spoon the mixture into bowls or cups. Chill in the fridge for at least 30 minutes. This helps it firm up and makes it ready to serve.
Tips & Tricks
Perfecting the Texture
Whipping coconut cream can be tricky. The key is to use well-chilled coconut milk. If your milk isn’t cold enough, it won’t whip up well. Avoid overwhipping the cream. You want it fluffy, not grainy. Watch for lumps; these can form if the cream is too warm or if you add the sweetener too soon. Mixing should be gentle and steady for the best results.
Balancing Flavors
Taste is personal. Start with a smaller amount of erythritol. You can always add more later. If your cream tastes too sweet, a pinch of salt can help balance it. Salt brings out the flavors and makes it taste richer. Try adding a bit more vanilla if you want a stronger flavor. This recipe is flexible, so adjust it to match your taste buds.
Presentation Techniques
Presentation makes a big impact. Use clear dessert cups or bowls to show off the lovely cream. For color, layer the coconut cream with fresh mixed berries. This adds a nice contrast and looks beautiful. Finish with a mint leaf on top for a touch of green. A well-presented dish makes it more inviting and fun to eat.
Pro Tips
- Chill the Equipment: For even fluffier coconut cream, chill your mixing bowl and beaters in the freezer for about 10-15 minutes before whipping.
- Sweetener Adjustments: Taste and adjust the amount of erythritol or sweetener to your preference, as some sweeteners can vary in sweetness.
- Garnish Creatively: Try adding a sprinkle of toasted coconut flakes or a drizzle of sugar-free chocolate sauce for an extra touch of flavor and texture.
- Store Properly: Keep any leftovers in an airtight container in the refrigerator for up to 3 days, as the cream may thicken upon chilling.
Variations
Flavor Add-Ins
You can easily change the flavor of your coconut cream. Try adding cocoa powder for a chocolate twist. Just mix in 1-2 tablespoons, depending on your taste. If you love coffee, add 1 tablespoon of instant coffee or espresso. This gives a nice kick to the cream. Spice it up with a dash of cinnamon or nutmeg for warmth. The options are endless!
Dairy-Free Alternatives
If you want to avoid coconut, use cashew or almond cream instead. Soak raw cashews overnight. Blend them with water until smooth. This will create a nice, creamy base. You can also try using oat cream, which has a similar texture. Each option keeps your treat dairy-free and still delicious!
Seasonal Variations
Using fresh, seasonal fruits can elevate your coconut cream. In summer, top it with juicy strawberries or peaches. In fall, try roasted apples or spiced pears. Winter brings citrus fruits like oranges or grapefruits, adding brightness to your dish. Each season brings new flavors, so get creative!
Storage Info
Refrigeration Guidelines
The coconut cream lasts for about 3 to 5 days in the fridge. Store it in an airtight container. If you notice any separation, just give it a good stir before serving. This keeps the texture nice and creamy.
Freezing Instructions
Yes, you can freeze coconut cream! To do it right, spoon it into a freezer-safe container. Leave some space at the top since it expands when frozen. For best results, use it within 2 to 3 months. To thaw, place it in the fridge overnight. Stir well after thawing to restore the creamy texture.
FAQs
Can I use regular milk instead of coconut milk?
You can use regular milk, but the taste will change. Coconut milk gives a rich flavor. If you want a lighter option, try almond or oat milk. These will alter the texture and taste but still work well.
Is gelatin necessary for this recipe?
No, gelatin is not necessary. You can skip it for a lighter cream. If you want thickness, try using chia seeds or a bit of cornstarch. Both options can help thicken your cream without changing the taste much.
How can I make this recipe vegan?
To make this recipe vegan, use agar-agar instead of gelatin. For sweeteners, choose maple syrup or agave nectar. Both add sweetness without any animal products. This keeps the dessert creamy and plant-based.
Can I make this ahead of time?
Yes, you can prepare this cream ahead of time! Make it up to two days before serving. Store it in the fridge. Just remember to give it a quick whip before serving to restore its fluffiness.
What can I serve with Silky Sugar-Free Vanilla Coconut Cream?
This cream pairs well with fresh fruits like berries or mango. You can also serve it with gluten-free cookies or dark chocolate. For an elegant touch, add a sprig of mint on top. Enjoy experimenting with different flavors!
In this article, we explored how to make silky, sugar-free vanilla coconut cream. We covered each step, from chilling and separating coconut milk to whip up a fluffy texture. I shared tips for balancing flavors and beautiful presentation, as well as variations to suit your taste preferences. Remember, this dish can be stored easily and customized to your liking. I hope you try the recipe and enjoy the results. It's a simple treat that can impress anyone!