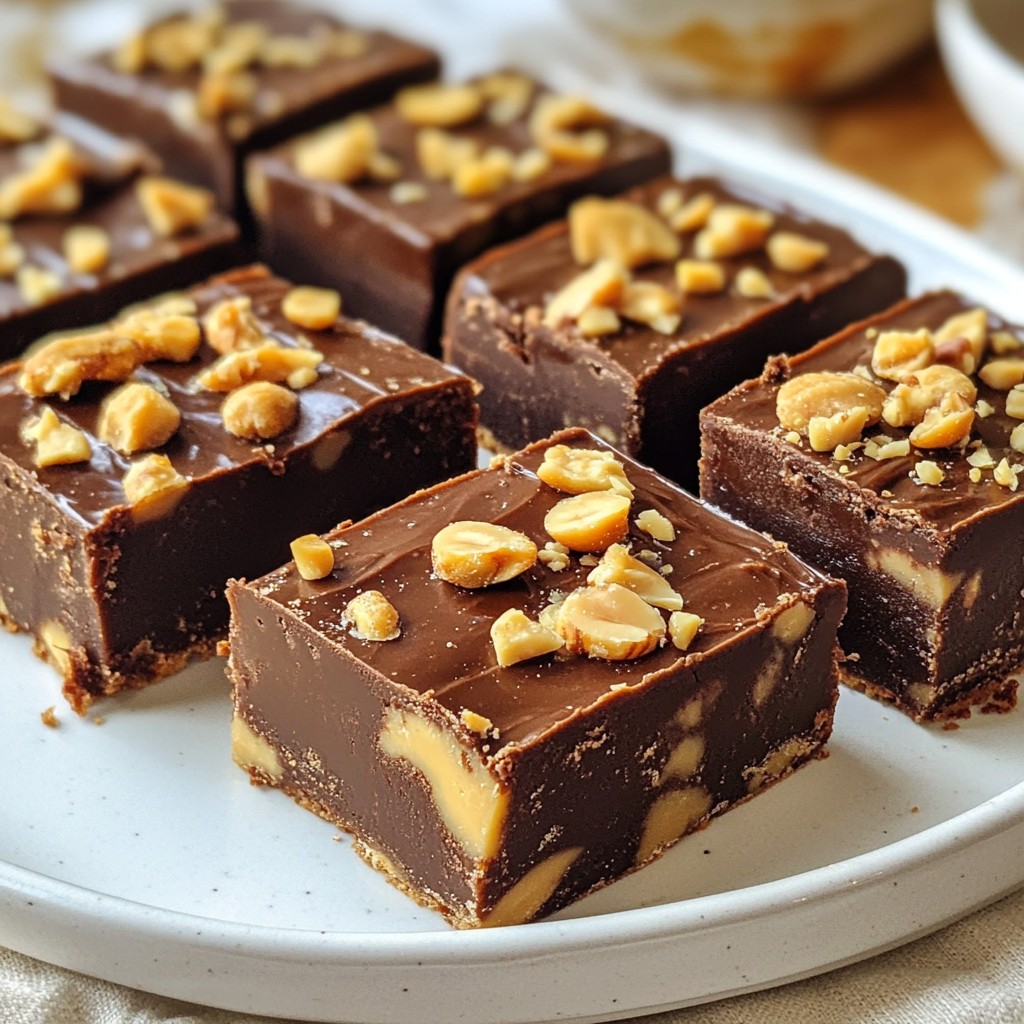
When you crave something sweet but want to stick to your keto plan, these Rich Keto Peanut Butter Fudge Bars are your answer! I’m excited to share a simple recipe that satisfies your taste buds without busting your carb count. These bars are creamy, delicious, and packed with nutrients. Get ready to impress yourself and others with this easy treat that everyone will love!
Why I Love This Recipe
- Easy to Make: This recipe comes together in just 10 minutes, making it perfect for a quick sweet treat.
- Keto-Friendly: With low carbs and no added sugars, these fudge bars fit perfectly into a keto diet.
- Rich and Satisfying: The combination of peanut butter and cocoa creates a decadent flavor that satisfies your sweet tooth.
- Customizable: You can easily adjust the sweetness or add your favorite nuts for extra crunch and texture.
Ingredients
List of Ingredients
- 1 cup natural peanut butter (creamy or crunchy)
- 1/2 cup coconut oil, melted
- 1/4 cup unsweetened cocoa powder, sifted
- 1/2 cup granulated erythritol (or another keto-friendly sweetener)
- 1 teaspoon vanilla extract
- 1/4 teaspoon sea salt (to taste)
- 1/2 cup chopped nuts (optional: walnuts, almonds, or pecans)
Recommended Brands or Types of Ingredients
For natural peanut butter, I recommend brands like Smucker’s or Justin’s. They have no added sugars or oils. For coconut oil, look for organic brands such as Nutiva or Spectrum. They offer great flavor and quality. Choose a high-quality cocoa powder like Ghirardelli for rich taste. For sweeteners, erythritol from Swerve or monk fruit sweeteners from Monk Fruit in the Raw are both excellent choices. They keep the bars keto-friendly without adding sugar.
Nutritional Information per Serving
Each bar contains about:
- Calories: 150
- Total Fat: 12g
- Saturated Fat: 7g
- Carbohydrates: 6g
- Dietary Fiber: 2g
- Sugars: 1g
- Protein: 5g
This makes these fudge bars a great option for a low-carb snack. They are rich in healthy fats and protein, giving you energy without the sugar crash.

Step-by-Step Instructions
Preparation Process
First, gather your ingredients. You need:
- 1 cup natural peanut butter
- 1/2 cup coconut oil, melted
- 1/4 cup unsweetened cocoa powder
- 1/2 cup granulated erythritol
- 1 teaspoon vanilla extract
- 1/4 teaspoon sea salt
- 1/2 cup chopped nuts (optional)
In a medium bowl, mix the melted coconut oil with the peanut butter. Stir it well with a spatula until it is smooth. You want to avoid lumps in this mix.
Next, add the erythritol, sifted cocoa powder, vanilla extract, and sea salt. Blend everything together until it looks velvety. If you like nuts, fold them in gently. This gives a nice crunch to the fudge bars.
Mixing Techniques for Best Results
To get the best texture, keep mixing until all ingredients are well combined. A spatula works best for this. If you want a smoother look, use a whisk. Make sure there are no dry spots. You should have a uniform and creamy mixture.
Cooling and Setting Instructions
Now, prepare an 8x8-inch baking dish. Line it with parchment paper, leaving some paper hanging over the edges. This makes it easy to lift the fudge out later.
Pour the peanut butter mix into the dish. Use your spatula to spread it evenly. This helps the bars set uniformly.
Cover the dish with plastic wrap. Place it in the fridge for 2-3 hours. This allows the fudge to harden completely. Once set, lift the fudge out using the parchment paper. Place it on a cutting board and slice it into bars or squares. You can store these bars in an airtight container in the fridge for up to two weeks.
Tips & Tricks
How to Achieve the Perfect Texture
To get the best texture for your keto peanut butter fudge bars, start with room-temperature peanut butter. This makes it easier to mix with coconut oil. Always melt the coconut oil until it's liquid, but do not overheat. Mix these well until smooth. When you add the cocoa powder and sweetener, sift them first to prevent lumps. This keeps your fudge creamy. Letting the mixture chill for a full 2-3 hours helps it set perfectly, giving you a nice, firm bar.
Variations to Enhance Flavor
You can customize these bars in many fun ways. Add a pinch of cinnamon or nutmeg for warmth. If you love chocolate, try adding chocolate chips or chunks to the mix. You can also swap in different nuts. Walnuts, almonds, or pecans all add unique flavors and textures. For a fun twist, use almond butter instead of peanut butter for a different taste. Mixing in shredded coconut can also add a tropical flair.
Presentation Tips for Serving
For a show-stopping presentation, use a nice platter. Cut the bars into even squares or rectangles. Drizzle melted dark chocolate over the top for a rich look. You can also sprinkle a bit of sea salt for extra flavor and style. If you want to impress, place some fresh berries around the bars. This adds color and a fresh touch to your dessert table.
Pro Tips
- Choose the Right Peanut Butter: For a smoother texture, opt for creamy peanut butter; if you prefer a bit of crunch, go for crunchy peanut butter.
- Sweetener Options: You can experiment with different keto-friendly sweeteners like monk fruit or stevia to find your preferred level of sweetness.
- Storage Tips: To keep your fudge bars fresh longer, always store them in an airtight container in the fridge, or freeze them for up to three months.
- Enhance the Flavor: Consider adding a pinch of cinnamon or a dash of espresso powder to elevate the chocolate flavor of your fudge bars.
Variations
Different Sweetener Options
You can change the sweetener to fit your taste. Erythritol works well, but you can try monk fruit or stevia too. Each sweetener has a unique flavor. Some may be sweeter than others. Adjust the amount based on what you choose. Always taste as you mix. This way, you can find the right balance for your fudge.
Nut Alternatives for Crunch
If you want a crunch, use different nuts. Chopped walnuts add a rich flavor. Almonds give a nice snap. Pecans offer a buttery taste. You can even skip nuts if you prefer a smooth texture. Just make sure to adjust the mix. This helps keep the fudge creamy and delicious.
Adding Flavor Enhancers like Spices or Extracts
For a fun twist, add spices or extracts. A pinch of cinnamon gives warmth. A bit of nutmeg can enhance the nutty taste. You can also try a splash of almond extract for a new flavor. Any addition can make the fudge more exciting. Start with small amounts and taste as you go.
Storage Information
Storing in the Refrigerator
I love keeping my rich keto peanut butter fudge bars in the fridge. They stay fresh and delicious this way. After you cut them, place the bars in an airtight container. This helps keep them moist. The fudge can last up to two weeks when stored like this. Make sure to check them often to ensure they stay tasty.
Freezing Instructions for Longer Shelf Life
If you want to keep them longer, freezing is a great option. Wrap each bar in plastic wrap tightly. Then, place them in a freezer-safe bag. Write the date on the bag so you remember when you made them. You can store them in the freezer for up to three months. When you want a treat, just take a bar out and let it thaw in the fridge.
Signs of Spoilage
It is important to know when your fudge bars are no longer good. Look for any changes in color or texture. If you see mold or they have a strange smell, it’s time to toss them. Also, if they feel too soft or mushy, they might be spoiled. Always trust your senses to keep your treats safe and yummy.
FAQs
Can I substitute peanut butter with another nut butter?
Yes, you can use almond butter or cashew butter. Just keep in mind that the taste will change. Almond butter gives a nutty flavor, while cashew butter is creamier. Choose the one you like best for your bars.
How long can these bars be stored?
Store these bars in an airtight container. They stay fresh in the fridge for up to two weeks. You can also freeze them for about three months. Just make sure to wrap them well to avoid freezer burn.
What is the best way to cut the bars for serving?
After the fudge sets, lift it out using the parchment paper. Place it on a cutting board. Use a sharp knife for clean cuts. For even squares, you can mark the cuts lightly before slicing. Enjoy your perfect portions!
In this blog post, I covered important ingredients and their types. You learned about preparation steps, mixing techniques, and how to cool your mixture. Tips for perfect texture and fun variations were shared. Plus, I explained storage methods to keep your bars fresh.
In summary, making these bars is easy and fun. Try out different flavors, and enjoy your tasty creation!