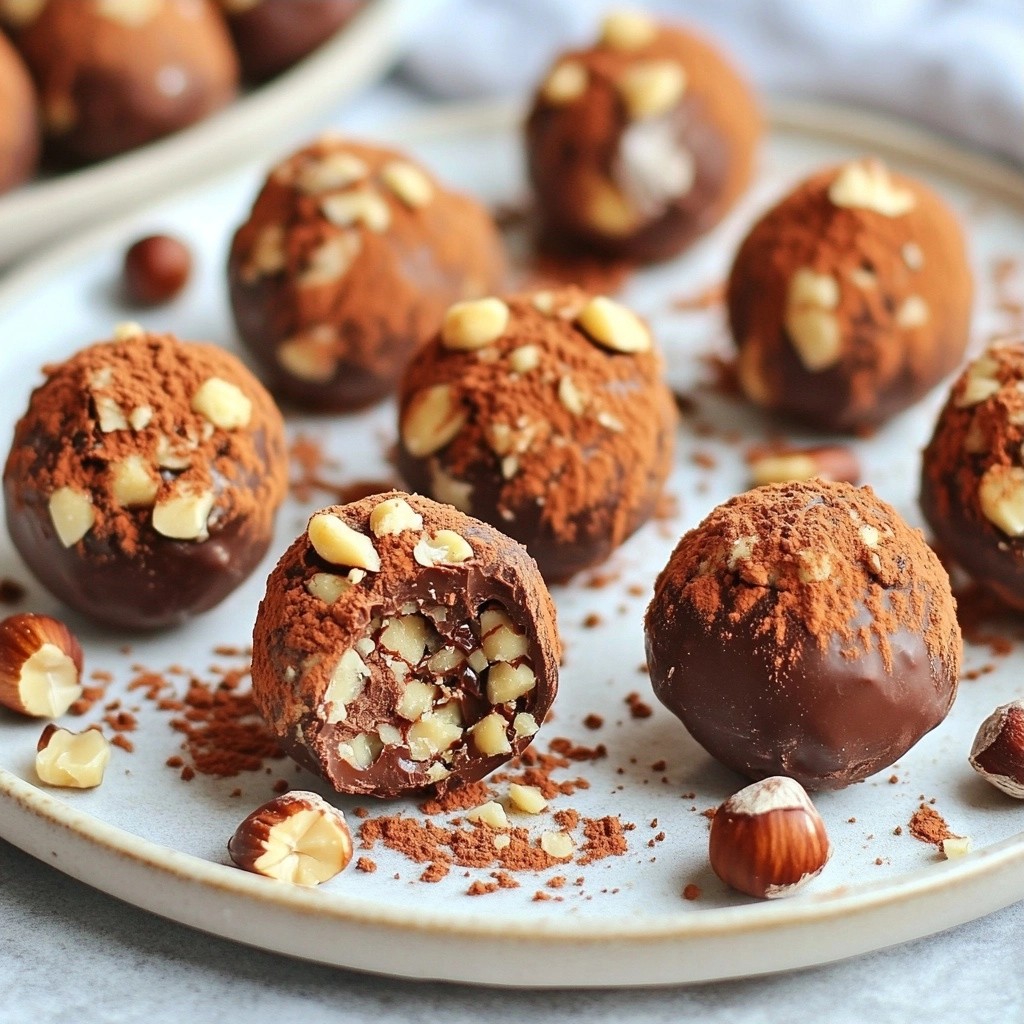
Craving a sweet treat without the guilt? Let me introduce you to my Sugar-Free Low-Carb Hazelnut Chocolate Truffle Bites Delight. These delicious bites are rich, creamy, and perfect for anyone wanting to enjoy dessert while sticking to a low-carb lifestyle. With simple ingredients and an easy step-by-step guide, you'll be amazed at how quickly they come together. Dive in to discover how to make these indulgent treats!
Why I Love This Recipe
- Deliciously Decadent: These truffle bites are rich and satisfying, providing a chocolatey indulgence without the sugar.
- Low-Carb Delight: Perfect for those following a low-carb diet, these truffles allow you to enjoy a sweet treat without the carbs.
- Nutty Texture: The combination of hazelnut flour and chopped hazelnuts gives these truffles a delightful crunch that contrasts beautifully with the smooth chocolate.
- Easy to Make: With simple ingredients and straightforward steps, these truffles are quick to prepare, making them an ideal homemade treat.
Ingredients
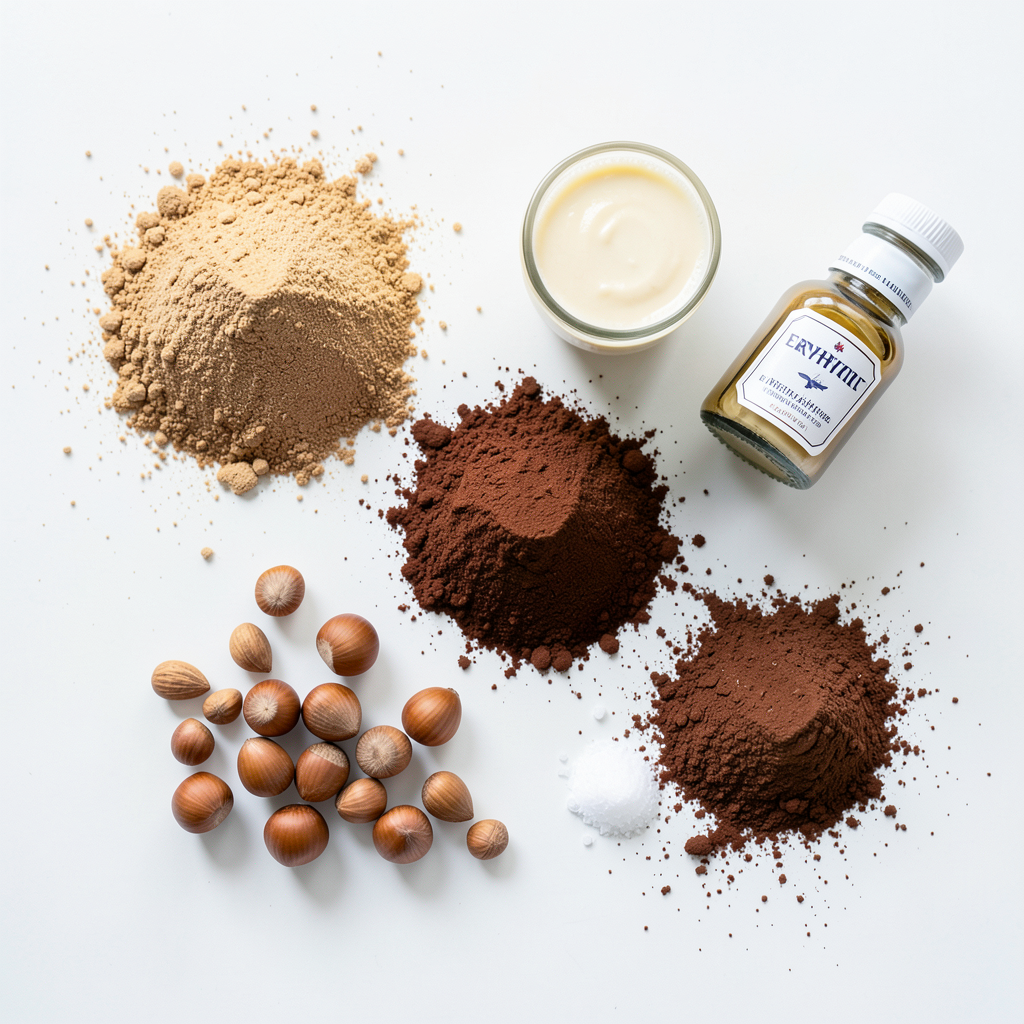
- 1 cup hazelnut flour
- 1/2 cup unsweetened cocoa powder
- 1/4 cup powdered erythritol (or your preferred sugar substitute)
- 1/4 cup unsweetened almond butter
- 1/2 cup unsweetened coconut milk
- 1 teaspoon pure vanilla extract
- Pinch of salt
- 1/2 cup chopped hazelnuts (for coating)
- Additional unsweetened cocoa powder (for coating)
These ingredients blend perfectly to create a rich, chocolatey treat. Hazelnut flour gives a nutty taste and smooth texture. Unsweetened cocoa powder brings deep chocolate flavor without sugar. The powdered erythritol adds sweetness, making them guilt-free. Unsweetened almond butter adds creaminess and healthy fats. Coconut milk keeps the truffles moist and dairy-free. Pure vanilla extract enhances overall flavor. A pinch of salt balances the sweetness. Finally, chopped hazelnuts and cocoa powder coat the truffles, adding crunch and richness.
Using these ingredients, you create a delicious truffle that fits into a low-carb lifestyle. Each bite offers a rich chocolate experience without the sugar rush.
Step-by-Step Instructions
Mixing Dry Ingredients
First, grab a mixing bowl. Combine the following dry ingredients:
- 1 cup hazelnut flour
- 1/2 cup unsweetened cocoa powder
- 1/4 cup powdered erythritol
- Pinch of salt
Whisk these ingredients together well. This mix creates a rich base for your truffles.
Incorporating Wet Ingredients
Now, it’s time for the wet ingredients. Add in:
- 1/4 cup unsweetened almond butter
- 1/2 cup unsweetened coconut milk
- 1 teaspoon pure vanilla extract
Stir the mixture until it is smooth and thick. This will give your truffles a creamy texture.
Chilling Dough and Shaping Truffles
Cover your mixing bowl with plastic wrap. Place it in the fridge for about 30 minutes. This helps the dough firm up for easier handling. After 30 minutes, scoop out small amounts of the mixture. Roll them into balls with your hands. Aim for about 1 tablespoon of batter per truffle.
Coating the Truffles
For the coating, prepare a shallow dish. In it, mix:
- 1/2 cup chopped hazelnuts
- Additional unsweetened cocoa powder
Roll each truffle in this nutty mix until fully coated. This adds flavor and texture to your truffles.
Setting the Truffles
Arrange the coated truffles on a parchment-lined baking sheet. Place them back in the fridge for 15-20 minutes to set. This final chill will help them firm up and be ready to enjoy.
Tips & Tricks
Adjusting Sweetness
You can use many sweeteners for this recipe. I like powdered erythritol, but you can try stevia or monk fruit. Each sweetener has a different taste and sweetness level. Start with a smaller amount, then taste the mixture. If it needs more sweetness, add a little more sweetener, and mix again.
Perfecting Texture
Chilling the mixture is key. It firms up the truffles, making them easier to roll. After mixing, cover the bowl and chill for 30 minutes. When you scoop and roll, use your palms to shape them gently. This helps create a smooth finish.
Presentation Tips
For a great look, arrange the truffles on a nice plate. You can scatter chopped hazelnuts around them for a pop of color and texture. If you're giving these as gifts, wrap each truffle in clear cellophane. Tie it with a ribbon for a special touch.
Pro Tips
- Chill for Better Texture: Allow the mixture to chill in the refrigerator for at least 30 minutes. This helps the truffles firm up, making them easier to roll and giving them a better texture.
- Customize Your Coating: Experiment with different coatings! Instead of just hazelnuts and cocoa powder, try rolling your truffles in shredded coconut, crushed almonds, or even matcha for a unique twist.
- Store Properly: To maintain freshness, store the truffles in an airtight container in the fridge. They will last up to a week, making them perfect for meal prep or a sweet treat throughout the week.
- Make Them Bite-Sized: For a fun variation, consider shaping the truffles into smaller bites. This makes them perfect for parties or gatherings where guests can enjoy a variety of treats!
Variations
Flavor Additions
You can add fun flavors to your truffle bites. Try using different nut butters like cashew or peanut butter. These swaps bring new tastes and textures. You can also mix in spices or extracts. A drop of peppermint extract can give a fresh twist. Vanilla or almond extracts add warmth and depth.
Dietary Substitutions
If you need a nut-free option, use sunflower seed butter instead of almond butter. For a dairy-free treat, stick with coconut milk. You can also coat the truffles in sesame seeds or finely shredded coconut. These changes create a new flavor experience and keep the snacks exciting.
Serving Suggestions
Pair your truffles with drinks like coffee or herbal tea. They also taste great with fresh fruit. For parties, arrange them on a colorful platter. You can sprinkle extra chopped hazelnuts around for a nice touch. Another fun idea is to serve them in decorative cups for guests to enjoy.
Storage Info
Best Storage Practices
To keep your Sugar-Free Low-Carb Hazelnut Chocolate Truffle Bites fresh, store them right. First, let the truffles cool fully after setting. Use an airtight container to seal them tightly. This helps keep moisture out and flavor in. I recommend stacking them in layers, with parchment paper in between to prevent sticking. Glass containers work well, but plastic ones are fine too. Always label the container with the date. This way, you’ll know when you made them!
Freezing Instructions
If you want to save some for later, freezing is a great option. Place the truffles in a single layer on a tray and freeze them for about two hours. After they’re firm, transfer them to a freezer-safe bag or container. This helps save space and keeps them fresh longer. When you’re ready to enjoy them, take out the truffles and let them thaw in the fridge for a few hours. Thawing in the fridge keeps their texture nice and smooth. Enjoy your treats whenever you crave something sweet!
FAQs
Can I use a different sweetener?
Yes, you can use other sweeteners. Options include stevia, monk fruit, or allulose. Each sweetener has a different taste and sweetness level. If you switch, start with less and taste as you go. This way, you can adjust to your liking. Always check for changes in texture. Some sweeteners may make the truffles softer or harder.
How long do these truffles last?
These truffles can last up to one week in the fridge. Store them in an airtight container. For longer storage, freeze them. They can last for up to three months in the freezer. Just make sure to wrap each truffle well. When ready to eat, thaw in the fridge overnight for the best texture.
Are these truffles suitable for Keto diet?
Yes, these truffles fit well in a Keto diet. They are low in carbs and sugar-free. Each truffle has about 2 grams of net carbs. The hazelnut flour and almond butter provide healthy fats, making them a great treat. Enjoy them without guilt while staying on track with your Keto goals.
You’ve learned to make delicious hazelnut truffles step by step. We covered ingredients, mixing, and shaping, plus tips for sweetness and texture. You can even try fun variations and get smart storage ideas. These truffles are simple and tasty, perfect for sharing or gifting. Enjoy creating these treats and impress everyone with your skills!