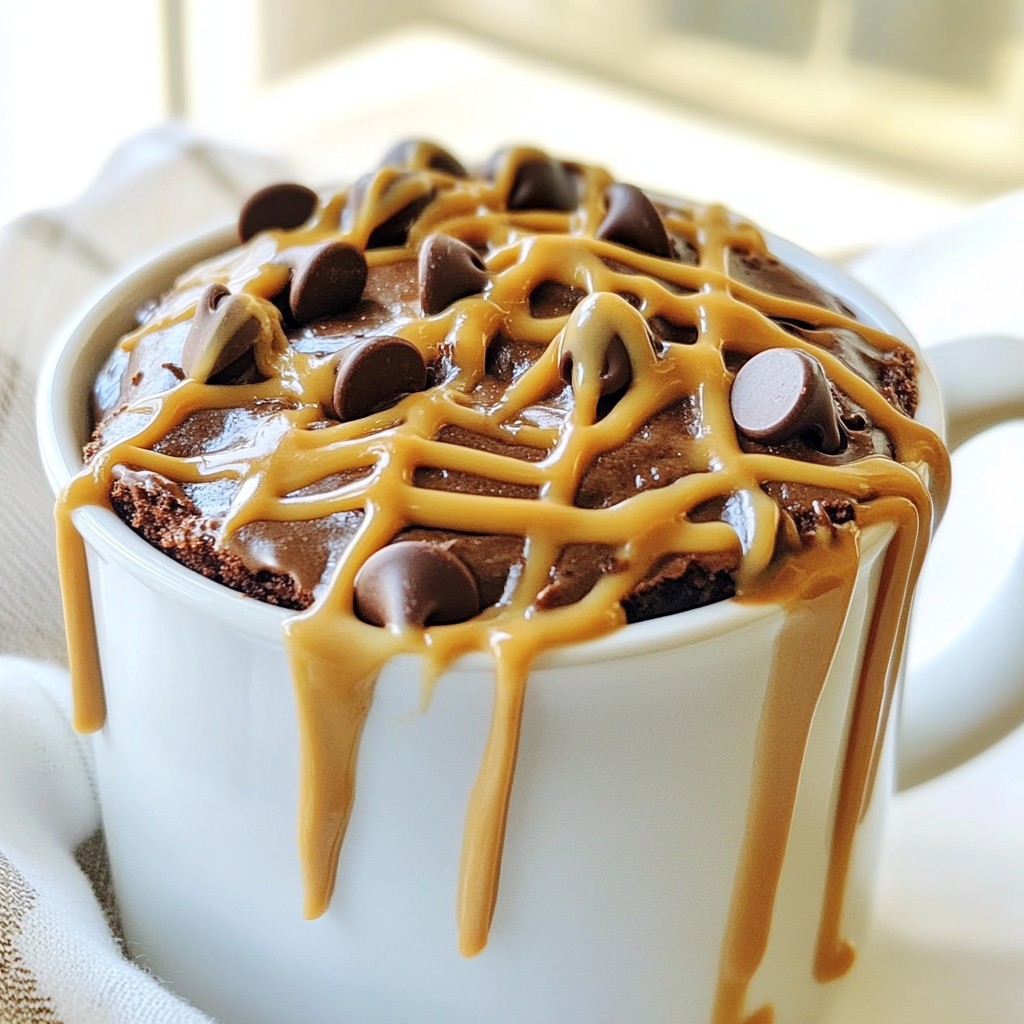
Craving something sweet and quick? You’re in for a treat with my Chocolate Peanut Butter Mug Cake! This easy recipe combines rich chocolate and creamy peanut butter in just minutes. Perfect for busy days or late-night snacks, you’ll love how simple and satisfying it is. Ready to indulge? Let’s dive into the tasty ingredients and the quick steps to make this decadent dessert your new favorite!
Why I Love This Recipe
- Quick and Easy: This mug cake comes together in just a few minutes, perfect for a last-minute dessert craving.
- Decadent Flavor: The combination of rich chocolate and creamy peanut butter creates a delightful taste that satisfies sweet cravings.
- Customizable: You can easily adjust the ingredients to suit your dietary preferences or add extras like nuts or fruit.
- Single Serving: Making one serving means no leftovers, making it a guilt-free treat that you can indulge in anytime.
Ingredients
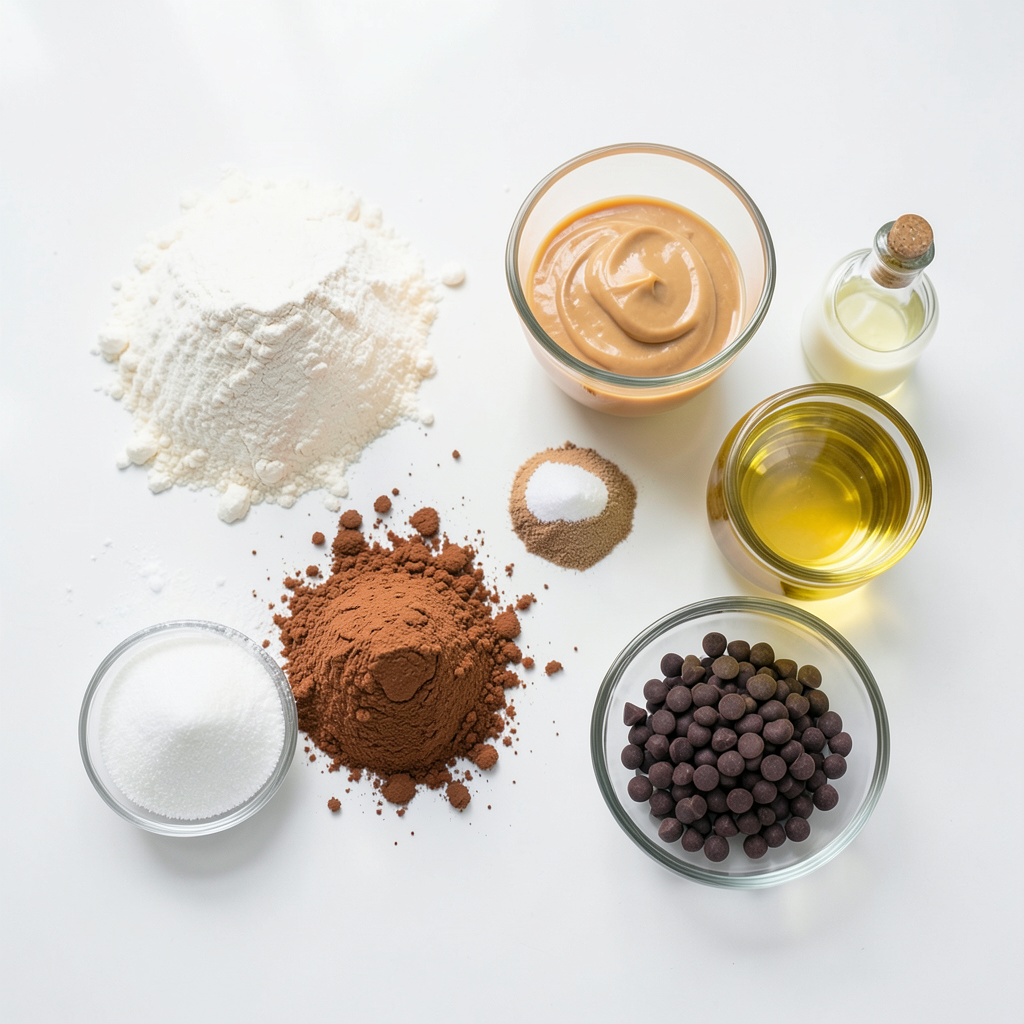
To make a rich and tasty Chocolate Peanut Butter Mug Cake, you'll need these simple ingredients:
- 4 tablespoons all-purpose flour
- 2 tablespoons unsweetened cocoa powder
- 4 tablespoons granulated sugar
- 1/8 teaspoon baking powder
- 1 small pinch of salt
- 4 tablespoons milk (or your preferred dairy-free alternative)
- 2 tablespoons peanut butter
- 2 tablespoons vegetable oil
- 1/4 teaspoon pure vanilla extract
- 2 tablespoons chocolate chips (optional)
Each ingredient plays a key role in making this cake moist and flavorful. The all-purpose flour gives the cake structure. The cocoa powder adds that rich chocolate flavor. Sugar sweetens the cake and helps it rise. Baking powder is crucial for making the cake fluffy. A pinch of salt enhances all the flavors.
Milk adds moisture. If you want a dairy-free option, almond or oat milk works well. Peanut butter gives the cake its signature taste. Choose creamy for smoothness or crunchy for texture. Vegetable oil keeps the cake moist. Vanilla extract adds a lovely aroma and flavor. Finally, chocolate chips give extra chocolatey goodness if you choose to add them.
Gather these ingredients, and you're ready to whip up a delightful treat!
Step-by-Step Instructions
Preparing the Dry Ingredients
First, grab a microwave-safe mug. Add the all-purpose flour, cocoa powder, sugar, baking powder, and a pinch of salt. Sift these dry ingredients into the mug. Sifting helps break up clumps. This step is key. You want a smooth mix, so use a whisk to blend well. Make sure there are no lumps.
Combining Wet Ingredients
Now it's time for the fun part. Pour in the milk. Then add the peanut butter, vegetable oil, and vanilla extract. Use a fork or small whisk to mix everything. Stir until you have a smooth batter. No lumps should be left. If you like, fold in chocolate chips for extra flavor.
Cooking the Mug Cake
Place the mug in the microwave. Cook it on high for 1 minute and 30 seconds. Watch it closely as it cooks. Microwaves can vary, so keep an eye on it. The cake will rise and look set. It may have a soft center. After cooking, let it cool for a minute. This helps avoid burns. Enjoy it straight from the mug or move it to a plate for a special touch.
Tips & Tricks
Ingredient Substitutions
For milk, you can use dairy-free options like almond milk or oat milk. These choices still give a great taste. If you want to swap peanut butter, try almond butter or sunflower seed butter. Both options work well in this recipe.
Achieving the Perfect Texture
Watch the cooking time closely. Start with 1 minute and 30 seconds, but check if it needs more time. The cake should rise and look set. If it jiggles too much, it may need a few more seconds. Look for a soft center, which means it's done.
Serving Suggestions
To make your mug cake look fancy, drizzle some extra peanut butter on top. A sprinkle of powdered sugar adds a nice touch, too. For a special treat, serve it with a scoop of vanilla ice cream. The warm cake and cold ice cream go perfectly together!
Pro Tips
- Use Room Temperature Ingredients: Make sure your milk and peanut butter are at room temperature for better incorporation into the batter, which results in a smoother texture.
- Microwave Power Variations: Since microwave wattages can vary, start with 1 minute and check the cake's doneness. If needed, cook in 10-second intervals until set.
- Experiment with Mix-Ins: Feel free to add nuts, dried fruit, or a splash of coffee to elevate the flavor profile and customize your mug cake.
- Serve Warm: This cake is best enjoyed warm. If it cools down, pop it back in the microwave for a few seconds to refresh that gooey texture.
Variations
Flavor Enhancements
To elevate your chocolate peanut butter mug cake, try different types of chocolate. You can use:
- Milk chocolate for a sweeter taste
- Dark chocolate for a rich flavor
- White chocolate for a creamy touch
These options add layers of flavor to your treat. You can also mix in some nuts or fruit. Chopped walnuts or almonds add crunch. Fresh banana or berries bring a fruity twist. These enhancements make your mug cake unique and even more enjoyable.
Different Dietary Options
If you follow a gluten-free diet, you can easily modify the recipe. Substitute all-purpose flour with a gluten-free blend. This change keeps the cake delicious and safe for gluten-free eaters.
For a vegan version, replace milk with almond, soy, or oat milk. Use a plant-based butter instead of regular peanut butter. You can also skip the chocolate chips or choose dairy-free ones. These adjustments ensure everyone can enjoy this tasty treat, no matter their dietary needs.
Storage Info
Short-term Storage
If you have leftover chocolate peanut butter mug cake, you can keep it in the fridge. Place the cooled mug cake in an airtight container. It stays fresh for up to two days. When you're ready to enjoy it again, simply reheat it in the microwave. Heat for about 15 to 20 seconds. Check if it’s warm enough. If not, heat for a few more seconds until it's just right.
Long-term Storage
For long-term storage, you can freeze the mug cake batter. To do this, prepare the batter as usual but stop before cooking it. Pour the batter into a freezer-safe container or bag. Make sure to seal it tightly to avoid freezer burn. The batter can stay good for up to three months.
When you’re ready to bake it, thaw the batter in the fridge overnight. Then, pour it into your mug and cook as directed. This makes it easy to whip up a quick treat whenever you want!
FAQs
How do I make a mug cake without a microwave?
You can bake a mug cake in the oven. Preheat your oven to 350°F (175°C). Use an oven-safe mug for the cake. Mix the dry ingredients as usual. Then, combine the wet ingredients in the same mug. Pour the batter into a small baking dish if your mug is not safe for the oven. Bake for about 20-25 minutes. Check for doneness by inserting a toothpick. The toothpick should come out clean. Baking takes longer than microwaving, so be patient.
Can I double the recipe?
Yes, you can double the recipe. Simply multiply each ingredient by two. Use a larger mug or a bowl to mix the batter. If you use a bigger dish, adjust the cooking time. Start by checking the cake after 2 minutes. It may need up to 3-4 minutes more, depending on the size. Always monitor the cake closely to avoid overcooking.
Why did my mug cake overflow?
Overflowing can happen for a few reasons. First, you may have used too big of a portion in your mug. A standard mug should only be half full with batter. Second, adding too much baking powder can cause it to rise too fast. Lastly, mixing too much air into the batter can also lead to overflow. To fix this, try using a smaller mug or reducing the batter amount.
You’ve learned to make a tasty mug cake with simple steps and easy ingredients. Remember to mix dry and wet parts well for a smooth batter. Monitor the cooking time to get the best texture. Try different flavors and options to make it your own. Storing leftovers is easy; just follow the tips provided. Baking can be fun and creative. Now you can enjoy a delicious treat anytime you want!